Blog

Person cleaning kitchen table with vinegar spray in casual attire.

How to Clean High-Traffic Areas in 5 Easy Steps

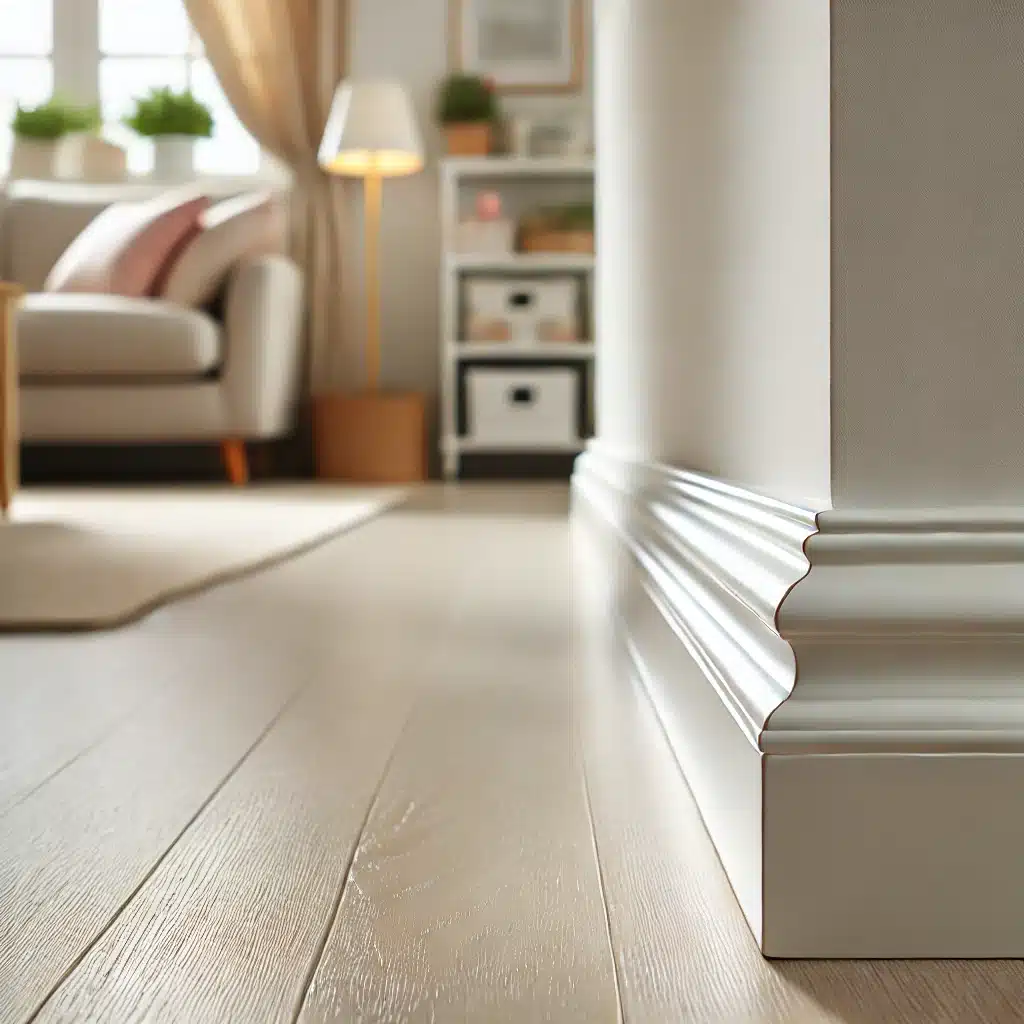
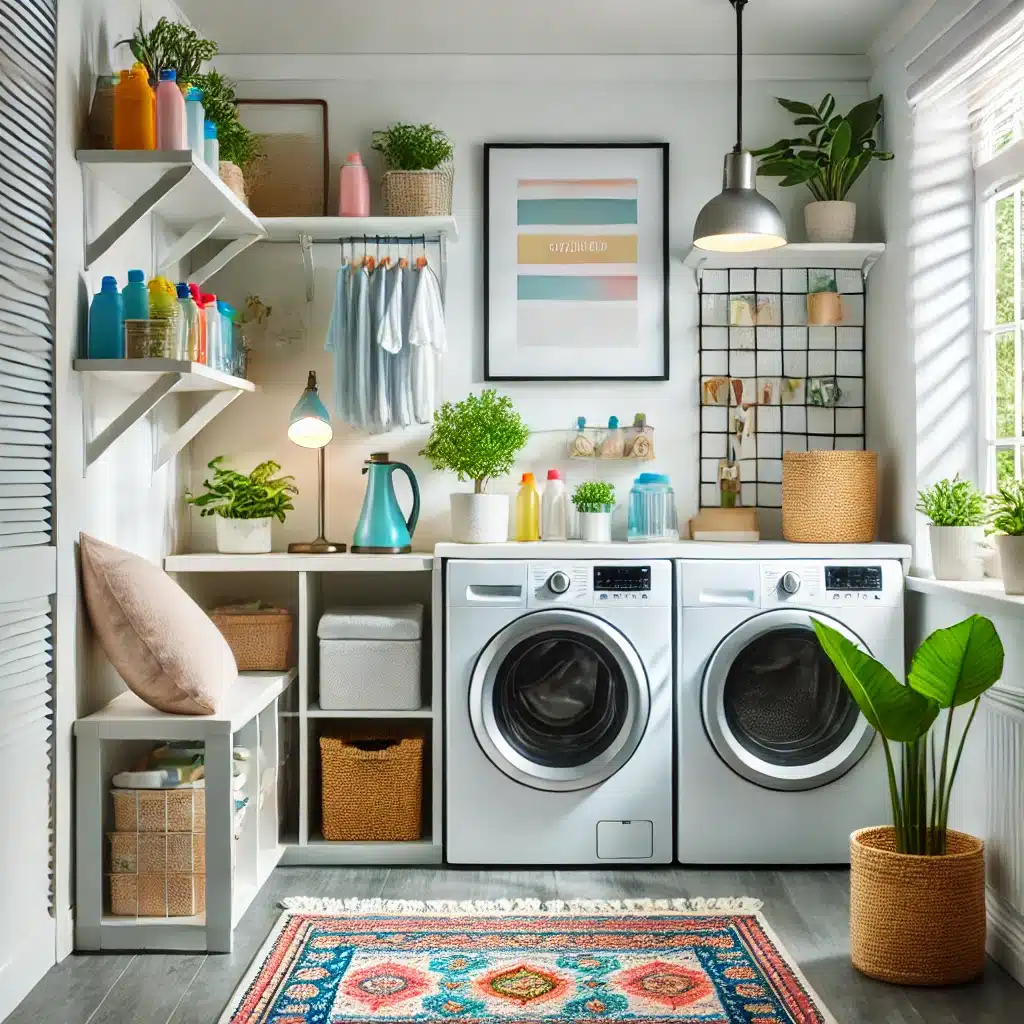
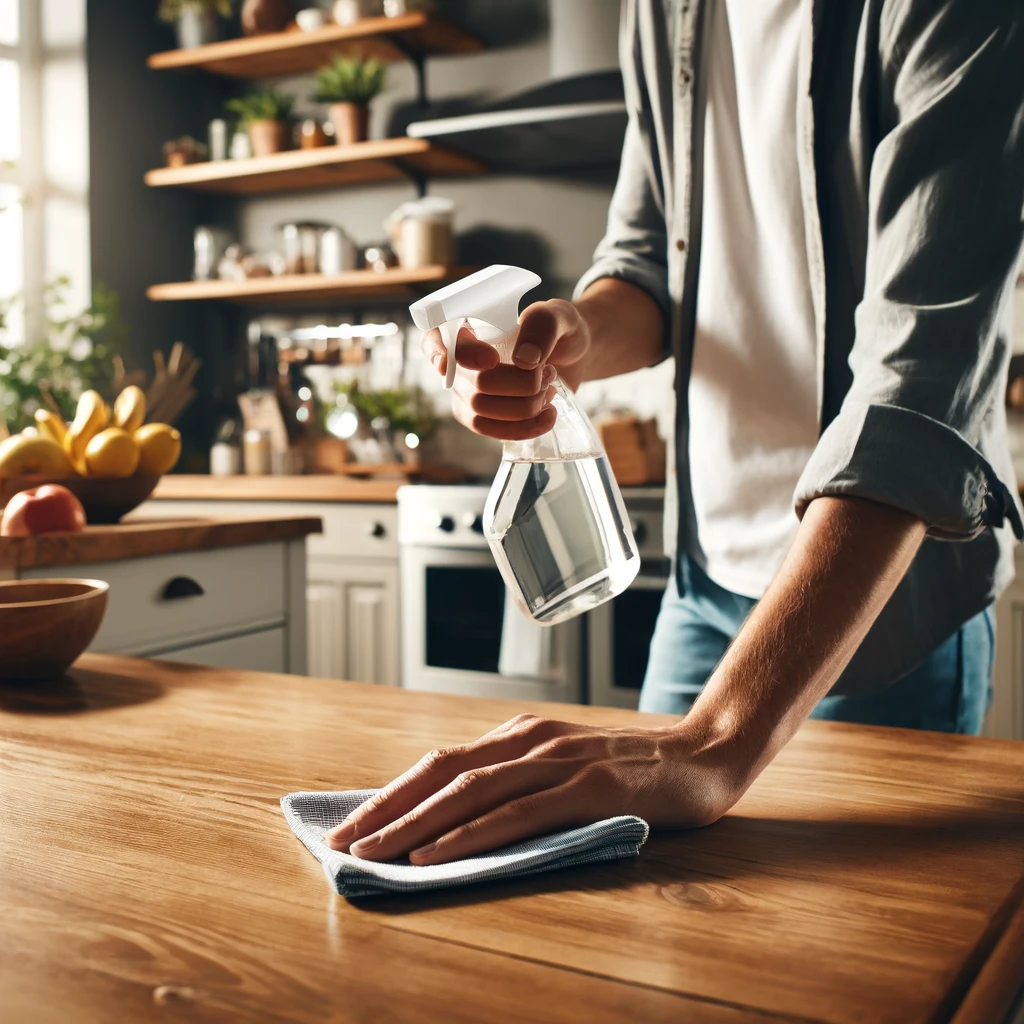
Keeping Clean High-Trafficc areas is essential for maintaining a tidy and welcoming home. These spots, like hallways, entryways, and living rooms, see the most foot traffic and tend to accumulate dirt and grime quickly. Here’s a simple guide to help you clean high-traffic areas effectively in just five easy steps. 1. Gather Your Cleaning Supplies Before you start, make sure you have all the necessary cleaning supplies on hand. For cleaning high-traffic areas, you’ll need: A vacuum cleaner A mop and bucket All-purpose cleaner Microfiber cloths A scrub brush Having everything ready will save you time and make the process smoother.     2. Declutter the Area High-traffic areas often become cluttered with shoes, bags, and other items, making it challenging to keep these spaces clean and organized. Start by removing any objects that don’t belong in the area. This initial step is crucial as it clears the way for a more thorough cleaning and helps you to better see the surfaces that need attention. By decluttering first, you create an environment where cleaning high-traffic areas becomes more manageable and efficient. Whether it’s shoes piled up at the entryway or random items scattered in the hallway, getting rid of this clutter will make a significant difference. Moreover, maintaining a neat space by regularly decluttering helps prevent the accumulation of dust and dirt, which can be more easily overlooked when items are strewn about. A clutter-free area not only looks more inviting but also contributes to a healthier living environment. Once the unnecessary items are removed, you can clean high-traffic areas more effectively, ensuring that every corner is accessible and can be properly cleaned. This proactive approach to decluttering ensures that your high-traffic areas remain tidy and welcoming, making your overall cleaning routine much simpler and more efficient. 3. Vacuum Thoroughly Vacuuming thoroughly is crucial in high-traffic areas as it helps remove dirt, dust, and debris that get tracked in daily. These areas, like entryways and living rooms, tend to collect the most dirt, making regular vacuuming essential. Using a vacuum cleaner with a strong suction and a brush roll is particularly effective in lifting dirt from carpets and rugs, ensuring a deep clean. It’s important to move slowly and make multiple passes over the same spot to pick up as much dirt as possible. This method not only improves the cleanliness of your floors but also helps in maintaining the longevity of your carpets by preventing dirt build-up that can cause wear and tear. Don’t forget to vacuum under furniture and along baseboards, as these areas can harbor dust and dirt that are often overlooked. Moving smaller furniture pieces and getting into these nooks and crannies ensures a more comprehensive clean. High-traffic areas can quickly become hotspots for dust and allergens, so a thorough vacuuming routine helps to create a healthier living environment. Regularly vacuuming these areas also makes subsequent cleaning tasks easier, as there is less dirt to tackle with mopping or wiping down surfaces. By making vacuuming a consistent part of your routine, you can effectively clean high-traffic areas and keep your home looking and feeling fresh.     4. Mop the Floors After vacuuming, it’s time to mop the floors to ensure they are spotless and sanitized. Mopping is especially important for hard surfaces like tile, laminate, or hardwood, as it removes any remaining dust and grime that vacuuming might have missed. Begin by filling your bucket with water and adding an appropriate floor cleaner suitable for the type of flooring you have. Using the right cleaner is crucial to avoid any damage or residue on the floor. Make sure your mop is clean and well-maintained to prevent spreading dirt around rather than removing it. As you mop, be sure to wring out excess water from the mop head to avoid oversaturating the floor, which can cause damage, especially to hardwood and laminate surfaces. For stubborn stains that resist regular mopping, use a scrub brush to gently lift the grime without scratching or harming the floor’s finish. This detailed approach to mopping not only helps to clean high-traffic areas more effectively but also maintains the integrity and appearance of your flooring. Consistent mopping as part of your cleaning routine ensures that high-traffic areas remain hygienic and visually appealing, contributing to a cleaner, more inviting home environment. 5. Wipe Down Surfaces High-traffic areas often have surfaces that collect dust and fingerprints, such as light switches, door handles, and baseboards. These areas are frequently touched and can quickly become hotspots for germs and dirt. To clean high-traffic areas effectively, use a microfiber cloth and an all-purpose cleaner to wipe down these surfaces. Microfiber cloths are particularly effective because they trap dust and dirt rather than spreading it around, ensuring a thorough clean. Spray the cleaner onto the cloth rather than directly on the surface to avoid over-wetting and potential damage to electronic components or delicate finishes. This step not only cleans but also disinfects, contributing to a healthier environment. Regularly wiping down high-touch surfaces helps prevent the spread of germs and keeps your home looking its best. It’s especially important in high-traffic areas where these surfaces see constant use. By maintaining a routine of wiping down these spots, you ensure that your home remains a clean, safe space for everyone. Consistently cleaning high-traffic areas, including these often-overlooked surfaces, enhances the overall cleanliness and hygiene of your living environment, making it more comfortable and inviting for all.     Clean High-Traffic With Toronto Shine Cleaning! Cleaning high-traffic areas doesn’t have to be a daunting task. By following these five easy steps, you can keep these busy spots in your home looking fresh and inviting. Regular maintenance is key, so make these steps a part of your weekly cleaning routine. Consistent attention to vacuuming, mopping, wiping down surfaces, and decluttering will ensure that dirt and grime don’t have a chance to build up, keeping your home in top shape. These simple habits can make a significant difference in maintaining a

How to Clean High-Traffic Areas in 5 Easy Steps Read More »

Fridge organization with clean shelves and bins.

How to Clean Refrigerator in 5 Easy Steps

Keeping a Clean Refrigerator is essential for a healthy kitchen. Here’s a quick guide on how to clean refrigerator in just five easy steps. Step 1: Empty and Sort To start the process of having a clean refrigerator, begin by taking out all the food from your fridge. This allows you to see everything you have and make it easier to reach all the nooks and crannies that need cleaning. Once everything is out, it’s time to sort through your items. Discard any expired or unwanted food items, ensuring that your refrigerator will only contain fresh and safe-to-eat products. This step not only helps in maintaining a clean refrigerator but also creates more space and prevents unpleasant odors. While sorting, place perishable foods in a cooler to keep them fresh while you clean the refrigerator. This is crucial to ensure that items like dairy products, meats, and fresh produce remain at a safe temperature and don’t spoil. By organizing your food items and disposing of expired ones, you’re setting the stage for a thoroughly clean refrigerator that will be easier to maintain in the long run. This initial step is essential for a deep clean and helps in maintaining overall kitchen hygiene.     Step 2: Remove and Wash Shelves and Drawers For a truly clean refrigerator, it’s essential to remove all the removable parts, such as shelves and drawers. This step is crucial because these components often harbor spills, crumbs, and bacteria that can affect the freshness and safety of your food. Carefully take out these parts and set them aside. Washing them thoroughly with warm soapy water or a vinegar solution will help eliminate any stuck-on grime or residue. The warm water combined with soap or vinegar is effective in cutting through grease and sanitizing the surfaces. Once you have washed the shelves and drawers, make sure to rinse them well to remove any soap or vinegar residue. Dry them thoroughly with a clean towel or let them air dry completely before placing them back in the refrigerator. This ensures that moisture does not lead to mold growth or other issues. Properly cleaned and dried shelves and drawers are vital for maintaining a clean refrigerator, providing a hygienic environment for your food. This step not only enhances the cleanliness but also prolongs the lifespan of your refrigerator components.     Step 3: Wipe Down Interior Achieving a clean refrigerator involves thoroughly cleaning the interior surfaces to remove any spills, stains, and bacteria that may have accumulated over time. Start by preparing a cleaning solution of warm water mixed with a mild detergent or vinegar, both of which are effective yet gentle cleaning agents. Using a soft sponge or cloth, meticulously wipe down every surface inside the fridge, including the walls, the ceiling, the shelves, and the door. Pay special attention to corners and crevices where grime and food particles often get trapped. Ensure that you tackle any sticky spots or stubborn stains with a bit of extra scrubbing, but be gentle to avoid damaging the interior surfaces. A clean refrigerator not only looks better but also helps in preventing cross-contamination of food items. Once all surfaces are wiped down, you can go over them with a damp cloth to remove any remaining soap or vinegar residue. This step is crucial for maintaining a hygienic environment inside your fridge, which directly contributes to the longevity of your stored food and overall kitchen cleanliness. Step 4: Clean Door Seals Cleaning the door seals is a vital step in achieving a thoroughly clean refrigerator. The seals, also known as gaskets, play a crucial role in maintaining the refrigerator’s internal temperature by providing an airtight seal. However, they often become a breeding ground for grime, mold, and mildew due to their frequent contact with moisture and food particles. To ensure they are clean, dip a cloth in a vinegar solution, which is effective in breaking down and removing these contaminants. Carefully wipe along the entire length of the door seals, paying special attention to the folds and crevices where dirt can accumulate. Regularly cleaning the door seals not only contributes to a clean refrigerator but also ensures that your appliance operates efficiently. Dirty seals can compromise the refrigerator’s ability to maintain a consistent temperature, leading to higher energy consumption and potential spoilage of food. By keeping the door seals clean, you help maintain the refrigerator’s performance and extend its lifespan. Additionally, a clean refrigerator door seal prevents the buildup of mold and mildew, which can cause unpleasant odors and potentially affect the safety of your stored food. Step 5: Replace and Organize After ensuring that all shelves and drawers are thoroughly cleaned and completely dry, it’s time to replace them in your refrigerator. Position them back in their original spots, making sure everything fits snugly and securely. This step is crucial for restoring the structure and functionality of your fridge, paving the way for an efficiently organized space. When returning the food to your clean refrigerator, take a moment to plan the arrangement. Organize items in a way that maximizes accessibility and visibility, placing frequently used items at the front and center. This not only makes it easier to find what you need but also helps in maintaining order and cleanliness over time. Efficient organization of your clean refrigerator can significantly impact its usability and the longevity of your food. Consider grouping similar items together—like dairy, meats, and vegetables—to streamline your fridge’s layout. Keeping an eye on expiration dates and placing older items towards the front ensures nothing gets forgotten and goes to waste. Moreover, proper organization helps in maintaining a consistent temperature throughout the fridge, as good airflow is essential for preserving the freshness of your food. By investing a little time in thoughtful arrangement, you can enjoy a clean refrigerator that supports both convenience and food safety, making your daily kitchen routines smoother and more efficient.     A Clean Refrigerator With Toronto Shine Cleaning! That’s it! With these

How to Clean Refrigerator in 5 Easy Steps Read More »

Immaculate stainless steel microwave interior with door open and bright light.

How to Clean a Microwave in 5 Minutes

Microwaves are a kitchen lifesaver, but they can get pretty grimy after repeated use. Spills, splatters, and lingering odors can make your microwave less appealing. Thankfully, you can clean your microwave quickly and efficiently. Here’s a simple guide on how to clean a microwave in just 5 minutes! 1. Gather Your Supplies Before you start cleaning your microwave, it’s essential to gather a few basic supplies: A microwave-safe bowl Water Vinegar or lemon juice A clean cloth or sponge Baking soda (optional for stubborn stains) With your supplies ready, you can move on to preparing your cleaning solution. Fill the microwave-safe bowl with one cup of water, then add a few tablespoons of vinegar or the juice of half a lemon. If you’re using lemon, don’t hesitate to toss in the squeezed halves for an extra boost of fresh scent. Place the bowl and set it to run on high for three minutes. This process allows the solution to boil and create steam, which helps loosen food particles and stains. After the timer goes off, let the bowl sit inside for a couple of minutes to maximize the steam’s effectiveness.     2. Prepare the Cleaning Solution To prepare the cleaning solution for your microwave, start by filling a safe bowl with one cup of water. This water will serve as the base for the cleaning solution. Next, add a few tablespoons of vinegar to the water, which is excellent for cutting through grease and grime. Alternatively, you can squeeze half a lemon into the water. The acidity of the lemon helps break down stubborn stains, and if you toss in the squeezed lemon halves, they will add extra cleaning power and a refreshing citrus scent to your microwave. This combination is not only effective but also leaves a pleasant aroma. Once your cleaning solution is ready, place the bowl inside the microwave. Set the microwave to run on high for three minutes. The goal here is to bring the solution to a boil, creating steam that will soften any stuck-on food particles and grime. After the three minutes are up, let the bowl sit for a couple more minutes to allow the steam to permeate and work its magic. This steaming process is crucial as it loosens debris and makes it significantly easier to wipe away, leaving your microwave clean and fresh with minimal effort. 3. Microwave the Solution With your cleaning solution prepared, the next step is to place the bowl in the microwave and set it to run on high for three minutes. This duration is sufficient to bring the solution to a boil, which will create a significant amount of steam inside. The steam plays a critical role in loosening the grime and food particles that have accumulated on the interior surfaces. As the steam spreads throughout, it softens any hardened spills and stains, making them much easier to clean. This method not only saves you from scrubbing but also ensures that the microwave is thoroughly sanitized. After the three-minute timer goes off, resist the urge to open the microwave immediately. Instead, let the bowl sit inside for an additional couple of minutes. This extra time allows the steam to continue working its magic, further loosening any stubborn grime. The extended steaming period ensures that even the toughest spots are softened and ready to be wiped away with minimal effort. Once you open it, you will find that the interior is significantly easier to clean.     4. Wipe Down the Interior Once the steaming process is complete, carefully remove the bowl from the microwave, keeping in mind that it will be quite hot. Use oven mitts or a thick towel to avoid burns. With the bowl safely set aside, take a clean cloth or sponge and begin wiping down the interior surfaces of the microwave. Thanks to the steam, the majority of food particles and stains will have loosened, allowing you to easily remove them with minimal effort. This method effectively softens stubborn grime, so you won’t need to scrub vigorously. As you wipe down the microwave, pay special attention to areas with more residue buildup. The steam should have done most of the work, making it easy to clean even the corners and crevices. The softened grime will lift away, leaving the interior surfaces clean and shiny. If you encounter any particularly stubborn spots, a little extra pressure with the cloth or sponge should be enough to remove them. 5. Address Stubborn Stains If you come across any stubborn stains that the steam didn’t fully loosen, don’t worry. There’s an easy fix for these persistent spots. Dip your cloth or sponge into some baking soda, which is known for its gentle abrasive properties. Using baking soda will help you scrub away the tougher stains without scratching the microwave’s surface. Gently apply the baking soda to the stained areas and rub in small, circular motions. This action helps lift the grime effectively while being kind to the microwave’s interior. Continue this process until all the stubborn spots are addressed. The baking soda will not only help in removing the stains but also deodorize the microwave, leaving it smelling fresh. Once you have scrubbed away all the tough spots, take another pass with a clean, damp cloth to wipe away any remaining baking soda residue. This final step ensures that the microwave is clean and free from any abrasive particles, leaving it sparkling and ready for your next use. 6. Clean the Turntable While cleaning the microwave, it’s important not to overlook the turntable, as it often collects food debris and spills. Begin by removing the turntable from the microwave and setting it aside. Wash the turntable just as you would any other dish, using warm, soapy water. This process helps to remove any stuck-on food particles and grease that might have accumulated over time. Be thorough in your cleaning to ensure that all residue is removed, making the turntable spotless and ready for use

How to Clean a Microwave in 5 Minutes Read More »

Spotless white baseboard and clean floor in a well-lit room.

How to Clean Baseboards: 5 Easy Hacks

Cleaning baseboards might not be at the top of your cleaning list, but keeping them spotless can make a big difference in the overall appearance of your home. Dusty and dirty baseboards can be an eyesore, but don’t worry! With these five easy hacks, you can keep your baseboards looking pristine without spending hours scrubbing. Let’s dive in! 1. Dust Regularly with a Microfiber Cloth Dusting regularly is the first step in keeping them clean. A microfiber cloth is perfect for this job because it traps dust and dirt without scattering it around. Here’s how to do it: Use a dry microfiber cloth to wipe down the baseboards. For stubborn dust, lightly dampen the cloth with water. Remember to dust the tops and edges for a thorough clean. Dusting your baseboards regularly is the first step in keeping them clean. A microfiber cloth is perfect for this job because it traps dust and dirt without scattering it around. Here’s how to do it: Use a dry microfiber cloth to wipe down the baseboards. For stubborn dust, lightly dampen the cloth with water. Remember to dust the tops and edges for a thorough clean. Dusting your baseboards regularly is essential to maintaining their appearance and preventing the buildup of grime. A microfiber cloth works wonders for this task because it effectively traps dust and dirt, preventing it from simply being pushed around. When using a dry microfiber cloth, gently wipe along the surface of your baseboards, making sure to cover all areas, including the tops and edges. This will help you achieve a thorough clean without missing any spots. For those stubborn dust particles that refuse to budge, you can lightly dampen the microfiber cloth with water. This adds just enough moisture to lift the dust without leaving streaks or watermarks on your baseboards. It’s crucial to wring out the cloth well so it’s not too wet; just a little dampness is all you need. Regularly wiping down this way not only keeps them looking fresh but also reduces the amount of time you’ll need to spend on deeper cleaning sessions later on. Don’t forget that the tops and edges of your baseboards are just as important as the front-facing surfaces. Dust tends to accumulate in these areas, often going unnoticed until it becomes quite noticeable. By including these often-overlooked parts in your regular dusting routine, you’ll ensure that every inch is kept in top condition. Regular dusting with a microfiber cloth is a simple yet effective method to maintain the cleanliness and aesthetic appeal of your baseboards, contributing to a cleaner and more inviting home environment.     2. Use a Vacuum Cleaner Attachment A vacuum cleaner with a brush attachment can make cleaning baseboards a breeze. This method is great for quickly removing dust and debris. By using the brush attachment, you can easily reach into corners and crevices where dust tends to accumulate. This is especially useful for those tricky spots that are hard to clean with a cloth alone. First, attach the brush to your vacuum cleaner. The brush attachment is designed to loosen dust and dirt while the vacuum sucks it away, making it an efficient tool for cleaning baseboards. As you run the vacuum along the baseboards, make sure to move slowly to give the attachment enough time to pick up all the dust and debris. Pay special attention to corners and edges, as these areas often collect the most dirt. This method not only cleans but also helps maintain the condition of your baseboards by preventing the buildup of grime. If you have pets, this hack is particularly beneficial. Pet hair can easily get trapped along baseboards, making them look dirty even if the rest of your house is clean. The brush attachment on your vacuum cleaner can effectively remove pet hair, leaving your baseboards spotless. Regular use of the vacuum cleaner attachment ensures that pet hair and dust are kept under control, making your home look well-maintained and tidy. 3. Magic Erasers for Stubborn Stains Magic erasers are fantastic tools for removing scuffs and stains from baseboards. These cleaning marvels work exceptionally well on both painted and wooden baseboards, making them a versatile option for any home. The unique material of magic erasers allows them to lift and remove even the most stubborn marks that other cleaning tools might leave behind. To use a magic eraser effectively, start by wetting it with water and squeezing out any excess moisture. This step is crucial as it activates the cleaning properties of the eraser without making it too wet, which could potentially damage the baseboards. Once the eraser is ready, gently scrub the stained area using circular motions. This technique ensures that you cover all angles of the stain, effectively breaking it down and lifting it away from the surface of the baseboards. After scrubbing, it’s important to wipe away any residue with a clean cloth. This final step ensures that no remnants of the stain or the magic eraser are left behind, leaving your baseboards looking spotless and refreshed. Regular use of magic erasers can keep your baseboards in top condition, effortlessly handling those inevitable scuffs and marks that come with everyday life.     4. DIY Cleaning Solution A DIY cleaning solution can be incredibly effective in tackling the grime and dirt that builds up on baseboards over time. Creating your own cleaning solution is not only cost-effective but also allows you to use natural ingredients that are safe for your home and family. One simple yet powerful recipe involves using common household items like vinegar, water, and dish soap. These ingredients combine to create a solution that cuts through dirt and leaves your baseboards looking fresh and clean. To prepare this cleaning solution, mix one part vinegar with one part water in a spray bottle. Vinegar is a natural disinfectant and helps break down grime, while water dilutes the vinegar’s acidity to prevent any damage to your baseboards. Adding a few

How to Clean Baseboards: 5 Easy Hacks Read More »

Spotless brown leather couch with cushions in a polished living room setting.

How to Clean Upholstery: 5 Simple Methods

Keeping your upholstery looking fresh and clean can be a bit of a challenge, especially with the daily wear and tear it goes through. But don’t worry! Here are five simple methods to help you clean your upholstery effectively and maintain its beauty. 1. Vacuum Regularly Vacuuming regularly is the simplest and most efficient method for maintaining the cleanliness of your upholstery. The upholstery attachment on your vacuum cleaner is specifically designed to handle the delicate fabrics and intricate details of your furniture. By consistently using this tool, you can easily remove dust, crumbs, and pet hair that tend to accumulate on your sofas, chairs, and other upholstered items. To start, remove any loose cushions to ensure you can access every part of your furniture. This step allows you to reach areas that are often neglected and where dirt and debris tend to settle. Using the upholstery attachment, begin cleaning the surface of the fabric with gentle, even strokes. This method ensures that you lift away dust and dirt without damaging the material. Pay special attention to the crevices and seams, as these are common spots where grime can build up over time. The attachment’s design helps you navigate these tight spaces effectively. If your cushions are removable, take the extra time to vacuum both sides. This thorough approach guarantees that no part of your upholstery is overlooked. Regular vacuuming not only enhances the appearance of your furniture but also extends its lifespan by preventing the accumulation of dirt and allergens. By making vacuuming a routine part of your cleaning schedule, you ensure that your upholstery remains fresh and inviting, providing a clean and comfortable environment in your home.     2. Spot Cleaning Spot cleaning is an essential technique for maintaining the beauty and longevity of your upholstery. Given the inevitability of spills and stains, knowing how to address them promptly can prevent permanent damage. The key to effective spot cleaning is quick action and the use of appropriate cleaning solutions. When a spill occurs, the first step is to blot the area immediately with a clean, dry cloth. This initial action helps absorb as much liquid as possible, reducing the risk of the stain setting into the fabric. Avoid rubbing the spill, as this can cause the liquid to penetrate deeper into the upholstery, making it harder to remove and potentially damaging the fabric fibers. By gently blotting, you can manage the spill more effectively and preserve the integrity of your furniture. Before applying it to the stained area, it’s crucial to test this solution on a small, inconspicuous section of the upholstery. This precaution ensures that the cleaning agent does not discolor or damage the fabric. After confirming the solution is safe, use a soft cloth to gently dab the stain. The key is to dab, not rub, as rubbing can spread the stain and embed it further into the fabric. After treating the stain, blot the area with a clean, damp cloth to remove any soap residue. Finally, allow the upholstery to air dry completely, ensuring no moisture is left behind, which could lead to mold or mildew growth. By incorporating these spot-cleaning techniques into your routine, you can effectively manage accidental spills and stains on your upholstery. This not only maintains the aesthetic appeal of your furniture but also extends its lifespan. 3. Use a Steam Cleaner Steam cleaning is an excellent method for giving your upholstery a deep and thorough clean. Unlike other cleaning techniques that rely on harsh chemicals, steam cleaning uses the power of hot water vapor to lift dirt, stains, and allergens from the fabric. This makes it a more environmentally friendly option and safer for households with children and pets. To begin, it’s essential to vacuum the upholstery thoroughly. This step removes loose dirt and debris that could interfere with the steam cleaning process. By ensuring the surface is free from particles, you allow the steam cleaner to penetrate deeper into the fabric, effectively removing embedded dirt and grime. Once the upholstery is prepped, fill the steam cleaner with water and a suitable upholstery cleaning solution. This combination will enhance the cleaning power of the steam and help break down tough stains. When using the steam cleaner, it’s crucial to follow the manufacturer’s instructions to achieve the best results and avoid damaging your upholstery. Work in small sections to ensure each area is cleaned evenly. It’s important to avoid over-wetting the fabric, as excessive moisture can lead to mold and mildew growth. By carefully controlling the amount of steam applied, you can effectively clean the upholstery without soaking it. After steam cleaning, allow the upholstery to dry completely before using it again. This drying period is essential to prevent any lingering dampness, which can attract more dirt and compromise the cleanliness you’ve just achieved. Regular steam cleaning not only revitalizes the appearance of your upholstery but also promotes a healthier living environment by eliminating allergens and bacteria. This method keeps your furniture looking fresh and extends its lifespan by maintaining the integrity of the fabric.     4. Baking Soda Deodorizer Using baking soda as a deodorizer is an effective and natural way to refresh your upholstery and eliminate lingering odors. This common household item is known for its ability to absorb and neutralize smells, making it an ideal choice for keeping your furniture smelling fresh without the need for harsh chemicals. To deodorize your upholstery, begin by evenly sprinkling a generous amount of baking soda over the entire surface. This allows the baking soda to come into contact with all areas of the fabric, ensuring a thorough deodorizing effect. Let the baking soda sit for at least 15-20 minutes. During this time, it will absorb any unwanted odors trapped in the upholstery fibers. If your furniture has particularly stubborn smells, you might consider leaving the baking soda on for a longer period, even overnight, for maximum absorption. For a more intensive clean, especially if there are stains involved,

How to Clean Upholstery: 5 Simple Methods Read More »

Immaculate open dishwasher with shining stainless steel and clean racks.

How to Clean Dishwasher: 6 Steps for a Sparkling Finish

Keeping a clean dishwasher is essential for ensuring your dishes come out sparkling and your appliance lasts longer. In this guide, we’ll walk you through the simple steps to clean your dishwasher effectively. Let’s dive into how to clean your dishwasher and keep it running smoothly! 1. Gather Your Cleaning Supplies Before you embark on your mission to clean your dishwasher, it’s essential to gather all the necessary supplies: White vinegar Baking soda A soft brush or toothbrush Dish soap Microfiber cloth A bowl or cup These everyday household items are powerful allies in your cleaning arsenal, making the process smooth and efficient. White vinegar is a natural cleaner known for its ability to break down grease and eliminate odors, making it perfect for tackling the inside of your dishwasher. Baking soda, on the other hand, is great for scrubbing away stains and providing a fresh finish. A soft brush or toothbrush will help you get into those nooks and crannies, especially around the filter and spray arms, where food particles often get stuck. Dish soap and a microfiber cloth will ensure you can wipe down surfaces effectively without scratching them. Lastly, a bowl or cup will be used to hold the vinegar during one of the cleaning cycles. Having these items ready and within reach is crucial as it allows you to clean your dishwasher in one go, without interruptions. By preparing your cleaning supplies beforehand, you ensure that the cleaning process is quick and efficient, saving you time and effort. Plus, using these common household items means you don’t need to spend extra money on specialized cleaning products, making it a cost-effective solution for maintaining a clean dishwasher. Having these items on hand will make the cleaning process quick and efficient.     2. Empty and Inspect the Dishwasher To begin the process to clean your dishwasher effectively, start by removing all dishes, utensils, and racks from the interior. This step ensures that you have unobstructed access to every part of the dishwasher, allowing you to clean it thoroughly. As you empty the appliance, take a moment to notice any obvious signs of debris or buildup that might be affecting its performance. Once the dishwasher is empty, carefully inspect the interior for any food debris or grime. It’s common for particles to accumulate in hidden corners, around the door seals, and especially near the drain. The drain area is a critical spot to check because clogs here can impede the dishwasher’s ability to drain water properly, leading to potential issues with cleanliness and functionality. Similarly, the spray arms should be examined closely, as blockages in the small holes can reduce the effectiveness of the water jets, resulting in dishes that aren’t thoroughly cleaned. Pay special attention to these areas and make a mental note of any spots that need extra care. Sometimes, simply wiping away visible debris can make a significant difference. However, for a deep clean, it’s essential to address any hidden grime that might not be immediately visible. By thoroughly inspecting and identifying problem areas, you set the stage for a more effective cleaning process. This careful inspection ensures that when you proceed with the cleaning steps, you’ll be able to target and eliminate all the dirt and buildup, resulting in a truly clean dishwasher that performs at its best. 3. Clean the Filter A crucial step in ensuring you maintain a clean dishwasher is addressing the filter, which can often become clogged with food particles and grease over time. The filter is usually located at the bottom of the dishwasher, and its primary function is to trap food debris, preventing it from recirculating onto your dishes during the wash cycle. When the filter is clogged, it can hinder your dishwasher’s performance, leading to poor cleaning results and unpleasant odors. To begin, locate the filter at the base of your dishwasher. Carefully remove it, paying attention to how it is installed so you can easily replace it later. Once removed, rinse the filter thoroughly under hot running water to loosen and wash away the accumulated debris. For stubborn particles or greasy buildup, use a soft brush, such as an old toothbrush, to gently scrub the filter. This will help ensure that all the tiny holes and mesh are free of obstructions, allowing water to flow through it properly. After cleaning, make sure to inspect the filter to ensure it’s completely free of any residue. A clean filter is essential for the efficient operation of your dishwasher, as it allows the appliance to drain water correctly and prevents food particles from sticking to your dishes. Once you’re satisfied with its cleanliness, reinstall the filter securely in its original position. 4. Clean the Spray Arms To maintain a clean dishwasher, paying attention to the spray arms is essential. These components are responsible for distributing water during the wash cycle, ensuring that every dish and utensil gets thoroughly cleaned. Over time, the tiny holes in the spray arms can become clogged with mineral deposits, food particles, and other debris, which can significantly reduce their effectiveness. Begin by removing the spray arms from the dishwasher. This process usually involves unscrewing or unclipping them, depending on your dishwasher model. Once removed, rinse the spray arms under warm water. This initial rinse helps to dislodge any loose debris and prepares them for a more thorough cleaning. Next, use a toothpick or a small brush to carefully clear any clogged holes in the spray arms. This step is crucial because even small blockages can disrupt the water flow, leading to subpar cleaning results. Ensure you check each hole meticulously, as the effectiveness of your dishwasher depends on these spray arms being fully operational. After you have cleaned each hole and are satisfied that water can flow freely through all of them, reattach the spray arms securely. Properly maintained spray arms will ensure that your dishwasher can clean your dishes effectively, contributing to a consistently clean dishwasher and spotless dishware. 5. Run a

How to Clean Dishwasher: 6 Steps for a Sparkling Finish Read More »

Modern microfiber mop with wringer bucket, long handle, and flat head.

Essential Tools and Supplies for Cleaning Jobs

Keeping your home sparkling clean with a cleaning job can be a breeze if you have the right tools and supplies. Whether you’re tackling a deep clean, regular maintenance, or preparing for a move-in/move-out cleaning job, having 1. Microfiber Cloths Microfiber cloths are a game-changer for any cleaning job. These versatile cloths, made from synthetic fibers, are highly absorbent and can be used either dry or damp. Their unique construction allows them to trap dust, dirt, and even bacteria effectively, making them a staple in any cleaning arsenal. Unlike traditional cloths or paper towels, microfiber cloths can clean surfaces without leaving streaks or scratches, ensuring a spotless finish every time. This makes them ideal for a variety of tasks, from dusting delicate surfaces like electronics and furniture to wiping down kitchen counters and polishing mirrors and windows. What sets microfiber cloths apart in any cleaning job is their ability to handle different types of surfaces with ease. When used dry, they excel at dusting, thanks to their electrostatic properties, which attract and hold onto dust particles rather than just pushing them around. When dampened, these cloths become even more effective, lifting and absorbing spills and grime without the need for harsh chemicals. This dual functionality not only makes cleaning more efficient but also more environmentally friendly, as it reduces the reliance on disposable products and chemical cleaners. In addition to their versatility and efficiency, microfiber cloths are also incredibly durable. They can be washed and reused hundreds of times without losing their cleaning power, making them a cost-effective solution for any household. For anyone tackling a cleaning job, whether it’s routine maintenance or a deep clean, microfiber cloths are an essential tool that can handle everything from everyday dusting to intensive scrubbing. 2. All-Purpose Cleaner An all-purpose cleaner is a must-have for any cleaning arsenal, serving as the backbone for tackling a wide range of cleaning jobs. Its versatility is one of its greatest strengths, allowing you to use it on multiple surfaces and stains with ease. From greasy kitchen counters to grimy bathroom tiles and even certain types of flooring, an all-purpose cleaner can handle it all. This means you don’t need to clutter your cleaning cupboard with multiple specialized products. Instead, you can rely on a single, powerful solution to maintain the cleanliness and hygiene of your home efficiently. When choosing an all-purpose cleaner for your cleaning jobs, it’s crucial to consider products that are safe for both the environment and your family. Eco-friendly cleaners made from natural ingredients can be just as effective as their chemical-laden counterparts, without the harsh side effects. These cleaners reduce the number of toxins released into your home, ensuring a healthier living space for everyone. Additionally, they are often biodegradable, minimizing environmental impact. 3. Vacuum Cleaner A good vacuum cleaner is essential for maintaining clean carpets and floors, making it a cornerstone tool for any cleaning job. The right vacuum can significantly reduce the time and effort required to keep your home tidy, ensuring that every nook and cranny is free from dust, dirt, and debris. Modern vacuum cleaners come equipped with various features and attachments designed to handle different surfaces and hard-to-reach areas, from plush carpets to hardwood floors and narrow crevices. These attachments enhance the vacuum’s versatility, allowing you to switch between different cleaning tasks seamlessly and efficiently. For those with pets, a vacuum cleaner equipped with a HEPA filter is particularly beneficial. Pet hair and dander can be challenging to manage, but a HEPA filter traps these tiny particles, preventing them from being recirculated into the air. This is especially important for maintaining good indoor air quality and reducing allergens, which can be a significant concern for allergy sufferers.     4. Broom and Dustpan For quick clean-ups and daily maintenance, a sturdy broom and dustpan are indispensable tools in any cleaning job. These simple yet effective items are perfect for swiftly sweeping up crumbs, dirt, and debris from your floors, making them essential for keeping your home tidy on a day-to-day basis. Unlike vacuum cleaners, which can be cumbersome for smaller messes, a broom and dustpan offer a lightweight and portable solution. They are especially handy in high-traffic areas like kitchens and entryways, where dirt and debris accumulate rapidly. A broom with angled bristles is particularly effective for thorough cleaning jobs, as it can easily reach into corners and under furniture where dust and dirt often hide. These bristles are designed to adapt to the contours of your floors, ensuring that every sweep captures as much debris as possible. This makes them not only efficient but also versatile, suitable for a variety of surfaces from hardwood and tile to linoleum. 5. Mop and Bucket A mop and bucket are essential for keeping your floors spotless, making them vital tools for any cleaning job. The right combination ensures that you can effectively remove dirt, spills, and stains, maintaining the overall cleanliness and appearance of your home. Whether you opt for a traditional string mop or a more modern microfiber mop, it’s important to choose one that’s suitable for your specific flooring type. For example, a string mop is excellent for heavy-duty cleaning jobs, while a microfiber mop is perfect for delicate surfaces and daily maintenance. The versatility of these tools allows you to adapt your cleaning approach based on the needs of different areas in your home. A bucket with a wringer is an invaluable addition to your mopping setup, providing you with better control over the amount of water used during your cleaning job. This feature is particularly important for preventing water damage to sensitive flooring materials like hardwood or laminate, which can warp or buckle when exposed to excessive moisture. By wringing out the mop thoroughly, you can ensure that your floors are cleaned efficiently without being overly saturated. Additionally, using a mop and bucket combination can significantly reduce the physical strain of mopping, as it minimizes the need to bend over and manually wring out

Essential Tools and Supplies for Cleaning Jobs Read More »

Immaculate laundry room with bright lights, organized shelves, and modern appliances.

How to Clean Your Laundry Room: 6 Easy Steps for a Sparkling Space

Keeping your laundry room clean and organized not only makes it a more pleasant space to work in but also ensures that your laundry process is efficient and effective. Here’s a simple guide on how to clean your laundry room in just five easy steps. Whether you have a small laundry nook or a full-fledged laundry room, these tips will help you maintain a sparkling space. 1. Clear Out the Clutter Start by removing any items that don’t belong in the laundry room. This might include random storage, misplaced cleaning supplies, or forgotten clothes. Create designated spots for laundry detergents, fabric softeners, and other essentials to keep everything organized. Using baskets or bins can help categorize items, making them easy to access when needed and ensuring your laundry room stays neat and functional. Next, go through your laundry supplies and discard anything that’s expired or no longer needed. This will not only free up space but also ensure that you’re only using effective products. A well-organized laundry room with only the essentials will make your laundry tasks more efficient and less stressful. By sorting and purging regularly, you can maintain a clutter-free environment that makes laundry day a breeze. By dedicating some time to clear out the clutter, you set the foundation for a clean and organized laundry room. This initial step is crucial for creating a space where you can easily find what you need and keep everything in its place. A decluttered laundry room is not only more pleasant to work in but also promotes a more streamlined and efficient laundry routine. 2. Clean the Machines To ensure your laundry room stays in top condition, it’s essential to clean the machines regularly. Start with the washing machine by wiping down its exterior with a damp cloth and mild detergent to remove any dust or detergent spills. For the interior, running an empty cycle with hot water and vinegar helps eliminate built-up grime and odors. Additionally, pay special attention to the detergent drawer and the rubber seal around the door, as these areas are prone to mold and mildew. Next, turn your attention to the dryer. It’s crucial to remove lint from the dryer lint trap after every use to maintain efficiency and safety. For a deeper clean, vacuum the lint trap and the surrounding area to prevent lint buildup, which can pose a fire hazard. Also, clean the dryer drum with a cloth dampened with a mild cleaning solution to remove any residues from fabric softeners or dryer sheets. Finally, check the dryer vent to ensure it’s clear of obstructions, as a blocked vent can reduce dryer performance and increase the risk of fire. By keeping both your washing machine and dryer in pristine condition, you enhance the functionality of your laundry room and extend the lifespan of your appliances. Regular maintenance of these machines not only ensures they operate efficiently but also contributes to a cleaner, more organized laundry room.     3. Tackle the Surfaces Keeping the surfaces in your laundry room clean is essential for maintaining a hygienic and pleasant environment. Start by wiping down all countertops, shelves, and cabinets with a multipurpose cleaner. These areas are often prone to detergent spills and other residues, so paying special attention to them ensures that your laundry room remains spotless. For stubborn stains, using a mixture of baking soda and water can be particularly effective, breaking down grime without harsh chemicals. Next, focus on the floors in your laundry room. Begin by sweeping or vacuuming to remove dust and debris that accumulate from daily use. Following this, mop the floor with a cleaner suitable for your specific flooring type to ensure a deep clean. For those with tile floors, it’s important to clean the grout lines as well, as these can harbor dirt and stains that regular mopping might miss. By consistently tackling both the surfaces and the floors, you create a cleaner and more organized laundry room. This routine not only improves the overall appearance of the space but also makes it a more efficient and enjoyable area to work in. 4. Freshen Up the Air Keeping your laundry room smelling fresh is essential for creating a pleasant environment. Good ventilation plays a key role in this. If your laundry room has a window, open it to let in fresh air and allow any moisture to escape. Running an exhaust fan can also help to air out the space, reducing humidity and preventing musty odors. For a more continuous solution, consider placing a small air purifier in the room. This can help reduce any lingering odors and improve overall air quality. In addition to proper ventilation, using deodorizers can significantly enhance the freshness of your laundry room. A simple and effective method is to place a bowl of baking soda or a few activated charcoal bags around the room. These natural deodorizers are excellent at absorbing unpleasant smells. For a more pleasant aroma, you can also use essential oils. Add a few drops to a cotton ball or use a fabric refresher spray to infuse the room with a subtle, pleasant scent. By focusing on both ventilation and deodorizers, you can keep your laundry room smelling fresh and inviting. This not only makes it a more enjoyable space to work in but also helps to maintain a clean and healthy environment.   5. Maintain the Cleanliness To ensure your laundry room stays clean and tidy, establishing a regular cleaning schedule is essential. Consistently wiping down surfaces, cleaning the machines, and decluttering as needed will keep your laundry room in top condition. Regular maintenance not only prevents dirt and grime from building up but also makes your occasional deep cleaning sessions much quicker and easier. By dedicating a little time each week to upkeep, you can enjoy a spotless and efficient laundry room. In addition to regular cleaning, organizing your laundry room can greatly enhance its functionality. Investing in storage solutions like shelves, hooks, and laundry

How to Clean Your Laundry Room: 6 Easy Steps for a Sparkling Space Read More »

Modern living room with cozy sofa, plush pillows, and stylish coffee table.

How to Clean Living Room in 5 Simple Steps

A clean living room sets the tone for the entire home. Whether you’re expecting guests or just want to relax in a tidy space, cleaning your living room can make a big difference. Follow these five simple steps to transform your living room into a fresh, inviting space. 1. Declutter the Area The first step to a clean living room is getting rid of the clutter. Clutter can make even the most spacious living rooms feel cramped and chaotic. Begin by surveying the room and identifying items that don’t belong there. This could be anything from toys and books to mail and miscellaneous items that have found their way into the living room. Gather these items using a basket or box. This method keeps everything contained and makes it easier to transport items back to their proper places. Once you have collected the out-of-place items, take a few minutes to put them back where they belong. Returning items to their designated spots not only clears up the living room but also helps maintain order throughout the house. If certain items don’t have a designated spot, consider creating one. For example, set up a specific area for mail or create a storage space for toys in another room. This will prevent clutter from accumulating in the living room in the future. To make decluttering more manageable and even enjoyable, set a timer for 10 minutes. Challenge yourself to see how much clutter you can clear away in that time. This approach makes the task feel less overwhelming and can turn it into a fun, race-against-the-clock activity. By regularly decluttering in short, focused bursts, you’ll maintain a consistently clean living room without feeling like you’re dedicating hours to tidying up.     2. Dust Surfaces Dust can accumulate quickly in the living room, especially on surfaces like coffee tables, shelves, and electronics. A layer of dust not only dulls the appearance of your living room but can also contribute to allergies and respiratory issues. To tackle this, use a microfiber cloth, which is excellent for trapping dust particles without spreading them around. Begin dusting from the highest surfaces, such as shelves and the tops of cabinets, and work your way down. This method ensures that any dust that falls from higher surfaces is captured when you clean the lower areas. Pay special attention to less obvious places that often get overlooked during routine cleaning. Lampshades, picture frames, and baseboards can collect significant amounts of dust over time. These areas might not be immediately noticeable, but cleaning them can make a big difference in the overall cleanliness of your living room. Additionally, don’t forget to dust electronics like TVs and speakers. Dust can interfere with their functionality and reduce their lifespan, so keeping them clean is crucial. When dusting, use a damp cloth for delicate surfaces and a dry cloth for more robust areas. A damp cloth helps to capture dust without dispersing it into the air, making it ideal for fragile or highly polished surfaces that can scratch easily. On the other hand, a dry cloth is perfect for wood furniture and other sturdy surfaces. By regularly dusting your living room, you’ll maintain a fresher, cleaner environment that not only looks better but also feels more inviting and comfortable. 3. Vacuum and Clean Floors Whether you have carpets, rugs, or hardwood floors, they need regular cleaning to maintain a clean living room. Carpets and rugs are magnets for dust, dirt, and allergens that can diminish the comfort and cleanliness of your living space. Start by vacuuming thoroughly, making sure to cover every inch, including under furniture and in the corners. A high-quality vacuum cleaner with strong suction and appropriate attachments can make a big difference, ensuring that embedded dirt and debris are effectively removed. If you have hardwood floors, after vacuuming, follow up with a mop to give them a nice shine and remove any remaining dust or grime. A gentle cleaner specifically designed for hardwood floors can enhance their natural beauty and extend their lifespan. For an extra touch of cleanliness and shine, consider using a damp mop with a solution of water and a mild wood cleaner. This not only cleans the floors but also conditions the wood, preventing it from drying out and becoming damaged. For carpets and rugs, occasional deep cleaning is essential to maintain a truly clean living room. Using a carpet cleaner or hiring professional carpet cleaning services can help remove deep-seated dirt and stains that regular vacuuming might miss. This deep clean revitalizes the carpet fibers and restores their appearance and freshness. Additionally, move furniture slightly to clean underneath and behind them. You’ll be surprised at how much dirt can accumulate in hidden spots. Regularly moving and cleaning these areas ensures that no part of your living room is neglected, contributing to a consistently clean and healthy environment.     4. Wipe Down Furniture Furniture can harbor dust and stains, so give it a good wipe down. Your living room furniture is not just a collection of functional pieces; it’s also a major element of your home’s aesthetic. Dust, spills, and daily use can leave your furniture looking tired and worn. Start by selecting appropriate cleaners for each type of furniture. Leather sofas require a leather cleaner to maintain their suppleness and prevent cracking. For upholstered furniture, use a fabric cleaner that can lift stains without damaging the material. Wooden furniture benefits from a gentle wood cleaner that preserves its finish while removing grime and fingerprints. As you clean, pay extra attention to armrests, cushions, and any spots that get frequent use. These areas are often the first to show signs of wear and dirt. Armrests, in particular, can accumulate oils from skin contact, which attract dust and dirt. Cushions can harbor crumbs, pet hair, and other debris. Remove cushions and vacuum underneath them to ensure you’re getting all the hidden dirt. For fabric cushions, spot clean any stains and give them a good

How to Clean Living Room in 5 Simple Steps Read More »

Spotless brown leather couch with cushions in a polished living room setting.

5 Tips on How to Clean Home Furniture

Keeping your clean home furniture not only enhances its appearance but also extends its lifespan. Whether you have a cozy couch, a sleek coffee table, or elegant dining chairs, regular maintenance is essential. Here are five practical tips on how to clean home furniture effectively. 1. Understand Your Furniture Material Understanding your furniture material is the first step in knowing how to clean home furniture effectively. Each type of material requires a specific approach to ensure it remains in top condition. Wooden furniture, for instance, benefits from a gentle wipe with a damp cloth to remove surface dirt, followed immediately by a dry cloth to prevent any water damage. For a more thorough clean, a mixture of mild soap and water can be used, but it’s essential to ensure the wood is dried properly afterward to avoid any warping or damage. Regular cleaning not only keeps the wood looking fresh but also preserves its natural beauty and strength. Leather furniture, on the other hand, requires a different technique. To clean home furniture made of leather, a soft, damp cloth is ideal for regular maintenance, as it can remove dust and minor stains without causing damage. For tougher stains, it’s advisable to use a leather cleaner recommended by the manufacturer, as these products are specifically formulated to treat leather without stripping its natural oils. Regular conditioning with a quality leather conditioner can also help keep the material supple and prevent cracking, ensuring that your leather furniture remains luxurious and comfortable for years to come. Fabric furniture presents its own set of challenges, as it tends to collect dust and dirt more easily than other materials. To effectively clean home furniture upholstered in fabric, regular vacuuming is crucial. This helps to remove surface dust and prevent it from settling deeper into the fibers. For spot cleaning, a fabric cleaner or a mild detergent mixed with water can be very effective. It’s important to test any cleaning solution on an inconspicuous area first to ensure it doesn’t cause discoloration. By understanding and catering to the specific needs of each material, you can maintain the appearance and integrity of your furniture, making your home look pristine and inviting.     2. Regular Dusting Regular dusting is an essential practice when you want to clean home furniture and keep it looking its best. Dust can accumulate quickly on all types of surfaces, leading to a dull appearance and even potential damage over time. By incorporating regular dusting into your cleaning routine, you can maintain the vibrancy and longevity of your furniture. A microfiber cloth or a soft duster is ideal for this task, as these tools effectively capture dust without scratching the surface. Microfiber cloths are particularly useful because they attract dust particles through static electricity, ensuring that you don’t simply move dust around but actually remove it from your furniture. For more intricate designs or hard-to-reach areas, a vacuum cleaner with a brush attachment can be incredibly useful. This tool can access nooks and crannies that a regular duster might miss, ensuring that every part of your furniture is clean. When using a vacuum cleaner, it’s important to use the soft brush attachment to avoid scratching delicate surfaces. Regular dusting with these tools not only keeps your furniture looking fresh but also prevents the buildup of dust that can lead to respiratory issues and allergies, contributing to a healthier home environment. In addition to aesthetic benefits, regular dusting helps protect your furniture from wear and tear. Dust particles can be abrasive, and when left to accumulate, they can cause scratches or wear down the finish on your furniture. This is especially true for polished or varnished surfaces, where even fine dust can leave marks over time. By taking the time to clean home furniture regularly with a gentle touch, you can preserve the integrity and appearance of your pieces. 3. Spot Cleaning Spills Immediately Spot cleaning spills immediately is a crucial step to clean home furniture and maintain its pristine condition. Accidents are inevitable, whether it’s a glass of wine tipping over or a cup of coffee spilling. The key to preventing long-term damage is to act quickly. Start by blotting the spill with a clean, dry cloth to absorb as much of the liquid as possible. It’s important to blot rather than rub, as rubbing can spread the stain and push it deeper into the fabric or material, making it harder to remove. When dealing with fabric furniture, a simple mixture of water and mild detergent can often do the trick. After blotting up the excess liquid, apply the cleaning solution to a clean cloth and gently dab at the stain. Be sure to test the solution on an inconspicuous area first to ensure it doesn’t cause any discoloration or damage to the fabric. For stubborn stains, you may need to repeat this process several times. Once the stain is removed, rinse the area with a cloth dampened with clean water to remove any soap residue, then blot it dry with a dry cloth. Leather furniture requires a different approach. After blotting the spill, use a specialized leather cleaner that’s appropriate for the type of leather your furniture is made from. Apply the cleaner to a soft cloth and gently clean the affected area, following the manufacturer’s instructions. Regular conditioning of leather furniture can also help prevent spills from soaking in too quickly and make spot cleaning easier. For wooden furniture, after blotting the spill, use a damp cloth to gently wipe the area, followed immediately by a dry cloth to prevent any water damage.     4. Use Protective Covers Using protective covers is a highly effective strategy to clean home furniture and maintain its pristine condition, especially in households with kids or pets. These covers act as a first line of defense against everyday mishaps, such as spills, stains, and general wear and tear. By shielding your furniture, covers significantly reduce the amount of direct contact with potentially damaging substances.

5 Tips on How to Clean Home Furniture Read More »