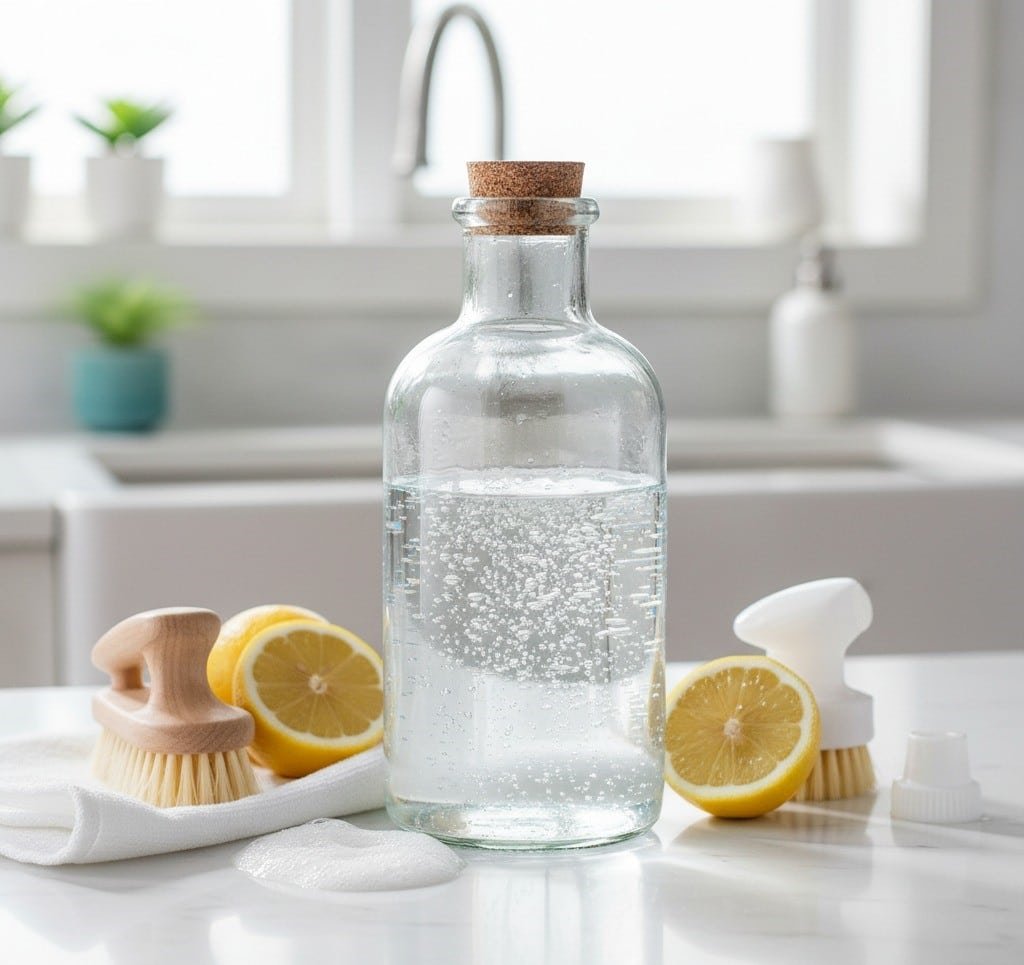
Blog

essential window cleaning tools

7 Essential Window Cleaning Tools Every Home Needs

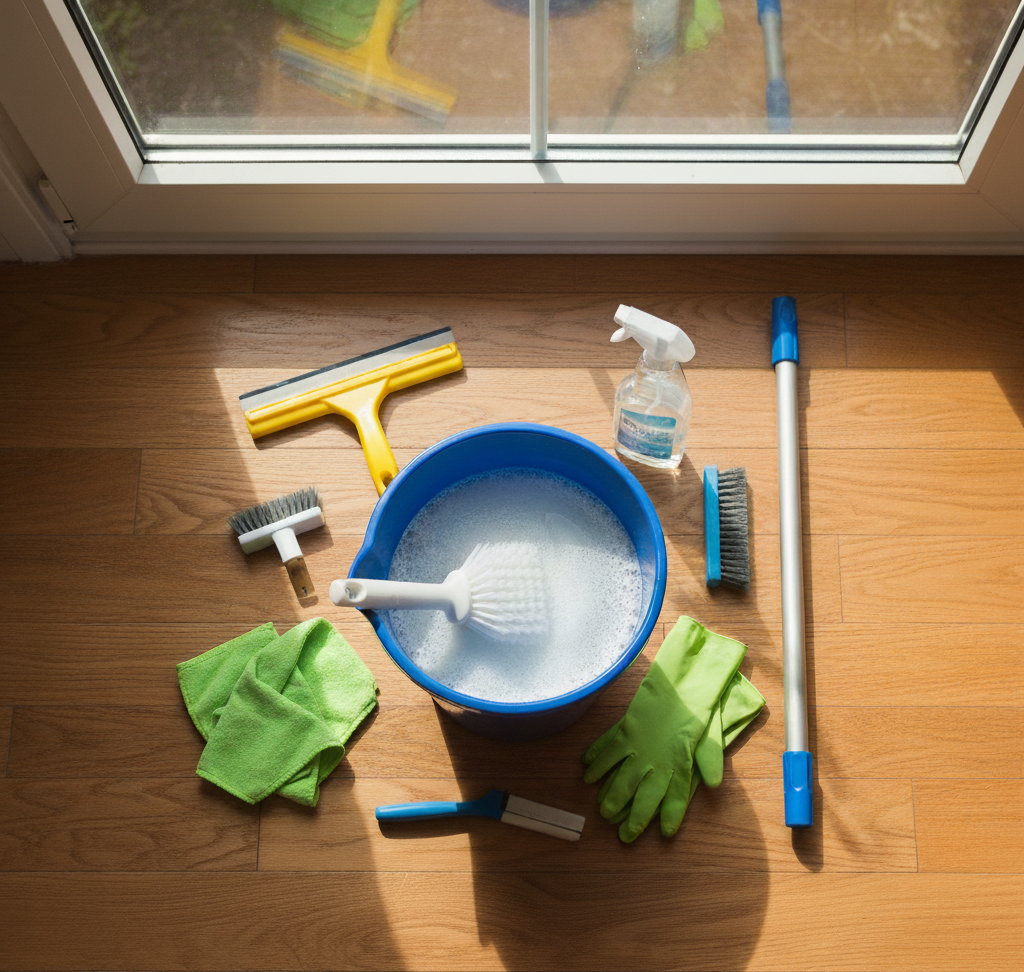
7 Essential Window Cleaning Tools for Streak-Free Glass A spray bottle of blue liquid and a roll of paper towels will never give you a professional finish. That approach mostly moves dirt around, leaves a static-attracting residue, and deposits lint on the glass. Professional window cleaning tools are not complicated, but each one is designed to work with the others to remove dirt and water completely and efficiently. Here are the seven essentials every home needs. 1. Squeegee The squeegee is the heart of the operation and the single most important tool in the kit. A professional squeegee has a comfortable handle, a metal channel that holds the blade perfectly straight, and a soft, pliable rubber blade with a sharp, square edge. A nicked or rounded blade leaves streaks no matter how good your technique is. A 10 or 12 inch squeegee is a versatile starting point for most homes. 2. Scrubber or T-Bar Before the squeegee can dry the glass, the window must be scrubbed. The applicator, also known as a scrubber or T-bar, holds a removable microfiber sleeve that carries a significant amount of cleaning solution. Its texture agitates and lifts grime without scratching the glass. Choose a scrubber a couple of inches wider than your squeegee so every pass gets full coverage. 3. Bucket Any bucket can hold water, but professionals use a rectangular bucket wide enough to fully submerge the scrubber and squeegee, so the tools are evenly wetted. Many have side clips that keep your tools out of the dirty water and ready for use, which makes the whole process cleaner and more organized. 4. Soap The cleaning solution is a lesson in simplicity. The goal is not a mountain of suds, which are hard to remove and leave a film. Professionals use highly concentrated, biodegradable soaps that add slip to the water so the squeegee glides smoothly. For home use, a few drops of clear dish soap in a gallon of cool water is enough to break surface tension and lift grease. Too much soap causes streaks, because the water does the cleaning and the soap is only there to help. 5. Microfiber Cloths Microfiber cloths are the detailing tools that separate a good job from a perfect one. They are highly absorbent and, most importantly, lint-free. Keep at least two: one for wiping frames and sills before you start, and a completely dry one for wiping the squeegee blade between strokes and detailing the edges of the pane when you finish. 6. Scraper For paint overspray, dried bug residue, or adhesive, a proper window scraper holds a single-edge razor blade at a safe angle. The absolute rule is that the glass must be wet: using a scraper on dry glass guarantees scratches. On a wet, lubricated surface it removes the most resilient grime without leaving a mark. 7. Extension Pole For windows out of reach, an extension pole is a much safer alternative to a ladder. Professional scrubber and squeegee handles attach securely to the pole, letting you clean second-story windows from the ground while improving safety and speed. Falls are a leading cause of injury, and the CDC tracks fall data for good reason, so reducing ladder use around the home is smart. Window Cleaning Technique That Works Wet the glass with the scrubber, working the solution over the whole pane. Scrub away the dirt, then remove the dirty water with the squeegee. Wipe the squeegee blade with a dry microfiber cloth after each pass. Detail the edges of the pane and wipe the sill to finish. Keeping window sills and tracks dry also prevents mold from growing around windows, where moisture tends to collect. Window Cleaning Tools at a Glance Tool Role Pro Tip Squeegee Removes water and solution from glass Keep the rubber blade sharp and square Scrubber or T-bar Wets and scrubs the glass surface Pick one wider than the squeegee Bucket Holds solution and tools Use side clips to keep tools out of dirty water Soap Adds slip for a smooth glide A few drops of clear dish soap per gallon Microfiber cloths Detail frames, edges, and sills Keep one dry for blade and edge work Scraper Removes paint, bugs, and adhesive Only use on wet glass Extension pole Reaches upper windows safely Safer than a ladder for second-story panes Frequently Asked Questions What is the best homemade window cleaning solution? A few drops of clear dish soap in a gallon of cool water. It breaks surface tension and lifts grease without creating the heavy suds that leave film and streaks on glass. How often should windows be cleaned? Interior windows every one to two months, and exterior windows at least twice a year, more often in spring and fall when pollen and dust are heaviest. Why do my windows streak after cleaning? Streaks usually come from a nicked squeegee blade, too much soap, or drying the glass with a linty cloth. Check the blade, cut the soap, and finish with a dry microfiber cloth. Can I clean second-story windows without a ladder? Yes. An extension pole with a scrubber and squeegee attachment lets you reach upper panes from the ground, which is safer and faster than balancing on a ladder. Every tool in this system has a purpose, and together they produce a result that consumer products cannot match. For a flawless finish without the hassle, Toronto Shine Cleaning uses this exact system of professional-grade window cleaning tools so your windows are impeccably clean every time. Pair it with a deep cleaning service, book regular maid service, review our pricing, or contact us at (647) 424-0355 from any of our locations.

7 Essential Window Cleaning Tools Every Home Needs Read More »
laminate floor cleaning

Best Ways To Clean Laminate Flooring Without Damage

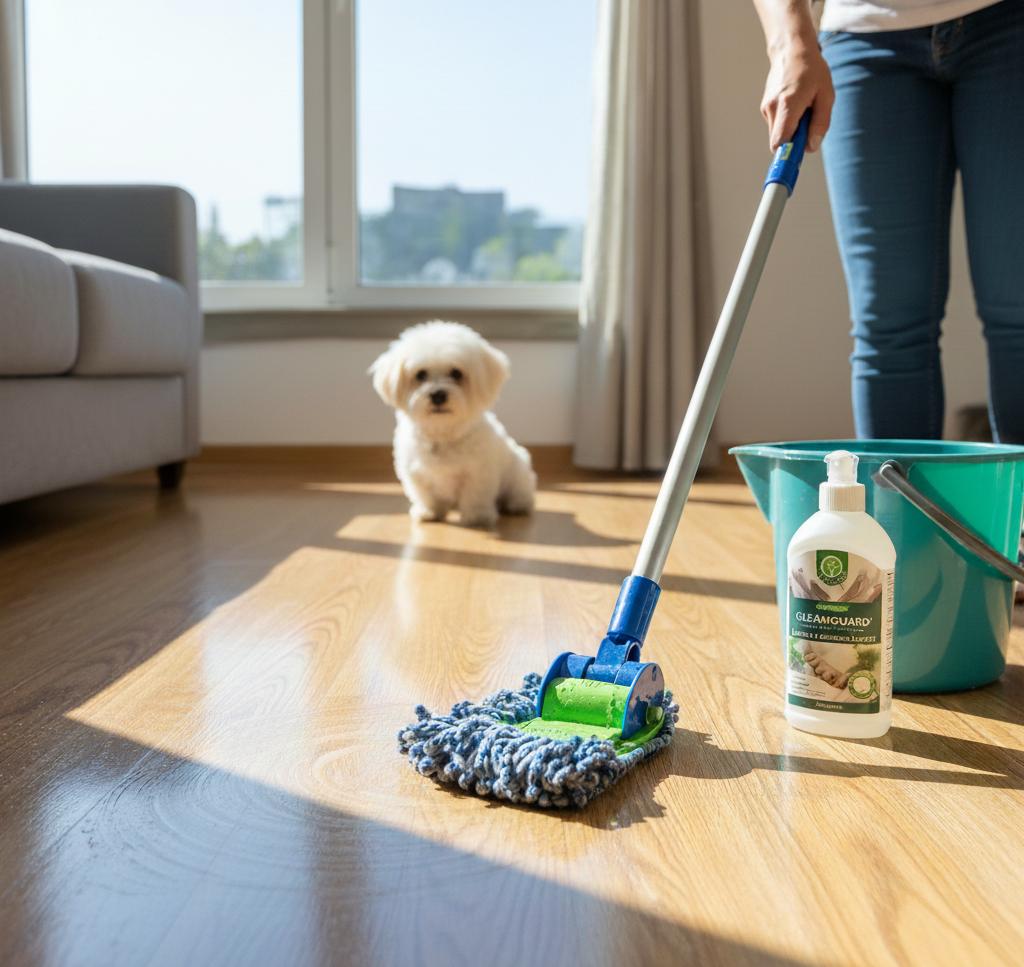
Best Ways To Clean Laminate Flooring Without Damage Laminate flooring mimics the character of hardwood, stone, or tile at a fraction of the cost and upkeep demands, and its worldwide popularity comes down to durability, versatility, and easy care. That layered engineering also comes with one strict maintenance rule: water is the enemy. The right approach swaps soaking and scrubbing for proper tools and techniques that lift dirt with the absolute minimum of liquid. This guide covers the daily routine, the weekly mop-down, stain remedies, and long-term protection habits that keep laminate looking new. How Laminate Is Built, and Why Moisture Is Its Weak Point Laminate fuses several layers together under heat and pressure. On top sits a tough, clear wear layer shielding the high-resolution printed image below. Under that, a dense fiberboard core provides stability and impact resistance, finished by a backing layer that adds moisture resistance. This construction explains both the strength and the weakness of the floor. The wear layer shrugs off water; the fiberboard core and the seams between planks do not. Moisture that seeps between boards makes the core swell, warp, and buckle, and that damage is irreparable. Dry grit is the other enemy: sand and soil grains behave like fine sandpaper underfoot, scratching microscopic lines into the finish that dull its look over time. Consistent, preventative cleaning removes both threats before harm is done. Your Essential Laminate Cleaning Toolkit A microfiber dust mop or soft-bristled broom: your first line of defense; a microfiber head beats a broom because static charge traps dust and pet hair. A vacuum with a hard floor setting: great at pulling debris from between planks, but fit a soft-bristle hard floor head or switch off the beater bar: a stiff rotating carpet brush can scratch laminate. A high-quality microfiber mop: the single most important tool for washing the floor, since its absorbent pads clean well with very little water. A pH-neutral floor cleaner or a DIY substitute: something that will not leave a hazy residue or attack the protective wear layer. Doormats at every entrance, trapping dirt, grit, and moisture before it reaches the floor. The Weekly Laminate Floor Care Routine Daily care takes minutes: a quick dust-mop or soft-broom pass is the best single defense against long-term wear. Weekly, follow this sequence. Dry clean first, then spot-treat Always remove loose dust and debris before any liquid touches the floor, by dust mopping or vacuuming with the beater bar off. Mopping a dirty floor simply pushes a slurry of abrasive grit around and causes scratches. Next, treat spots and spills individually: a damp microfiber cloth handles most marks, while rubbing alcohol dabbed on a cloth lifts stubborn scuffs or ink. Choose a safe cleaning solution Health Canada’s advice on using household products safely starts with reading and following product labels, which applies to floor cleaners too. Your options: A commercial pH-neutral, water-based laminate cleaner is often the safest bet; always follow the dilution instructions on the bottle. A DIY cleaner of one part white vinegar to ten parts warm water, decanted into a spray bottle, dissolves grime without residue; for very large floors, mix half a cup of vinegar into a gallon of water instead. A quick-drying, streak-free blend of equal parts water, isopropyl alcohol, and vinegar, decanted into a spray bottle. Never use oil-based soaps such as Murphy Oil Soap, wax, or any shine-adding product: they leave a dull, streaky film that is hard to remove and can turn dangerously slippery. The damp-mop technique Never flood laminate with water; the mop pad should be damp, not wet. With a bucket, dip the head, then wring until it feels almost dry. A spray bottle is superior: mist one small section at a time, then immediately wipe it up with a dry microfiber mop, working in manageable sections so no standing water sits over the seams. A properly damp-mopped floor air-dries in a minute or two; wipe any remaining wet areas with a clean, dry cloth to prevent water spots. For more on safe product handling, see Health Canada’s household chemical safety tips. Spill and Stain Remedy Chart Mess Remedy Liquid spills such as water, juice, or soda Blot at once with a dry, clean cloth; for sticky messes, wipe on your cleaning solution, follow with a water-rinsed cloth, then dry fully Grease and oil Gently rub with isopropyl alcohol on a clean cloth, or use the vinegar solution Ink, nail polish, or permanent marker Work the mark gently with a clean white cloth spotted with rubbing alcohol or an acetone-based polish remover, keeping the amount small, then wipe away residue using a damp cloth Black scuff marks from shoes Buff them off with a dry tennis ball or a standard pencil eraser Long-Term Protection for Laminate Floors Attach felt pads to every furniture leg, chair, table, sofa, and cabinet, checking and replacing them as they wear; this is the single most important anti-scratch step. Lift furniture completely when moving it and never drag heavy items across the floor. Keep pet nails trimmed so they do not scratch the surface. Avoid stiletto heels, which concentrate enormous pressure on a tiny point and can dent the planks. Manage sunlight: laminate, especially older varieties, can fade under prolonged direct exposure, so close curtains or blinds during the brightest hours. When a home needs a top-to-bottom reset, the crew at our deep cleaning service cares for every surface from the floors up, and weekly upkeep fits neatly into a regular maid plan. Moving out with scratched or stained floors? End-of-tenancy details sit on our move in and out cleaning page. Frequently Asked Questions About Cleaning Laminate Flooring Can I use a regular string mop and bucket on laminate? Only if you wring the mop until it feels almost dry. A damp mop is acceptable; a wet one lets water into the seams, where the core swells, warps, and buckles beyond repair. A spray bottle with a microfiber mop is safer because you mist

Best Ways To Clean Laminate Flooring Without Damage Read More »

Cleaning Quartz Countertops: How to Clean Efficiently and Quickly

Quartz countertops have become a hallmark of the modern kitchen and bathroom, celebrated for their stunning aesthetics, vast range of colours, and remarkable durability. But what truly sets quartz apart from natural stones like granite or marble is its engineering. A quartz countertop is a composite material, typically made of about 90-95% ground natural quartz crystals bound together with a polymer resin and pigments. This manufacturing process creates a surface that is non-porous, a crucial feature that lies at the heart of its easy maintenance and superior hygiene. Unlike natural stone, which has microscopic pores that can absorb liquids and harbor bacteria, the resin in quartz seals the surface completely. This means spills are less likely to cause permanent stains, and germs have nowhere to hide. However, this engineered perfection does not mean quartz is indestructible. The very resin that provides its non-porous shield is also the component most vulnerable to damage from improper cleaning methods. Understanding how to care for your quartz countertops is essential to preserving their beauty and ensuring they last a lifetime. The Golden Rules of Quartz Care Before diving into specific cleaning methods, it’s vital to internalize a few fundamental principles. These rules are designed to protect the resin that binds the quartz together, which is the key to its longevity. Be Gentle: Your primary cleaning tools should be soft. Abrasive scrubbers and harsh chemicals are the enemies of a quartz surface. Act Fast: The non-porous nature of quartz gives you a grace period, but it’s not infinite. Wiping up spills, especially acidic or highly pigmented ones, as soon as they happen is the best way to prevent potential staining. Use a Simple Solution: For the vast majority of cleaning tasks, a simple solution of mild dish soap and warm water is all you will ever need. Avoid Extreme Heat: The resin used in quartz countertops can be damaged by sudden and extreme temperature changes (thermal shock). Always use trivets or hot pads for pots and pans coming directly from the stove or oven. Your Daily Cleaning Routine The beauty of quartz is that its daily maintenance is incredibly straightforward. A few minutes each day is all it takes to keep your countertops looking pristine. You Will Need: A soft sponge or microfiber cloth Mild dish soap A spray bottle with warm water A clean, dry microfiber cloth The Process: Clear the Surface: Remove any crumbs, food particles, and debris from the countertop with a soft, dry cloth or a soft-bristled brush. Create Your Cleaning Solution: In your spray bottle, mix warm water with a few drops of a gentle, pH-neutral dish soap. You don’t need a lot of soap; too much will leave a hazy film. Spray and Wipe: Lightly mist the entire surface of the countertop with the soap and water solution. Using your soft sponge or microfiber cloth, wipe down the entire area in gentle, circular motions. Rinse (If Necessary): If you used a bit too much soap, you may need to rinse the surface. Wipe the countertop with a separate cloth dampened with plain water to remove any soap residue. Dry and Buff: This is a crucial step that many people skip. Using your clean, dry microfiber cloth, thoroughly dry the entire countertop. This not only prevents water spots and streaks but also buffs the surface to a beautiful, lustrous shine. Tackling Tougher Spills and Stains Even with diligent daily cleaning, stubborn spots and spills are bound to happen. The non-porous surface of quartz gives you an advantage, but some substances require a bit more effort. Dried-On Food: If you encounter hardened food, resist the urge to scrape it off with a metal knife or scour pad. Instead, spray the spot with your water and soap solution and let it sit for 5-10 minutes to soften the residue. Then, gently lift the food away using a flexible plastic putty knife or a plastic pan scraper. Once the gunk is removed, clean the area as usual. Grease and Oil: Quartz is highly resistant to grease stains, but splatters can leave a film. For greasy spots, a good degreasing dish soap is your best friend. Apply a small amount directly to the greasy area, add a little water, and work it into a lather with a soft sponge. Wipe away the residue and rinse thoroughly to ensure no soap film is left behind. Stubborn Stains (Wine, Coffee, Tea, Permanent Marker): For more persistent stains that don’t lift with soap and water, you have a few safe options. Isopropyl Alcohol: Dampen a soft cloth with isopropyl (rubbing) alcohol and apply it to the stain. Let it sit for a minute, then rub gently in a circular motion. The alcohol acts as a solvent that can break down many stubborn pigments. Once the stain is gone, rinse the area with plain water and dry. Baking Soda Paste: For a gentle abrasive option, create a paste of baking soda and a small amount of water. Apply the paste to the stain and let it sit for a few minutes. Using a soft sponge, gently scrub the area. The baking soda provides a very fine grit that can help lift stains without scratching the resin. Rinse thoroughly and dry. Hard Water Stains: If you live in an area with hard water, you may notice a chalky film or mineral deposits, especially around the faucet. For this, white vinegar can be used-but with extreme caution. While quartz is generally resistant to acid, prolonged exposure can potentially dull the finish of the resin. Spray a small amount of a 50/50 vinegar and water solution onto the hard water spot, let it sit for no more than one minute, then immediately rinse the area thoroughly with plain water and dry completely. What to AVOID Protecting your investment is just as much about what you don’t do as what you do. Using the wrong product can cause irreversible damage to the resin, leading to discoloration, dulling, and a breakdown of the surface. NEVER Use Harsh or Abrasive Chemicals: This is the most important rule. Keep the following far

Cleaning Quartz Countertops: How to Clean Efficiently and Quickly Read More »

child with a sense of responsibility and organizing the house

Discover Why Involving Your Child In Daily Cleaning Is More Important Than You Think

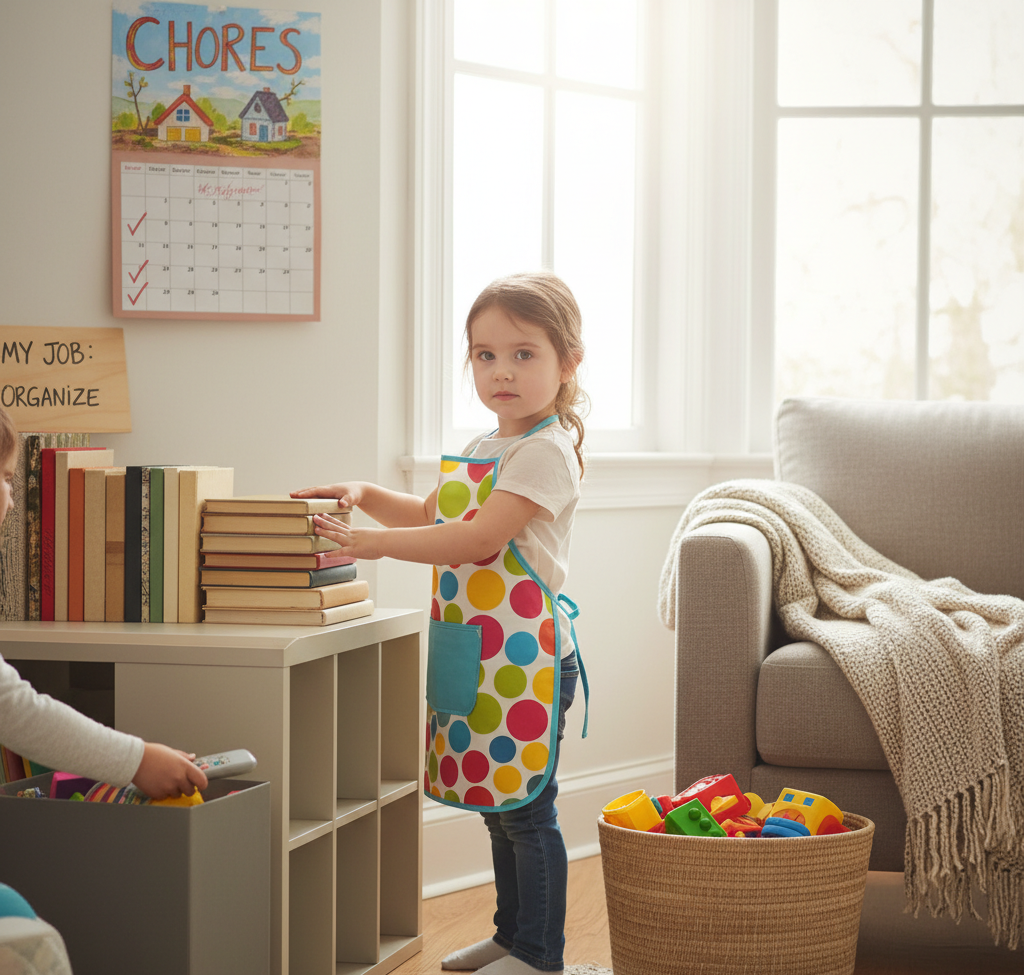
The question many parents have is how do I teach my child to be more responsible? In the bustling rhythm of modern family life, the daily upkeep of a home can often feel like a relentless and overwhelming task, a never-ending cycle of tidying, wiping, and washing that falls heavily on the shoulders of the parents. In this constant battle against clutter and mess, one of the most powerful yet frequently underutilized resources is sitting right at the dinner table: the children. Involving children in daily cleaning is not about offloading parental responsibility or achieving a flawlessly pristine home. It is a profound and deliberate act of teaching, a foundational lesson in responsibility, respect, life skills, and the intrinsic value of contributing to a shared environment. Building Character Transforming chores from a dreaded obligation into a natural and expected part of the daily routine is a process that builds character and strengthens family bonds. It shifts the household dynamic from one where parents are the service providers and children are the consumers, to one of a collaborative team working towards a common goal. When a child learns to wipe up their own spills, put away their own toys, or help set the table, they are internalizing a powerful message: “I am a capable and valuable member of this family. My actions matter, and I have a role to play in the well-being of our home.” This sense of belonging and competence is a cornerstone of healthy self-esteem. The benefits of integrating children into daily cleaning routines extend far beyond the immediate advantage of having an extra pair of hands. Cultivating Responsibility and Accountability: Consistently performing a chore, no matter how small, teaches a child to be responsible for their own space and their own belongings. It instills a sense of ownership and accountability. They learn that a clean room or a tidy living area is not something that magically happens, but is the result of conscious effort. This understanding of cause and effect is a critical life lesson that translates into academic, social, and eventually, professional success. Developing Essential Life Skills: The ability to maintain a clean and organized living space is a fundamental life skill that many young adults find themselves lacking when they first leave home. By teaching children how to properly sweep a floor, load a dishwasher, or do a load of laundry, you are equipping them with the practical knowledge they will need to live independently. These are not just chores; they are lessons in self-sufficiency. Fostering Respect for Property and People: When children are actively involved in the effort it takes to clean and maintain a home, they develop a greater appreciation for it. A child who has just spent time vacuuming the living room carpet is far less likely to carelessly track mud across it. They begin to understand the work that goes into creating a pleasant environment and, by extension, develop more respect for the efforts of others. Building a Strong Work Ethic: The discipline of completing a task, even when it’s not particularly fun, is the foundation of a strong work ethic. Learning to see a job through to completion and taking pride in the result is a value that will serve a child throughout their entire life. Enhancing Motor Skills and Coordination: For younger children, many cleaning tasks are excellent for developing both fine and gross motor skills. Scrubbing a surface, using a spray bottle, sorting laundry, or sweeping with a small broom all help to improve coordination, strength, and dexterity. Strengthening Family Bonds: Working together on household tasks can be a valuable opportunity for connection. It’s a time to talk, to teach, and to work side-by-side. Turning on some music and tackling the after-dinner cleanup as a family can transform a mundane chore into a positive, shared experience. It reinforces the idea that the family is a team. The key to successfully involving children in cleaning is to start early and to make the tasks age-appropriate. The goal is not perfection, but participation and learning. Toddlers (Ages 2-3) At this age, children are naturally inclined to imitate their parents and are often enthusiastic about “helping.” The focus should be on simple, game-like tasks that are within their physical capabilities. Putting Toys Away: This is the most fundamental chore. Make it a game by singing a “clean-up song” or timing how quickly they can fill the toy box. Clear, labeled bins with pictures can help them learn where everything goes. Wiping Up Spills: Keep a small, designated cloth or sponge accessible for them. When a small spill occurs, encourage them to wipe it up themselves. It won’t be a perfect job, but it teaches immediate responsibility. Placing Clothes in the Hamper: This simple task teaches them where dirty clothes belong. “Dusting” with a Cloth: Give them a small microfiber cloth and let them wipe down low, safe surfaces like baseboards or the legs of a coffee table while you do the real dusting. Preschoolers (Ages 4-5) Preschoolers can handle more complex, multi-step tasks. They are developing more coordination and can follow simple instructions. Setting the Table: They can be responsible for putting out napkins, placemats, and silverware. Clearing Their Own Plate: Teach them to carry their own plate to the sink or countertop after a meal. Making Their Bed: It won’t be hotel-perfect, but they can learn to pull up the duvet or comforter. Keep bedding simple to make this task easier for them. Feeding Pets: Filling a pet’s food or water bowl (with supervision) is an excellent way to teach responsibility and empathy for another living being. Helping with Groceries: They can help unload groceries, putting away non-breakable items in low cupboards. Early Elementary (Ages 6-8) At this age, children can take on more responsibility and begin to perform chores independently. Sweeping or Using a Small Handheld Vacuum: They can be responsible for sweeping the kitchen floor after meals or vacuuming up small messes. Loading and Unloading the Dishwasher: They can learn how to place dishes in the dishwasher (with guidance on sharp items) and can

Discover Why Involving Your Child In Daily Cleaning Is More Important Than You Think Read More »

5 Mistakes You Need To Stop Making When Using The Duster

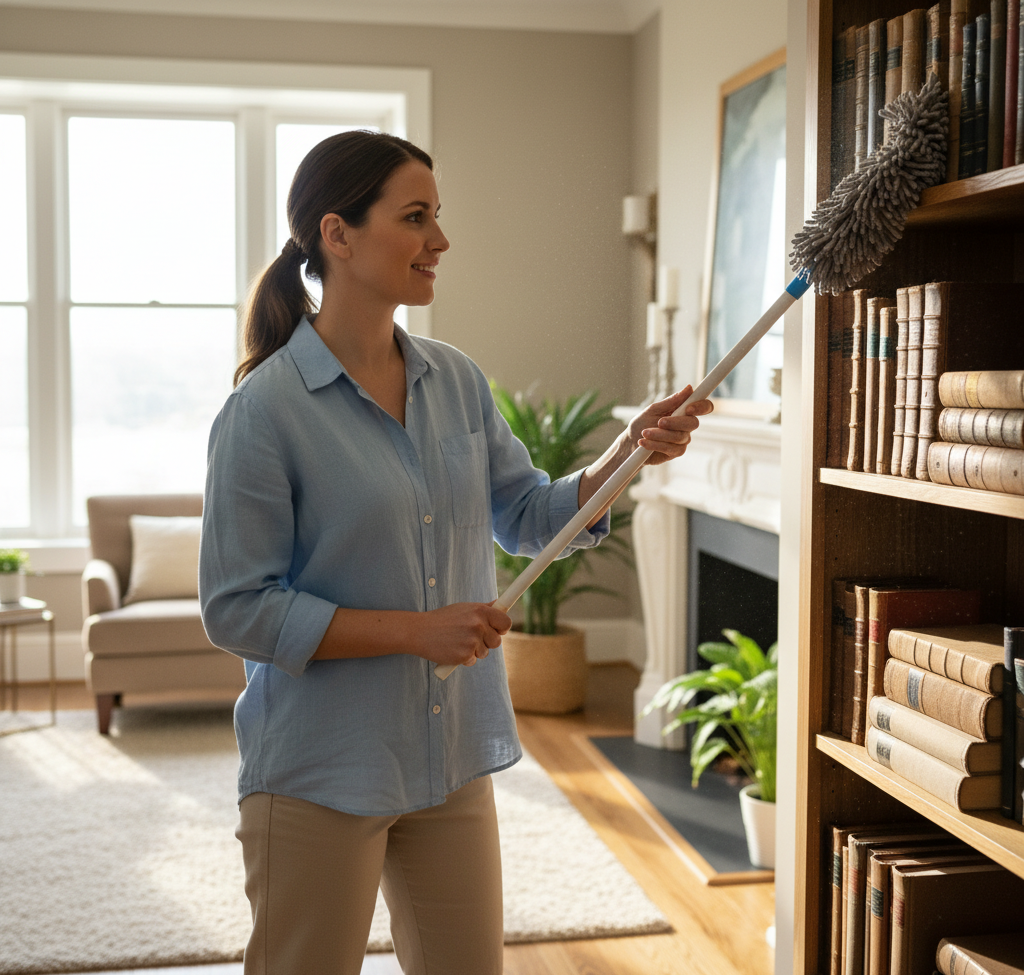
5 Mistakes You Need To Stop Making When Using The Duster Dust is an unavoidable reality of every indoor space: a shifting mix of dead skin cells, fabric fibers, pollen, pet dander, soil tracked in from outside, and even microscopic meteorite debris. It settles on every horizontal surface as a fine gray layer that dulls your home’s look and quietly degrades indoor air quality; for people with allergies or asthma it is a genuine health concern, since it harbors dust mites and other allergens. The duster is your primary weapon, but most people use it badly. The goal of effective dusting is to capture dust and remove it from the environment entirely, not to move it from one surface to another. Here are the five mistakes to stop making. Mistake 1: Trusting a Feather Duster The feather duster, usually made from ostrich, turkey, or chicken feathers on a handle, is the iconic image of dusting and the least effective tool on this list. Its feathers trap little dust; their main action is dislodging particles and sending them airborne to resettle elsewhere minutes or hours later. A high-quality ostrich feather duster performs slightly better because the fine, interlocking barbules create a minor static charge, but it still mostly displaces rather than captures. For a truly clean home, the feather duster is closer to a decorative antique than a working tool. Mistake 2: Using One Duster for Every Surface The real revolution in dusting was microfiber: a synthetic blend of polyester and polyamide (nylon) whose fibers are split into strands many times smaller than a human hair, creating enormous surface area. The split-fiber net physically traps dust, dirt, and even bacteria, and used dry, it generates a positive static charge that pulls in negatively charged dust particles. No chemical sprays are needed. The right lineup covers the whole house: Handheld microfiber dusters: the everyday workhorse for furniture, electronics, picture frames, and general surfaces, with flexible heads that bend under ceiling fan blades and on top of tall bookcases. Extendable dusters: a telescoping pole reaches ceilings, light fixtures, high corners, and cabinet tops, eliminating the stepladder and the neck and shoulder strain of overhead work. Slim or flat dusters: a long, thin profile slides under refrigerators and ovens, between cabinets, and alongside the washer and dryer, where thick layers of unseen dust and lint collect. Microfiber cloths: dry for delicate surfaces, lightly dampened for smudges and stubborn grime without streaks. Lambswool dusters: genuine sheep’s wool contains lanolin, a natural oil that together with the wool’s static charge actively attracts and holds dust instead of pushing it away, making them excellent and gentle on large flat surfaces like tables and shelves. Disposable dusters: a reusable handle with throwaway synthetic heads that trap dust by static; convenient for light, regular dusting, but less environmentally friendly and more expensive over the long term than washable microfiber. Mistake 3: Dusting in the Wrong Order Technique matters as much as the tool, and the single most important principle is to work from top to bottom, because gravity carries any dislodged dust downward. Dusting should come before anything else in a room: wipe lower surfaces and vacuum only after you finish. Start at the highest points: ceiling corners, light fixtures, and fan blades, using an extendable duster. Move down to cabinet tops, bookcases, and wall shelves, then picture frames, window sills, tables, desks, and dressers. Finish at the baseboards and only then vacuum the floor to capture whatever settled. Health Canada’s overview of indoor air contaminants and health is a good reminder that settled dust is tied to the particulates you breathe, so order and method genuinely reduce exposure. Mistake 4: Swiping Aggressively and Ignoring Tricky Surfaces Let the fibers make contact with the surface and lift the dust; aggressive swiping just sends it flying. For heavily dusted surfaces, a slow, single-direction pass works best. Then adjust by surface: Surface What to Do Instead Blinds Use a multi-pronged duster that cleans several slats at once, or close the blinds, dust the whole surface with a handheld duster, reverse the slats, and dust the other side Electronics Turn off and unplug first; TVs and computers build static fields that attract dust. Wipe screens and casings with a clean, dry microfiber cloth, blow dust from keyboards and vents with compressed air, then wipe again Delicate items A very soft, clean paintbrush or new makeup brush works as a precision duster on chandeliers, collectibles, and artificial plants, lifting dust without damage Mistake 5: Never Cleaning the Duster Itself A duster saturated with dust cannot pick up more; it simply spreads the old load around. Cleaning the tool is part of the routine, not an afterthought. The CDC’s guidance on when and how to clean and disinfect your home makes the same point about surfaces: cleaning first is what makes everything else work. Microfiber wins here, since most duster heads are removable and machine washable: wash with regular detergent but no fabric softener, which clogs the microscopic fibers and destroys the static-trapping ability, then air-dry or tumble on low heat. For a lambswool duster, spin it outdoors between your hands to release loose dust, then hand-wash in lukewarm water with mild detergent, rinse thoroughly, and air-dry. How Often Should You Dust? Dusting is continuous maintenance, not a one-time task. For most homes, thorough dusting once a week keeps levels under control. Homes with pets or allergy sufferers, neighborhoods with high pollen counts, and areas near construction need more frequent passes. A consistent routine removes the allergens and particles that affect well-being, not just the visible film. For a comprehensive clean that catches dust from crown corners to the tightest crevices, our regular maid service builds systematic dusting into every visit, and a seasonal deep cleaning clears the accumulated layers. Frequently Asked Questions About Dusting What is the best duster for allergies? A microfiber duster, used dry. Its split fibers and static charge capture dust, dander, and even bacteria rather than displacing them

5 Mistakes You Need To Stop Making When Using The Duster Read More »

Autumn Allergy

Autumn Allergy: 4 Essential Cleaning Plan For a Healthy Home

Autumn Allergy: A Four-Part Cleaning Plan for a Healthier Home September brings a stunning display of autumn colour, but the seasonal shift also kicks off misery for allergy sufferers: sneezing, itchy eyes, and respiratory discomfort. While the fall beauty is enjoyed outdoors, an invisible battle begins inside. The season’s chief offenders are ragweed pollen, which drifts in on winds from hundreds of kilometers away, and mold spores thriving in early fall’s damp, decaying debris. Both infiltrate homes, settle on surfaces, embed in fabrics, and circulate through the air you breathe. Creating a healthy indoor environment is the most effective relief strategy, and that takes a targeted plan, not a simple tidy-up. Here are the four zones to tackle. Zone 1: The Bedroom You spend roughly a third of your life in the bedroom, which makes it the most critical allergy zone in the house. Bedding collects a nightly deposit of dust mites and their waste, pet dander, and pollen carried in on hair and clothes, so wash sheets, pillowcases, and duvet covers weekly in hot water of at least 130 F (54 C), the temperature required to kill dust mites. For delicate fabrics, use a warm wash followed by at least 15 minutes in a hot dryer for a similar result, and launder the pillows and duvets themselves every few months. Allergen-proof covers on the mattress and pillows create an impermeable barrier against triggers. Curtains act like large filters trapping airborne dust and pollen, so take them down and launder them each fall; for non-washable blinds, wipe every slat with a damp microfiber cloth to remove settled pollen that would otherwise aggravate symptoms each time you open or close them. Finally, vacuum the entire mattress surface with your cleaner’s upholstery attachment. Dust mites number in the millions inside the average mattress, a year-round issue that worsens any autumn allergy. Zone 2: Floors and Air Quality Carpets and rugs can trap dust, dirt, and allergens equal to eight times their own weight, so your cleaning method matters. The single most important tool is a vacuum with a genuine HEPA filter. Standard vacuums often stir up fine particles like pollen and make symptoms worse, while a HEPA filter is designed to capture 99.97 percent of tiny particles, trapping allergens and removing them from your home. That is non-negotiable with a severe autumn allergy, and Health Canada’s page on air contaminants and health explains why particles in indoor air deserve this attention. Technique counts too: move slowly and methodically with multiple overlapping passes so the vacuum pulls allergens from deep within the fibers, and vacuum high-traffic areas at least twice a week during peak season. Zone 3: Moisture Control and Mold Elimination Mold is a major autumn allergy trigger, and its growth tracks moisture directly, which makes the cooler, damper weather of early fall ideal conditions for it. In bathrooms, run the exhaust fan during every shower and for at least 20 minutes afterward to vent moisture outside, and clean tile grout regularly with a vinegar and water mixture to kill emerging spores. In basements and crawl spaces, which are naturally prone to dampness, run a dehumidifier to keep humidity below 50 percent; a musty basement smell is a clear sign of a problem that can significantly worsen symptoms. In kitchens, always use the stove’s exhaust fan when cooking and check under the sink and around the dishwasher for leaks. Health Canada’s guidance on reducing humidity, moisture, and mould is the authoritative reference for keeping growth from starting. Zone 4: Whole-Home Habits for Allergy Relief Pollen and dust settle on every surface, so round out the plan with the areas people overlook: Dust with a damp cloth. Dry dusting merely displaces allergens into the air you breathe, so wipe surfaces with a damp microfiber cloth that traps particles, always working from the top of the room downward. Service the HVAC before heating season. Replace the furnace filter before the first run of fall, and consider a high-efficiency filter built to capture small particles like pollen and mold spores. Vacuum upholstery weekly. Sofas and armchairs collect allergens just like carpets do, so go over them with the upholstery attachment. Use this chart to match triggers to tactics: Trigger Where it hides Removal tactic Ragweed pollen Curtains, blinds, windowsills, carpets Launder curtains each fall, damp-wipe slats and sills, HEPA-vacuum high-traffic areas twice weekly Dust mites Mattresses, pillows, bedding, upholstered furniture Weekly hot wash at 130 F (54 C) minimum, allergen-proof covers, vacuum the mattress and sofas Mold spores Bathroom grout, basements, crawl spaces, under-sink leaks Run exhaust fans during showers plus 20 minutes, keep humidity below 50 percent, fix leaks promptly Frequently Asked Questions About Autumn Allergies and Cleaning What temperature kills dust mites in laundry? At least 130 F (54 C). If the fabric cannot take hot water, wash warm and then tumble dry hot for at least 15 minutes, which achieves a similar result for bedding. Is a HEPA vacuum really necessary for allergy relief? Yes, if symptoms are significant. Ordinary vacuums can exhaust fine pollen and dust back into the room air, while a HEPA filter captures 99.97 percent of tiny particles so allergens leave the house instead of recirculating. When should I change my furnace filter for fall? Before the first run of the season, so summer’s dust and pollen are not blown through the house the moment heating starts. A high-efficiency filter rated for pollen and mold spores is worth the upgrade during allergy season. Does feather or dry dusting help allergy sufferers? No. Dry dusting knocks allergens into the air where you inhale them. Wipe with a damp microfiber cloth, working top to bottom, and vacuum or mop the floor last. Allergy-Season Help from Toronto Shine Cleaning If pollen season overwhelms your weekend routine, our team can take over: textile washing, HEPA-quality vacuuming, and moisture-zone scrubbing are core parts of every deep cleaning we perform, and weekly or biweekly visits through our regular maid service keep triggers from

Autumn Allergy: 4 Essential Cleaning Plan For a Healthy Home Read More »

scale buildup in an espresso machine

Descaling Agent: Essential Tips On How To Use This Cleaning Product

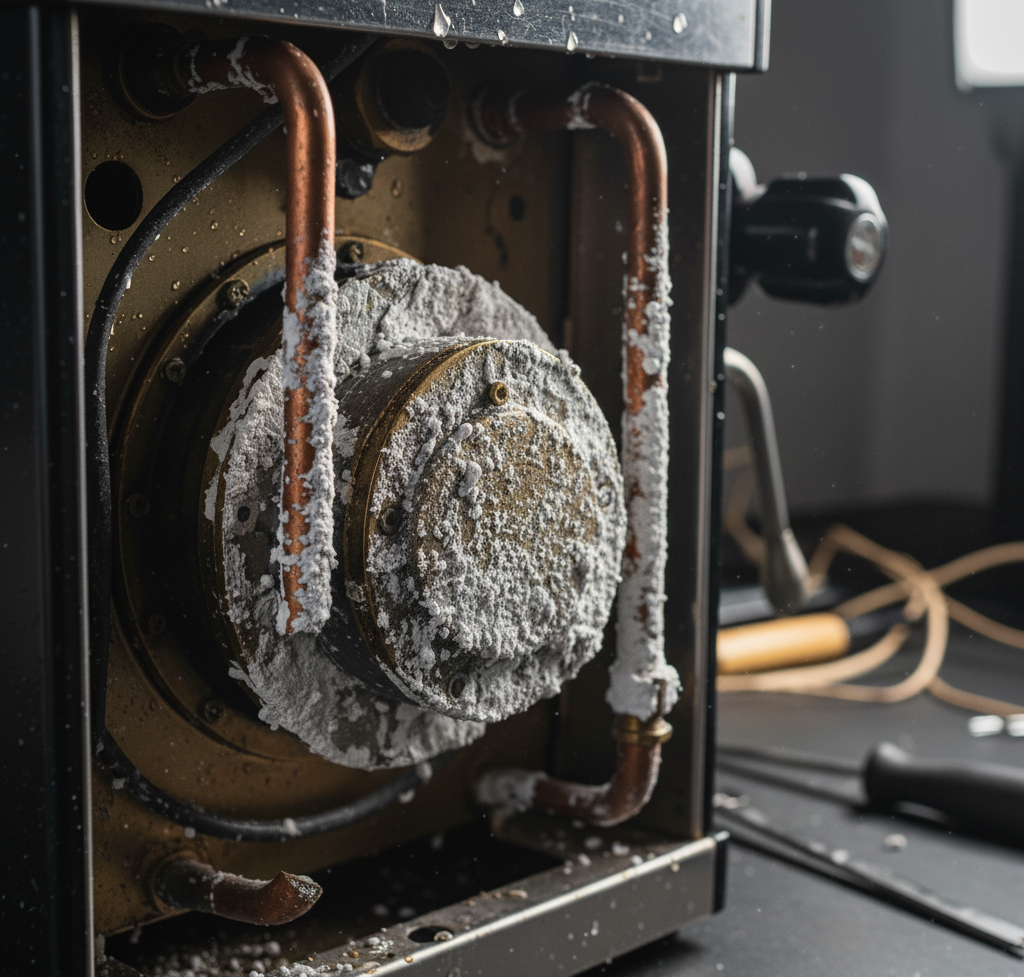
Descaling Agent: Essential Tips on How to Use This Cleaning Product Limescale is the silent buildup that infiltrates appliances wherever hard water flows. Every time water evaporates, traces of calcium carbonate and magnesium stay behind, hardening over time into a stubborn crust. That scale is not just unsightly; it threatens how efficiently your most-used appliances run, how long they last, and even their hygiene. The countermeasure is a descaling agent, and knowing how to choose and apply one turns a vague chore into simple preventative upkeep that saves money and adds years of life to your machines. The Chemistry: Why Acid Dissolves Limescale Understanding a descaler is understanding basic chemistry. Limescale is alkaline, so only an acid can dismantle it. A descaling agent is essentially a buffered acidic liquid engineered to attack mineral crusts safely: the acid reacts with calcium carbonate and converts the scale into water-soluble substances you can flush away. The stakes are highest in appliances that heat water. Heating elements attract limescale: as water heats, minerals precipitate faster and coat the element in an insulating layer. The machine then burns noticeably more energy to hit the same temperature, driving up electricity bills, and chronic overheating can eventually burn the element out. Kettles, coffee makers, washers, and dishwashers all qualify. Pantry Descaling Agents: Vinegar, Citric Acid, and Lemon For many routine jobs, simple non-toxic household acids work perfectly, and Health Canada’s tips for using household chemicals safely apply to them just as they do to commercial bottles: read labels, ventilate, and protect your skin. White vinegar (acetic acid): the most accessible descaler, strong enough for light to moderate buildup. It is inexpensive and multi-purpose, but the strong, lingering odor demands thorough rinsing, and it may lack punch against very heavy, long-term scale. Use it for routine care of kettles, drip coffee makers, and showerheads. Citric acid: sold as a powder in grocery and bulk food stores, it is a more powerful acid that works faster on tougher scale, and its big advantage is being completely odorless, so it will not leave a vinegar aftertaste in coffee or tea. Most commercial eco-friendly descalers are simply citric acid in a box, and it is highly effective and safe for most applications. Lemon juice: a weaker form of citric acid for very light tasks like faucet water spots and surface film. Not strong enough for appliance interiors, but useful externally, and it leaves a fresh scent. Commercial Descalers: When to Buy the Bottle Serious buildup or delicate, high-end appliances call for a formulated product. Health Canada’s overview of household product safety reminds you to follow label directions on dilution and contact time for any cleaning chemical. Two families dominate: Formic acid or sulfamic acid descalers: industrial-strength acids common in products designed for high-performance espresso machines and specialized equipment. They work very quickly and remove heavy scale extremely well, but they are potent: handle them with care, follow the label’s dilution and contact-time instructions precisely, and wear gloves. Lactic acid descalers: a gentler, plant-derived, biodegradable option. Because lactic acid is less corrosive than the stronger acids, it stays safe across a wide range of appliances while still delivering excellent descaling power. Practical Descaling Methods Appliance by Appliance Appliance Method Electric kettle Fill halfway with equal parts white vinegar and water, boil, then let it sit for an hour before pouring out and rinsing thoroughly. For an odorless clean, boil one to two tablespoons of citric acid powder in a half-full kettle, let it sit, and rinse: the scale dissolves completely. Drip coffee maker Scale slows brewing, disrupts water temperature, and makes coffee taste bitter and chalky. Run a reservoir of equal parts vinegar and water through a full brew cycle with a clean filter in place, discard it, then run two to three cycles of fresh water to rinse out all residue and taste. Espresso machine Check the user manual first. Many makers warn that vinegar’s acidity can harm internal aluminum parts and rubber seals over time, so they specify a commercial descaler instead. Typically you run the solution through via the reservoir, then rinse extensively so every trace is flushed out. Washing machine and dishwasher Run the empty machine on the hottest, longest cycle. In the washer, add two cups of white vinegar or half a cup of citric acid to the detergent dispenser. In the dishwasher, set a bowl holding a cup of vinegar on the top rack, or sprinkle half a cup of citric acid across the bottom. This clears scale plus soap scum. Showerhead and faucet Erratic spray or reduced flow usually means scale. For the baggie method, pour white vinegar into a sturdy plastic bag, submerge the head or aerator, and secure the bag with a rubber band or twist tie. Soak several hours or overnight, remove the bag, run the water to flush dissolved scale, and scrub leftovers with an old toothbrush. Safety Precautions Before You Pour Know your materials: acids etch unsealed natural stone such as marble, travertine, and limestone, so keep vinegar and other acidic cleaners off them, and show caution with cast iron and some aluminum surfaces. Follow commercial descaler directions precisely for dilution and contact time. Ventilate the area, since fumes from vinegar and stronger descalers are irritating. Rinse thoroughly, especially in anything that handles food or beverages; multiple fresh-water passes prevent residue and aftertaste. Wear gloves with any descaling product, natural or not, to avoid skin irritation. Descaling belongs inside a proper deep clean, and if mineral neglect has spread beyond your kettle, our deep cleaning service tackles hard-water buildup through the whole house. Lighter upkeep fits a regular maid schedule, and prep for a move is covered under move in and out cleaning. Frequently Asked Questions About Descaling Agents Which is better for a kettle, vinegar or citric acid? Both dissolve scale well. Vinegar comes straight from the pantry but leaves a strong odor and needs rinsing; citric acid is odorless, works faster, and is the safer bet if

Descaling Agent: Essential Tips On How To Use This Cleaning Product Read More »

cleaning front-laod washing machine

Cleaning Front-Load Washing Machine: Detailed Guide to a Sanitized Machine

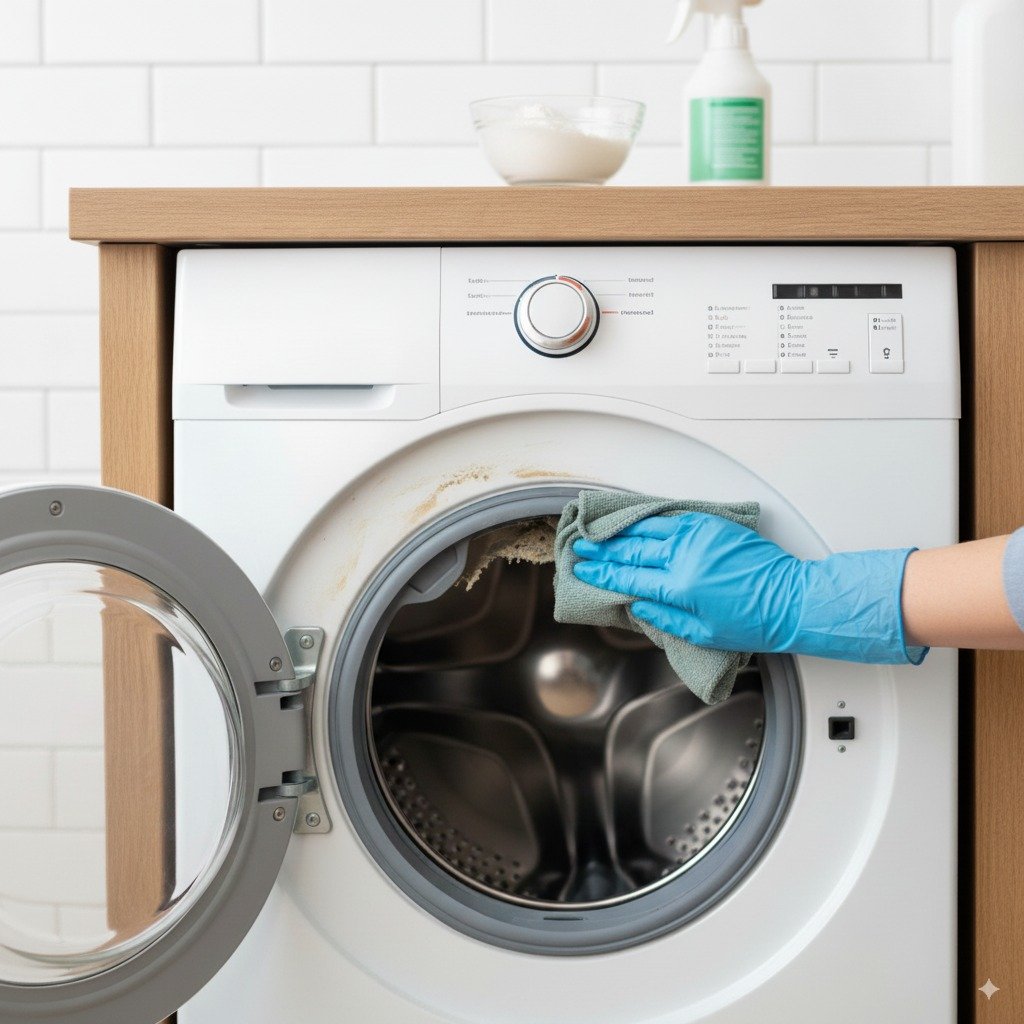
Why Front-Load Washing Machines Get Musty A front-load washer is efficient engineering: it uses less water than a top-loader, treats fabrics gently, and spins fast enough to pull extra moisture out of the load, which shortens drying time. The flip side of that design is an airtight door seal and low water levels that leave standing dampness inside the drum. Mold, mildew, and bacteria feed on leftover detergent and body soil in those damp zones and produce a sour smell that transfers to clean laundry. That odour is a maintenance flag, not a breakdown. Learning how to clean a front-load washing machine protects its performance, keeps your clothes hygienic, and adds years to the appliance. Where Grime Collects in a Front-Loader Top-loaders dry out between loads; front-loaders do not. They trap moisture in four places, and each needs its own treatment before the smell goes away. Rubber door gasket: the deep folds hold water, lint, hair, and a detergent film after every cycle. That dark, damp layer is an incubator for mold and mildew, visible as black spots and a sour smell. Drum and outer tub: the stainless drum resists buildup, but the hidden outer tub collects a slimy film of soap scum and biofilm that can break off in flakes and redeposit on clothes. Detergent dispenser drawer: undissolved detergent, fabric softener, and bleach cake up inside the drawer and its housing, feeding more mold. Drain pump filter: a trap at the bottom of the machine catches coins, buttons, lint, and hair. Left unmaintained, decomposing debris and stagnant water create a powerful, unpleasant odour. Mold spreads wherever moisture lingers, and the CDC’s mold resources explain why drying damp spots is the first line of defence. How to Deep-Clean a Front-Load Washer, Step by Step Set aside about an hour of hands-on work plus the run time for two empty cleaning cycles. Grab rubber gloves, clean cloths, a soft-bristled brush or an old toothbrush, distilled white vinegar, and chlorine bleach, then treat each problem area individually. Step 1: Scrub the gasket Mix equal parts white vinegar and water, or add half a cup of chlorine bleach to a gallon of water, and never mix vinegar and bleach together. Vinegar dissolves soap scum and discourages mold; bleach is the stronger choice once black mildew spots appear. Pull the seal back to reach the gap between gasket and drum, wipe every fold inside and out, scrub stubborn spots with the brush, rinse the area with a cloth dampened in plain water, and dry the gasket fully. Removing the moisture is what stops mildew from returning the same week. Step 2: Sanitize and descale the drum and tub With the machine empty, pour one cup of chlorine bleach into the dispenser’s bleach compartment, skip detergent, and run the hottest, longest cycle available, ideally a Tub Clean or Clean Washer setting or a heavy-duty or sanitary one. This kills the mold, mildew, and bacteria living in the drum and outer tub. Then run a second hot, long cycle with one cup of distilled white vinegar poured directly into the drum. The acid dissolves lingering residue, clears out traces of bleach, and deodorizes the machine, and the two-cycle order follows the same logic as the CDC guidance on disinfecting with bleach: sanitize first, rinse the chemistry out afterward. Step 3: Soak the dispenser drawer Pull the drawer out until it stops, then press the release tab, often marked Push, to free it completely. Soak the drawer in hot water with white vinegar for about 30 minutes, scrub every compartment including the narrow channels and undersides, and brush out the empty housing while the drawer soaks, because mold often grows on the ceiling of that cavity. Rinse, dry, and slide the drawer back in until it clicks. Step 4: Clear the drain pump filter Check your manual for the exact procedure; most front-loaders hide the filter behind a small access door at the bottom front. Lay a thick towel on the floor and keep a shallow pan close by, because trapped water escapes the moment you open it. Unscrew the cap slowly, let the water drain, and pull the filter out. Pick away lint, hair, coins, and buttons, rinse the filter under running water, wipe the housing inside, and screw the cap back tightly to prevent leaks. For many owners, this step finally kills the smell. Problem area What collects there What to use Rubber gasket Water, lint, hair, detergent film, black mildew spots Vinegar-and-water solution, or 1/2 cup chlorine bleach per gallon of water Drum and outer tub Soap scum and biofilm 1 cup bleach on a hot cycle, then 1 cup distilled white vinegar on a second hot cycle Dispenser drawer Undissolved detergent, fabric softener, bleach residue 30-minute soak in hot water and vinegar, plus a small brush Drain pump filter Coins, buttons, hair, stagnant water Running water, a towel, and a shallow pan for the spill Daily Habits That Keep a Front-Load Washer Fresh A deep clean resets the machine; small habits keep it reset. Leave the door ajar after every wash so air circulates through the drum and seal. Wipe the gasket with a dedicated cloth after the last load of the day to lift out standing water. Use only high-efficiency detergent, measured to the label. Regular detergent over-suds and leaves a residue mold feeds on, and more soap never means cleaner clothes. Move wet laundry to the dryer as soon as the cycle ends so nothing sits damp in a closed drum. Run one empty hot cycle with bleach or vinegar every month to hold buildup at bay. Front-Load Washer Cleaning FAQ How often does a front-load washer need a real deep clean? Wipe the gasket after every use and run a monthly maintenance cycle. Take the full four-step approach, including the filter and dispenser drawer, whenever odours return or every few months with heavy use. Can I clean the whole machine with vinegar alone? For general upkeep, yes. Vinegar dissolves

Cleaning Front-Load Washing Machine: Detailed Guide to a Sanitized Machine Read More »

How to Tackle Tough Stains on Clothes: 5 Proven Methods

How to Tackle Tough Stains on Clothes: 5 Proven Methods Coffee on a white shirt, red wine at a dinner party, grass stains after a park afternoon: stains are universal, but panic is optional. The difference between a saved garment and a casualty is rarely luck. It is speed, technique, and knowing which family a stain belongs to. Here is the complete playbook, organized by stain type, with the household tools that do the work. Three Rules Before Any Treatment Act fast: a fresh stain is a temporary problem, while a set-in stain bonds with the fibers and becomes a long-term challenge. Blot, never rub: rubbing grinds particles deeper, spreads the stain wider, and frays the fabric; use a clean white cloth and work from the outside edges inward. Test first: try any solution on an inside seam or hem to rule out discoloration. And the rule that saves the most clothes: never put a stained garment in the dryer, because heat permanently sets most stains. Air dry until the stain is verifiably gone, and repeat treatment if even a faint trace remains. Your Stain Removal Toolkit No cabinet of specialty products required: Cold water, the first response for unknown and protein-based stains Clear dish soap, without bleach, the gentle degreaser for oil-based stains White vinegar, the mild acid that breaks down tannins like coffee, tea, and juice Baking soda, the gentle abrasive and deodorizer that forms a lifting paste 3% hydrogen peroxide, a mild oxygen bleach for blood and grass, test on colors first Rubbing alcohol, the solvent for ink and some dye stains Enzyme cleaner, built for protein stains like blood, sweat, and dairy Whatever you reach for, read the label and keep products in their lane; Health Canada’s household products guidance is the reference for using any cleaner safely, and its chemical safety page explains why products should never be mixed on a whim. Method 1: Tannin Stains, the Plant-Based Family Coffee, tea, red wine, juice, berries, and grass are all plant dyes. For coffee and tea, blot immediately and flush cold water from the back of the fabric to push the stain out, then apply equal parts white vinegar and water for 10 to 15 minutes, followed by a baking soda paste and a soft brush if needed. For red wine, speed is everything: blot thoroughly, cover the stain completely with salt, and let it draw the wine out for at least an hour before scraping and rinsing cold. Treat any residue with a paste of hydrogen peroxide and dish soap for 30 minutes. Grass stains respond to dish soap or enzyme cleaner worked in for 15 minutes, with rubbing alcohol dabbed on stubborn spots before a cold rinse. Method 2: Oil-Based Stains, the Greasy Family Cooking oil, butter, salad dressing, grease, and most makeup will not budge with water alone. Cover the fresh stain with an absorbent powder, baking soda, cornstarch, or talcum, and let it sit at least 30 minutes to draw oil out of the fibers, then scrape it off. Work clear dish soap directly into the spot and let it sit 10 to 15 minutes, then wash in the hottest water the fabric tolerates. For foundation and lipstick, scrape off the excess first, apply dish soap or an oil-free makeup remover, and use a dab of rubbing alcohol to break down waxy components. Method 3: Protein Stains, Always Cold Blood, sweat, dairy, egg, and mud share one non-negotiable rule: cold water only. Hot water cooks the protein and sets it permanently. Flush fresh blood with cold running water from the back of the fabric, soak set-in traces in cold salt water for an hour, then apply 3% hydrogen peroxide directly and watch it bubble as it lifts the stain. Yellow underarm marks come from antiperspirant reacting with body oils; scrub them with one part dish soap to two parts hydrogen peroxide, sprinkle baking soda over, and let it work for an hour. Mud is the counterintuitive one: let it dry completely, brush off the solids, then treat the residue with detergent for 15 minutes and wash cold. Method 4: Dye Stains, the Toughest Family Ink and mustard are pigment problems. For ballpoint ink, place a paper towel under the fabric to absorb what gets lifted, then dab with rubbing alcohol using a clean cloth; the ink should transfer to the cloth in stages, refreshing the cloth section as you go, before a thorough cold rinse. Mustard’s turmeric is a potent dye: scrape, flush cold, apply vinegar, then treat remaining yellowing with dish soap and hydrogen peroxide and, if possible, let the garment sit in direct sunlight, which naturally bleaches the stain. Method 5: The Overnight Rescue for Old Stains Set-in stains reward patience. Soak the garment in an oxygen-based bleach solution, mixed per the product directions in the warmest water the fabric safely tolerates, for several hours or overnight; enzyme cleaners handle old protein stains the same way. After the soak, treat any survivor with the matching method above and launder. Delicates like silk and wool sit outside all of this: no hot water, no harsh scrubbing, mild detergent and gentle hand washing only, or a professional dry cleaner when the item is precious. Stain Family Fastest Fix Coffee or tea Tannin Cold flush, then vinegar and water, 10 to 15 minutes Red wine Tannin Salt blanket for an hour, then peroxide paste Cooking oil Oil-based Absorbent powder, then dish soap, hot wash Blood Protein Cold water only, then 3% hydrogen peroxide Ink Dye Alcohol dabbing over an absorbent towel Stain Removal FAQs Why does the dryer ruin my chances? Heat permanently bonds stains to fibers, which is why the check before drying matters more than any product. If the stain is fully gone, dry normally; if not, re-treat and re-wash, and keep air drying until it disappears. Can hydrogen peroxide go on any fabric? It is safe on most whites and colorfast fabrics but can lift dye, so always test

How to Tackle Tough Stains on Clothes: 5 Proven Methods Read More »

Hydrogen Peroxide for cleaning

Understand The Formula For Hydrogen Peroxide And 4 Ways To Use It For Cleaning

In the world of cleaning, few products offer the versatility, affordability, and eco-friendly power of hydrogen peroxide. Often found in a simple brown bottle in the first-aid aisle, this unassuming liquid is a formidable ally in the quest for a truly clean and disinfected home. Its chemical formula, H₂O₂, is just one oxygen atom away from water (H₂O). This extra oxygen atom is what makes it a powerful oxidizer, allowing it to break down stains, kill germs, and deodorize surfaces effectively. When its work is done, it safely decomposes into nothing more than water and oxygen, making it a much gentler choice for your home and the environment compared to harsh chemical cleaners like chlorine bleach. Understanding the humble brown bottle is the first step to unlocking its potential. For household cleaning, the standard 3% solution is all you need. While higher concentrations exist, they can be corrosive and are not intended for general use. The dark bottle is essential because hydrogen peroxide is sensitive to light, which causes it to break down more quickly into water and oxygen, losing its cleaning power. For best results, it’s often helpful to attach a spray nozzle directly to the original bottle. Before you begin, always remember a few key safety rules: wear gloves to protect your skin, ensure good ventilation, and most importantly, never mix hydrogen peroxide with bleach or ammonia, as this can create toxic gases. 1.Hydrogen Peroxide in the Kitchen The kitchen is where hygiene is paramount, and hydrogen peroxide shines as a non-toxic disinfectant and cleaner. Disinfecting Cutting Boards and Countertops: Wooden and plastic cutting boards can harbor dangerous bacteria like Salmonella and E. coli. After washing your cutting board with soap and water, spray it liberally with 3% hydrogen peroxide. Let it sit and bubble for about 10 minutes, this bubbling action is the peroxide working to lift and kill germs from the pores of the surface. Rinse thoroughly with water. The same process can be used on non-porous countertops (avoiding unsealed natural stone like marble) for a food-safe disinfection. Cleaning and Deodorizing the Sink: The kitchen sink is often one of the dirtiest places in the home. To clean and sanitize it, wash it first with soap and water. Then, spray the entire basin and faucet with hydrogen peroxide. Let it sit for 15-20 minutes before rinsing. For tough stains, create a paste of baking soda and hydrogen peroxide, apply it to the stained area, let it sit, and then scrub gently with a non-abrasive sponge. This not only cleans but also eliminates lingering odors. Brightening Stained Cookware: Burnt-on food and stains on baking sheets, pots, and pans can be incredibly stubborn. To tackle them, create a paste of baking soda and hydrogen peroxide. Apply a thick layer to the stained areas, let it sit for several hours or even overnight. The peroxide will work to break down the carbonized food, and the baking soda will act as a gentle abrasive. Scrub with a sponge, and you’ll find much of the staining lifts away with minimal effort. Sanitizing the Refrigerator and Dishwasher: Because hydrogen peroxide is food-safe, it’s perfect for cleaning appliances that handle your food. Wipe down shelves, drawers, and the interior walls of your refrigerator with a cloth dampened with peroxide to disinfect surfaces and eliminate odors. You can also run an empty dishwasher cycle with a cup of hydrogen peroxide in the bottom to help kill mold, mildew, and bacteria that can build up inside the machine. 2.Tackling the Bathroom The bathroom is a constant battleground against germs, mold, and mildew. Hydrogen peroxide is an indispensable tool in this fight. Eliminating Mold and Mildew: In damp environments like showers, mold and mildew are common. To treat affected areas, spray 3% hydrogen peroxide directly onto the mold. Let it sit for at least 30 minutes to an hour. The peroxide will kill the mold spores. After it has sat, use a stiff brush to scrub the area and then rinse with water. This is particularly effective on tile grout, shower curtains, and around fixtures. Disinfecting the Toilet: Hydrogen peroxide is a fantastic toilet bowl cleaner and disinfectant. Pour about half a cup of peroxide into the toilet bowl and let it sit for 30 minutes. The solution will work to break down stains and kill germs. After waiting, scrub the bowl with a toilet brush and flush. You can also spray the exterior, seat, and handle with peroxide and wipe clean for a complete sanitization. Whitening Grout: Grout between tiles can become discolored over time. To restore its brightness, make a thick paste of baking soda and hydrogen peroxide. Apply the paste directly to the grout lines using an old toothbrush or a small brush. Let it sit and bubble for 10-15 minutes, then scrub vigorously. Wipe away the excess paste with a damp cloth. You may need to repeat the process for heavily stained areas, but the results are often dramatic. Sanitizing Toothbrushes and Bath Toys: Items that go in the mouth need regular sanitizing. Soak toothbrushes in a small cup of hydrogen peroxide for about 5-10 minutes once a week to kill bacteria. Similarly, bath toys can be soaked in a solution of warm water and peroxide to eliminate mold and mildew that can grow inside them. Rinse everything thoroughly before use. 3.Around the House The applications of hydrogen peroxide extend far beyond the kitchen and bathroom. Effective Stain Removal in Laundry: Hydrogen peroxide is a mild bleach, making it excellent for removing stubborn stains, especially from white fabrics. It is particularly effective on organic stains like blood, grass, and red wine. For blood stains, apply peroxide directly to the fresh stain (it will bubble as it reacts with an enzyme in blood) and blot with a clean cloth before washing. For general stains, mix two parts hydrogen peroxide with one part dish soap. Apply to the stain, let it sit, and then launder as usual. Important: Always spot-test on a hidden area of colored fabrics first, as it can cause

Understand The Formula For Hydrogen Peroxide And 4 Ways To Use It For Cleaning Read More »