Cleaning Guide

Spotless brown leather couch with cushions in a polished living room setting.

How to Clean Upholstery: 5 Simple Methods

Keeping your upholstery looking fresh and clean can be a bit of a challenge, especially with the daily wear and tear it goes through. But don’t worry! Here are five simple methods to help you clean your upholstery effectively and maintain its beauty. 1. Vacuum Regularly Vacuuming regularly is the simplest and most efficient method for maintaining the cleanliness of your upholstery. The upholstery attachment on your vacuum cleaner is specifically designed to handle the delicate fabrics and intricate details of your furniture. By consistently using this tool, you can easily remove dust, crumbs, and pet hair that tend to accumulate on your sofas, chairs, and other upholstered items. To start, remove any loose cushions to ensure you can access every part of your furniture. This step allows you to reach areas that are often neglected and where dirt and debris tend to settle. Using the upholstery attachment, begin cleaning the surface of the fabric with gentle, even strokes. This method ensures that you lift away dust and dirt without damaging the material. Pay special attention to the crevices and seams, as these are common spots where grime can build up over time. The attachment’s design helps you navigate these tight spaces effectively. If your cushions are removable, take the extra time to vacuum both sides. This thorough approach guarantees that no part of your upholstery is overlooked. Regular vacuuming not only enhances the appearance of your furniture but also extends its lifespan by preventing the accumulation of dirt and allergens. By making vacuuming a routine part of your cleaning schedule, you ensure that your upholstery remains fresh and inviting, providing a clean and comfortable environment in your home.     2. Spot Cleaning Spot cleaning is an essential technique for maintaining the beauty and longevity of your upholstery. Given the inevitability of spills and stains, knowing how to address them promptly can prevent permanent damage. The key to effective spot cleaning is quick action and the use of appropriate cleaning solutions. When a spill occurs, the first step is to blot the area immediately with a clean, dry cloth. This initial action helps absorb as much liquid as possible, reducing the risk of the stain setting into the fabric. Avoid rubbing the spill, as this can cause the liquid to penetrate deeper into the upholstery, making it harder to remove and potentially damaging the fabric fibers. By gently blotting, you can manage the spill more effectively and preserve the integrity of your furniture. Before applying it to the stained area, it’s crucial to test this solution on a small, inconspicuous section of the upholstery. This precaution ensures that the cleaning agent does not discolor or damage the fabric. After confirming the solution is safe, use a soft cloth to gently dab the stain. The key is to dab, not rub, as rubbing can spread the stain and embed it further into the fabric. After treating the stain, blot the area with a clean, damp cloth to remove any soap residue. Finally, allow the upholstery to air dry completely, ensuring no moisture is left behind, which could lead to mold or mildew growth. By incorporating these spot-cleaning techniques into your routine, you can effectively manage accidental spills and stains on your upholstery. This not only maintains the aesthetic appeal of your furniture but also extends its lifespan. 3. Use a Steam Cleaner Steam cleaning is an excellent method for giving your upholstery a deep and thorough clean. Unlike other cleaning techniques that rely on harsh chemicals, steam cleaning uses the power of hot water vapor to lift dirt, stains, and allergens from the fabric. This makes it a more environmentally friendly option and safer for households with children and pets. To begin, it’s essential to vacuum the upholstery thoroughly. This step removes loose dirt and debris that could interfere with the steam cleaning process. By ensuring the surface is free from particles, you allow the steam cleaner to penetrate deeper into the fabric, effectively removing embedded dirt and grime. Once the upholstery is prepped, fill the steam cleaner with water and a suitable upholstery cleaning solution. This combination will enhance the cleaning power of the steam and help break down tough stains. When using the steam cleaner, it’s crucial to follow the manufacturer’s instructions to achieve the best results and avoid damaging your upholstery. Work in small sections to ensure each area is cleaned evenly. It’s important to avoid over-wetting the fabric, as excessive moisture can lead to mold and mildew growth. By carefully controlling the amount of steam applied, you can effectively clean the upholstery without soaking it. After steam cleaning, allow the upholstery to dry completely before using it again. This drying period is essential to prevent any lingering dampness, which can attract more dirt and compromise the cleanliness you’ve just achieved. Regular steam cleaning not only revitalizes the appearance of your upholstery but also promotes a healthier living environment by eliminating allergens and bacteria. This method keeps your furniture looking fresh and extends its lifespan by maintaining the integrity of the fabric.     4. Baking Soda Deodorizer Using baking soda as a deodorizer is an effective and natural way to refresh your upholstery and eliminate lingering odors. This common household item is known for its ability to absorb and neutralize smells, making it an ideal choice for keeping your furniture smelling fresh without the need for harsh chemicals. To deodorize your upholstery, begin by evenly sprinkling a generous amount of baking soda over the entire surface. This allows the baking soda to come into contact with all areas of the fabric, ensuring a thorough deodorizing effect. Let the baking soda sit for at least 15-20 minutes. During this time, it will absorb any unwanted odors trapped in the upholstery fibers. If your furniture has particularly stubborn smells, you might consider leaving the baking soda on for a longer period, even overnight, for maximum absorption. For a more intensive clean, especially if there are stains involved,

How to Clean Upholstery: 5 Simple Methods Read More »

Modern microfiber mop with wringer bucket, long handle, and flat head.

Essential Tools and Supplies for Cleaning Jobs

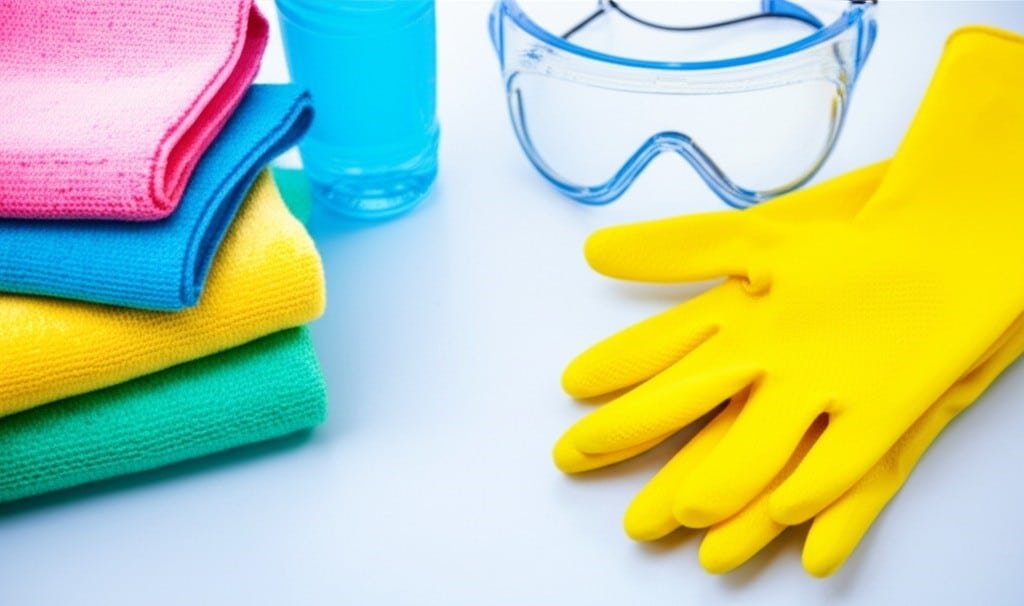
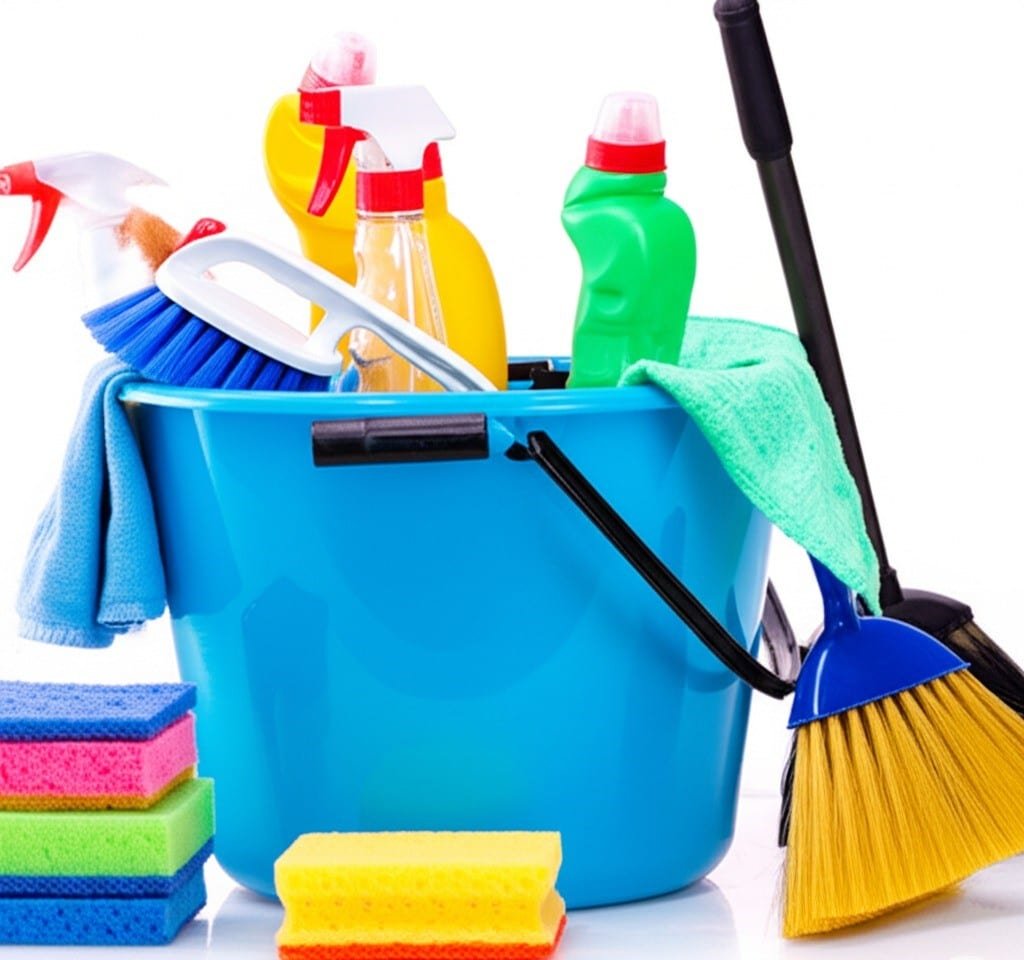
Keeping your home sparkling clean with a cleaning job can be a breeze if you have the right tools and supplies. Whether you’re tackling a deep clean, regular maintenance, or preparing for a move-in/move-out cleaning job, having 1. Microfiber Cloths Microfiber cloths are a game-changer for any cleaning job. These versatile cloths, made from synthetic fibers, are highly absorbent and can be used either dry or damp. Their unique construction allows them to trap dust, dirt, and even bacteria effectively, making them a staple in any cleaning arsenal. Unlike traditional cloths or paper towels, microfiber cloths can clean surfaces without leaving streaks or scratches, ensuring a spotless finish every time. This makes them ideal for a variety of tasks, from dusting delicate surfaces like electronics and furniture to wiping down kitchen counters and polishing mirrors and windows. What sets microfiber cloths apart in any cleaning job is their ability to handle different types of surfaces with ease. When used dry, they excel at dusting, thanks to their electrostatic properties, which attract and hold onto dust particles rather than just pushing them around. When dampened, these cloths become even more effective, lifting and absorbing spills and grime without the need for harsh chemicals. This dual functionality not only makes cleaning more efficient but also more environmentally friendly, as it reduces the reliance on disposable products and chemical cleaners. In addition to their versatility and efficiency, microfiber cloths are also incredibly durable. They can be washed and reused hundreds of times without losing their cleaning power, making them a cost-effective solution for any household. For anyone tackling a cleaning job, whether it’s routine maintenance or a deep clean, microfiber cloths are an essential tool that can handle everything from everyday dusting to intensive scrubbing. 2. All-Purpose Cleaner An all-purpose cleaner is a must-have for any cleaning arsenal, serving as the backbone for tackling a wide range of cleaning jobs. Its versatility is one of its greatest strengths, allowing you to use it on multiple surfaces and stains with ease. From greasy kitchen counters to grimy bathroom tiles and even certain types of flooring, an all-purpose cleaner can handle it all. This means you don’t need to clutter your cleaning cupboard with multiple specialized products. Instead, you can rely on a single, powerful solution to maintain the cleanliness and hygiene of your home efficiently. When choosing an all-purpose cleaner for your cleaning jobs, it’s crucial to consider products that are safe for both the environment and your family. Eco-friendly cleaners made from natural ingredients can be just as effective as their chemical-laden counterparts, without the harsh side effects. These cleaners reduce the number of toxins released into your home, ensuring a healthier living space for everyone. Additionally, they are often biodegradable, minimizing environmental impact. 3. Vacuum Cleaner A good vacuum cleaner is essential for maintaining clean carpets and floors, making it a cornerstone tool for any cleaning job. The right vacuum can significantly reduce the time and effort required to keep your home tidy, ensuring that every nook and cranny is free from dust, dirt, and debris. Modern vacuum cleaners come equipped with various features and attachments designed to handle different surfaces and hard-to-reach areas, from plush carpets to hardwood floors and narrow crevices. These attachments enhance the vacuum’s versatility, allowing you to switch between different cleaning tasks seamlessly and efficiently. For those with pets, a vacuum cleaner equipped with a HEPA filter is particularly beneficial. Pet hair and dander can be challenging to manage, but a HEPA filter traps these tiny particles, preventing them from being recirculated into the air. This is especially important for maintaining good indoor air quality and reducing allergens, which can be a significant concern for allergy sufferers.     4. Broom and Dustpan For quick clean-ups and daily maintenance, a sturdy broom and dustpan are indispensable tools in any cleaning job. These simple yet effective items are perfect for swiftly sweeping up crumbs, dirt, and debris from your floors, making them essential for keeping your home tidy on a day-to-day basis. Unlike vacuum cleaners, which can be cumbersome for smaller messes, a broom and dustpan offer a lightweight and portable solution. They are especially handy in high-traffic areas like kitchens and entryways, where dirt and debris accumulate rapidly. A broom with angled bristles is particularly effective for thorough cleaning jobs, as it can easily reach into corners and under furniture where dust and dirt often hide. These bristles are designed to adapt to the contours of your floors, ensuring that every sweep captures as much debris as possible. This makes them not only efficient but also versatile, suitable for a variety of surfaces from hardwood and tile to linoleum. 5. Mop and Bucket A mop and bucket are essential for keeping your floors spotless, making them vital tools for any cleaning job. The right combination ensures that you can effectively remove dirt, spills, and stains, maintaining the overall cleanliness and appearance of your home. Whether you opt for a traditional string mop or a more modern microfiber mop, it’s important to choose one that’s suitable for your specific flooring type. For example, a string mop is excellent for heavy-duty cleaning jobs, while a microfiber mop is perfect for delicate surfaces and daily maintenance. The versatility of these tools allows you to adapt your cleaning approach based on the needs of different areas in your home. A bucket with a wringer is an invaluable addition to your mopping setup, providing you with better control over the amount of water used during your cleaning job. This feature is particularly important for preventing water damage to sensitive flooring materials like hardwood or laminate, which can warp or buckle when exposed to excessive moisture. By wringing out the mop thoroughly, you can ensure that your floors are cleaned efficiently without being overly saturated. Additionally, using a mop and bucket combination can significantly reduce the physical strain of mopping, as it minimizes the need to bend over and manually wring out

Essential Tools and Supplies for Cleaning Jobs Read More »

Immaculate laundry room with bright lights, organized shelves, and modern appliances.

How to Clean Your Laundry Room: 6 Easy Steps for a Sparkling Space

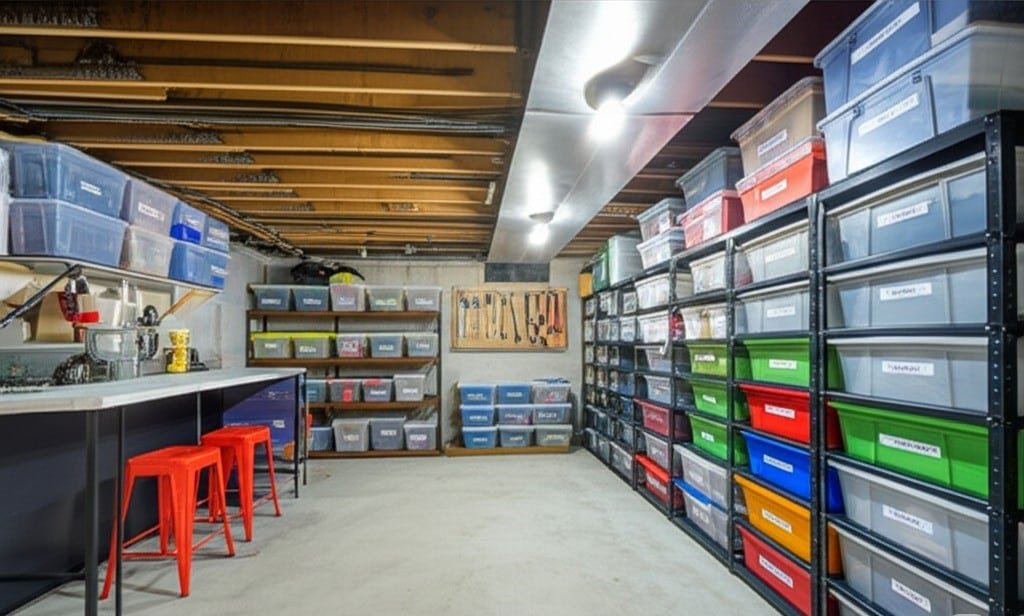
Keeping your laundry room clean and organized not only makes it a more pleasant space to work in but also ensures that your laundry process is efficient and effective. Here’s a simple guide on how to clean your laundry room in just five easy steps. Whether you have a small laundry nook or a full-fledged laundry room, these tips will help you maintain a sparkling space. 1. Clear Out the Clutter Start by removing any items that don’t belong in the laundry room. This might include random storage, misplaced cleaning supplies, or forgotten clothes. Create designated spots for laundry detergents, fabric softeners, and other essentials to keep everything organized. Using baskets or bins can help categorize items, making them easy to access when needed and ensuring your laundry room stays neat and functional. Next, go through your laundry supplies and discard anything that’s expired or no longer needed. This will not only free up space but also ensure that you’re only using effective products. A well-organized laundry room with only the essentials will make your laundry tasks more efficient and less stressful. By sorting and purging regularly, you can maintain a clutter-free environment that makes laundry day a breeze. By dedicating some time to clear out the clutter, you set the foundation for a clean and organized laundry room. This initial step is crucial for creating a space where you can easily find what you need and keep everything in its place. A decluttered laundry room is not only more pleasant to work in but also promotes a more streamlined and efficient laundry routine. 2. Clean the Machines To ensure your laundry room stays in top condition, it’s essential to clean the machines regularly. Start with the washing machine by wiping down its exterior with a damp cloth and mild detergent to remove any dust or detergent spills. For the interior, running an empty cycle with hot water and vinegar helps eliminate built-up grime and odors. Additionally, pay special attention to the detergent drawer and the rubber seal around the door, as these areas are prone to mold and mildew. Next, turn your attention to the dryer. It’s crucial to remove lint from the dryer lint trap after every use to maintain efficiency and safety. For a deeper clean, vacuum the lint trap and the surrounding area to prevent lint buildup, which can pose a fire hazard. Also, clean the dryer drum with a cloth dampened with a mild cleaning solution to remove any residues from fabric softeners or dryer sheets. Finally, check the dryer vent to ensure it’s clear of obstructions, as a blocked vent can reduce dryer performance and increase the risk of fire. By keeping both your washing machine and dryer in pristine condition, you enhance the functionality of your laundry room and extend the lifespan of your appliances. Regular maintenance of these machines not only ensures they operate efficiently but also contributes to a cleaner, more organized laundry room.     3. Tackle the Surfaces Keeping the surfaces in your laundry room clean is essential for maintaining a hygienic and pleasant environment. Start by wiping down all countertops, shelves, and cabinets with a multipurpose cleaner. These areas are often prone to detergent spills and other residues, so paying special attention to them ensures that your laundry room remains spotless. For stubborn stains, using a mixture of baking soda and water can be particularly effective, breaking down grime without harsh chemicals. Next, focus on the floors in your laundry room. Begin by sweeping or vacuuming to remove dust and debris that accumulate from daily use. Following this, mop the floor with a cleaner suitable for your specific flooring type to ensure a deep clean. For those with tile floors, it’s important to clean the grout lines as well, as these can harbor dirt and stains that regular mopping might miss. By consistently tackling both the surfaces and the floors, you create a cleaner and more organized laundry room. This routine not only improves the overall appearance of the space but also makes it a more efficient and enjoyable area to work in. 4. Freshen Up the Air Keeping your laundry room smelling fresh is essential for creating a pleasant environment. Good ventilation plays a key role in this. If your laundry room has a window, open it to let in fresh air and allow any moisture to escape. Running an exhaust fan can also help to air out the space, reducing humidity and preventing musty odors. For a more continuous solution, consider placing a small air purifier in the room. This can help reduce any lingering odors and improve overall air quality. In addition to proper ventilation, using deodorizers can significantly enhance the freshness of your laundry room. A simple and effective method is to place a bowl of baking soda or a few activated charcoal bags around the room. These natural deodorizers are excellent at absorbing unpleasant smells. For a more pleasant aroma, you can also use essential oils. Add a few drops to a cotton ball or use a fabric refresher spray to infuse the room with a subtle, pleasant scent. By focusing on both ventilation and deodorizers, you can keep your laundry room smelling fresh and inviting. This not only makes it a more enjoyable space to work in but also helps to maintain a clean and healthy environment.   5. Maintain the Cleanliness To ensure your laundry room stays clean and tidy, establishing a regular cleaning schedule is essential. Consistently wiping down surfaces, cleaning the machines, and decluttering as needed will keep your laundry room in top condition. Regular maintenance not only prevents dirt and grime from building up but also makes your occasional deep cleaning sessions much quicker and easier. By dedicating a little time each week to upkeep, you can enjoy a spotless and efficient laundry room. In addition to regular cleaning, organizing your laundry room can greatly enhance its functionality. Investing in storage solutions like shelves, hooks, and laundry

How to Clean Your Laundry Room: 6 Easy Steps for a Sparkling Space Read More »

Modern living room with cozy sofa, plush pillows, and stylish coffee table.

How to Clean Living Room in 5 Simple Steps

A clean living room sets the tone for the entire home. Whether you’re expecting guests or just want to relax in a tidy space, cleaning your living room can make a big difference. Follow these five simple steps to transform your living room into a fresh, inviting space. 1. Declutter the Area The first step to a clean living room is getting rid of the clutter. Clutter can make even the most spacious living rooms feel cramped and chaotic. Begin by surveying the room and identifying items that don’t belong there. This could be anything from toys and books to mail and miscellaneous items that have found their way into the living room. Gather these items using a basket or box. This method keeps everything contained and makes it easier to transport items back to their proper places. Once you have collected the out-of-place items, take a few minutes to put them back where they belong. Returning items to their designated spots not only clears up the living room but also helps maintain order throughout the house. If certain items don’t have a designated spot, consider creating one. For example, set up a specific area for mail or create a storage space for toys in another room. This will prevent clutter from accumulating in the living room in the future. To make decluttering more manageable and even enjoyable, set a timer for 10 minutes. Challenge yourself to see how much clutter you can clear away in that time. This approach makes the task feel less overwhelming and can turn it into a fun, race-against-the-clock activity. By regularly decluttering in short, focused bursts, you’ll maintain a consistently clean living room without feeling like you’re dedicating hours to tidying up.     2. Dust Surfaces Dust can accumulate quickly in the living room, especially on surfaces like coffee tables, shelves, and electronics. A layer of dust not only dulls the appearance of your living room but can also contribute to allergies and respiratory issues. To tackle this, use a microfiber cloth, which is excellent for trapping dust particles without spreading them around. Begin dusting from the highest surfaces, such as shelves and the tops of cabinets, and work your way down. This method ensures that any dust that falls from higher surfaces is captured when you clean the lower areas. Pay special attention to less obvious places that often get overlooked during routine cleaning. Lampshades, picture frames, and baseboards can collect significant amounts of dust over time. These areas might not be immediately noticeable, but cleaning them can make a big difference in the overall cleanliness of your living room. Additionally, don’t forget to dust electronics like TVs and speakers. Dust can interfere with their functionality and reduce their lifespan, so keeping them clean is crucial. When dusting, use a damp cloth for delicate surfaces and a dry cloth for more robust areas. A damp cloth helps to capture dust without dispersing it into the air, making it ideal for fragile or highly polished surfaces that can scratch easily. On the other hand, a dry cloth is perfect for wood furniture and other sturdy surfaces. By regularly dusting your living room, you’ll maintain a fresher, cleaner environment that not only looks better but also feels more inviting and comfortable. 3. Vacuum and Clean Floors Whether you have carpets, rugs, or hardwood floors, they need regular cleaning to maintain a clean living room. Carpets and rugs are magnets for dust, dirt, and allergens that can diminish the comfort and cleanliness of your living space. Start by vacuuming thoroughly, making sure to cover every inch, including under furniture and in the corners. A high-quality vacuum cleaner with strong suction and appropriate attachments can make a big difference, ensuring that embedded dirt and debris are effectively removed. If you have hardwood floors, after vacuuming, follow up with a mop to give them a nice shine and remove any remaining dust or grime. A gentle cleaner specifically designed for hardwood floors can enhance their natural beauty and extend their lifespan. For an extra touch of cleanliness and shine, consider using a damp mop with a solution of water and a mild wood cleaner. This not only cleans the floors but also conditions the wood, preventing it from drying out and becoming damaged. For carpets and rugs, occasional deep cleaning is essential to maintain a truly clean living room. Using a carpet cleaner or hiring professional carpet cleaning services can help remove deep-seated dirt and stains that regular vacuuming might miss. This deep clean revitalizes the carpet fibers and restores their appearance and freshness. Additionally, move furniture slightly to clean underneath and behind them. You’ll be surprised at how much dirt can accumulate in hidden spots. Regularly moving and cleaning these areas ensures that no part of your living room is neglected, contributing to a consistently clean and healthy environment.     4. Wipe Down Furniture Furniture can harbor dust and stains, so give it a good wipe down. Your living room furniture is not just a collection of functional pieces; it’s also a major element of your home’s aesthetic. Dust, spills, and daily use can leave your furniture looking tired and worn. Start by selecting appropriate cleaners for each type of furniture. Leather sofas require a leather cleaner to maintain their suppleness and prevent cracking. For upholstered furniture, use a fabric cleaner that can lift stains without damaging the material. Wooden furniture benefits from a gentle wood cleaner that preserves its finish while removing grime and fingerprints. As you clean, pay extra attention to armrests, cushions, and any spots that get frequent use. These areas are often the first to show signs of wear and dirt. Armrests, in particular, can accumulate oils from skin contact, which attract dust and dirt. Cushions can harbor crumbs, pet hair, and other debris. Remove cushions and vacuum underneath them to ensure you’re getting all the hidden dirt. For fabric cushions, spot clean any stains and give them a good

How to Clean Living Room in 5 Simple Steps Read More »

Spotless brown leather couch with cushions in a polished living room setting.

5 Tips on How to Clean Home Furniture

Keeping your clean home furniture not only enhances its appearance but also extends its lifespan. Whether you have a cozy couch, a sleek coffee table, or elegant dining chairs, regular maintenance is essential. Here are five practical tips on how to clean home furniture effectively. 1. Understand Your Furniture Material Understanding your furniture material is the first step in knowing how to clean home furniture effectively. Each type of material requires a specific approach to ensure it remains in top condition. Wooden furniture, for instance, benefits from a gentle wipe with a damp cloth to remove surface dirt, followed immediately by a dry cloth to prevent any water damage. For a more thorough clean, a mixture of mild soap and water can be used, but it’s essential to ensure the wood is dried properly afterward to avoid any warping or damage. Regular cleaning not only keeps the wood looking fresh but also preserves its natural beauty and strength. Leather furniture, on the other hand, requires a different technique. To clean home furniture made of leather, a soft, damp cloth is ideal for regular maintenance, as it can remove dust and minor stains without causing damage. For tougher stains, it’s advisable to use a leather cleaner recommended by the manufacturer, as these products are specifically formulated to treat leather without stripping its natural oils. Regular conditioning with a quality leather conditioner can also help keep the material supple and prevent cracking, ensuring that your leather furniture remains luxurious and comfortable for years to come. Fabric furniture presents its own set of challenges, as it tends to collect dust and dirt more easily than other materials. To effectively clean home furniture upholstered in fabric, regular vacuuming is crucial. This helps to remove surface dust and prevent it from settling deeper into the fibers. For spot cleaning, a fabric cleaner or a mild detergent mixed with water can be very effective. It’s important to test any cleaning solution on an inconspicuous area first to ensure it doesn’t cause discoloration. By understanding and catering to the specific needs of each material, you can maintain the appearance and integrity of your furniture, making your home look pristine and inviting.     2. Regular Dusting Regular dusting is an essential practice when you want to clean home furniture and keep it looking its best. Dust can accumulate quickly on all types of surfaces, leading to a dull appearance and even potential damage over time. By incorporating regular dusting into your cleaning routine, you can maintain the vibrancy and longevity of your furniture. A microfiber cloth or a soft duster is ideal for this task, as these tools effectively capture dust without scratching the surface. Microfiber cloths are particularly useful because they attract dust particles through static electricity, ensuring that you don’t simply move dust around but actually remove it from your furniture. For more intricate designs or hard-to-reach areas, a vacuum cleaner with a brush attachment can be incredibly useful. This tool can access nooks and crannies that a regular duster might miss, ensuring that every part of your furniture is clean. When using a vacuum cleaner, it’s important to use the soft brush attachment to avoid scratching delicate surfaces. Regular dusting with these tools not only keeps your furniture looking fresh but also prevents the buildup of dust that can lead to respiratory issues and allergies, contributing to a healthier home environment. In addition to aesthetic benefits, regular dusting helps protect your furniture from wear and tear. Dust particles can be abrasive, and when left to accumulate, they can cause scratches or wear down the finish on your furniture. This is especially true for polished or varnished surfaces, where even fine dust can leave marks over time. By taking the time to clean home furniture regularly with a gentle touch, you can preserve the integrity and appearance of your pieces. 3. Spot Cleaning Spills Immediately Spot cleaning spills immediately is a crucial step to clean home furniture and maintain its pristine condition. Accidents are inevitable, whether it’s a glass of wine tipping over or a cup of coffee spilling. The key to preventing long-term damage is to act quickly. Start by blotting the spill with a clean, dry cloth to absorb as much of the liquid as possible. It’s important to blot rather than rub, as rubbing can spread the stain and push it deeper into the fabric or material, making it harder to remove. When dealing with fabric furniture, a simple mixture of water and mild detergent can often do the trick. After blotting up the excess liquid, apply the cleaning solution to a clean cloth and gently dab at the stain. Be sure to test the solution on an inconspicuous area first to ensure it doesn’t cause any discoloration or damage to the fabric. For stubborn stains, you may need to repeat this process several times. Once the stain is removed, rinse the area with a cloth dampened with clean water to remove any soap residue, then blot it dry with a dry cloth. Leather furniture requires a different approach. After blotting the spill, use a specialized leather cleaner that’s appropriate for the type of leather your furniture is made from. Apply the cleaner to a soft cloth and gently clean the affected area, following the manufacturer’s instructions. Regular conditioning of leather furniture can also help prevent spills from soaking in too quickly and make spot cleaning easier. For wooden furniture, after blotting the spill, use a damp cloth to gently wipe the area, followed immediately by a dry cloth to prevent any water damage.     4. Use Protective Covers Using protective covers is a highly effective strategy to clean home furniture and maintain its pristine condition, especially in households with kids or pets. These covers act as a first line of defense against everyday mishaps, such as spills, stains, and general wear and tear. By shielding your furniture, covers significantly reduce the amount of direct contact with potentially damaging substances.

5 Tips on How to Clean Home Furniture Read More »

Organized cleaning caddy with supplies, sprays, and brushes.

5 Must-Have Tools for Cleaners to Achieve a Spotless Home

Keeping your home spotless doesn’t have to be a daunting task, especially if you have the right Tools for Cleaners for the job. Whether you’re a professional cleaner or just someone who takes pride in maintaining a clean home, having the best tools can make all the difference. In this guide, we’ll explore the must-have tools for cleaners that will help you achieve a spotless home effortlessly. 1. High-Quality Microfiber Cloths Microfiber cloths are a staple in any cleaning arsenal, and for good reason. These versatile cloths are perfect for dusting, wiping surfaces, and even cleaning windows without leaving streaks. Unlike traditional cleaning rags, microfiber cloths are designed with thousands of tiny fibers that can effectively pick up and trap dust, dirt, and even bacteria. This unique structure makes them incredibly efficient at cleaning a variety of surfaces, from glass and stainless steel to wood and tile. As a result, they are considered one of the most essential tools for cleaners aiming to achieve a spotless home. One of the standout features of microfiber cloths is their absorbency. They can hold up to seven times their weight in water, making them ideal for mopping up spills and wiping down wet surfaces. This high absorbency also means that they can remove more dirt and grime in a single swipe, reducing the need for multiple passes and making the cleaning process faster and more efficient. Furthermore, because they are so effective at trapping particles, they help prevent the spread of dust and allergens, contributing to a healthier indoor environment. Another advantage of microfiber cloths is their durability and eco-friendliness. Unlike disposable wipes or paper towels, microfiber cloths can be washed and reused hundreds of times without losing their effectiveness. This not only saves money in the long run but also reduces waste, making them a more sustainable choice for environmentally conscious cleaners. By incorporating high-quality microfiber cloths into your cleaning routine, you can achieve a higher standard of cleanliness with less effort and contribute to a more sustainable planet.     2. Extendable Duster Dust can accumulate in hard-to-reach places like ceiling fans, high shelves, and corners, often going unnoticed until it becomes a significant problem. An extendable duster is a game-changer when it comes to tackling these spots, eliminating the need for a ladder and making the process much safer and more efficient. This tool is designed to extend your reach, allowing you to clean areas that are typically out of arm’s length without straining or risking injury. When it comes to essential tools for cleaners, an extendable duster is indispensable for maintaining a dust-free home. One of the most significant advantages of an extendable duster is its flexibility. Many models come with a flexible head that can bend and adjust to various angles, making it effortless to clean around corners, behind furniture, and above appliances. This flexibility is particularly useful for cleaning ceiling fans, which can collect a surprising amount of dust and are often awkward to clean with conventional tools. By using an extendable duster, you can ensure that every nook and cranny in your home is free of dust, improving overall cleanliness and air quality. In addition to its practical benefits, an extendable duster is also a time-saver. Traditional dusting methods often require multiple tools and considerable effort, especially when dealing with high or hard-to-reach areas. An extendable duster streamlines this process, allowing you to clean efficiently and effectively with just one tool. This convenience makes it a favorite among professional cleaners and homeowners alike, solidifying its status as one of the top tools for cleaners. By incorporating an extendable duster into your cleaning routine, you can achieve a more thorough and efficient clean, ensuring your home remains spotless and inviting. Moreover, an extendable duster is easy to store and maintain. Most models can be collapsed to a compact size, making them easy to tuck away in a closet or cleaning caddy when not in use. Many dusters also feature washable heads, allowing you to reuse them multiple times before needing a replacement. This combination of convenience, efficiency, and durability makes an extendable duster a smart investment for anyone serious about keeping their home dust-free. 3. Multi-Surface Cleaner A good multi-surface cleaner is a true game-changer in the world of cleaning. Instead of juggling multiple products for different surfaces, you can use one cleaner for countertops, appliances, and even floors. This versatility is a significant time-saver, allowing you to tackle various cleaning tasks with a single product. The convenience of a multi-surface cleaner cannot be overstated, as it simplifies your cleaning routine and ensures a consistent clean throughout your home. As one of the essential tools for cleaners, a multi-surface cleaner streamlines the process and enhances efficiency. One of the key benefits of using a multi-surface cleaner is the assurance of uniform cleanliness across different areas of your home. Whether you’re wiping down kitchen counters, cleaning bathroom sinks, or mopping floors, a multi-surface cleaner provides the same level of effectiveness on each surface. This uniformity is crucial for maintaining a high standard of hygiene and cleanliness, reducing the risk of cross-contamination and ensuring that every part of your home is equally clean. By incorporating a multi-surface cleaner into your arsenal of tools for cleaners, you can achieve a comprehensive clean without the hassle of switching products. In addition to its cleaning efficacy, a multi-surface cleaner is often more economical and environmentally friendly. Purchasing a single product that can handle multiple tasks reduces the need for multiple bottles, cutting down on plastic waste and storage space. Many multi-surface cleaners are formulated to be gentle yet effective, minimizing the use of harsh chemicals that can be harmful to both your health and the environment. By choosing a high-quality, eco-friendly multi-surface cleaner, you not only simplify your cleaning routine but also contribute to a more sustainable approach to home maintenance.     4. Vacuum Cleaner with Attachments A vacuum cleaner is undeniably a must-have for maintaining clean floors, but having

5 Must-Have Tools for Cleaners to Achieve a Spotless Home Read More »

Person holding basket with cleaning supplies and vacuum attachment.

6 Essential Supplies for Cleaning Every Home

Keeping your home spick and span is much easier when you have the right Supplies for Cleaning. With so many products on the market, it can be tough to know what’s truly essential. To help you out, we’ve put together a list of six must-have supplies for cleaning that every home should have. 1. Microfiber Cloths Microfiber cloths are a game-changer for cleaning. These versatile cloths are perfect for dusting, wiping down surfaces, and even tackling tough scrubbing jobs. What sets microfiber cloths apart is their super absorbent nature; they can pick up dust and dirt effortlessly, often without the need for any chemical cleaners. This makes them an excellent choice for those who prefer to keep their cleaning routine as natural and eco-friendly as possible. The tiny fibers in these cloths can reach into the smallest nooks and crannies, ensuring a thorough clean every time. One of the standout benefits of microfiber cloths is their reusability. Unlike disposable wipes or paper towels, microfiber cloths can be washed and reused many times, making them a cost-effective and environmentally friendly option. This durability doesn’t come at the expense of effectiveness; even after multiple washes, these cloths retain their ability to clean efficiently. For households looking to reduce waste and save money on cleaning supplies, microfiber cloths are an indispensable part of their supplies for cleaning arsenal. Microfiber cloths are incredibly versatile, they can be used dry for dusting or dampened with water for wiping down surfaces. When used with just a bit of water, they can clean mirrors, windows, and stainless steel appliances to a streak-free shine. Their gentle yet effective cleaning action makes them suitable for a wide range of surfaces, from delicate electronics screens to sturdy kitchen countertops. Investing in a good set of microfiber cloths can revolutionize your cleaning routine, making it easier and more efficient while being kind to the environment.     2. All-Purpose Cleaner An all-purpose cleaner is an indispensable component of any comprehensive collection of supplies for cleaning. This versatile product is designed to tackle a wide range of surfaces, making it perfect for use throughout the home. From kitchen counters, where food spills and grease can accumulate, to bathroom tiles that often face soap scum and grime, an all-purpose cleaner simplifies your cleaning routine by addressing multiple cleaning challenges with a single solution. This versatility means you can streamline your cleaning process, reducing the need for multiple specialized products. When selecting an all-purpose cleaner, it’s essential to choose one that is safe for various surfaces and possesses strong disinfecting properties. This ensures that not only are you removing visible dirt and grime, but you are also eliminating harmful bacteria and germs that can lurk on surfaces. This dual action of cleaning and disinfecting helps maintain a healthier home environment. Whether you’re wiping down high-touch areas like door handles and light switches or giving your kitchen and bathroom a thorough clean, an all-purpose cleaner can handle the job efficiently, saving you time and effort. Using an all-purpose cleaner can significantly reduce the clutter under your sink or in your cleaning closet. Instead of juggling multiple products for different surfaces, you have a single, reliable cleaner that can do it all. This not only makes the cleaning process more straightforward but also more cost-effective, as you are purchasing fewer products overall. For those looking to maintain a clean and sanitary home with minimal hassle, investing in a high-quality all-purpose cleaner is a smart choice. It’s a cornerstone of any well-stocked arsenal of supplies for cleaning, ensuring your home is both spotless and hygienic with minimal effort. 3. Vacuum Cleaner A reliable vacuum cleaner is an essential part of your supplies for cleaning, playing a vital role in maintaining the cleanliness and hygiene of your home. Floors, whether covered in carpets, hardwood, or tiles, can accumulate dust, dirt, and allergens that affect not only the appearance of your home but also the quality of the air you breathe. A good vacuum cleaner efficiently removes these particles, ensuring that your living spaces are spotless and healthier. The powerful suction of a quality vacuum can deeply clean carpets, lifting embedded dirt and pet hair, while gentle enough to care for delicate hardwood and tile surfaces without causing damage. In today’s market, vacuum cleaners come with a range of features designed to enhance their versatility and convenience. When choosing a vacuum, consider models that offer various attachments. These accessories, such as upholstery brushes, crevice tools, and stair attachments, significantly expand the vacuum’s capabilities. Upholstery attachments make it easy to clean furniture and curtains, removing dust and allergens that settle in fabric. Crevice tools are perfect for those narrow, hard-to-reach spots between furniture and along baseboards. Modern vacuum cleaners often come with advanced filtration systems, such as HEPA filters, that capture even the smallest particles and allergens, making them an excellent choice for households with allergy sufferers. Bagless models offer convenience with easy-to-empty dust bins, while bagged versions might be preferable for those looking to minimize exposure to dust during disposal. Investing in a high-quality vacuum cleaner is a smart move for maintaining a clean and healthy home environment.     4. Scrub Brushes Scrub brushes are a vital component in any effective set of supplies for cleaning, especially when it comes to dealing with tough stains and grime. These brushes are designed to provide the necessary scrubbing power to dislodge stubborn dirt that regular wiping can’t handle. For outdoor cleaning tasks, a stiff-bristled brush is indispensable. This type of brush can handle heavy-duty cleaning tasks such as scrubbing decks, patios, and driveways, where dirt and debris can accumulate and become embedded over time. Its robust bristles ensure that you can remove even the most stubborn grime with relative ease. When it comes to indoor cleaning, particularly in bathrooms, a softer scrub brush is essential. Bathrooms are prone to soap scum, mildew, and mineral deposits, especially in showers and bathtubs. A softer brush is gentle enough to use on

6 Essential Supplies for Cleaning Every Home Read More »

Close-up of a hand holding a water bottle, dressed in casual attire.

How to Prevent Heatstroke with Cleaning: 5 Essential Tips

As the summer heat intensifies, the risk of heatstroke becomes a significant concern, especially for those of us who spend time cleaning our homes. Heatstroke is a serious condition caused by your body overheating, usually as a result of prolonged exposure to or physical exertion in high temperatures. Here are five essential tips to help you prevent heatstroke while keeping your home spotless. 1. Clean During Cooler Times of the Day One of the simplest ways to prevent heatstroke is to schedule your cleaning tasks during the cooler parts of the day. Early mornings and late evenings are typically cooler, making them ideal times to tackle household chores. The early morning hours, just after sunrise, provide a comfortable environment where the temperature is more manageable. Similarly, late evenings, when the sun is setting, offer relief from the intense heat of midday. By aligning your cleaning routine with these cooler times, you can significantly reduce the risk of heatstroke and make the task more pleasant. Cleaning during the peak heat of midday can be dangerous, as this is when temperatures are at their highest. The combination of physical exertion and extreme heat can quickly lead to dehydration and heatstroke. By avoiding these peak hours, you not only protect yourself from the risk of overheating but also ensure that you remain productive and efficient. This simple adjustment in your cleaning schedule can make a significant difference in your overall well-being during the hot summer months. To make this strategy even more effective, consider setting a timer to remind yourself to take breaks and stay hydrated. It’s easy to get absorbed in cleaning tasks and lose track of time, but regular intervals for rest and water intake are crucial. Staying hydrated helps your body regulate its temperature and prevents heat exhaustion. This proactive approach ensures that you maintain your energy levels and avoid the dangers of heatstroke, all while keeping your home clean and tidy. By integrating these practices into your routine, you can enjoy a safer, more comfortable cleaning experience throughout the summer.     2. Stay Hydrated Staying hydrated is paramount in preventing heatstroke, especially during intense cleaning sessions in the summer heat. As you engage in physical activities like cleaning, your body loses fluids through sweat, which must be replenished to maintain optimal body function and temperature regulation. Without adequate hydration, your risk of developing heatstroke increases significantly. Therefore, it’s essential to keep a bottle of water close by and make it a habit to take regular sips, ensuring that your body remains well-hydrated throughout your cleaning tasks. The importance of hydration cannot be overstated, particularly when temperatures soar. When you sweat, your body loses not only water but also essential electrolytes that are vital for various bodily functions. Dehydration can impair your body’s ability to cool itself, leading to a rapid increase in core temperature, which is a key factor in heatstroke. To combat this, drink water consistently, even if you do not feel thirsty. Thirst is not always a reliable indicator of your hydration needs, especially during prolonged physical activity. Furthermore, it’s wise to avoid beverages like caffeine and alcohol when cleaning in the heat, as these can act as diuretics, exacerbating dehydration and increasing the risk of heatstroke. To make hydration a more enjoyable and frequent part of your cleaning routine, consider adding a slice of lemon or cucumber to your water. These natural flavor enhancers not only make your water taste more refreshing but can also encourage you to drink more frequently. This small adjustment can significantly improve your overall hydration levels. Additionally, setting a timer to remind yourself to take water breaks can help maintain a steady intake of fluids. 3. Wear Lightweight and Breathable Clothing Wearing lightweight and breathable clothing is crucial when it comes to preventing heatstroke during cleaning activities. The right clothing can significantly help regulate your body temperature, keeping you cool and comfortable even in the hottest conditions. Opting for fabrics such as cotton that are both lightweight and loose-fitting allows for better air circulation, which aids in cooling your body naturally. By choosing breathable materials, you can minimize the risk of overheating and maintain a steady body temperature, which is essential in preventing heatstroke. Light-colored clothing plays an important role as well. Dark colors tend to absorb more heat from the sun, raising your body temperature more quickly. In contrast, light-colored fabrics reflect the sun’s rays, reducing heat absorption and keeping you cooler. This simple choice in clothing can make a substantial difference in how your body handles the heat, especially during peak summer months when temperatures are high. Wearing light-colored, breathable fabrics not only helps in temperature regulation but also provides a more comfortable cleaning experience, reducing the physical strain caused by excessive heat. If you’re cleaning outside, adding a wide-brimmed hat to your outfit can provide extra protection from direct sunlight. A hat shields your face, neck, and shoulders from the sun’s rays, reducing the amount of heat your body absorbs. This additional layer of protection can prevent sunburn and further lower the risk of heatstroke. By combining the right clothing choices with accessories like a hat, you can create a comprehensive strategy to stay cool and safe while tackling your cleaning tasks.     4. Use Fans and Air Conditioning Using fans and air conditioning effectively is essential for preventing heatstroke while engaging in cleaning tasks. Keeping your environment cool helps regulate your body temperature, ensuring you don’t overheat as you move around and exert yourself. Air conditioning is a highly efficient way to maintain a comfortable indoor climate, especially during the peak of summer when temperatures soar. If your home is equipped with air conditioning, make sure to set it to a comfortable level that will keep you cool without being too chilly, as sudden temperature changes can also be uncomfortable. For those without air conditioning, strategically placing fans around your cleaning areas can help circulate air and lower the room temperature. Fans can create

How to Prevent Heatstroke with Cleaning: 5 Essential Tips Read More »

Wet shower tiles in bathroom

How to Keep Your Bathroom Mold-Free: Top 5 Tips

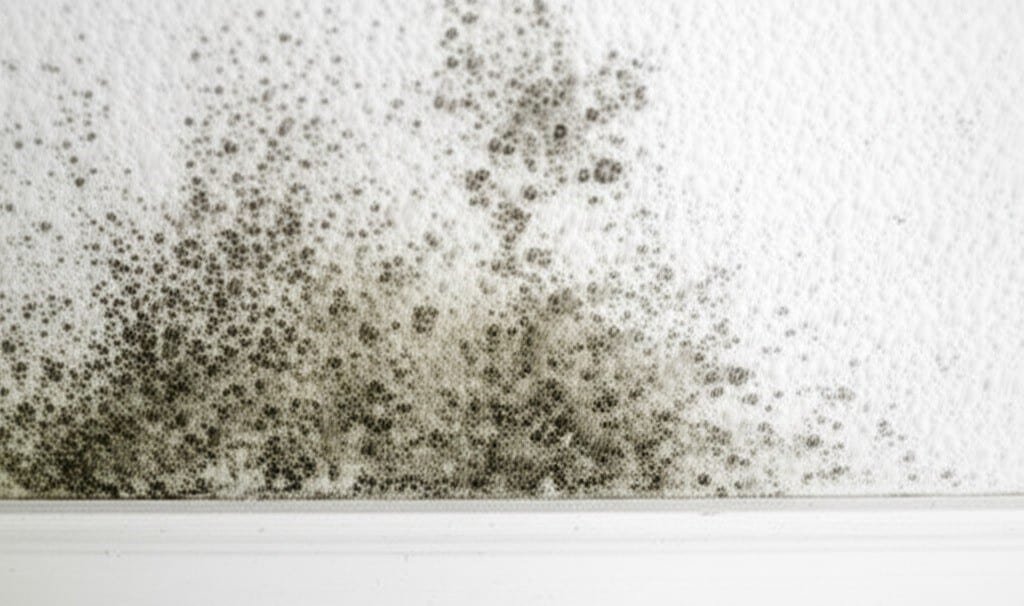
Keeping your bathroom mold-free is essential for maintaining a healthy home environment. Mold can cause various health issues and damage your property, so preventing its growth should be a top priority. Here are five simple yet effective tips to keep your bathroom mold-free. 1. Ensure Proper Ventilation One of the most important steps to keep your bathroom mold-free is ensuring proper ventilation. Mold thrives in damp, humid environments, so reducing moisture is key. Proper ventilation helps to remove the excess humidity that mold needs to grow. Start by using an exhaust fan. Turn it on during and after showers to help reduce the humidity in the bathroom. The fan will pull the moist air out of the room and expel it outside, preventing it from settling on surfaces where mold could take root. If your bathroom doesn’t have an exhaust fan, it might be worth installing one, especially if you regularly deal with mold issues. In addition to using an exhaust fan, opening windows can be incredibly effective. If your bathroom has a window, open it up to allow fresh air to circulate. This not only helps to reduce humidity but also brings in fresh air, which can further help in keeping your bathroom mold-free. If your bathroom doesn’t have windows, consider leaving the bathroom door open after showers. This will let the moist air escape into the rest of the house, where it can disperse more evenly and not settle on bathroom surfaces. 2. Regular Cleaning Start by focusing on the tiles and grout. These areas are particularly susceptible to mold because they retain moisture. Scrub the tiles and grout regularly with a mixture of water and bleach, or use a specialized mold cleaner to ensure that mold spores are eliminated. Pay special attention to the corners and edges where mold tends to hide and grow unnoticed. Next, make it a habit to wipe down all wet surfaces after each shower. This includes the walls, shower doors, and any other areas that get wet during use. By removing excess moisture, you reduce the likelihood of mold spores settling and growing. A simple squeegee can be very effective for this purpose, making the task quick and easy. Don’t forget about the shower curtain, as mold can easily grow on it if it remains damp. Wash or replace your shower curtain regularly to keep it clean and mold-free. If you prefer fabric shower curtains, choose ones that are machine washable and make sure to dry them completely after each wash. Incorporating these regular cleaning practices into your routine can go a long way in keeping your bathroom mold-free. Consistent scrubbing of tiles and grout, wiping down wet surfaces, and maintaining a clean shower curtain are all crucial steps in preventing mold growth and ensuring a healthy, pleasant bathroom environment.     3. Fix Leaks Immediately Addressing leaks immediately is crucial for keeping your bathroom mold-free. Even small leaks can create an ideal environment for mold growth, as they provide a constant source of moisture. Regularly inspecting your bathroom for any signs of leaks and addressing them promptly can make a significant difference. Start by thoroughly inspecting faucets and pipes. Look for any drips or leaks, as even minor seepage can lead to moisture buildup and, subsequently, mold growth. Pay close attention to connections under the sink and behind the toilet, as these areas are often overlooked but can be common sources of leaks. Next, check around the base of the toilet. Leaks in this area can be particularly problematic because they can go unnoticed and cause significant damage over time. Ensure there are no signs of water pooling around the toilet base, and if you detect any moisture, take immediate action to fix the leak. Additionally, it’s essential to maintain the seals around your bathtub and sink. Over time, caulking can crack or peel, allowing water to seep into gaps and create a breeding ground for mold. Reapply caulking as needed to ensure that these areas are properly sealed and protected against moisture infiltration. By regularly inspecting faucets, pipes, and the toilet base, and by maintaining the seals around your bathtub and sink, you can effectively prevent leaks and keep your bathroom mold-free. Promptly fixing any issues as they arise will help maintain a dry and healthy bathroom environment.     4. Use Mold-Resistant Products Investing in mold-resistant products can make a big difference in keeping your bathroom mold-free. These specially designed items help prevent mold growth by creating environments that are less conducive to mold spores settling and thriving. One of the best ways to start is by using mold-resistant paint on your bathroom walls and ceiling. This type of paint contains antimicrobial agents that inhibit mold growth, offering an extra layer of protection in areas that are frequently exposed to moisture. Applying mold-resistant paint can significantly reduce the chances of mold developing on your bathroom surfaces, keeping them clean and healthy for longer. Shower curtains are another area where mold-resistant options can be incredibly beneficial. Traditional shower curtains can become breeding grounds for mold due to their constant exposure to water and humidity. By opting for mold-resistant shower curtains, you can minimize the risk of mold growth. These curtains are designed to repel water and dry quickly, reducing the moisture that mold needs to thrive. Floor mats are also important to consider when aiming to keep your bathroom mold-free. Choose bathroom mats that dry quickly and are specifically designed to resist mold. These mats typically have features that prevent water from soaking in and allow them to dry rapidly, preventing mold spores from taking hold. Ensuring that your bath mats dry out completely between uses is key to maintaining a mold-free bathroom environment. By incorporating mold-resistant paint, shower curtains, and floor mats into your bathroom, you create a hostile environment for mold, making it easier to maintain a clean and healthy space. These small investments can go a long way in preventing mold growth and keeping your bathroom

How to Keep Your Bathroom Mold-Free: Top 5 Tips Read More »

Person organizing room, separating items into Keep, Donate, Trash, Relocate boxes.

How to Declutter in Oshawa: 6 Tips for a More Organized Home

Feeling overwhelmed by clutter in your Oshawa home? You’re not alone! Whether you’re preparing for a move, welcoming a new family member, or just want a more serene space, decluttering can transform your home. Here are six practical tips to help you declutter in Oshawa and create a more organized living environment. 1. Start Small and Stay Focused When it comes to tackling the clutter in your home, it’s easy to feel overwhelmed by the sheer volume of items that need to be sorted and organized. To effectively declutter in Oshawa, start small and stay focused. Rather than attempting to overhaul your entire house in one go, choose a single drawer, closet, or corner of a room to begin with. This approach makes the task more manageable and less daunting. Starting with a smaller area allows you to see progress quickly, which can be incredibly motivating. For instance, if you begin with a cluttered kitchen drawer, you can sort through its contents, decide what to keep and what to discard, and neatly organize the remaining items. This small victory provides a sense of accomplishment and encourages you to move on to the next area. Additionally, focusing on one section at a time prevents the task from becoming too overwhelming. It’s easy to get distracted by the mess in other parts of the house, but by concentrating on one spot, you can maintain your focus and efficiency. This method also helps in avoiding the common pitfall of moving items from one cluttered area to another without actually reducing the overall amount of clutter. For example, once you have successfully decluttered a single closet, you can experience the immediate benefit of an organized space, which boosts your confidence to tackle larger areas. Gradually, as you work through each section of your home, the overall impact becomes more noticeable, leading to a more organized and serene living environment. 2. Sort and Categorize Sort your belongings into specific categories: keep, donate, recycle, and toss. This methodical approach helps you to clearly see what you have, assess the necessity of each item, and make informed decisions about what to do with them. Start by gathering all the items from the area you are decluttering and place them in a single spot. This allows you to see the full extent of what you own and makes the sorting process easier. As you go through each item, ask yourself if it serves a purpose in your life or brings you joy. If the answer is yes, it goes into the “keep” pile. If not, it should be placed in one of the other categories: donate, recycle, or toss. The “donate” category is for items that are still in good condition but no longer needed by you. In Oshawa, there are numerous local donation centers and charities that can benefit from your unwanted goods. Places like Goodwill, Salvation Army, and local shelters will gladly accept clothing, household items, and even furniture that you no longer use but could be of great value to someone else. For items that can be recycled, Oshawa offers various recycling facilities and programs. Items such as paper, glass, and certain plastics should be sorted into the recycling category. This not only helps in decluttering your home but also contributes to environmental sustainability. The “toss” category is for items that are broken, damaged, or otherwise unusable. These should be disposed of properly according to Oshawa’s waste disposal guidelines. By discarding items that are no longer functional, you create space and reduce the clutter in your living environment. Sorting and categorizing your belongings in this manner provides a clear and structured approach to decluttering in Oshawa. It helps you to make thoughtful decisions about what to keep and what to let go of, ensuring that your home becomes more organized and manageable.     3. Use the Four-Box Method The four-box method is an incredibly effective technique to consider. This popular method involves labeling four boxes with the categories Keep, Donate, Trash, and Relocate. By going through your items one by one and placing each item into one of these boxes, you are forced to make a decision about each item, thereby reducing clutter efficiently. Start by gathering all the items in the area you wish to declutter. Having everything in one place allows you to systematically go through each item without feeling overwhelmed. As you pick up each item, ask yourself where it belongs. If it’s something you use regularly or holds significant value, place it in the Keep box. These are items that will remain in your home because they serve a purpose or bring joy. For items that you no longer need but are still in good condition, place them in the Donate box. Oshawa has many local organizations and charities that can benefit from your donations. By choosing to donate, you not only declutter your home but also contribute to the community. Items that are broken, damaged, or no longer usable should go into the Trash box. Disposing of these items properly according to Oshawa’s waste management guidelines will help you get rid of unnecessary clutter. This step is crucial in creating a cleaner, more organized living space. Lastly, the Relocate box is for items that belong in a different part of your home. These might be things that are out of place or need to be moved to a more appropriate location. By relocating these items, you ensure that everything in your home has a designated spot, which is essential for maintaining order and reducing clutter in the long run. 4. Digitize Documents and Photos Paper clutter is a common issue in many homes, contributing to an overwhelming sense of disorganization. To effectively declutter in Oshawa, consider digitizing your important documents and photos. This modern approach not only frees up valuable physical space but also ensures that your crucial paperwork and cherished memories are securely backed up. Start by gathering all your paper documents and photos in one place.

How to Declutter in Oshawa: 6 Tips for a More Organized Home Read More »