Cleaning Guide

Cleaning with alcohol at home, spray bottle and cleaning gloves

7 Smart Ways to Clean with Alcohol at Home

Rubbing alcohol is one of those products we all have lying around but don’t always know how to use. Whether it’s 70% or 90% isopropyl, this simple product can actually be a cleaning superhero. When you clean with alcohol, you get fast-drying, streak-free results while also killing germs. From glass to electronics, there are tons of surfaces that benefit from cleaning with alcohol. Check out these 7 smart ways to use it around your home. 1. Clean and Sanitize Your Phone Our phones go with us everywhere, which means they pick up dirt, germs, and oils constantly. That’s why it’s so important to clean with alcohol regularly. A soft cloth or cotton pad with a small amount of rubbing alcohol can safely remove smudges and sanitize your phone. Since alcohol evaporates quickly, it won’t damage your screen or ports when used properly. Plus, you don’t have to worry about leftover moisture like with water-based cleaners. Just a light wipe-down leaves your phone cleaner and germ-free. Make it a habit to clean with alcohol at least once a week. It keeps your device looking great and helps prevent the spread of bacteria from one touch to the next. It’s one of the simplest ways to keep things clean without extra effort. 2. Disinfect High-Touch Surfaces Doorknobs, remotes, light switches—these spots get touched constantly and are easy to forget. When you clean with alcohol, you can disinfect them quickly without leaving a mess behind. It dries fast, kills bacteria, and doesn’t need rinsing, making it a perfect everyday cleaner. Spray a little alcohol onto a microfiber cloth and wipe down these high-traffic areas. It’s especially helpful if someone in your home is sick or if you’ve had guests over. Cleaning with alcohol is a smart way to keep surfaces safe and sanitized. This method also works well on electronics, like keyboards and controllers, that you can’t clean with soap and water. Keeping these items germ-free is simple when you regularly clean with alcohol. 3. Make Your Mirrors and Glass Shine If you’re tired of streaky glass and foggy mirrors, try switching up your routine and clean with alcohol instead. It cuts through fingerprints, hairspray, and toothpaste with zero streaks. Plus, it evaporates super fast, so you don’t have to worry about drip marks. Just mix equal parts alcohol and water in a spray bottle, spritz your mirror lightly, and wipe it down with a lint-free cloth. The result is a crystal-clear reflection with almost no effort. Cleaning with alcohol is especially useful in high-humidity spots like bathrooms. Use it on windows, glass tabletops, and even shower doors. Once you start to clean with alcohol, you’ll notice how easy it is to get that perfect shine—no extra scrubbing or polishing needed. 4. Remove Sticky Residue and Labels Sticker gunk, tape residue, and old labels can be super frustrating to clean. One of the easiest solutions is to clean with alcohol. Just apply some to a cotton pad or cloth and rub the sticky area gently. The adhesive starts to dissolve, making cleanup a breeze. This method is great on glass, plastic, metal, and even some finished wood. Always test a small spot first to be safe. If you’re removing labels from jars or price tags from new items, cleaning with alcohol gets the job done quickly. No more scraping with your fingernails or using harsh removers. When you clean with alcohol, the process is smooth, fast, and totally fuss-free. 5. Clean Your Makeup Tools Makeup brushes and beauty tools get dirty fast, and if you don’t clean them regularly, they can collect bacteria that ends up on your skin. That’s where cleaning with alcohol comes in handy. It’s perfect for a quick disinfect between deep washes. Spray your brushes lightly with alcohol and wipe them on a tissue to remove product buildup. You can also clean with alcohol on tools like tweezers, nail clippers, and eyelash curlers. It’s a fast way to keep everything sanitary and fresh. While it doesn’t replace a soapy deep clean, using alcohol in between keeps bacteria at bay and your tools ready to use. It’s another reason to always have rubbing alcohol on hand. 6. Freshen Up Bathroom Fixtures Faucets and towel bars can collect water spots and fingerprints fast. To bring back their shine, simply clean with alcohol using a soft cloth. It cuts through grime quickly and leaves chrome and stainless steel looking polished. Unlike soapy cleaners, cleaning with alcohol doesn’t leave a residue. It also helps prevent bacteria from building up, especially around sink handles and other high-touch areas. Since it dries instantly, there’s no need for rinsing or buffing. Add this to your weekly bathroom routine and your fixtures will always look fresh. It’s another simple reason to clean with alcohol when you want fast results and a cleaner look. 7. Disinfect Reusable Items Like Keys and Glasses You carry your keys, glasses, and wallet everywhere—so they’re bound to collect dirt and germs. It’s easy to overlook them, but taking a moment to clean with alcohol makes a big difference. A quick wipe-down can keep these everyday items cleaner and safer. Use a microfiber cloth with a little rubbing alcohol to clean glasses and sunglasses without streaks. For keys, just give them a good wipe to kill germs and remove any gunk from frequent handling. Cleaning with alcohol also works on headphones, debit cards, and your mouse. It only takes a minute to build this habit into your weekly routine. When you clean with alcohol, you’re staying ahead of the grime—and keeping your hands and face safer, too. Clean with Alcohol for the Small Stuff, Call Toronto Shine for the Big Stuff Knowing how to clean with alcohol gives you a powerful tool for quick, easy home cleaning. It’s affordable, fast-drying, and super effective for disinfecting and polishing everything from electronics to mirrors. Adding these habits to your weekly routine will help you stay on top of messes and keep germs at bay.

7 Smart Ways to Clean with Alcohol at Home Read More »

Cleaning while using chalk

6 Surprising Ways to Try Cleaning with Chalk Around the House

When people talk about natural cleaning methods, cleaning with chalk usually doesn’t come up. But maybe it should. This basic item sitting in your junk drawer or garage can actually tackle some sneaky household messes. From greasy laundry stains to musty closets, cleaning with chalk is a budget-friendly hack that’s surprisingly effective. Here are six ways to use it in your home. 1. Use Chalk to Absorb Grease Stains on Clothes If you spill oil or grease on your shirt, cleaning with chalk might save it. Just grab a stick of white chalk and gently rub it on the greasy spot. The chalk works fast to absorb the oil, making it easier to wash out later. Let it sit for a bit, then toss it in the wash like normal. One of the best things about cleaning with chalk is that it doesn’t involve harsh chemicals. It’s gentle on fabric and easy to use, especially if you catch the stain early. Avoid getting the spot wet before applying the chalk, or the grease might set deeper. You can also use this trick on napkins, cloth bags, or even furniture cushions. Chalk is a simple fix you can keep handy in your laundry room or purse for those “oops” moments. 2. Deodorize Musty Closets with Chalk If your closet smells musty or feels damp, cleaning with chalk might be the easy fix. Chalk naturally absorbs moisture, which helps control humidity and odor. Just bundle a few sticks in a sock or mesh bag and hang it in the closet. You’ll notice the difference in a few days. The great thing about cleaning with chalk in small spaces is that it’s completely mess-free. It doesn’t leak, stain, or require batteries. You can also use it in drawers, bathroom cabinets, or linen closets to fight off that damp, funky smell. Swap the chalk out once a month for best results. It’s a simple trick that helps protect your clothes, shoes, and linens from mold and moisture damage. 3. Prevent Silver from Tarnishing Tired of polishing silver? Cleaning with chalk can help prevent tarnish before it starts. Just place a few sticks of chalk in your jewelry box or silverware drawer. The chalk absorbs excess moisture from the air—one of the main reasons silver tarnishes. Cleaning with chalk doesn’t mean scrubbing or polishing; it’s a preventative trick. Over time, this habit will help your silver stay shinier without as much upkeep. It’s a small change with big results. You don’t need anything fancy. Even a couple of broken chalk pieces in a small container will do the trick. Just keep them out of direct contact with your jewelry to avoid dust buildup. 4. Clean Fingerprints Off Walls If you’ve got kids, pets, or just everyday smudges, you know the struggle of keeping walls clean. For small fingerprints, cleaning with chalk can help. Rub white chalk over the mark, then wipe with a soft, dry cloth. It lifts oils without damaging most paints. Always test it in a hidden spot first, but this method works well on matte or flat finishes where wet cleaners can make things worse. Cleaning with chalk works because the chalk powder acts like a gentle absorber that soaks up skin oils and dirt. You’ll love this trick for quick fixes before guests arrive or during routine touch-ups. It’s one of those cleaning secrets you’ll want to share. 5. Stop Toolbox Rust with Chalk If your tools are starting to rust, moisture might be the issue. Cleaning with chalk in your toolbox means placing a few chalk sticks in there to soak up the humidity. It’s a low-effort way to keep your tools in great shape. The chalk works like a mini moisture magnet. Just toss some in different corners of your toolbox, especially around metal tools. Replace them every month or so, depending on how damp your space is. Whether your tools live in the garage or the basement, cleaning with chalk helps avoid that orange rust buildup and keeps your equipment ready to use. 6. Remove Ring Marks from Walls or Wood Got ring marks on your coffee table or colored scuffs on the wall? Cleaning with chalk might help fade or even erase them. Gently rub white chalk over the mark, let it sit, then wipe away. It absorbs surface oils or residue, helping reduce the stain. This trick works best on fresh marks or shallow stains. While it won’t remove deep damage, cleaning with chalk gives you a simple first step before reaching for the heavy-duty stuff. It’s perfect for wooden tables, sideboards, or walls that get marked up by furniture. Keep some chalk nearby and you’ve got a fast solution ready whenever you need it. Let Chalk Help, But Leave the Big Jobs to Toronto Shine Cleaning Chalk is a surprisingly useful tool for a bunch of small cleaning tasks around the house. From lifting grease stains and reducing moisture to stopping rust and cleaning up marks, it does more than you’d expect for something so simple. And the best part? You probably already have some in a drawer somewhere. But for the deep cleans, the move-outs, or the days when life’s just too busy, let the pros step in. Toronto Shine Cleaning offers top-notch cleaning services across the GTA. Whether it’s your home, condo, or office, we bring the sparkle so you don’t have to lift a finger (except maybe to grab some chalk for a small mess!).

6 Surprising Ways to Try Cleaning with Chalk Around the House Read More »

Housekeeping, cleaning with cloth

6 Housekeeping Tips That Will Instantly Make Your Home Feel Cleaner

If you want a home that looks fresh without spending hours cleaning, you’re in the right place. These housekeeping tips focus on high-impact areas that make your space feel cleaner fast. Whether you’re building a new housekeeping routine or just want some easy housekeeping ideas, these six tricks will make a noticeable difference. Keeping your home clean doesn’t have to be overwhelming—it’s all about working smarter, not harder. Let’s break down the habits that help your home shine in no time. 1. Focus on Entryways First One of the most underrated housekeeping tips is to start with your entryway. It’s the first impression people get of your home. Tidy up shoes, bags, and jackets every day to instantly boost how clean the whole house feels. Wipe down any surfaces and give the floor a quick sweep. Add a light-scented candle or diffuser to make it smell as fresh as it looks. Good housekeeping routines always start with areas that get the most traffic and are seen first. Keep the entry organized by using bins for shoes and hooks for coats. These small steps help you stay consistent without needing a full overhaul. A quick tidy takes just five minutes and makes a big impact. If you keep it up daily, you’ll never feel embarrassed about surprise guests showing up. Focusing on the front door area is one of those daily housekeeping habits that instantly makes the rest of your space feel cleaner. You don’t have to go for perfection—just neat and fresh. A clean entrance sets the tone and helps you feel more in control of your home. This is one of those easy housekeeping ideas that offers instant results without requiring deep cleaning. Start your routine at the door, and everything else will feel more manageable from there. 2. Make the Beds Every Morning Making your bed is a simple housekeeping tips that pays off big. It instantly makes your bedroom look organized, even if there are other messes around. In fact, many professional cleaners say this is the first thing you should do in your daily housekeeping routine. It sets the tone for a clean and productive day and gives the whole room a calm, fresh feel. You don’t need to make it fancy—just smooth out the sheets, fluff the pillows, and straighten the blankets. A clean bed anchors the room and makes you feel like you’ve accomplished something right away. If you like a more styled look, try adding a throw or switching up pillow covers now and then. Small touches make your housekeeping routine feel more intentional. Even if you skip the rest of the bedroom chores, a made bed gives a neat overall impression. This is one of those fast, effective housekeeping tips that makes a big difference with minimal effort. Add it to your daily checklist, and you’ll notice how it influences the rest of your cleaning habits. 3. Wipe Down High-Touch Surfaces Another super effective housekeeping tips is focusing on high-touch areas like light switches, doorknobs, counters, and handles. These spots get dirty quickly and can make your home feel grimy even when the rest is clean. Include this in your daily housekeeping routine to keep your home looking fresh and reduce germs at the same time. Use a mild cleaner and microfiber cloth to give these areas a quick wipe. Don’t forget remotes, cabinet pulls, and faucets—basically, anything you touch regularly. These small zones often go unnoticed, but they have a huge impact on how clean your space feels. Keeping them clean adds that polished, professional finish to your housekeeping efforts. This is one of the best easy housekeeping ideas for anyone short on time. You don’t need to deep clean every day, but wiping down these areas helps you maintain that just-cleaned vibe. Add this step into your weekly or even daily routine for a home that always feels fresh and cared for. 4. Clear the Clutter Before You Clean A top housekeeping tips from pros? Don’t clean around the mess. Take five to ten minutes to clear off surfaces before you start wiping or vacuuming. A clutter-free space automatically looks cleaner, even if you haven’t scrubbed a single thing. Good housekeeping routines start with decluttering—it sets the stage for everything else. Put away mail, fold throw blankets, and gather loose items into a catch-all tray or bin. This makes deep cleaning easier and faster later on. Use small baskets to contain items that belong together, and don’t be afraid to toss or donate what you don’t need. Clutter takes up space physically and mentally, so clearing it out helps both. This is one of the most practical housekeeping tips for busy people. Instead of waiting for a big cleaning day, build quick clutter sweeps into your daily habits. It keeps your home looking tidy and makes future cleaning much simpler. Plus, it gives you that clean-home feeling with less effort. 5. Keep Cleaning Supplies Within Reach If cleaning products are hard to get to, you’re way less likely to use them. One smart housekeeping tips is to store supplies in the rooms where you’ll use them. For example, keep glass cleaner and wipes under the bathroom sink and kitchen spray under the counter. This small shift makes your daily housekeeping a lot more doable. When your tools are close, it’s easy to clean up little messes as they happen. Got toothpaste on the mirror? Wipe it right away. Spills on the counter? Handle them before they harden. These mini cleanups save time and prevent big build-ups. It’s one of those easy housekeeping tips and ideas that keeps your home looking cared for all week long. This tip works great for families too—everyone can pitch in when supplies are easy to find. You’re not just making cleaning easier; you’re turning it into a low-stress routine. Keeping supplies handy is one of those behind-the-scenes housekeeping hacks that makes everything run smoother. 6. Vacuum or Sweep High-Traffic Areas Daily Want your home

6 Housekeeping Tips That Will Instantly Make Your Home Feel Cleaner Read More »

Cleaning with a dirty cloth and dirting ever more

5 Common House Cleaning Mistakes You Need to Stop Making

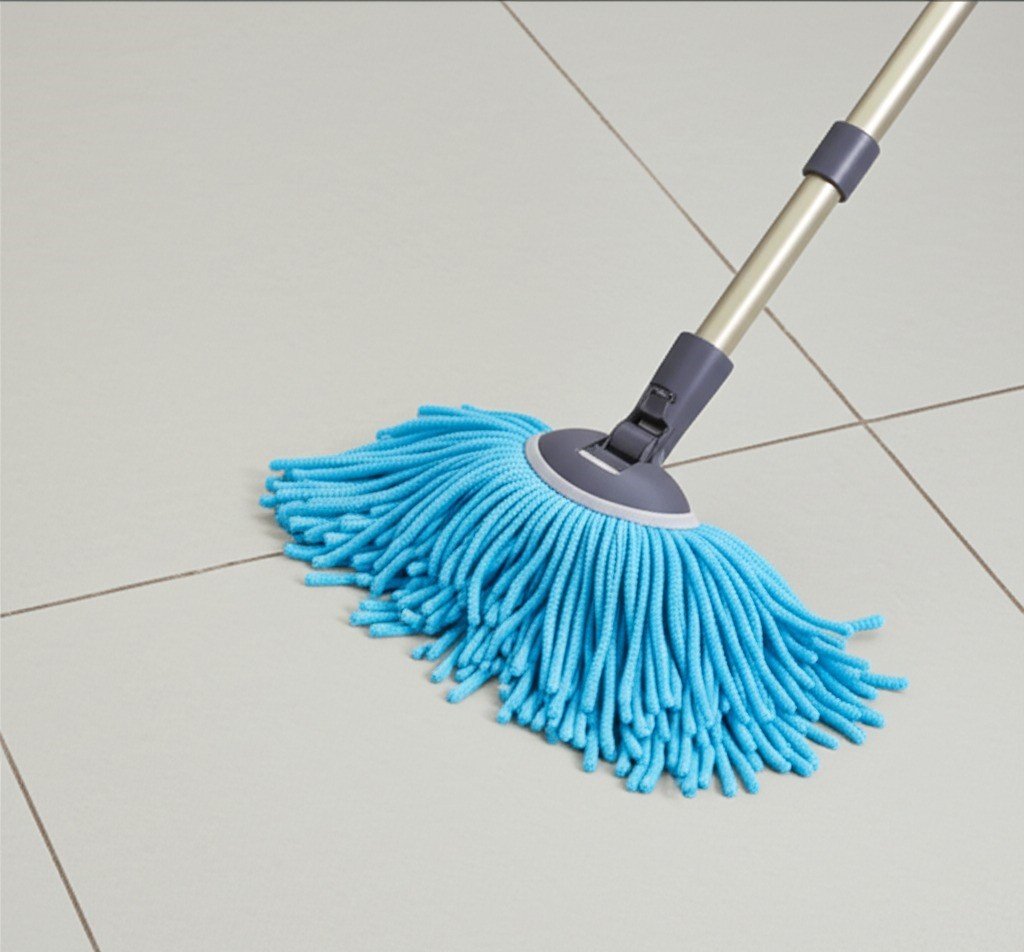
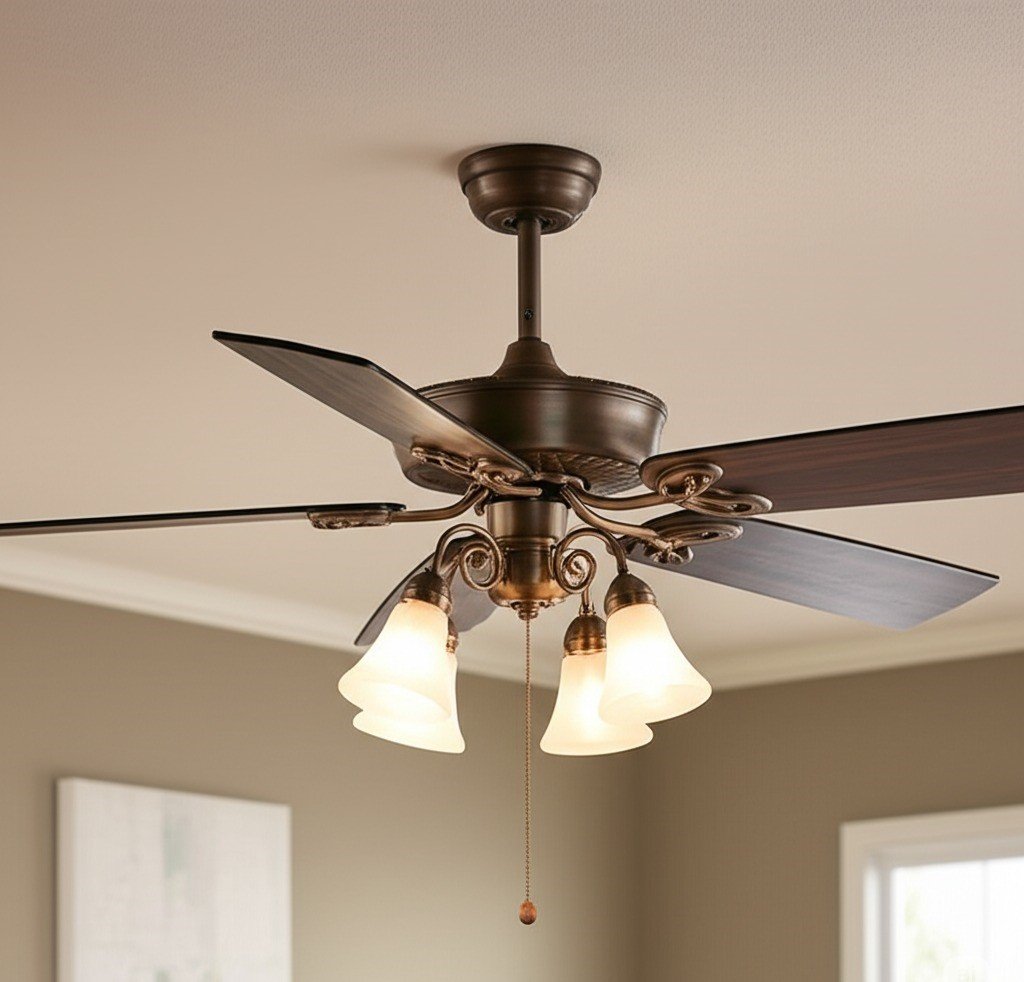
Keeping your home clean might seem simple, but many people unknowingly make house cleaning mistakes that make their efforts less effective. These errors can lead to wasted time, frustration, and even a dirtier home in the long run. The good news is that with a few small changes, you can clean smarter, not harder. Let’s take a look at five of the most common house cleaning mistakes and how to fix them. 1. Using Too Much Cleaning Product It’s easy to think that using extra cleaning products will make your home cleaner, but this is one of the biggest house cleaning mistakes you can make. Overusing cleaning solutions can leave behind sticky residues that attract dust and dirt, making surfaces look dull and grimy over time. This is especially true for floors, countertops, and glass surfaces, where too much cleaner creates a film that’s hard to remove. Another issue with using too much product is that it can take longer to clean. If you don’t rinse or wipe properly, you’ll be left with streaks or buildup, which means you’ll have to clean the same area again sooner than expected. Instead, always follow the recommended amounts on the label and use a damp microfiber cloth to remove any excess cleaner. For a more efficient clean, try using multi-purpose cleaners that require minimal effort. Microfiber cloths and steam cleaning can also help reduce the need for excessive chemicals. When it comes to house cleaning mistakes, remember that less is more—a small amount of the right product goes a long way! 2. Ignoring High-Touch Areas One of the most overlooked house cleaning mistakes is forgetting to clean high-touch areas. While most people focus on visible surfaces like floors, counters, and sinks, areas like door handles, light switches, remote controls, and refrigerator handles accumulate germs quickly. These spots are touched multiple times a day, making them breeding grounds for bacteria and viruses. Not cleaning these areas regularly can lead to the spread of illness among family members. Even if the rest of your home is spotless, ignoring these high-contact surfaces means germs can easily transfer from person to person. Using disinfectant wipes or a simple microfiber cloth with a sanitizing solution once a day can help keep germs at bay. To make sure you don’t forget, create a checklist of high-touch areas in your home and include them in your regular cleaning routine. A quick daily wipe-down can make a big difference in keeping your home healthier and safer for everyone. Avoiding this house cleaning mistake will help maintain a truly clean environment. 3. Cleaning from the Bottom Up If you’ve ever cleaned your floors first, only to find dust and crumbs falling from your countertops later, you’re not alone. Many people make the mistake of cleaning from the bottom up, which means they have to redo their work multiple times. This inefficient approach is one of the most common house cleaning mistakes that can make cleaning feel like an endless cycle. The correct cleaning order is to start from the top and work your way down. Begin by dusting ceiling fans, light fixtures, and shelves before wiping down furniture and countertops. This way, any dust or dirt that falls will be cleaned up when you vacuum or mop the floors last. This simple switch can save you time and ensure a more thorough clean. For even better results, use a microfiber duster to trap dust rather than spreading it around. When vacuuming, go from room to room systematically to prevent tracking dirt back into areas you’ve already cleaned. Following this step-by-step approach will leave your home cleaner and make your cleaning routine more efficient. 4. Using the Same Cloth for Everything Reusing the same cloth to clean different areas might seem convenient, but it actually spreads bacteria and dirt from one surface to another. For example, if you use the same rag to wipe down your bathroom sink and then move to your kitchen counters, you could be transferring germs from one area to a food preparation space. This is a major house cleaning mistake that many people don’t realize they’re making. To avoid this mistake, have separate cleaning cloths for different areas of your home. Use color-coded microfiber cloths—one color for the kitchen, another for the bathroom, and a different one for dusting furniture. This simple method ensures that germs stay contained and don’t spread throughout your home. Another great tip is to wash your cloths regularly. Dirty rags can hold bacteria, so make sure to toss them in the laundry after each use. Keeping a stash of fresh, clean cloths on hand will make cleaning more effective and help maintain a healthier home. Avoiding this house cleaning mistake will make a noticeable difference in your cleaning results. 5. Forgetting to Clean Your Cleaning Tools Cleaning tools themselves need to be cleaned! Sponges, mop heads, vacuum filters, and even brooms collect dirt, bacteria, and grime over time. If you don’t clean them regularly, you might just be spreading dirt around instead of removing it. A dirty sponge or mop can leave behind a foul odor and make your home less sanitary. This is one of the most overlooked house cleaning mistakes that can impact the cleanliness of your space. To keep your tools effective, wash sponges and dishcloths in hot water or replace them frequently. Mop heads should be cleaned after each use—many are machine washable, making it easy to maintain them. Vacuum filters should be emptied and cleaned to ensure optimal suction and prevent dust from being blown back into your home. By taking a few minutes to clean your tools after each use, you’ll ensure they work better and last longer. Plus, you’ll avoid the frustration of re-cleaning areas that didn’t actually get clean the first time! Avoiding this house cleaning mistake will make your cleaning routine more efficient and effective. Let Toronto Shine Cleaning Do the Hard Work for You! House cleaning takes time and effort, and avoiding

5 Common House Cleaning Mistakes You Need to Stop Making Read More »

Paper written home cleaning routine

6 Expert Tips for a Home Cleaning Routine

Keeping your home clean doesn’t have to be overwhelming. With the right home cleaning routine, you can maintain a fresh, organized space without spending hours scrubbing. A structured approach makes cleaning more manageable and ensures that no area gets neglected. By following these six expert tips, you’ll be able to keep your home spotless while saving time and effort. A well-planned home cleaning routine is not just about making your house look good—it also creates a healthier living environment. Dust, allergens, and bacteria can build up quickly, affecting indoor air quality and leading to potential health issues. Sticking to a consistent cleaning schedule will help prevent these problems and make your home a more comfortable place to live. However, even with the best intentions, keeping up with a home cleaning routine can be time-consuming, especially for busy households. That’s why having a strategy in place is key. These expert-backed cleaning tips will help you streamline your routine, maximize efficiency, and ensure your home stays fresh with less effort. 1. Declutter Before You Start Before diving into your home cleaning routine, start by decluttering. A messy space makes cleaning more difficult and allows dust and dirt to collect around unnecessary items. Go through each room and remove anything you no longer use. If you haven’t touched an item in over a year, consider donating or discarding it. Decluttering isn’t just about making your home look tidy—it also improves air circulation and creates a sense of calm. Studies have shown that an organized space reduces stress and increases productivity. By incorporating decluttering into your home cleaning routine, you’ll create a more relaxing environment while making actual cleaning tasks much easier. To keep clutter under control, dedicate 10-15 minutes daily to tidying up a specific area. This simple habit will prevent messes from piling up and ensure your home stays neat. When clutter is minimized, you’ll find that maintaining a home cleaning routine becomes far more manageable. 2. Follow a Cleaning Schedule A well-structured home cleaning routine is all about consistency. Instead of letting dirt accumulate and tackling everything at once, break your cleaning tasks into daily, weekly, and monthly schedules. This ensures every part of your home is cleaned regularly without feeling overwhelmed. Daily cleaning should include wiping kitchen countertops, washing dishes, and vacuuming high-traffic areas. Weekly tasks can focus on deeper cleaning, such as dusting furniture, scrubbing the bathroom, and changing bed linens. Monthly deep-cleaning tasks, like washing windows, organizing closets, and steam-cleaning carpets, help maintain your home’s overall freshness. Following a home cleaning routine makes cleaning feel less like a chore and more like a habit. If you live in a busy household, assign tasks to different family members to share the workload. A set schedule ensures that cleaning is done regularly, keeping your home in top shape with minimal effort. 3. Use the Right Cleaning Products An effective home cleaning routine requires using the right products. Not all surfaces are the same, and using the wrong cleaner can cause damage or leave behind streaks and residue. Investing in high-quality cleaning supplies will help you achieve better results while protecting your home’s surfaces. Microfiber cloths are ideal for dusting, as they trap dust instead of spreading it around. Disinfecting sprays are essential for high-touch areas such as doorknobs, light switches, and countertops to eliminate germs. For specialized surfaces like stainless steel, granite, or hardwood floors, use the appropriate cleaners to maintain their shine and durability. If you prefer eco-friendly options, many plant-based cleaning products provide powerful results without harmful chemicals. Choosing the right cleaning products ensures your home cleaning routine is both efficient and safe for your family. 4. Clean from Top to Bottom One of the best ways to optimize your home cleaning routine is to work from top to bottom. This prevents dust and debris from falling onto areas you’ve already cleaned, reducing the need for extra work. Start by dusting ceiling fans, light fixtures, and shelves before moving down to countertops, tables, and appliances. The last step should always be vacuuming or mopping the floors, ensuring all dust and dirt are removed. By following this method, you save time and effort while achieving a more thorough clean. Applying the top-to-bottom strategy across different rooms keeps your home cleaning routine structured and efficient. Whether you’re doing a quick tidy-up or a deep clean, this approach ensures that every part of your home gets the attention it needs. 5. Focus on High-Traffic Areas In any home cleaning routine, high-traffic areas require extra attention. Rooms like the kitchen, bathroom, and entryway are used the most and tend to accumulate dirt, germs, and grime faster than other areas. In the kitchen, focus on disinfecting countertops, stovetops, and sinks daily. Food spills and residue can attract bacteria, so regular sanitization is key. Bathrooms need frequent scrubbing to prevent mold and mildew buildup, particularly in showers and around sinks. Keeping these areas clean improves hygiene and extends the life of fixtures. For entryways, placing doormats at entrances helps reduce the amount of dirt tracked inside. Vacuuming and mopping frequently will also prevent dust from spreading throughout your home. Focusing on these high-use areas ensures your home cleaning routine keeps your entire space fresh and welcoming. 6. Make The Home Cleaning Routine a Family Effort Cleaning doesn’t have to be a solo task! Involving the whole family in your home cleaning routine makes the process faster and more manageable. Assigning simple tasks to family members—such as sweeping, taking out the trash, or wiping down surfaces—keeps cleaning from becoming overwhelming. For families with children, making cleaning fun can encourage participation. Setting a timer for a “10-minute tidy-up” or offering small rewards can turn chores into a game. When cleaning is a team effort, maintaining a tidy home becomes much easier. If your schedule is packed and keeping up with a home cleaning routine feels impossible, professional help is always an option. Toronto Shine Cleaning offers top-tier cleaning services to keep your home spotless without

6 Expert Tips for a Home Cleaning Routine Read More »

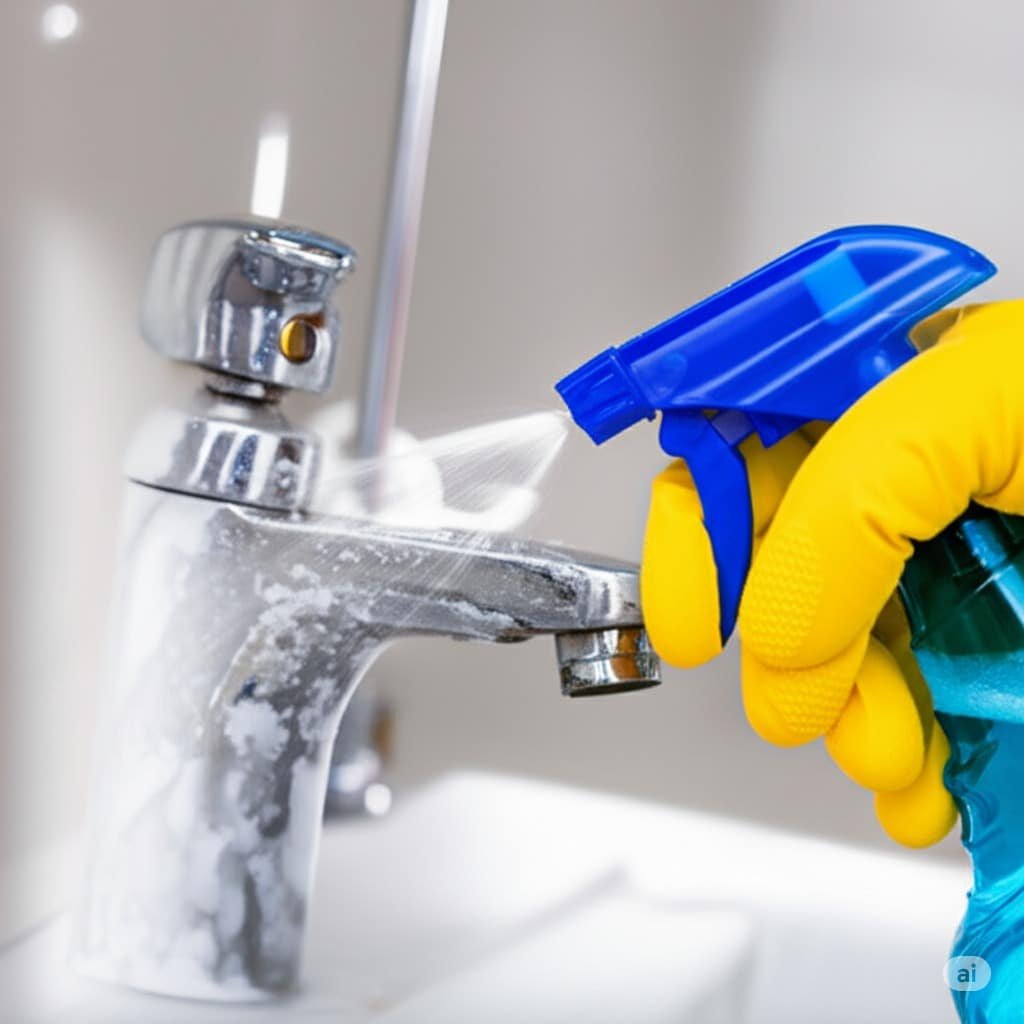
Apartment cleaning mistake, cleaning purple paint spraying a cleaner

7 Common Apartment Cleaning Mistakes and How to Avoid Them

Keeping your apartment clean is essential for a healthy and comfortable living space. However, many people make simple apartment cleaning mistakes that can make the job harder, less effective, or even damaging to surfaces. Here are seven of the most common apartment cleaning mistakes and how to avoid them to keep your home fresh and spotless. 1. Using the Wrong Cleaning Products One of the biggest apartment cleaning mistakes people make is using the wrong products for specific surfaces. Not all cleaners are universal, and using a harsh chemical on delicate materials like wood or marble can cause permanent damage. For example, bleach-based cleaners can discolor granite countertops, while ammonia can strip the finish off wooden furniture. Always read the labels and ensure the cleaner is safe for the surface you are using it on. Another issue with the wrong cleaning products is that some cleaners may leave behind residue that attracts more dirt rather than removing it. Many multi-purpose sprays work well for quick cleans, but they might not be suitable for deep cleaning certain materials. Investing in high-quality, specialized cleaners can make a huge difference in the longevity and cleanliness of your apartment. For a more eco-friendly approach, look for non-toxic cleaners that are safe for both your home and the environment. Many commercial brands now offer plant-based options that effectively clean without harmful chemicals. Choosing the right product ensures your apartment remains fresh without unnecessary wear and tear on your belongings. 2. Skipping High-Touch Areas When cleaning, many people focus on visible areas like floors, countertops, and bathrooms but forget about high-touch surfaces. These areas include light switches, doorknobs, remote controls, and refrigerator handles. Since these spots are used frequently, they accumulate bacteria and germs quickly, making them a hotspot for potential illness. Ignoring these spots is a common apartment cleaning mistake that can compromise your home’s hygiene. To keep your apartment truly clean, make a habit of disinfecting these areas regularly. A simple wipe-down with a disinfectant cloth or spray can go a long way in maintaining a hygienic home. If you’re using reusable cloths, make sure to wash them frequently to prevent bacteria buildup. Especially during flu season or when guests come over, high-touch areas should be cleaned even more often. These small cleaning habits can significantly improve the overall cleanliness of your home and help prevent the spread of germs.     3. Forgetting to Dust Before Vacuuming Many people vacuum first and then dust, thinking they are being efficient. However, dusting after vacuuming can undo all your hard work by allowing dust particles to settle back onto freshly cleaned floors. Dust accumulates on surfaces like shelves, blinds, and furniture, and when disturbed, it becomes airborne, eventually settling on the floor again. This is a common apartment cleaning mistake that leads to more dust buildup. To clean effectively, always dust before you vacuum. Start with higher surfaces, like ceiling fans and shelves, then work your way down. Use a microfiber cloth or a duster that traps dust rather than just spreading it around. This method ensures that any dust that falls to the floor is picked up when you vacuum. In addition to dusting surfaces, don’t forget about vents and baseboards. These areas are often neglected but collect a surprising amount of dust over time. A regular dusting and vacuuming routine will keep your apartment looking fresh and help maintain good air quality. 4. Overloading the Dishwasher Cramming too many dishes into the dishwasher may seem like a time-saver, but it can actually prevent your dishes from getting properly cleaned. When dishes are packed too tightly, water and detergent can’t reach all surfaces, leaving behind food residue and soap buildup. This means you’ll have to rewash items, wasting both time and water. Overloading the dishwasher is another common apartment cleaning mistake that reduces efficiency. Instead, load your dishwasher efficiently by giving dishes enough space for water to circulate. Place larger items on the bottom rack and smaller, more delicate items on the top. If necessary, run two smaller loads instead of overloading one. Additionally, make sure to clean your dishwasher regularly. Food particles and grease can build up over time, reducing efficiency. Running a cleaning cycle with a dishwasher cleaner once a month will help keep it running smoothly and ensure your dishes come out sparkling clean.     5. Using Too Much Cleaning Product It’s common to think that using more cleaning product will make your apartment cleaner, but this is not the case. Overusing cleaning products can leave behind a sticky residue that attracts dirt and dust, making surfaces feel grimy faster than they should. This is one of the most overlooked apartment cleaning mistakes that can actually make your space dirtier. To avoid this mistake, always follow the recommended amount on the product label. Using too much can also make rinsing and wiping more difficult, leading to streaks and buildup. A little goes a long way when it comes to most cleaning solutions. If you notice streaks on glass, floors, or countertops, it may be a sign that you’re using too much product. Try using less and see if it makes a difference in the cleanliness of your space. 6. Ignoring Hidden Areas It’s easy to focus on visible areas like countertops and floors, but hidden spots often accumulate the most dirt. Under furniture, behind appliances, and inside cabinets are some of the most neglected areas in apartment cleaning mistakes. Dust, crumbs, and even mold can build up over time if these areas are ignored. Skipping these hidden areas is a major apartment cleaning mistake that can lead to long-term hygiene issues. Make it a habit to move furniture occasionally and vacuum or sweep underneath. Similarly, clean behind your stove and fridge at least once every few months to prevent grease and food debris from accumulating. Closets and storage areas should also be checked regularly. These spaces can collect dust and clutter, making them harder to clean later. A little

7 Common Apartment Cleaning Mistakes and How to Avoid Them Read More »

Baking soda used for cleanliness

6 Household Items To Remove Oil Stains Like Magic

Oil stains can be one of the toughest messes to clean, whether they’re on your favorite shirt, your kitchen countertop, or even your driveway. The worst part? If not treated quickly, oil can seep deep into fabrics and surfaces, making it even harder to remove. But before you panic or toss out that stained clothing, try these six common household items that can remove oil stains like magic! 1. Dish Soap Dish soap is a powerhouse when it comes to fighting grease, and it’s not just for washing dishes. Since it’s specifically designed to break down oils, it’s one of the best solutions to remove oil stains on fabric, upholstery, and even kitchen surfaces. To use dish soap, apply a few drops directly onto the stain, gently rub it in with your fingers or a soft brush, and let it sit for at least 10 minutes. For fabric stains, rinse the area with warm water before tossing it into the washing machine. If you’re dealing with a tough, set-in stain, repeat the process or soak the item in warm water mixed with dish soap for about 30 minutes. For oil spills on kitchen counters or stovetops, mix dish soap with warm water and scrub the affected area with a sponge. You’ll be surprised at how quickly it cuts through the grease! If you have a delicate fabric like silk or wool, be sure to use a mild dish soap and test a small area first. Dish soap is safe for most materials, but some delicate fabrics require extra care. Always air-dry your clothes after washing to make sure the stain is completely gone before using heat, as heat can set the stain permanently. 2. Baking Soda Baking soda is one of the best natural oil absorbers, making it a great solution for fresh and even some older oil stains. Its fine particles soak up the oil, helping to remove oil stains from fabrics, carpets, and even hard surfaces like tile or stone. If you catch an oil spill early, sprinkle a generous amount of baking soda over the stain and let it sit for at least 15–20 minutes. Then, use a brush to scrub it off, or vacuum the residue if you’re working on a carpet or upholstery. For deeper stains, you can create a paste by mixing baking soda with a small amount of water. Apply the paste to the stain, let it sit for another 15 minutes, and then scrub with a brush before rinsing or washing. This method works particularly well on clothing, as baking soda can lift even stubborn grease stains that dish soap alone might not tackle. Baking soda is also useful for removing oil stains from concrete driveways or garage floors. Simply sprinkle a thick layer over the stain, let it sit overnight, and scrub it off the next day with warm water and a stiff brush. Since baking soda is non-toxic and gentle, it’s a great option for families with pets and kids. 3. Cornstarch Cornstarch works similarly to baking soda when it comes to oil stain removal. It absorbs grease quickly and effectively, making it a handy alternative if you don’t have baking soda on hand. Just like with baking soda, sprinkle a generous amount of cornstarch onto the stain and let it sit for at least 30 minutes to an hour. This allows it to fully absorb the oil before you brush or vacuum it away. If you’re dealing with an oil stain on clothing, press the cornstarch into the fabric using your fingers or a spoon. Let it sit before brushing it off, then wash the clothing as you normally would. For fresh oil spills on furniture, you can also apply cornstarch, let it absorb the oil, and then wipe it away with a damp cloth. For larger stains, such as grease spills on carpets or rugs, you can combine cornstarch with a small amount of mild detergent for extra cleaning power. Let the mixture work its magic before scrubbing gently with a soft brush. This method is effective for delicate surfaces that might not hold up well to stronger chemical cleaners. 4. Chalk Chalk may seem like an unexpected oil stain remover, but it works wonders on fresh grease stains—especially on clothing. Chalk is made of calcium carbonate, which naturally absorbs grease and oil. The best way to use it is to rub white chalk directly onto the oil stain as soon as possible. Let it sit for a few minutes before brushing off the excess powder and washing the fabric as usual. This trick is particularly useful for on-the-go emergencies. If you’re eating out and accidentally spill salad dressing or butter on your clothes, rubbing a piece of chalk over the stain can help prevent the oil from setting in. Keep a small piece of white chalk in your bag for quick stain treatments when you’re not at home. Chalk works best on lighter fabrics, so if you’re trying to remove oil stains from dark clothing, test a small area first to ensure it doesn’t leave a visible residue. It’s a quick and easy solution for those last-minute stain mishaps before an important event! 5. Rubbing Alcohol Rubbing alcohol is a powerful oil and grease remover that works well on clothes, furniture, and even some hard surfaces. It helps break down oils and evaporates quickly, leaving little residue behind. To use rubbing alcohol on fabric stains, pour a small amount onto a clean cloth or cotton ball and blot the stained area. Let it sit for a few minutes before rinsing with water or washing the item in the laundry. For stains on upholstery, apply rubbing alcohol using a soft cloth and gently dab at the stain until the oil lifts. Be careful not to rub too hard, as this might spread the stain further. Rubbing alcohol is also effective on glass and countertops—just apply it to a paper towel and wipe away greasy fingerprints or residue.

6 Household Items To Remove Oil Stains Like Magic Read More »

Detergent being wasted while cleaning

7 Common Detergent Mistakes You Need to Avoid

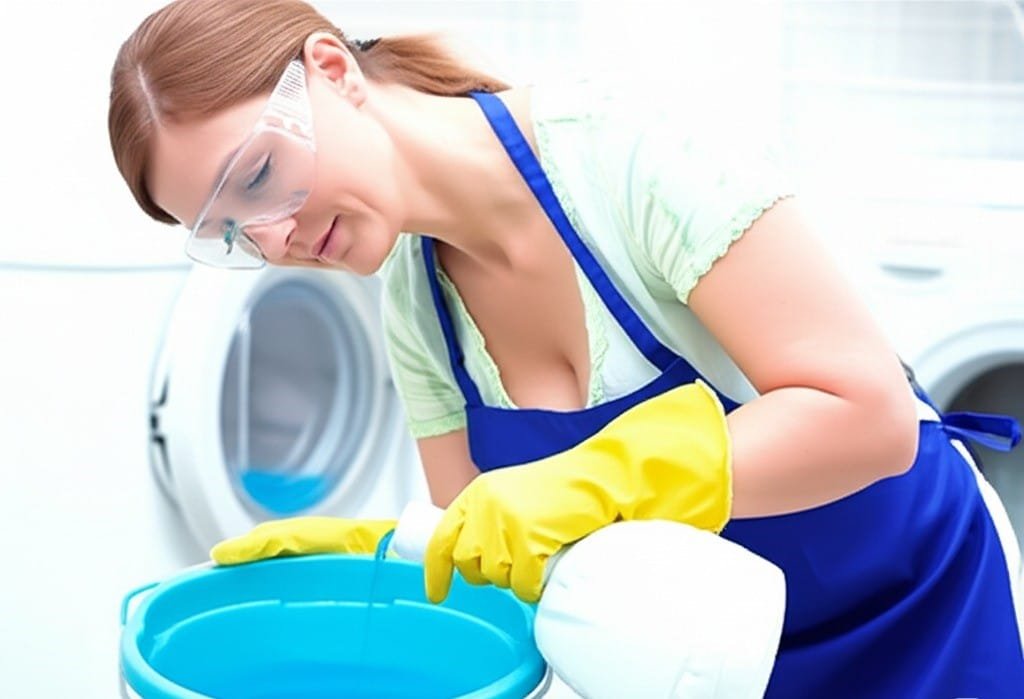
Using detergent might seem straightforward, but small detergent mistakes can lead to ineffective cleaning, stubborn stains, or even damage to your clothes. Here are seven common detergent mistakes to avoid to keep your laundry fresh and clean. 1. Using Too Much Detergent More detergent doesn’t mean cleaner clothes. Excess detergent creates too many suds, trapping dirt and residue in fabrics. This buildup can make clothes feel stiff and cause skin irritation. Clothes may also develop a soapy residue that dulls colors and reduces fabric softness over time. Using too much detergent can also clog your washing machine, leading to mold and mildew growth. The excess soap may not fully rinse out, causing unpleasant odors in both your machine and clothes. If you notice a musty smell in your laundry, this might be the cause. To avoid this detergent mistake, always measure Detergent Mistakes according to the manufacturer’s instructions. If your clothes feel sticky or stiff after washing, try using less detergent and running an extra rinse cycle to remove any residue. 2. Not Using Enough Detergent On the flip side, using too little detergent won’t properly clean your laundry. Dirt and oils will remain trapped in the fabric, leading to dull-looking and smelly clothes. Skimping on detergent might also result in stubborn stains that require extra washes, wasting more water and energy in the long run. Using insufficient detergent can also allow bacteria and allergens to linger on your clothes. This is especially problematic for those with sensitive skin or allergies. Sweat, body oils, and everyday grime need an adequate amount of detergent to be fully removed. To avoid this detergent mistake, use the recommended amount based on the size of the load and the level of soiling. For extra-dirty laundry, pre-treat stains and increase detergent slightly instead of underusing it.     3. Pouring Detergent Directly on Clothes Pouring detergent straight onto clothes can lead to staining and uneven cleaning. Liquid detergent should go into the designated dispenser, while powder detergent should be evenly distributed in the drum before adding clothes. Failing to do so may result in Detergent Mistakes residue that sticks to fabrics and causes discoloration. Undissolved detergent can also leave behind a sticky residue, which attracts dirt and makes clothes feel rough. This buildup may cause irritation, especially for those with sensitive skin. Detergent stains are often difficult to remove and may require additional washes. To avoid this detergent mistake, always follow the washing machine’s guidelines. If your machine lacks a dispenser, mix detergent with water before adding it to your laundry. This ensures even distribution and thorough cleaning. 4. Ignoring Water Temperature Different detergents work best at specific water temperatures. Hot water is great for whites and heavily soiled items, while cold water is best for bright colors and delicate fabrics. Washing everything at the wrong temperature can lead to shrinkage, fading, or ineffective stain removal. Cold water saves energy but may not activate some detergents properly, leading to less effective cleaning. On the other hand, hot water can set certain stains, making them harder to remove. It can also damage delicate fabrics, causing them to wear out faster. To avoid detergent mistakes related to water temperature, always check clothing labels and choose the right water temperature for each load. Using a high-quality detergent designed for cold washes can help maintain fabric integrity while still getting clothes thoroughly cleaned. 5. Using the Wrong Detergent for Your Washer High-efficiency (HE) washers require HE detergent. Regular detergent produces too many suds, which can leave a residue in the washer and lead to buildup over time. This buildup can cause mechanical issues, foul odors, and inefficient cleaning performance. Using the wrong detergent can also shorten the lifespan of your washing machine. Excessive suds make it harder for the washer to drain properly, leading to mildew and unpleasant smells. If you’ve noticed your washer struggling or smelling bad, it might be due to improper detergent use. To prevent this detergent mistake, always check your washing machine’s manual and use the correct type of detergent. HE detergents are designed to work with less water and produce fewer suds, ensuring your washer runs efficiently and your clothes come out clean. 6. Overloading the Washing Machine Stuffing your washing machine to the brim prevents detergent from distributing evenly. Clothes won’t get properly cleaned, and detergent might not rinse out completely. Overloading can also strain the machine, leading to mechanical issues over time. When the drum is too full, clothes don’t have enough space to move around, causing dirt and detergent residue to get trapped in the fabric. This can make your laundry smell musty and look dull, even after washing. In severe cases, overloading can lead to unbalanced loads and excessive wear on your machine. To avoid this detergent mistake, fill your washing machine only up to three-quarters full. This allows enough room for water and detergent to circulate properly, ensuring a thorough and effective clean.     7. Skipping Fabric Softener or Additives While detergent is key, fabric softeners and stain removers can enhance your laundry results. Skipping these extras can leave your clothes feeling rough or looking dull. Fabric softeners help maintain softness, while additives like oxygen bleach can brighten colors and remove tough stains. Some people avoid fabric softener due to concerns about buildup, but using the right amount ensures your clothes stay fresh without residue. If you find your laundry feels stiff or loses its softness over time, consider adding a small amount of fabric softener to your routine. For stubborn stains, pre-treating with a stain remover before washing can make a big difference. Adding baking soda or borax to your wash can also help boost cleaning power and eliminate odors. Conclusion Avoiding these detergent mistakes can make a huge difference in the cleanliness and longevity of your clothes. Proper detergent use, the right water temperature, and balanced loads all contribute to better laundry results. Paying attention to these small details ensures your clothes stay fresh, bright,

7 Common Detergent Mistakes You Need to Avoid Read More »

Microfiber towel stored

6 Easy Steps to Clean Microfiber Cloths Properly

Clean Microfiber cloths are excellent for cleaning, but if not washed correctly, they lose their effectiveness. Follow these six simple steps to keep them in top condition and ensure you always clean microfiber cloths the right way. Shake Off Dirt and Debris Before washing, shake out any dust, dirt, or debris from your microfiber cloths. This prevents particles from embedding into the fibers during washing and keeps them working efficiently. A quick shake outside or over a trash can removes loose debris, ensuring a cleaner wash. For heavily soiled cloths, consider rinsing them under warm water before tossing them into the wash. This helps to remove excess grime that could otherwise spread during the washing cycle. Avoid scrubbing them aggressively, as this can damage the delicate fibers. If the microfiber cloths have been used for greasy or oily messes, soaking them in warm water with a small amount of mild detergent before washing can help break down residues. This pre-treatment step ensures a thorough clean without leaving behind unwanted build-up. Separate from Other Fabrics Wash microfiber cloths separately from cotton, towels, or lint-producing fabrics. Mixing them with other materials can cause them to trap lint, reducing their cleaning power. Microfiber is designed to attract dust and debris, so washing them alone prevents unwanted fibers from clinging to them. Additionally, keeping microfiber separate from rough or abrasive fabrics prevents potential damage to the fibers. Rough materials can cause microtears in the cloth, making them less effective over time. The softer and smoother the microfiber remains, the better it will perform in cleaning tasks. For best results, sort your microfiber cloths by usage. For example, cloths used for glass cleaning should be washed separately from those used for dusting or mopping. This prevents cross-contamination and maintains their specialized cleaning abilities. Always clean microfiber cloths separately to maximize their lifespan.     Use a Gentle Detergent Use a mild, liquid detergent free from bleach and fabric softeners. Harsh chemicals can damage the microfiber fibers, reducing their ability to pick up dust and absorb liquids effectively. Bleach can break down the fibers, while fabric softeners leave a residue that diminishes their absorbency. When selecting a detergent, opt for one labeled as free of dyes and fragrances. These additives can leave a coating on microfiber, affecting its performance. A simple, gentle detergent will keep your microfiber cloths in optimal condition for longer. Avoid using powder detergents, as they can leave behind particles that may get trapped in the fibers. Liquid detergents dissolve more easily, ensuring a thorough clean without residue buildup. Using too much detergent can also clog the fibers, so a small amount is sufficient. Always clean microfiber cloths with the right detergent to keep them in top shape. Choose the Right Washing Method For best results, wash microfiber cloths in warm water on a gentle cycle. If hand-washing, soak them in a sink with warm water and detergent, then rinse thoroughly to remove all soap residue. Proper washing prevents fiber damage and maintains the cloth’s effectiveness. When machine washing, select a cycle with minimal agitation to avoid fraying the fibers. A mesh laundry bag can also help protect Clean Microfiber Cloths during the wash. This is especially useful if you have delicate microfiber used for glass or electronics cleaning. If hand-washing, be sure to rinse the cloths multiple times to remove any detergent completely. Soap residue can make microfiber feel stiff and reduce its absorbency. A final rinse with clean water ensures the cloths remain soft and effective. The key to maintaining high-quality cleaning is knowing how to properly clean microfiber cloths. Air Dry or Low Heat Avoid high heat when drying Clean Microfiber Cloths. Air drying is best, but if using a dryer, select a low heat or no heat setting. Excessive heat can melt the fibers and reduce their effectiveness. Hanging microfiber cloths to dry ensures they retain their soft texture and absorbency. If drying in a machine, avoid using dryer sheets, as they contain fabric softeners that coat the fibers. Instead, tumble dry on low or use an air-only setting to protect the integrity of the microfiber. The less heat exposure, the longer the cloths will maintain their quality. To speed up air drying, hang microfiber cloths in a well-ventilated area. They dry quickly due to their synthetic nature, making them ready for use in no time. Keeping them properly dried prevents mildew growth and maintains their superior cleaning performance. If you clean microfiber cloths correctly, they will last much longer and perform better.     Store Clean Microfiber Cloths Properly Once your Clean Microfiber Cloths are completely dry, proper storage is essential to maintain their cleaning power. Store them in a clean, dry place away from dust and dirt. Keeping them in an airtight container or resealable bag can prevent unwanted debris from sticking to the fibers. Avoid folding them too tightly, as this can cause creases that reduce their effectiveness. Instead, lay them flat or roll them up for easy access. Designating separate storage areas for different types of microfiber cloths, such as glass-cleaning cloths and dusting cloths, helps keep them organized and ready for use. Never store Clean Microfiber Cloths in damp or humid areas, as moisture can lead to mold growth. Keeping them in a well-ventilated space ensures they remain fresh and absorbent, ready to tackle any cleaning task. By following these six easy steps, your Clean Microfiber Cloths will stay soft, and ready to tackle any mess. Proper care ensures they last longer and maintain their superior cleaning ability. If you want expert cleaning services that use high-quality microfiber cloths and the best cleaning techniques, consider Toronto Shine Cleaning. Their professional team ensures spotless results for homes and businesses, so you don’t have to worry about the hassle of cleaning!

6 Easy Steps to Clean Microfiber Cloths Properly Read More »

Clean faux wood floor with a couch

Quick and Simple Faux Wood Floor Cleaning Routine for Busy Homes

Keeping your faux wood floors clean doesn’t have to be a challenge, even in a busy home. With the right faux wood floor cleaning routine, you can maintain a spotless, streak-free look with minimal effort. Since faux wood flooring is designed to be low-maintenance, all it takes is a few simple steps to keep it looking fresh and polished. Whether you have faux wood laminate flooring, vinyl plank floors, or engineered wood, this quick and effective routine will help you clean your floors properly while preventing damage. Follow these steps for the best faux wood floor cleaning results. 1. Daily Dusting to Prevent Build-Up One of the easiest ways to maintain faux wood floors is by removing dust and dirt daily. Even though faux wood flooring is durable, dirt and small particles can scratch the surface over time, making it look dull. A simple daily faux wood floor cleaning routine prevents buildup and keeps your floors looking like new. Use a microfiber mop or a vacuum with a hard floor setting to remove dust efficiently. A microfiber mop traps dirt without causing scratches, while a vacuum can get into corners and edges where dirt tends to collect. If using a vacuum, make sure it doesn’t have a beater bar, as this can damage faux wood floors. For households with pets or children, consider dusting twice a day in high-traffic areas. This quick step will save you from deeper cleaning later and help your faux wood flooring maintain its shine. 2. Weekly Mopping for a Deeper Clean While dusting removes surface dirt, your faux wood floors still need a proper faux wood floor cleaning session at least once a week. Mopping helps remove grime, spills, and footprints that can make your floors look dull over time. The best method is to use a damp microfiber mop and a pH-neutral cleaner designed for faux wood flooring. Avoid excess water, as too much moisture can seep into the material and cause damage. Spray a small amount of faux wood floor cleaner onto the surface and mop in sections for a streak-free finish. If you want to add extra shine to your faux wood flooring, buff it with a dry microfiber cloth after mopping. This prevents water streaks and keeps the floors looking polished. Always avoid steam mops and harsh chemicals, as they can wear down the protective coating of faux wood floors. 3. Spot Clean Spills Immediately Spills are unavoidable, but how you handle them makes all the difference. Since faux wood flooring is water-resistant but not waterproof, leaving spills unattended can lead to stains or warping. Proper faux wood floor cleaning means acting fast when messes happen. For small spills, use a soft cloth or paper towel to soak up the liquid immediately. Follow up with a slightly damp microfiber cloth to clean any residue. For sticky spills, a mild faux wood floor cleaner can help break down the mess without harming the surface. If you notice scuff marks or tough stains, a melamine sponge (like a Magic Eraser) can be gently used to remove them. Just be careful not to scrub too hard, as this can wear down the finish of your faux wood floors. Keeping a quick-clean kit handy will make spot cleaning easier and prevent stains from setting in. 4. Protect Floors from Scratches A good faux wood floor cleaning routine isn’t just about cleaning—it’s also about prevention. Scratches and scuff marks can make even the cleanest floors look worn out. Taking a few extra steps to protect your faux wood flooring will help maintain its beauty for years to come. One of the easiest ways to prevent scratches is by using felt pads under furniture legs, especially chairs and tables that get moved frequently. If you have rolling office chairs, consider placing a protective floor mat underneath to reduce wear and tear. Another great tip is to use area rugs or runners in high-traffic areas. This not only adds style to your home but also protects faux wood floors from excessive foot traffic. Lastly, encourage a no-shoes policy to keep dirt and debris from being tracked inside, reducing the risk of scratches and scuff marks. 5. Monthly Deep Clean for Extra Shine While daily dusting and weekly mopping are enough for most homes, a monthly deep faux wood floor cleaning session will help remove stubborn grime and restore the shine. This is especially important in busy households with pets, kids, or frequent guests. For a deep clean, use a high-quality faux wood floor cleaner and a soft mop to thoroughly clean every part of the floor, including corners and baseboards. If your faux wood flooring looks dull, you can use a faux wood polish to bring back its natural shine—just make sure it’s safe for your specific flooring type. Avoid wax-based products, as these can create a residue buildup. Also, stay away from excessive water or steam mops, as they can damage the protective coating of faux wood floors. By using the right products and techniques, you can maintain the beauty of your floors without causing long-term damage. Final Thoughts Keeping your faux wood floors clean doesn’t have to be difficult, even in a busy home. By following a simple faux wood floor cleaning routine—daily dusting, weekly mopping, and monthly deep cleaning—you can maintain a polished, streak-free floor with minimal effort. If you’re short on time or need professional help, Toronto Shine Cleaning is here to make your life easier. Our expert cleaners specialize in faux wood floor cleaning and deep home cleaning, ensuring your floors stay spotless without the hassle. Contact us today and let our team handle the cleaning while you enjoy a fresh, sparkling home!

Quick and Simple Faux Wood Floor Cleaning Routine for Busy Homes Read More »