Home Disinfecting

How to Clean Apartment Before Moving Out

How to Clean Apartment Before Moving Out: 5 Pro Tips for Renters

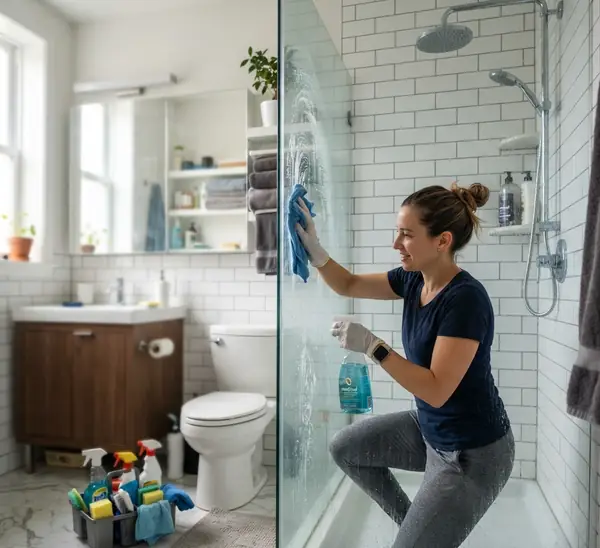
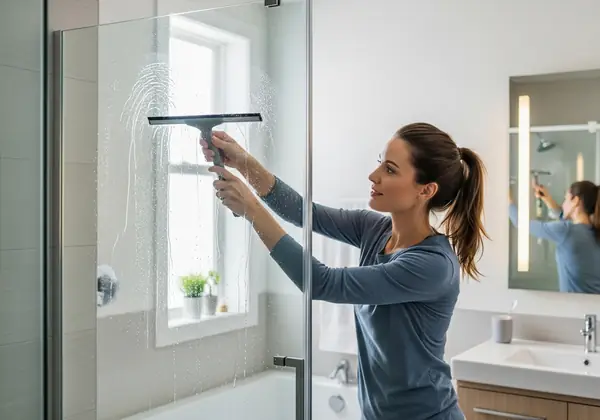
Moving? Discover exactly how to clean apartment before moving out with our ultimate step-by-step Canadian guide. Secure your deposit and leave your rental spotless! How to Clean Apartment Before Moving Out in Canada Moving to a new home is an exciting milestone, but the process of getting there is undeniably one of life’s most stressful events. Between packing up your life into cardboard boxes, organizing moving trucks, and setting up utilities at your new Canadian residence, your to-do list is likely overflowing. However, there is one crucial task that stands between you and a stress-free departure: the final deep clean. If you are wondering how to clean apartment before moving out, you are not alone. Whether you are a tenant trying to ensure the full return of your security or damage deposit, or a condo owner preparing the space for a new buyer, leaving your property in pristine condition is a non-negotiable obligation. Property managers and landlords across Canada—from bustling downtown Toronto to the scenic coasts of Vancouver—have high standards for unit turnovers. A simple “broom-swept” finish is rarely enough. In this comprehensive guide, we will break down exactly how to tackle this massive chore room by room, ensuring you don’t miss a single speck of dust. Move-Out Clean is Crucial In the Canadian rental market, the condition in which you leave your apartment directly impacts your finances. While landlords expect normal “wear and tear” (like minor scuffs on the floor or slightly faded paint), they do not excuse accumulated dirt, grease, or grime. Failing to properly clean your unit can result in steep cleaning fees deducted directly from your deposit, or in some provinces, a bill sent to you after you move out. Furthermore, if you are moving out of a commercial space or a corporate apartment, commercial lease agreements often contain strict “make-good” clauses that require the property to be returned to its exact original state. Learning how to clean apartment before moving out not only protects your wallet but also provides you with the peace of mind to focus entirely on your new home. Essential Cleaning Supplies Before you dive into the deep clean, you need to assemble your arsenal. Having the right tools on hand prevents you from losing momentum. Gather these items into a portable cleaning caddy: 1. Microfiber Cloths: Essential for trapping dust and achieving streak-free shines without scratching surfaces. 2.Heavy-Duty Degreaser: A must-have for the kitchen, particularly the stove and range hood. 3.Glass Cleaner: For windows, mirrors, and glass shower doors. 4.Bathroom Cleaner/Descaler: To tackle hard water stains and soap scum. 5.Baking Soda and White Vinegar: The ultimate eco-friendly, DIY cleaning duo for odors and tough stains. 6.Vacuum with Attachments: Crucial for carpets, corners, and window tracks. 7.Mop and Bucket: A microfiber flat mop or spin mop works best. 8.Non-Abrasive Sponges and a Stiff Grout Brush: For scrubbing without damaging finishes. 9. Garbage Bags: You will generate a lot of trash during this final phase. How to Clean Apartment Before Moving Out The golden rule of moving out is to wait until the apartment is completely empty before you begin your deep clean. Cleaning around boxes and furniture is inefficient and guarantees you will miss hidden spots. Once the movers have loaded the truck, follow this room-by-room breakdown. 1. The Kitchen The kitchen is the hardest-working room in any apartment, and it requires the most intense labor during a move-out clean. Landlords pay hyper-attention to appliances, so this is where you should focus your energy. The Refrigerator and Freezer:Start by unplugging the fridge and leaving the freezer door open to defrost if there is ice buildup. Remove every single shelf, crisper drawer, and door bin. Wash these in the sink with warm, soapy water. Spray the interior shell of the fridge with a mixture of water and white vinegar, wiping away any sticky spills, food residue, and neutralizing odors. Dry everything completely before reassembling. Pro Tip: Carefully pull the fridge away from the wall to sweep and mop the dusty, crumb-filled floor beneath it. The Oven and Stovetop:This is often the most dreaded task. If your oven has a self-cleaning feature, run it the day before you plan to do the rest of your cleaning, as it takes hours and creates strong odors. Alternatively, make a thick paste of baking soda and water, coat the inside of the oven (avoiding the heating elements), and let it sit overnight. The next day, spray it with vinegar and wipe away the dissolved, carbonized grease. For the stovetop, remove the burner grates and soak them in hot, soapy water. Use a strong degreaser on the cooktop surface to remove grease rings. Cabinets and Drawers:Open every cupboard and drawer. Use your vacuum’s crevice tool to suck up stray crumbs. Wipe down the interior shelves with a damp microfiber cloth. Finally, use a degreaser to wipe down the exterior cabinet faces, paying special attention to the sticky areas around the handles and directly above the stove. The Sink and Dishwasher:Scrub the kitchen sink with an abrasive-free cleanser like Bar Keepers Friend to polish stainless steel and remove water stains. Clean out the sink strainer. If the apartment has a dishwasher, check the filter at the bottom, remove any trapped food debris, and wipe down the interior edges of the door. 2. The Bathroom Bathrooms demand a rigorous, highly hygienic approach. The goal here is to remove all traces of soap scum, mold, and mineral deposits. The Shower and Bathtub:Spray a targeted bathroom descaler or a heavy vinegar solution onto the shower walls, tub basin, and glass doors. Let it dwell. Allowing the product to sit for 10-15 minutes breaks down the alkaline mineral deposits from hard Canadian water, saving you from exhausting manual scrubbing. Use a stiff-bristled brush to scrub the grout lines. Rinse thoroughly and dry the glass doors with a squeegee to prevent new water spots. The Toilet:Apply a heavy-duty toilet bowl cleaner and let it sit while you clean the rest of the bathroom. Scrub the inside of the bowl with a toilet brush. Then, use an antibacterial spray to wipe down

How to Clean Apartment Before Moving Out: 5 Pro Tips for Renters Read More »

Move Out Cleaning Services Cost: 5 Factors That Determine Your Move Out Cleaning Services Cost

Wondering about the move out cleaning services cost in Canada? Discover the factors that influence pricing, what a deep clean includes, and why it secures your deposit. Move Out Cleaning Services Cost in Canada Moving is universally recognized as one of life’s most overwhelming transitions. Amidst the chaos of packing boxes, coordinating logistics, and managing the emotional toll of leaving a familiar space, cleaning the empty property often becomes an exhausting afterthought. Whether you are a tenant striving to secure a full security deposit return, a homeowner preparing a property for the highly competitive Canadian real estate market, or a business relocating to a new commercial facility, the state in which you leave the premises matters immensely. When staring down an empty, dusty house at the end of moving day, the immediate question that arises concerns the move out cleaning services cost and understanding what that financial investment actually covers. Decoding the move out cleaning services cost requires looking beyond a simple flat rate. In Canada, professional cleaning companies typically structure their pricing based on a combination of square footage, the current condition of the property, and the specific regional market rates. A sprawling suburban house in the Greater Toronto Area will naturally command a different price point than a compact one-bedroom condominium in downtown Vancouver. Some agencies charge an hourly rate per cleaner, while others provide a comprehensive flat fee based on a detailed intake assessment. Understanding these variables allows homeowners and tenants to budget accurately and avoid unexpected surprises when the final invoice arrives. The Variables  The primary baseline for calculating the move out cleaning services cost is the physical size of the property. Square footage directly translates to the amount of time and labor required to wash floors, wipe down walls, and sanitize bathrooms. However, square footage alone does not tell the whole story. The overall condition of the home plays an equally significant role. A property that has been meticulously maintained with regular bi-weekly cleaning will require far less intensive labor than a home where deep cleaning has been neglected for several years. Heavy accumulations of pet hair, significant soap scum buildup in the bathrooms, and neglected kitchen appliances demand specialized treatments and extended scrubbing time, which directly increases the overall labor hours and the subsequent cost. Another variable is the distinction between a standard clean and a true end-of-tenancy clean. A standard cleaning service usually involves surface-level dusting, vacuuming, and wiping down visible countertops. A move out clean is an entirely different, far more rigorous undertaking. It is a microscopic reset of the home. Professional teams are expected to clean the areas that rarely see the light of day when furniture is present. This includes scrubbing baseboards, washing the inside of window tracks, wiping down doors and doorframes, and removing the hidden dust that settles behind major appliances.  Kitchen and Bathroom The kitchen and the bathrooms are the two areas that demand the highest concentration of effort and drastically influence the move out cleaning services cost. In the kitchen, professional cleaners must address the interiors of all major appliances. The refrigerator must be completely emptied, with every shelf and drawer removed, washed, and sanitized to eliminate odors and sticky spills. The oven presents an even greater challenge, often requiring heavy-duty degreasers and significant physical exertion to remove layers of baked-on carbon and grease. Furthermore, every single kitchen cabinet and drawer must be vacuumed out and wiped down, inside and out, removing the subtle layer of cooking grease that coats surfaces over time. Bathrooms require a similar level of exhaustive detailing. Professional cleaners must eradicate all traces of the previous occupants, which means tackling hard water stains on glass shower doors, removing mineral buildup around faucets, and scrubbing grout lines until they return to their original color. The toilet must be cleaned meticulously, including the base and behind the tank, while the exhaust fans are dusted to ensure proper ventilation for the next resident. The sheer intensity of the labor required in these wet rooms is a major factor in why move out cleaning is priced higher than standard maintenance cleaning. Commercial Move Out Cleaning Considerations The commercial sector faces its own unique set of challenges when relocating. When a business moves to a new office, the lease agreement almost always includes a strict “make good” clause. This legal stipulation requires the commercial tenant to return the space to its original, pristine condition before handing over the keys. The move out cleaning services cost for a commercial space is evaluated differently than a residential home, focusing heavily on vast expanses of carpeting, high-traffic washrooms, and extensive interior glass partitions. Office environments accumulate a unique type of wear and tear. Desks leave scuff marks on the walls, breakroom refrigerators harbor forgotten spills, and rolling chairs grind dirt deep into the carpet fibers. To meet the rigorous demands of commercial landlords, departing businesses must invest in a thorough sanitization process. By utilizing dedicated office cleaning techniques, professionals can remove the scuffs, extract the carpets, and ensure the space is perfectly neutralized for the incoming tenant. Failing to execute this properly can result in the landlord withholding massive commercial security deposits or pursuing legal action for breach of lease, making the upfront cleaning cost a vital investment in risk management. Eco-Friendly and Hidden Costs In recent years, the Canadian cleaning industry has seen a massive surge in the demand for sustainable practices. Many outgoing tenants and ethical homeowners now specifically request the use of eco-friendly cleaning products during their move out process. These biodegradable, plant-based solvents are highly effective at breaking down grease and sanitizing surfaces without leaving behind toxic volatile organic compounds or harsh chemical fumes. While opting for a green cleaning service might slightly adjust the move out cleaning services cost due to the premium nature of organic ingredients, the peace of mind knowing that the local waterways and the indoor air quality are protected is an invaluable return on that investment. It is also important to account for

Move Out Cleaning Services Cost: 5 Factors That Determine Your Move Out Cleaning Services Cost Read More »

The Move Out Cleaning Checklist That Guarantees a Happy Landlord

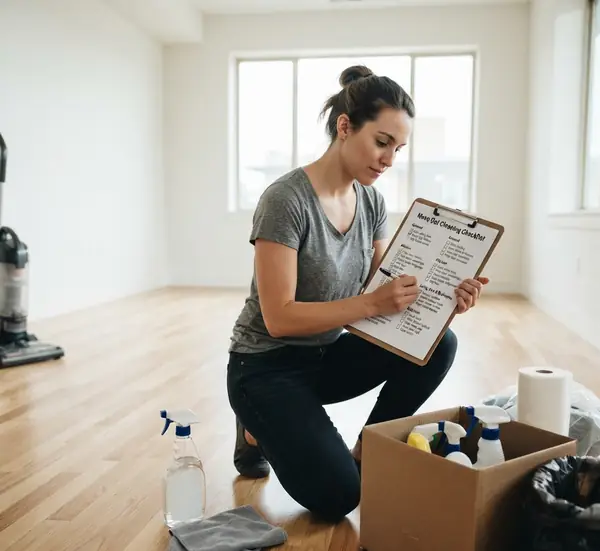
Secure your deposit and leave your property spotless. Discover our ultimate move out cleaning checklist for residential and commercial spaces across Canada. Move Out Cleaning Checklist Moving to a new location is universally recognized as one of life’s most demanding transitions. Whether you are transitioning from a cozy apartment in downtown Toronto, upgrading to a larger family home in the suburbs, or relocating a bustling commercial office, the logistical hurdles are immense. Amidst the chaos of packing boxes, coordinating moving trucks, and managing utility transfers, there is one critical task that consistently looms over the entire process: the final deep clean. Leaving a property in pristine condition is not merely a courtesy; it is often a strict legal and financial obligation. For residential tenants, a thorough clean is the primary key to recovering a full security deposit. For commercial leaseholders, it is a contractual necessity to avoid steep financial penalties under “make good” clauses. To navigate this high-stakes requirement without succumbing to exhaustion, you need a strategic, organized plan of attack. Utilizing a comprehensive move out cleaning checklist is the only way to ensure every hidden corner, greasy appliance, and dusty baseboard is addressed, leaving the property in flawless condition for its next occupants. Navigating the Canadian real estate market requires a clear understanding of property standards. Landlords and property managers across the country maintain high expectations for cleanliness during a tenant turnover. The standard of “broom swept” is rarely sufficient in today’s market. Property owners expect the space to be returned in the exact condition it was received, accounting for normal wear and tear but absolutely zero accumulated grime. When you rely on a detailed move out cleaning checklist, you remove the guesswork from the equation. You transition from frantically scrubbing random surfaces at the eleventh hour to executing a methodical, top-to-bottom restoration of the space. This level of organization not only protects your financial interests but also provides profound peace of mind during an otherwise stressful transition. Residential Cleaning Requirements The residential move out cleaning checklist is an intensive, room-by-room guide designed to tackle the deep-seated dirt that accumulates over years of habitation. Because a home is a place of cooking, bathing, and daily living, the cleaning requirements are highly specific to each zone. To execute this properly, you must wait until every single piece of furniture and every last cardboard box has been removed from the premises. Attempting to deep clean around moving chaos is inefficient and guarantees that spots will be missed. Once the space is entirely vacant, the true restoration can begin. 1.Kitchen Zone The kitchen is undoubtedly the most scrutinized room during a move-out inspection. It is the hardest-working space in the home, and its surfaces bear the brunt of daily meals, grease splatters, and food spills. Your move out cleaning checklist must begin with the major appliances, as these require the most time and chemical dwell time. Pull the refrigerator away from the wall to sweep and mop the hidden accumulation of dust and debris beneath it. Inside the refrigerator, remove every shelf and drawer, washing them in warm, soapy water. Wipe down the interior shell with a food-safe cleaner to remove sticky rings and neutralize odors, then leave the appliance unplugged with the doors propped open to prevent mold. Next, address the oven and stovetop. Apply a heavy-duty oven cleaner to the interior cavity, carefully avoiding the heating elements, and allow it to sit while you tackle other tasks. The stovetop requires meticulous degreasing. Remove the burner grates and soak them in hot water, then scrub the cooktop surface to remove all carbonized food and grease rings. Do not forget to clean or replace the range hood filter, which is often saturated with sticky, aerosolized cooking oils. The cabinetry requires equal attention. Open every single cupboard and drawer to vacuum out the inevitable collection of crumbs and dust. Wipe down both the interior shelves and the exterior cabinet faces, paying special attention to the greasy buildup that frequently occurs around handles and underneath the upper cabinets. Finally, scrub the kitchen sink, polishing the stainless steel or porcelain, and thoroughly descale the faucet to remove any chalky hard water deposits. 2.Bathroom Space Bathrooms demand a rigorous, highly hygienic approach. A property manager will look closely at this space for any signs of mold, mildew, or lingering soap scum. Start your move out cleaning checklist by applying a targeted bathroom cleaner to the shower walls, bathtub, and glass doors. Allow the product ample dwell time to break down the alkaline mineral deposits from hard water and the waxy residue of soap scum. Scrub the grout lines vigorously with a stiff-bristled brush to lift any discoloration. The toilet must be sanitized entirely, inside and out. This includes scrubbing the bowl, wiping down the tank, the seat, the lid, and the often-neglected porcelain base where dust and grime settle near the floor. Clean the bathroom vanity by wiping out the interior drawers, scrubbing the sink basin, and polishing the mirror with a streak-free glass cleaner. Ensure the bathroom exhaust fan cover is vacuumed and wiped clean of dust, as a clogged fan is a common oversight that inspectors frequently check. Finally, mop the bathroom floor, ensuring you reach deeply behind the toilet and into the corners. 3.Living Rooms, Bedrooms, and Common Areas While the kitchen and bathrooms harbor the most stubborn grime, the living areas, bedrooms, and hallways make up the majority of the square footage in a home. The focus here is on dust removal and floor restoration. Your move out cleaning checklist for these areas should dictate a strict top-to-bottom methodology. Begin by looking up. Dust all ceiling fan blades, wipe down light fixtures to remove trapped insects and dust, and clean the air vents and return registers. Next, focus on the walls and windows. Remove any nails, screws, or wall anchors you installed during your tenancy, and use a small amount of spackle to fill the holes, smoothing them over carefully. Wipe

The Move Out Cleaning Checklist That Guarantees a Happy Landlord Read More »

Pet-Safe Floor Cleaners

Pet-Safe Floor Cleaners: 5 Best DIY Recipes and Tips

The Ultimate Guide to Pet-Safe Floor Cleaners in Canada Finding reliable pet-safe floor cleaners is essential if you share your home with a furry friend. You already know the daily struggle: between muddy paw prints in the spring, shedding fur in the summer, and the dreaded white stains from winter street salt, keeping your floors clean in Canada is a year-round job. But in our rush to get our hardwood and tiles sparkling again, we often overlook a critical detail: the products we use. Finding reliable pet-safe floor cleaners isn’t just about eco-friendly living; it is a vital step in protecting the health and well-being of your cats and dogs. Traditional cleaning products are packed with harsh chemicals that can irritate your pet’s skin, eyes, and respiratory system. Because our pets live closer to the ground than we do, they bear the brunt of these toxic residues. In this comprehensive guide, we will explore why you need to ditch the harsh chemicals, what ingredients to look for, how to make your own DIY pet-safe floor cleaners at home, and how to maintain a pristine, pet-friendly home or commercial space—even during the messy Canadian winters. Switch to Pet-Safe Floor Cleaners  When you mop your floors with conventional commercial cleaners, you might think you are doing your home a favor by eliminating bacteria. However, you are often leaving behind an invisible layer of chemical residue. For humans walking around in socks or slippers, this isn’t a huge issue. For pets, it’s a completely different story. “Paw-to-Mouth” Unlike humans, dogs and cats don’t wear shoes indoors. They walk directly on the floors, lay their bare bellies on the tiles to cool down, and most importantly, they groom themselves. When a cat or dog licks their paws after walking across a freshly mopped floor, they are directly ingesting whatever chemical residue was left behind. Over time, the accumulation of these toxins can lead to severe health issues, including gastrointestinal upset, skin rashes, lethargy, and in severe cases, liver or kidney damage. Traditional Floor Cleaners If you look at the back of a standard floor cleaner bottle, you will likely see ingredients that are highly toxic to animals. Here are a few you must avoid: Ammonia: Found in many heavy-duty cleaners, ammonia is highly irritating to a pet’s respiratory tract. It can cause coughing, sneezing, and severe eye irritation. Bleach (Chlorine): While great for disinfecting, bleach leaves a toxic residue. If ingested, it can cause vomiting and severe throat burns. Phthalates and Synthetic Fragrances: That “pine” or “spring breeze” scent is usually chemically engineered. These volatile organic compounds (VOCs) linger in the air near the floor, right where your pet breathes. Phenols: Often found in cloudy disinfectants, phenols are particularly toxic to cats, as their livers lack the enzyme needed to break these chemicals down. By switching to pet-safe floor cleaners, you eliminate these risks entirely, creating a safe sanctuary for your pets to play, sleep, and roll around. DIY Pet-Safe Floor Cleaners You don’t need to spend a fortune on specialty boutique products to keep your home clean and safe. Some of the most effective cleaning agents are probably sitting in your kitchen pantry right now. When mixed correctly, these natural ingredients can tackle grease, dirt, and mud, all while being completely safe for your pets. Here are the superstars of natural, pet-safe cleaning: White Vinegar: The ultimate natural cleaner. Its acidity cuts through grease, lifts dirt, and naturally deodorizes. The strong smell dissipates entirely once it dries. Baking Soda: A mild abrasive that is perfect for scrubbing tough, dried-on mud spots without scratching your expensive hardwood or tile floors. Castile Soap: A vegetable-based soap that is non-toxic and incredibly effective at lifting dirt. It’s gentle on surfaces but tough on grime. Essential Oils (Use with Extreme Caution): While humans love lavender or lemon, many essential oils (like tea tree, eucalyptus, and citrus) are highly toxic to pets, especially cats. If you have cats, it is best to skip essential oils entirely and rely on the natural, clean scent of a well-washed floor. Recipes by Floor Type Not all floors are created equal. The heavy-duty cleaner you use on your bathroom tiles could severely damage the finish on your living room hardwood floors. Here is exactly how to make and use DIY pet-safe floor cleaners based on the specific surfaces in your home. For Hardwood Floors Hardwood floors are incredibly common in Canadian homes, but they are notorious for showing paw prints and water spots. The rule of thumb for hardwood is: less water is always better. The Recipe: 1 Gallon of very warm water 1/2 Cup of white vinegar 2-3 Drops of liquid castile soap (unscented) How to use it: Mix the ingredients in a large bucket. Dip your mop into the solution, but wring it out until it is only slightly damp. You never want to leave standing water on hardwood, as it can cause the wood to warp. Mop in the direction of the wood grain to avoid streaks. The vinegar cuts through the pet dander, while the castile soap gently lifts the dirt. For Tile, Linoleum, and Vinyl Mudrooms and entryways take a beating, especially during the Canadian spring thaw. For these durable surfaces, you can use a slightly stronger solution to cut through the mess. The Recipe: 1 Gallon of hot water 1 Cup of white vinegar 1 Tablespoon of liquid castile soap How to use it: For stubborn dried mud or sticky messes, you can apply this solution more liberally. If you have deep grout lines in your tile that are looking dingy, sprinkle a little plain baking soda directly onto the grout, spray it lightly with your vinegar solution (it will fizz!), and scrub gently with an old toothbrush before mopping the whole area. Store-Bought Pet-Safe Floor Cleaners We get it—not everyone has the time or desire to mix their own cleaning potions. If you prefer to buy your cleaning supplies off the shelf at your local Canadian grocery or hardware store, you need to know how to

Pet-Safe Floor Cleaners: 5 Best DIY Recipes and Tips Read More »

Eco-Friendly Cleaning Products for a Sustainable Spring

Canada’s Best Eco-Friendly Cleaning Products for a Sustainable Spring – 5 Amazing Tips

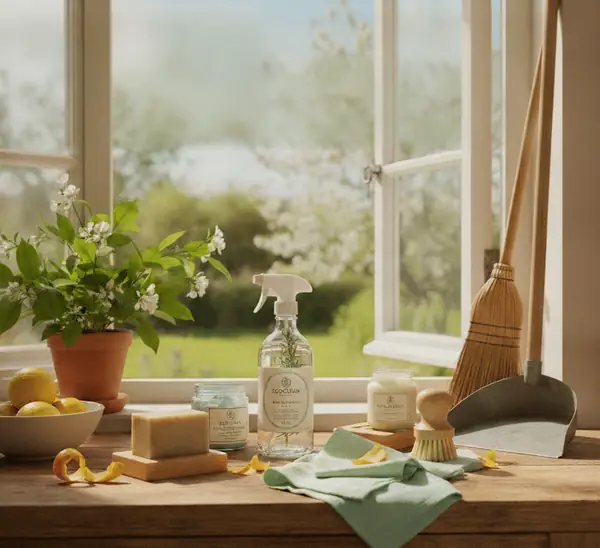
As we transition into spring, many Canadians are looking to refresh their homes using Eco-Friendly Cleaning Products in Canada that are both effective and gentle on the planet.The melting snow and the arrival of longer, warmer days naturally inspire a deep desire to open the windows, clear out the stagnant air of the long winter, and scrub away the accumulated grime. Historically, this seasonal reset meant arming ourselves with an array of harsh, chemical-laden liquids housed in heavy, single-use plastic bottles. We equated the sharp, synthetic smell of bleach and artificial fragrances with the concept of cleanliness. Today, the approach to maintaining a home has fundamentally shifted. Achieving a spotless, hygienic living space no longer requires compromising our environmental values, contributing to landfills, or degrading our indoor air quality. Natural Cleaning Products The demand for sustainable cleaning solutions has transformed from a niche market into a standard expectation for household maintenance across the country. This change is driven by a growing, collective awareness of the entire lifecycle of traditional cleaning agents. When we use conventional sprays, floor cleaners, and detergents, the active chemicals do not simply vanish after we wipe them away with a paper towel. They evaporate into the air we breathe, contributing significantly to indoor air pollution. During the Canadian winter, when our homes are sealed tight against the cold to maximize heating efficiency, these volatile organic compounds remain trapped inside, circulating through our ventilation systems and irritating our lungs, eyes, and skin. Furthermore, the environmental cost extends far beyond our front doors. The water we use to mop our floors, scrub our sinks, and wash our clothes eventually washes down our drains. Traditional cleaning chemicals, laden with phosphates, artificial dyes, and petroleum-based surfactants, make their way through municipal water treatment facilities and eventually into our local waterways, rivers, and lakes. These substances can disrupt fragile aquatic ecosystems, contributing to harmful algal blooms and threatening wildlife. The shift towards natural cleaning products is a direct, functional response to this destructive cycle. It prioritizes ingredients that are biodegradable, meaning they break down harmlessly in the environment without leaving a toxic legacy behind. Cleaning Refills The most significant and functional innovation in the sustainable cleaning sector is the decisive move away from shipping water. Traditional surface cleaners, glass sprays, and bathroom disinfectants consist almost entirely of water—often up to ninety-five percent. This means that consumers are paying premium prices to transport heavy, bulky plastic bottles of water across the country on freight trucks, burning massive amounts of fossil fuels in the process. Once the liquid is used, the thick plastic bottle is tossed into the recycling bin, where its fate is uncertain at best, as a staggering amount of plastic waste still ends up in landfills. Switching to concentrated cleaning refills disrupts this highly inefficient and wasteful model entirely. These modern products come in the form of small, dehydrated tablets, concentrated gels, or dissolvable sheets. Because the water has been removed, they are incredibly lightweight and compact, packaged in compostable paper or minimal, recyclable cardboard. The mechanics of using them are brilliantly simple. You keep a single, high-quality, reusable spray bottle—often made of glass or durable aluminum—and fill it with warm tap water from your own sink. You drop the concentrated tablet into the water, wait a few minutes for it to dissolve completely, and you are left with a full bottle of fresh, potent cleaning solution. This simple adjustment eliminates the need to continuously manufacture, ship, and discard single-use plastic bottles. It drastically reduces the carbon emissions associated with the supply chain and reclaims valuable storage space under your sink. More importantly, it is a highly functional system that delivers the exact same cleaning power, utilizing the exact same principles of chemistry to break down dirt and grease, but without the unnecessary environmental and logistical baggage. Truly Sustainable Navigating the cleaning aisle or shopping online requires a careful and discerning eye, as the market is heavily saturated with products that use clever marketing to appear greener than they actually are. A bottle colored with earth tones and decorated with a picture of a leaf does not guarantee a sustainable or safe product. This practice, known as greenwashing, preys on consumer intentions without delivering actual environmental benefits. Truly eco-friendly cleaning products in Canada rely on absolute transparency. Authentic brands clearly list all ingredients on their packaging or websites, avoiding vague terms like fragrance that may conceal harmful synthetic compounds. Genuine natural cleaners use plant-based surfactants instead of harsh detergents and avoid artificial dyes, chlorine bleach, ammonia, and optical brighteners. By closely reading labels for recognizable, biodegradable ingredients and considering independent third-party certifications, consumers can choose products that are safe for their families, pets, and the environment. Daily Routine There is a lingering, outdated misconception that green cleaning solutions are somehow weaker or less effective than their conventional, chemical-heavy counterparts. The reality of modern green chemistry has proven this entirely false. The natural world provides incredibly powerful compounds for breaking down organic matter, cutting through heavy grease, and dissolving stubborn mineral deposits. Consider the power of simple, naturally derived acids. Citric acid, naturally found in abundance in citrus fruits, is a master at tackling the specific challenges of a bathroom. It effortlessly cuts through the alkaline nature of soap scum and dissolves the hard water limescale that builds up on shower doors and faucets. Natural enzymes, often utilized in sustainable laundry detergents and stain removers, act as biological catalysts. They literally digest the proteins, starches, and fats found in food spills, sweat, and grass stains, breaking them down into smaller molecules that are easily washed away by water. Essential oils are also frequently utilized in sustainable cleaning, but not just for their pleasant aromas. Oils extracted from tea tree, eucalyptus, lavender, and citrus peels provide natural antibacterial and antifungal properties. They leave behind a clean, fresh scent that invigorates the home without overpowering the senses or triggering respiratory sensitivities the way synthetic perfumes do. These natural compounds work in harmony

Canada’s Best Eco-Friendly Cleaning Products for a Sustainable Spring – 5 Amazing Tips Read More »

Cottage for Spring: A Step-by-Step Guide to Cleaning and Opening Your Cottage for Summer

For millions of Canadians, the late-May transition to warmer weather signals the beginning of a cherished seasonal ritual: opening the cottage. Whether nestled in the woods of Muskoka, along the shores of Lake Huron, or deep in the Kawarthas, the family cottage is a place of retreat, a sanctuary where the frantic pace of city life is replaced by the gentle rhythms of nature. However, before the first fire can be lit or the first dock can be launched, there is a formidable hurdle to clear. A cottage that has been shuttered and unheated for six months of harsh Canadian winter does not welcome its owners with open arms. Instead, it presents a unique set of challenges, from musty, stagnant air and layers of fine dust to the inevitable evidence of wintering woodland pests. Opening the cottage is a multi-step operation, a rigorous deep clean that requires a systematic approach to ensure the space is safe, hygienic, and comfortable for the season ahead. Checking The process must begin before you even step inside, with a thorough inspection of the property’s exterior. The heavy snow, ice, and wind of a Canadian winter can cause significant structural damage that must be identified and addressed immediately. Walk around the perimeter of the cottage, checking the roof for missing shingles or damage from fallen branches. Inspect the siding, gutters, and downspouts to ensure they are secure and free of debris. Look closely at the windows and doors, checking for cracked glass, damaged screens, or gaps in the caulking that could allow water or pests to enter. Check the deck and stairs for rot or loose boards that could pose a safety hazard. This initial inspection ensures that the shell of your cottage is secure and that no major repairs are needed before you begin the interior cleanup. 1.Ventilation Once you are ready to open the door, your very first action should be to open all the windows and doors to establish airflow. A cottage that has been sealed tight for half a year will have a dense, musty smell, a combination of stagnant air, trapped humidity, and the natural off-gassing of wood and textiles. Opening the windows immediately helps to flush out this stale air, bringing in the fresh spring breeze and drying out any lingering dampness. While the cottage is airing out, conduct a slow, thorough walkthrough of the interior. Look for any signs of water leaks on the ceilings and walls, check for damp spots in the corners, and inspect the floors for any buckling or warp. This is also the time to look for signs of unwanted winter residents, such as mice or red squirrels, which are common issues in seasonal cabins. 2.Pests Addressing pest contamination is one of the most critical and high-stakes tasks of opening a cottage, and it must be handled with extreme care due to the health risks associated with rodent droppings. If you discover mouse droppings or nesting materials, do not immediately grab a broom or a vacuum cleaner. Dry sweeping or vacuuming can aerosolize dangerous virus particles, such as hantavirus, which can then be inhaled. Instead, wear rubber gloves and a high-quality mask, and thoroughly saturate the affected areas with a disinfectant spray or a solution of one part bleach to ten parts water. Let the liquid sit for ten minutes to fully wet and sanitize the material, then carefully wipe up the droppings with paper towels and place them in a sealed plastic bag for disposal. Once the droppings are removed, disinfect the entire surface again to ensure the area is safe. Deep Cleaning 1.Kitchen With the safety checks complete, the deep clean of the kitchen can begin. This is a high-use area that must be thoroughly sanitized before any food preparation takes place. If you left your refrigerator unplugged with the doors propped open over the winter—which is the correct practice to prevent mold—it will have collected a layer of dust and perhaps some dead insects. Wash the entire interior with a solution of warm water and mild dish soap, paying attention to the rubber door gaskets. If you have a stovetop and oven, check the burner wells and the interior cavity for any signs of nesting materials before turning them on. Wipe down the interior of all cabinets and drawers, and wash all plates, glasses, and cutlery before using them, as mice can easily navigate closed cabinets during the quiet winter months. 2.Bathroom The bathroom and the water system present another unique set of seasonal challenges. During the winterization process in the fall, water lines are drained, and non-toxic antifreeze is poured into toilet bowls, sink drains, and shower traps to prevent the pipes from freezing and bursting. Restoring the water system requires care. Once your water pump is primed and turned on, run every faucet, showerhead, and toilet until the water runs completely clear, flushing away the colored antifreeze and any standing water or sediment from the pipes. Check all visible plumbing connections under sinks and behind the toilet for any leaks that may have occurred due to minor freezing. Once the water is running clear, thoroughly scrub and sanitize the toilet, sink basin, and shower, using a vinegar solution to dissolve any hard water mineral deposits that have settled over the winter. 3.Living areas The living areas and bedrooms require a deep, systematic dusting and textile refresh. In many cottages, furniture is covered with old sheets or drop cloths in the fall to protect it from dust and pests. Carefully fold these covers inward to trap the dust and take them outside to be shaken out and laundered. Vacuum the upholstered furniture thoroughly, removing the cushions to reach the deep crevices where dust and cobwebs accumulate. Shaking out area rugs outdoors is a highly effective way to remove embedded grit before vacuuming them. For the bedrooms, launder any blankets, comforters, and mattress protectors that have been stored in closets or chests, as they will have absorbed the musty cottage

Cottage for Spring: A Step-by-Step Guide to Cleaning and Opening Your Cottage for Summer Read More »

tourist arriving at an Airbnb apartment

What to Expect from a Professional Airbnb Cleaning Service

In the highly competitive Airbnb Cleaning Service market, the quality of a guest’s stay is determined by many variables, but none is as critical or as immediate as the cleanliness of the property. When travelers book an Airbnb, they are seeking a unique, home-like experience combined with the pristine, standardized comfort of a high-end hotel. The moment a guest crosses the threshold, their first impression is formed by what they see, feel, and smell. A single stray hair in the bathroom, a greasy fingerprint on a kitchen cabinet, or a musty odor in the bedroom can instantly ruin that impression, leading to a disappointing stay and, ultimately, a negative review. In the short-term rental business, reviews are the lifeblood of success, directly influencing search rankings, booking rates, and nightly pricing. Consequently, a rigorous and reliable cleaning routine is not merely a chore; it is a fundamental business strategy. Standard cleaning? The process of preparing a property for the next guest, commonly referred to as a turnover clean, is vastly different from a standard residential cleaning. A routine home cleaning is about maintaining a comfortable level of tidiness for the residents. A turnover clean, however, is a meticulous staging and sanitization process designed to erase any evidence of the previous occupants, creating a “blank slate” that makes each new guest feel as though they are the very first person to ever stay in the space. This intensive process must be performed within a tight, high-pressure window, typically between the standard check-out time of eleven in the morning and the check-in time of three in the afternoon. Managing this logistically demanding task requires a highly organized, step-by-step strategy. First Phase The first phase of a successful turnover begins the moment the previous guests depart, starting with a thorough inspection of the property. This is a critical step before any actual cleaning takes place. Walk through every room to check for any visible damage to the walls, furniture, or appliances, and verify that all key amenities, such as the television, Wi-Fi, and kitchen appliances, are in working order. This is also the time to look for any personal items left behind by the guests. If damage is found or items are missing, documenting the scene with photographs immediately is essential for any reimbursement claims. Once the inspection is complete, the physical cleaning process can begin, and the first task should always be to strip the beds and collect all dirty towels. Starting the laundry immediately is a key efficiency strategy, as washing, drying, and folding linens is almost always the primary bottleneck in the turnover schedule. Keeping double or even triple sets of identical sheets and towels on hand is a highly recommended practice, allowing the cleaning team to immediately remake the beds with fresh, pre-washed linens while the dirty ones are laundered, saving precious time during the tight turnover window. With the laundry underway, the systematic cleaning of the bedrooms and living areas can proceed, working from the top down to ensure that any dust or debris falls onto floors that have not yet been cleaned. Dust all elevated surfaces, including light fixtures, ceiling fan blades, picture frames, and the tops of furniture. Wipe down high-touch areas like light switches, door handles, and remote controls with a disinfectant. Vacuum the upholstered furniture thoroughly, removing the cushions to clear away any crumbs or debris that may have accumulated in the crevices. When making the beds, attention to detail is paramount. The linens must be crisp, clean, and arranged neatly, creating the inviting, unlived-in appearance that guests expect. The Kitchen Moving into the kitchen, the standard of cleanliness must be exceptionally high, as this is an area where guests are highly sensitive to grease and food residue. Clear out the refrigerator and freezer completely, discarding any leftovers or opened items left by the previous guests. Wipe down the interior shelves and door bins to remove any sticky spots. Clean the interior of the microwave, which is a common site for splatters. The stovetop and the exterior of all major appliances must be degreased and polished until they are free of smudges and fingerprints. Inspect the interior of the oven and dishwasher to ensure they are clean. Perhaps most importantly, check all the dishes, cutlery, and glassware stored in the cabinets. Even if the previous guests ran the dishwasher, it is not uncommon for some items to remain greasy or spotted. Every dish must be thoroughly inspected and re-washed if necessary, as finding a dirty fork is a major detractor for guests. Wipe down all countertops, backsplashes, and the interior of the sink basin, and finish by thoroughly cleaning and sanitizing the garbage can, which can be a primary source of kitchen odors. The Bathroom The bathroom requires the most intensive sanitization of all, as it is the area where any lapse in cleanliness is most noticeable and least forgiven. Hair removal is the absolute highest priority in this space. Even a single strand of hair left on the bathroom floor, in the sink, or on a freshly folded towel can completely destroy a guest’s perception of cleanliness. Meticulously clean and disinfect the entire toilet, paying attention to the base, the handle, and the hard-to-reach area behind the bowl. Scrub the shower, bathtub, and tile walls to remove any buildup of soap scum or hard water stains. Polish the faucets, showerhead, and drain covers until they are gleaming and free of mineral spots. Wipe down the mirror with a streak-free glass cleaner, and clean the vanity countertop and sink basin. Ensure the bathroom is stocked with a generous supply of fresh, fluffy towels, neatly folded or rolled, along with essential toiletries like hand soap, shampoo, conditioner, and body wash. Floor Once all the individual rooms have been thoroughly cleaned and sanitized, the focus shifts to the floors throughout the property. Vacuum all carpets and area rugs slowly and methodically, making overlapping passes to pull up all dust and hair. For hard surfaces like hardwood,

What to Expect from a Professional Airbnb Cleaning Service Read More »

The Best DIY Methods for Cleaning Your Bathroom Sink Drain

The bathroom sink drain is one of the hardest-working and least-appreciated fixtures in a home. It is a silent, constant workhorse, dutifully swallowing everything we send its way in the course of our daily routines: viscous globs of toothpaste, clouds of shaving cream, strands of hair from brushing, oily residue from facial cleansers, and the waxy buildup of soap scum. Over time, this constant barrage of organic and inorganic matter takes its toll. The first sign of trouble is often subtle, a slight gurgle as the water slowly spirals away, taking just a few seconds longer than it used to. Soon, you notice a persistent, unpleasant odor wafting up from the depths, a damp, sour smell of decay and stagnant water. Eventually, the drain becomes fully clogged, turning your sink into a basin of murky, standing water, bringing your morning routine to a frustrating halt. Cleaning a bathroom sink drain is not just a reactive task for when a clog occurs; it is a crucial act of preventative maintenance that preserves the health of your plumbing and the freshness of your home. Hot Water The most effective approach to drain care begins with simple, regular maintenance designed to prevent major blockups from ever forming. One of the easiest and most powerful preventative measures is a regular boiling water flush. At least once a week, boil a full kettle of water and pour it directly down the bathroom sink drain. The intense heat of the boiling water is incredibly effective at melting and dissolving the congealed grease, soap scum, and other fatty, waxy substances that are the primary culprits in building up slow-moving clogs. These sticky materials are what create the foundation of a clog, acting like flypaper for hair and other debris. The weekly boiling water flush is an excellent way to maintain a clear bathroom sink drain, washing away this sticky buildup before it has a chance to solidify and trap other matter. It is a thirty-second task that can save you from a major headache down the line. Baking Soda and White Vinegar To address the common issue of drain odors, the classic combination of baking soda and white vinegar is a safe and remarkably effective solution. This method works through a simple acid-base chemical reaction that fizzes and scrubs the inside of the drain pipe, while also neutralizing the odor-causing bacteria that thrive in the dark, damp environment. Start by pouring about half a cup of dry baking soda directly into the drain opening. Follow this with an equal amount of plain white vinegar. The mixture will immediately begin to foam and bubble vigorously. This fizzing action is not just for show; it is actively working to dislodge small particles of grime, soap scum, and hair from the pipe walls. Place a drain stopper or a small cloth over the opening to contain the reaction within the pipe, forcing the foam to work its way through the P-trap below. This is great for deodorizing the bathroom sink drain. Let this mixture work its magic for fifteen to thirty minutes. To finish, flush the drain thoroughly with another kettle of boiling water to wash away all the loosened debris and any remaining vinegar and baking soda. Unclogging When you are faced with a slow-moving bathroom sink drain that regular maintenance cannot resolve, it is time to escalate to a physical removal of the blockage. More often than not, the primary obstruction is located very close to the drain opening, tangled in the mechanism of the pop-up stopper. Before reaching for any tools, you must first address this gatekeeper. The clog is often right below the stopper in the bathroom sink drain. Look for the small metal rod that extends from the back of the drainpipe just below the sink. This is the pivot rod, and it is held in place by a retaining nut. Place a small bucket or a towel under the pipe, as a little water may drip out. Unscrew this nut, which is often just finger-tight. Once the nut is loose, you can pull the pivot rod out slightly from the linkage it connects to. This will release the stopper, allowing you to lift it straight out of the drain opening. You will likely be greeted by a disgusting but satisfying sight: a dense clump of hair, soap scum, and other gunk that was the main cause of your slow drain. Clean the stopper thoroughly with an old toothbrush and some cleaner before setting it aside. With the stopper removed, you can now access the top section of the drainpipe. A simple, inexpensive plastic tool known as a drain snake or zip-it tool is incredibly effective here. This is a long, thin, flexible strip of plastic with barbed, tooth-like edges running down its sides. Simply feed the tool down into the bathroom sink drain as far as it will go, wiggling and rotating it as you push it down. Then, slowly pull it back up. The barbs will snag onto the hair and grime, allowing you to pull up the main body of the clog. You will likely need to repeat this process several times, wiping the tool clean with a paper towel after each pass, until the tool comes up relatively clean. This physical removal is a great way to clear the bathroom sink drain without chemicals. For the most stubborn clogs or as a part of a deep annual cleaning, you may need to address the P-trap. This is the U-shaped section of pipe located directly beneath your sink. It is a critical component of the bathroom sink drain system. Its clever design serves two critical functions: it holds a small amount of water at all times to create a seal that blocks unpleasant sewer gases from entering your home, and its curved shape makes it an effective trap for larger debris (or dropped rings), preventing clogs from forming deeper in your plumbing. While cleaning the P-trap may seem intimidating, it is

The Best DIY Methods for Cleaning Your Bathroom Sink Drain Read More »

The 20 Spots You’re Forgetting on Your Spring Cleaning Checklist

The term “spring cleaning checklist” evokes a powerful and almost instinctual urge to refresh our living spaces after a long, stagnant winter. It is more than just a routine tidying; it is a full-scale, top-to-bottom reset, a chance to clear away the accumulated dust, clutter, and grime of the colder months. However, the sheer scale of this task can be overwhelming, often leading to a paralysis of inaction. Where do you even begin? The secret to transforming this monumental project into a manageable and even satisfying endeavor lies in a single, indispensable tool: the checklist. A well-structured checklist is not just a list of chores; it is a strategic roadmap, a system that breaks down an overwhelming goal into a series of clear, achievable steps, ensuring that no forgotten corner is left untouched. The most effective way to approach a spring cleaning checklist is to organize it by room, transforming the daunting task of cleaning an entire house into a series of smaller, more focused projects. This allows you to concentrate your energy on one space at a time, providing a clear sense of accomplishment as you physically check off each room and move on to the next. The Kitchen The kitchen is the most intensive room to deep clean and should be a top priority. It is where grease, food particles, and daily traffic converge. Tops of Cabinets and Refrigerator: Begin at the highest point. This out-of-sight area is a notorious trap for a sticky, greasy film of dust. Carefully wipe this surface with a powerful degreasing solution. Cabinet Fronts: Wipe down the exterior of all cabinets and drawers to remove fingerprints and splatters. Pay special attention to the areas around the handles. The Refrigerator Deep Clean: This is a major project in itself. Empty the entire fridge, discard expired food, and wash all removable shelves and drawers in warm, soapy water. Wipe down the entire interior shell. Pull the refrigerator away from the wall to vacuum the dusty condenser coils and clean the floor beneath. The Oven and Stovetop: A true deep clean involves more than just wiping the surface. For the oven, this means tackling the baked-on interior, either with the self-cleaning function or a non-toxic baking soda paste left to sit overnight. For the stovetop, remove the grates and burner caps and soak them in hot, soapy water before scrubbing. Clean every crevice of the cooktop itself. The Sink and Drain: Descale the faucet to remove mineral buildup. Thoroughly scrub and sanitize the sink basin. Crucially, clean and deodorize the garbage disposal and sink drain by flushing with boiling water and using a baking soda and vinegar solution. Small Appliances: Do not forget the microwave, coffee maker, and toaster. Clean the interior of the microwave, descale the coffee maker, and empty and wipe out the crumb tray of the toaster. Backsplash and Countertops: Clear everything off the countertops and give them a deep clean and polish, paying special attention to scrubbing the grout lines of the backsplash. Final Pass: Wipe down all baseboards, light switches, and finish with a thorough mopping of the floor. The Bathrooms Bathrooms require a deep focus on sanitation and the removal of soap scum and mineral deposits. Exhaust Fan: The cover of the bathroom fan is a magnet for dust. Remove it, wash it thoroughly, and vacuum the fan blades and housing. Shower and Tub: This is a multi-step process. First, descale the showerhead by soaking it in vinegar to restore water flow. Scrub the walls, tub, and shower doors with a cleaner designed to cut through soap scum. Meticulously scrub every grout line with a stiff brush to remove mildew and discoloration. The Toilet: A deep clean goes beyond the bowl. Clean the entire exterior, including the tank, the base, and the often-neglected area where the toilet meets the floor. The Vanity and Sink: Clear the countertop completely. Clean and polish the faucet and fixtures. Scrub the sink basin and clean out the overflow hole. Organize the medicine cabinet, discarding expired products, and wipe down all shelves. Washing Textiles: Launder the shower curtain and any bath mats. Final Pass: As with the kitchen, finish by wiping down baseboards, light switches, and mopping the floor. The Bedrooms Bedrooms are often less about grime and more about dust and allergens. The goal is to create a fresh, restful environment. The Mattress: This is a crucial spring cleaning task. Strip the bed completely and vacuum the entire mattress surface with an upholstery attachment. Spot-clean any stains and deodorize it by sprinkling it with baking soda, letting it sit, and then vacuuming it up. Laundering Bedding: While the mattress is airing out, wash all of your bedding, including the items that are often overlooked: the duvet or comforter, pillows, and the mattress protector. Closet Reorganization: This is the perfect time for a seasonal wardrobe switch. Empty the closet, wipe down the shelves, and sort through your clothes, storing heavy winter items and bringing spring and summer clothes to the forefront. Dusting from Top to Bottom: Dust all surfaces, starting with the highest points like ceiling fan blades, light fixtures, and the tops of dressers and bookcases, working your way down. Windows: Clean the interior of the windows, wash the curtains, and dust the blinds. Final Pass: Wipe down all baseboards and furniture legs, and finish with a thorough vacuuming of the entire floor, including deep under the bed. The Living and Common Areas These high-traffic areas require a focus on deep dusting and restoring order. Upholstered Furniture: A deep clean involves more than just fluffing pillows. Remove all cushions and use a vacuum’s crevice tool to get deep into the seams and under the frame to remove years of crumbs and dust. Carpets and Rugs: Move furniture to vacuum areas that are normally covered. For a true deep clean, consider a professional carpet cleaning to remove the embedded dirt and allergens of winter. Walls and Baseboards: Wipe down all baseboards. For walls, this is a good time to spot-clean any scuffs or marks. The High and Lows of Dusting: As in the bedroom, a systematic, top-to-bottom dusting

The 20 Spots You’re Forgetting on Your Spring Cleaning Checklist Read More »

Activated Charcoal for cleaning home

5 Proven Facts About Activated Charcoal for Cleaning Your Home

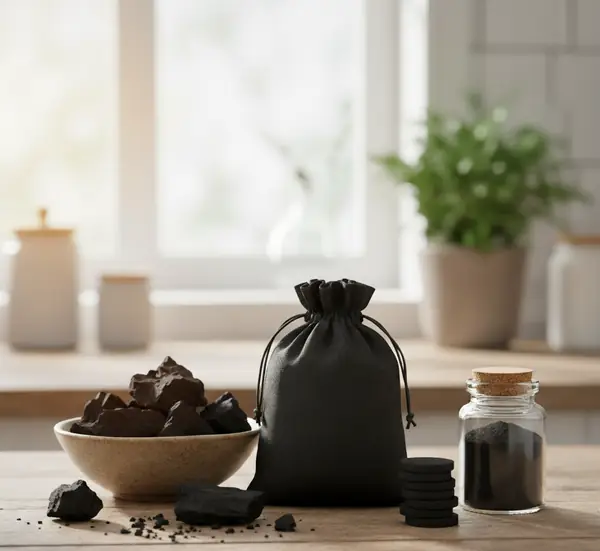
How does activated charcoal work? In the world of home care, some of the most powerful solutions work not through aggressive scrubbing or harsh chemical reactions, but through a quiet, passive, and relentless process of attraction. Among these silent workers, activated charcoal stands out as a true natural wonder. This unassuming, porous black substance is a master of purification, a molecular-level trapper that can pull odors, pollutants, and impurities directly out of the air and water. Understanding the science behind this simple material unlocks a versatile, sustainable, and incredibly effective tool for creating a cleaner, fresher, and healthier home environment. What is Activated Charcoal? The magic of activated charcoal lies in a powerful scientific principle called adsorption—not to be confused with its more common cousin, absorption. While absorption involves a substance soaking up another, like a sponge soaking up water, adsorption is a surface-level phenomenon. The process of creating activated charcoal involves heating carbon-rich materials, such as wood, coconut shells, or bamboo, to extremely high temperatures in the absence of oxygen. This process, called pyrolysis, is followed by “activation,” which involves treating the charcoal with oxygen or steam. This activation erodes the internal surfaces of the charcoal, creating a vast, labyrinthine network of microscopic pores and dramatically increasing its surface area. A single gram of activated charcoal can have a surface area equivalent to a football field. It is this immense, porous surface area that gives activated charcoal its power. The surface of the carbon is covered with millions of tiny bonding sites. Think of it as a form of molecular Velcro. When air or water containing impurities flows past it, the unwanted molecules—be they volatile organic compounds (VOCs), odor-causing bacteria, or chlorine—are drawn to this surface and become physically stuck. The charcoal literally traps and holds onto these molecules, removing them from the surrounding environment. It does not mask them or neutralize them with another chemical; it physically removes them from circulation. How to use 1.Deodorizer The most common and celebrated application for activated charcoal in the home is as a passive, long-lasting deodorizer. This is where it truly excels, providing a continuous, chemical-free solution to a host of common household smells. One of the most challenging areas to keep fresh is a damp, musty space with poor air circulation, such as a basement, a closet, or the cabinet under a sink. This musty smell is caused by the off-gassing of mold and mildew spores that thrive in humid environments. While conventional air fresheners simply mask this odor with a stronger scent, activated charcoal directly addresses the source. By placing a few breathable bags filled with activated charcoal in these areas, you create a silent, 24/7 odor trap. As air circulates, the charcoal will continuously adsorb the airborne mold spores and the volatile organic compounds they produce, effectively removing the musty smell from the air rather than just covering it up. 2.Kitchen This same principle makes activated charcoal a phenomenal tool for refrigerators and freezers. While an open box of baking soda can neutralize some acidic food odors, activated charcoal is a broader-spectrum solution, capable of trapping a wider range of odor molecules. A small bag placed in the fridge will not only absorb the pungent smells of onions, garlic, or strong cheeses but will also help to prevent flavor transfer between different foods. This means your butter will not taste faintly of last night’s fish, and your fruits will not absorb the savory smells of other items. It even goes a step further by adsorbing ethylene gas, a natural ripening agent emitted by many fruits and vegetables. By removing this gas, activated charcoal can actually help to extend the freshness of your produce. 3.Bathrooms, Mudrooms, and Pet areas Activated charcoal is also a lifesaver in high-odor zones like bathrooms, mudrooms, and pet areas. A small bag placed discreetly near a litter box can dramatically reduce ambient odors, providing a constant defense against smells without releasing any fragrances that might irritate a sensitive pet. In a shoe closet, a sports equipment locker, or directly inside a pair of gym shoes, it will work relentlessly to adsorb the moisture and trap the bacteria that cause footwear to become unpleasant. By managing the odor at its source, it keeps these confined spaces from becoming overpowering. 4.Purifying Water Beyond deodorizing the air, activated charcoal is one of the most effective and widely used substances for purifying water. This is the same principle of adsorption at work. The charcoal filters found in popular water pitchers and faucet-mounted systems are filled with granulated activated carbon. As tap water flows through the filter, the charcoal’s vast surface area traps a host of common impurities. It is particularly effective at removing chlorine, which is added to municipal water as a disinfectant but can give it an unpleasant taste and smell. It also adsorbs many organic compounds, such as pesticides and industrial solvents, further improving the quality and taste of your drinking water. However, it is just as important to understand what activated charcoal doesn’t do in water. It does not remove dissolved minerals, so it will not soften your water. It is also not effective at removing most viruses, bacteria, or inorganic contaminants like fluoride and nitrates. For this reason, it should be seen as a tool for improving the taste and quality of municipally treated water, not for purifying water from an unknown or unsafe source. Stain Remover While its passive deodorizing and filtering abilities are its primary strengths, activated charcoal can also be used in a more hands-on cleaning capacity, particularly as a gentle, stain-lifting poultice. A poultice is a thick paste designed to draw out stains from porous surfaces. This method can be effective on stubborn organic stains—like wine or oil—on unsealed surfaces like concrete or very dark stone. To create a poultice, you can mix activated charcoal powder with water to form a thick paste, similar in consistency to peanut butter. Apply this paste in a thick layer over the stain, then cover

5 Proven Facts About Activated Charcoal for Cleaning Your Home Read More »