December 16, 2022

Regular Maid Cleaning Service

Clean Your Kitchen Like a Pro With Our Best Kitchen Cleaning Tips

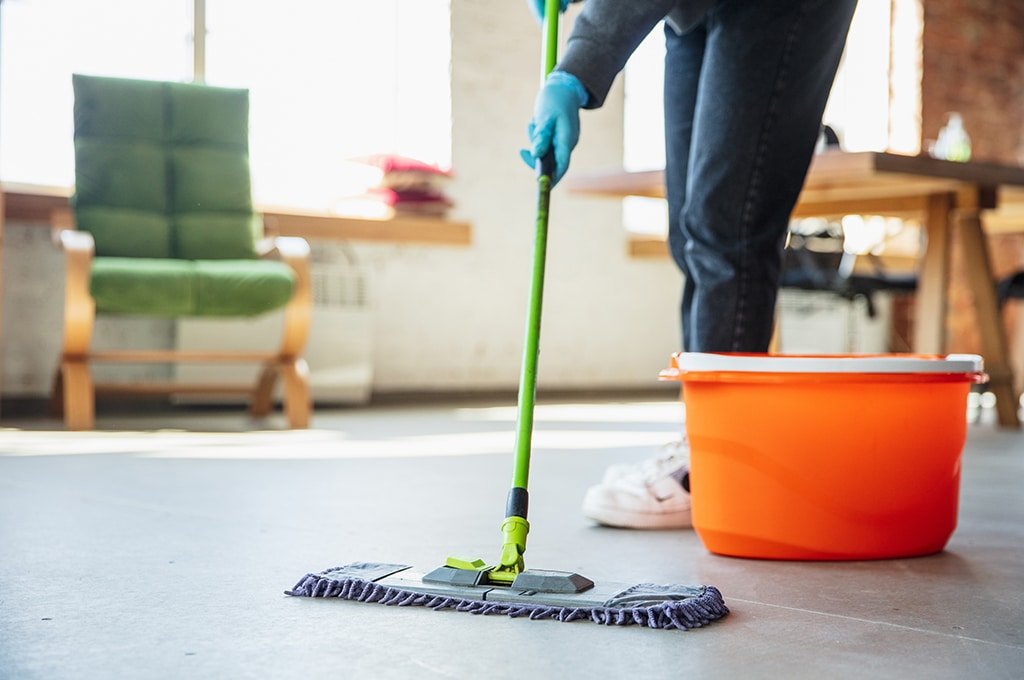
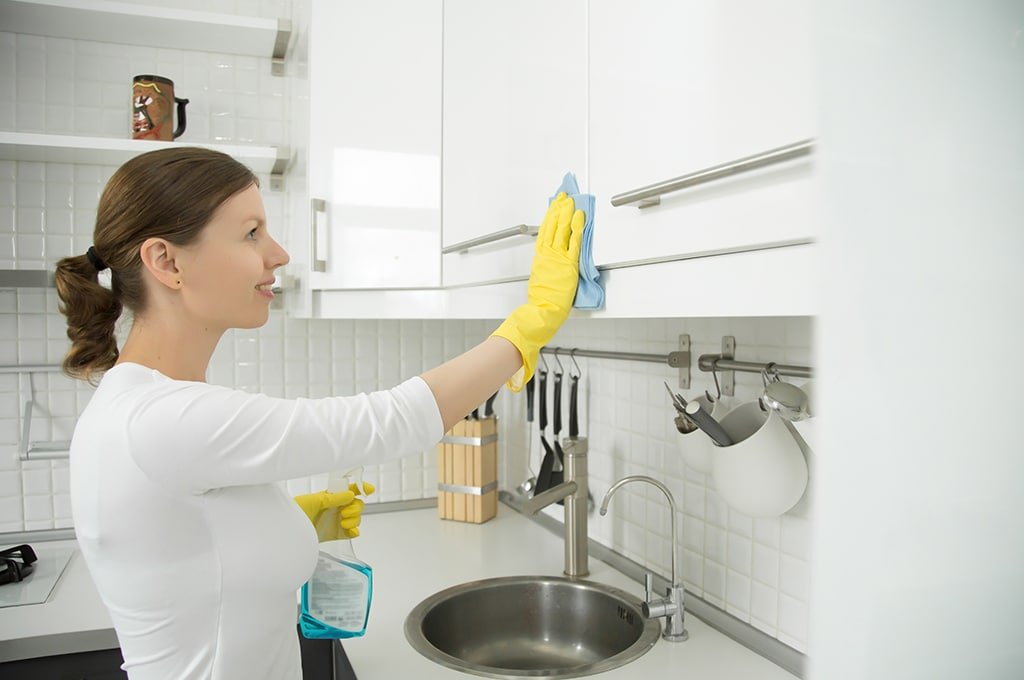
Hey there, fellow clean freaks! Are you ready to Clean Your Kitchen from cluttered chaos to sparkling sanctuary? Let’s dive into some top-notch kitchen cleaning tips that’ll make your kitchen shine like it’s brand new. Trust me, by the end of this, you’ll be itching to grab those cleaning supplies! Declutter First, Clean Later The first rule of a great kitchen clean-up is to declutter before you dive into the actual cleaning. It’s all about starting fresh. You know the drill: before you even think about reaching for that spray bottle and those cleaning wipes, let’s get those countertops cleared. Remove those random spice jars, the toaster you haven’t used in weeks, and maybe that stack of mail that’s been sitting there for far too long. Clearing your countertops isn’t just about making space for cleaning; it’s about setting the right stage for your cleaning performance to unfold. It’s like preparing a blank canvas before you start painting – essential for the masterpiece to come. Next up, tackle the items hiding in the darker corners of your kitchen. We’re talking about those jars and boxes sitting in your pantry and the forgotten leftovers in your fridge. Time to play detective and check those expiry dates. If you stumble upon something that’s old or hasn’t seen the light of day in a long time, it’s probably time to let it go. Decluttering is not just about creating physical space in your kitchen; it’s about clearing out the old to make room for new, fresh energy. Plus, it’s way easier to clean shelves and drawers when they aren’t overflowing with items. Conquer the Countertops When it comes to giving your kitchen a professional-grade clean, conquering the countertops is a must. After all, they’re the spaces where all the action happens, from meal preps to casual coffee breaks. So, let’s make sure they’re not just clean, but gleaming! Starting with the basics, it’s essential to pick the right cleaner for your countertops. Different materials like granite, marble, and laminate each require their own special kind of tender loving care. For instance, granite countertops love a mild, pH-neutral cleaner that won’t strip away their sealant or dull their shine. Marble, on the other hand, needs a non-acidic cleaner to avoid etching its delicate surface. And for those with laminate countertops, a simple mix of a mild detergent and water usually does the trick. But what if you’re a fan of the natural, DIY approach? Well, there’s a simple yet effective solution for you too. A homemade mix of equal parts vinegar and water in a spray bottle can work wonders on most surfaces. This natural solution is a fantastic option for a quick, everyday cleanup. It cuts through grease and grime, leaving your counters with a clean, streak-free finish. However, it’s crucial to remember that vinegar is a no-go for more delicate stone surfaces like granite or marble. The acidic nature of vinegar can etch these surfaces, causing permanent damage.     Get Sparkling Appliances In the quest for a sparkling kitchen, giving your appliances the attention they deserve is crucial. They’re the heart of the kitchen, after all, and keeping them clean not only makes your kitchen look great but also extends the life of these appliances. Let’s start with the fridge, the guardian of all your fresh ingredients. The first step is to take everything out. Yes, everything. It might seem like a chore, but it’s the perfect opportunity to reorganize and reassess what’s in there. Once emptied, tackle the shelves with a mild cleaner that’s tough on spills but gentle on the appliance’s surface. Pay special attention to the door seals. These often-overlooked nooks can harbor crumbs and sticky residues, so giving them a thorough wipe is crucial for maintaining a hygienic fridge. Next up, the oven, the powerhouse of your cooking adventures. If you’re looking for a chemical-free cleaning solution, a baking soda paste (made from just baking soda and water) is your go-to option. Spread this paste inside the oven, let it sit overnight, and then watch as the grime wipes away with ease the next day. It’s a gentle yet effective method to tackle even the most stubborn oven stains. And let’s not forget the microwave, the unsung hero of quick meals and reheated coffee. A simple yet effective way to clean it is by heating a bowl of water with lemon juice for a few minutes inside the microwave. This creates a natural steam that loosens any splatters or food particles, making them a breeze to wipe off. Plus, it leaves your microwave smelling fresh and citrusy. Sinks and Faucets Moving on to an often overlooked but vital part of your kitchen cleaning routine, let’s talk about sinks and faucets. These areas might not seem as glamorous as gleaming countertops or sparkling appliances, but they play a crucial role in keeping your kitchen functional and hygienic. To get that sink shining, a combination of baking soda and dish soap is your best friend. This dynamic duo works wonders in removing food particles, grease, and stains, leaving your sink looking and smelling fresh. For those times when your sink needs a little extra TLC, especially if you’re dealing with stubborn stains or want to sanitize, a water and bleach solution comes in handy. Mix about one tablespoon of bleach per gallon of water for this potent cleaner. Just remember to rinse your sink thoroughly afterward to ensure no bleach residue is left behind. Now, let’s not forget the faucets. These can be the crowning jewel of your kitchen if kept shiny and spot-free. A simple yet effective way to clean your faucets is by wiping them down with a cloth dampened with vinegar. This is particularly effective in removing water spots and restoring the shine to your fixtures. It’s amazing how these small details, like a gleaming faucet, can elevate the overall look and feel of your kitchen. Floors and More In your journey to a spotlessly clean

Clean Your Kitchen Like a Pro With Our Best Kitchen Cleaning Tips Read More »

Best Cleaning Services Toronto

Professional House Cleaning Services: Is it Worth the Cost?

Hey there! Are you sitting on the fence about hiring professional house cleaning services? Maybe you’re thinking, “Should I really spend my hard-earned cash on this?” Well, you’re not alone. Let’s dive into the world of professional cleaning services and find out if they’re really worth your bucks. The Convenience Factor Now, let’s talk convenience because, let’s face it, we all love things that make our lives easier. Imagine coming home to a sparkling clean house after a long, exhausting day at work. Sounds like a dream, right? That’s the magic of professional cleaning services. They swoop in and take care of the dirty work, so you don’t have to lift a finger. Think about it. No more sacrificing your precious weekends scrubbing toilets, battling with the dust on your shelves, or dealing with that mysterious sticky spot on the kitchen floor. Instead, your free time is truly yours to enjoy. Whether it’s catching up on the latest Netflix series, having a chill hangout with friends, diving into your favorite hobby, or just enjoying some quiet time, the hours you regain are priceless. And it’s not just about the cleaning itself. Arranging these services is usually a breeze. With a few clicks or a phone call, you can schedule a cleaning at a time that works for you. Many services even offer key drop-off arrangements, so you don’t need to be home while the cleaning is done. It’s like having a cleaning fairy; you leave, they clean, and you come back to a home that’s spotless. Also, think about those special occasions – maybe you’re hosting a dinner, having guests over, or just want your place to look extra neat for a relaxing weekend. In these moments, professional cleaning can be a lifesaver. They’ll make sure your home is guest-ready, leaving you with one less thing to stress about. Deep Clean Like a Pro Let’s talk about the nitty-gritty of deep cleaning, because honestly, it’s a whole different ball game compared to regular tidying up. Let’s face it, no matter how diligent we are with our weekly clean-up routines, there are always those areas we often overlook (or, let’s be real, skillfully ignore). That’s where professional cleaners come in and change the game. They don’t just clean; they deep clean. And by deep clean, I mean they tackle every nook and cranny with a level of detail most of us never even think about. We’re talking about those hard-to-reach spots that often get neglected – under the beds, the top of the fridge, behind the couch, the dusty corners of the ceiling, and let’s not forget about those pesky baseboards that seem to attract dust like magnets. These areas, if left unattended, can accumulate dust, allergens, and all sorts of grime, affecting the overall air quality and cleanliness of your home. But professional cleaners don’t stop there. They go above and beyond, addressing areas that many of us don’t even consider part of our regular cleaning routine. Think about your kitchen, for instance. Those overhead exhaust fans, the insides of your oven, and even the crumb-infested corners of your toaster – all get a thorough, professional clean. And in the bathroom, they target lime and soap scum buildup, ensuring that your tiles, shower doors, and even the grouting are sparkling and sanitized. It’s not just about making things look clean on the surface. Professional cleaners have the tools and expertise to sanitize and eliminate germs and bacteria from high-touch surfaces like doorknobs, light switches, and remote controls. This level of cleaning is particularly important in today’s context, where maintaining a healthy home environment is more critical than ever. And let’s talk about those special fabrics and surfaces in your home. Delicate upholstery, ornate rugs, and unique surfaces like granite or marble require special care. Professional cleaners know exactly how to treat these materials to ensure they’re not just clean but also preserved and protected from wear and tear. The result of all this? A cleaner, fresher, and healthier home. It’s the kind of clean that you can see, smell, and feel. It’s the kind of clean that gives you peace of mind, knowing that every part of your home has been thoroughly taken care of.     The Right Tools for the Job When we talk about professional cleaners, we’re not just talking about someone with a mop and a bucket. These pros come equipped with an arsenal of tools and cleaning agents that are specifically designed for every type of cleaning challenge. Whether it’s getting rid of stubborn carpet stains, making your bathroom tiles shine, or tackling the grease on your kitchen backsplash, they’ve got the tools and know-how to handle it all. First off, let’s consider the equipment. Professional cleaners use industrial-grade vacuums that have more power and efficiency than our regular home vacuums. These machines can get more dirt, dust, and allergens out of your carpets and upholstery, leaving them cleaner and fresher. They also have specialized tools for every surface and fabric type in your home, from hardwood floor polishers to upholstery steamers. These tools are designed to be tough on dirt but gentle on your belongings, ensuring that everything gets cleaned without damage. Now, let’s talk cleaning agents. The pros don’t just use your average off-the-shelf cleaning products. They have access to high-quality solutions that are more effective and often faster acting. Whether it’s a particular type of soap to cut through kitchen grease or a special compound for lifting carpet stains, they have a product for every problem. And the best part? Many professional cleaning services are now turning to eco-friendly products. These environmentally friendly options are not only effective but also safer for your family and pets. They reduce the exposure to harsh chemicals in your home and are better for the planet. It’s a win-win! Furthermore, professional cleaners have the expertise to use these tools and products correctly. It’s not just about having the right equipment; it’s about knowing how to

Professional House Cleaning Services: Is it Worth the Cost? Read More »

Cleaning Services East York

A Complete Guide to Cleaning After Moving Out

Hey there! Are you searching for a guide to cleaning after moving out, wondering how to make it sparkle for the next person? No worries! I’m here to guide you through a top-to-bottom clean-up that’ll leave your space looking absolutely pristine. Whether you’re aiming to get that security deposit back without a hitch or just want to do a solid for the next occupant, this guide’s here to have your back. Start with a Plan Jumping straight into cleaning without a plan can be like trying to navigate a maze blindfolded. You know you need to get to the end, but how? The key lies in breaking down this monumental task into manageable chunks. Unlike your usual spruce-up, moving out cleaning demands a level of detail and thoroughness that’s a few notches above. So, let’s sketch out a strategy that’ll make this a breeze: Room-by-Room Checklist: The best way to tackle this is one room at a time. It’s like playing a game of cleaning chess – strategize and conquer each section before moving on to the next. This way, you won’t feel overwhelmed and you can ensure every nook and cranny gets the attention it deserves. Imagine the satisfaction of ticking off each room from your list! Deep Cleaning vs. Surface Cleaning: This is a crucial distinction. Some areas in your home will need more love than others. The oven, for instance, might be begging for a deep clean after all those baking adventures, or the bathroom tiles might be showing signs of soap scum and water stains. These spots will need your full attention and a bit of elbow grease. On the other hand, surfaces like countertops or shelves might just need a quick wipe to dust off and shine. It’s all about prioritizing and focusing your energy where it’s needed most. Supplies Ready: Ever been in the middle of a cleaning spree only to find out you’re out of cleaner or scrubbing pads? Yeah, not fun. To avoid these mood-killing interruptions, do a quick inventory of your cleaning supplies before you start. Ensure you have everything from cleaners, sponges, and cloths to gloves and garbage bags. It’s better to be over-prepared than to have to hit pause and dash to the store mid-clean. By setting up a clear plan and organizing your approach, you’ll find the task less daunting and more efficient. It’s about making the process as smooth and stress-free as possible. So, take a deep breath, arm yourself with your cleaning gear, and let’s make your place shine like it’s brand new! Tackling Each Room Now, let’s break down the cleaning process room by room.     Kitchen Fridge: Start by emptying it out completely. Toss anything old or expired. Then, mix a gentle cleaning solution (like baking soda and water) to wipe down the shelves and inner walls. Don’t ignore the nooks where crumbs and spills hide. The door seals often get overlooked but can harbor grime, so give them a good clean. And remember to unplug and pull out the fridge to clean the floor and wall behind it. Dust off the coils at the back too; this can actually help your fridge run more efficiently! Oven: This can be a bit of a project, but it’s so satisfying! If your oven has a self-cleaning function, start there. If not, you can make a paste with baking soda and water, apply it inside the oven, and let it sit overnight. The next day, wipe it down. Don’t forget the racks and the oven’s exterior, especially the knobs where greasy fingers often touch. Microwave: Mix some lemon juice or vinegar with water in a microwave-safe bowl and microwave it for a few minutes until it boils and steams up the window. This steam loosens grime and food splatters, making it easier to wipe down. Clean the outside, too, including the buttons. Dishwasher: Check the filter and clean out any trapped food particles. Run it empty with a dishwasher cleaner or just plain vinegar to freshen it up and remove any lingering odors. Cabinets: Empty them out and wipe down both the insides and outsides. Pay attention to the handles – they can get surprisingly grimy. For the tops of high cabinets, a duster with an extendable handle works wonders to remove that layer of dust that often accumulates there. Countertops: Use a cleaner suitable for your countertop material. If you have natural stone, like granite or marble, use a cleaner specifically for those surfaces. For laminate, a mild soap and water solution does the trick. Don’t forget the backsplash – it can collect a lot of splatters from cooking. Sink: To tackle limescale, use a mixture of vinegar and water, or a limescale remover if the buildup is significant. Don’t just clean the sink bowl; scrub the rim and the drain too. A toothbrush can be handy for scrubbing around the edges and the faucet. Faucets: After removing limescale, polish your faucets to make them shine. You can use a commercial polish or a DIY solution like a flour and water paste for stainless steel faucets, or just a soft cloth dampened with water and a bit of dish soap. Bathroom Shower/Tub: For the shower or tub, a good scrub is key. Use a bathroom cleaner that’s designed to cut through soap scum and limescale. Don’t forget the shower doors or curtains – these can harbor a lot of soap residues and mildew. A mixture of vinegar and water works great on glass doors. If you have tiles, scrub the grout lines too; a toothbrush can be your best friend for this task. After cleaning, rinse everything thoroughly. Toilet: Cleaning the toilet is not the most glamorous task, but it’s essential. Use a strong disinfectant toilet cleaner. Don’t just clean the bowl; make sure to clean the rim, the seat, the lid, and the area around the base of the toilet. The toilet handle is a germ hotspot, so give that a good

A Complete Guide to Cleaning After Moving Out Read More »