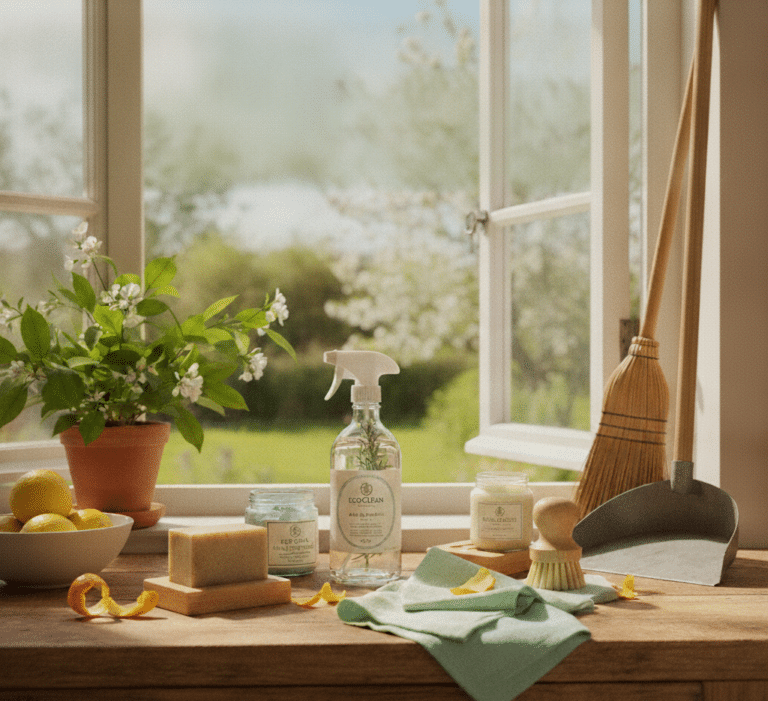
Deep clean your Nescafe machine isn’t just about keeping your coffee tasting great—it’s also about ensuring your machine lasts as long as possible. Coffee lovers know the difference a clean machine can make to their morning cup. So, let’s dive into how you can get your Nescafe machine sparkling clean with these five simple steps. Trust me, it’s easier than you think, and your taste buds will thank you!
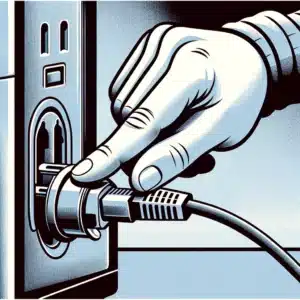
Step 1: Unplug and Disassemble
Stepping into the process of deep cleaning your Nescafe machine starts with the fundamental and crucial step of ensuring your safety by unplugging the machine. This initial action sets the stage for a hazard-free cleaning session, ensuring that there’s no risk of electrical shock as you delve into the nooks and crannies of your beloved coffee companion.
Once the machine is safely disconnected from its power source, the disassembly begins. This part of the process might feel a bit like a puzzle, carefully removing each piece that can be detached. Typically, the parts you’ll be looking to remove include the drip tray, which catches any coffee drips or spills during brewing, ensuring your counter stays clean. The water reservoir, which holds the water needed for brewing your coffee, also needs to be detached and is often one of the larger components of the machine. The pod holder, a critical piece where the coffee pod sits during brewing, will also need to be removed.
Disassembling your Nescafe machine is not just about taking it apart; it’s a crucial step that allows you to access all the areas where coffee oils and residue can build up over time. These residues, if not cleaned, can affect the taste of your coffee and the efficiency of your machine. By breaking down the machine into its components, you’re able to give each part the thorough cleaning it deserves. Think of it as a spa day for your Nescafe machine, where each component gets the attention it needs to function at its best.
Step 2: Soak and Scrub
This step is akin to giving your machine a luxurious bath, designed to tackle the stubborn coffee oils and residues that have built up over time. Start by filling your sink with warm, soapy water—think of it as preparing a relaxing bubble bath, but for your coffee machine’s components. The warmth of the water combined with the soap acts as a gentle yet effective means to soften and break down the oils and residues that cling to the surfaces and hidden corners of each part.
Once your sink is ready, immerse the disassembled parts into this soothing bath, letting them soak for about 20 minutes. This soaking period is crucial as it allows the warm soapy water to work its magic, loosening the grime and making it easier to remove. It’s a moment where patience pays off, as giving the parts enough time to soak can significantly reduce the effort needed to clean them.
After the soaking time is up, it’s time to roll up your sleeves and get scrubbing. Armed with a soft sponge or brush, begin the meticulous process of cleaning each piece. This is where your attention to detail really shines. As you scrub, focus on the nooks and crannies of each component. These areas can often harbor hidden coffee residues that, if left uncleaned, can affect the taste of your coffee or even the efficiency of your machine. Approach this task like a treasure hunt, where instead of seeking out gold or jewels, you’re on a mission to find and eliminate all traces of old coffee bits.
Step 3: Rinse and Dry
This stage is about ensuring that all the effort you’ve put into cleaning does not get compromised by leftover soap residue or moisture that could invite unwanted guests, like mold or bacteria, into your coffee machine.
Start by rinsing each scrubbed part under running water. The aim here is to be thorough and meticulous, making sure that no nook or cranny retains any soap. This step washes away the last remnants of grime and cleaning solution, clearing the stage for a fresh coffee brewing experience. The running water acts like a final sweep, ensuring that each component is primed and ready for the next step in its cleaning journey.
Once the rinse is complete, the drying process begins. This is where patience and attention to detail come into play again. You have two choices here: let the parts air dry or help them along with a clean, dry towel. If you choose to air dry, arrange the parts on a drying rack or a clean surface where they can sit undisturbed, allowing air to circulate freely around them. This natural drying process is gentle and effective, ensuring that every drop of moisture evaporates. Alternatively, patting the parts dry with a towel can speed up the process, allowing you to reassemble your machine faster. Whichever method you choose, the goal is to ensure that every component is thoroughly dry.
Step 4: Descale the Machine
The descaling process can be approached in two ways, offering flexibility based on your preferences and what you have on hand. For those who prefer ready-made solutions, commercial descaling products are designed specifically for this purpose, formulated to effectively dissolve calcium deposits without harming your machine’s internal components. Alternatively, for a more natural and readily available option, a homemade mixture of equal parts water and white vinegar serves as an effective DIY descaling solution. Vinegar, with its acetic acid content, is naturally adept at breaking down limescale, making it a potent ally in the maintenance of your Nescafe machine.
Filling the water reservoir with your chosen descaling solution is the first step in this detox process. Then, initiate the brewing cycle several times without a coffee pod in place. This allows the solution to circulate throughout the machine, ensuring that it reaches all areas where calcium deposits may have formed. As the solution moves through the machine, it works to dissolve and lift away the deposits, much like how a detox flushes toxins from the body.
However, the process doesn’t end with descaling. Just as important is the thorough rinsing of the machine afterward. This involves running the machine multiple times with just water, no descaling solution or coffee pod, to ensure that any residue from the descaling process is completely flushed out. This rinse cycle is critical, as it ensures that your next cup of coffee is free from any aftertaste of vinegar or descaling solution, restoring the machine to its optimal brewing condition.

Step 5: Reassemble and Brew a Cleaning Cycle
After ensuring that every component of the machine has been meticulously cleaned, descaled, and thoroughly dried, it’s time to put the pieces back together. This reassembly isn’t just about making your machine whole again; it’s about preparing it for its primary function—to brew that perfect cup of coffee. Each piece fits back into its place, restoring the machine’s functionality and appearance. It’s akin to putting the pieces of a puzzle back together, where every part is essential for the complete picture.
Once the machine is reassembled, there’s one more step before you can return to your regular coffee brewing routine. Brewing a cycle with just water is an integral part of the cleaning process, serving a similar purpose to the final rinse at a car wash. This step is designed to flush out any residual cleaning solution or descaling agent that might linger within the machine’s system. By running water through the machine, you ensure that these remnants are thoroughly washed away, leaving the internal mechanisms pristine and ready for use.
This final cleaning cycle acts as a seal of approval, indicating that your machine is not only visually clean but also internally purified. It reassures you that the next cup of coffee will be brewed in a machine free of any unwanted residues, guaranteeing the pure, unadulterated flavor of your coffee. Just as you would appreciate the gleam of your car after it’s been washed and rinsed, this final step in the cleaning process leaves your Nescafe machine sparkling clean, both inside and out.
Deep Clean Your Nescafe Machine With Easy!
Diving into the world of coffee with a freshly cleaned Nescafe machine truly sets the stage for a delightful coffee experience every morning. The difference in taste is palpable—a rich, full-bodied flavor that can only come from a machine that’s been cared for with diligence. It’s a simple yet profound reminder of how the quality of our coffee reflects the care we put into maintaining our brewing equipment. Regular deep cleaning not only preserves the intricate flavors of your coffee but also ensures that your Nescafe machine remains a reliable companion in your daily routine, ready to deliver that much-needed burst of energy at the start of each day.
However, we understand that life can get busy, and finding the time for a thorough cleaning of your Nescafe machine might not always be feasible. This is where the expertise of a professional cleaning service can be invaluable. Toronto Shine Cleaning offers a range of specialized cleaning services that extend beyond your typical household needs, including the meticulous care and maintenance of your coffee machines. Their team of experts is equipped with the knowledge and tools to ensure your Nescafe machine is in peak condition, guaranteeing the best possible flavor from every cup.
So, why not give yourself and your Nescafe machine the gift of a professional deep clean? Toronto Shine Cleaning can take the hassle out of maintaining your coffee machine, allowing you to relish in the rich, full flavors of your coffee without the added worry of upkeep. Embrace the joy of many more mornings with your freshly cleaned Nescafe machine, knowing that a team of cleaning experts is just a call away to help preserve the essence of your coffee experience.