7 Genius Kitchen Drawers Organization Ideas You Need to Try
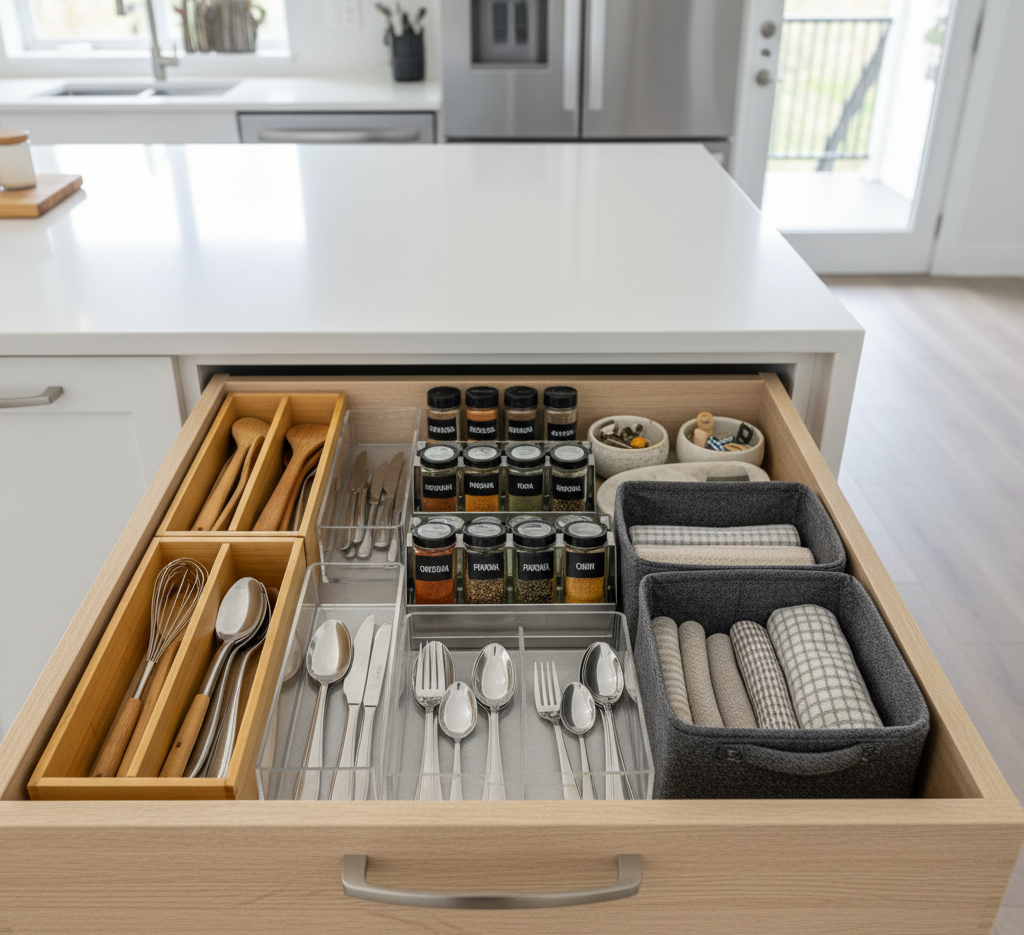
Kitchen drawers are the unsung workhorses of the home, the primary storage for the essential tools we use every single day. They hold our cutlery, our cooking utensils, our knives, and all the miscellaneous gadgets that make a kitchen function. Yet, for all their importance, they often devolve into a state of chaotic, jumbled frustration. A search for a simple vegetable peeler can become an archaeological dig through a tangled mess of spatulas, whisks, and mystery items. This disorganization is more than just an aesthetic issue; it is a source of daily friction, a constant, low-grade stress that makes cooking less efficient and less enjoyable. Taking control of your kitchen drawers is a transformative act of creating a smooth, logical workflow, saving precious time and bringing a profound sense of calm to the heart of your home. Emptying The first and most critical step in this organizational journey is the total empty-out. This is a non-negotiable, foundational act. You cannot truly assess or organize what you cannot see. One by one, you must empty every single drawer in your kitchen, placing all of their contents onto your countertops or a large dining table. This may seem like a daunting and messy task, but it is the only way to begin with a truly clean slate. It forces you to confront the sheer volume of what you own and immediately reveals the redundancies and clutter that have been hiding in plain sight. As you empty each drawer, take a moment to give the now-vacant space a thorough cleaning. Use a vacuum with a crevice tool to suck up the inevitable collection of crumbs, dust, and debris that accumulates in the corners. Then, wipe down the entire interior of the drawer with a damp cloth and a gentle all-purpose cleaner. Starting with a pristine, empty container is a powerful psychological reset that prepares you for building a new, intentional system from the ground up. With your entire collection of drawer-bound items laid bare, the most difficult and most liberating phase begins: the edit. This is where you must be practical, honest, and sometimes ruthless. The goal is to create a curated arsenal of tools that you actually use and love, rather than a museum of impulse buys and inherited gadgets. Pick up each individual item and ask yourself a series of direct questions. Is this item broken, rusted, or melted? Do I have duplicates or even triplicates of this item? Have I used this in the last year? Does this “unitasker”—a gadget designed for only one, very specific purpose like an avocado slicer or a strawberry huller—truly earn its valuable real estate in my kitchen? Based on your answers, sort every item into one of three distinct piles: keep, donate, or discard. Discard anything that is broken. For the duplicates, keep the one that is in the best condition or that you prefer to use, and donate the rest. Be particularly critical of the unitaskers. If a simple knife can do the job just as well, it may be time to let the gadget go. This purging process is deeply satisfying, as you reclaim valuable space and edit your collection down to the functional essentials. Planning Now, with your edited collection of “keep” items and your clean, empty drawers, the strategic planning phase can begin. Do not simply start putting things back. The most effective organizational system is based on the principle of zoning. This means storing items as close as possible to where they will actually be used, creating a logical workflow that minimizes unnecessary steps and movement around the kitchen. Think of your kitchen as a series of work zones. 1.Prep Zone The primary “Prep Zone” is typically the largest stretch of open counter space, where you do most of your chopping and mixing. The drawers in this zone are prime real estate for the tools you need to prepare ingredients. This is where your knives should live, along with peelers, graters, measuring cups and spoons, mixing bowls, and cutting boards. 2.Cooking Zone The “Cooking Zone” is the area immediately surrounding your stovetop and oven. The drawers here should house all the tools you reach for when you are actively cooking with heat. This includes spatulas, tongs, wooden spoons, whisks, oven mitts, and trivets. By having these items within arm’s reach of the stove, you create a seamless and safe cooking experience, eliminating the need to rummage through a distant drawer while something is sizzling on the burner. 3.Eating and Serving Zone The “Eating and Serving Zone” is usually located near your dishwasher or your dining table. This is the logical home for your everyday cutlery—the forks, knives, and spoons you use for meals. This drawer should also contain serving utensils, cloth napkins, and any other items you need to set the table. Storing cutlery near the dishwasher makes the task of unloading it significantly faster and more efficient. 4.Baking Zone The “Baking Zone,” if you are a baker, might be a dedicated area where you store your stand mixer. The drawers here should contain all your baking-specific tools: spatulas, pastry brushes, cookie cutters, rolling pins, and piping bags. 5.Utility Drawer At the end, every kitchen needs a “Utility Drawer,” which is the tamed, organized version of the dreaded “junk drawer.” This drawer is not for kitchen tools, but for the essential household items you need to access regularly. This is the home for scissors, pens, a notepad, tape, rubber bands, batteries, and a small toolkit with a screwdriver and pliers. The key to keeping this drawer from descending into chaos is rigorous containment, which we will address next. Containment With your zones established, the next layer of organization is containment. This is the physical act of using dividers and inserts to create a designated home for every single item. Simply placing loose items into a zoned drawer is not enough; they will inevitably slide around and become a jumbled mess. Drawer organizers are the key to a sustainable
7 Genius Kitchen Drawers Organization Ideas You Need to Try Read More »