Blog

Homemade natural cleaning solutions displayed on a sunny kitchen countertop.

How to Refresh Your Home: 5 Essential Oil Recipes for Natural Cleaning

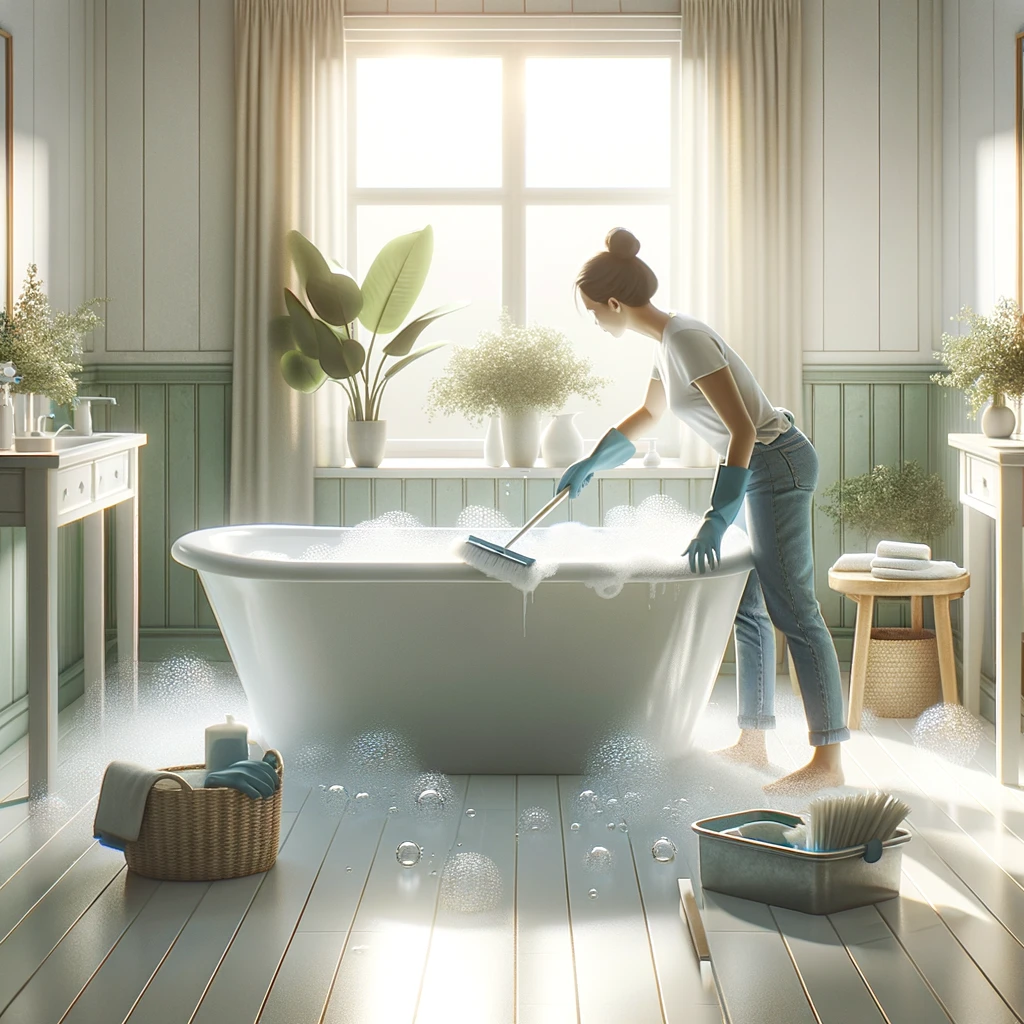
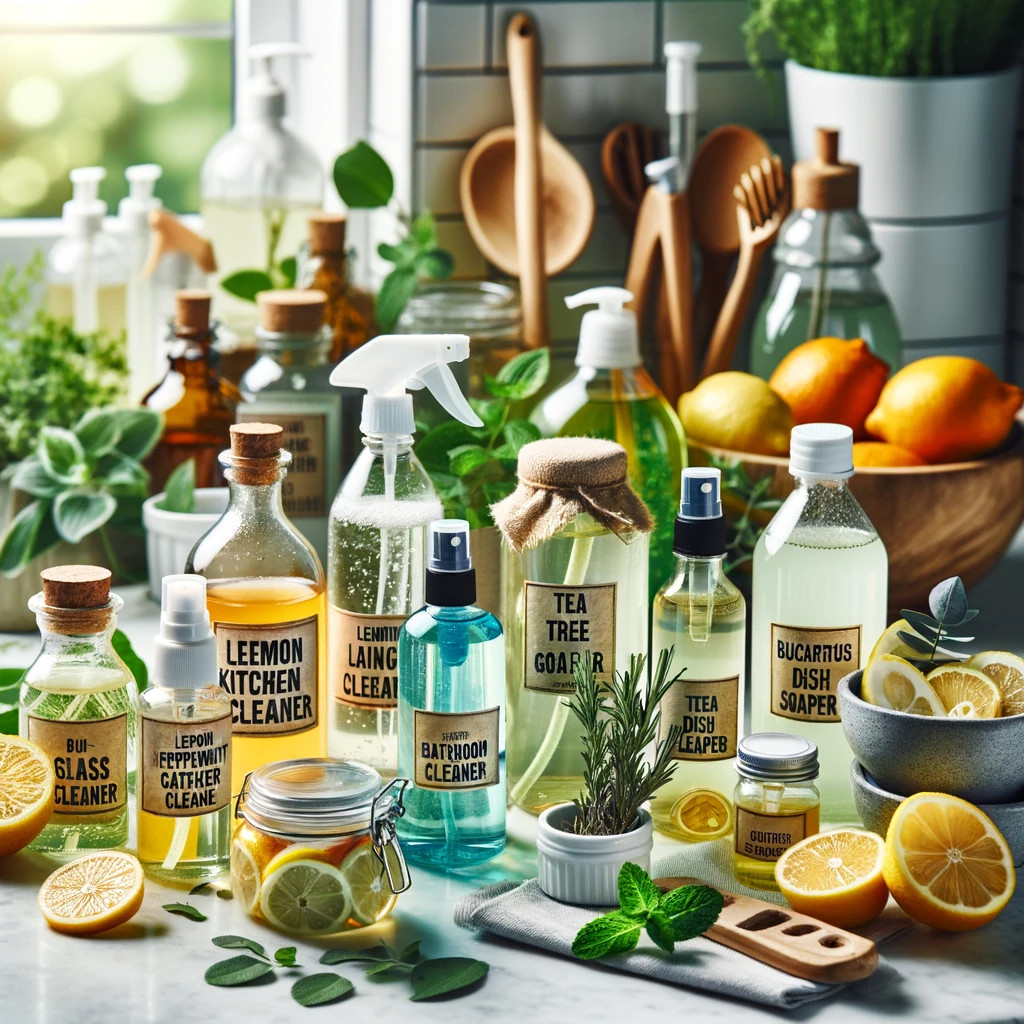
Hey there! Ready to give your home that Essential Oil Recipes for Natural Cleaning? inviting vibe without resorting to harsh chemicals? Let’s dive into the world of essential oils and whip up some natural cleaning solutions that not only cleanse but also leave your space smelling divine. Essential oils are not just about the aroma; they come packed with powerful cleaning properties too. Here are 5 essential oil recipes to refresh your home naturally: 1. All-Purpose Lemon Lavender Cleaner Let’s expand further on the All-Purpose Lemon Lavender Cleaner with a detailed breakdown that highlights each component and step in the process, providing you with a deeper understanding and appreciation for this natural, aromatic cleaner: 1 cup of water: Acts as the base for the cleaner, diluting the vinegar and essential oils to make them safe for use on various surfaces. Water helps in spreading the cleaning solution evenly. 1 cup of white vinegar: A powerful natural disinfectant, vinegar cuts through grease, grime, and dirt with ease. Its acidic nature makes it effective against bacteria and viruses, ensuring your surfaces are not just clean but sanitized. 15 drops of lemon essential oil: Known for its refreshing scent and strong antibacterial properties, lemon essential oil is a key ingredient in combating kitchen messes and brightening surfaces. It leaves behind a clean, invigorating aroma that uplifts the mood. 15 drops of lavender essential oil: Adds a calming, floral scent to the mix, transforming cleaning into a more pleasant, stress-free experience. Lavender’s natural antiseptic properties complement the lemon and vinegar, enhancing the cleaner’s effectiveness. A spray bottle: The perfect container for your homemade cleaner, making it easy to mix, store, and use. A spray bottle allows for convenient application, ensuring you cover the desired areas with just the right amount of cleaner. How to Make It: Begin by pouring water, vinegar, and the carefully measured drops of essential oils directly into your spray bottle. This method ensures that the blend achieves a harmonious balance, maximizing both the cleaning capabilities and the aromatic benefits of the ingredients. Given the natural tendency of essential oils to separate from the vinegar and water mixture, it’s crucial to give the bottle a good shake prior to each use. This step guarantees that the oils are evenly dispersed throughout the solution, allowing for consistent application and effectiveness. When it comes to using this cleaner, its versatility truly shines. Designed for hard, non-porous surfaces, it works wonders on countertops, kitchen tables, appliances, and bathroom fixtures. The application process couldn’t be simpler: just spray the mixture onto the surface in question and wipe it down with a cloth or sponge to achieve a clean and shining finish. The benefits of this homemade cleaner extend far beyond its surface-cleaning prowess. The lemon essential oil and vinegar join forces to offer robust antibacterial and antiviral properties, forming a formidable barrier against the spread of common household germs. Meanwhile, the lavender essential oil envelops your space in its calming scent, transforming routine cleaning into a more pleasant and stress-relieving activity. This concoction is not only effective but also non-toxic and eco-friendly, ensuring it’s a safe choice for homes with children, pets, and a preference for green living solutions. 2. Peppermint Window and Mirror Cleaner Diving into the Peppermint Window and Mirror Cleaner, let’s unfold each element and the crafting process that combines to form a sparkling, pest-repellent marvel for your glass surfaces: 1 ½ cups of water: Serves as the foundation of this cleaner, effectively diluting the vinegar and essential oil to ensure they’re gentle yet effective on glass surfaces. Water facilitates the even distribution of the cleaning mixture, ensuring a streak-free shine. ½ cup of white vinegar: This ingredient is a cleaning powerhouse, renowned for its ability to dissolve grime, combat streaks, and leave a crystal-clear finish. Its natural acidity is hostile to germs, making it an excellent disinfectant for windows and mirrors. 10 drops of peppermint essential oil: Far more than a fresh scent, peppermint oil is a natural deterrent against spiders and ants. Its inclusion turns this cleaner into a dual-threat against dirt and unwanted critters, leaving behind a refreshing minty aroma that revitalizes your home environment. A spray bottle: An essential tool for this homemade concoction, the spray bottle ensures easy mixing, storage, and application. It allows for a fine mist that evenly coats windows and mirrors without over-saturating them, making your cleaning efforts more efficient and effective. How to Make It: Initiate the process by combining the water and white vinegar in your spray bottle, followed by the peppermint essential oil. This preparation strategy ensures a well-balanced mix, leveraging the cleaning strength and aromatic benefits of the components in equal measure. Because essential oils can separate from their water and vinegar base, a vigorous shake before use is imperative. This action guarantees the essential oil’s thorough integration, offering consistent cleaning power and fragrance with every spray. In application, the Peppermint Window and Mirror Cleaner shines with versatility. It’s specifically formulated for use on glass, making it your go-to for leaving windows and mirrors without smudges or streaks. Simply spray a light coating on the glass surface and wipe away with a cloth or sponge for an immediate gleam. But the advantages of this homemade cleaner go beyond mere aesthetics. The peppermint essential oil’s inclusion serves a dual purpose, not only imparting a clean, uplifting scent but also acting as a natural repellant against common household pests like spiders and ants. Additionally, the non-toxic and environmentally friendly nature of this cleaner makes it a safe and responsible choice for households, ensuring cleanliness doesn’t come at the cost of health or the planet. Equally effective in enhancing the ambiance of your living space, the Peppermint Window and Mirror Cleaner introduces a minty freshness that can energize and refresh. This blend doesn’t just clean; it transforms the act of cleaning into an enjoyable, beneficial task. Its utility extends across the home, from living room windows to bathroom mirrors, making it an

How to Refresh Your Home: 5 Essential Oil Recipes for Natural Cleaning Read More »

Sparkling clean bathroom drain amid glossy tiles.

7 Easy Tips for Keeping Your Bathroom Drain Sparkling Clean

A Bathroom Drain Sparkling Clean: that unsung hero of plumbing that we only notice when it’s too late and we’re standing in an unexpected puddle during our shower. Keeping it sparkling clean not only saves us from waterlogged feet but also keeps our bathroom smelling fresh and functioning well. Here are seven simple, yet super effective tips to keep your bathroom drain not just clear, but sparkling clean! 1. Boiling Water This simple yet powerful cleaning hack doesn’t require any fancy equipment or harsh chemicals, making it an eco-friendly choice for those of us looking to maintain our homes in a more sustainable way. To get the most out of this method, consider making it a regular part of your weekly bathroom maintenance. For instance, you could choose a specific day of the week to “boil the troubles away.” However, it’s important to exercise caution with this method, especially around bathroom fixtures made of delicate materials like porcelain. These can be susceptible to damage from sudden temperature changes. To mitigate this risk, you can pour the boiling water directly into the drain rather than letting it splash over the surrounding areas. Alternatively, if your sink or tub is particularly sensitive, consider using very hot water from the tap instead of boiling water to avoid any potential damage. For those hard-to-reach areas or stubborn buildup, you might follow up the boiling water with a plunger or a plumber’s snake to ensure everything is flowing smoothly. This one-two punch is often enough to keep your drains clear and functional without resorting to harsh chemicals or professional intervention. 2. Daily Flushing with Cold Water While it may seem counterintuitive, especially after discussing the benefits of boiling water, flushing your bathroom drain with cold water on a daily basis can also contribute significantly to keeping it clear and clean. Cold water, especially after using the sink or shower, can help solidify and flush away any residual oils or products that have been used. These substances, which might include hair conditioners, body oils, or shaving creams, often cling to the sides of pipes when they’re in their warmer, more viscous state. By running cold water through the drain for a minute or so, you’re essentially helping to harden these residues. This practice is particularly useful after shaving or washing hair in the sink, as it helps ensure that loose hairs are fully flushed away rather than getting caught in the drain. Over time, this can reduce the likelihood of clogs forming, maintaining a smoother flow of water through your pipes. Incorporating this simple step into your daily routine requires minimal effort but can have a meaningful impact on the maintenance of your bathroom’s plumbing. It’s an easy, yet effective strategy to complement the more intensive cleaning measures, ensuring that your bathroom drain remains as clear and functional as possible. 3. Old Toothbrush Beyond just the practicality, repurposing old toothbrushes for cleaning tasks is a nod towards environmental sustainability. Instead of contributing to landfill waste by throwing them away, you’re giving them a second life. This approach aligns with eco-friendly cleaning practices, emphasizing reuse and reducing waste without compromising on cleanliness. To effectively use an old toothbrush for cleaning your drain, start by dipping it in a cleaning solution. The liquid will help dissolve the grime, while the mechanical action of the toothbrush bristles works to scrub it away. For tougher buildup, consider using the toothbrush in conjunction with a plunger or drain snake for a comprehensive clean. The toothbrush’s design, initially intended for meticulous dental hygiene, translates well to meticulous home hygiene. Its handle offers a comfortable grip for sustained scrubbing sessions, while the varied bristle lengths typically found on toothbrushes can reach uneven surfaces within the drain area. Regular use of an old toothbrush for cleaning around the drain cover and inside visible parts of the drain can significantly reduce the likelihood of clogs forming. By incorporating this simple tool into your cleaning arsenal, you’re not just taking care of your home in an effective manner; you’re also doing your part for the planet by reusing and recycling what might otherwise be considered waste.     4. Hair Catcher This straightforward yet effective device is designed to fit snugly over the drain, trapping hair, soap scum, and any other debris that could potentially lead to blockages. By capturing these elements before they have a chance to enter your plumbing system, a hair catcher significantly reduces the risk of clogs forming deep within the pipes. The beauty of using a hair catcher lies in its simplicity and ease of use. Installation typically requires no tools or plumbing expertise; you simply place it over or inside your drain. Despite its simple design, the impact on your drain’s health and functionality is profound. With this guardian in place, water continues to flow freely, and the need for chemical cleaners or professional plumbing services can be drastically reduced. Regular maintenance of your hair catcher is crucial to ensure its effectiveness. This involves a simple routine of removing the catcher, discarding the collected debris, and giving it a quick clean. Depending on your household’s needs, this could be a weekly task, ensuring that the catcher remains efficient at trapping debris without impeding water flow. For an even deeper clean, soaking the hair catcher in a vinegar solution can help dissolve any soap residue or buildup, keeping it in top condition. Investing in a hair catcher is a proactive step towards sustainable home maintenance. Not only does it save you the hassle and expense of dealing with clogs, but it also reduces the need for potentially harmful chemical drain cleaners, aligning with eco-friendly cleaning practices. Moreover, the hair catcher’s longevity and reusability make it an economical choice, offering lasting protection for your drains with minimal environmental impact. 5. Professional Drain Cleaner The chemical composition of many professional drain cleaners allows them to power through tough blockages, but this potency also means they can be quite harsh on your plumbing

7 Easy Tips for Keeping Your Bathroom Drain Sparkling Clean Read More »

Hourglass in sunlight symbolizing efficient time management.

How to Conquer Your Spring Cleaning in Just One Day: 5 Time-Saving Tips

Spring Cleaning in Just One Day! That time of year when the flowers start blooming, the birds start chirping, and our homes… well, they need a bit of a refresh. But who says you need to spend all week scrubbing and dusting? Not us! Let’s dive into how you can conquer your spring cleaning in just one day with these 5 time-saving tips. Ready to reclaim your weekend? Let’s get started! 1. Plan and Prioritize Start by walking through your home with a critical eye—think of yourself as a guest seeing it for the first time. Notice what areas catch your attention first. Is it the pile of shoes by the front door? Or maybe the dust bunnies partying under the living room couch? These areas that jump out at you should be at the top of your list because they’re likely to have the biggest impact on the overall feel of your home. Next, consider the tasks that traditionally take up the most time but are essential for a thorough clean. These might not be the first things a guest notices but think about what makes you feel like your home is truly clean. For some, it’s having sparkling windows that let the spring sunshine in. For others, it’s ensuring the bathroom is so clean it practically sparkles. Identify these tasks and slot them into your priority list, keeping in mind the balance between impact and effort. As you’re creating your checklist, be realistic about what you can achieve in a day. It’s easy to get carried away and list every single cleaning task imaginable, but remember, the goal is a refresh, not a deep dive into every corner of your home. If your list starts getting too long, take another look and ask yourself, “Will completing this task make a significant difference in how my home feels?” If the answer is no, maybe it’s something that can wait for a regular cleaning day. Finally, once you have your list, organize it in a way that makes sense for your cleaning flow. Some people like to tackle room by room, while others prefer to do all of one type of task at a time (like dusting every room before moving on to vacuuming). Consider what will work best for you and your home’s layout. 2. Gather Your Tools and Supplies Each room you enter has its own mini checklist of tasks. Wouldn’t it be convenient if your caddy or bucket was organized in a way that aligns with these tasks? Start by categorizing your cleaning products and tools based on their use. Keep glass cleaners, microfiber cloths, and squeegees in one section of your caddy for easy access when you hit the windows and mirrors. Have another section dedicated to surfaces, stocked with multi-surface cleaners, disinfectants, and dusters. If you’re using eco-friendly homemade solutions, make sure they’re clearly labeled and stored safely to avoid any mix-ups. Don’t overlook the importance of having the right tools for specific tasks. Specialized brushes for grout cleaning, extendable dusters for those hard-to-reach cobwebs, and scrub brushes for tile and tubs can make a world of difference in both your effort and the end result. Investing in these tools and having them at the ready can transform a daunting task into a manageable one. Consider the logistics of your cleaning day. Are there supplies that are used in nearly every room, like trash bags or paper towels? Make sure these are plentiful and placed where they can be easily grabbed without disrupting your flow. It might even be helpful to have a small stockpile in multiple locations around your house if your space is large. Wear comfortable, moveable clothing and sturdy shoes to keep you in top form as you clean. You might also want to keep a small notepad and pen in your caddy for jotting down any reminders or supplies you notice running low on. This preemptive measure keeps you one step ahead, ensuring you’re not caught off guard by an empty bottle of cleaner halfway through your day. By optimizing your collection of cleaning supplies not just for accessibility but for strategic use, you transform your toolkit from a mere collection of products into a streamlined extension of your cleaning prowess.     3. Multi-Task and Set Timers consider the layout of your home and the tasks at hand to sequence your activities logically. For instance, if you’re planning to clean the kitchen and the bathroom, you can apply cleaner to the kitchen counters and bathroom tiles and then work on vacuuming the living room while the cleaner does its magic. This approach ensures that you’re always moving forward, even when you’re waiting for something else to complete. Leveraging the power of timers goes beyond merely preventing procrastination. Use them to create mini-deadlines that can help you stay focused and motivated. For example, challenge yourself to complete the dusting of one room within 10 minutes or to declutter a particular area in 15 minutes. These short bursts of focused activity, often referred to as the Pomodoro Technique, can dramatically increase your productivity by creating a sense of urgency and accomplishment. Another aspect to consider is the psychological benefit of multitasking with timers. It can turn the cleaning process into a game, where you race against the clock to beat your previous times. This gamification of mundane tasks makes them more engaging and less of a chore. You can even reward yourself with short breaks or a small treat after completing a set number of tasks or “levels,” providing additional motivation to keep going. While multitasking, it’s crucial to balance tasks that require different levels of energy and concentration. Pair a physically demanding task, like scrubbing floors, with a lighter, more automated task, such as running the laundry machine. This balance helps in managing your energy levels throughout the day, preventing exhaustion and ensuring a steady pace of work. Lastly, don’t underestimate the power of a well-timed break. Use your timer

How to Conquer Your Spring Cleaning in Just One Day: 5 Time-Saving Tips Read More »

Person cleaning a sparkling white bathtub in a bright, airy bathroom.

7 Natural and Effective Ways to Clean Your Bathtub

Ready to sparkling Clean Your Bathtub without the harsh chemicals? You’re in the right place! Whether you’re tackling soap scum, hard water stains, or just giving your tub a regular refresh, natural solutions can be surprisingly effective and much kinder to the environment. Let’s dive into seven natural and effective ways to get your bathtub looking brand new. 1. Baking Soda Paste Baking soda, also known as sodium bicarbonate, is a versatile ingredient that shines beyond the kitchen. When it comes to cleaning, particularly your bathtub, it stands out for its gentle yet effective abrasive properties. The magic begins when you create a simple paste by mixing baking soda with a bit of water. This unassuming mixture transforms into a mighty cleaning agent that can tackle various issues, from everyday grime to more stubborn spots. Applying this paste directly onto the surface of your bathtub allows it to work its magic, particularly on soap scum and light stains that can dull the appearance of your bathroom centerpiece. The paste’s texture provides just the right amount of abrasiveness to scrub away these nuisances without scratching or damaging the tub’s surface. It’s a delicate balance that baking soda strikes perfectly, offering a safe and effective way to maintain the cleanliness and shine of your bathtub. After letting the paste sit on the surface for about 15 to 20 minutes, the baking soda has ample time to penetrate and break down the grime. This waiting period is crucial as it allows the natural chemical reaction of baking soda with the stains to loosen their grip on the tub’s surface. When it’s time to scrub, using a sponge or a soft brush ensures that you can effectively remove the softened grime without exerting too much force or causing any harm. The final step of rinsing the tub thoroughly is satisfying, as you wash away the residue and reveal a cleaner, more inviting bathtub. The beauty of this method lies in its simplicity and the fact that it relies on a non-toxic, environmentally friendly ingredient. It’s a testament to the power of natural cleaning solutions and their place in our homes for maintaining cleanliness in a safer, more sustainable manner.     2. Vinegar and Dish Soap Solution The simple act of mixing equal parts white vinegar and dish soap creates a potent cleaning solution that harnesses the strengths of both ingredients. The vinegar, known for its acidic properties, is a natural descaler and disinfectant. It effortlessly cuts through tough grime, dissolving the bonds that hold dirt and soap scum to your bathtub’s surface. On the other hand, dish soap brings its grease-fighting power to the mix. It’s designed to break down oils and fats, which makes it incredibly effective at tackling the oily residues that can accumulate in a bathtub from body washes, shampoos, and conditioners. When combined, these two household staples form a cleaning solution that’s not only easy to make but also hard on grime and gentle on your tub’s finish. Applying this solution is just as straightforward as making it. By storing it in a spray bottle, you’re equipped with a convenient and efficient tool for coating the bathtub’s surface evenly. This ensures that every nook and cranny is covered, allowing the solution to work its magic uniformly. Letting it sit for about an hour is crucial. This dwell time gives the acidic vinegar and the surfactants in the dish soap enough time to penetrate and break down the grime and soap scum. It’s this waiting period that really leverages the chemical capabilities of your solution, making the scrubbing process that follows much less laborious. When it’s time to scrub, the grime that once clung stubbornly to your bathtub’s surface will now be loosened and much easier to remove. A brush, especially one with stiff bristles, becomes an effective tool for this task, allowing you to target even the most persistent areas of buildup without damaging the tub. Rinsing away the solution after scrubbing reveals a clean, revitalized surface, often with minimal effort compared to conventional cleaning methods. This vinegar and dish soap solution stands out not only for its cleaning prowess but also for its accessibility and environmental friendliness. Almost every household has vinegar and dish soap, making this method cost-effective and easy to adopt. Additionally, it’s a more health-conscious choice, avoiding the harsh chemicals found in many commercial cleaners. 3. Lemon and Salt Scrub Using a lemon, a fruit celebrated for its high citric acid content, is key to this approach. Citric acid is a natural chelating agent, which means it’s capable of binding with minerals in the hard water stains, effectively loosening their grip on the surfaces of your bathtub. This action makes the stains much easier to remove without the need for harsh chemicals. By cutting a lemon in half, you directly apply these natural acids onto the stained areas, maximizing the lemon’s cleaning potential. Sprinkling salt onto the cut side of the lemon before scrubbing introduces a gentle abrasive element to this cleaning duo. Salt, being granular and somewhat coarse, works excellently in conjunction with the lemon’s acidity to physically break down and scrub away the stain particles. This combination ensures that you’re not just chemically loosening the stains but also physically removing them from the surface. Moreover, the lemon and salt scrub is a delightfully fragrant way to clean. Unlike the overpowering or chemical smells associated with traditional cleaners, this method leaves behind a fresh, citrusy scent that can make your bathroom feel cleaner and more inviting. It’s a natural deodorizer, ensuring that not only does your bathtub get a thorough clean, but your entire bathroom benefits from a fresher atmosphere. This approach is especially appealing for those seeking sustainable and non-toxic cleaning solutions. Lemons and salt, common kitchen staples, are readily biodegradable and safe for most surfaces, making this method a responsible choice for the environment and a safer option for homes with children or pets. In addition to its effectiveness and eco-friendliness,

7 Natural and Effective Ways to Clean Your Bathtub Read More »

Person savoring coffee near a Nescafe machine in a cozy setting.

How to Deep Clean Your Nescafe Machine in 5 Simple Steps

Deep clean your Nescafe machine isn’t just about keeping your coffee tasting great—it’s also about ensuring your machine lasts as long as possible. Coffee lovers know the difference a clean machine can make to their morning cup. So, let’s dive into how you can get your Nescafe machine sparkling clean with these five simple steps. Trust me, it’s easier than you think, and your taste buds will thank you! Step 1: Unplug and Disassemble Stepping into the process of deep cleaning your Nescafe machine starts with the fundamental and crucial step of ensuring your safety by unplugging the machine. This initial action sets the stage for a hazard-free cleaning session, ensuring that there’s no risk of electrical shock as you delve into the nooks and crannies of your beloved coffee companion. Once the machine is safely disconnected from its power source, the disassembly begins. This part of the process might feel a bit like a puzzle, carefully removing each piece that can be detached. Typically, the parts you’ll be looking to remove include the drip tray, which catches any coffee drips or spills during brewing, ensuring your counter stays clean. The water reservoir, which holds the water needed for brewing your coffee, also needs to be detached and is often one of the larger components of the machine. The pod holder, a critical piece where the coffee pod sits during brewing, will also need to be removed. Disassembling your Nescafe machine is not just about taking it apart; it’s a crucial step that allows you to access all the areas where coffee oils and residue can build up over time. These residues, if not cleaned, can affect the taste of your coffee and the efficiency of your machine. By breaking down the machine into its components, you’re able to give each part the thorough cleaning it deserves. Think of it as a spa day for your Nescafe machine, where each component gets the attention it needs to function at its best.   Step 2: Soak and Scrub This step is akin to giving your machine a luxurious bath, designed to tackle the stubborn coffee oils and residues that have built up over time. Start by filling your sink with warm, soapy water—think of it as preparing a relaxing bubble bath, but for your coffee machine’s components. The warmth of the water combined with the soap acts as a gentle yet effective means to soften and break down the oils and residues that cling to the surfaces and hidden corners of each part. Once your sink is ready, immerse the disassembled parts into this soothing bath, letting them soak for about 20 minutes. This soaking period is crucial as it allows the warm soapy water to work its magic, loosening the grime and making it easier to remove. It’s a moment where patience pays off, as giving the parts enough time to soak can significantly reduce the effort needed to clean them. After the soaking time is up, it’s time to roll up your sleeves and get scrubbing. Armed with a soft sponge or brush, begin the meticulous process of cleaning each piece. This is where your attention to detail really shines. As you scrub, focus on the nooks and crannies of each component. These areas can often harbor hidden coffee residues that, if left uncleaned, can affect the taste of your coffee or even the efficiency of your machine. Approach this task like a treasure hunt, where instead of seeking out gold or jewels, you’re on a mission to find and eliminate all traces of old coffee bits. Step 3: Rinse and Dry This stage is about ensuring that all the effort you’ve put into cleaning does not get compromised by leftover soap residue or moisture that could invite unwanted guests, like mold or bacteria, into your coffee machine. Start by rinsing each scrubbed part under running water. The aim here is to be thorough and meticulous, making sure that no nook or cranny retains any soap. This step washes away the last remnants of grime and cleaning solution, clearing the stage for a fresh coffee brewing experience. The running water acts like a final sweep, ensuring that each component is primed and ready for the next step in its cleaning journey. Once the rinse is complete, the drying process begins. This is where patience and attention to detail come into play again. You have two choices here: let the parts air dry or help them along with a clean, dry towel. If you choose to air dry, arrange the parts on a drying rack or a clean surface where they can sit undisturbed, allowing air to circulate freely around them. This natural drying process is gentle and effective, ensuring that every drop of moisture evaporates. Alternatively, patting the parts dry with a towel can speed up the process, allowing you to reassemble your machine faster. Whichever method you choose, the goal is to ensure that every component is thoroughly dry. Step 4: Descale the Machine The descaling process can be approached in two ways, offering flexibility based on your preferences and what you have on hand. For those who prefer ready-made solutions, commercial descaling products are designed specifically for this purpose, formulated to effectively dissolve calcium deposits without harming your machine’s internal components. Alternatively, for a more natural and readily available option, a homemade mixture of equal parts water and white vinegar serves as an effective DIY descaling solution. Vinegar, with its acetic acid content, is naturally adept at breaking down limescale, making it a potent ally in the maintenance of your Nescafe machine. Filling the water reservoir with your chosen descaling solution is the first step in this detox process. Then, initiate the brewing cycle several times without a coffee pod in place. This allows the solution to circulate throughout the machine, ensuring that it reaches all areas where calcium deposits may have formed. As the solution moves through the machine, it works to dissolve and lift

How to Deep Clean Your Nescafe Machine in 5 Simple Steps Read More »

Person joyfully cleaning a sunny, cozy living room floor.

“How to Find the Best Maid Services Near Me” A 5-Step Guide

Ever felt overwhelmed by the sheer amount of cleaning tasks piling up at your home? “I need to find the best maid services near me!” But how do you sift through the sea of options to find the perfect match for your cleaning needs? Don’t sweat it; I’ve got you covered with a handy 5-step guide that’ll make finding your cleaning superhero as easy as pie. Step 1: Define Your Needs When you start thinking about hiring a maid service, the variety of options available can be overwhelming. It’s like going to a restaurant with a 10-page menu—where do you even start? This is why knowing your specific needs is akin to narrowing down your meal choices to what you’re really in the mood for, making the selection process much more manageable. First off, consider the size and layout of your space. A sprawling home with multiple bedrooms will have different needs compared to a cozy, one-bedroom apartment. Are there areas that require special attention, like antique furniture or high ceilings? Identifying these nuances will ensure the service you choose can handle your particular challenges. Next, think about the frequency of service. This isn’t just about how often you’d like them to come but also about fitting into your lifestyle and schedule. Some people prefer a thorough clean once a week to reset their space, while others might opt for less frequent visits, focusing on deeper cleaning tasks. Your work schedule, social commitments, and personal preference for privacy will all play a part in deciding this. Another factor to weigh is your budget. Maid services can range from budget-friendly to premium, depending on the scope and frequency of cleaning. Being clear about how much you’re willing to spend will help you avoid falling in love with a service that’s outside your budget. Also, consider the reason behind seeking a maid service. For instance, if you’re aiming for that end-of-tenancy clean, you’ll want a service that specializes in detailed, deep-cleaning tasks designed to make your space look as good as new. On the other hand, if you’re hosting an event and need your place to be spotless, look for services that offer customized cleaning packages tailored to these one-off needs. Think about your personal preferences and requirements. Do you prefer eco-friendly cleaning products due to allergies or environmental concerns? Do you have pets that might influence the type of cleaning needed or the products used? These details are key in finding a service that not only cleans your home but also respects and aligns with your values and lifestyle.     Step 2: Start Your Search After you’ve tapped into your personal network and done a preliminary internet search, it’s time to delve deeper. Social media platforms can be incredibly useful in this phase. Many local community groups on platforms like Facebook or Nextdoor allow you to post inquiries or search for recommendations on maid services. These groups often have real-time feedback and experiences shared by members, giving you insights into the reliability and quality of services from a more personal perspective. Professional platforms like LinkedIn can also offer clues to the reputation and professionalism of the cleaning services you’re considering. A company with a well-maintained LinkedIn profile may indicate a higher level of professionalism and commitment to their business image. Don’t forget about the power of local bulletin boards, both online and in physical spaces like community centers or grocery stores. Local businesses often advertise their services there, and you might find a flyer for a cleaning service that’s exactly what you’re looking for but hasn’t shown up in your online searches. Review sites specifically dedicated to service industries, such as Angie’s List or HomeAdvisor, are also invaluable resources. These sites not only list local cleaning services but also provide detailed reviews, ratings, and sometimes even pricing information. They can offer a more comprehensive view of what each service offers and how they stack up against each other in terms of customer satisfaction. Another often-overlooked method is directly contacting real estate agents or property management companies in your area. Given their involvement in property turnovers and maintenance, they likely have a list of trusted cleaning services that they use regularly and can recommend based on their experiences. Step 3: Check Reviews and Ratings After identifying potential maid services, it’s essential to analyze the feedback they’ve received from various sources. While independent review sites and social media are great starting points, there are additional strategies to get a comprehensive view of a service’s reputation. One effective method is to visit the company’s website and look for a testimonials section. Businesses often showcase their best reviews here, which can give you insight into the strengths they pride themselves on. However, remember that these are selected highlights, so it’s important to balance this information with reviews from third-party sites. Another approach is to engage with the community on social media platforms where the service is active. Observing how they interact with customers, respond to feedback, and address concerns can offer valuable insights into their customer service approach and commitment to satisfaction. Look for responsiveness and a willingness to engage constructively with both positive and negative comments. Don’t hesitate to reach out directly to reviewers, if possible. Some platforms allow you to message users who have left reviews. This can provide an opportunity to ask specific questions about their experience, particularly if they’ve posted about a situation similar to what you’re seeking help with. Direct feedback can often be more detailed and candid, giving you a clearer picture of what to expect. Furthermore, consider the context and details in each review. Pay attention to the nature of complaints or praise. For example, if negative reviews consistently mention issues that wouldn’t bother you as much, such as minor scheduling mishaps in an otherwise stellar cleaning service, you might decide those aren’t dealbreakers. Conversely, if you notice repeated mentions of aspects that are crucial to you, like the use of eco-friendly products or the ability

“How to Find the Best Maid Services Near Me” A 5-Step Guide Read More »

Ergonomic Gaming Chair in Sleek White Room Design

How Often Should You Clean a Gaming Chair? A Detailed Schedule

Hey, fellow gamers and cleanliness enthusiasts! Ever wondered how often you should Clean a Gaming Chair to keep it in prime condition? Well, you’re in luck because I’ve got a detailed schedule just for you. Let’s keep that throne of yours looking and feeling fresh, so you can focus on those epic gaming sessions without any distractions. Immediate Clean-ups: Spills and Smudges When it comes to immediate clean-ups for spills and smudges on your gaming chair, acting fast is key to preventing any long-term damage. It’s all about having the right tools and products at your disposal to effectively tackle whatever mess comes your way, ensuring your chair remains in top-notch condition. For spills that are water-based—like sodas, energy drinks, or just plain water—a clean, damp cloth is your first line of defense. It’s important to blot the spill rather than rubbing it, as rubbing can push the liquid deeper into the fabric or upholstery, making it harder to remove. For these types of spills, microfiber cloths are particularly effective. They’re super absorbent and gentle on all types of materials, from leather to fabric. In cases where water alone isn’t enough, a mild detergent solution can be used. Mixing a small amount of dish soap with water creates a gentle cleaning solution that can lift more stubborn stains. Always use the solution sparingly to avoid saturating the chair too much. Oil-based spills, which can come from foods, lotions, or other greasy substances, require a different approach. For these, you’ll need a cleaner that’s specifically designed to break down oils. Krud Kutter Original Concentrated Cleaner/Degreaser is a great option here. It’s a versatile, water-based cleaner that can tackle grease, oil, and grime without harsh chemicals. Apply it to a cloth and gently dab at the spill, ensuring not to spread the stain further. As always, doing a spot test on a hidden part of your chair before using any new product is crucial to ensure it won’t damage the material. One of the most important steps in dealing with any spill or smudge is to consult the manufacturer’s cleaning guidelines for your specific gaming chair. These guidelines can provide valuable insights into what products and methods are safe to use on the chair’s material, whether it’s leather, mesh, fabric, or a synthetic blend. Ignoring these recommendations can lead to discoloration, material breakdown, or other types of damage, compromising the look and lifespan of your chair. To make future spills easier to handle, consider using a fabric protector on your gaming chair, if the material and manufacturer’s guidelines allow it. Products like Scotchgard Fabric & Upholstery Protector can create a repellent barrier on fabrics, making it more difficult for spills to penetrate the material and cause stains. This can be a game-changer, especially for those who frequently snack or drink at their gaming setup.     Weekly Wipe-downs Starting with the basics, the microfiber cloth stands out as an essential tool in your cleaning kit. Its super-fine fibers are perfect for picking up dust, dirt, and even microscopic debris without the need for chemical cleaners or leaving any scratches on your chair’s surface. For the best results, lightly dampen one corner of the cloth with water to tackle any stubborn spots or smudges, then use the dry part to buff the area to a shine. This method ensures you’re not introducing too much moisture to your chair, which could seep into the cushioning and potentially cause damage over time. When it comes to products, especially for those with leather chairs, choosing the right leather conditioner is crucial. Leather Honey Leather Conditioner is a highly recommended option, known for its long-lasting formula that penetrates deep into the leather to protect it from drying out and cracking. Another great choice is the Weiman Leather Cleaner and Conditioner, which offers a dual-action formula that cleans and conditions in one step, making it a time-saver during your cleaning routine. For fabric chairs, a gentle fabric cleaner like Scotchgard Fabric & Upholstery Cleaner not only cleans but also adds a protective layer to repel future spills and stains. Remember, whatever product you choose, always perform a spot test in an inconspicuous area to ensure there’s no adverse reaction to the material. In addition to these products, consider incorporating a soft-bristled brush into your routine for fabric chairs. This can help loosen any particles trapped in the weave of the fabric, making them easier to vacuum or wipe away. It’s a gentle yet effective way to deep clean without resorting to harsh chemicals or vigorous scrubbing, which could damage the fabric. Monthly Deep Cleans When the calendar flips to a new month, it’s the perfect reminder for a deeper dive into cleaning your gaming chair, going beyond the surface to ensure every part of your throne is pristine. This monthly ritual is about giving your chair the spa treatment it deserves, ensuring longevity and maintaining that brand-new feel. Kicking off your monthly deep clean, a vacuum cleaner equipped with a brush attachment becomes your best tool. This setup is ideal for coaxing out the dust, crumbs, and other debris hiding in the chair’s crevices, seams, and under the cushions. The brush attachment is gentle enough not to damage the fabric or leather but effective in dislodging particles that have settled over the month. A vacuum like the Dyson V15 Detect, known for its powerful suction and soft brush attachment, can make light work of this task, ensuring no corner is left untouched. For those with fabric gaming chairs, finding a cleaner that can handle spots and odors without harming the material is crucial. The Bissell Pet Stain Eraser is a portable and effective option, designed to tackle stains and smells with ease. Its formula is gentle on fabrics, making it a safe choice for your chair. Another great option is the Folex Carpet Spot Remover, which is celebrated for its ability to remove tough stains without the need for rinsing or vacuuming after application, making it a

How Often Should You Clean a Gaming Chair? A Detailed Schedule Read More »

Clean and Serene Indoor Space - Health Benefits Visual

7 Surprising Benefits of Regular Cleaners Services for Your Health and Home

The humble act of cleaners services—often relegated to a weekend chore or something we scramble to do before guests arrive. But what if I told you that regularly enlisting the help of professional cleaning services, like those offered by Toronto Shine Cleaning, could bring surprising and significant benefits to both your health and home? Let’s dive into the seven unexpected perks that might just have you rethinking your cleaning routine. 1. Reduced Allergy and Asthma Symptoms It’s worth noting the meticulous attention to detail that professional cleaners bring to the table. Unlike standard cleaning practices, professional services go beyond just dusting and vacuuming. They focus on deep cleaning areas that are often overlooked but can harbor significant amounts of allergens. This includes under beds, behind furniture, and along baseboards—places where dust and pet hair accumulate without regular attention. The products used by professional cleaning services are chosen with care to avoid the introduction of new irritants. While some cleaning products can trigger allergic reactions or asthma symptoms due to harsh chemicals, professional services opt for eco-friendly and hypoallergenic cleaning solutions. These products are effective at eliminating germs and dirt while being gentle on your respiratory system and the environment. Professional cleaners also emphasize the importance of maintaining a regular cleaning schedule. It’s not just about the immediate relief from allergens; consistent cleaning prevents the accumulation of dust, pollen, and dander over time. This proactive approach is crucial for households with allergy sufferers, as it can significantly reduce the frequency and severity of allergy and asthma flare-ups. Investing in regular cleaning services means that the air filters and vents in your home receive timely attention. Cleaners ensure that these crucial components are free from dust build-up, allowing your home’s air filtration system to function efficiently. This not only contributes to cleaner air but also enhances the overall efficiency of your heating, ventilation, and air conditioning (HVAC) system, potentially reducing energy costs. 2. Lower Stress and Fatigue Levels The connection between a clean home and reduced stress levels extends into several facets of our daily lives, illustrating how profound an impact our living environment can have on our mental health. When professional cleaners take over the task of maintaining our homes, they do more than just tidy up; they create an atmosphere conducive to relaxation and peace. This transformation is not merely about aesthetics; it’s about fostering an environment where the mind can unwind, free from the distractions and irritants of disarray. A cluttered space is not just visually unappealing; it’s a constant reminder of tasks undone, contributing to a sense of unease and procrastination. This clutter can hinder our ability to focus, making even simple tasks seem daunting. Professional cleaning services cut through this chaos, organizing and cleaning in a way that prioritizes harmony and flow within the home. The physical act of decluttering and cleaning has been shown to have a cathartic effect, but when time or energy is lacking, having a service step in ensures that the benefits are still realized. Moreover, the act of entrusting the cleanliness of your home to professionals can alleviate the burden of domestic chores, freeing up time and energy. This redistribution of resources allows individuals and families to focus on activities that bring them joy and relaxation, whether it’s spending time together, pursuing hobbies, or simply resting. The mental load of keeping track of cleaning tasks is lifted, allowing for a lighter, more positive outlook on life. The sense of renewal and refreshment that comes from a professionally cleaned home can also inspire healthier lifestyle choices. A clean and organized kitchen invites cooking and meal preparation, leading to better eating habits. Similarly, a tidy and inviting living area encourages physical activity and mindful relaxation, such as yoga or meditation, further contributing to stress reduction and improved well-being.     3. Enhanced Indoor Air Quality Enhancing the indoor air quality of your home is crucial for maintaining the health and comfort of its occupants. It’s an area where the expertise of professional cleaning services shines, as they employ techniques and products designed specifically to purify and maintain the freshness of your home’s air. One of the key strategies used by professional cleaners to improve indoor air quality is the thorough removal of dust and particulate matter. These particles, often invisible to the naked eye, can circulate through your home’s air and settle on surfaces, contributing to poor air quality. Professional cleaners tackle this issue head-on by using microfiber cloths that trap dust effectively, rather than merely dispersing it back into the air. They also utilize vacuum cleaners equipped with HEPA filters, which are capable of capturing particles as small as 0.3 microns, including pollen, pet dander, and dust mites. This meticulous approach ensures that the air in your home remains clean and less likely to provoke allergies or respiratory discomfort. Furthermore, professional cleaning services are acutely aware of the potential hazards associated with volatile organic compounds (VOCs) found in many conventional cleaning products. VOCs can evaporate into the air at room temperature, degrading indoor air quality and posing health risks over time. To mitigate this, professional cleaners opt for eco-friendly cleaning solutions with low or no VOC content. These products achieve the dual goals of effective cleaning and maintaining healthy indoor air, without introducing harmful chemicals into your environment. In addition to using safer cleaning products, professional services can also advise on maintaining optimal indoor air quality between visits. This might include recommendations for air-purifying plants, the use of air purifiers, and tips for reducing humidity levels, which can foster the growth of mold and mildews, further compromising air quality. 4. Increased Productivity This principle applies as much to the home as it does to the workplace. In a clean and organized space, the mind is less likely to be distracted by out-of-place items or the subconscious to-do list of cleaning tasks that need attention. This mental clarity is invaluable, whether you’re working from home, pursuing creative projects, or simply trying to unwind

7 Surprising Benefits of Regular Cleaners Services for Your Health and Home Read More »

Powerful vacuum deep cleans mattress, highlighting the cleaners head in action.

5 Simple Steps to Clean Mattress: How to Refresh Your Bed Easily

Oh, the joy of jumping into a fresh, clean mattress at the end of a long day! But when was the last time you gave your mattress a little TLC? If you can’t remember, it’s probably overdue for a refresh. Not to worry, though! I’ve got a super simple 5-step guide to help you make your mattress feel brand new again. Trust me, it’s easier than you think, and you don’t need any fancy gadgets or harsh chemicals. Let’s dive in and get your bed feeling like a dreamy cloud! 1. Strip and Wash When you start with stripping your bed, it’s not just about removing the sheets and covers; it’s about setting the stage for a thorough clean. Begin by peeling away every layer, including any decorative items like throw pillows and blankets that often get overlooked. These items collect dust and allergens just as much as your regular bedding, so giving them a clean (according to their care instructions) can really freshen up the whole bed. As you load your washing machine, make sure to separate items by color and material type. This is important because different fabrics require different washing temperatures and settings to avoid damage. For example, cotton sheets can generally handle a hot wash, which is great for killing germs, but more delicate materials might need a gentler approach. If your washing machine has a sanitize cycle, using it for your bed linens can be particularly effective in eliminating dust mites and other allergens. If you’re concerned about using too much heat or have items that are too delicate for hot temperatures, adding a laundry sanitizer to your wash can offer a similar level of deep cleaning without the risk. For duvets and comforters, consider their size and material before deciding whether to wash them at home or take them to a professional. Large or particularly bulky items might not fit properly in a standard washing machine and could benefit from the larger capacity of commercial machines at laundromats or from professional cleaning services that know how to handle them without causing damage. Drying your bedding is just as crucial as the washing process. Make sure to thoroughly dry sheets, pillowcases, and mattress covers to prevent any mildew or mustiness. Again, pay attention to fabric care labels. While many items can go in the dryer, others might be better off air-dried to preserve their quality and shape. 2. Vacuum the Mattress When you start vacuuming, it’s best to do so in a methodical manner. Begin at the top of the mattress and work your way down in overlapping, narrow paths to ensure you’re covering every inch of the surface. This systematic approach helps to make sure no spot is missed, especially since it’s easy to overlook areas that don’t seem dirty at first glance. The sides of your mattress are just as important as the top. Many people forget about this part, but the sides can harbor just as much dust and debris, particularly if you have a bed frame that allows dust to settle from the floor onto the mattress edges. Use the same careful, overlapping strokes here, and don’t rush. It’s these often-ignored areas that can make a significant difference in the overall cleanliness of your bed. Seams and crevices are indeed hotspots for dust and allergens. These areas provide the perfect hiding spots for particles to accumulate undisturbed. When you reach these parts, slow down and use the vacuum’s crevice tool if available. This attachment is specifically designed to get into tight spaces and remove debris that other tools might miss. Sometimes, giving these areas an extra pass or two can lift out dust that’s been compacted over time. If your mattress has any buttons, fabric folds, or embroidery, these are areas where dust can easily be trapped. Carefully vacuum around these decorations, being careful not to damage the mattress. The goal is to remove dust without harming the mattress’s structure or appearance. This vacuuming process not only helps in removing visible dust and particles but also aids in reducing the number of allergens, such as dust mites and pet dander, that can cause nighttime allergies and affect sleep quality. Moreover, removing dead skin cells lessens the food supply for dust mites, contributing to a healthier sleeping environment.     3. Spot Clean Stains When mixing your cleaning solution, it’s important to consider the type of stain you’re dealing with. A general mixture of dish soap and water is a great starting point for most stains, as it’s gentle enough not to damage the fabric but effective enough to tackle light to moderate stains. However, the ratio of soap to water should be low to avoid creating too much suds, which can be difficult to rinse out. A teaspoon of dish soap to two cups of water is a good guideline. For more stubborn stains, such as blood or urine, you might need a different approach. Hydrogen peroxide, for example, can be effective for blood stains, but it should be used sparingly and tested on a small, inconspicuous area of your mattress first to ensure it doesn’t bleach the fabric. Always dab the stain rather than rub, as rubbing can spread the stain further or embed it deeper into the mattress fibers. Applying the cleaning solution should be done with a light hand. Use a clean, white cloth to avoid any color transfer from the cloth to the mattress. Dab the stain gently, working from the outside in to prevent the stain from spreading. Allow the solution to sit for a few minutes to break down the stain, then dab again with a dry cloth to absorb the solution and lifted stain. This may need to be repeated several times for tougher stains. For oil-based stains, such as makeup or greasy food, a solution of baking soda and water can be effective. Make a paste and apply it directly to the stain, letting it sit for 30 minutes to an hour.

5 Simple Steps to Clean Mattress: How to Refresh Your Bed Easily Read More »

Person decluttering room with basket in hand.

How to Declutter Your Home for Spring: A Step-by-Step Guide

It’s not just a time for the flowers to bloom but also the perfect season to Declutter Your Home for Spring, giving it a fresh, vibrant feel. If the thought of tackling this task feels daunting, worry not! I’ve got a step-by-step guide to make decluttering your space as breezy as a beautiful spring day. So, let’s roll up our sleeves and dive in! Step 1: Set Your Goals Starting with the end in mind transforms the process from a daunting task into an exciting journey towards your ideal living space. Think about what you want each room to look like and how you want to feel when you’re in them. Is your goal to create more space in your living room for family activities? Or perhaps you’re aiming to transform your home office into a productivity haven, free from distractions and unnecessary clutter. Understanding your motivation is key. Whether it’s the desire for a serene environment where you can unwind and relax or the need for a functional space that supports your daily activities, your underlying reasons will guide your decluttering efforts and keep you motivated even when the going gets tough. Setting goals that are specific and achievable is also about realism. Acknowledge the time and effort it will take. If you’re juggling a busy schedule, consider setting smaller, more focused goals. Maybe start with decluttering a single drawer or shelf a day. This approach keeps the task manageable and helps build momentum as you see your efforts paying off day by day. Setting goals is also about envisioning a lifestyle. Decluttering is more than just getting rid of things; it’s about making room for what truly matters. By having clear goals, you not only transform your space but also take a step towards the life you want to lead—a life less cluttered with things and more filled with meaning and joy. Step 2: Create a Plan Start by taking a walk through your home, notebook in hand, and assess each room. Note the areas that feel most cluttered and those that simply need a quick tidy. This walkthrough gives you a bird’s eye view of the task ahead, helping you prioritize areas that will make the biggest impact on your daily life once decluttered. Once you’ve identified the key areas to focus on, it’s time to set a timeline. Be realistic about what you can achieve in each decluttering session. For example, sorting through a wardrobe or a bookshelf might take a few hours, while organizing a junk drawer might be done in less than one. Scheduling these sessions into your calendar makes decluttering a part of your routine, rather than a sporadic activity that’s easy to postpone. Consider the rhythm of your week when you plan your sessions. If your energy levels are higher in the morning, schedule decluttering sessions for then. If you’re someone who finds decluttering therapeutic, perhaps an evening session would be a relaxing way to end your day. And about those breaks—don’t underestimate them. Decluttering can be physically and emotionally taxing. Finding mementos or deciding what to part with can stir up memories and emotions. Breaks are not just pauses but moments to reflect, recharge, and celebrate the progress you’ve made. They can be as simple as a cup of tea in your newly organized living space or a walk outside to clear your mind. In your plan, also consider the disposal of items. Knowing in advance where to donate clothes, recycle electronics, or sell valuable items can make the process smoother and prevent piles of discarded items from cluttering up your space post-declutter. Lastly, involve your household in the planning process. Decluttering can affect everyone in the space, and their buy-in can make the journey more enjoyable and less of a chore. Whether it’s assigning tasks or deciding together what stays and what goes, a team effort not only lightens the load but also brings a sense of shared accomplishment.     Step 3: Gather Your Supplies Firstly, consider the types of containers you’ll need for different categories of items. For donations, sturdy bags or boxes that can be easily transported to a charity shop are ideal. For items you plan to sell, you might want clear bins or bags to keep them in good condition and separate from donations or trash. And for those things that have reached the end of their life, have recycling bins and trash bags ready to go. But your toolkit needs more than just containers for sorting. Labeling your boxes and bags can save you a ton of time and confusion later on. Simple sticky labels or a marker pen will do the job. Mark each container with its destination—donate, sell, recycle, or trash—to keep your items organized as you declutter. Cleaning supplies are the unsung heroes of the decluttering process. Once you clear a space, you’ll likely uncover dust and grime that’s been hiding. Have a basic cleaning kit ready with supplies like all-purpose cleaner, dusting cloths, and a vacuum cleaner. This allows you to clean as you go, ensuring that each area is not only decluttered but also sparkling clean. Consider having some maintenance tools at hand. A screwdriver, for example, can help dismantle items that need to be broken down for disposal or recycling. Scissors or a box cutter can open packages or break down cardboard boxes for recycling. For those precious items you decide to keep, having organizing aids like shelf dividers, storage bins, or drawer organizers ready can immediately help you put everything in its right place. Investing in these tools upfront means you won’t delay the final step of organizing your possessions. Step 4: Sort Your Items Sorting through your belongings requires a balance of practicality and sentimentality. While the one-year rule is a solid starting point, there are additional questions you can ask yourself to help with the decision-making process. Consider the item’s usefulness, emotional value, and whether it contributes positively to your living space. If an

How to Declutter Your Home for Spring: A Step-by-Step Guide Read More »