Blog

The Power of Citric Acid

The Power of Citric Acid: Your Solution for Limescale and Grime

The Quiet Workhorse Hiding in the Baking Aisle Aisle after aisle of specialty sprays promise to blast away limescale, soap scum, and hard-water haze, most of them loaded with aggressive chemistry and perfume-strong fragrances. Meanwhile, near the flour and sugar at your grocery store, sits a white crystalline powder that quietly outperforms many of them: citric acid. Nature packs this weak organic acid into lemons and limes, and as a cleaning agent it dissolves mineral-based trouble without the corrosive punch of the strong mineral acids found in heavy-duty descalers. What makes it so useful in a house supplied with hard water is that most of the stubborn buildup we fight is mineral, not grease. Calcium and magnesium ride along in dissolved form, and when the water evaporates off a kettle wall or a shower door, those minerals stay behind as a chalky crust or a cloudy skin. Citric acid is built for exactly that job. How Chelation Does the Scrubbing for You The mechanism has a name: chelation. Citric acid molecules latch onto the calcium and magnesium ions in scale and lock them into a new structure called a chelate. Unlike the original deposit, a chelate dissolves in water, so the crust stops clinging to the surface and rinses straight down the drain. This matters for more than convenience. Power-scrubbing scale is usually a losing fight, and the abrasion can scar the surface underneath. Chemistry replaces elbow grease, and your finishes stay intact. Five Jobs It Handles Beautifully Kettles: Fill the vessel halfway, stir in one to two tablespoons of powder, bring it to a boil, then let it stand for twenty to thirty minutes while the deposits fizz apart. Pour it out and rinse with fresh water several times until the interior looks nearly new. Coffee makers: Dissolve a tablespoon or two in a full reservoir and run a brew cycle with no grounds, then run at least two more cycles with plain water so no acid taste lingers in the internal lines. Dishwashers: Start with an empty machine, add roughly half a cup to the tub floor or the main detergent dispenser, and run the longest, hottest cycle to clear scale from spray arms, filters, and walls so dishes stop coming out spotty. Showerheads: Slip a plastic bag filled with the solution over the head, secure it with a rubber band or twist tie, and soak for at least an hour, or overnight when jets spray in crooked, weakened lines. Finish with a hot rinse to flush the plumbing. Toilets: Pour about half a cup into the bowl before bed, skip the flush, and give the bowl a quick brush in the morning. Hard-water rings dissolve overnight, so stains lift without harsh fumes. In the laundry room, about a quarter cup added to the main wash chelates the minerals that make detergent fail, so whites come back brighter, colors look fresher, and stiff fabrics soften without a commercial softener. The powder can also help release rust spots from clothing. A Simple Spray for Daily Messes For general kitchen duty, dissolve one to two tablespoons in a liter of warm water in a spray bottle, shake until the crystals disappear, and you have a degreasing, de-spotting spray for countertops, sinks, and stainless faucets. Sprinkle a little on a damp cutting board, scrub, wait a few minutes, and rinse to freshen it. In the bathroom, flood the same spray over soap scum on doors, tile, and tubs and let it work for ten to fifteen minutes before a non-abrasive sponge and a rinse restore clarity to glass. Where Citric Acid Must Never Go Surface Verdict Why Marble, granite, travertine Never The acid reacts with calcium carbonate and etches the polish permanently Glass, chrome, porcelain Safe Dissolves water spots and leaves a streak-free shine Unsealed grout, brass plating Avoid Can eat into grout and strip the plating from fixtures Old, delicate antiques Test first Unknown finishes deserve a hidden-spot trial Respect the Acid Food-grade does not mean friction-free. Wear gloves during longer sessions, keep the powder out of your eyes, and flush immediately with water if contact happens. The cardinal rule: never blend citric acid with chlorine bleach, because the pair can release toxic chlorine gas. The federal hygiene guidance on cleaning and disinfecting with bleach explains why bleach deserves careful, solitary use, and the CDC’s overview of when and how to clean and disinfect at home is a good sanity check on any routine. Because it is inexpensive and biodegradable, a well-stocked jar of citric acid quietly replaces a shelf of single-purpose bottles. When Soaking Is No Longer Enough Some buildup predates your ownership of the home, and no bag-on-the-showerhead trick reaches it. That is when a deep cleaning service pays for itself: crews arrive with professional tools for the scale, grime, and neglected corners a weekend project cannot shift. Routine upkeep is cheaper still, with regular house cleaning booked on your calendar and current rates published on the pricing page (studio and one-bedroom visits start at $212.63 before HST). To talk through your home, call Toronto Shine Cleaning at (647) 424-0355. Frequently Asked Questions Is the powder the same thing as lemon juice? It is the same acid your tongue detects in citrus, just isolated as a purified white crystal, which makes it far more concentrated and measurable than juice. Why does my kettle scale so quickly? Hard water is loaded with dissolved calcium and magnesium. Every boil evaporates water and leaves a thin mineral film behind, and those layers thicken into the crust that can also sap heating efficiency and flake into your cup. Can citric acid damage my appliances? On glass, porcelain, chrome, and stainless interiors it is gentle by design, since it is a weak organic acid. The danger list is short: natural stone, unsealed grout, brass-plated fittings, and any pairing with bleach. Will it help dingy laundry? Yes, if hard water is the culprit. A quarter cup in the main wash binds the minerals

The Power of Citric Acid: Your Solution for Limescale and Grime Read More »

The Pan Care Guide: The Best Tips For Cleaning 7 Different Types of Pans

Why Pan Care Depends on the Material A well-cared-for pan earns its place in your kitchen, but the right cleaning method varies by material. The wrong technique scratches surfaces, strips seasoning, or leaves permanent stains. This guide covers seven common pan types with the daily care and stain-fighting tricks each one needs to perform and last. Whatever the material, a few rules apply to every pan: Let cookware cool before washing to avoid thermal shock. Match the scrubber to the surface, from soft sponges to chainmail. Dry everything thoroughly, especially iron and carbon steel. Follow the manufacturer’s care instructions when in doubt. Non-Stick and Stainless Steel Pans Non-Stick: Gentle Cleaning Only The guiding principle for any non-stick pan, PTFE-based or ceramic, is gentleness. Let the pan cool for a few minutes before washing; plunging a hot pan into cold water causes thermal shock that can warp the base and degrade the coating. Wash with a soft sponge, mild dish soap, and warm water, and skip steel wool, abrasive scouring pads, and harsh cleansers entirely, since they destroy the non-stick surface. For stuck-on food, pour in roughly an inch of water with a drop of dish soap and warm the pan on low until the residue releases. A brownish film from cooking oils lifts with a baking soda and water paste left on for twenty minutes. Use wooden, silicone, or nylon utensils, avoid very high heat, and hand-wash even dishwasher-safe pans, since dishwasher heat shortens the coating’s life. Stainless Steel: Tough but Prone to Tints Stainless steel pans handle more vigorous cleaning. For daily use, soap, water, and a standard sponge are enough. Deglaze a hot pan with a splash of water or broth right after cooking to lift browned bits. For burnt-on messes, cover the grime with water, add a tablespoon of baking soda, and boil for several minutes, then cool and scrape with a wooden spoon. Blackened carbon responds to a paste of powdered cleanser such as Bar Keepers Friend, whose oxalic acid breaks down tough stains. Rainbow-like heat tint is harmless oxidation from overheating: pour white vinegar over the bottom, wait ten to fifteen minutes (or heat it gently), then wash as usual. Cast Iron and Carbon Steel Skillets Cast Iron: Protect the Seasoning Cast iron care is about maintaining seasoning, the baked-on oil layer that makes the pan naturally non-stick and rust-resistant. Clean the pan while it is still warm with hot water and a stiff-bristled brush or pan scraper, using a chainmail scrubber for stubborn bits. A tiny drop of mild soap is acceptable on a well-seasoned pan, though purists skip it. Never let it air dry: rust follows. Dry it on the stove over low heat, rub in half a teaspoon of neutral oil such as canola or flaxseed, and heat until the oil just smokes. If rust appears, scrub down to bare metal with steel wool and soapy water, then re-season by coating the pan with a thin layer of oil and baking it for an hour, upside down, in a hot oven. Carbon Steel: Same Ritual, Lighter Pan Carbon steel behaves like cast iron: clean with hot water and a brush, skip harsh soaps, and dry it over the burner right after washing. Finish by wiping on a micro-thin coat of oil to protect the patina. Rust is the primary enemy, so immediate, thorough drying is your best defense. Enameled Cast Iron, Copper, and Aluminum Enameled Cast Iron: No Seasoning Needed Enameled cast iron, like a classic Dutch oven, has a glass-like coating fused to the iron, so there is no seasoning or rust to manage. Mild dish soap, warm water, and a soft sponge handle daily cleaning, but metal utensils and scouring pads can chip the enamel. Tomato sauce or red wine stains lift when you simmer water with two tablespoons of baking soda for about ten minutes, or apply a baking soda paste for an hour on stubborn spots. Always cool the pot before washing; extreme temperature shifts can craze the enamel. Copper: Two Surfaces, Two Routines Copper pans have an interior lining, usually stainless steel or tin, cleaned like the material itself. The exterior is the showpiece, and tarnish lifts with a paste of lemon juice and salt or baking soda, rubbed on gently and rinsed with warm water after a few minutes. Ketchup works too, and commercial copper cleaners are effective. Aluminum: Reactive but Restorable Aluminum is lightweight and conducts heat well, but alkaline foods and minerals in water darken it over time. Simmer a quart of water with about two teaspoons of cream of tartar or a splash of lemon juice for ten to fifteen minutes to restore brightness. Never use the dishwasher: harsh detergents cause permanent darkening and pitting. Anodized aluminum is harder and less reactive but still deserves hand-washing. Material matters beyond cleaning: Health Canada’s safe use of cookware and bakeware guidance notes that worn or pitted pans can transfer substances into food, and CDC food safety basics cover keeping kitchen surfaces free of germs. Pan type Everyday clean Stubborn stain fix Never Non-stick Soft sponge, mild soap Baking soda paste Abrasive pads, high heat, dishwasher Stainless steel Soap and water Boiling baking soda, Bar Keepers Friend None; vinegar cures heat tint Cast iron Hot water and brush Chainmail scrubber, re-season Air drying, harsh soaps Carbon steel Hot water and brush Stovetop drying and oiling Air drying, harsh soaps Enameled cast iron Mild soap, soft sponge Baking soda simmer Metal utensils and scouring pads Copper Soap and water inside Lemon-salt paste on exterior Scouring the lining Aluminum Soap and water Cream of tartar simmer Dishwasher Frequently Asked Questions About Cleaning Pans Is it okay to put non-stick pans in the dishwasher? Even pans labeled dishwasher safe last longer when hand-washed. Dishwasher heat and harsh detergents break down non-stick coatings over time. How do I fix a rusted cast iron skillet? Scrub the rust away with steel wool and soapy water down to bare metal, then

The Pan Care Guide: The Best Tips For Cleaning 7 Different Types of Pans Read More »

cleaning exhaust

How to Clean Your Kitchen Exhaust Fan: A Complete Guide

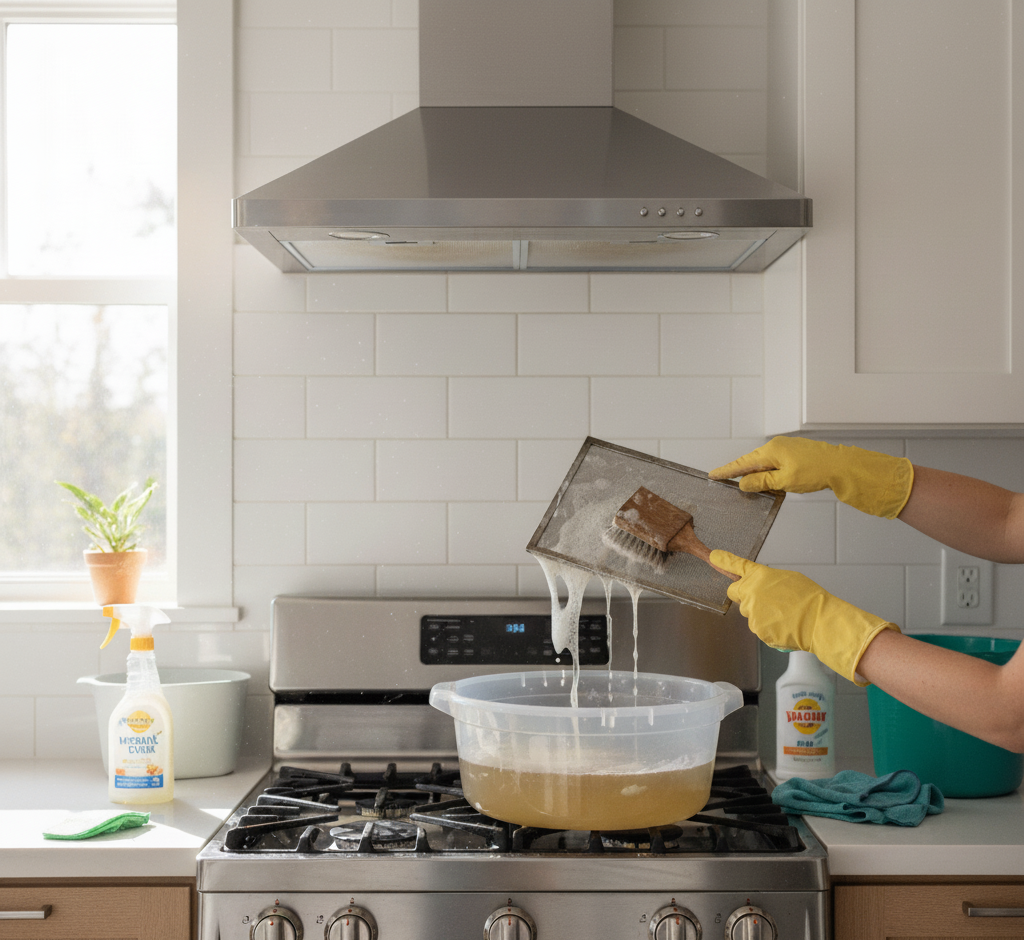
Why Your Kitchen Exhaust Fan Needs Regular Cleaning Your kitchen exhaust fan, or range hood, works harder than almost any appliance you own. Every time you cook, it pulls airborne grease, moisture, and fumes out of the kitchen, protecting your indoor air quality and stopping a sticky film from settling on walls and cabinets. But in doing that job, the fan, its filters, and the ductwork become a hidden reservoir of grimy buildup. Left alone, that grease is more than unpleasant: it is a serious fire hazard and the reason your fan slowly stops working. Cleaning the exhaust system is a maintenance task that directly affects the safety and efficiency of your kitchen. The Fire Risk Hiding in a Dirty Range Hood During frying, searing, or roasting, invisible droplets of cooking grease rise with the steam. When that warm air reaches the cooler metal surfaces of the hood, the grease condenses and clings to the filter, the fan blades, and the interior. Layer builds on layer with every meal until the coating is thick, gummy, and rancid. That residue is concentrated fuel. If a pot flares up on the stove, flames can be pulled straight into a grease-laden hood and travel through the ductwork into the walls of your home. A clean exhaust system gives smoke a safe escape route; a dirty one turns the hood into a fuse. There is also the efficiency problem: a clogged filter blocks airflow, so cooking smells linger, smoke sets off alarms, and the fan motor strains, overheats, and can burn out entirely. Old grease even attracts insects and rodents. How Often Should You Clean or Replace the Filters? How often depends on how you cook. As a general rule, clean reusable metal filters at least once a month, and every two weeks if you fry or sear often. The hood interior and fan blades need a full degreasing once or twice a year. Charcoal filters in recirculating hoods cannot be washed at all; they must be replaced, typically every three to six months, according to your appliance manual. Component Type Cleaning schedule Metal mesh or baffle filters Reusable Soak and scrub monthly; every 2 weeks for heavy frying Charcoal filter Disposable Replace every 3-6 months; never wash Hood interior and fan blades Built-in Full degrease 1-2 times per year Step-by-Step: How to Clean Your Kitchen Exhaust Fan Prepare the Workspace Safely Begin at the breaker panel: cut power to the range hood entirely rather than flipping the fan switch, so the unit cannot start while your hands are inside it. Cover the stovetop with an old towel or newspaper to catch falling grime, then gather rubber gloves, a non-abrasive scrub brush, a heavy-duty degreaser, and a bucket filled with very hot water. Clean the Metal Filters Most hoods that vent outside use reusable metal mesh or baffle filters held by a latch or slide. Fill the sink or a bucket with water as hot as your tap runs, squeeze in a generous squirt of degreasing dish soap and about half a cup of baking soda, and let the filters soak for twenty to thirty minutes, longer for heavy buildup. Scrub both sides, paying attention to the crevices of the mesh, rinse with hot water, and let the filters dry completely before reinstalling them. Replace Charcoal Filters If your hood recirculates air instead of venting outside, it uses a charcoal filter that absorbs odors. These are not designed to be washed; once saturated, they stop working, and washing ruins them. Check your manual for the correct part number and the recommended replacement interval. Degrease the Hood Interior and Fan Blades With the filters out, spray the interior surfaces generously with degreaser and let it sit for several minutes to penetrate the grease. Wipe down the inside of the hood with a non-abrasive sponge or cloth dipped in hot, soapy water, rinsing frequently, and work carefully around the light wiring and motor. The fan blades are usually the most coated part: wipe each blade, rotating the fan by hand to reach every side. Be firm enough to remove the grease but gentle enough not to bend the blades, since an unbalanced fan vibrates noisily. Finish With the Exterior For stainless steel, spray the cleaner onto a soft microfiber cloth rather than the hood itself and wipe in the direction of the grain to avoid streaks. Painted hoods only need a damp, soapy cloth. Once every piece is clean and completely dry, reinstall the filters, restore power at the breaker, and enjoy a quieter, stronger fan. Cut power at the circuit breaker before touching anything. Soak metal filters in hot water, degreasing soap, and baking soda. Replace, never wash, charcoal filters. Wipe each fan blade by hand without bending it. Polish stainless steel along the grain. Frequently Asked Questions About Exhaust Fan Cleaning Can I wash a charcoal filter? No. Charcoal filters are meant to absorb odors, and washing destroys them. Replace them every three to six months or per your manual. Why does my kitchen still smell after cooking? A grease-clogged filter blocks airflow, so the fan cannot pull odors out. Cleaning or replacing the filter usually restores performance. How do I clean between the fan blades? Rotate the blades by hand and wipe each one with a degreaser-soaked cloth, working carefully so you do not bend them and unbalance the fan. Is the grease in a range hood really a fire hazard? Yes. Cooking grease is flammable, and a stovetop flare-up can ignite buildup in the hood and ductwork. Regular cleaning keeps that risk low. Do I need to unplug the hood before cleaning? Switch off the circuit at the breaker, not just the fan switch, so the fan cannot start unexpectedly while you are working inside the hood. Let a Professional Handle the Deep Grime A greasy exhaust system is one of the toughest cleaning jobs in the home, and the moisture it removes matters for your whole house: poor kitchen ventilation

How to Clean Your Kitchen Exhaust Fan: A Complete Guide Read More »

Perfect Cleaning Schedule

Cleaning Schedule: A Room-by-Room Guide to Your Perfect Cleaning Schedule

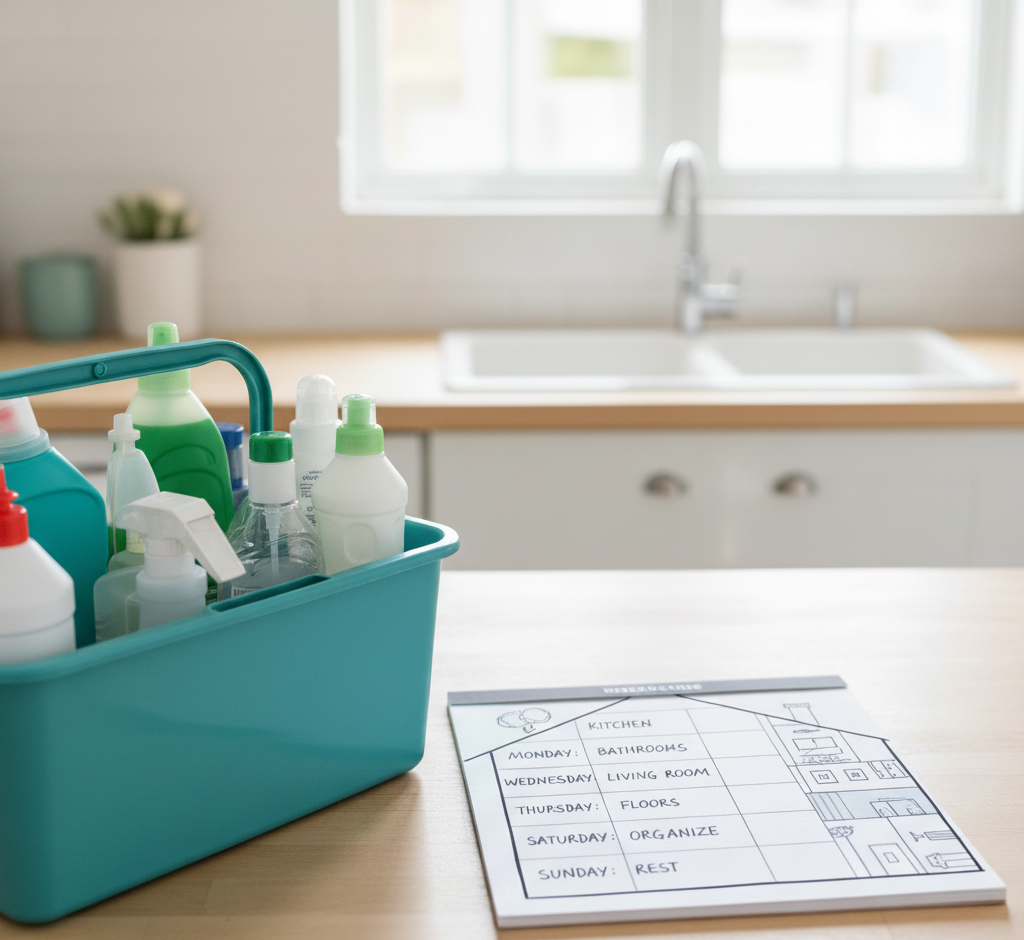
Why a Cleaning Schedule Beats Cleaning Marathons For many households, cleaning swings between two extremes: frantic multi-hour marathons before guests arrive, or weeks of ignoring the dust bunnies and sticky counters until frustration wins. This reactive approach is exhausting and inefficient. The secret to a consistently clean home is not stronger chemicals or more scrubbing; it is a simple cleaning schedule that turns one overwhelming project into small, predictable daily habits. Breaking tasks into daily, weekly, monthly, and seasonal frequencies keeps grime from ever building up to marathon levels, and it frees your weekends. Daily Habits: Fifteen to Twenty Minutes That Work Daily tasks are the foundation of the system. They take little time but have the biggest impact on how your home feels: Make the bed each morning; it takes under two minutes and instantly makes the bedroom look put together. Wipe kitchen counters and the sink after every meal so spills and crumbs never harden. Give the kitchen floor a quick sweep at day’s end so crumbs never get tracked through the house. Follow the one-load rule: wash, dry, fold, and put away a single load of laundry daily so the pile never becomes a mountain. The Weekly Reset: Bathrooms, Kitchen, and Dust The weekly clean is a deeper reset of the main living areas. You can do everything on one cleaning day or spread one or two rooms across the week, an approach called zone cleaning. Bathrooms deserve a full scrub for hygiene as much as appearance: the toilet inside and out, the shower and tub to stop soap scum before it thickens, the sink and countertops scrubbed and disinfected, the mirror polished streak-free, and the floor swept and mopped. In the kitchen, wipe down appliance exteriors including the refrigerator, dishwasher, microwave, and stovetop, clean the microwave interior by heating a bowl of water with vinegar to loosen grime, and mop the floor. Throughout the living areas and bedrooms, dust every surface, then vacuum carpets, rugs, and hard floors; regular vacuuming lifts the dust, dander, and allergens that would otherwise circulate. Monthly Projects for the Details Monthly tasks catch the slow, creeping grime that separates merely tidy homes from deeply clean ones. Wipe down baseboards, which collect dust and scuffs; clean light fixtures and ceiling fans; run an empty cleaning cycle on the washing machine to prevent soap scum and mildew; and clean the dishwasher filter to keep it performing well. Window sills and sliding door tracks also trap dirt and insects, so give them a monthly pass. Seasonal Projects: The Whole-Home Reset Every quarter, set aside time for the big jobs. Empty the refrigerator and freezer, wipe down shelves and drawers, and discard expired food. Wash windows inside and out, deep clean carpets and upholstery with a rented machine or a professional service, and organize closets and pantries while decluttering. Season-specific extras include cleaning the gutters in the fall and pressure washing the deck in the spring. Frequency Typical tasks Time tip Daily Make beds, wipe counters, quick sweep, one load of laundry Batch these into a 20-minute evening routine Weekly Bathroom scrub, appliance wipe-downs, dusting, vacuuming, mopping Assign one or two rooms per day Monthly Baseboards, light fixtures, washing machine cycle, window sills Pair with bill-paying day as a reminder Seasonal Fridge deep clean, windows, carpets, closets, gutters, deck Pick one weekend per season and book help early Make the Schedule Fit Your Life A schedule is a template, not a rigid document. If you live alone and rarely cook, the kitchen needs less attention; if you have kids and pets, daily floor care and weekly vacuuming become non-negotiable. Task batching helps some households: make Monday dusting day and Tuesday floor day so you stay focused with one set of tools. A clear schedule also makes delegation easy, since everyone in the family knows which tasks belong to which day, removing the constant negotiation about who cleans what. Above all, aim for progress, not perfection. Miss a day and simply pick it up tomorrow; because the system prevents buildup, one skipped task never snowballs into a disaster. Cleaning science supports the approach: the CDC explains that regular cleaning and disinfecting of your home removes most germs from surfaces, and that handwashing is one of the best ways to stop germs from spreading between family members. Frequently Asked Questions About Cleaning Schedules How long should daily cleaning take? Fifteen to twenty minutes is enough when you focus on the high-impact habits: making the bed, wiping counters after meals, a quick floor sweep, and one load of laundry. Is it better to clean one room a day or everything weekly? Both work. Zone cleaning, with one or two rooms per day, keeps the workload even, while a single weekly cleaning day suits people who prefer to finish everything at once. What should I clean monthly that people usually forget? Baseboards, ceiling fans and light fixtures, the washing machine drum, dishwasher filter, and window sills and sliding door tracks are the details that quietly collect grime. How do I stay consistent with a cleaning schedule? Keep tasks small and visible, pair them with existing habits such as morning coffee or evening TV, and remember that a missed day is fine as long as you resume the next day. When should I hire professional cleaners instead of doing it myself? Monthly and seasonal projects such as carpet deep cleaning, fridge resets, and whole-home refreshes are ideal to outsource, especially before holidays or when allergies act up. Keep the Schedule on Track With Professional Help The heaviest items on your schedule do not have to be DIY. Toronto Shine Cleaning’s regular cleaning service handles the weekly core clean, while our deep cleaning service covers the monthly and seasonal projects that need extra muscle. We serve homes across Toronto and the GTA, and our reviews show what consistent cleaning looks like. Call (647) 424-0355 or check our pricing to build your routine around a professional team.

Cleaning Schedule: A Room-by-Room Guide to Your Perfect Cleaning Schedule Read More »

woman preparing the house for Halloween

Halloween Cleaning: The Secret to a Stress-Free Halloween? A Pre-Holiday Clean.

Why a Pre-Halloween Clean Makes the Holiday Easier Halloween planning usually centers on costumes, candy, pumpkins, and decorations, but the step that makes everything else work is a pre-holiday clean. A targeted cleaning session that moves from the outside of your home inward prepares your walkway, entryway, and main rooms for trick-or-treaters, guests, and decorations. It is not just about tidiness: clearing wet leaves and clutter prevents slips, a wiped-down kitchen makes treat prep safer, and a dust-free living room shows off your spooky decor instead of hiding it. Start Outside: Walkway, Porch, and Front Door The exterior is where the Halloween experience begins, so it deserves the first pass. The walkway, porch, and front door form the stage for the whole evening and the first point of contact for every visitor. Clear the Walkway and Porch In October, the path to your door is often covered with fallen leaves, twigs, and mud. Damp leaves make the path genuinely slippery, a real risk for small children in bulky costumes moving around in the dark. Sweep the entire walkway from the sidewalk to the front steps, then spray it with a garden hose to wash away residual grime. On the porch, remove leftover summer items such as empty planters, garden tools, and worn-out mats, then sweep the whole surface, paying attention to corners where dust and spiderwebs collect. Real webs usually just look neglected, so clear them away to make room for the fake ones. Wipe Down the Door, Windows, and Lights The front door is the centerpiece of the evening. Wipe it down with a damp cloth and warm water with a few drops of dish soap to remove fingerprints and summer dust, and clean the door handle and hardware while you are at it. Windows beside the entry deserve the same attention, since clean glass makes silhouettes, clings, and lighting effects pop; a half-and-half spray of white vinegar and water, wiped with a microfiber cloth or squeegee, does the job. Wipe railings and handrails too, because parents and kids will grip them in the dark. Finally, dust the exterior light fixtures, where built-up dirt and dead insects can dim the glow, and replace any burned-out bulbs so the path and your best decorations stay visible. Sweep leaves and debris from the whole walkway. Clear summer planters, tools, and worn mats from the porch. Wash the front door, handle, windows, and railings. Dust light fixtures and check every bulb. Clean the doormat and the floor beneath it. Inside: Entryway and Main Living Areas Inside, start with the entryway, which faces a constant parade of opening doors on Halloween night. Clear clutter like shoes, bags, and mail so there is a wide, safe path for groups of excited children. Take the doormat outside and scrub it with soap and water if it is a durable outdoor style, or vacuum it well if it is an indoor mat, and clean the floor underneath, which traps surprising amounts of grit. This is also the moment to place a boot tray by the door for wet footwear in the months ahead. From there, move to the living areas visible from the front door: dust the mantel, bookshelves, and tables where candy bowls will sit, then vacuum floors and upholstery. Removing dust and allergens now means better indoor air quality once the decorations go up and the windows stay closed for winter. Kitchen and Bathroom Prep for Guests and Treats The kitchen becomes the command center for Halloween treats, so clear the countertops and wipe them down with a sanitizing cleaner before any baking or candy prep begins. The CDC’s food safety basics start with keeping hands and surfaces clean, and its cleaning and disinfecting guidance explains when to go beyond a simple wipe. Take the chance to sort through the refrigerator, discarding old leftovers to make room for party platters and drinks. The guest bathroom deserves a quick seasonal refresh: shine the mirror, scrub the sink and toilet, wipe the countertop, and put out fresh hand towels with a full supply of soap and toilet paper. Clean the Decorations and Their Storage Space Before carrying bins up from the basement or garage, sweep the floor and wipe the shelves where they were stored so you do not track old dust into clean rooms. As you unpack, give each item a quick wipe: plastic pumpkins, ceramic figures, and other hard decorations gather a layer of dust in storage, and fabric pieces such as throws and wall hangings freshen up in the dryer on a no-heat air cycle. Area Pre-Halloween focus Why it matters Walkway and porch Sweep leaves, hose off grime Prevents slips in the dark Front door and windows Wipe surfaces, clean glass Clean backdrop for decor Entryway Declutter, clean doormat Safe path, less dirt tracked in Living areas Dust and vacuum Better air quality before winter Kitchen and bathroom Sanitize counters, stock supplies Safe treat prep, happy guests Frequently Asked Questions About Halloween Cleaning How early should I clean before Halloween? Aim for the weekend before, so the house is ready for decorating, costume try-ons, and any early parties, with a quick touch-up on the day itself. Is cleaning the walkway really necessary? Yes. Wet leaves and debris are a slipping hazard for children in bulky costumes moving in the dark, and a clear path also makes your home look inviting. What if I am not hosting a party? The essentials stay the same: safe walkways, a clean entry for trick-or-treaters, a tidy kitchen for candy, and a stocked bathroom. Skip only the extra party prep. How do I clean decorations that sat in storage? Wipe hard items such as plastic pumpkins and ceramic figures with a damp cloth, and freshen fabric pieces in the dryer on an air-only cycle to remove dust. Should I clean before or after decorating? Clean first, then decorate. A dust-free base makes the decorations look better and keeps you from wiping around fragile pieces later. Get

Halloween Cleaning: The Secret to a Stress-Free Halloween? A Pre-Holiday Clean. Read More »

humidifier being effective

Humidifier Cleaning: The Hidden Danger in Your Humidifier (And How to Prevent It)

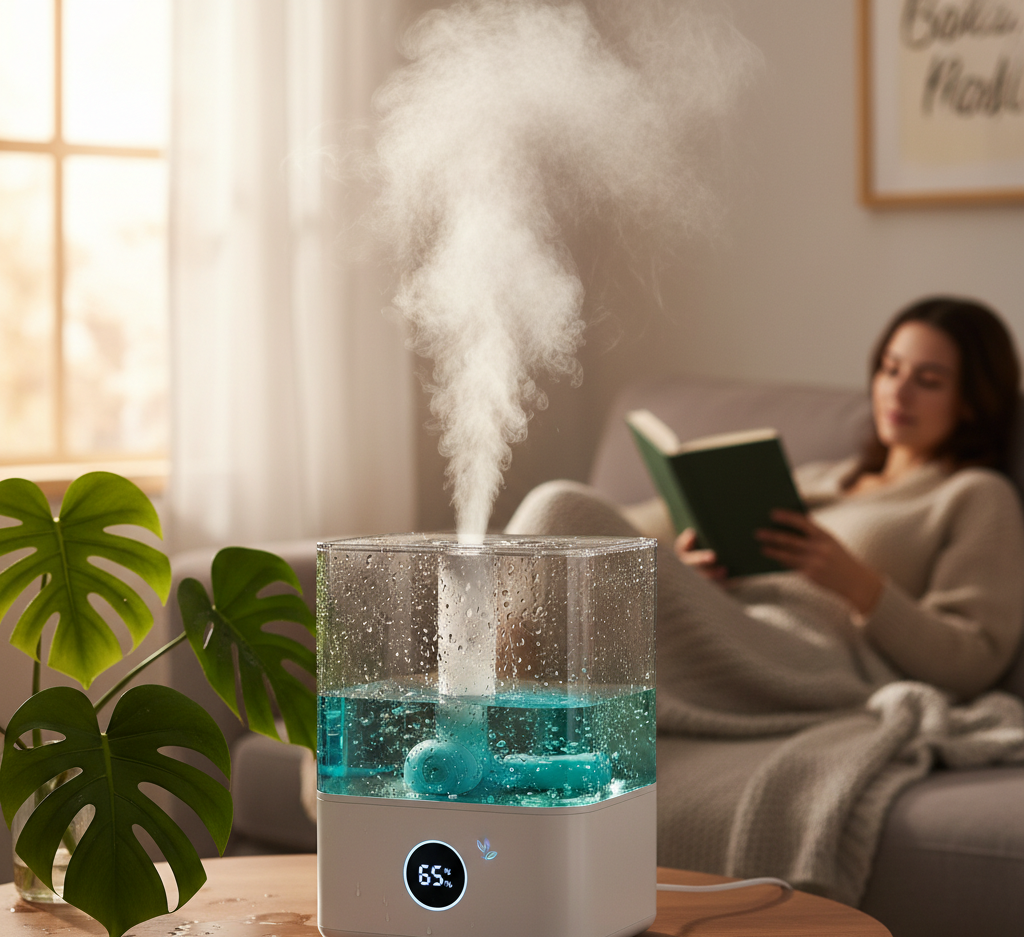
The Invisible Price of a Cozy Canadian Winter The cold does most of its indoor damage quietly. Sealed houses and running furnaces strip moisture from the air until the environment inside your walls turns drier than a desert, and your body reports the loss first: a throat that tickles all day, a voice that croaks until mid-morning, skin that feels tight and itchy, lips that chap, knuckles that crack. Add the sudden snap of static from a doorknob and wooden furniture that creaks and splits as the season drags on. The CDC’s winter weather guidance captures how thoroughly the cold season reshapes life indoors, and dry air is the part nobody shovels. The fix is one small appliance that puts water vapor back where the furnace took it out. Run properly, a humidifier turns a harsh, parched house into a comfortable one. The word “run” is doing a lot of work there, because this machine never runs clean on autopilot. Why the Number 30 to 50 Matters Indoor comfort is usually discussed through relative humidity, which compares the moisture the air holds to the maximum it could hold at that temperature. Health experts put the comfort zone between 30 and 50 percent. Cold outdoor air carries almost no water, and once you heat it indoors, the percentage collapses into single digits. Parched air behaves like a sponge, pulling moisture from your skin and from the mucous membranes lining your nose, throat, and lungs. Those membranes are your first line of defense at trapping viruses and bacteria, so when they dry out, colds and sinus trouble hit harder and linger longer. Kept properly humid, they soothe coughs and ease congestion instead, which is why humidifier season overlaps with cold and flu season. The Hidden Danger in the Tank Every humidifier carries a reservoir of standing water, and standing water at room temperature is exactly where mold, mildew, and bacteria build an empire. An uncleaned unit then does something genuinely counterproductive: it aerosolizes whatever is growing inside and broadcasts a plume of microscopic contaminants into the air your family breathes. That can flare allergies and, in some cases, trigger a respiratory illness known as humidifier fever. The CDC’s overview of mold and your health explains why inhaled mold exposure is worth taking seriously. The same page on cleaning and disinfecting with bleach doubles as a reminder that disinfectants need correct dilution and a thorough rinse. Which Machine Do You Have? Type How it works Trade-off Evaporative Fan blows air through a wet wick, releasing invisible cool mist that self-regulates as the room humidifies The wick is consumable: minerals clog it, and neglect lets it harbor mold Ultrasonic A vibrating diaphragm shatters water into a visible cool mist; very quiet, no filter to buy Anything dissolved in the water leaves with the mist, so tap water sprinkles white dust on every surface Vaporizer A heating element boils water, so the steam released is sterile and warm Uses more electricity and poses a burn risk around small children Whole-house Built into the forced-air system, holding every room at a set level automatically Costliest option, needs professional installation and upkeep If you own the ultrasonic kind, the tank is only half the story: use distilled water, because its minerals have been removed, so the mist stays pure and the dust never settles. Distilled water also stretches the life of an evaporative wick. A Routine That Takes Minutes Daily: Empty the tank, rinse it, and refill with fresh water. Never just top up old water that has been sitting. Weekly descale: Unplug, separate tank from base, and soak both with equal parts white vinegar and water for at least an hour; the acetic acid dissolves the chalky crust. Gently brush the residue away. Weekly disinfect: Swirl a mix of one teaspoon of household bleach per gallon of water in the tank, hold it for about twenty minutes, then rinse obsessively until no bleach smell survives. A 3 percent hydrogen peroxide solution works the same way. Always finish dry: Air-dry every part completely before reassembly, because a dry surface cannot grow mold. Placement and measurement seal the deal. Sit the unit on a level, water-resistant surface a few feet off the floor, away from walls, electronics, and wooden furniture, with room for airflow. Then spend a few dollars on a hygrometer, the little device that reads room humidity, so you can confirm you are inside the 30 to 50 percent band. Over-humidifying is a real mistake too: too much moisture beads on windows and walls and grows the very mold you bought the machine to outmaneuver. Breathe Easy, Live Spotless A clean humidifier protects the air you breathe; a clean home protects everything else. Toronto Shine Cleaning covers both angles with scheduled regular cleaning and seasonal deep cleaning for your home, serving neighbourhoods across the city as listed on our locations page. Call (647) 424-0355 to book, or start with an online quote at your convenience. Frequently Asked Questions How often should a humidifier be cleaned? A quick empty-rinse-refill belongs every single day, while the full descale-and-disinfect routine should happen weekly through the whole season you run the machine. What is the white powder on my shelves? That is your tap water wearing a disguise. Ultrasonic models atomize dissolved minerals along with the water, and they settle as fine dust. Switching to distilled water stops it. Can a dirty humidifier really make me sick? Yes. Standing water breeds mold and bacteria, and the mist launches them into the room air, which can trigger allergies and, in some cases, a respiratory illness called humidifier fever. Is higher humidity better if dry air is the problem? No. Above the 30 to 50 percent range, condensation forms on windows and walls and invites mold growth. A cheap hygrometer keeps you in the safe band.

Humidifier Cleaning: The Hidden Danger in Your Humidifier (And How to Prevent It) Read More »

Hot Tub Cleaning: Get Perfectly Balanced Hot Tub Water Every Time

Own a Spa, Become a Part-Time Water Chemist A hot tub is the most social square footage in many Canadian backyards: stargazing after a long day, laughter that carries over the jets, aching muscles surrendered to hydrotherapy. But unlike a refrigerator, a spa never runs on autopilot. It is a sealed basin of warm, constantly circulating water, which means it is a small living ecosystem. Left alone, that same warmth that feels wonderful on your skin is a five-star resort for bacteria, algae, and every microorganism that thrives in heat. The difference between a sanctuary and a murky hazard is not heroic spring weekends of scrubbing. It is a short, boring, repeatable routine of testing, balancing, and sanitizing. Set the Chemistry in the Right Order Three pillars hold a spa together: total alkalinity first, pH second, sanitizer third. Disturb one and the others drift, so work the order faithfully. Test two to three times weekly with the color-coded dip strips, and more often when the tub sees heavy use. Total alkalinity: this measures how well the water resists pH swings, a buffer that keeps chemistry from lurching. Hold it between 80 and 120 parts per million. Too low and pH can crash suddenly into corrosive territory; too high and pH creeps upward, clouding the water and forming scale. Sodium bicarbonate lifts it; a pH-down product based on sodium bisulfate brings it back. pH: on the familiar 0 to 14 scale, with 7 neutral, a spa wants 7.4 to 7.6. That number is not arbitrary: it sits near the natural pH of the human eye, which is why it feels gentle on bathers. Acidic water gnaws at heater elements and pump seals and stings skin; alkaline water makes sanitizer sluggish, turns the water cloudy, and crusts scale onto the shell. Sodium carbonate raises pH, sodium bisulfate lowers it. Sanitizer: only once the first two are balanced can chlorine or bromine do its job. Chlorine oxidizes fast and hard but smells stronger and destabilizes in hot water; aim for 1 to 3 ppm. Bromine tolerates heat better, stays quieter on the nose, and gets recharged by oxidizing, which makes it a spa favorite; hold 3 to 5 ppm. Either way, the level must stay in range whenever anyone soaks. The CDC’s guidance on bleach and disinfection is a solid refresher on why sanitizer contact times and dilutions are never something to eyeball. Shock the Water, Then Let It Vent Even perfectly sanitized water collects the residue of bathing itself: lotions, deodorants, soaps, and organic matter that feed bacteria and haze the surface. Once a week, dose the tub with an oxidizer, a habit called shocking. The big dose breaks down that waste, finishes off resistant microbes, and in a bromine spa reactivates spent bromine ions back into working sanitizer. Run the jets and leave the cover off while you do it so the water circulates and the gases escape; trapped chemical vapor chews up the underside of the cover over time, a point the general CDC advice on cleaning and disinfecting at home reinforces for any strong product. The Hardware That Keeps Water Clear Component Routine Why it matters Filter cartridge Hose-rinse between the pleats weekly; deep-soak in a filter-cleaning solution overnight every few months; replace roughly once a year Clogged media clouds water and strains the pump Cover Wash with mild soap, then treat with a UV-protective vinyl conditioner; prop it open after shocking It traps heat, blocks debris, and slows sunlight from burning off sanitizer Shell At refill only: soft cloth with a vinegar-and-water solution, or a dedicated spa shell cleaner for stubborn stains Abrasive pads and powders permanently scratch acrylic The Quarterly Reset No matter how disciplined you are, dissolved solids and spent chemicals eventually saturate the water until balancing turns into a chore of chasing numbers. Every three to four months, drain and refill. Before pulling the plug, run a pipe flush or biofilm remover through the jets for several hours to dislodge the unseen slime colonizing the plumbing. Then kill power at the circuit breaker, a genuine safety step, before draining by pump or built-in valve. Wipe the empty shell, rinse away every trace of cleaner, and refill with the hose tucked into the filter compartment so air leaves the lines instead of locking the pump dry. Restore power, bring the water up to temperature, and rebuild the chemistry in its faithful order: alkalinity, then pH, then sanitizer. Two Pools of Maintenance, One Standard Spa care proves what house care has always proven: small, scheduled routines beat heroic rescues. When your home needs its own quarterly reset, Toronto Shine Cleaning’s deep cleaning service reaches the built-up grime behind appliances, fixtures, and baseboards; rates start at $270.38 for a studio or one-bedroom and appear in full on the pricing page, alongside what neighbours say about our crews. Book a visit or ask a water-chemistry question of your own at (647) 424-0355. Frequently Asked Questions Why fix alkalinity before pH? Alkalinity is the buffer that anchors pH. Balance the pH first and an unstable buffer will knock it off again within days, wasting chemicals and leaving bathers in corrosive or scale-forming water. Chlorine or bromine: which sanitizer should I choose? Chlorine works faster and costs less but loses stability in hot water and smells more assertive. Bromine thrives at spa temperatures, stays nearly odorless, and regenerates when you shock, which is why many owners prefer it. How long can water sit before I must change it? Roughly three to four months under normal use. Dissolved solids accumulate until no amount of product keeps the water balanced, and a fresh fill plus shell clean resets the system. Can I use kitchen scrubbers on the acrylic shell? Never. Steel wool and scouring powders leave fine scratches that harbor bacteria and dull the gloss. A soft cloth with vinegar and water handles ordinary scale, and dedicated spa cleaners handle the rest.

Hot Tub Cleaning: Get Perfectly Balanced Hot Tub Water Every Time Read More »

Bathroom Cabinet

How to Organize Your Bathroom Cabinet: A Step-by-Step Guide

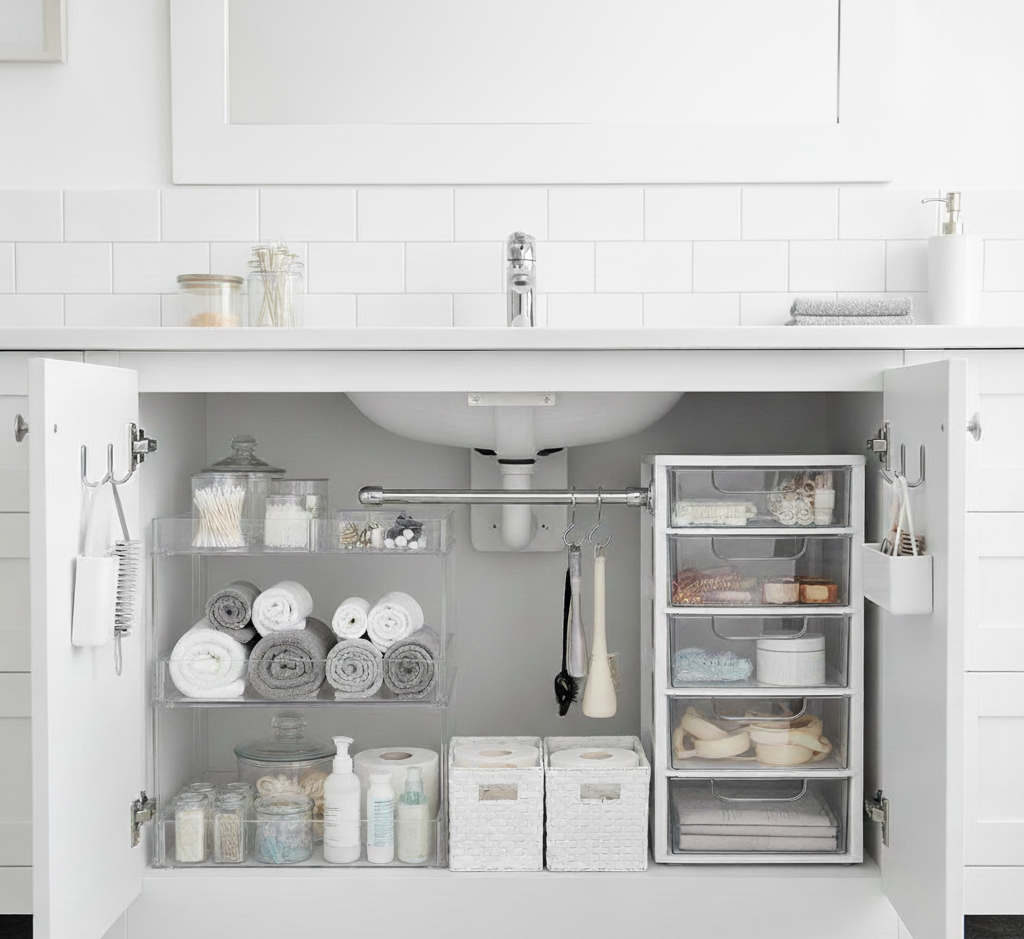
Why Your Bathroom Cabinet Needs a System, Not Just a Tidy Your bathroom cabinet holds the first tools you reach for in the morning and the last ones at night, yet in many homes it is the most chaotic corner of the house. Half-empty toothpaste tubes, expired medications, stray hair ties, and sticky drips from bottles that leaked months ago all pile up until a quick search for a bandage turns into a five-minute dig. That friction is small, but you feel it twice a day. Organizing this space is not merely tidying up; it is a full system reset that turns a frustrating cupboard into a calm, efficient part of your routine. The project needs more than ten spare minutes and good intentions. It demands a methodical approach, a dose of honesty, and a clear vision for how the cabinet should function day to day. Step 1: Gather Supplies and Empty the Cabinet Completely Start with preparation, not with the shelves themselves. Diving in without a plan usually creates a bigger mess than the one you started with, so gather everything you need first: A trash bag for the items you will discard. A box for products that belong in another room. An all-purpose cleaner and a few microfiber cloths. Small clear bins, drawer dividers, or a turntable. At least one hour of unhurried time. Then remove every single item, with no exceptions. Lay everything out on a towel on the floor or a nearby counter so you see the full inventory in one glance. This blank slate forces a conscious decision about each object that wants to return, and it is the only way to clean the cabinet itself properly. Step 2: Sort Into Keep, Toss, and Relocate Work through the pile and sort every item into one of three groups: keep, throw away, or relocate. Be ruthless, because the trash pile is usually the largest. Expired medications can be ineffective or even dangerous, so check the date on every bottle, and take old prescriptions to a pharmacy take-back program instead of flushing them; Health Canada explains safe disposal of prescription drugs. Expired cosmetics and skincare can harbor bacteria and irritate your skin, so toss them along with rusty razors, stretched-out hair ties, crusted nail polish, and sunscreen from two summers ago. Products in good condition that you rarely touch, such as bulk cotton balls or a large first aid kit, belong in the relocate pile: move them to a linen closet or return them to the family member who owns them. Only the items you genuinely use on a regular basis earn a place back in the cabinet. Step 3: Deep Clean the Empty Cabinet With the cabinet bare, spray the shelves, back wall, and door interior with your all-purpose cleaner and wipe every surface with a clean microfiber cloth. Give sticky rings left by bottles and dried toothpaste drips extra attention, since this is your one chance to get the interior truly pristine. Let everything dry completely before you add anything back. If cleaning products live in this cabinet or under the sink, store them the way Health Canada recommends for household chemical safety: labeled, sealed, and out of reach of children. Step 4: Group Like Items and Claim Prime Real Estate Before anything goes back, organize the keep pile into categories: all dental care together, all skincare together, all hair products together. Grouping first is the foundation of the new system. Small clear acrylic bins give each category a home and let you see everything at a glance instead of rummaging through opaque containers. In a deep cabinet, a turntable or Lazy Susan keeps less frequent items such as face masks and weekly treatments reachable with a spin, so nothing is forgotten in the dark back corners. The most important rule is prime real estate: the items you reach for every morning and night, your toothbrush, toothpaste, face wash, and daily moisturizer, belong at eye level near the front. Travel sizes and special occasion makeup go on higher shelves or toward the back. Use the inside of the door as well: small magnetic strips hold bobby pins, tweezers, and nail clippers, while stick-on acrylic pods keep cotton swabs and hair ties within easy reach. On tall shelves, a freestanding shelf riser creates a second level for small items. Cabinet Zones at a Glance Zone What Goes There Best Container Daily dental care Toothbrush, toothpaste, floss Small clear bin at eye level Everyday skincare Face wash, moisturizer, daily sunscreen Front of the prime shelf Hair and styling Brushes, ties, light styling products Door pods or drawer divider Weekly treatments Face masks, exfoliators Turntable toward the back Travel and backup Toiletries, extra soap High shelf or linen closet Step 5: Maintain the System With Two Simple Habits An organized cabinet is not a one-time achievement; it is a system that needs a small amount of upkeep. Put each product back in its designated home immediately after use, which takes only seconds. Follow the one-in, one-out rule: when a new bottle of face wash arrives, the old one should already be finished and discarded, so half-empty bottles never accumulate again. Then schedule a quick five-minute reset once a month to straighten anything that has strayed and wipe down spills before they become sticky rings. Frequently Asked Questions How often should I reorganize my bathroom cabinet? Do a full empty-and-sort twice a year, such as when the clocks change, plus a five-minute monthly tidy. Seasonal reviews catch expired sunscreen and old medications before they pile up. Can I throw expired medication in the garbage? The safest option is a pharmacy take-back program, which accepts unused and expired drugs any day of the year. Never flush medicines down the toilet or sink, and if no take-back option exists, contact your pharmacy or municipality for guidance. How do I stop products from leaking and making a mess? Wipe bottle necks and threads before returning them, store liquids upright inside bins,

How to Organize Your Bathroom Cabinet: A Step-by-Step Guide Read More »

 Professional vs. The DIY Reality duct cleaning

Professional vs. DIY Duct Cleaning: What You Need to Know Before You Start

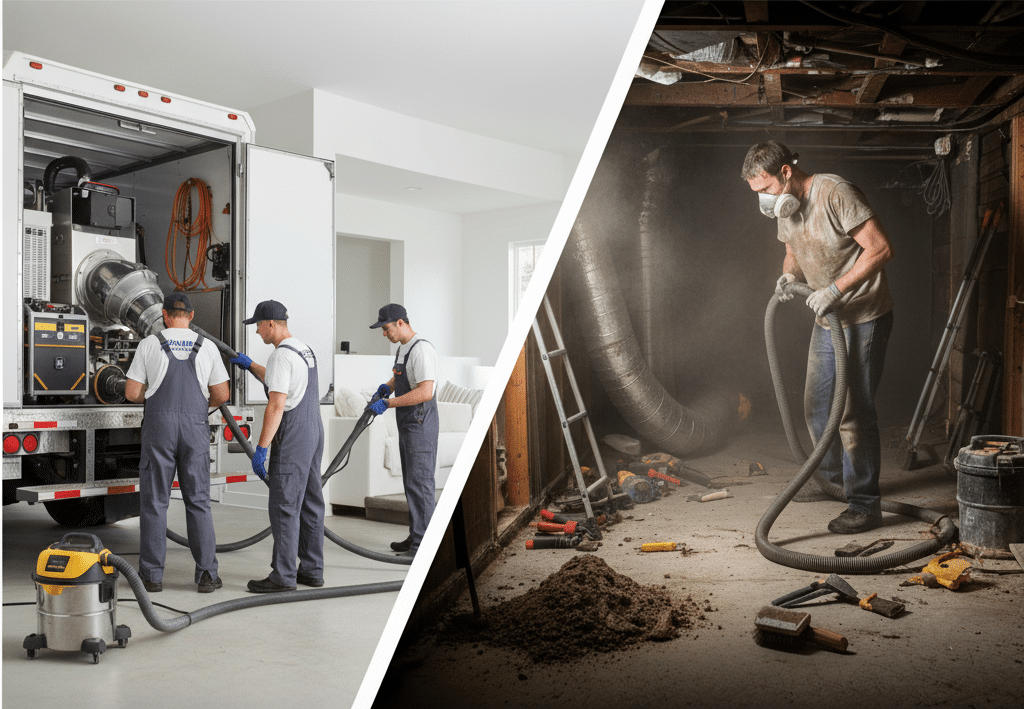
Two Jobs Wearing the Same Name Duct cleaning lives in a strange corner of home maintenance. It promises fresher air, a healthier household, and an HVAC system that stops working so hard, and when you pull a register cover and find felt-thick dust inside, the job looks as simple as pointing a vacuum hose into the wall. Except there are really two different services hiding behind one phrase. A professional whole-system decontamination and a DIY surface sweep use different equipment, aim at different targets, and finish with dramatically different results. The single most important step is deciding which one you are actually buying or building. You can do the second, if you go in clear-eyed about the risks and honest about the reach. What a Professional Crew Really Does Industrial-grade work happens inside your ducts while a truck-strength vacuum system hooks into the main trunk line near the furnace. That rig holds the entire network under negative pressure, turning your house’s airways into one giant vacuum cleaner before a single brush moves. Technicians then thread flexible tools deep through each register: high-pressure air whips that blast caked-on dust loose, and rotary brushes that scrub duct walls no hose could ever reach. Everything dislodged gets pulled toward the collection unit instead of into your living room. The at-home version borrows a shop-vac and a long brush. Without negative pressure you clean only what the hardware physically touches, which is typically the first few feet branching off each register: you are dusting the endpoints of the system, not the system itself. Real Benefits, Real Hazards The rewards of a careful DIY pass are genuine but modest: removing clumps near the grilles improves airflow into rooms, visible dust stops puffing out of the vents, and the service call you did not book stays in your pocket. The hazards are equally concrete. Debris shaken loose without suction behind it can be pushed deeper into the trunk lines, creating a blockage or surfacing later as a dust storm. Flexible ductwork, the silvery accordion hose behind your walls and ceilings, tears and punctures easily under spinning brushes and rigid vacuum tools. Rupture it inside a wall and an afternoon project becomes a costly professional repair. Dust is rarely alone in ducts. Mold, mildew, bacteria, and allergens may share the space, and the CDC’s page on mold and health spells out why stirring spores up without containment is a gamble with your air. Disturbing them can trigger allergies and respiratory flare-ups in the very rooms you hoped to improve. Expect diminishing returns: hours of labour may only make a visible dent in the dust level at the endpoints, which many owners find frustrating rather than satisfying. Assemble the Right Arsenal Tool Job it does Powerful shop-vac, ideally HEPA-filtered Sucks debris without exhausting fine dust back into your air; a household vacuum cannot handle the load Dryer-vent cleaning kit Flexible rotating brush head plus connectable rods that chuck into a power drill, the secret weapon for reaching inside Screwdriver or drill Releases the register grilles Microfiber cloths, bucket of hot soapy water Washes the grilles themselves clean Painter’s tape or cardboard Seals off every register you are not actively working New furnace filter Non-negotiable final install N95 mask (or better) and safety glasses Worn the entire time, no exceptions The Method, Step by Step Set aside several hours and move slowly. Kill the HVAC at the thermostat first so nothing stirs while you work. Tape or card over every supply and return register except the one in front of you. Unscrew that grille, scrub it in the utility sink or outside, and let it dry fully. Feed the shop-vac hose as deep into the open duct as comfort allows and start sucking. Then thread the drill-driven brush past the hose on low speed while the vacuum runs, feeding it in and pulling it out so dislodged dust meets suction immediately. Reseal the register, repeat through every supply, then the larger return ducts that carry the room’s unfiltered air. With furnace power off at the breaker, open the blower panel and vacuum the compartment with a small brush attachment, dodging wiring and fan blades. Finish by installing the new filter, uncovering every register, refitting the dried grilles, restoring power, and running the fan roughly fifteen minutes so the fresh filter catches whatever still floats. Call the Professionals When… Some conditions end the DIY conversation immediately: black splotches at the vents or a musty smell that will not quit, because agitating mold scatters spores through every room; rodents or insects nesting in the ductwork, whose droppings and remains need contained removal and sanitizing; the aftermath of a major renovation, since construction dust overwhelms a shop-vac; an old home with uncertain, fragile ducts; or a household member managing severe allergies or asthma, where anything short of a full-service clean undercuts the point. The CDC’s overview of cleaning and disinfecting at home makes the same distinction for surfaces: proper equipment, correct order, and real containment are what separate cleaning from rearranging dirt. The Middle Ground: House-Side Help A register sweep manages what is visible; it will never mimic the negative pressure of a professional rig. What a cleaning service does replicate is the rest of the dust reservoir feeding those ducts: the fabrics, floors, and corners that recirculate particles into your HVAC every day. Toronto Shine Cleaning handles that load through recurring maid service, full deep cleaning for your home, and move-in or move-out cleaning when the air should start over with you, with transparent quotes on the pricing page. Talk to us at (647) 424-0355 about what your system actually needs. Frequently Asked Questions Is DIY duct cleaning a scam? Not a scam, but a mismatch of expectation. Vacuuming the reachable few feet of each branch is real surface cleaning. Calling it duct cleaning oversells it, since most of the system stays untouched. What is the single biggest danger of doing it myself? Tearing flexible ductwork with a rigid brush

Professional vs. DIY Duct Cleaning: What You Need to Know Before You Start Read More »

Cleaning a Glass Top Stove: The Do’s and Don’ts for a Perfect Shine

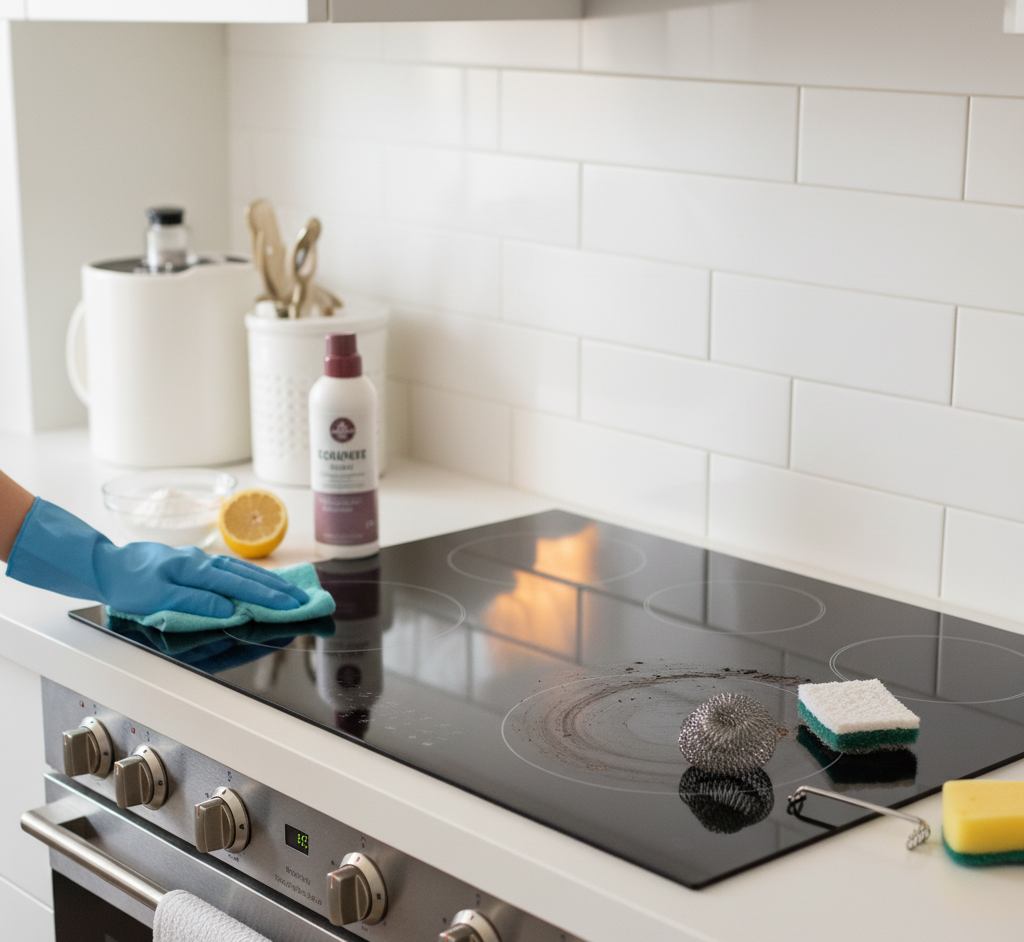
The Centerpiece That Scares People A glass cooktop is the modern kitchen’s showcase: a seamless, minimalist slab that reflects the room and wipes in seconds. It is also the appliance homeowners are most afraid to touch, because every horror story about dulled finishes and permanent scars starts with someone cleaning it the wrong way. The good news is that caring for glass-ceramic is not hard, and it is not dangerous. It is precise. The surface shrugs off enormous temperature swings by engineering, yet it stays vulnerable to exactly two enemies: scratching from improper tools, and chemical pitting from the wrong spills. A toolkit of cheap staples, a couple of techniques, and a consistent routine keep the shine coming back for years. The Ground Rules: Six Absolute Don’ts Most damage is inflicted by well-meaning owners grabbing the wrong product, so memorize the bans before touching a single burner. No abrasive sponges. Steel wool and green scouring pads etch a web of micro-scratches that dull the finish permanently and give grime tiny crevices to live in, making every future clean harder. No abrasive powders. Cleansers like Comet and Ajax suit porcelain and stainless sinks, not glass-ceramic; their gritty particles scratch just like the pads. No ammonia-based glass cleaners. The classic blue window spray is too harsh for a cooktop and can leave discoloration or streaks that refuse to lift. No knives or sharp utensils as scrapers. Prying burnt food off with a butter knife is a fast track to deep, irreversible gouges. No cleaning a hot surface. Beyond the burn risk, cold liquid on hot glass can trigger thermal shock and, in extreme cases, crack the cooktop. Wait for the indicator light and a cool touch. Never let sugary spills harden. Jam, candy, and sweet sauces boiling over are the one true emergency: hot sugar chemically bonds to glass-ceramic and leaves permanent pits if allowed to cool in place. The Only Toolkit You Need Everything else is assembled from household staples: at least two microfiber cloths, one to clean and one to buff, since the fabric is soft, non-abrasive, lint-free, and thirsty; baking soda for a gentle alkaline scrub that lifts grease and stains with mild abrasive action; distilled white vinegar in a spray bottle, usually diluted half and half with water, because its mild acid cuts grease and dissolves the hard-water minerals that cause haze and streaks; a non-abrasive sponge labeled safe for non-stick pans; and the one genuinely specialized purchase, a cooktop scraper, a handle holding a single-edge razor blade at a shallow, controlled angle, the only tool allowed near carbonized debris. Optional but excellent: a commercial cooktop cleaner such as Weiman or Cerama Bryte, which condition as much as they clean, using silicones to fill microscopic imperfections and leave a protective film that makes the next wipe easier. Level One: The Sixty-Second Habit Consistency shrinks every future scrub. After each meal, once the hot-surface light is off, knock loose crumbs away with a dry cloth, mist the slab with the diluted vinegar so light grease splatters begin to loosen, then buff dry with the second microfiber in wide circles until the shine comes back streak-free. Owners who actually do this rarely need anything more. Level Two: When Life Boils Over For burnt-on messes, hold the razor scraper at roughly 30 to 45 degrees and glide short, smooth strokes under the raised deposits rather than digging at them; the scraping noise sounds alarming, but a flat blade will not scratch glass. Then blanket the entire surface in a generous, even layer of baking soda. Soak a large dish towel in hot, soapy water, wring it damp and steamy rather than dripping, and lay it over the powder for fifteen to thirty minutes, long enough for heat and moisture to soften the grime while the soda breaks down grease. Wipe the towel away and scrub in circles with it or the non-scratch sponge, working the now-pasty baking soda until stains surrender without force. Rinse every residue with a clean, damp cloth, re-mist the vinegar solution, and buff to a finish. A quick reference for the messes that panic people: Problem Response Deadline Molten sugar spill Kill the heat, glove up, and scrape the puddle to a cool zone with the razor tool Before it cools and bonds Melted plastic or foil Scrape while soft; a moment on the lowest burner re-softens it if hardened. Ventilate, since fumes are unpleasant Same day Chalky white water film Let the vinegar spray sit a few minutes, then wipe Next clean Silver-grey streaks Often metal smears from aluminum or copper pans, buffable with a commercial cooktop cleaner Next clean True Scars vs. Fake Scars Deep scratches, sadly, are permanent, and no polish erases them. Many apparent scratches are transfers: a pan’s soft metal left on harder glass. Those lift with the mild abrasives in a dedicated cooktop cleaner, which is why the bottle earns its place on the shelf. The same logic behind a clean cooktop, using gentle chemistry and the right tool on the right surface, is what the CDC recommends in its guide to when and how to clean and disinfect your home, and it matters most where food is prepared, as the agency’s food-safety prevention tips point out. Zero Scratching Required Some stoves absorb years of neglect before one owner notices, and a full burn-in cannot always be buffed out. When you would rather hand the problem to professionals with the right tools and no risk to your finish, Toronto Shine Cleaning’s deep cleaning service handles kitchens appliance by appliance, or keep the daily game easy with weekly maid service starting at $212.63 for a studio or one-bedroom before HST, detailed on the pricing page. Book a slot or ask about your surface at (647) 424-0355. Frequently Asked Questions Can I use window cleaner on a glass cooktop? No. Most formulas contain ammonia, which is too harsh for glass-ceramic and can discolor the surface or leave streaks no re-wipe removes. Stick

Cleaning a Glass Top Stove: The Do’s and Don’ts for a Perfect Shine Read More »