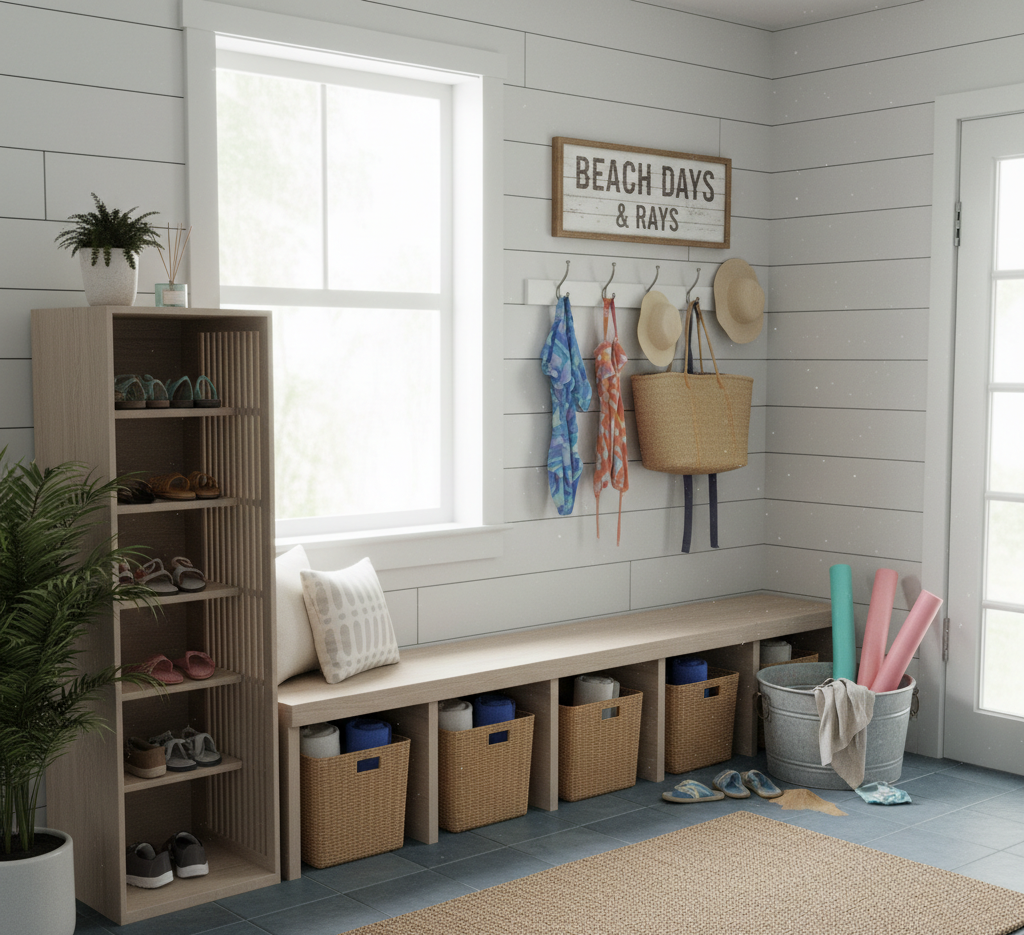
How to Deep Clean and Organize Your Mudroom for the Summer Season
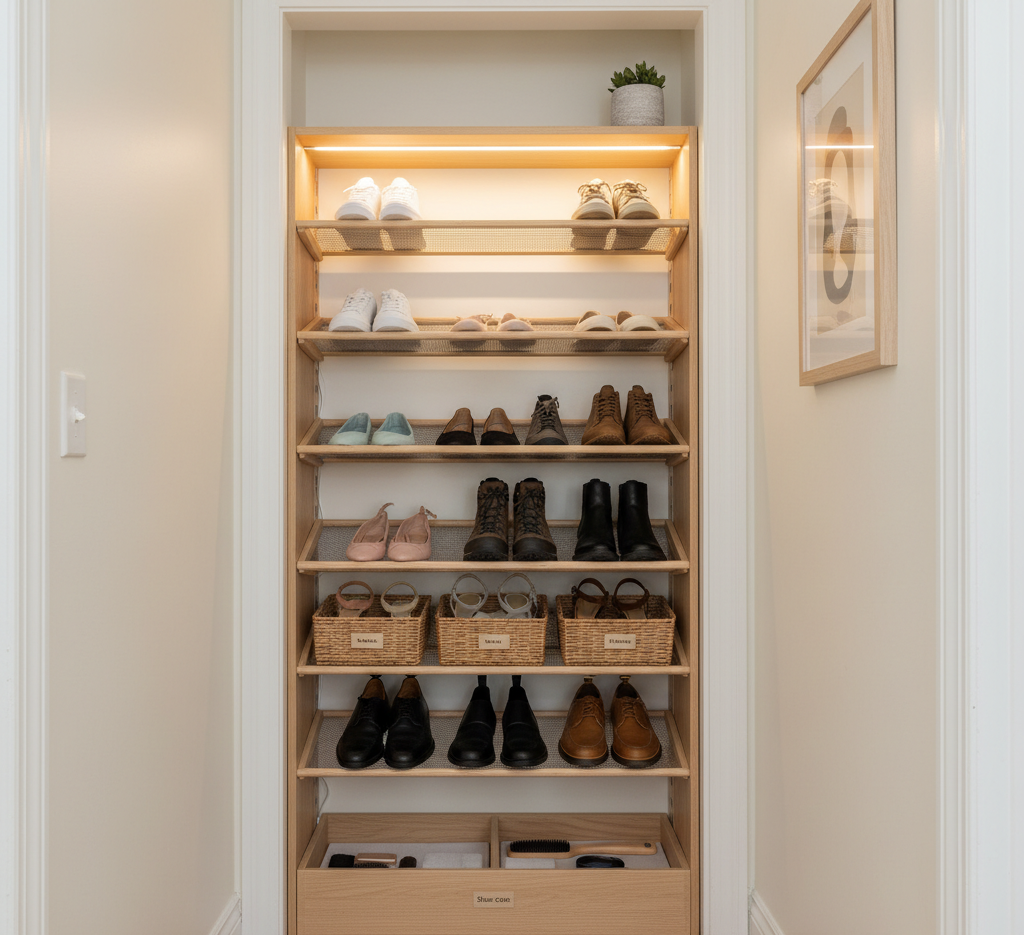
By the time late May arrives, a welcome shift occurs across Canada. The cold, relentless dampness and thick mud of early spring begin to recede, replaced by the long, dry, and sun-filled days of summer. As our daily routines transition from seeking shelter indoors to embracing outdoor activities, the physical demands on our homes change dramatically. The busiest area of the home, the entryway or mudroom, must adapt to this seasonal shift. For months, this transition zone has functioned as a wet-weather barrier, holding heavy rain jackets, muddy boots, wet umbrellas, and a collection of salt-stained floor mats. Now, as the lifestyle moves towards backyard barbecues, park visits, and lake trips, the mudroom must be systematically reset. This seasonal transition is a multi-step process, involving a thorough deep cleaning of the space, the proper care and storage of spring rain gear, and the strategic organization of summer essentials like sandals, sunscreen, beach towels, and outdoor toys, ensuring your entranceway remains functional, organized, and inviting throughout the high-activity summer months. First Step The foundation of a successful seasonal transition is a complete and thorough deep clean of the empty space. You cannot effectively organize new items in a room that is still coated in the grit and residue of the previous season. Begin by removing absolutely everything from the mudroom or entryway: take down all jackets, empty the shoe racks, clear out the storage cubbies, and roll up the floor mats. This total empty-out creates a blank canvas and immediately reveals the areas that need specific attention. Begin with a thorough dry cleaning. Use a vacuum cleaner equipped with a crevice tool to clear out all the dust, dried mud, sand, and pet hair that has accumulated in the corners of cubbies, behind benches, along baseboards, and in the window tracks. 1.Wet Cleaning Once the loose debris is gone, the wet cleaning can begin, and the focus should be on removing the stubborn, grey film of spring road salt and dried mud that covers the floors and lower walls. For durable tile, vinyl, or linoleum floors, a solution of equal parts warm water and white vinegar is highly effective. The mild acidity of the vinegar breaks down the alkaline salt residues that have dried into the grout lines and corners. Use a stiff-bristled brush to scrub the grout lines, then mop the entire floor and rinse it with clean, plain water. If your entryway features hardwood, avoid using excess water; instead, use a well-wrung microfiber mop lightly dampened with a wood-safe cleaner. The walls, baseboards, and seating benches in a mudroom take a significant beating from wet raincoats, dirty backpacks, and kicking boots. Wipe down these surfaces with a soft cloth dampened with a solution of warm water and a few drops of mild dish soap. For stubborn scuff marks on painted walls or baseboards, a lightly dampened melamine foam eraser can work wonders, lifting the black marks with gentle circular rubbing. Pay special attention to high-touch areas like coat hooks, door handles, cabinet pulls, and light switches, sanitizing them thoroughly to remove accumulated grime. Finally, wash the interior and exterior of the door window and any surrounding glass to let the bright summer light flood into the clean space. 2.Jackets and Windbreakers With the space clean and drying, turn your attention to the rain gear that must be prepared for long-term storage over the summer. Storing these items while they are still dirty or damp is a critical mistake that can lead to permanent fabric damage, mold, and unpleasant odors. Inspect all rain jackets and windbreakers. Wash them according to their care labels, typically on a gentle cycle with cool water and a mild detergent. Avoid fabric softeners, which can degrade the water-resistant coatings on technical rain fabrics. If the jackets have lost their water-beading capabilities, this is the perfect time to apply a spray-on waterproofing treatment before storing them. Ensure the jackets are completely dry before hanging them in a spare closet or placing them in breathable garment bags. 3.Rain Boots Rain boots require meticulous care before they are packed away. Rubber is a natural material that can dry out, crack, and degrade if left coated in dried mud and road salt over the summer. Scrub the outsoles clean of all dirt and gravel, and wipe down the rubber uppers with a cloth dampened with warm, soapy water. If the boots have removable fabric insoles, take them out, wash them separately, and ensure they are thoroughly dry. To neutralize any odors, sprinkle a little baking soda inside the boots. Once dry, store them in a cool, dry place away from direct sunlight or heat sources, which can cause the rubber to warp and crack. Heavy umbrellas should be opened fully, wiped down to remove any dirt, and left to dry completely in the sun before being folded and placed in storage. Now, with the spring gear packed away, the strategic organization of your summer essentials can begin. The primary goal is to create a system of maximum visibility and accessibility, ensuring that the items you need for outdoor activities are easy to grab on your way out the door and easy to put away when you return. Transition 1.Footwear Footwear organization shifts from heavy, structured boots to lightweight, casual options like sandals, flip-flops, sneakers, and water shoes. Because summer footwear is generally smaller and less bulky, you can often fit more pairs into the same space. Utilize low, open shoe racks or adjustable shelves inside the mudroom cubbies. Group the footwear by family member, and arrange them so that the most frequently used pairs—like daily slide sandals or running sneakers—are on the most accessible middle shelves, while water shoes and occasional-use footwear are placed on lower or higher levels. This prevents a chaotic pile from forming at the bottom of the door. 2.Protection Next, establish a dedicated sun protection and insect defense station. This is one of the most functional additions you can make to a summer entryway.
How to Deep Clean and Organize Your Mudroom for the Summer Season Read More »