
Appliance Cleaning

Modern, clean computer keyboard on an organized desk with soft lighting.

How to Clean Your Keyboard Like a Pro in 5 Simple Steps

Clean Your Keyboard to look like it’s just come out of the box doesn’t have to be as complicated as cracking a secret code. Whether you’re a gamer whose keys have seen better days, a busy professional whose keyboard is a breadcrumb museum, or just someone looking to spruce up their workspace, these five simple steps will have your keyboard looking and feeling fresh in no time. 1. Unplug and Flip Starting off with the basics, turning off your keyboard is not just about safety, it’s about preparing for a mini adventure. Think of it as setting the stage for a deep clean operation. Whether it’s a trusty wired keyboard that’s been with you through countless late-night projects or a sleek wireless one that’s seen more than its fair share of coffee spills, turning it off ensures you won’t accidentally send a string of gibberish to your boss or start an unintended video call. Plus, it’s about protecting the electronics from any static discharge or accidental short-circuits while you clean. Now, the flipping part is where the magic begins. It’s not just a gentle overturn; it’s an act that reveals the hidden secrets of your keyboard’s life. As you cautiously flip it over, tapping gently on the back like you’re coaxing secrets out of a friend, you’ll find yourself on a little archaeological dig right at your desk. The crumbs, the dust, and who-knows-what-else that start to tumble out are the remnants of quick lunches, midnight snacks, and those times you just couldn’t step away from the screen. But here’s a pro tip: don’t just stop after one flip and shake. Give it a few gentle taps on the back, rotate it, and shake it again. You want to approach it from multiple angles, ensuring that you’re not just moving the debris around, but actually getting it out. It’s a bit like finding the best angle to tap a ketchup bottle; there’s a sweet spot that gets everything moving. As the bits of debris start to fall away, you might find yourself reflecting on the memories each crumb and speck of dust represents. That’s the beauty of this step-it’s not just cleaning; it’s a trip down memory lane, reminding you of the many hours you’ve spent at your desk. And with each shake, you’re not just getting rid of physical debris; you’re setting the stage for a fresher, cleaner, and more inviting workspace. 2. Compressed Air is Your Best Friend Diving into the realm of compressed air as a cleaning tool for your keyboard, it’s worth emphasizing just how transformative this step can be. Imagine holding a miniature cyclone in your hands, one that has the power to reach where no cloth or hand can. The can of compressed air isn’t just a tool; it’s your ally in the battle against the unseen forces of grime that have settled in the hardest-to-reach places of your keyboard. When you begin, consider the angle at which you’re holding the keyboard. This isn’t merely about convenience; it’s about strategy. By tilting the keyboard, you’re not just preparing for a surface clean; you’re setting up the conditions for a thorough excavation of debris. The angle allows the force of the air to dislodge particles from their hiding spots, ensuring they’re not just pushed deeper into the crevices of your keyboard. As you wield the can, the importance of controlled bursts cannot be overstated. This technique ensures that the air’s force is directed precisely where it’s needed, minimizing the risk of damage to the delicate mechanisms beneath the keys. It’s akin to using a scalpel instead of a sword; precision is key. The short, controlled bursts act as targeted strikes against the buildup of debris, ensuring that each press is both effective and safe. Moreover, navigating the keyboard’s landscape with compressed air is an exercise in patience and coverage. It’s not just about the spaces between the keys; it’s also about the edges, the underside of the keys, and even the USB port or wireless connection points. Each area requires attention to ensure that the keyboard is not just clean on the surface but also free from potential problems that could arise from accumulated dust and dirt. The satisfaction of this process is immediate. As the air flows, you can almost see the keyboard breathe a sigh of relief, its pathways cleared, and its operation smoothed. This isn’t just about aesthetics; a clean keyboard can significantly affect functionality, reducing the risk of sticky keys or unresponsive presses that can frustrate even the most patient users.     3. The Gentle Swipe Taking the concept of the “Gentle Swipe” to the next level involves not just swabbing the surface of each key, but treating this process as a meticulous labor of love, ensuring that every keypress thereafter is as satisfying as the first. The use of isopropyl alcohol isn’t arbitrary; it’s chosen for its effectiveness in disinfecting without harming the electronics that lie beneath the keys. This is where the science of cleaning meets the art of maintaining the tools we use daily. When you select a cotton swab or a soft cloth, you’re choosing tools that are gentle yet effective. The cotton swab, with its pointed end, becomes a precision instrument, allowing you to navigate the contours and edges of each key with the finesse of a painter touching up a masterpiece. The soft cloth, on the other hand, offers a broader canvas, allowing for quicker work over the flat surfaces, absorbing and wiping away the grime that dulls the shine of your keyboard. The technique of dipping the swab or cloth in alcohol requires a careful balance. Too much liquid, and you risk seepage beneath the keys, potentially harming the delicate circuits below. Too little, and you might not capture all the germs and oils that have accumulated. The goal is to moisten the tool just enough to clean effectively without leaving any residue. This balance ensures that each swipe not only cleans

How to Clean Your Keyboard Like a Pro in 5 Simple Steps Read More »
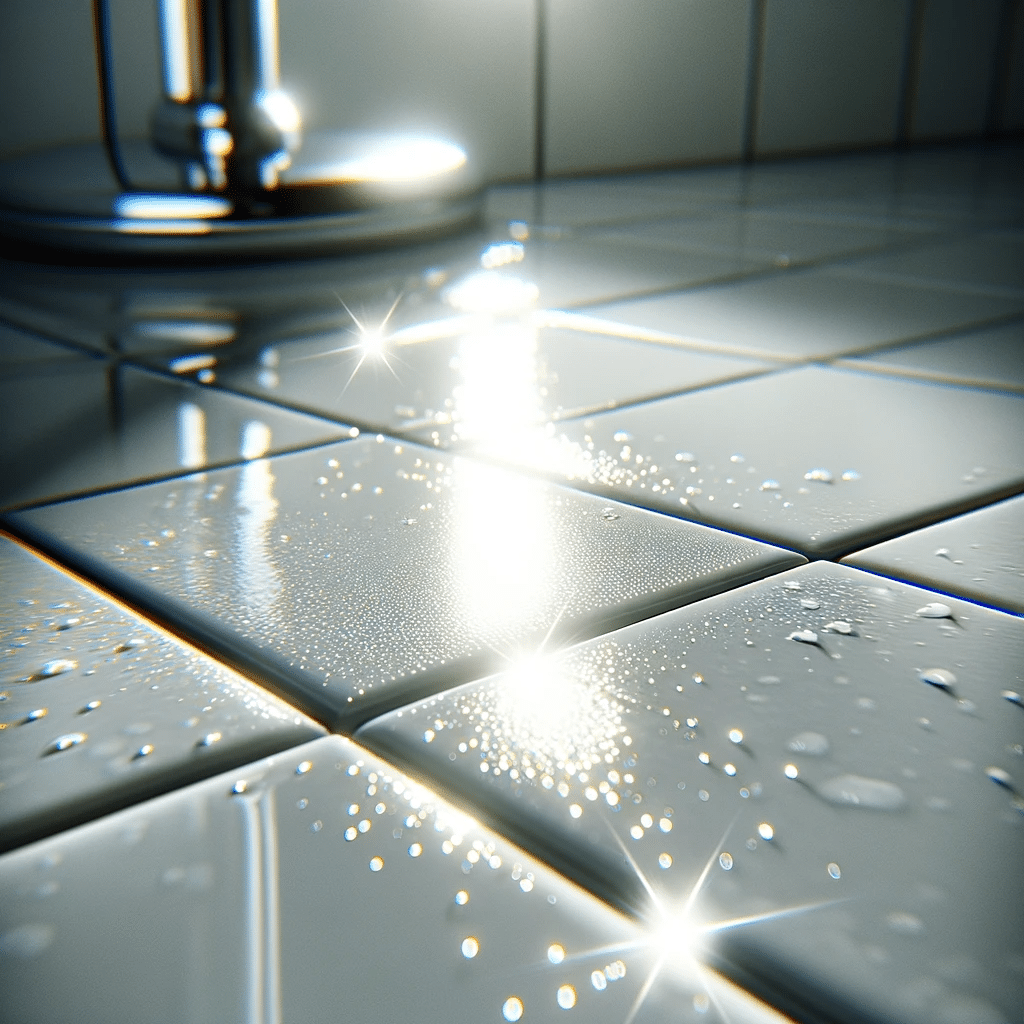
Wet shower tiles in bathroom

7 Effective Ways to Clean Up Water-Based Stains from Every Surface

Oh, those water-based stains! Whether it’s a splash of coffee on the couch, a finger-paint masterpiece on the wall, or just the remnants of a rainy day tracked across your floors, these seemingly harmless spills can be surprisingly stubborn to remove. But fear not! I’m here with seven effective, straightforward ways to tackle water-based stains on every surface around your home, keeping your space sparkling clean and stress-free. 1. Fabric and Upholstery: Gentle Dabbing and Mild Detergent When it comes to fabric and upholstery, water-based stains can feel like uninvited guests that just won’t leave. The trick lies in handling them swiftly and with care. Here’s a deeper dive into effectively dealing with these pesky stains, ensuring your fabrics remain pristine and welcoming. After the initial blotting, which should be done as quickly as possible to prevent the liquid from seeping deeper into the fibers, prepare your cleaning solution. This mixture should be gentle: think about using a mild detergent that you’d trust with your favorite delicate garments. The water should be cool to lukewarm, as hot water can set the stain further into the fabric, making it harder to remove. Now, dip a soft cloth into your prepared solution. It’s crucial that this cloth is colorfast to avoid transferring any dye onto the fabric or upholstery you’re cleaning. Wring out the cloth so it’s damp, not dripping, to avoid saturating the fabric with water which can lead to additional issues like mildew or water rings. As you dab the stain, start from the outside and work your way in. This technique prevents the stain from spreading outward, making it larger and more noticeable. Patience is key here; the goal is to lift the stain, not rub it away aggressively. Rubbing not only risks spreading the stain but can also damage the fabric’s fibers, leading to pilling or a worn appearance. Once you’ve treated the stain, it’s time to rinse. Using a clean cloth dipped in fresh cool water, gently dab the area to remove any soap residue. It’s important to remove all traces of the detergent to avoid attracting dirt and grime to the cleaned spot. The final step is allowing the area to air dry completely. Avoid the temptation to speed up this process with a hair dryer or direct heat, as this can set the stain permanently or damage the fabric. If the fabric is safe for ironing, you might lightly iron the damp area (using an appropriate heat setting) with a clean cloth between the iron and the fabric to help remove any lingering moisture. 2. Carpets: Baking Soda and Vinegar Magic After you’ve liberally sprinkled baking soda over the stain, giving it about 10 minutes to work its magic, it’s not just a waiting game. During this time, the baking soda is busy absorbing the stain, drawing it out of the carpet fibers. This process not only helps in stain removal but also deodorizes your carpet, tackling any unwanted smells that might be associated with the spill. Moving on to the vinegar solution, the reason behind using equal parts white vinegar and water is twofold. Vinegar, being acidic, is a natural disinfectant that not only helps in lifting the stain but also kills off bacteria that might be lingering in the carpet. The water dilutes the vinegar, ensuring the carpet isn’t subjected to too high a concentration, which could potentially affect the carpet’s color or texture. When you lightly spray the vinegar solution over the baking soda, the resulting fizzing action is a sign that the cleaning process is actively working. This reaction helps to lift the stain from the carpet fibers, making it easier to blot away. It’s crucial to wait until this fizzing action stops before moving on to the blotting stage. Blotting too early can push the baking soda deeper into the carpet, making it harder to vacuum later. As you blot the treated area with a clean, dry cloth, you’ll notice the stain transferring onto the cloth. This step may require patience and gentle persistence, especially with more stubborn stains. The key here is to dab rather than rub to avoid working the stain deeper into the carpet. Once you’re satisfied that you’ve lifted as much of the stain and moisture as possible, allow the area to dry thoroughly. This might take several hours, depending on the humidity and ventilation in the room. A dry, clean carpet not only looks better but also prevents the growth of mold and mildew, which can be health hazards. The final vacuuming is not just about removing any leftover baking soda. It also helps to fluff up the carpet fibers, restoring your carpet’s texture and appearance to its pre-stain state. For larger or more stubborn stains, this process can be repeated. However, it’s important to note that some stains may require professional cleaning, especially if they’re on delicate or specialty carpets.     3. Hardwood Floors: Immediate Wipe and Special Cleaners The first step, immediate wiping, cannot be overstated. Hardwood floors are particularly susceptible to water damage; even small amounts of liquid can seep into the cracks and crevices of the flooring, leading to warping, staining, or swelling of the wood. By quickly absorbing the spill with a soft, dry cloth, you minimize the risk of long-term damage. It’s important to blot rather than rub the spill to avoid spreading the moisture further into the wood grains. For stains that have settled into the wood or are not fully removed by blotting alone, turning to a cleaner specifically formulated for hardwood floors is your next step. These cleaners are designed to effectively tackle stains without damaging the wood’s finish or integrity. It’s crucial to choose a product that matches the type of finish on your floor, whether it’s polyurethane, oil-sealed, or another treatment, as some cleaners may not be compatible with all finishes. When applying the cleaner, the method of application is just as important as the product itself. Pouring the cleaner directly onto

7 Effective Ways to Clean Up Water-Based Stains from Every Surface Read More »

Person savoring coffee near a Nescafe machine in a cozy setting.

How to Deep Clean Your Nescafe Machine in 5 Simple Steps

How to Deep Clean Your Nescafe Machine in 5 Simple Steps A clean Nescafe machine makes better coffee and lasts longer. Coffee oils, mineral deposits, and residue build up over time, affecting flavor and performance. With these five simple steps, you can restore your machine to peak condition without special tools or harsh chemicals. Regular cleaning also prevents mold and bacteria from growing inside the machine where moisture lingers. Step 1: Unplug and Disassemble Start by unplugging your machine for safety. Remove all detachable parts: the drip tray, water reservoir, and pod holder. Each component collects coffee oils and residue that can alter the taste of your brew. Disassembling lets you reach every hidden area where grime accumulates. Set aside any small parts like the water filter so they do not get lost during cleaning. Step 2: Soak and Scrub the Parts Fill your sink with warm, soapy water and submerge the removable parts. Let them soak for 20 minutes to loosen built-up coffee oils. Then scrub each piece with a soft sponge or brush, paying extra attention to crevices and corners. A gentle scrub removes residue without scratching plastic surfaces. For stubborn stains, a paste of baking soda and water works well as a natural abrasive. Step 3: Rinse and Dry Thoroughly Rinse every part under running water to remove all soap residue. Leftover soap can affect future brews and encourage mold growth. Dry each component completely with a clean towel or let them air dry on a rack. Thorough drying prevents bacteria from forming inside the machine. The CDC recommends regular cleaning of kitchen appliances to prevent bacteria buildup and ensure food safety. Step 4: Descale the Machine Mineral buildup from water, known as limescale, can clog internal tubes and reduce brewing temperature. Fill the water reservoir with a descaling solution or a mixture of equal parts water and white vinegar. Run the brew cycle several times without a coffee pod to circulate the solution through the internal system. Then run two or three cycles with fresh water only to flush out all descaling residue. Descaling every three months keeps your machine working efficiently. For more on safe cleaning practices, Health Canada provides guidance on household chemicals and cleaning products. Step 5: Reassemble and Brew a Cleaning Cycle Once all parts are dry, reassemble the machine. Run one final cycle with plain water to clear any remaining particles from the internal lines. Your machine is now clean, descaled, and ready to brew coffee with full, pure flavor. Wipe down the exterior with a damp cloth to remove dust and fingerprints as well. Quick Reference: Cleaning Checklist Unplug the machine before disassembling Soak parts in warm soapy water for 20 minutes Scrub gently with a soft sponge or brush Rinse thoroughly and dry each component Descale with vinegar solution or commercial descaler Run a final water cycle after reassembly How Often Should You Clean Each Part? Cleaning Step Frequency Time Needed Rinse drip tray and pod holder Weekly 2 minutes Deep clean removable parts Monthly 30 minutes Descale the machine Every 3 months 20 minutes Keep Your Coffee Tasting Fresh Regular maintenance preserves the rich flavor of your coffee and extends the life of your Nescafe machine. A clean machine means every morning cup tastes as good as the first. If deep cleaning your coffee machine feels too time-consuming, professional cleaning services can help. Toronto Shine Cleaning offers thorough appliance cleaning as part of their deep cleaning services and regular maid services. Their team has the tools and expertise to handle tough coffee stains and mineral deposits. Pair your coffee machine care with a thorough professional home cleaning plan to keep your entire kitchen spotless. Call (647) 424-0355 to schedule an appointment or learn more about their affordable packages for Toronto homes. FAQ How often should I deep clean my Nescafe machine? Deep clean the removable parts monthly and descale every three months. Weekly rinsing of the drip tray and pod holder keeps daily buildup manageable. Can I use vinegar to descale my Nescafe machine? Yes. A 50/50 mixture of white vinegar and water works as an effective natural descaler. Always rinse thoroughly with fresh water afterward to remove vinegar taste. What happens if I never descale my coffee machine? Limescale builds up inside the machine, reducing water flow and heating efficiency. Over time, this can damage internal components and shorten the machine’s lifespan. Is it safe to put Nescafe parts in the dishwasher? Check your model’s manual. Most Nescafe plastic parts are not dishwasher-safe and should be hand washed to prevent warping or damage. Why does my coffee taste bitter after cleaning? You may not have rinsed thoroughly enough. Run two or three additional water cycles through the machine to flush out any remaining cleaning solution or vinegar residue.

How to Deep Clean Your Nescafe Machine in 5 Simple Steps Read More »

Elegant Cozy Living Room with Luxurious Deep Brown Leather Couch

How to Effectively Clean Your Leather Couch in 5 Simple Steps

How to Effectively Clean Your Leather Couch in 5 Simple Steps Leather furniture adds style and comfort to your home, but it requires proper care to stay beautiful. Dust, body oils, and spills can dull the finish over time. These five simple steps will clean your leather couch safely without damaging the material. Step 1: Vacuum Thoroughly Use your vacuum’s soft brush attachment to remove dust, crumbs, and pet hair from every surface. Pay close attention to crevices, seams, and the area between seat cushions. Dust and grit act like sandpaper on leather, causing micro-scratches over time. Regular vacuuming prevents this wear and keeps the leather smooth. The CDC recommends cleaning soft surfaces regularly to reduce allergens and maintain household hygiene. Step 2: Wipe with a Damp Cloth Dampen a soft microfiber cloth with distilled water and wring it out thoroughly. The cloth should be barely damp, not wet. Gently wipe the entire surface of the couch to remove surface dust and light residue. Wet leather can stain or warp, so use as little moisture as possible. Work in small sections to control moisture levels. Avoid using tap water if your area has hard water, as mineral deposits can leave marks on leather. Step 3: Clean with a Mild Leather Cleaner Apply a small amount of pH-balanced leather cleaner to a soft cloth. Test on a hidden area first, such as the back or underside of the couch, to check for colorfastness. Gently rub the cleaner into the leather using circular motions. Focus on high-contact areas like armrests and headrests where body oils build up. Never use harsh chemicals, bleach, or all-purpose cleaners on leather, as they can strip the finish and cause cracking. Step 4: Condition the Leather After cleaning, apply a leather conditioner to restore moisture and flexibility. Leather dries out naturally over time, especially in heated or air-conditioned homes. Conditioning prevents cracking and keeps the material supple. Apply conditioner with a soft cloth and buff gently. Let it absorb for the time recommended on the product label, then buff off any excess. Condition your leather couch every 6 to 12 months for best results. Step 5: Treat Stains Promptly Blot spills immediately with a dry cloth to prevent them from soaking into the leather. For oil-based stains, sprinkle cornstarch or baking soda over the area and let it sit for several hours before vacuuming. For ink stains, dab gently with a cotton swab dipped in rubbing alcohol and blot dry. Always test any stain treatment on a hidden area first. Prompt action prevents permanent staining and keeps your couch looking like new. Leather Care Checklist Vacuum with soft brush attachment weekly Wipe with damp microfiber cloth as needed Clean with pH-balanced leather cleaner every 3-6 months Condition leather every 6-12 months Blot spills immediately with a dry cloth Keep leather away from direct sunlight and heat sources Dos and Don’ts of Leather Cleaning Do Don’t Vacuum regularly with soft brush Use harsh chemicals or bleach Use pH-balanced leather cleaner Scrub aggressively with abrasive pads Condition every 6-12 months Saturate leather with water Blot spills immediately Leave spills to dry on the surface Keep out of direct sunlight Place near heat registers or fireplaces Protect Your Leather Investment Leather furniture is a long-term investment that rewards regular care. Avoid placing your couch in direct sunlight, which can fade and dry the material. Keep it at least three feet away from radiators, fireplaces, and air conditioning vents. Rotate cushions periodically to ensure even wear. For more tips on caring for household surfaces, Health Canada offers guidance on safe use of household products and furniture maintenance. If your leather couch needs professional attention, Toronto Shine Cleaning can help. Their team handles delicate upholstery with the right products and techniques. Visit their deep cleaning page or regular maid services page for more information. Call (647) 424-0355 or check their pricing to find a plan that suits your home. You can also read customer reviews to see why Toronto homeowners trust their team. FAQ How often should I clean my leather couch? Vacuum weekly and do a full clean-and-condition treatment every 6 to 12 months. Blot spills whenever they happen. Can I use baby wipes to clean leather? No. Baby wipes often contain alcohol, fragrances, and moisturizers that can damage leather over time. Use a dedicated pH-balanced leather cleaner instead. What is the best leather conditioner? Look for a conditioner with natural oils such as lanolin or beeswax. Avoid products with silicone, which can leave a sticky residue. How do I remove pet hair from leather? Use a vacuum with a soft brush attachment or a slightly damp rubber glove. The static from the glove lifts hair easily. Is it safe to steam clean leather furniture? No. Steam cleaning forces moisture into leather, causing it to warp, crack, or discolor. Stick to dry or damp methods only.

How to Effectively Clean Your Leather Couch in 5 Simple Steps Read More »

Elegant living room with plush velvet sofas exuding warmth and sophistication.

5 Simple Ways to Tackle Stains on Velvet Couches

Stains on Velvet Couches: 5 Simple Solutions A velvet couch is a luxurious centrepiece, but spills and blemishes are part of life. The good news: with the right techniques, you can remove most stains without damaging the fabric’s plush pile. These 5 simple methods will help you tackle stains on velvet couches and keep your favourite seat looking immaculate. 1. Know Your Velvet Before You Clean The right method depends on the fabric. Synthetic velvet, usually polyester or microfiber, is engineered for durability and handles water-based cleaning solutions well. Natural velvet, made from silk, cotton, or wool, is more delicate: water and harsh cleaners can leave marks or change the fabric’s softness and colour. Check the furniture tag for care instructions, or look up the manufacturer’s guidance with your model number. This one step tells you which methods below are safe for your couch. 2. Use a Dry Cleaning Powder for Fresh Stains Dry cleaning powder is a velvet-friendly option because it cleans without water, so there is no risk of watermarks. Choose a powder labelled safe for upholstery, sprinkle it lightly over the stain, and press it gently with a clean, dry cloth so it makes full contact. Let it sit for 30 minutes to a few hours, depending on the product instructions, then vacuum with an upholstery brush attachment. Dab, never rub, since rubbing pushes the stain deeper into the pile. 3. Brush Gently With the Nap A soft brush lifts surface dirt and restores the velvet’s plush texture. Use an upholstery brush or even a baby hairbrush, and work in light, sweeping motions in a single direction, following the nap of the fabric. Brushing before cleaning removes loose particles that would otherwise grind into the fibres, and brushing again after the area dries brings back the velvet’s luster. Never scrub against the pile, which can crush or flatten it. 4. Try a Specialty Velvet Cleaner Specialty velvet cleaners are formulated for the fabric’s dense pile and delicate nature. Read the label to confirm the product suits your velvet type, whether synthetic or natural, and spot test it on a hidden area first to rule out discoloration. Apply a small amount to a clean, dry cloth and dab it onto the stain. Less is more: saturating the velvet risks watermarks and can damage the cushion underneath. 5. Steam Clean With Caution, or Call a Professional Steam cleaning loosens dirt and grime embedded in velvet without harsh chemicals, but moisture control is everything. Too much steam saturates the fabric and causes watermarks that are very hard to remove, and damp conditions can invite mold. The CDC’s mold overview explains why controlling moisture matters in your home. For most velvet couches, professional steam cleaning is the safest choice: trained cleaners adjust temperature and pressure to your fabric type and dry the piece properly afterward. The CDC’s mold clean up guidelines are also worth reviewing if a couch has ever been soaked. Match the Method to the Stain Coffee or tea: blot immediately, then treat with dry cleaning powder. Grease or oil: sprinkle powder or cornstarch, let it sit, then vacuum. Ink or makeup: use a specialty velvet cleaner with light dabbing. Water rings: brush gently with the nap once fully dry. Stain Type Best Method Key Caution Fresh liquid Blot, then dry cleaning powder Never rub Grease and oil Absorbent powder Let it sit before vacuuming Ink and makeup Specialty velvet cleaner Spot test first Set-in stains Professional steam cleaning Avoid over-wetting Keep Your Velvet Couch Pristine Stains on velvet couches are manageable when you match the method to the fabric and act quickly. When the stain is stubborn or you want guaranteed results, Toronto Shine Cleaning specializes in luxury fabrics, including velvet, using fabric-friendly methods and professional equipment. Combine it with a deep cleaning of your home or a regular maid service, and check our pricing page for transparent rates. We serve homes across Toronto and the GTA. Call (647) 424-0355 to book your upholstery cleaning today. Velvet Couch Stain FAQ Can I use water on a velvet couch? It depends on the velvet. Synthetic velvet handles water-based cleaning well, but natural velvet can water-mark easily. When in doubt, use a dry cleaning powder or a specialty velvet cleaner instead. How do I remove watermarks from velvet? Let the area dry completely, then brush it gently with the nap using a soft upholstery brush or baby hairbrush. If the mark persists, a professional cleaner can often restore the pile. Can I vacuum a velvet couch? Yes, with a soft brush attachment and gentle suction. Vacuuming weekly removes dust and grit that can dull the pile, and it prepares the fabric for spot treatments. Should I steam clean velvet myself? Only with care. Household steamers easily over-wet velvet, causing watermarks and potential mold. Professional steam cleaning is safer for most velvet couches.

5 Simple Ways to Tackle Stains on Velvet Couches Read More »

Woman preparing a meal in a clean kitchen with clean appliances

Cleaning Home Appliances: The Key to Prolonging Their Lifespan and Ensuring a Healthy Home

Hey there! Cleaning Home Appliances is like giving a little love back to our cozy corners, especially when it comes to those handy helpers: our home appliances. You might not think about them much beyond their daily use, but taking care of your appliances is a big step toward a happy home and, surprisingly, a healthier you. So, let’s dive into how cleaning your home appliances can stretch their lifespan and turn your place into a sanctuary of health. The Magic Behind Clean Appliances Imagine your home appliances as teammates in the game of life, each playing a crucial role in making your daily routine run smoothly. The secret to keeping these players at the top of their game? Regular cleaning and maintenance. Just like a well-oiled machine, a clean appliance operates more efficiently, which translates into less energy consumption and lower utility bills. This efficiency isn’t just about saving a few bucks-it’s about extending the lifespan of these essential household helpers. When dust, grime, and grease build up, they can impede the normal function of your appliances, forcing them to work overtime. This not only leads to higher energy costs but also increases the likelihood of mechanical failures and the need for costly repairs or replacements. By keeping your appliances clean, you’re actually investing in their longevity, ensuring that they serve you faithfully for years to come. It’s a simple equation: a little bit of regular cleaning equals significant savings and less hassle over time. Beyond the economic benefits, the cleanliness of your appliances has a direct impact on your home’s health environment. It’s an unsettling thought, but the very tools we rely on to keep our homes clean and our food safe can become havens for bacteria, mold, and other undesirable pathogens if not properly maintained. This is especially concerning in appliances that come into direct contact with our food, like refrigerators and dishwashers. Regular cleaning eradicates these unwanted guests, ensuring that your appliances are not only physically clean but also safe and hygienic to use. For households with individuals prone to allergies, asthma, or other respiratory conditions, this aspect of appliance maintenance is crucial. Dust and mold spores that accumulate in and around appliances can easily become airborne, exacerbating symptoms and affecting indoor air quality. By keeping your appliances clean, you’re taking a proactive step in promoting a healthier living space, reducing the risk of allergen-induced health issues, and ensuring the wellbeing of everyone under your roof. The benefits of keeping your appliances clean extend far beyond aesthetics. It’s about enhancing efficiency, prolonging lifespan, saving money, and promoting a healthier home environment. This approach to appliance maintenance is a testament to the adage that prevention is better than cure. By dedicating a little time and effort to regular cleaning, you’re not just taking care of your appliances; you’re taking care of your home and the people in it. So, next time you’re tidying up around the house, remember that a clean appliance is your ally in living a healthier, happier life. Your Cleaning Toolkit When it comes to your fridge, cleanliness affects both functionality and health. Beyond just discarding old or spoiled items, giving the interior a comprehensive clean with a solution of water and baking soda can tackle unpleasant odors and prevent the growth of mildew. This simple, yet effective mixture is gentle enough not to damage the interior surfaces but powerful enough to cleanse and deodorize. For an added touch, removing shelves and drawers to wash them separately can address any hidden spills or stains, ensuring every nook and cranny is fresh. The challenge of cleaning ovens and stovetops lies in addressing those stubborn, baked-on messes without resorting to harsh chemicals. A paste made from baking soda and water offers an eco-friendly solution. Applied to problem areas and left to sit, this paste softens the grime, making it easier to scrub away without scratching surfaces. This method not only revives your cooking appliances but does so in a way that’s safe for your family and the environment. Even machines designed to clean can accumulate buildup over time. Running your dishwasher empty with a cup of white vinegar is a surprisingly effective way to cut through any lingering grease, soap scum, and hidden debris. This routine maintenance ensures that your dishwasher operates at peak efficiency, providing a better clean for your dishes and extending the machine’s lifespan. It’s a simple step that can lead to noticeably better performance. Much like the dishwasher, your washing machine benefits immensely from an occasional vinegar run. An empty cycle with white vinegar helps to dissolve soap residue and mineral buildups, which can hamper efficiency. For front-loading washers, paying extra attention to the rubber seal around the door is crucial. Moisture and detergent can collect here, promoting mold growth. A quick wipe-down can prevent this issue, keeping your machine fresh and your clothes cleaner. Forget scrubbing; steam cleaning your microwave with a bowl of water and lemon juice is a game-changer. This method loosens the grime and food splatters, allowing you to easily wipe the interior clean. The lemon adds a natural freshness, eliminating any lingering odors. It’s a quick and hassle-free way to keep one of the most frequently used appliances in your kitchen in pristine condition.     Embracing Eco-Friendly Cleaning Practices for Your Appliances Hey there! In our journey to keep our homes spick-and-span, embracing eco-friendly cleaning practices is like giving a high-five to Mother Nature. It’s not just about the sparkle; it’s about nurturing our environment while we do it. Our home appliances work tirelessly to make our lives easier, and they deserve a clean that’s both effective and kind to the planet. Let’s explore how adopting green cleaning methods for your appliances not only contributes to their efficiency and lifespan but also plays a crucial role in creating a sustainable and healthy home. The Green Scene in Appliance Care Sustainable Sparkle: Switching to eco-friendly cleaning solutions helps reduce the chemical runoff that can harm our

Cleaning Home Appliances: The Key to Prolonging Their Lifespan and Ensuring a Healthy Home Read More »