Appliance Cleaning

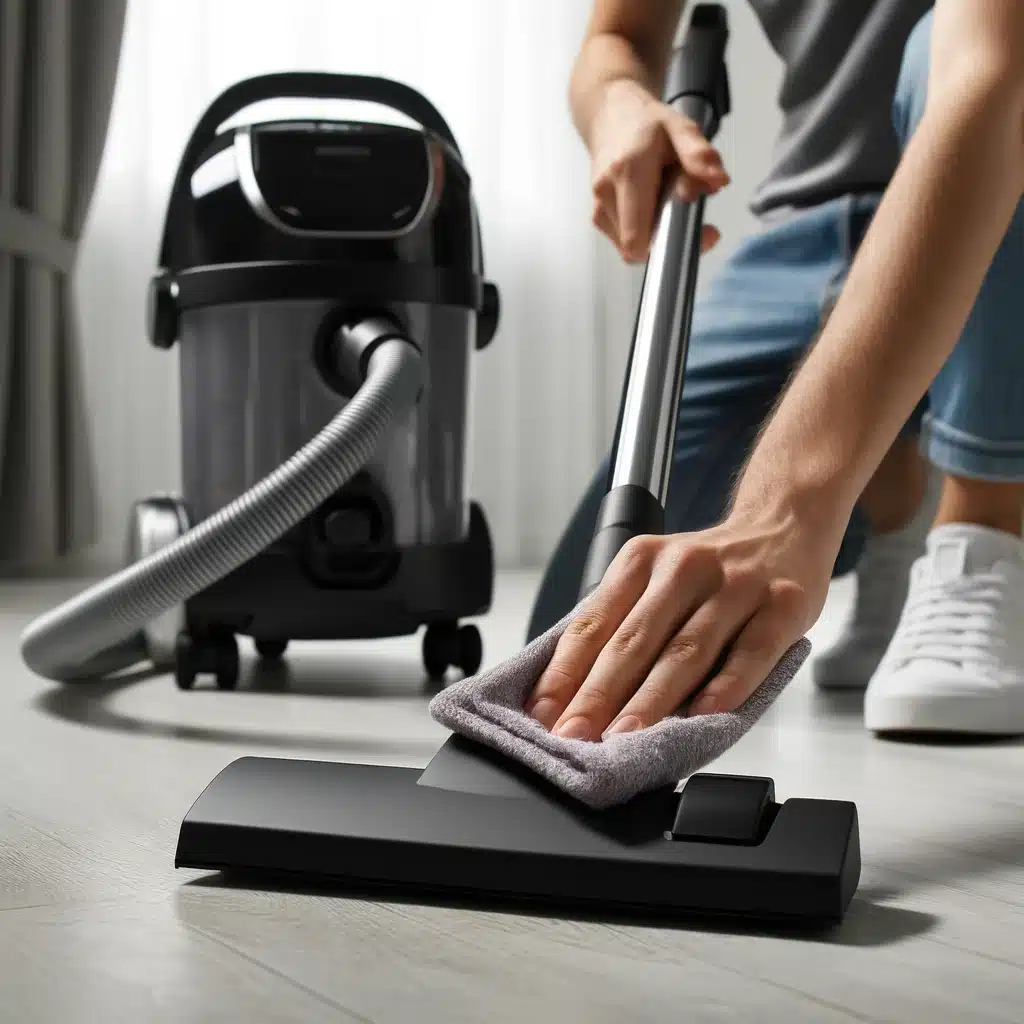
Person wiping vacuum cleaner parts with cloth.

6 Simple Steps to Clean Vacuum Cleaner

Keeping your vacuum cleaner in top-notch condition is crucial for maintaining a clean home. A clean vacuum cleaner not only performs better but also lasts longer. Here’s a step-by-step guide to ensure your vacuum is always in its best shape. 1. Empty the Bag or Canister First things first, always start by emptying the bag or canister to ensure a clean vacuum cleaner. A full bag or canister reduces suction power and makes your vacuum work harder, significantly affecting its performance. For those with a bagless vacuum, it’s essential to regularly detach the canister and properly dispose of the collected dirt and debris. This prevents clogs and maintains the vacuum’s efficiency. If your vacuum uses bags, replace the bag when it’s about two-thirds full. This not only helps in maintaining optimal suction but also extends the life of the vacuum by preventing the motor from overworking. Emptying the bag or canister is not just about maintaining suction power; it’s also about ensuring that the air quality in your home remains high. When a vacuum cleaner bag or canister is full, dust and allergens can be expelled back into the air, defeating the purpose of vacuuming. By keeping the bag or canister empty, you are not only keeping your floors clean but also minimizing the amount of dust and allergens in your home environment. This is particularly important for households with pets or individuals who suffer from allergies. A clean vacuum cleaner with an empty bag or canister operates more hygienically and contributes to a healthier living space. Moreover, regularly emptying the bag or canister can prevent potential damage to your vacuum cleaner. When the bag or canister is full, the vacuum motor has to work harder, which can lead to overheating and eventually reduce the lifespan of the appliance. Additionally, a full bag or canister can cause the vacuum to lose suction, making it less effective at picking up dirt and debris. By making it a habit to check and empty the bag or canister before it reaches maximum capacity, you can ensure that your clean vacuum cleaner performs at its best for a longer period. This simple maintenance step can save you money in the long run by reducing the need for repairs or replacements. 2. Clean or Replace the Filters Maintaining a clean vacuum cleaner involves more than just emptying the bag or canister; it also requires regular attention to the filters. Filters play a critical role in trapping dust and allergens, ensuring that the air expelled by the vacuum is clean and free of contaminants. To begin, consult your vacuum’s manual to locate the filters, as their placement can vary by model. Most vacuums are equipped with both a pre-motor filter and an exhaust filter. These components are essential for maintaining the vacuum’s performance and the air quality in your home. For vacuums with washable filters, it’s important to rinse them under lukewarm water to remove any accumulated dust and debris. Be sure to allow the filters to air-dry completely before reinserting them into the vacuum. This prevents any moisture from causing mold or mildew to form inside the vacuum, which could compromise its efficiency and create unpleasant odors. Regularly cleaning these filters ensures that your vacuum maintains strong suction and operates efficiently, contributing to a truly clean vacuum cleaner. If your vacuum’s filters are not washable, it is crucial to replace them according to the manufacturer’s recommendations, typically every 3 to 6 months. Over time, non-washable filters become clogged with particles and lose their effectiveness, which can strain the vacuum motor and reduce suction power. By adhering to the replacement schedule, you help maintain optimal performance and extend the lifespan of your vacuum cleaner. Keeping the filters clean or replacing them as needed ensures that your clean vacuum cleaner continues to perform at its best, capturing dust and allergens effectively and promoting a healthier living environment.     3. Inspect and Clear the Brush Roll Maintaining a clean vacuum cleaner involves regular attention to the brush roll, also known as the beater bar. This component is crucial for agitating carpets and effectively picking up dirt and debris. However, it often becomes tangled with hair, string, and other materials, which can impede its performance. To keep your brush roll in optimal condition, turn your vacuum over and carefully inspect it for any entangled materials. Using a pair of scissors, gently cut away any hair, string, or debris that has wrapped around the brush roll. It’s important to be gentle during this process to avoid damaging the bristles, which are essential for the brush roll’s effectiveness. Taking the time to regularly clean the brush roll ensures that it remains free of obstructions and can continue to perform its role efficiently. This not only improves the vacuum’s ability to clean carpets but also helps in maintaining a clean vacuum cleaner overall. By consistently inspecting and clearing the brush roll, you prevent potential blockages that could strain the vacuum’s motor and reduce its suction power. A clean brush roll can move freely and agitate carpet fibers effectively, allowing the vacuum to pick up more dirt and debris with each pass. This maintenance step is especially important for households with pets or high-traffic areas, where hair and debris accumulate more rapidly. 4. Check the Hose and Attachments Ensuring a clean vacuum cleaner involves more than just maintaining the main unit; it also requires regular checks and cleaning of the hose and attachments. Over time, hoses and attachments can become clogged with debris, which significantly reduces the vacuum’s suction power. To maintain optimal performance, start by detaching the hose from the vacuum. Using a broomstick or a similar tool, carefully push out any blockages that may be lodged inside the hose. This step is crucial to restoring full suction and ensuring that your vacuum operates efficiently. If your vacuum’s hose is washable, take the time to run water through it to clear out any remaining dirt and debris. Be sure to

6 Simple Steps to Clean Vacuum Cleaner Read More »

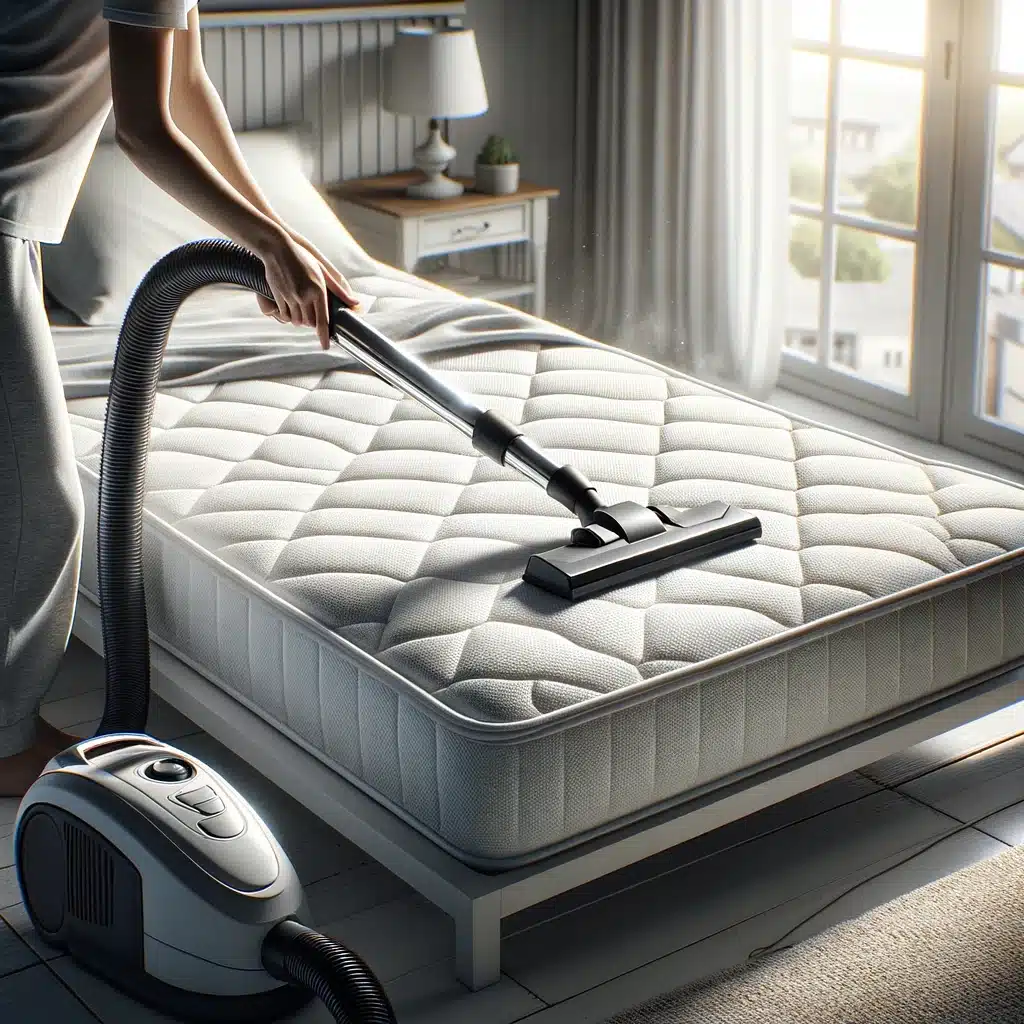
Person cleaning mattress with vacuum in sunny bedroom.

6 Easy Steps on How to Clean with Vacuum Cleaner

How to Clean with a Vacuum Cleaner: 6 Easy Steps Keeping your home clean and dust-free is much easier when you know how to use your vacuum cleaner effectively. Whether you are a cleaning pro or a first-time owner, these six simple steps will help you get the most out of every vacuuming session and keep your floors looking their best. Step 1: Choose the Right Vacuum Cleaner Start with the right tool for your floors: Upright vacuum. Best for homes with large carpeted areas, thanks to powerful suction and a wide cleaning path. Canister vacuum. Versatile for mixed surfaces and hard-to-reach spots, sliding easily under furniture and along baseboards. Stick vacuum. Lightweight and easy to store, perfect for quick clean-ups and small apartments. Robot vacuum. Hands-off daily maintenance that navigates around obstacles while you do other things. The right pick depends on your layout and needs. For households with allergies or asthma, a model with a HEPA filter makes a real difference, because the EPA explains how HEPA filters capture the fine particles that standard filters let back into the air. Step 2: Prepare the Area Before you vacuum, remove small objects such as toys, clothes, and cords that could clog the machine. Dust surfaces like shelves and tables first, so any dust that falls gets picked up by the vacuum instead of settling on the floor. Move light furniture, including chairs, small tables, and floor lamps, to reach the spots that are usually missed during a standard cleaning session. Step 3: Check and Clean the Vacuum A well-maintained vacuum cleans better and lasts longer. Empty the dust bag or canister regularly, because a full bag significantly reduces suction power. Check and clean or replace the filters to keep airflow strong, since clogged filters hinder performance and shorten the life of the machine. Inspect the brush roll for tangled hair and debris, which can affect pickup and even damage the motor if left unattended. Step 4: Vacuum Strategically Start in the farthest corner of the room and work back toward the exit, so you never walk over freshly vacuumed floor. Use straight, slightly overlapping strokes to cover every inch without gaps, and adjust the height and suction settings when moving between carpet and hardwood. Tailoring the settings helps the vacuum perform efficiently on each surface. Step 5: Focus on High-Traffic Areas Hallways and living rooms collect the most dirt and debris. Move the vacuum slowly over heavily soiled carpet so it has time to lift deeply embedded dust, and vacuum in two directions, north-south and then east-west, to pull particles out from every angle. Go over spots and stains several times, slowing down to let the vacuum work. These are also the areas where allergens settle, and Asthma Canada recommends vacuuming with a HEPA filter to control indoor triggers such as dust mites and pet dander, which the National Institute of Environmental Health Sciences lists among the most common household allergens. Step 6: Finish Up and Store Properly After the last pass, inspect the rooms for missed spots and go over them again. Empty the canister even if it is not completely full, so the vacuum keeps optimal suction for next time. Wipe down the exterior, check the filters and brush roll for lingering debris, and store the vacuum in a dry place with the cord wound neatly to avoid tangles and fraying. When to Let the Professionals Handle the Vacuuming Even the best home routine has limits. Professional crews bring commercial-grade equipment, HEPA filtration, and the experience to vacuum, dust, and sanitize a whole home efficiently. Toronto Shine Cleaning’s regular maid cleaning includes thorough vacuuming on a schedule that fits your life, while a deep cleaning service tackles the build-up that daily vacuuming misses, such as under beds, behind appliances, and along baseboards. Check the house cleaning prices to find a plan that fits your home and budget. Frequently Asked Questions How often should I vacuum? High-traffic areas deserve vacuuming two to three times a week, while low-traffic rooms can go weekly. Homes with pets or allergy sufferers benefit from more frequent passes, ideally with a HEPA-filtered vacuum. Why does my vacuum lose suction? The most common causes are a full bag or canister, a clogged filter, or a blockage in the hose or brush roll. Empty the bin, clean the filters, and clear the brush roll, and suction usually returns. Is a HEPA filter worth it? For households with allergies or asthma, yes. HEPA filters capture tiny particles such as dust mite debris and pet dander and keep them from being blown back into the air. Can a robot vacuum replace a full clean? Not entirely. Robot vacuums are excellent for daily maintenance, but a full-size vacuum with attachments is still needed for deep cleaning carpets, edges, and upholstery. With the right machine and a consistent routine, vacuuming becomes quick and effective. And when the job calls for professional tools and a trained crew, Toronto Shine Cleaning is ready to help.

6 Easy Steps on How to Clean with Vacuum Cleaner Read More »

Spotless living room window sills adorned with colorful plants.

7 Easy Steps to Maintain and Clean Window Sills Easily

Window sills are one of those areas in the house that can gather dust, dirt, and even mold if not cleaned regularly. But keeping them neat and tidy doesn’t have to be a chore. Here are seven easy steps to effectively maintain and clean your window sills, ensuring they stay looking great all year round! 1. Gather Your Cleaning Supplies Before you embark on the task of cleaning your window sills, it’s crucial to have all your cleaning supplies ready and at arm’s reach. This preparatory step ensures a smooth and efficient cleaning process, allowing you to tackle the task without interruptions. Start by securing a vacuum cleaner equipped with a brush attachment. This tool is essential for gently removing dust and small particles from the window sills without scratching the surface. Next, you’ll want to have a couple of microfiber cloths on hand. These cloths are perfect for cleaning as they don’t leave behind lint and are gentle on all types of surfaces, making them ideal for both glass and the sills themselves. For the actual cleaning solution, mild soap will often suffice, especially when mixed with warm water in a bucket. This simple mixture can effectively lift dirt and reduce the accumulation of grime. For those tougher spots or areas where mold might begin to show, white vinegar is a great addition to your cleaning arsenal. Its natural acidity helps break down stains and combat mold growth without the harshness of chemical cleaners. And finally, if your window sills are made of wood, having a wood cleaner specifically designed for such surfaces is necessary. Wood cleaners not only clean but also offer protection to the sills, maintaining their integrity and appearance.     2. Clear the Debris Clearing the debris is the first hands-on step in effectively cleaning your window sills. Start by carefully removing any objects that you might have placed on the sills over time. These can include plants that bask in the sunlight, various decorations that add charm to your room, or any part of window treatments like blinds or curtains that may rest on the sills. Once these items are removed, you’ll have full access to the entire surface, making it easier to clean thoroughly. After you’ve cleared the space, grab your vacuum cleaner equipped with a brush attachment. This tool is especially useful for picking up dust and loose dirt from the sills without causing any scratches or damage. By vacuuming before you start wiping, you effectively prevent the redistribution of dust and dirt particles around the area, which could otherwise make your cleaning efforts more difficult. This step ensures that when you do begin to wipe down the sills, you’re working on removing any remaining dirt or stains rather than just pushing around what’s already there. It’s a simple but crucial part of maintaining clean and attractive window sills. 3. Wipe Down After you’ve effectively removed the loose dirt and dust, it’s time to focus on thoroughly wiping down the window sills. Start by dampening a microfiber cloth in warm, soapy water. The soap acts as a gentle cleanser that helps break down and lift any remaining dirt or oily residues without harsh chemicals, which makes it ideal for almost any type of window sill material. When cleaning, it’s crucial to be gentle and methodical, paying special attention to the corners and edges where dirt tends to accumulate. For those who have vinyl or plastic sills, this gentle wiping with soapy water will generally be adequate to restore cleanliness and shine. These materials are particularly forgiving and don’t require abrasive cleaners or vigorous scrubbing that might be necessary for other types of surfaces. It’s important to ensure that the microfiber cloth is well wrung out before it comes into contact with the window sills. Using too much water can be problematic, especially if it seeps into areas it shouldn’t. Excess moisture can lead to water damage, swelling in wood sills, or the growth of mold and mildew, which can be both unsightly and potentially harmful.     4. Tackle Tough Stains When you come across stubborn stains or mold on your window sills, a more targeted approach is necessary to restore their cleanliness. One of the most effective for dealing with these tougher issues is white vinegar.The acidity of the white vinegar is excellent for breaking down grime and mold without the harshness associated with chemical cleaners, making it safe for most window sill materials. After preparing your vinegar, apply it directly to the stains or moldy areas on the window sills. It’s best to let the solution sit for a few minutes. This dwell time allows the vinegar to penetrate the stains or mold, breaking down the molecular bonds that hold the dirt or spores to the surface. After letting it sit, take a soft cloth and gently wipe away the solution. You will find that the previously tough stains or mold wipe away much more easily, leaving your window sills looking refreshed and clean. 5. Dry the Sills Once the window sills have been cleaned and any tough stains have been addressed, it’s essential to dry them thoroughly. This step is critical in preventing any potential water damage, which can be particularly detrimental to wooden sills. Water that lingers can seep into the pores or crevices of wood, leading to swelling, warping, or even rot over time. Furthermore, damp surfaces are prime breeding grounds for mold and mildew, which not only pose health risks but can also cause unsightly stains and damage. To ensure your window sills are properly dried, use a clean, absorbent towel or cloth. Gently pat the sills dry, making sure to absorb all residual moisture. Pay special attention to any nooks and crannies where water might collect. Ensuring the sills are completely dry helps maintain their structure and appearance, preventing any long-term damage and keeping your window sills in pristine condition. 6. Treat Wooden Sills Maintaining wooden window sills requires a bit more specialized care

7 Easy Steps to Maintain and Clean Window Sills Easily Read More »

Middle-aged woman organizing living room table, casual attire.

7 Easy and Quick Cleaning Hacks Every Homeowner Needs to Know

Keeping your homeowner task can sometimes feel like a full-time job. But, what if you could cut corners without sacrificing cleanliness? Here are seven quick cleaning hacks every homeowner needs to know that can make keeping up with the chores a little less overwhelming and a lot more efficient. Get ready to make your cleaning routine quicker and easier! 1. Microwave Cleaning Magic Let’s start with the microwave, a notorious hotspot for spills and splatters. For homeowners looking for an easy and effective way to tackle this common kitchen trouble spot, there’s a simple trick that doesn’t involve endless scrubbing. Just grab a microwave-safe bowl and fill it with water, adding a few slices of lemon for a natural cleaning boost. Place this in your microwave and set it to high for about five minutes. The heat helps the water to boil and produce steam, while the lemon not only adds a refreshing scent but also contributes acidic properties that break down the food residues. As the steam fills the microwave, it softens the splatters and baked-on food particles. After the timer goes off, carefully remove the hot bowl (using oven mitts to protect your hands). You’ll find that a simple wipe with a cloth will now effortlessly remove the gunk. Plus, the fresh lemon scent leaves your microwave smelling clean without the use of harsh chemicals. This quick hack not only saves homeowners time but also keeps the microwave ready for its next use with minimal effort. 2. Vinegar: Your New Best Friend White vinegar truly is a powerhouse when it comes to cleaning, making it a must-have for homeowners seeking a versatile and eco-friendly solution for their cleaning needs. To harness the full potential of white vinegar, start by mixing a solution of equal parts water and vinegar in a spray bottle. This mixture works wonders as a glass cleaner-simply spray it on windows or mirrors and then wipe them down with a lint-free cloth. You’ll notice it leaves a streak-free shine that rivals commercial cleaners, all without any harsh chemicals. But the benefits of white vinegar don’t stop at glass cleaning. It’s also incredibly effective for descaling kettles and coffee makers, a common headache for many homeowners. The acidic nature of vinegar helps to dissolve lime and mineral build-ups that can affect the performance and taste of your appliances. Just fill the kettle or coffee maker’s reservoir with a mixture of half vinegar and half water, run it through a brewing cycle, then rinse thoroughly with plain water to eliminate any vinegar smell. This simple step extends the life of your appliances and ensures they operate efficiently.     3. Baking Soda for Cleaner Sofas For homeowners dealing with the common problem of stained and odorous sofas, baking soda offers a simple and effective cleaning solution. Start by sprinkling a liberal amount of baking soda directly onto the sofa fabric. The natural properties of baking soda make it excellent for absorbing both odors and stains. Allow it to sit on the fabric for about 20 minutes, giving it enough time to penetrate the surface and neutralize any unpleasant smells while also working to lift stains from the material. Once the baking soda has had time to do its magic, use the brush attachment on your vacuum cleaner to thoroughly remove the powder from the sofa. This step not only clears away the baking soda but also any loosened dirt and debris that has been brought to the surface. The result is a fresher, cleaner look for your sofa without the need for harsh chemical cleaners or expensive professional services. This method is especially beneficial for homeowners looking for a cost-effective way to maintain their furniture in a pet-friendly home or in busy households where spills and accidents are frequent. 4. Dust with Dryer Sheets Homeowners often seek efficient and effective ways to manage household dust, and an innovative approach involves using dryer sheets instead of traditional dusting tools. Dryer sheets are excellent for picking up dust due to their electrostatic properties, which attract and hold dust particles rather than just moving them around. This makes them particularly effective on a wide range of surfaces, from wooden furniture to electronics and even baseboards. Additionally, dryer sheets leave behind a light, pleasant scent, which enhances the freshness of any room. They also significantly reduce static on surfaces. This reduction in static is particularly beneficial as it prevents dust from resettling quickly after it’s been wiped away, keeping surfaces cleaner for longer. For homeowners looking to maintain a dust-free home with less frequent dusting required, integrating dryer sheets into their cleaning arsenal can be a game-changer. 5. Rubber Gloves for Pet Hair Homeowners with pets understand the challenge of keeping furniture free from pet hair. One surprisingly effective technique involves using a simple pair of rubber gloves, a method that can save significant time compared to traditional lint rolling. Start by slightly dampening the rubber gloves with water; this increases the gloves’ ability to attract and hold onto pet hair. Then, simply run your hands over the surfaces of your upholstery where pet hair tends to accumulate. As you move your gloved hands over the fabric, the pet hair will adhere to the damp rubber, pulling it away from the sofa, chairs, or cushions with ease. Once you’ve collected the hair, it can be effortlessly rinsed off the gloves under running water, preparing them for another use. This method not only reduces the time spent cleaning but also avoids the need for sticky tape rollers or repeatedly emptying vacuum containers. It’s a straightforward, quick solution that helps pet-owning homeowners keep their living spaces clean and comfortable with minimal fuss.     6. Toothpaste: Not Just for Teeth Homeowners often encounter tough spots around the house that are difficult to clean, such as scuffed walls and dirty piano keys. An unexpected but highly effective solution for these issues is white toothpaste. This common bathroom staple can be used far beyond

7 Easy and Quick Cleaning Hacks Every Homeowner Needs to Know Read More »

Close-up of gray acoustic foam panels for soundproofing in studio.

How to Clean Acoustic Foam in 6 Easy Steps

When it comes to maintaining a pristine recording environment or ensuring your home studio remains top-notch, cleaning acoustic foam is a task you can’t overlook. Acoustic foam plays a vital role in managing sound quality by reducing noise and echoes, but it can also gather dust and other particles that may affect its performance. Fear not, for cleaning your acoustic foam isn’t as daunting as it sounds. Here are six easy steps to help you keep your foam looking and functioning like new. Step 1: Vacuum Gently The first step in cleaning your acoustic foam is to vacuum it gently. Using a vacuum cleaner with a soft brush attachment is crucial because the soft bristles are gentle on the foam’s delicate structure. Begin by running the vacuum slowly over the surface of the acoustic foam. This action helps to pull out any loose dust, hair, and small particles that have accumulated on the surface. It’s important to pay attention to the direction in which you vacuum. The foam has a specific texture and pattern, so moving the vacuum along the alignment of these patterns rather than against them helps prevent any potential snagging or pulling that could damage the foam. This method is not just effective but also ensures that the acoustic foam remains in good condition without compromising its ability to absorb sound. Regular vacuuming, perhaps once a week or bi-weekly depending on the location and usage of the foam, is usually sufficient for light cleaning and routine maintenance. This not only keeps the foam looking fresh but also extends its lifespan by preventing the buildup of dust and other particles that can eventually embed deeper into the foam, making them harder to remove later.   Step 2: Spot Clean Stains When maintaining your acoustic foam, addressing spots and stains promptly is essential to prevent permanent damage. After identifying areas that are particularly dirty or stained, it’s crucial to treat these spots separately to ensure thorough cleaning without soaking the entire piece of foam. Here’s how you can tackle those stubborn stains effectively: Begin by mixing a very mild laundry detergent with water to create a cleaning solution that is gentle yet effective. It’s important to use a mild detergent to avoid any harsh chemicals that could potentially degrade the acoustic properties of the foam. Once your solution is ready, immerse a clean, soft cloth into the mixture and wring it out until it is just damp, not wet. This control of moisture is critical because introducing too much water into the foam can lead to issues like mold growth or breakdown of the foam structure over time. Gently dab the damp cloth on the stained areas of the acoustic foam. The key here is to pat the stains rather than scrub them, as scrubbing can push the dirt deeper into the foam or cause surface damage. Pat the area until the stain begins to lift. This method may need to be repeated a few times with fresh portions of your damp cloth to fully remove the stain. After treating the stained areas, if you notice any soap residue, it’s a good idea to go over the spots with a clean cloth that has been dampened with plain water. This helps in removing any leftover detergent which, if left behind, could attract more dirt over time. Step 3: Use a Foam Cleaning Solution For those times when your acoustic foam needs more than just a light cleaning, opting for a specialized foam cleaning solution is a smart choice. These solutions are specifically designed to handle the unique material of acoustic foam, ensuring that they clean deeply without causing any harm to the structure or acoustic properties of the foam. To use a foam cleaning solution effectively, start by gently spraying a light coat across the surface of the acoustic foam. It’s important to cover all areas but avoid saturating the foam. These cleaning agents are formulated to act on the dirt and oils that can accumulate in the foam from airborne particles and environmental exposure. By letting the solution sit for a few minutes, you give it time to penetrate and break down this buildup, making it easier to wipe away. Once the solution has had time to work, take a clean, dry cloth and gently wipe over the surface of the acoustic foam. This step helps to lift away the dirt and debris that the cleaning solution has loosened. Be sure to use soft, gentle strokes to avoid damaging the foam’s surface. This wiping not only removes the cleaning agent but also any particles that have been broken down and brought to the surface. This deeper cleaning method can be particularly useful in environments where the foam is exposed to more frequent use or in areas with higher levels of dust and air pollution. Regular use of a foam cleaning solution can help maintain the visual appeal and functional integrity of your acoustic foam, ensuring it continues to perform its sound-absorbing duties effectively.     Step 4: Rinse with a Damp Cloth Once you’ve addressed specific stains or applied a cleaning solution to your acoustic foam, the next critical step is to rinse the foam with a damp cloth. This process is essential to ensure that no cleaning solution remains on the foam, as leftover chemicals can attract more dirt or degrade the foam’s quality over time. To do this effectively, select a clean cloth and slightly dampen it with clean water. It’s important to ensure the cloth is not overly wet-squeeze out any excess water so that it’s just damp enough to pick up any remaining soap without saturating the foam. Saturating your acoustic foam can lead to a range of problems, such as extended drying times and potential for mold growth if not properly aired out. Gently wipe the surface of the foam with the damp cloth, going over areas where the cleaning solution was applied. This gentle wiping helps lift and remove any traces

How to Clean Acoustic Foam in 6 Easy Steps Read More »

Person polishing wooden island with essential oils in sunny kitchen.

7 Natural Ways to Clean and Polish Wood for a Lasting Shine

Wood furniture and surfaces add warmth and elegance to any home, but keeping them in pristine condition can be a bit of a challenge. Fortunately, you don’t have to rely on harsh chemicals to keep your wood items looking their best. Here are seven natural methods to clean and polish wood that not only bring out its beauty but are also eco-friendly and gentle on your furniture. 1. Vinegar and Olive Oil Mixture One of the most effective and gentle ways to care for your wood furniture is by using a mixture of vinegar and olive oil. This combination is not only simple to prepare but also highly effective in maintaining the luster and health of wood surfaces. The acidity of the vinegar gently cleanses the wood, removing dirt and grime without damaging the wood’s natural structure. Meanwhile, the olive oil acts as a nourishing polish, deeply conditioning the wood and enhancing its inherent shine. To make this natural wood cleaner and polish, combine one part white vinegar with three parts olive oil in a bowl or a jar. This ratio ensures that the oil sufficiently coats and protects the wood while the vinegar keeps it clean and bright. Before applying, it’s essential to stir the mixture thoroughly to blend the ingredients well. Using a soft, lint-free cloth, dip it into the mixture and wring out any excess liquid. Gently apply the solution to your wood furniture, always rubbing gently in the direction of the wood grain. This technique ensures that the oil penetrates evenly and prevents any cross-grain scratches that could mar the surface. After applying, take another clean cloth and buff the wood lightly to bring out a more vibrant shine and ensure that no excess oil remains on the surface. This method is particularly beneficial for wood items that are handled frequently or exposed to the elements, as it not only cleans but also provides a protective layer that enhances the wood’s durability and appearance.     2. Lemon Juice and Olive Oil This natural polish not only cleans effectively but also leaves a delightful, citrusy aroma that invigorates any space. Lemon juice, known for its potent cleaning properties, cuts through dirt and buildup without harsh chemicals. It’s particularly effective at tackling greasy residues that can accumulate on kitchen tables and cabinets, making it an excellent choice for areas where food is prepared. When combined with olive oil, this mixture does more than just clean. Olive oil acts as a natural conditioner, penetrating deep into the pores of the wood to restore moisture and protect it from drying out or cracking. This is especially important for wood that may be exposed to heat or air conditioning, which can sap the moisture from wood and leave it looking dull. To prepare this wood polish, mix one part freshly squeezed lemon juice with two parts olive oil. It’s important to use fresh lemon juice rather than bottled for the best results, as fresh lemon juice contains natural enzymes that are effective at breaking down grime. After mixing, apply the solution to a soft cloth, making sure the cloth is damp but not overly wet, which could saturate and damage the wood. Gently rub the cloth over the wood surfaces in your home, following the grain of the wood to avoid any scratches. The olive oil will nourish the wood, while the lemon juice enhances its color and sheen. 3. Beeswax Polish Beeswax polish is an exceptional choice for maintaining and enhancing the natural beauty of wood furniture. This traditional method goes beyond mere surface cleaning to provide a protective barrier that safeguards wood against scratches, moisture, and everyday wear and tear. When beeswax is combined with a nourishing carrier oil like jojoba or coconut oil, it creates a robust polish that not only enhances the wood’s appearance but also fortifies its durability. To prepare your own beeswax wood polish, start by sourcing natural beeswax, which can typically be found at craft stores or online. Melt the beeswax in a double boiler until it becomes liquid. Carefully blend in your choice of carrier oil-jojoba oil is especially good for its long shelf life and mimicking the natural oils found in wood, while coconut oil offers a slightly sweet fragrance and additional antibacterial properties. A good ratio to maintain is one part beeswax to three parts oil, which ensures that the mixture is easy to apply while still being rich enough to penetrate deeply into the wood. Once the beeswax and oil have fully integrated, allow the mixture to cool slightly; it should still be warm enough to be malleable. Using a soft, lint-free cloth, work the warm polish into the wood surfaces, rubbing in circular motions to ensure that the mixture covers evenly. This method allows the wax to fill in tiny pores and scratches, creating a smooth, even surface. After applying the beeswax polish, allow it to sit on the wood for a few minutes to ensure deep penetration. Then, with another clean, soft cloth, buff the wood to a high shine. This final buffing step not only enhances the wood’s natural luster but also helps to harden the protective wax coating, forming a durable seal that repels dust, water, and stains. 4. Tea Brewing Tea brewing offers a surprisingly effective method for cleaning and enriching the appearance of wood furniture. The natural tannins found in black tea make it an excellent choice for gently cleansing and enhancing the natural grain of wood surfaces. These tannins, which give tea its characteristic color and astringency, also have properties that can help to lift dirt and residue without the harsh effects associated with chemical cleaners. To use tea as a cleaning solution for wood, start by brewing a strong pot of black tea. Typically, using one or two more tea bags than you would for drinking creates the ideal concentration for cleaning. Allow the tea to steep until it’s very strong, then let it cool to room temperature to prevent

7 Natural Ways to Clean and Polish Wood for a Lasting Shine Read More »

Kitchen rust, rust, oven rust

How to Remove Rust and Corrosion from Metal: 5 Best Methods

Dealing with rust and corrosion on metal surfaces can be a real headache, especially when it starts affecting the functionality or aesthetics of your items. Whether it’s tools, outdoor furniture, or any metal object, knowing how to effectively remove rust can prolong the life of your belongings and keep them looking great. Here, we’ll walk through five effective methods to get rid of rust and corrosion from metal. Grab your gloves, and let’s get started! 1. White Vinegar Bath: The Natural Soak White vinegar isn’t just a staple for your salad dressing-it’s also a highly effective natural rust remover for metal objects. The key ingredient here is acetic acid, which actively reacts with rust to help dissolve it, clearing the way for a cleaner, shinier metal surface beneath. This method is especially suitable for those who prefer eco-friendly cleaning solutions over harsh chemicals. To start, if you’re dealing with smaller metal items, simply find a container large enough to fully submerge them in white vinegar. Allow these items to sit in the vinegar bath overnight. This extended soak gives the acetic acid ample time to penetrate and break down the rust. For larger metal pieces that can’t be easily submerged, you don’t need to worry about finding an oversized container. Instead, grab some rags or even old towels, soak them in vinegar, and wrap them around the rusted areas of the metal. The goal is to keep the rusty spots thoroughly moistened with vinegar, so sometimes it might be helpful to re-soak the rags periodically to keep them wet throughout the soaking period. Once the soaking time has elapsed, it’s time to tackle the loosened rust. Using a metal brush or a piece of crumpled aluminum foil, scrub the treated areas vigorously. The abrasive action of the brush or foil helps to lift and remove the rust particles from the metal surface. After you’ve scrubbed the metal clean, the final step is to rinse the items with water. This not only removes any remaining vinegar and rust residue but also stops the acetic acid from further acting on the metal. Be sure to dry the metal thoroughly after rinsing. Leaving the metal wet could potentially lead to new rust formation, undoing all your hard work. Dry it off with a clean cloth or towel to ensure that every nook and cranny is moisture-free.     2. Baking Soda Paste: The Gentle Scrub When faced with less aggressive rust or when you need to treat delicate metal surfaces, baking soda emerges as an excellent, mild alternative to harsher chemical rust removers. This common household item is not only accessible but also gentle on metal while being tough on rust. To utilize baking soda for rust removal, start by preparing a thick paste. This is done by mixing baking soda with a small amount of water until you achieve a consistency that’s substantial enough to cling to vertical surfaces without dripping. This paste formation is crucial as it ensures that the baking soda stays in contact with the rusted areas long enough to facilitate the cleaning process. Once your paste is ready, apply it generously over the rusted portions of the metal. Spread the paste evenly, covering all rusty spots thoroughly. After applying, let the paste sit on the rust for a couple of hours. This dwelling time is vital as it allows the baking soda to chemically interact with the rust, breaking it down and making it easier to scrub away. Following the resting period, take a brush and gently scrub the treated areas. The texture of the baking soda paste helps to exfoliate the rust from the metal surface without scratching or damaging it. Scrubbing should be done with enough pressure to remove rust but gentle enough to preserve the integrity of the metal underneath. The final step in this rust removal process is to rinse and dry the metal. Washing off the baking soda paste with water not only cleans away the loosened rust particles but also any residual baking soda. It’s important to thoroughly dry the metal after rinsing. Any lingering moisture could potentially lead to new rust formation, which would counteract your cleaning efforts. Use a clean, dry cloth to wipe down the metal, ensuring that it is completely dry and free of moisture.     3. Potato and Dish Soap: The Surprising Trick It might sound unconventional at first, but using a potato combined with dish soap is a surprisingly effective method for removing rust from metal surfaces. This technique leverages the natural oxalic acid found in potatoes, an organic compound that interacts with rust to dissolve and loosen it, making removal a breeze. To start this rust-removal process, simply take a regular potato and slice it in half. The fresh cut surface of the potato will be used as your ‘applicator’. Apply a liberal amount of dish soap to this cut end of the potato. The dish soap not only helps in lubricating the surface but also enhances the rust removal process due to its degreasing properties. Next, use the soapy potato half just as you would a brush. Rub the cut end with the dish soap directly onto the rusted areas of the metal. As you do this, the oxalic acid from the potato interacts with the rust, breaking it down, while the dish soap aids in gently scrubbing the rust away without damaging the metal underneath. This method is especially useful for dealing with small patches of rust or for treating areas that are typically hard to reach with conventional tools. After thoroughly scrubbing the rusted areas, the next step is to rinse the metal. This step is crucial as it washes away the residual potato juices and soap, along with the loosened rust particles. Make sure to rinse the metal thoroughly to ensure that no soapy or acidic residues remain, as these could cause further corrosion if left on the metal. Finally, drying the metal effectively is key to prevent any

How to Remove Rust and Corrosion from Metal: 5 Best Methods Read More »

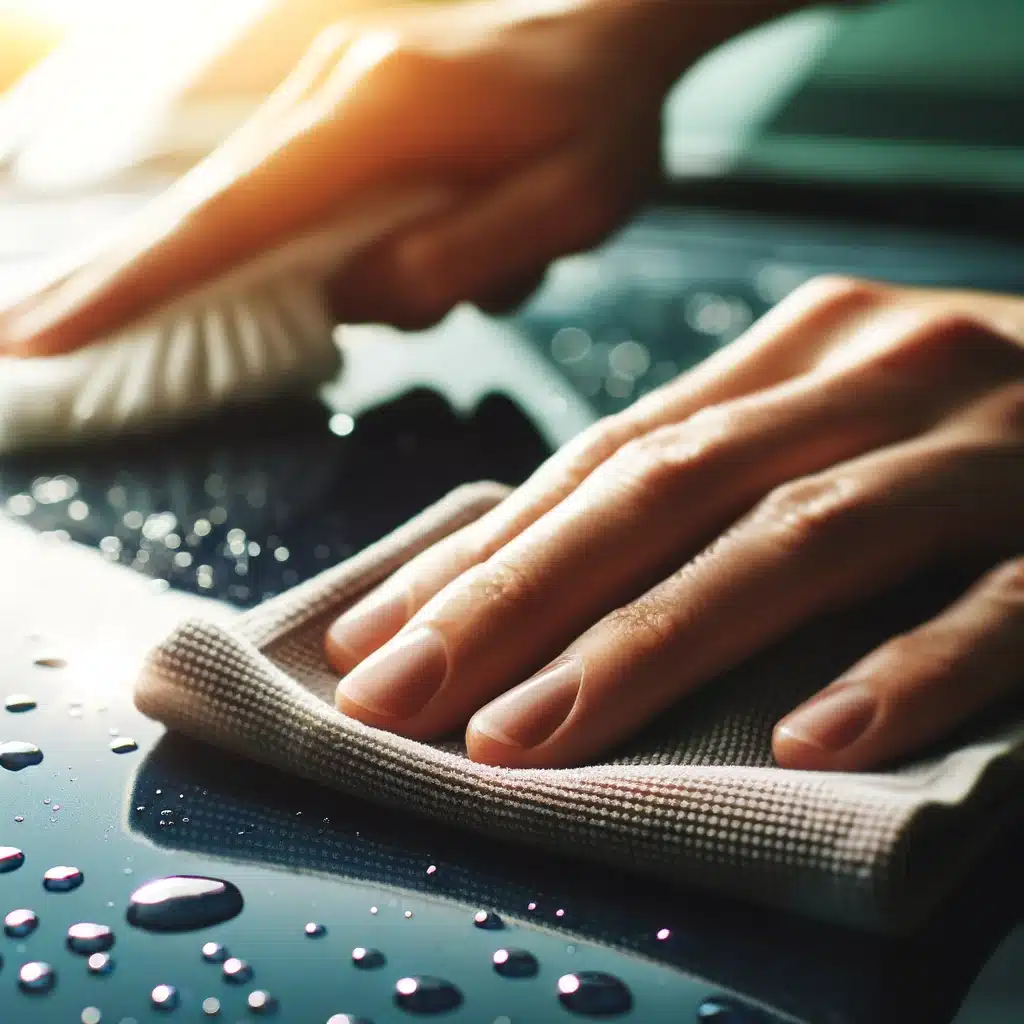
Hand cleaning shiny surface with microfiber cloth and water droplets.

How to Clean Plastic Surfaces: 6 Effective Ways to a Deep Clean

6 Effective Ways to Deep Clean Plastic Surfaces Plastic surfaces are everywhere in your home — kitchen storage containers, outdoor furniture, children’s toys, bathroom organizers, and countless everyday items. Knowing the right cleaning method makes a big difference in how your plastics look and how long they last. Here are six effective ways to deep clean plastic surfaces using common household ingredients and professional-grade techniques. For the toughest jobs, Toronto Shine Cleaning offers expert services to restore your home’s plastic items to like-new condition. Vinegar and Salt for Grease and Grime White vinegar is a natural degreaser that cuts through built-up grease on plastic surfaces without harsh chemicals. Dampen a clean cloth with undiluted white vinegar and wipe down the plastic to remove everyday dirt and residue. For stubborn sticky spots or baked-on grease, sprinkle a small amount of salt over the area before applying the vinegar. The salt acts as a gentle abrasive that lifts grime without scratching the surface. Let the mixture sit for a few minutes, then wipe clean. Rinse with water and dry with a soft towel for a streak-free finish. This method is ideal for kitchen containers, cutting boards, and food storage lids. Baking Soda Paste for Tough Stains Baking soda’s mild abrasive properties make it perfect for tackling stubborn stains on plastic without causing scratches. Mix a few tablespoons of baking soda with a small amount of water to form a thick paste. Apply the paste directly to stained areas and scrub gently with a soft brush or sponge. The natural abrasive action lifts discoloration and built-up residue effectively. Rinse thoroughly with clean water to remove all traces of baking soda, then dry with a soft cloth. This method works well on plastic tupperware, garden furniture, and children’s toys that have seen better days. Bleach Solution for Disinfecting For plastic surfaces that need serious disinfection — such as bathroom items, pet bowls, or secondhand finds — a diluted bleach solution is highly effective. Mix one tablespoon of bleach into one gallon of water. Apply the solution to the plastic surface and let it sit for 5 to 10 minutes. Ensure the area is well ventilated and wear protective gloves during application. After the dwell time, rinse thoroughly with clean water and dry completely. This approach kills mold, mildew, and bacteria on contact. The CDC provides guidance on safely disinfecting with bleach to ensure effective germ removal without damaging surfaces. For guidance on choosing the right approach, the CDC explains when to clean and when to disinfect surfaces in your home. Cleaning Method Best For Key Tip Vinegar + Salt Grease, sticky residue, food containers Use undiluted vinegar for best results Baking Soda Paste Tough stains, discoloration, toys Use a soft brush to avoid scratches Bleach Solution Disinfecting, mold, secondhand items Ventilate area and wear gloves Isopropyl Alcohol Label adhesive, sticky residue Test on a small area first Soap + Essential Oils Daily cleaning, light grime Rinse to avoid soap film Commercial Cleaners Outdoor furniture, weathered plastic Spot test before full application Isopropyl Alcohol for Sticky Residues Sticky residue from labels, tape, or spilled adhesives can ruin the look of plastic items. Isopropyl alcohol dissolves these adhesives quickly without damaging the underlying surface. Apply a small amount of 70% or higher isopropyl alcohol to a cloth or paper towel and gently rub the affected area. The alcohol breaks down the adhesive, allowing it to wipe away cleanly. After removing the residue, rinse the surface with water to eliminate any alcohol trace, then dry thoroughly. This method is particularly useful for removing price tag glue from new containers or tape marks from plastic storage bins. For help with large cleaning projects around your home, Toronto Shine Cleaning offers regular maid cleaning to keep everything pristine. Soap and Essential Oils for Daily Cleaning For routine maintenance, a gentle solution of mild dish soap and water is all you need. Add a few drops of essential oil such as lemon, lavender, or tea tree for natural antibacterial properties and a fresh scent. Dip a soft cloth into the warm soapy mixture and wipe down plastic surfaces. Rinse with clean water to remove soap film and dry with a soft towel. This method is perfect for daily or weekly cleaning of plastic items that see regular use, such as bathroom organizers, desk accessories, and kitchen tools. It is safe, gentle, and leaves a pleasant fragrance behind. Tools You Will Need for Plastic Cleaning Having the right tools on hand makes cleaning plastic surfaces faster and more effective. Stock your cleaning kit with these essentials: Microfiber cloths — Gentle on plastic and lift dirt without scratching. Use separate cloths for cleaning and drying. Soft-bristle brushes — Ideal for scrubbing textured plastic surfaces like outdoor furniture or storage containers with ridges. Spray bottles — Fill one with diluted vinegar solution and another with plain water for rinsing as you work. Protective gloves — Wear rubber gloves when using bleach, alcohol, or commercial cleaners to protect your skin. Baking soda and white vinegar — Keep these pantry staples handy for quick stain treatment and degreasing between deep cleans. Commercial Cleaners for Outdoor Plastic For outdoor plastic furniture, storage bins, and items exposed to weather, commercial plastic cleaners are formulated to handle the extra dirt and UV exposure. Always follow the product label instructions and perform a spot test on an inconspicuous area first to check for discoloration. These cleaners often include protective agents that reduce dust buildup and restore shine. Use a soft sponge or cloth to apply the cleaner, scrub gently, and rinse thoroughly. For extensive outdoor cleaning needs, professional deep cleaning services can save you time and effort. Frequently Asked Questions Can I use vinegar on all types of plastic? Vinegar is safe for most hard plastics but avoid using it on delicate or coated plastics. Test on a small hidden area before applying broadly. Will bleach damage plastic surfaces? Diluted bleach (1 tablespoon per gallon of water) is

How to Clean Plastic Surfaces: 6 Effective Ways to a Deep Clean Read More »

Person stretching at sunset outdoors

How a Clean Home Improves Your Mental Health: 5 Psychological Benefits

How a Clean Home Improves Your Mental Health: 5 Psychological Benefits Ever wonder why you feel lighter when you walk into a tidy room? It is not just the visual pleasure of everything in its place. A clean, organized home has real effects on stress, mood, focus, sleep, and daily habits. Here are five psychological benefits of keeping your space clean, plus simple ways to build the habit on a busy Toronto schedule. 1. A Tidy Home Reduces Stress and Anxiety Clutter bombards your brain with stimuli. Every pile of mail, stack of dishes, and scattered pair of shoes is a visual reminder of unfinished work, keeping your mind in a low-level alert state even when you want to relax. Clearing the visible chaos removes those triggers, which is why decluttering feels like exhaling after a long day. 2. Cleaning Boosts Your Mood Completing a task, especially one that visibly improves your surroundings, produces a genuine sense of accomplishment. Finishing a cleaning session gives you an immediate, tangible win, and the fresh, orderly result keeps reinforcing that positive feeling every time you walk into the room. It also helps to frame cleaning as self-care rather than a chore: a short session with music or a podcast turns maintenance into a mood reset. 3. A Clean Space Enhances Focus and Productivity If you work from home in Toronto, your desk is your office. Disorganization competes for your attention: your brain works overtime to filter out visual distractions, which leads to mental fatigue. A clear desk and tidy room free up cognitive resources for the work in front of you. This is one reason so many remote workers schedule a 10 minute tidy-up before they start the day. Even clearing a single surface before a meeting can sharpen your focus, because your brain no longer has to track loose ends in the background. 4. An Orderly Bedroom Supports Better Sleep Your bedroom should signal rest, not chores. Clutter keeps your mind processing tasks while you try to wind down, and a bed covered in laundry does not invite relaxation. Making the bed in the morning, putting clothes away, and keeping surfaces clear help your brain shift into rest mode at night. The National Heart, Lung, and Blood Institute explains why quality sleep is so important: it supports mood, memory, and emotional resilience, exactly what you need to handle a stressful week. 5. Clean Surroundings Encourage Healthier Habits An organized kitchen invites cooking; a cluttered one invites takeout. When counters are clean and ingredients are visible, preparing a meal feels easier, and cooking at home supports healthier eating overall. A clean home also keeps allergens, dust, and mould in check. The National Institute of Environmental Health Sciences notes that common indoor allergens like dust mites can trigger allergy and asthma symptoms that disrupt sleep and energy, and Asthma Canada’s guide to common asthma triggers is a helpful reference for sensitive households. The EPA’s indoor air quality guide covers reducing dust, moisture, and fumes at home. Quick Wins for a Calmer Home Make your bed every morning, it takes 60 seconds and sets the tone for the day. Do a 10 minute evening reset: clear counters, fluff pillows, put shoes away. Keep one landing zone for keys, mail, and bags near the door. Wash sheets weekly and open windows for 10 minutes a day. When You Need a Helping Hand Maintaining a calm home takes time, and time is exactly what a busy week never has enough of. If the state of your space is weighing on you, outsourcing the cleaning is a legitimate mental health move. Toronto Shine Cleaning offers regular residential cleaning and deep cleaning services across the GTA, with transparent pricing starting at $212.63 for a studio or 1 bedroom home before HST and a 15 percent discount on weekly and bi-weekly schedules. Clients rate us 4.9 out of 5 on Google, as shown on our reviews page. Call 647-424-0355 to book your first visit and see how much lighter home feels. Start with one room: clear a single surface and notice how it feels. Small wins build momentum, and momentum is what turns a clean home into a lasting mental health habit. How quickly does decluttering reduce stress? Most people notice a calmer feeling within minutes of clearing a visible space, because visual clutter is removed as a stress trigger. The effect compounds over days as the tidy habit becomes routine. Can cleaning replace therapy or medication? No. A clean home supports mental wellness, but it is not a treatment for anxiety, depression, or other conditions. Use these habits alongside professional support from a doctor or therapist, not instead of it. Does a messy bedroom really affect sleep? Yes, for many people. Visual clutter keeps the brain processing unfinished tasks, which delays relaxation. An orderly, dark, cool bedroom makes it easier to fall asleep and stay asleep. What is the best cleaning routine for mental health? Small daily habits beat marathon sessions: make the bed, do a 10 minute evening reset, and keep surfaces clear. Weekly tasks like laundry and vacuuming prevent buildup, and a monthly deep clean keeps the whole home feeling fresh.

How a Clean Home Improves Your Mental Health: 5 Psychological Benefits Read More »

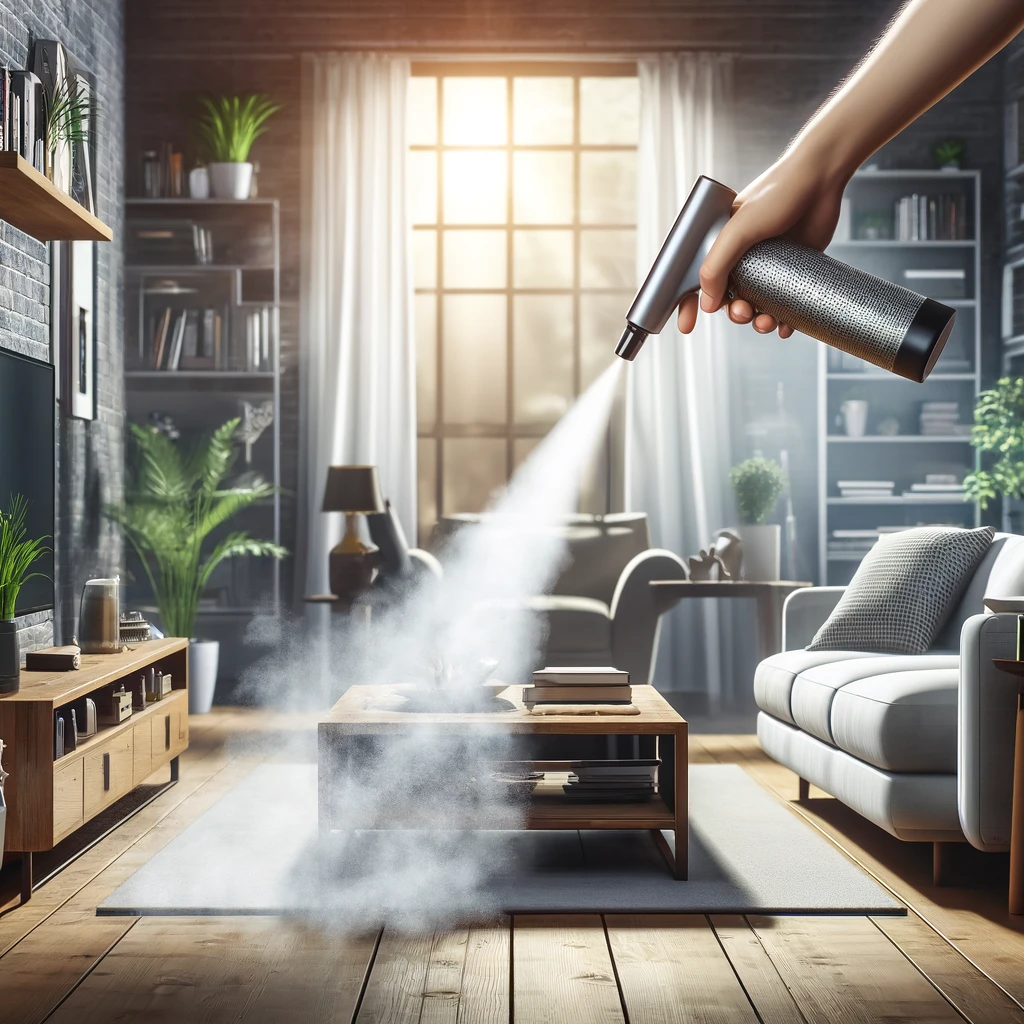
Modern living room cleaned with compressed air, showing dust particles in sunlight.

5 Surprising Benefits of Cleaning with Air Compressed: A Healthier Home Awaits

Oh, cleaning with air compressed! That’s like having a mini tornado at your fingertips to blast away dirt and grime. But it’s not just about having fun watching dust bunnies scatter in fear. There are some genuinely surprising benefits to using compressed air for cleaning, especially when it comes to making your home healthier. Let’s dive into the top 5 reasons why you might want to consider this method for your next cleaning spree. 1. Bids Farewell to Allergens When you think about traditional cleaning methods, it’s all about swiping, wiping, and occasionally vacuuming. While these methods are effective to a certain extent, they sometimes just push allergens around rather than completely removing them from our living spaces. This is where cleaning with air compressed comes into play, acting as a game-changer for those of us seeking a truly allergen-free environment. Cleaning with air compressed isn’t just about removing the visible dust or debris; it’s about targeting the unseen, the particles that float in the air and settle into the deepest crevices of our homes. These are the culprits behind the sneezing, the itchy eyes, and the endless allergies that many of us suffer from, especially during peak allergy seasons. With compressed air, you can literally blow these irritants out of their hiding spots-out from under heavy furniture, deep within your upholstered couches, or from the intricate parts of your decorative items-places that are often overlooked or too cumbersome to clean with regular methods. Moreover, using compressed air for cleaning is an incredibly precise method. You can control the direction and the intensity of the air flow, ensuring that even the most delicate items in your home can be cleaned without risk of damage. This precision also means you can target specific areas known for harboring allergens, such as window sills, bookshelves, and electronics, which tend to attract dust like magnets. Another significant advantage of cleaning with air compressed is its ability to enhance the air quality in your home. By dislodging and removing allergens from their sources, rather than just moving them around, you’re actively improving the air you breathe. This is particularly beneficial for individuals with respiratory conditions, as it can contribute to a healthier living environment that supports their well-being. Incorporating cleaning with air compressed into your routine can make a noticeable difference in your home’s overall health. Imagine opening your windows to let in the fresh air and knowing that the only thing that’s circulating is just that-clean, fresh air, free of the pesky allergens that used to make your home anything but a refuge.     2. No Chemicals? No Problem! The beauty of using compressed air lies in its simplicity and effectiveness, a powerful combination that sidesteps the need for chemical concoctions altogether. It’s a method that speaks to the growing desire for sustainability and safety in our daily lives, particularly when it comes to maintaining our living spaces. When we talk about cleaning with air compressed, we’re embracing a method that relies solely on the force of air to remove dirt, dust, and other surface contaminants. This straightforward approach eliminates the risk of chemical residues that can linger on surfaces and in the air, posing health risks to our families and pets. Those with asthma, allergies, or chemical sensitivities can especially benefit from a cleaning method that doesn’t add potentially harmful substances to their environment. The absence of chemicals in the cleaning process is a huge win for the environment. Traditional cleaning agents can contain phosphates, nitrates, and other substances harmful to waterways and wildlife. By opting for compressed air, we’re not only ensuring a safer indoor environment but also contributing to the broader effort to protect our planet. It’s a way to reduce our ecological footprint, one cleaning session at a time. But the advantages don’t stop at health and environmental benefits. Cleaning with air compressed also means there’s no need to keep a stockpile of various cleaning agents for different surfaces and materials. This minimalist approach not only simplifies the cleaning process but also saves storage space and reduces waste associated with packaging and disposing of chemical products. Imagine the convenience of having one tool that can do it all, from dusting delicate electronics to refreshing upholstery and beyond. This method is particularly suited to modern homes, where electronics and gadgets are an integral part of our lives. Chemical cleaners can be damaging to these items, but compressed air provides a safe and effective way to keep them dust-free and functioning at their best. It’s a gentle yet powerful solution for maintaining the cleanliness and longevity of everything from computer keyboards to entertainment systems. 3. Mighty Mite Fighter Dust mites, those microscopic critters that feast on flakes of human skin, are a leading cause of allergies and asthma in the home. They find sanctuary in the warm and fibrous environments of our mattresses, sofas, and carpets, places where traditional cleaning methods often fail to reach them effectively. However, when we harness the power of compressed air, we gain a significant advantage in this ongoing battle for a healthier living environment. Cleaning with air compressed brings a dynamic shift in how we tackle these pervasive allergens. Unlike vacuuming, which can sometimes merely redistribute dust and mites, compressed air forces these tiny pests out of their deep-seated hiding spots. This method dislodges not just the mites themselves but also their waste and the skin flakes they feed on, which are major triggers for allergies and asthma. By using compressed air to blast these areas, we can reduce the allergen load significantly. The efficacy of compressed air in combating dust mites extends beyond just the immediate cleanup. By disturbing the environment these mites thrive in, you’re making your home less hospitable to them over time. This preventative approach is key to maintaining long-term control over dust mite populations, ensuring they don’t have the chance to rebound between cleanings. Regular use of compressed air can therefore help sustain a healthier balance, keeping these invisible

5 Surprising Benefits of Cleaning with Air Compressed: A Healthier Home Awaits Read More »