Window sills are one of those areas in the house that can gather dust, dirt, and even mold if not cleaned regularly. But keeping them neat and tidy doesn’t have to be a chore. Here are seven easy steps to effectively maintain and clean your window sills, ensuring they stay looking great all year round!
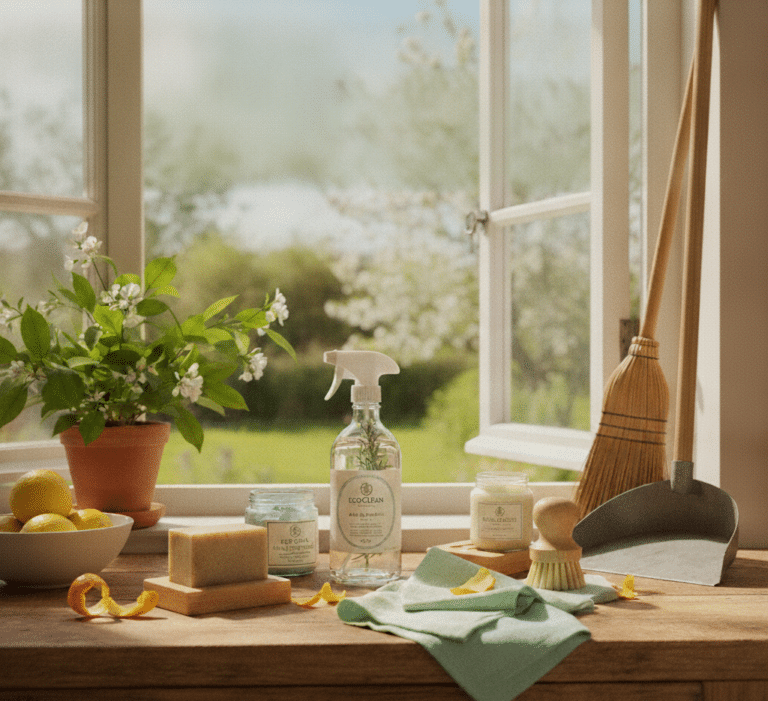
1. Gather Your Cleaning Supplies
Before you embark on the task of cleaning your window sills, it’s crucial to have all your cleaning supplies ready and at arm’s reach. This preparatory step ensures a smooth and efficient cleaning process, allowing you to tackle the task without interruptions. Start by securing a vacuum cleaner equipped with a brush attachment. This tool is essential for gently removing dust and small particles from the window sills without scratching the surface.
Next, you’ll want to have a couple of microfiber cloths on hand. These cloths are perfect for cleaning as they don’t leave behind lint and are gentle on all types of surfaces, making them ideal for both glass and the sills themselves. For the actual cleaning solution, mild soap will often suffice, especially when mixed with warm water in a bucket. This simple mixture can effectively lift dirt and reduce the accumulation of grime.
For those tougher spots or areas where mold might begin to show, white vinegar is a great addition to your cleaning arsenal. Its natural acidity helps break down stains and combat mold growth without the harshness of chemical cleaners. And finally, if your window sills are made of wood, having a wood cleaner specifically designed for such surfaces is necessary. Wood cleaners not only clean but also offer protection to the sills, maintaining their integrity and appearance.

2. Clear the Debris
Clearing the debris is the first hands-on step in effectively cleaning your window sills. Start by carefully removing any objects that you might have placed on the sills over time. These can include plants that bask in the sunlight, various decorations that add charm to your room, or any part of window treatments like blinds or curtains that may rest on the sills. Once these items are removed, you’ll have full access to the entire surface, making it easier to clean thoroughly.
After you’ve cleared the space, grab your vacuum cleaner equipped with a brush attachment. This tool is especially useful for picking up dust and loose dirt from the sills without causing any scratches or damage. By vacuuming before you start wiping, you effectively prevent the redistribution of dust and dirt particles around the area, which could otherwise make your cleaning efforts more difficult. This step ensures that when you do begin to wipe down the sills, you’re working on removing any remaining dirt or stains rather than just pushing around what’s already there. It’s a simple but crucial part of maintaining clean and attractive window sills.
3. Wipe Down
After you’ve effectively removed the loose dirt and dust, it’s time to focus on thoroughly wiping down the window sills. Start by dampening a microfiber cloth in warm, soapy water. The soap acts as a gentle cleanser that helps break down and lift any remaining dirt or oily residues without harsh chemicals, which makes it ideal for almost any type of window sill material.
When cleaning, it’s crucial to be gentle and methodical, paying special attention to the corners and edges where dirt tends to accumulate. For those who have vinyl or plastic sills, this gentle wiping with soapy water will generally be adequate to restore cleanliness and shine. These materials are particularly forgiving and don’t require abrasive cleaners or vigorous scrubbing that might be necessary for other types of surfaces.
It’s important to ensure that the microfiber cloth is well wrung out before it comes into contact with the window sills. Using too much water can be problematic, especially if it seeps into areas it shouldn’t. Excess moisture can lead to water damage, swelling in wood sills, or the growth of mold and mildew, which can be both unsightly and potentially harmful.

4. Tackle Tough Stains
When you come across stubborn stains or mold on your window sills, a more targeted approach is necessary to restore their cleanliness. One of the most effective for dealing with these tougher issues is white vinegar.The acidity of the white vinegar is excellent for breaking down grime and mold without the harshness associated with chemical cleaners, making it safe for most window sill materials.
After preparing your vinegar, apply it directly to the stains or moldy areas on the window sills. It’s best to let the solution sit for a few minutes. This dwell time allows the vinegar to penetrate the stains or mold, breaking down the molecular bonds that hold the dirt or spores to the surface. After letting it sit, take a soft cloth and gently wipe away the solution. You will find that the previously tough stains or mold wipe away much more easily, leaving your window sills looking refreshed and clean.
5. Dry the Sills
Once the window sills have been cleaned and any tough stains have been addressed, it’s essential to dry them thoroughly. This step is critical in preventing any potential water damage, which can be particularly detrimental to wooden sills. Water that lingers can seep into the pores or crevices of wood, leading to swelling, warping, or even rot over time. Furthermore, damp surfaces are prime breeding grounds for mold and mildew, which not only pose health risks but can also cause unsightly stains and damage.
To ensure your window sills are properly dried, use a clean, absorbent towel or cloth. Gently pat the sills dry, making sure to absorb all residual moisture. Pay special attention to any nooks and crannies where water might collect. Ensuring the sills are completely dry helps maintain their structure and appearance, preventing any long-term damage and keeping your window sills in pristine condition.
6. Treat Wooden Sills
Maintaining wooden window sills requires a bit more specialized care to ensure they stay protected and retain their aesthetic appeal. When dealing with wood, it’s crucial to choose a cleaner that is specifically formulated for this type of material. These wood cleaners are designed to clean without stripping away natural oils or damaging the wood.
Once you have the appropriate wood cleaner, apply a small amount to a soft cloth. Gently wipe the surface of the wooden window sills, following the grain of the wood to avoid scratching or creating marks. This not only cleans the surface but also helps to enhance the natural patterns and beauty of the wood.
After cleaning, consider the condition of the wood. If your window sills are starting to look dry or worn, applying a wood conditioner can help restore moisture and vitality. For window sills exposed to heavy wear or environmental factors, a sealant might be advisable. Wood sealants provide a protective layer that can shield the wood from moisture and UV damage, prolonging the life of your window sills and keeping them looking great.

7. Regular Maintenance
Ensuring that your window sills remain clean and in good condition over the long term requires a commitment to regular maintenance. By establishing a routine cleaning schedule, you can significantly reduce the need for intensive cleaning sessions and keep your window sills looking their best with minimal effort.
Make it a practice to lightly dust the window sills at least once a week. This can be quickly done with a soft cloth or duster, and it prevents dust particles from accumulating, which can eventually lead to more stubborn grime that’s harder to remove. Alongside weekly dusting, it’s beneficial to perform a more thorough cleaning of the window sills once a month. This deeper clean involves the steps outlined previously, such as vacuuming any debris, wiping down with a suitable cleaner, and ensuring everything is dry and treated if necessary.
This regular maintenance schedule helps to preserve the aesthetic and structural integrity of the window sills, keeping them free from dirt, grime, and potential damage. Consistent care not only enhances the appearance of your window sills but also contributes to the overall cleanliness and hygiene of your living space.
Window Sills Shiny as Never!
Ensuring that your window sills remain clean and in good condition over the long term requires a commitment to regular maintenance. By establishing a routine cleaning schedule, you can significantly reduce the need for intensive cleaning sessions and keep your window sills looking their best with minimal effort. Regular upkeep prevents the buildup of dirt and debris, which can become harder to manage over time. This proactive approach helps safeguard the material of your sills, whether they are made of wood, vinyl, or any other substance, against premature wear and tear.
Make it a practice to lightly dust the window sills at least once a week. This can be quickly done with a soft cloth or duster, and it prevents dust particles from accumulating, which can eventually lead to more stubborn grime that’s harder to remove. Alongside weekly dusting, it’s beneficial to perform a more thorough cleaning of the window sills once a month. This deeper clean involves the steps outlined previously, such as vacuuming any debris, wiping down with a suitable cleaner, and ensuring everything is dry and treated if necessary. Incorporating these simple steps into your cleaning regimen not only maintains the cleanliness of your window sills but also enhances the overall air quality and hygiene of your home.
However, for those who find maintaining this routine challenging due to busy schedules or if you’re dealing with window sills that require more specialized care, professional help is just a call away. Toronto Shine Cleaning offers expert cleaning services that can take the hassle out of maintaining your window sills and other parts of your home. Our trained professionals use the best tools and cleaning solutions to ensure your window sills and other surfaces are not just clean but protected and preserved against future dirt and damage.