Clean Your Keyboard to look like it’s just come out of the box doesn’t have to be as complicated as cracking a secret code. Whether you’re a gamer whose keys have seen better days, a busy professional whose keyboard is a breadcrumb museum, or just someone looking to spruce up their workspace, these five simple steps will have your keyboard looking and feeling fresh in no time.
1. Unplug and Flip
Starting off with the basics, turning off your keyboard is not just about safety, it’s about preparing for a mini adventure. Think of it as setting the stage for a deep clean operation. Whether it’s a trusty wired keyboard that’s been with you through countless late-night projects or a sleek wireless one that’s seen more than its fair share of coffee spills, turning it off ensures you won’t accidentally send a string of gibberish to your boss or start an unintended video call. Plus, it’s about protecting the electronics from any static discharge or accidental short-circuits while you clean.
Now, the flipping part is where the magic begins. It’s not just a gentle overturn; it’s an act that reveals the hidden secrets of your keyboard’s life. As you cautiously flip it over, tapping gently on the back like you’re coaxing secrets out of a friend, you’ll find yourself on a little archaeological dig right at your desk. The crumbs, the dust, and who-knows-what-else that start to tumble out are the remnants of quick lunches, midnight snacks, and those times you just couldn’t step away from the screen.
But here’s a pro tip: don’t just stop after one flip and shake. Give it a few gentle taps on the back, rotate it, and shake it again. You want to approach it from multiple angles, ensuring that you’re not just moving the debris around, but actually getting it out. It’s a bit like finding the best angle to tap a ketchup bottle; there’s a sweet spot that gets everything moving.
As the bits of debris start to fall away, you might find yourself reflecting on the memories each crumb and speck of dust represents. That’s the beauty of this step—it’s not just cleaning; it’s a trip down memory lane, reminding you of the many hours you’ve spent at your desk. And with each shake, you’re not just getting rid of physical debris; you’re setting the stage for a fresher, cleaner, and more inviting workspace.
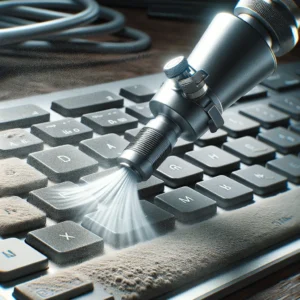
2. Compressed Air is Your Best Friend
Diving into the realm of compressed air as a cleaning tool for your keyboard, it’s worth emphasizing just how transformative this step can be. Imagine holding a miniature cyclone in your hands, one that has the power to reach where no cloth or hand can. The can of compressed air isn’t just a tool; it’s your ally in the battle against the unseen forces of grime that have settled in the hardest-to-reach places of your keyboard.
When you begin, consider the angle at which you’re holding the keyboard. This isn’t merely about convenience; it’s about strategy. By tilting the keyboard, you’re not just preparing for a surface clean; you’re setting up the conditions for a thorough excavation of debris. The angle allows the force of the air to dislodge particles from their hiding spots, ensuring they’re not just pushed deeper into the crevices of your keyboard.
As you wield the can, the importance of controlled bursts cannot be overstated. This technique ensures that the air’s force is directed precisely where it’s needed, minimizing the risk of damage to the delicate mechanisms beneath the keys. It’s akin to using a scalpel instead of a sword; precision is key. The short, controlled bursts act as targeted strikes against the buildup of debris, ensuring that each press is both effective and safe.
Moreover, navigating the keyboard’s landscape with compressed air is an exercise in patience and coverage. It’s not just about the spaces between the keys; it’s also about the edges, the underside of the keys, and even the USB port or wireless connection points. Each area requires attention to ensure that the keyboard is not just clean on the surface but also free from potential problems that could arise from accumulated dust and dirt.
The satisfaction of this process is immediate. As the air flows, you can almost see the keyboard breathe a sigh of relief, its pathways cleared, and its operation smoothed. This isn’t just about aesthetics; a clean keyboard can significantly affect functionality, reducing the risk of sticky keys or unresponsive presses that can frustrate even the most patient users.
3. The Gentle Swipe
Taking the concept of the “Gentle Swipe” to the next level involves not just swabbing the surface of each key, but treating this process as a meticulous labor of love, ensuring that every keypress thereafter is as satisfying as the first. The use of isopropyl alcohol isn’t arbitrary; it’s chosen for its effectiveness in disinfecting without harming the electronics that lie beneath the keys. This is where the science of cleaning meets the art of maintaining the tools we use daily.
When you select a cotton swab or a soft cloth, you’re choosing tools that are gentle yet effective. The cotton swab, with its pointed end, becomes a precision instrument, allowing you to navigate the contours and edges of each key with the finesse of a painter touching up a masterpiece. The soft cloth, on the other hand, offers a broader canvas, allowing for quicker work over the flat surfaces, absorbing and wiping away the grime that dulls the shine of your keyboard.
The technique of dipping the swab or cloth in alcohol requires a careful balance. Too much liquid, and you risk seepage beneath the keys, potentially harming the delicate circuits below. Too little, and you might not capture all the germs and oils that have accumulated. The goal is to moisten the tool just enough to clean effectively without leaving any residue. This balance ensures that each swipe not only cleans but also preserves the integrity of the keyboard.
As you gently clean the top of each key, consider the motion used. It’s not just a wipe; it’s a thoughtful glide across the surface, designed to lift and remove particles and pathogens. This action, when done correctly, doesn’t just clean; it also minimizes wear on the keys, ensuring that the legends (the letters and symbols) remain visible and intact for years to come. Each swipe is an act of care, extending the life of the keyboard while also ensuring it’s a safe, clean tool for daily use.
4. Key-Popping (Optional)
The art of key-popping, while optional, opens a doorway to a level of keyboard cleanliness that’s both deeply satisfying and profoundly effective. This step transcends the surface-level sprucing to delve into the heart of the keyboard, revealing the hidden realms that often go unnoticed yet accumulate the most grime over time.
Using a keycap puller or a flat, gentle tool for this operation is not merely about the act of removal but about the precision and care with which it’s done. The keycap puller, specifically designed for this purpose, clasps the edges of the keys firmly yet gently, allowing for a clean lift that minimizes the risk of damage to both the keycaps and the switches underneath. The alternative, a flat tool, demands a steady hand and an understanding of the delicate balance between applying sufficient force and preserving the integrity of the key mechanism.
Once the keys are removed, the landscape of the keyboard is transformed. The exposed base, often hidden beneath the keys, reveals the true extent of dirt and debris accumulation. This visibility is crucial, as it allows for targeted cleaning efforts where they are most needed. It’s a revelation of sorts, uncovering the secret life of your keyboard beyond the taps and clicks.
Cleaning the base of the keyboard in this exposed state allows for a thoroughness that’s simply not possible with the keys in place. You’re now able to address spills, dust, and other residues head-on, using soft cloths, swabs, or even compressed air to reach into every corner, around every switch, and under where the keys once sat. This step is about more than cleanliness; it’s about restoring your keyboard to a state of near-newness, ensuring that every press is as responsive as it was meant to be.
The caution about knowing how to reassemble the keys is paramount. This is where the adventure of key-popping meets the precision of a puzzle. Each key has its place, and understanding not just where it goes but the correct orientation and fit is crucial. This reassembly is not just about putting things back where they belong; it’s an exercise in patience and precision, ensuring that each key is not only clean but correctly positioned for optimal functionality.
5. Wipe and Dry
The “Wipe and Dry” step, while it may seem straightforward, is the culmination of your keyboard cleaning journey, sealing the deal on your hard work and ensuring that your device is not just clean, but also protected for the long haul. This is where the meticulousness of your efforts pays off, bringing together all previous steps into a satisfying conclusion.
Using a microfiber cloth is a choice that speaks to both effectiveness and gentleness. Unlike regular fabrics, microfiber is designed to pick up and trap dust, oils, and residues without leaving behind scratches or lint. Its gentle touch is crucial for the delicate surfaces of your keyboard, ensuring that the cleaning process doesn’t inadvertently lead to wear or damage. As you glide the cloth over each part of the keyboard, including the spaces where the keys were removed, you’re not just removing the last remnants of dirt; you’re also polishing the surface, leaving it smooth and clear.
The importance of ensuring that the keyboard is completely dry cannot be overstated. Moisture is the nemesis of electronic devices, with the potential to cause short circuits, corrosion, or other damage that can significantly affect the functionality of your keyboard. This drying process is therefore as much about protection as it is about cleanliness. Whether you’ve used liquid cleaners or not, a thorough drying ensures that no hidden moisture remains to haunt your keyboard later on.
For keyboards that have undergone the key-popping process, this step takes on an additional layer of significance. The exposed base, now cleaned and aired, receives a final once-over to catch any missed spots or residual moisture. This is not just about drying but ensuring that every nook and cranny, every switch and socket, is in prime condition. It’s an assurance that when the keys are replaced, they’re coming back to a foundation that’s as clean and dry as the day it was manufactured.
In a sense, this final polish is more than just a cleaning step; it’s a restoration process. It breathes new life into your keyboard, restoring its aesthetics and functionality. The satisfaction of wiping down your keyboard and seeing it dry, clean, and ready for reassembly is akin to admiring a piece of art that you’ve painstakingly restored. It’s a blend of accomplishment and anticipation, knowing that the fruits of your labor will translate into a better typing experience.
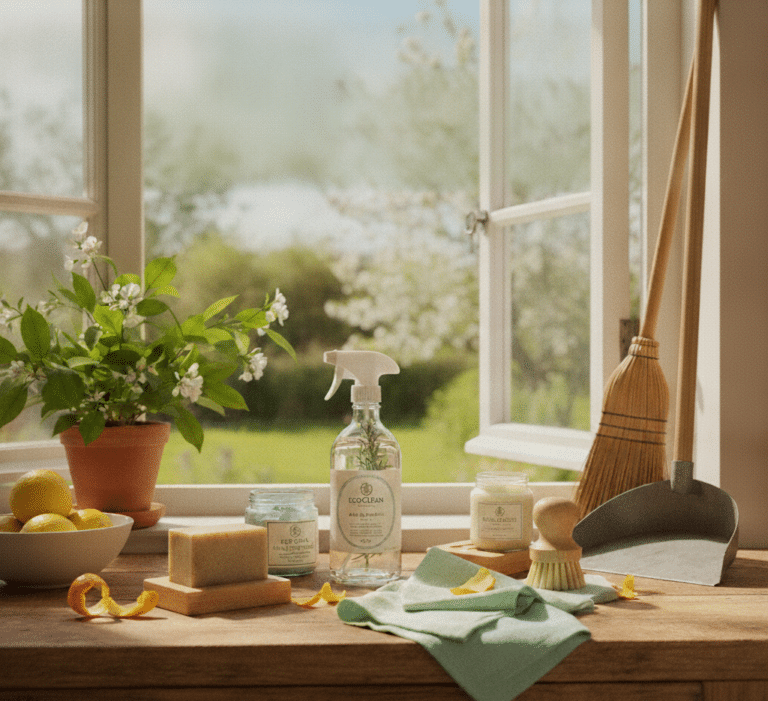
Clean Your Keyboard With Us!
Embarking on the journey of maintaining a clean keyboard with these five simple steps not only revitalizes your workspace but also embeds a sense of discipline and care towards your electronic companions. This routine, while seemingly focused on the cosmetic, goes much deeper, affecting the very essence of your work and gaming experience. It’s a testament to the value of cleanliness in our lives, highlighting how a clean environment can significantly boost our productivity and overall satisfaction. As you enjoy the fruits of your labor, remember that this act of cleaning is more than just maintenance; it’s a ritual that respects the tools of your trade, enhancing your interaction with the digital world.
However, the quest for a pristine work environment doesn’t stop at your keyboard. The entirety of your workspace deserves the same level of attention and care. In our bustling lives, finding the time and energy for such detailed cleaning can be a challenge, which is where Toronto Shine Cleaning steps in. Offering a wide range of professional cleaning services, from deep cleaning your home office to ensuring your entire living space is spotless, they bring the same level of meticulous care to every task. With their help, maintaining a clean and inviting environment becomes effortless, allowing you to focus on what truly matters in your work and personal life.
Toronto Shine Cleaning prides itself on being more than just a cleaning service; they’re your partners in creating a space that reflects the best version of your life. Whether it’s ensuring your workspace is conducive to productivity or that your home is a welcoming, clean haven, their expertise and dedication are unmatched. Serving Toronto and the surrounding areas, they’re just a call away from transforming your space into a beacon of cleanliness and tranquility.