Appliance Cleaning

Kitchen rust, rust, oven rust

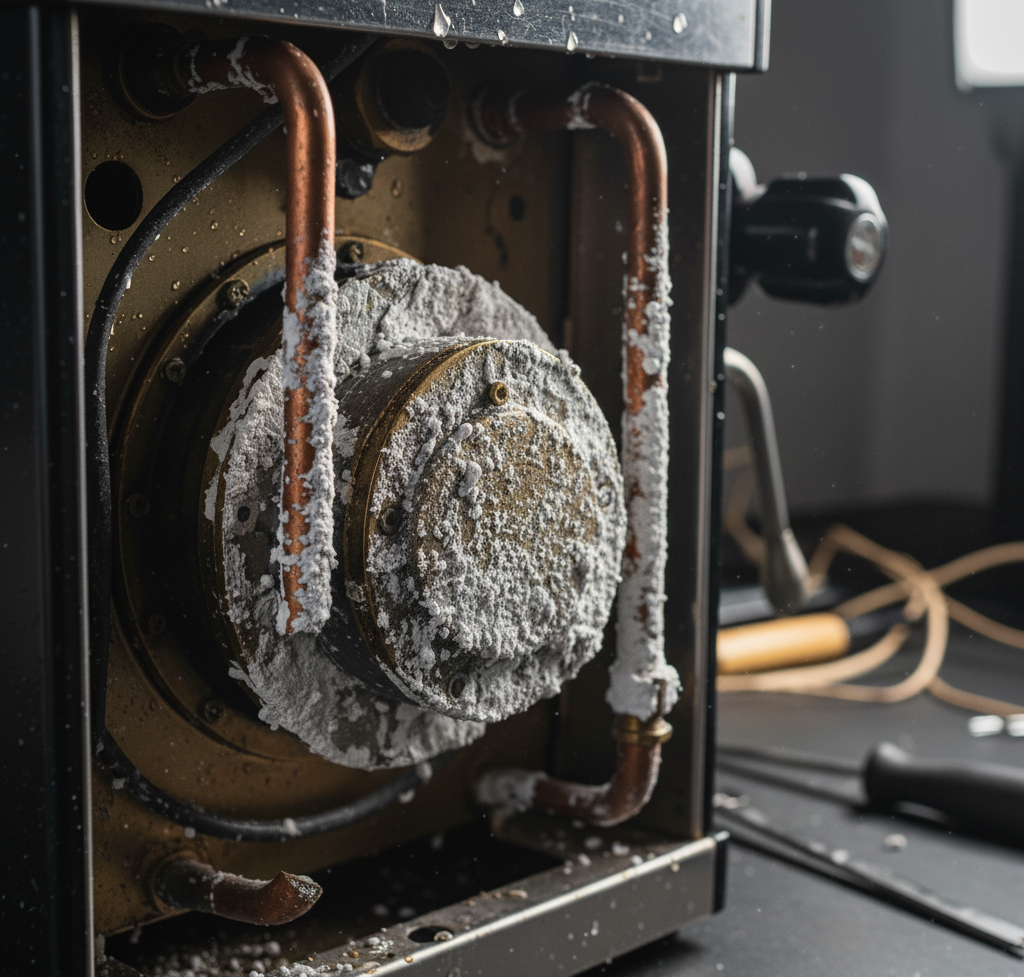
How to Remove Rust and Corrosion from Metal: 5 Best Methods

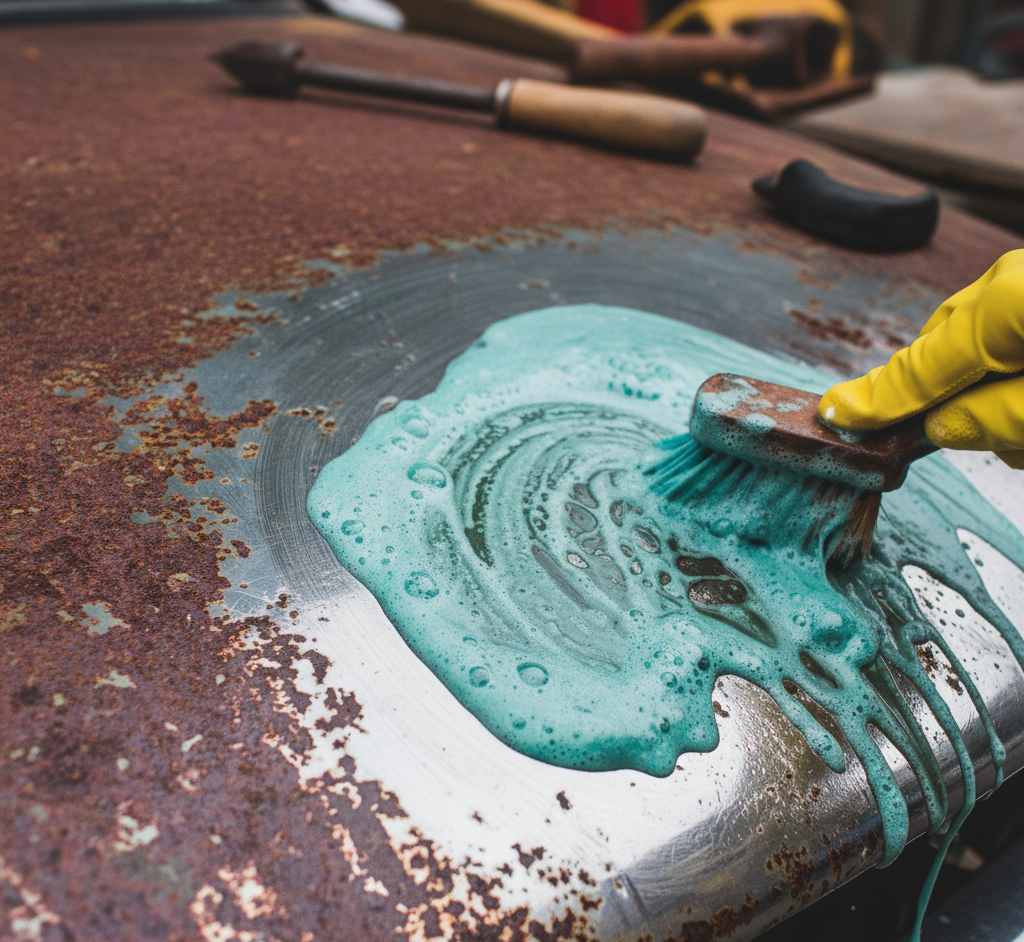
Dealing with rust and corrosion on metal surfaces can be a real headache, especially when it starts affecting the functionality or aesthetics of your items. Whether it’s tools, outdoor furniture, or any metal object, knowing how to effectively remove rust can prolong the life of your belongings and keep them looking great. Here, we’ll walk through five effective methods to get rid of rust and corrosion from metal. Grab your gloves, and let’s get started! 1. White Vinegar Bath: The Natural Soak White vinegar isn’t just a staple for your salad dressing—it’s also a highly effective natural rust remover for metal objects. The key ingredient here is acetic acid, which actively reacts with rust to help dissolve it, clearing the way for a cleaner, shinier metal surface beneath. This method is especially suitable for those who prefer eco-friendly cleaning solutions over harsh chemicals. To start, if you’re dealing with smaller metal items, simply find a container large enough to fully submerge them in white vinegar. Allow these items to sit in the vinegar bath overnight. This extended soak gives the acetic acid ample time to penetrate and break down the rust. For larger metal pieces that can’t be easily submerged, you don’t need to worry about finding an oversized container. Instead, grab some rags or even old towels, soak them in vinegar, and wrap them around the rusted areas of the metal. The goal is to keep the rusty spots thoroughly moistened with vinegar, so sometimes it might be helpful to re-soak the rags periodically to keep them wet throughout the soaking period. Once the soaking time has elapsed, it’s time to tackle the loosened rust. Using a metal brush or a piece of crumpled aluminum foil, scrub the treated areas vigorously. The abrasive action of the brush or foil helps to lift and remove the rust particles from the metal surface. After you’ve scrubbed the metal clean, the final step is to rinse the items with water. This not only removes any remaining vinegar and rust residue but also stops the acetic acid from further acting on the metal. Be sure to dry the metal thoroughly after rinsing. Leaving the metal wet could potentially lead to new rust formation, undoing all your hard work. Dry it off with a clean cloth or towel to ensure that every nook and cranny is moisture-free.     2. Baking Soda Paste: The Gentle Scrub When faced with less aggressive rust or when you need to treat delicate metal surfaces, baking soda emerges as an excellent, mild alternative to harsher chemical rust removers. This common household item is not only accessible but also gentle on metal while being tough on rust. To utilize baking soda for rust removal, start by preparing a thick paste. This is done by mixing baking soda with a small amount of water until you achieve a consistency that’s substantial enough to cling to vertical surfaces without dripping. This paste formation is crucial as it ensures that the baking soda stays in contact with the rusted areas long enough to facilitate the cleaning process. Once your paste is ready, apply it generously over the rusted portions of the metal. Spread the paste evenly, covering all rusty spots thoroughly. After applying, let the paste sit on the rust for a couple of hours. This dwelling time is vital as it allows the baking soda to chemically interact with the rust, breaking it down and making it easier to scrub away. Following the resting period, take a brush and gently scrub the treated areas. The texture of the baking soda paste helps to exfoliate the rust from the metal surface without scratching or damaging it. Scrubbing should be done with enough pressure to remove rust but gentle enough to preserve the integrity of the metal underneath. The final step in this rust removal process is to rinse and dry the metal. Washing off the baking soda paste with water not only cleans away the loosened rust particles but also any residual baking soda. It’s important to thoroughly dry the metal after rinsing. Any lingering moisture could potentially lead to new rust formation, which would counteract your cleaning efforts. Use a clean, dry cloth to wipe down the metal, ensuring that it is completely dry and free of moisture.     3. Potato and Dish Soap: The Surprising Trick It might sound unconventional at first, but using a potato combined with dish soap is a surprisingly effective method for removing rust from metal surfaces. This technique leverages the natural oxalic acid found in potatoes, an organic compound that interacts with rust to dissolve and loosen it, making removal a breeze. To start this rust-removal process, simply take a regular potato and slice it in half. The fresh cut surface of the potato will be used as your ‘applicator’. Apply a liberal amount of dish soap to this cut end of the potato. The dish soap not only helps in lubricating the surface but also enhances the rust removal process due to its degreasing properties. Next, use the soapy potato half just as you would a brush. Rub the cut end with the dish soap directly onto the rusted areas of the metal. As you do this, the oxalic acid from the potato interacts with the rust, breaking it down, while the dish soap aids in gently scrubbing the rust away without damaging the metal underneath. This method is especially useful for dealing with small patches of rust or for treating areas that are typically hard to reach with conventional tools. After thoroughly scrubbing the rusted areas, the next step is to rinse the metal. This step is crucial as it washes away the residual potato juices and soap, along with the loosened rust particles. Make sure to rinse the metal thoroughly to ensure that no soapy or acidic residues remain, as these could cause further corrosion if left on the metal. Finally, drying the metal effectively is key to prevent any

How to Remove Rust and Corrosion from Metal: 5 Best Methods Read More »

Hand cleaning shiny surface with microfiber cloth and water droplets.

How to Clean Plastic Surfaces: 6 Effective Ways to a Deep Clean

When it comes to cleaning, plastic surfaces can be tricky. They’re everywhere—from your kitchen storage containers to outdoor furniture and even children’s toys. Knowing the right way to tackle the cleaning can make your items look like new and extend their life. Whether you’re dealing with a stubborn stain or just routine cleaning, here are five effective ways to deep clean your plastic surfaces. 1. Vinegar Alone or with Salt Vinegar is an excellent choice for cleaning plastic surfaces, thanks to its natural ability to cut through grease and grime while leaving your plastics looking shiny and new without harmful chemical residues. To effectively use vinegar in your cleaning routine, begin by dampening a clean cloth with undiluted white vinegar and gently wiping over the plastic surfaces to remove everyday dirt and buildup. For more stubborn stains or areas with sticky residues, consider adding a bit of salt to the affected areas before you apply the vinegar. The salt acts as an abrasive, helping to scrub away the grime without scratching the plastic. Allow the mixture of vinegar and salt to sit on the stains for a few minutes, enhancing its ability to break down the dirt effectively. Once you’ve allowed it to sit, use the vinegar-dampened cloth for a final pass over the plastic, ensuring that you’ve thoroughly cleaned the area. Complete the process by rinsing the plastic with clean water to remove any lingering vinegar or salt, and dry it off with a soft towel. This method not only cleans effectively but also provides an eco-friendly way to maintain your plastic items in pristine condition without causing damage over time. 2. Baking Soda Paste Baking soda, recognized for its gentle abrasive properties, serves as an excellent choice for addressing tough stains on surfaces without risking any scratches. To harness its cleaning power, begin by mixing a few tablespoons of baking soda with a minimal amount of water to create a dense, powerful paste. When your paste is prepared, directly apply it to the stained areas on the plastic. Employ a soft brush or sponge to softly scrub at the stain, effectively lifting and removing it through the natural abrasive action of the baking soda, which ensures a thorough clean without harming the material. Continuing the process, it’s crucial to thoroughly rinse the plastic with clean water after scrubbing. This step is essential to eliminate all residual baking soda paste, which, if left unchecked, could leave behind white marks or residue. To finalize the cleaning, dry the surface with a soft cloth. This not only helps in preventing water spots but also ensures it looks clean, refreshed, and well-maintained. This cleaning method using baking soda paste is not just effective but also environmentally friendly and economical, making it a preferred option for maintaining the cleanliness and appearance of various plastic items around your home. Whether it’s kitchen containers, children’s toys, or garden furniture, this approach helps ensure that your surfaces remain in excellent condition, effectively extending their lifespan and keeping them looking as good as new.     3. Bleach for Disinfecting When disinfecting plastic surfaces, especially those frequently used in the kitchen or bathroom, bleach stands out as an exceptionally effective cleaning agent. It is adept at removing mold, mildew, and is essential for sanitizing secondhand items thoroughly. To begin safely cleaning plastic with bleach, dilute one tablespoon of bleach in a gallon of water. This ratio ensures effective disinfection while minimizing any harsh effects on the plastic material. Once you have prepared the bleach solution, apply it generously to the plastic surfaces needing disinfection. Allow the solution to settle and work its magic for about 5 to 10 minutes. During this time, it’s crucial to ensure that the area is well-ventilated. The use of protective gloves is also advised to protect your skin from any potential irritation caused by the bleach. After the bleach has sufficiently acted on the contaminants, it’s important to thoroughly rinse the plastic with clean water. This step removes all remaining traces of bleach, which, if left behind, could cause damage or discoloration over time. Finish the process by drying the surface completely. Ensuring the surface is dry not only prevents water marks but also inhibits any future bacterial or mold growth, often a concern in damp environments. By implementing this cleaning regimen, you enhance the hygiene and safety of plastic surfaces, particularly in areas prone to frequent use or high bacterial exposure. 4. Isopropyl Alcohol for Sticky Residues Isopropyl alcohol is particularly effective in cleaning sticky residues from labels, tapes, or spills on surfaces. Its properties make it a reliable choice for tackling the frustrating sticky spots that can mar the appearance of plastic items. To utilize this method, begin by applying a small amount of isopropyl alcohol onto a cloth or paper towel. Proceed by gently rubbing the affected area on the plastic. The alcohol works quickly to dissolve the adhesive or sticky substance, allowing for easy removal without requiring excessive force or scrubbing, which could potentially damage the surface. Once the sticky residue is fully removed, it is crucial to rinse the surface thoroughly with clean water. This step is essential to ensure that no traces of isopropyl alcohol remain, as residual alcohol could potentially degrade the plastic over time or leave behind a filmy residue. After rinsing, dry the surface completely with a soft cloth. This not only prevents water marks but also ensures that the plastic is perfectly clean and free from any lingering stickiness. By following this simple yet effective method, you can ensure that your plastic items are maintained in pristine condition. Isopropyl alcohol’s ability to handle sticky residues makes it an indispensable tool in your cleaning arsenal, particularly for preserving the aesthetic and functional quality of plastic objects around your home or office. 5. Commercial Plastic Cleaners For those who prefer a ready-made cleaning solution, commercial plastic cleaners are an excellent choice. These products are specifically formulated for surfaces and are particularly useful for

How to Clean Plastic Surfaces: 6 Effective Ways to a Deep Clean Read More »

Person stretching at sunset outdoors

How a Clean Home Improves Your Mental Health: 5 Psychological Benefits

Ever wondered why you feel so good walking into a clean room? There’s more to it than just the visual pleasure of seeing everything in its place. A tidy environment has significant benefits for your mental health. In this post, we’ll dive into the psychological perks of keeping your home clean and organized. Ready to feel lighter, brighter, and maybe even a bit happier? Let’s get into it! 1. Reduces Stress and Anxiety Imagine stepping into your home after a long day of work, only to be greeted by piles of unwashed dishes, cluttered tables, and a chaotic jumble of shoes and coats. This disarray can instantly make your heart rate spike and your stress levels soar. When your living environment is cluttered, it sends a barrage of stimuli to your brain, which it has to process all at once. This is similar to the demands of multitasking, where your brain is forced to shift its focus at a rapid pace, leading to feelings of exhaustion and anxiety. Psychological studies have highlighted that being surrounded by disorder and clutter can significantly affect your mental state, inducing a sense of tension and unease. This is because a chaotic environment can make it difficult for your brain to focus on relaxing and decompressing. Instead, it remains alert, constantly reminded of the disarray that needs addressing. The solution lies in maintaining an organized living space. By taking proactive steps to declutter and organize your environment, you actively remove potential stress triggers. This not only helps in tidying up the physical space but also plays a crucial role in clearing your mental space. With fewer distractions and less on your ‘mental to-do list’, your mind has more room to breathe, relax, and decompress. This organized state can act as a buffer against the day-to-day stresses that accumulate, providing you with a serene haven where you can rejuvenate and restore your mental health.     2. Boosts Your Mood Expanding on how a clean home can boost your mood, it’s important to recognize the deep psychological impact of living in a tidy environment on your mental health. When you look around and see that everything is in its place, the immediate visual satisfaction is not just about aesthetics—it resonates on a deeper emotional level. This sense of accomplishment when you finish tidying up isn’t trivial. Completing any task, especially one that improves your immediate surroundings, can lead to a surge in dopamine, a neurotransmitter associated with feelings of pleasure and satisfaction. This chemical boost in your brain is a natural mood enhancer. Therefore, the act of cleaning can become a small, self-administered therapy session, boosting your mood almost instantly. Furthermore, a clean and organized home reduces the cognitive overload caused by scattered belongings and unfinished tasks, which are visual cues that remind us of chaos and incomplete work. When these cues are minimized, your mind isn’t constantly prompted to think about these irritations or feel overwhelmed by them. Instead, with fewer distractions, you’re able to have a clearer, more focused mindset which contributes to a more stable and positive emotional state. 3. Enhances Focus and Productivity Delving deeper into how a clean home enhances focus and productivity, it’s essential to consider the broader implications on your mental health. Clutter isn’t merely a physical barrier; it acts as a mental distraction too, constantly pulling your attention away from tasks that require focus. Every pile of unsorted mail, every stack of dishes, and every disorganized shelf competes for your cognitive resources, making it harder for you to concentrate. When your environment is disorganized, your brain has to work overtime just to filter out these distractions and help you focus on your immediate tasks. This constant need to redirect attention not only drains your cognitive resources but can also lead to mental fatigue, making you less productive over time. However, by taking the initiative to clear out unnecessary items and organize your space, you effectively create a more conducive environment for concentration and efficiency. For those who work from home, this is particularly crucial. A tidy workspace limits distractions, which enhances your ability to process information and think clearly. The reduced clutter frees up mental space for creative thinking and problem-solving, which are essential for productivity. The process of organizing your space can itself be a mindful activity, serving to center your attention and calm your mind. This mental clarity is not only beneficial for your work performance but also for your overall mental well-being. It makes it easier to tackle tasks with a focused mind, reducing stress and increasing your job satisfaction.     4. Improves Sleep Quality The state of your bedroom can significantly influence your ability to unwind and decompress at the end of the day. Clutter and disarray in your sleeping area can serve as subconscious cues that keep your mind engaged, processing each item as a potential task or another issue to deal with. This can make it exceedingly difficult to shift into a restful state, as your brain continues to engage with the stimuli around you. Creating a clean, organized bedroom sets the stage for relaxation and can profoundly affect your mental well-being. When your sleeping environment is orderly, your mind is less likely to dwell on chores that need to be done or get distracted by the clutter. This allows you to transition more smoothly into sleep, reducing the time spent tossing and turning. Additionally, engaging in the routine of tidying up before bed, such as making your bed each morning or putting away clothes, can reinforce a sense of control and predictability, which are calming to the mind. These simple acts not only improve the physical space but also help establish a calming bedtime ritual that signals to your brain that it’s time to wind down. The quality of your sleep directly affects your mental health. A good night’s sleep helps to regulate mood, improve brain function, and increase emotional resilience. Conversely, poor sleep can exacerbate stress, depression, and

How a Clean Home Improves Your Mental Health: 5 Psychological Benefits Read More »

Modern living room cleaned with compressed air, showing dust particles in sunlight.

5 Surprising Benefits of Cleaning with Air Compressed: A Healthier Home Awaits

Oh, cleaning with air compressed! That’s like having a mini tornado at your fingertips to blast away dirt and grime. But it’s not just about having fun watching dust bunnies scatter in fear. There are some genuinely surprising benefits to using compressed air for cleaning, especially when it comes to making your home healthier. Let’s dive into the top 5 reasons why you might want to consider this method for your next cleaning spree. 1. Bids Farewell to Allergens When you think about traditional cleaning methods, it’s all about swiping, wiping, and occasionally vacuuming. While these methods are effective to a certain extent, they sometimes just push allergens around rather than completely removing them from our living spaces. This is where cleaning with air compressed comes into play, acting as a game-changer for those of us seeking a truly allergen-free environment. Cleaning with air compressed isn’t just about removing the visible dust or debris; it’s about targeting the unseen, the particles that float in the air and settle into the deepest crevices of our homes. These are the culprits behind the sneezing, the itchy eyes, and the endless allergies that many of us suffer from, especially during peak allergy seasons. With compressed air, you can literally blow these irritants out of their hiding spots—out from under heavy furniture, deep within your upholstered couches, or from the intricate parts of your decorative items—places that are often overlooked or too cumbersome to clean with regular methods. Moreover, using compressed air for cleaning is an incredibly precise method. You can control the direction and the intensity of the air flow, ensuring that even the most delicate items in your home can be cleaned without risk of damage. This precision also means you can target specific areas known for harboring allergens, such as window sills, bookshelves, and electronics, which tend to attract dust like magnets. Another significant advantage of cleaning with air compressed is its ability to enhance the air quality in your home. By dislodging and removing allergens from their sources, rather than just moving them around, you’re actively improving the air you breathe. This is particularly beneficial for individuals with respiratory conditions, as it can contribute to a healthier living environment that supports their well-being. Incorporating cleaning with air compressed into your routine can make a noticeable difference in your home’s overall health. Imagine opening your windows to let in the fresh air and knowing that the only thing that’s circulating is just that—clean, fresh air, free of the pesky allergens that used to make your home anything but a refuge.     2. No Chemicals? No Problem! The beauty of using compressed air lies in its simplicity and effectiveness, a powerful combination that sidesteps the need for chemical concoctions altogether. It’s a method that speaks to the growing desire for sustainability and safety in our daily lives, particularly when it comes to maintaining our living spaces. When we talk about cleaning with air compressed, we’re embracing a method that relies solely on the force of air to remove dirt, dust, and other surface contaminants. This straightforward approach eliminates the risk of chemical residues that can linger on surfaces and in the air, posing health risks to our families and pets. Those with asthma, allergies, or chemical sensitivities can especially benefit from a cleaning method that doesn’t add potentially harmful substances to their environment. The absence of chemicals in the cleaning process is a huge win for the environment. Traditional cleaning agents can contain phosphates, nitrates, and other substances harmful to waterways and wildlife. By opting for compressed air, we’re not only ensuring a safer indoor environment but also contributing to the broader effort to protect our planet. It’s a way to reduce our ecological footprint, one cleaning session at a time. But the advantages don’t stop at health and environmental benefits. Cleaning with air compressed also means there’s no need to keep a stockpile of various cleaning agents for different surfaces and materials. This minimalist approach not only simplifies the cleaning process but also saves storage space and reduces waste associated with packaging and disposing of chemical products. Imagine the convenience of having one tool that can do it all, from dusting delicate electronics to refreshing upholstery and beyond. This method is particularly suited to modern homes, where electronics and gadgets are an integral part of our lives. Chemical cleaners can be damaging to these items, but compressed air provides a safe and effective way to keep them dust-free and functioning at their best. It’s a gentle yet powerful solution for maintaining the cleanliness and longevity of everything from computer keyboards to entertainment systems. 3. Mighty Mite Fighter Dust mites, those microscopic critters that feast on flakes of human skin, are a leading cause of allergies and asthma in the home. They find sanctuary in the warm and fibrous environments of our mattresses, sofas, and carpets, places where traditional cleaning methods often fail to reach them effectively. However, when we harness the power of compressed air, we gain a significant advantage in this ongoing battle for a healthier living environment. Cleaning with air compressed brings a dynamic shift in how we tackle these pervasive allergens. Unlike vacuuming, which can sometimes merely redistribute dust and mites, compressed air forces these tiny pests out of their deep-seated hiding spots. This method dislodges not just the mites themselves but also their waste and the skin flakes they feed on, which are major triggers for allergies and asthma. By using compressed air to blast these areas, we can reduce the allergen load significantly. The efficacy of compressed air in combating dust mites extends beyond just the immediate cleanup. By disturbing the environment these mites thrive in, you’re making your home less hospitable to them over time. This preventative approach is key to maintaining long-term control over dust mite populations, ensuring they don’t have the chance to rebound between cleanings. Regular use of compressed air can therefore help sustain a healthier balance, keeping these invisible

5 Surprising Benefits of Cleaning with Air Compressed: A Healthier Home Awaits Read More »

Modern, clean computer keyboard on an organized desk with soft lighting.

How to Clean Your Keyboard Like a Pro in 5 Simple Steps

Clean Your Keyboard to look like it’s just come out of the box doesn’t have to be as complicated as cracking a secret code. Whether you’re a gamer whose keys have seen better days, a busy professional whose keyboard is a breadcrumb museum, or just someone looking to spruce up their workspace, these five simple steps will have your keyboard looking and feeling fresh in no time. 1. Unplug and Flip Starting off with the basics, turning off your keyboard is not just about safety, it’s about preparing for a mini adventure. Think of it as setting the stage for a deep clean operation. Whether it’s a trusty wired keyboard that’s been with you through countless late-night projects or a sleek wireless one that’s seen more than its fair share of coffee spills, turning it off ensures you won’t accidentally send a string of gibberish to your boss or start an unintended video call. Plus, it’s about protecting the electronics from any static discharge or accidental short-circuits while you clean. Now, the flipping part is where the magic begins. It’s not just a gentle overturn; it’s an act that reveals the hidden secrets of your keyboard’s life. As you cautiously flip it over, tapping gently on the back like you’re coaxing secrets out of a friend, you’ll find yourself on a little archaeological dig right at your desk. The crumbs, the dust, and who-knows-what-else that start to tumble out are the remnants of quick lunches, midnight snacks, and those times you just couldn’t step away from the screen. But here’s a pro tip: don’t just stop after one flip and shake. Give it a few gentle taps on the back, rotate it, and shake it again. You want to approach it from multiple angles, ensuring that you’re not just moving the debris around, but actually getting it out. It’s a bit like finding the best angle to tap a ketchup bottle; there’s a sweet spot that gets everything moving. As the bits of debris start to fall away, you might find yourself reflecting on the memories each crumb and speck of dust represents. That’s the beauty of this step—it’s not just cleaning; it’s a trip down memory lane, reminding you of the many hours you’ve spent at your desk. And with each shake, you’re not just getting rid of physical debris; you’re setting the stage for a fresher, cleaner, and more inviting workspace. 2. Compressed Air is Your Best Friend Diving into the realm of compressed air as a cleaning tool for your keyboard, it’s worth emphasizing just how transformative this step can be. Imagine holding a miniature cyclone in your hands, one that has the power to reach where no cloth or hand can. The can of compressed air isn’t just a tool; it’s your ally in the battle against the unseen forces of grime that have settled in the hardest-to-reach places of your keyboard. When you begin, consider the angle at which you’re holding the keyboard. This isn’t merely about convenience; it’s about strategy. By tilting the keyboard, you’re not just preparing for a surface clean; you’re setting up the conditions for a thorough excavation of debris. The angle allows the force of the air to dislodge particles from their hiding spots, ensuring they’re not just pushed deeper into the crevices of your keyboard. As you wield the can, the importance of controlled bursts cannot be overstated. This technique ensures that the air’s force is directed precisely where it’s needed, minimizing the risk of damage to the delicate mechanisms beneath the keys. It’s akin to using a scalpel instead of a sword; precision is key. The short, controlled bursts act as targeted strikes against the buildup of debris, ensuring that each press is both effective and safe. Moreover, navigating the keyboard’s landscape with compressed air is an exercise in patience and coverage. It’s not just about the spaces between the keys; it’s also about the edges, the underside of the keys, and even the USB port or wireless connection points. Each area requires attention to ensure that the keyboard is not just clean on the surface but also free from potential problems that could arise from accumulated dust and dirt. The satisfaction of this process is immediate. As the air flows, you can almost see the keyboard breathe a sigh of relief, its pathways cleared, and its operation smoothed. This isn’t just about aesthetics; a clean keyboard can significantly affect functionality, reducing the risk of sticky keys or unresponsive presses that can frustrate even the most patient users.     3. The Gentle Swipe Taking the concept of the “Gentle Swipe” to the next level involves not just swabbing the surface of each key, but treating this process as a meticulous labor of love, ensuring that every keypress thereafter is as satisfying as the first. The use of isopropyl alcohol isn’t arbitrary; it’s chosen for its effectiveness in disinfecting without harming the electronics that lie beneath the keys. This is where the science of cleaning meets the art of maintaining the tools we use daily. When you select a cotton swab or a soft cloth, you’re choosing tools that are gentle yet effective. The cotton swab, with its pointed end, becomes a precision instrument, allowing you to navigate the contours and edges of each key with the finesse of a painter touching up a masterpiece. The soft cloth, on the other hand, offers a broader canvas, allowing for quicker work over the flat surfaces, absorbing and wiping away the grime that dulls the shine of your keyboard. The technique of dipping the swab or cloth in alcohol requires a careful balance. Too much liquid, and you risk seepage beneath the keys, potentially harming the delicate circuits below. Too little, and you might not capture all the germs and oils that have accumulated. The goal is to moisten the tool just enough to clean effectively without leaving any residue. This balance ensures that each swipe not only cleans

How to Clean Your Keyboard Like a Pro in 5 Simple Steps Read More »

Wet shower tiles in bathroom

7 Effective Ways to Clean Up Water-Based Stains from Every Surface

Oh, those water-based stains! Whether it’s a splash of coffee on the couch, a finger-paint masterpiece on the wall, or just the remnants of a rainy day tracked across your floors, these seemingly harmless spills can be surprisingly stubborn to remove. But fear not! I’m here with seven effective, straightforward ways to tackle water-based stains on every surface around your home, keeping your space sparkling clean and stress-free. 1. Fabric and Upholstery: Gentle Dabbing and Mild Detergent When it comes to fabric and upholstery, water-based stains can feel like uninvited guests that just won’t leave. The trick lies in handling them swiftly and with care. Here’s a deeper dive into effectively dealing with these pesky stains, ensuring your fabrics remain pristine and welcoming. After the initial blotting, which should be done as quickly as possible to prevent the liquid from seeping deeper into the fibers, prepare your cleaning solution. This mixture should be gentle: think about using a mild detergent that you’d trust with your favorite delicate garments. The water should be cool to lukewarm, as hot water can set the stain further into the fabric, making it harder to remove. Now, dip a soft cloth into your prepared solution. It’s crucial that this cloth is colorfast to avoid transferring any dye onto the fabric or upholstery you’re cleaning. Wring out the cloth so it’s damp, not dripping, to avoid saturating the fabric with water which can lead to additional issues like mildew or water rings. As you dab the stain, start from the outside and work your way in. This technique prevents the stain from spreading outward, making it larger and more noticeable. Patience is key here; the goal is to lift the stain, not rub it away aggressively. Rubbing not only risks spreading the stain but can also damage the fabric’s fibers, leading to pilling or a worn appearance. Once you’ve treated the stain, it’s time to rinse. Using a clean cloth dipped in fresh cool water, gently dab the area to remove any soap residue. It’s important to remove all traces of the detergent to avoid attracting dirt and grime to the cleaned spot. The final step is allowing the area to air dry completely. Avoid the temptation to speed up this process with a hair dryer or direct heat, as this can set the stain permanently or damage the fabric. If the fabric is safe for ironing, you might lightly iron the damp area (using an appropriate heat setting) with a clean cloth between the iron and the fabric to help remove any lingering moisture. 2. Carpets: Baking Soda and Vinegar Magic After you’ve liberally sprinkled baking soda over the stain, giving it about 10 minutes to work its magic, it’s not just a waiting game. During this time, the baking soda is busy absorbing the stain, drawing it out of the carpet fibers. This process not only helps in stain removal but also deodorizes your carpet, tackling any unwanted smells that might be associated with the spill. Moving on to the vinegar solution, the reason behind using equal parts white vinegar and water is twofold. Vinegar, being acidic, is a natural disinfectant that not only helps in lifting the stain but also kills off bacteria that might be lingering in the carpet. The water dilutes the vinegar, ensuring the carpet isn’t subjected to too high a concentration, which could potentially affect the carpet’s color or texture. When you lightly spray the vinegar solution over the baking soda, the resulting fizzing action is a sign that the cleaning process is actively working. This reaction helps to lift the stain from the carpet fibers, making it easier to blot away. It’s crucial to wait until this fizzing action stops before moving on to the blotting stage. Blotting too early can push the baking soda deeper into the carpet, making it harder to vacuum later. As you blot the treated area with a clean, dry cloth, you’ll notice the stain transferring onto the cloth. This step may require patience and gentle persistence, especially with more stubborn stains. The key here is to dab rather than rub to avoid working the stain deeper into the carpet. Once you’re satisfied that you’ve lifted as much of the stain and moisture as possible, allow the area to dry thoroughly. This might take several hours, depending on the humidity and ventilation in the room. A dry, clean carpet not only looks better but also prevents the growth of mold and mildew, which can be health hazards. The final vacuuming is not just about removing any leftover baking soda. It also helps to fluff up the carpet fibers, restoring your carpet’s texture and appearance to its pre-stain state. For larger or more stubborn stains, this process can be repeated. However, it’s important to note that some stains may require professional cleaning, especially if they’re on delicate or specialty carpets.     3. Hardwood Floors: Immediate Wipe and Special Cleaners The first step, immediate wiping, cannot be overstated. Hardwood floors are particularly susceptible to water damage; even small amounts of liquid can seep into the cracks and crevices of the flooring, leading to warping, staining, or swelling of the wood. By quickly absorbing the spill with a soft, dry cloth, you minimize the risk of long-term damage. It’s important to blot rather than rub the spill to avoid spreading the moisture further into the wood grains. For stains that have settled into the wood or are not fully removed by blotting alone, turning to a cleaner specifically formulated for hardwood floors is your next step. These cleaners are designed to effectively tackle stains without damaging the wood’s finish or integrity. It’s crucial to choose a product that matches the type of finish on your floor, whether it’s polyurethane, oil-sealed, or another treatment, as some cleaners may not be compatible with all finishes. When applying the cleaner, the method of application is just as important as the product itself. Pouring the cleaner directly onto

7 Effective Ways to Clean Up Water-Based Stains from Every Surface Read More »

Person savoring coffee near a Nescafe machine in a cozy setting.

How to Deep Clean Your Nescafe Machine in 5 Simple Steps

Deep clean your Nescafe machine isn’t just about keeping your coffee tasting great—it’s also about ensuring your machine lasts as long as possible. Coffee lovers know the difference a clean machine can make to their morning cup. So, let’s dive into how you can get your Nescafe machine sparkling clean with these five simple steps. Trust me, it’s easier than you think, and your taste buds will thank you! Step 1: Unplug and Disassemble Stepping into the process of deep cleaning your Nescafe machine starts with the fundamental and crucial step of ensuring your safety by unplugging the machine. This initial action sets the stage for a hazard-free cleaning session, ensuring that there’s no risk of electrical shock as you delve into the nooks and crannies of your beloved coffee companion. Once the machine is safely disconnected from its power source, the disassembly begins. This part of the process might feel a bit like a puzzle, carefully removing each piece that can be detached. Typically, the parts you’ll be looking to remove include the drip tray, which catches any coffee drips or spills during brewing, ensuring your counter stays clean. The water reservoir, which holds the water needed for brewing your coffee, also needs to be detached and is often one of the larger components of the machine. The pod holder, a critical piece where the coffee pod sits during brewing, will also need to be removed. Disassembling your Nescafe machine is not just about taking it apart; it’s a crucial step that allows you to access all the areas where coffee oils and residue can build up over time. These residues, if not cleaned, can affect the taste of your coffee and the efficiency of your machine. By breaking down the machine into its components, you’re able to give each part the thorough cleaning it deserves. Think of it as a spa day for your Nescafe machine, where each component gets the attention it needs to function at its best.   Step 2: Soak and Scrub This step is akin to giving your machine a luxurious bath, designed to tackle the stubborn coffee oils and residues that have built up over time. Start by filling your sink with warm, soapy water—think of it as preparing a relaxing bubble bath, but for your coffee machine’s components. The warmth of the water combined with the soap acts as a gentle yet effective means to soften and break down the oils and residues that cling to the surfaces and hidden corners of each part. Once your sink is ready, immerse the disassembled parts into this soothing bath, letting them soak for about 20 minutes. This soaking period is crucial as it allows the warm soapy water to work its magic, loosening the grime and making it easier to remove. It’s a moment where patience pays off, as giving the parts enough time to soak can significantly reduce the effort needed to clean them. After the soaking time is up, it’s time to roll up your sleeves and get scrubbing. Armed with a soft sponge or brush, begin the meticulous process of cleaning each piece. This is where your attention to detail really shines. As you scrub, focus on the nooks and crannies of each component. These areas can often harbor hidden coffee residues that, if left uncleaned, can affect the taste of your coffee or even the efficiency of your machine. Approach this task like a treasure hunt, where instead of seeking out gold or jewels, you’re on a mission to find and eliminate all traces of old coffee bits. Step 3: Rinse and Dry This stage is about ensuring that all the effort you’ve put into cleaning does not get compromised by leftover soap residue or moisture that could invite unwanted guests, like mold or bacteria, into your coffee machine. Start by rinsing each scrubbed part under running water. The aim here is to be thorough and meticulous, making sure that no nook or cranny retains any soap. This step washes away the last remnants of grime and cleaning solution, clearing the stage for a fresh coffee brewing experience. The running water acts like a final sweep, ensuring that each component is primed and ready for the next step in its cleaning journey. Once the rinse is complete, the drying process begins. This is where patience and attention to detail come into play again. You have two choices here: let the parts air dry or help them along with a clean, dry towel. If you choose to air dry, arrange the parts on a drying rack or a clean surface where they can sit undisturbed, allowing air to circulate freely around them. This natural drying process is gentle and effective, ensuring that every drop of moisture evaporates. Alternatively, patting the parts dry with a towel can speed up the process, allowing you to reassemble your machine faster. Whichever method you choose, the goal is to ensure that every component is thoroughly dry. Step 4: Descale the Machine The descaling process can be approached in two ways, offering flexibility based on your preferences and what you have on hand. For those who prefer ready-made solutions, commercial descaling products are designed specifically for this purpose, formulated to effectively dissolve calcium deposits without harming your machine’s internal components. Alternatively, for a more natural and readily available option, a homemade mixture of equal parts water and white vinegar serves as an effective DIY descaling solution. Vinegar, with its acetic acid content, is naturally adept at breaking down limescale, making it a potent ally in the maintenance of your Nescafe machine. Filling the water reservoir with your chosen descaling solution is the first step in this detox process. Then, initiate the brewing cycle several times without a coffee pod in place. This allows the solution to circulate throughout the machine, ensuring that it reaches all areas where calcium deposits may have formed. As the solution moves through the machine, it works to dissolve and lift

How to Deep Clean Your Nescafe Machine in 5 Simple Steps Read More »

Elegant Cozy Living Room with Luxurious Deep Brown Leather Couch

How to Effectively Clean Your Leather Couch in 5 Simple Steps

How can you Clean Your Leather Couch? That stylish centerpiece of your living room that not only looks chic but is also a comfy spot to unwind after a long day. But when it comes to cleaning, leather can be a bit of a head-scratcher. Fear not! I’ve got a straightforward, step-by-step guide to help you keep your leather couch looking as good as new. Here’s how to tackle the task in five simple steps: 1. Start with a Soft Brush or Vacuum When embarking on the journey to clean your beloved leather couch, the initial step involves a simple yet critical task: removing all the loose dust and debris that have made themselves at home on its surface. This is where a soft-bristled brush or the soft brush attachment of your vacuum cleaner becomes your best ally. Imagine you’re on a treasure hunt, but instead of seeking gold, your goal is to gently coax all the accumulated particles—dust, crumbs, pet hair, perhaps even the odd popcorn kernel from movie nights—away from their cozy spots. The importance of this step can’t be overstated. As you navigate the brush or vacuum over the curves and crevices of your couch, you’re not just tidying; you’re preparing the leather for a deeper clean. It’s akin to clearing the stage before the main performance. By removing these particles, you ensure they won’t become abrasive under the pressure of cleaning, which could lead to scratches or other damage to the leather’s delicate surface. This step isn’t just about protection—it’s also about efficiency. A surface free of loose dirt and debris is more receptive to subsequent cleaning efforts, allowing you to achieve better results with less effort when you move on to wiping and conditioning. It’s a testament to the saying that sometimes, the simplest actions are the most impactful. So, take your time with this initial dusting, relishing in the knowledge that you’re setting the stage for your leather couch to shine.     2. Wipe with a Damp Cloth After the initial dusting, the next step in the cleaning odyssey involves a slightly damp cloth—your tool for the delicate task of directly engaging with the leather. This stage is akin to a gentle caress, a subtle interaction between cloth and leather that speaks volumes in the language of cleaning. Select a soft cloth, one that whispers rather than shouts, and introduce it to just enough water to moisten it. This dampening is a careful balance, akin to adding just the right amount of seasoning to a dish; too much could overwhelm, while too little might not suffice. Wringing out the cloth thoroughly ensures that it carries no more moisture than necessary. The goal is a tender wipe across the leather’s surface, a movement that’s more about finesse than force. Imagine you’re painting a masterpiece, and your cloth is the brush; each stroke is purposeful, aimed at lifting away the surface dirt and grime that have settled on the couch. This action, seemingly simple, is pivotal in the maintenance of leather’s beauty and longevity. It’s important to remember that leather, much like a precious heirloom, requires a nuanced approach. Too much water is its adversary, threatening to mar its elegance with unwanted spots or deeper damage. Thus, as you wipe, do so with the mindfulness of conserving water use, ensuring every touch is as effective as it is gentle. This step, when performed with care, not only cleans but also preserves the leather, ensuring that it remains a cherished part of your living space for years to come. 3. Apply a Leather Cleaner After ensuring your leather couch is free from dust and surface dirt, it’s crucial to address the deeper cleaning needs of the leather, and this is where a specialized leather cleaner comes into the spotlight. This isn’t just any cleaning agent; it’s a product meticulously formulated to nurture and cleanse leather without harshness, preserving its texture and integrity. When selecting your cleaner, aim for one that boasts compatibility and gentleness for leather, ensuring that it enhances rather than detracts from the leather’s natural qualities. Application is an art form in itself. Begin by introducing a modest amount of the leather cleaner to a soft cloth—a canvas awaiting the gentle touch of preservation. As you apply the cleaner, adopt a circular motion, reminiscent of gentle waves caressing the shore. This methodical, circular application allows the cleaner to penetrate the leather’s surface uniformly, ensuring that no area goes untreated. Heed the wisdom embedded in the cleaner’s instructions, for they guide you toward achieving optimal results, safeguarding your couch against potential harm. Moreover, the importance of conducting a patch test cannot be overstressed. Choose a spot that remains unseen during casual observation. This preliminary step is your safeguard against unwanted surprises, ensuring that the chosen cleaner maintains the leather’s color and finish as faithfully as the day it became a part of your home.     4. Wipe Off Cleaner and Dry Following the application of the leather cleaner, the next crucial steps involve removing any residual cleaner and ensuring the leather is properly dried. This phase is as vital as the cleaning itself, for it prevents the buildup of cleaner which could potentially affect the leather’s appearance and texture over time. Begin with a clean, slightly damp cloth, carefully wiping over the leather’s surface. This isn’t merely about removal; it’s a fine balancing act to lift away the excess product without introducing too much moisture to the leather. Each stroke should be deliberate and gentle, ensuring that no area is oversaturated or neglected. Once you’ve successfully removed the excess cleaner, transition to a dry, soft cloth for the drying process. This step is about more than just drying; it’s about buffing the leather to a soft sheen that speaks to its quality and durability. The action of gently buffing with a dry cloth not only helps in absorbing any lingering moisture but also works to restore the leather’s natural luster. It’s a moment

How to Effectively Clean Your Leather Couch in 5 Simple Steps Read More »

Elegant living room with plush velvet sofas exuding warmth and sophistication.

5 Simple Ways to Tackle Stains on Velvet Couches

The problems in stains on Velvet Couches, a luxurious staple in cozy living rooms everywhere, but also a commitment to upkeep—particularly when confronting the inevitable “Stains on Velvet Couches.” Yes, those accidental spills and blemishes that can detract from its splendor are a part of life. Yet, there’s no need for alarm. I’m here to arm you with five straightforward strategies, all designed without the rush of immediate action, to ensure your velvet haven remains immaculate. With a touch of care and the right techniques, maintaining the pristine condition of your velvet couch is entirely within reach, letting it continue to shine as the centerpiece of your home. 1. Understanding Your Velvet The distinction between synthetic and natural velvet isn’t just a small detail; it’s a pivotal factor that influences how you’ll approach stain removal. Synthetic velvet, often made from polyester or microfiber, is engineered for durability and resistance against spills and stains. This type of velvet has a bit of a leg up when it comes to cleaning because it’s designed to withstand water-based cleaning solutions without losing its vibrant color or plush texture. So, if you happen to spill something on synthetic velvet, you’re in a better position to tackle it head-on without too much worry. On the flip side, natural velvet carries with it a sense of luxury and sophistication that’s hard to match. Made from materials like silk, cotton, or wool, natural velvet demands a higher level of care and attention. This type of velvet is more susceptible to damage from water and harsh cleaning agents, which can leave unsightly marks or even alter the fabric’s softness and color. Because of its delicate nature, cleaning natural velvet often involves more nuanced techniques, focusing on minimizing exposure to liquids and avoiding any aggressive scrubbing. To arm yourself with the best care strategies, start by investigating the specific type of velvet your couch is adorned with. Furniture tags often contain this information, offering a quick reference guide to the do’s and don’ts of your particular fabric. If the tag is missing or unreadable, a bit of detective work online might be necessary. Look up the manufacturer’s website or reach out to their customer service with your model number; they can usually provide insights into the fabric’s composition and care instructions. This foundational knowledge of your velvet type is crucial. It informs every decision you make, from the cleaning products you select to the methods you employ to tackle those inevitable spills and stains. By understanding the unique characteristics of your velvet couch, you’re better equipped to maintain its beauty and longevity, ensuring it remains a cherished part of your living space for years to come.     2. Dry Cleaning Powder to the Rescue In the realm of dry cleaning powders, there are several options designed to cater to different types of stains and fabrics. For velvet, which demands gentle care, it’s important to opt for a powder that’s specifically labeled as safe for upholstery. These powders are formulated to tackle stains without harsh chemicals that could damage delicate fibers. Brands like Capture Carpet & Rug Dry Cleaner or Dryel’s At-Home Dry Cleaner offer solutions that are effective yet gentle enough for use on sensitive materials like velvet. These products usually contain absorbent compounds that bind to the stain particles and lift them away from the fabric. The application process is straightforward yet requires a gentle hand. Begin by lightly sprinkling the chosen dry cleaning powder over the affected area. It’s crucial to cover the stain adequately; however, avoid overloading the fabric to prevent residue buildup. Once applied, use a soft, clean, and dry cloth to gently dab over the powdered area. This action helps the powder to fully contact the stain, improving its absorption capabilities. The key here is to dab, not rub, as rubbing can push the stain deeper into the fabric or damage the velvet’s delicate pile. After allowing the powder sufficient time to sit and absorb the stain—typically recommended durations range from 30 minutes to a few hours, depending on the product instructions and the severity of the stain—the next step involves the removal of the powder. Attaching an upholstery brush to your vacuum cleaner, gently vacuum over the treated area to remove all traces of the dry cleaning powder. This step not only clears away the cleaning agent but also any loosened dirt and stain particles, leaving your velvet looking refreshed and vibrant. This dry cleaning powder method is particularly appealing for its ability to clean without water, thereby eliminating the risk of watermarks which are notoriously difficult to remove from velvet. Watermarks can leave uneven patches and discoloration, detracting from the fabric’s luxurious appearance. By using a dry cleaning powder, you effectively sidestep this issue, preserving the uniform texture and rich color of your velvet couch. 3. Soft Brushing Techniques The process of gently brushing the stained area not only lifts away dirt and debris but also rejuvenates the fabric, ensuring that the velvet maintains its distinctive, plush texture that we all love. When employing soft brushing techniques, it’s essential to select the right brush for the job. A brush with too hard bristles can be abrasive, potentially causing more harm than good. Instead, opt for a brush specifically designed for upholstery or even a baby’s hairbrush, as these types tend to have the softness required to protect the delicate fibers of your velvet couch. The goal here is to enhance the fabric’s appearance without compromising its integrity. The technique itself involves light, sweeping motions over the stained area. Start from one side and gently move the brush in a single direction, following the nap of the velvet. This ensures that you’re not only removing surface dirt but also aligning the fibers, which contributes to the fabric’s overall luster and softness. It’s a method that doesn’t just clean; it also cares for and preserves the unique characteristics of the velvet. Soft brushing can be particularly beneficial before and after other cleaning

5 Simple Ways to Tackle Stains on Velvet Couches Read More »

Woman preparing a meal in a clean kitchen with clean appliances

Cleaning Home Appliances: The Key to Prolonging Their Lifespan and Ensuring a Healthy Home

Hey there! Cleaning Home Appliances is like giving a little love back to our cozy corners, especially when it comes to those handy helpers: our home appliances. You might not think about them much beyond their daily use, but taking care of your appliances is a big step toward a happy home and, surprisingly, a healthier you. So, let’s dive into how cleaning your home appliances can stretch their lifespan and turn your place into a sanctuary of health. The Magic Behind Clean Appliances Imagine your home appliances as teammates in the game of life, each playing a crucial role in making your daily routine run smoothly. The secret to keeping these players at the top of their game? Regular cleaning and maintenance. Just like a well-oiled machine, a clean appliance operates more efficiently, which translates into less energy consumption and lower utility bills. This efficiency isn’t just about saving a few bucks—it’s about extending the lifespan of these essential household helpers. When dust, grime, and grease build up, they can impede the normal function of your appliances, forcing them to work overtime. This not only leads to higher energy costs but also increases the likelihood of mechanical failures and the need for costly repairs or replacements. By keeping your appliances clean, you’re actually investing in their longevity, ensuring that they serve you faithfully for years to come. It’s a simple equation: a little bit of regular cleaning equals significant savings and less hassle over time. Beyond the economic benefits, the cleanliness of your appliances has a direct impact on your home’s health environment. It’s an unsettling thought, but the very tools we rely on to keep our homes clean and our food safe can become havens for bacteria, mold, and other undesirable pathogens if not properly maintained. This is especially concerning in appliances that come into direct contact with our food, like refrigerators and dishwashers. Regular cleaning eradicates these unwanted guests, ensuring that your appliances are not only physically clean but also safe and hygienic to use. For households with individuals prone to allergies, asthma, or other respiratory conditions, this aspect of appliance maintenance is crucial. Dust and mold spores that accumulate in and around appliances can easily become airborne, exacerbating symptoms and affecting indoor air quality. By keeping your appliances clean, you’re taking a proactive step in promoting a healthier living space, reducing the risk of allergen-induced health issues, and ensuring the wellbeing of everyone under your roof. The benefits of keeping your appliances clean extend far beyond aesthetics. It’s about enhancing efficiency, prolonging lifespan, saving money, and promoting a healthier home environment. This approach to appliance maintenance is a testament to the adage that prevention is better than cure. By dedicating a little time and effort to regular cleaning, you’re not just taking care of your appliances; you’re taking care of your home and the people in it. So, next time you’re tidying up around the house, remember that a clean appliance is your ally in living a healthier, happier life. Your Cleaning Toolkit When it comes to your fridge, cleanliness affects both functionality and health. Beyond just discarding old or spoiled items, giving the interior a comprehensive clean with a solution of water and baking soda can tackle unpleasant odors and prevent the growth of mildew. This simple, yet effective mixture is gentle enough not to damage the interior surfaces but powerful enough to cleanse and deodorize. For an added touch, removing shelves and drawers to wash them separately can address any hidden spills or stains, ensuring every nook and cranny is fresh. The challenge of cleaning ovens and stovetops lies in addressing those stubborn, baked-on messes without resorting to harsh chemicals. A paste made from baking soda and water offers an eco-friendly solution. Applied to problem areas and left to sit, this paste softens the grime, making it easier to scrub away without scratching surfaces. This method not only revives your cooking appliances but does so in a way that’s safe for your family and the environment. Even machines designed to clean can accumulate buildup over time. Running your dishwasher empty with a cup of white vinegar is a surprisingly effective way to cut through any lingering grease, soap scum, and hidden debris. This routine maintenance ensures that your dishwasher operates at peak efficiency, providing a better clean for your dishes and extending the machine’s lifespan. It’s a simple step that can lead to noticeably better performance. Much like the dishwasher, your washing machine benefits immensely from an occasional vinegar run. An empty cycle with white vinegar helps to dissolve soap residue and mineral buildups, which can hamper efficiency. For front-loading washers, paying extra attention to the rubber seal around the door is crucial. Moisture and detergent can collect here, promoting mold growth. A quick wipe-down can prevent this issue, keeping your machine fresh and your clothes cleaner. Forget scrubbing; steam cleaning your microwave with a bowl of water and lemon juice is a game-changer. This method loosens the grime and food splatters, allowing you to easily wipe the interior clean. The lemon adds a natural freshness, eliminating any lingering odors. It’s a quick and hassle-free way to keep one of the most frequently used appliances in your kitchen in pristine condition.     Embracing Eco-Friendly Cleaning Practices for Your Appliances Hey there! In our journey to keep our homes spick-and-span, embracing eco-friendly cleaning practices is like giving a high-five to Mother Nature. It’s not just about the sparkle; it’s about nurturing our environment while we do it. Our home appliances work tirelessly to make our lives easier, and they deserve a clean that’s both effective and kind to the planet. Let’s explore how adopting green cleaning methods for your appliances not only contributes to their efficiency and lifespan but also plays a crucial role in creating a sustainable and healthy home. The Green Scene in Appliance Care Sustainable Sparkle: Switching to eco-friendly cleaning solutions helps reduce the chemical runoff that can harm our

Cleaning Home Appliances: The Key to Prolonging Their Lifespan and Ensuring a Healthy Home Read More »