Appliance Cleaning

dishwasher pods

How Dishwasher Pods Work and Why They’re So Effective

The dishwasher pod is a marvel of modern convenience, a small, self-contained packet that has transformed a daily chore. It represents the pinnacle of a long evolution, from messy powders and goopy liquids to a single, pre-measured dose that promises a perfect clean every time. This tiny pod is a masterful piece of chemical engineering, containing a complex, multi-part cleaning system designed to work in perfect sequence with the cycles of your dishwasher. However, to truly unlock the power of this convenience, one must understand how it works and, more importantly, how to use it correctly. A simple mistake in placement or preparation can be the difference between sparkling dishes and a frustrating, residue-covered mess. Cleaning System 1.Polyvinyl Alcohol At the heart of the dishwasher pod is a transparent, water-soluble film, typically made from a polymer called polyvinyl alcohol (PVA). This film is the pod’s magic trick, a stable barrier that keeps the potent cleaning agents safely contained until the precise moment they are needed. When the main wash cycle begins and the pod is hit with hot water, this film dissolves completely, releasing its contents into the machine. This is why it is absolutely essential to handle the pods with completely dry hands; even a small amount of moisture can begin to break down the PVA prematurely, causing the pods to stick together in their container or dissolve before they even make it into the machine. 2.Enzymatic Cleaners Inside this dissolvable skin lies a carefully formulated, multi-chambered cleaning system. The largest component is usually a powder. This is the heavy-lifting detergent, containing powerful enzymes that target specific types of food waste. Lipase enzymes are included to break down fats and oils, while amylase enzymes are designed to tackle starches from foods like potatoes, rice, and pasta. The powder also contains builders, which are chemicals that soften the water by binding to mineral ions like calcium and magnesium. This is crucial because hard water can interfere with the detergent’s effectiveness and leave behind a chalky, white film on glassware. 3.Rinse Aid The other chambers of the pod, often containing brightly colored liquids or gels, hold different agents that are released at the same time. These typically include surfactants, which are the same types of compounds found in dish soap. They work on a molecular level to break the surface tension of water and surround grease particles, allowing them to be washed away. This liquid portion also frequently contains a pre-measured dose of rinse aid. Rinse aid is essential for achieving a spot-free and streak-free finish, especially on glass and silverware. It works by reducing the surface tension of the water during the final rinse cycle, causing the water to sheet off the dishes in a thin layer rather than forming individual droplets that would otherwise evaporate and leave mineral spots behind. The multi-chamber design is a clever way to keep these different components stable and separate until they are all released together into the wash cycle. The Correct Use The proper use of a dishwasher pod is a simple process, yet it is where most mistakes are made. The most common and most critical error is placing the pod in the main detergent dispenser cup-the small, covered compartment on the inside of the dishwasher door. This seems like the logical place, but it is fundamentally wrong for how a dishwasher cycle operates. Most dishwashers begin with a pre-wash or pre-rinse cycle. During this brief cycle, the machine sprays the dishes with water to remove loose food particles, and then the dispenser cup pops open to release the detergent. If your pod is in that cup, it will be released and washed away with the pre-rinse water before the main, hot-water wash cycle even begins. This leaves your machine to complete its longest and most important cycle with no detergent at all, resulting in dirty, greasy dishes. The correct placement for a dishwasher pod is directly on the bottom of the dishwasher tub, usually near the filter or tucked into a corner of the silverware basket. Placing it here ensures that it remains safely in place during the pre-rinse cycle and will be dissolved by the hot water at the start of the main wash, allowing the detergent to be distributed effectively throughout the entire cycle. To ensure the pod dissolves completely and works at its peak performance, several other conditions must be met. First, do not overload the dishwasher. This is a cardinal rule of dishwashing in general, but it is especially important when using pods. The spray arms inside the machine must be able to spin freely to distribute water and detergent to every dish. If a large pot, pan, or cutting board is blocking a spray arm, it can prevent hot water from reaching and dissolving the pod, leaving you with a partially dissolved, goopy mess at the end of the cycle. Water temperature is another critical factor. While some modern pods are formulated to work in lower temperatures, most perform best with hot water, typically at least one hundred and twenty degrees Fahrenheit or fifty degrees Celsius. The heat is what activates the enzymes and ensures the PVA film dissolves quickly and completely. If your dishes are consistently coming out with a residue, it may be because your home’s hot water heater is set too low. Running the hot water at your kitchen sink for a minute before starting the dishwasher is a good practice, as it ensures that hot water, not cold water from the pipes, is the first thing to enter the machine. Even with perfect technique, you may occasionally encounter issues. If you find your pod has not fully dissolved, the first thing to check is the spray arms. Make sure they are not clogged with food debris and can spin without obstruction. Another common issue is a white, chalky film on glassware and cutlery. This is almost always a sign of very hard water. While pods contain water-softening agents, extremely hard water

How Dishwasher Pods Work and Why They’re So Effective Read More »

Get a Perfect Spring Clean Without Sacrificing Your Weekends

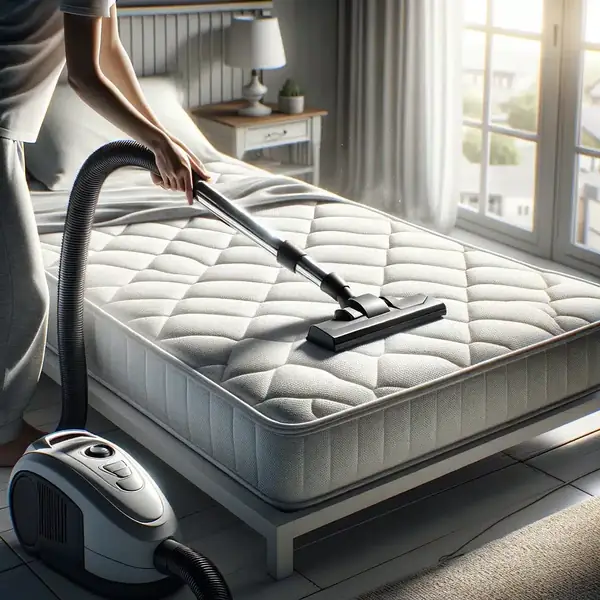
A Perfect Spring Clean Without Losing Your Weekends to It The first warm weekend in Toronto empties the parks and fills the patios, and it is a bad trade to spend those days on a ladder wiping blinds. Spring cleaning still has to happen: a winter of closed windows leaves dust, grease, and odours that a weekly tidy never touches. The fix is to stop treating the project as one enormous Saturday and instead work through a short list of zones in a fixed order. That structure lets a busy household finish in two days, and it is the same sequence our crews follow on a deep clean. Where the Time Actually Goes A spring clean is deeply uneven. A handful of neglected zones swallow most of the hours, and the rest of the house moves quickly once the heavy work is done. Zone The heavy tasks Realistic DIY time Kitchen Range hood, cupboard interiors, the fridge 4 to 6 hours Bathrooms Soap scum, grout, the toilet inside and out 2 to 3 hours each Living room Curtains, upholstery, blinds, lamps 2 to 3 hours Bedrooms Under the bed, fan blades, fresh linens 1 to 2 hours each Outdoor areas Patio furniture, deck, windows, garden tools 3 to 4 hours Kitchen: Degrease From Handles to Range Hood The kitchen is the greasiest room in the house and it gets the deepest attention. Wipe the cupboard handles and fronts, then pull everything out and wash the shelving inside. Appliances need the same two-layer treatment: scrub the stove, dishwasher, and fridge exteriors, where grime cakes onto the handles, then the inside of the fridge, where spills sit in places a sponge never reaches. A soft sponge and an old toothbrush cover most of it, with the toothbrush working the corners, the tracks, and the interior door seals. Three tasks homeowners skip The range hood: degrease the filter and the housing, since cooking oil settles there and re-deposits on every surface below. Inside the cupboards: empty them, wash the shelves, and restock while everything is out anyway. Sink and faucets: clear the buildup at the faucet base and the drain collar, then dry the basin so water spots do not return. Bathrooms: The Scrub You Keep Postponing Bathrooms hide germs in plain sight, so a true clean goes well past the bowl. Scrub the toilet inside and out, including the hinges and the handle, and lift the lid to wipe the tank as well. Then the bathtub or shower, where soap scum dulls the surface and the grout lines and mouldy caulk need real attention; that damp fungal buildup is exactly what the CDC’s guidance on mould and health tells you to control early, before it spreads. A mirror cabinet gets cleaned inside and out, and the toiletries go back inside it so the counter stays clear. Finish with the sinks, faucets, and showerheads, which hold a hard-water film no splash rinse removes. Living Room: Dust Traps and Light Fixtures The living room shows dust faster than anywhere else because it holds more fabric than any other room. Vacuum the curtains before the warm weather returns, spot clean the carpet where the kids and pets sit, and vacuum the sofa to pull embedded dust out of the cushions. Blinds respond to a damp microfiber cloth wiped one slat at a time. Then the fixtures: lamps collect a grey coat on the bulbs and inside the shades, and the switch panels and plates go dull from being handled all winter. Settled dust is also the main carrier of indoor allergens, and Health Canada’s advice on indoor air contaminants starts with removing it from soft surfaces. Bedrooms: Under the Bed and the Mattress Bedrooms are where dust bunnies go to breed, so get under the bed with the vacuum rather than a broom. The ceiling fan is the other hidden source: every blade carries a ridge of dust that the airflow throws into the room, so wipe the blades with microfiber or a duster built for the job. Then strip the bed, wash the blankets that have been storing body odour all winter, and flip or rotate the mattress while it is bare. Curtains, rugs, and upholstered chairs all take their turn in the wash or under the vacuum. Outdoor Areas: Patios, Decks, and Garden Tools The outdoor spaces are the parts of the home you actually live in all summer, so they belong on the list. Patio furniture wipes down with dish soap and a sponge, then rinses with a hose or a pressure washer. Sweep and wash the patio floor, the porch, the deck, and the balcony, scrub the outdoor carpet, and clean the windows that winter left streaked with rain marks. Garden tools are the item nobody thinks of: wipe the sap and soil off the blades and handles before it hardens. Two Days, Or the Whole Project Handed Over A schedule beats a heroic day. Kitchen and bathrooms on the first morning, when drying time helps, then living room and bedrooms in the afternoon, and the outdoor zone on day two while the weather holds. Work top to bottom and back to front in every room so you never cross a surface you just finished. If those two days are the ones you refuse to give up, our deep cleaning service covers exactly these zones with a bonded and insured crew. Rates sit on our pricing page before HST, including $393.75 for a two-bedroom deep clean and $441 for a three-bedroom, and a seasonal regular house cleaning visit holds the result. Confirm your borough on our locations page, and when cleaners are part of the plan, follow Health Canada’s household chemical safety rules on ventilation and storage. Frequently Asked Questions How long does a full spring clean take? A homeowner doing the whole house usually needs two full weekends. Working zone by zone in the order above is what stops it becoming a third, and handing the kitchen and bathrooms

Get a Perfect Spring Clean Without Sacrificing Your Weekends Read More »

cleaning basket

7 Key Areas to Focus on for a True Deep Clean

7 Key Areas That Separate a Deep Clean From a Tidying A routine clean wipes what is visible. A deep clean goes after the built-up grime you only find on your hands and knees with a flashlight. After years of working Toronto homes we can point to seven areas that decide whether a house is genuinely clean or merely tidy: the oven, the appliances, the grout lines, the toilet, the walls and baseboards, the hidden zones behind furniture, and the bathroom exhaust fan. Deep Clean Priorities at a Glance Area Why a wipe is not enough How often Oven Grease carbonizes and hardens each time you cook Every 1 to 3 months Appliances Interiors harbour odours and mould Every 1 to 3 months Grout lines Porous, so it absorbs dirt and stains Every 1 to 3 months Toilet Highest germ counts in the home Weekly, deep monthly Walls and baseboards Scuffs plus dust, hair, and pet fur Every 3 to 6 months Hidden areas Untouched for years behind furniture Every 3 to 6 months Exhaust fan Dust and mould coat the blades and motor Every 6 months Start in the Kitchen The oven The oven is one of the most overlooked spots in the house and rarely gets more than a quick wipe of the stovetop. Inside, spills bake onto the metal and carbonize into a grimy crust that ordinary cleaners barely touch. Wearing rubber gloves, apply a dedicated oven cleaner and let it dwell for the time the label states before wiping and rinsing with a damp cloth. A paste of baking soda and white vinegar handles mild buildup: spread it on, leave it several hours, then rinse. Appliances inside and out Appliances collect dust, crumbs, and grime on their surfaces and deep inside them. Scrub the stovetop and burners and clean the microwave and toaster, then the big three. Empty the fridge, wipe the shelves and interior door, toss expired food before restocking, and set an open box of baking soda inside to absorb odours. The dishwasher filter at the bottom of the tub traps food and grows a hard-water film; pull it out and wash it under hot running water with a brush and dish soap. In the laundry room, wipe the door gasket and detergent dispenser, where moisture and leftover detergent invite mould and a musty smell, then run a cleaning cycle with a machine cleaner or a cup of white vinegar. Keep the label and ventilation rules from Health Canada’s household chemical safety guidance in mind with these products. Work Through the Bathroom Grout lines Tile floors and shower walls need attention in two ways: the surface, and the grout holding the tiles together. Grout is porous and usually left unfinished, so it absorbs dirt and shows discolouration long before the tile does. Apply an alkaline cleaner or an oxygen bleach solution and scrub the lines with a stiff brush or an old toothbrush. Once it is clean and fully dry, apply a grout sealer so water and stains stop grabbing the lines, and reseal once a year. The toilet The toilet carries more germs than anywhere else in the home, and a superficial swipe misses the important parts. Use a toilet brush and a disinfectant made for toilets and work the whole interior, under the rim and down inside the drain hole where the worst buildup lives. Then the exterior: the seat, hinges, bolts, the base at the floor, and the flush handle, one of the most touched and most missed surfaces in the house. Wear gloves, ventilate, and never mix bleach with another cleaner; the CDC’s cleaning and disinfecting guidance is explicit about reading labels and allowing the contact time a product needs. Finish on the Vertical and the Invisible Walls and baseboards Walls hold scuffs, fingerprints, and dust, especially in hallways and behind doors. A lightly dampened magic eraser lifts most scuffs, and a baking soda paste handles stubborn ones. Then wipe the surface with a clean, barely damp microfiber cloth, working from the ceiling line down and saving the worst marks for last so the cloth is not smearing dirt across the paint. Baseboards catch dust, hair, and pet fur, so knock the debris off with the vacuum’s brush head and follow with the cloth. Hidden areas A deep clean goes where nobody looks. Dust, hair, crumbs, and forgotten objects pile up behind and under furniture, so pull the pieces away from the walls and vacuum there before wiping the floor. Then the quiet zones: closet and wardrobe floors, which collect lint, and the tops of shelves and cabinet fronts, where a thick layer builds up unseen. The bathroom exhaust fan The fan quietly pulls moist, dusty air out of the bathroom, and its blades and motor end up coated in dust and even mould. That slows the fan, spreads odours, and lets humidity linger, the same moisture problem the CDC’s guidance on mould and health tells you to control at the source. Switch the fan off at the breaker, remove the cover, vacuum the housing and blades, and wipe the blades with a damp cloth every six months. The Order That Makes It Stick Apply the oven cleaner first so it dwells while you work elsewhere. Vacuum loose debris from the ceiling line down in every room. Do the wet work next: appliances, then grout, then the toilet last. Walls and baseboards before the floor, so drips never re-mark clean paint. End with the fan cover and a final vacuum where furniture stood. Have the List Done for You Sequence matters more than effort, but seven areas still add up to a long day. Our crews carry this exact checklist, and a whole home deep cleaning service covers it in one visit. Rates before HST start at $270.38 for a studio or one-bedroom and $393.75 for a two-bedroom, listed on the pricing page. Renters can clear all of it at once with our end of tenancy move out cleaning.

7 Key Areas to Focus on for a True Deep Clean Read More »

How to Clean a Glass Stovetop: Your Secret Weapon for a Spotless Glass Stovetop

The glass stovetop, also known as the ceramic or glass-ceramic cooktop, is the epitome of modern kitchen design. Its sleek, black, uninterrupted surface offers a minimalist aesthetic that is both beautiful and, in theory, easy to clean. Unlike the coils and grates of traditional electric or gas ranges, which create a complex geography of hard-to-reach crevices, the flat plane of a glass stovetop promises a simple wipe-and-go experience. However, any owner of this appliance knows that this promise is conditional. While a brand-new glass stovetop is a joy to behold, a neglected one can quickly become a landscape of stubborn, baked-on messes, hazy white films, and microscopic scratches that permanently dull its shine. The key to maintaining that factory-new gleam lies in understanding the specific chemistry of the material and the physics of the soil that adheres to it. Cleaning a glass stovenol is not a battle of brute force; it is a science of solvency and precise mechanical leverage. Vitroceramic To clean a glass stovetop effectively, one must first appreciate the nature of the material. It is not ordinary window glass. It is a specialized ceramic glass engineered to withstand extreme and rapid temperature fluctuations without shattering. This “vitroceramic” material is incredibly hard and durable, but it is not impervious to damage. Its greatest vulnerability is scratching. The mistake that ruins most cooktops is the use of abrasive cleaners or scrubbing pads. A green scouring pad, a steel wool ball, or a powdered abrasive cleanser will act like sandpaper on the surface. While they may successfully remove the burnt-on food, they will leave behind a network of fine scratches. These micro-abrasions scatter the light, creating a dull, hazy appearance that can never be polished out. Furthermore, these scratches create microscopic valleys where future spills can get trapped, making the glass stovetop even harder to clean next time. The most common enemy of a glass stovetop is the boil-over. When a pot of starchy pasta water or sugary sauce bubbles over and hits the hot surface, the liquid evaporates instantly, leaving behind a carbonized crust that fuses to the glass. To the touch, this crust can feel as hard as concrete. The instinct is to scrub it, but the correct approach is a two-step process that combines chemical softening with mechanical shearing. The chemical softening phase involves using a specialized cleaner formulated for a glass stovetop. These are usually creamy, non-abrasive polishes that contain mild solvents and conditioners. The cream should be applied generously to the cool cooktop and spread over the burnt areas. The active ingredients need “dwell time” to work. They must sit on the stain for at least fifteen minutes to penetrate the carbon and begin to break down its molecular structure. Simply wiping the cleaner on and off immediately does nothing. Homemade Solution For those who prefer a pantry solution, a paste of baking soda and water is an excellent non-toxic alternative. The baking soda is alkaline, which helps to dissolve the acidic components of the burnt food, and its fine crystalline structure provides a gentle abrasion that is safe for the glass. This paste should also be allowed to sit and soften the debris. Some users enhance this method by spraying a light mist of white vinegar over the baking soda paste, creating a fizzing reaction that helps to lift the stain. However, the true power of the baking soda lies in its alkalinity and gentle scrubbing action. Once the chemical agents have had time to work, the mechanical shearing phase begins. This is where the single most important tool for glass stovetop maintenance comes into play: the razor blade scraper. While the idea of taking a metal razor to a glass surface sounds terrifying, it is the method recommended by almost every manufacturer. The key is that the steel of the razor blade is softer than the ceramic glass. When held at a shallow, forty-five-degree angle, the blade slides underneath the softened, burnt-on food, lifting it off the surface in a single sheet or flake. It does not scratch because it is not grinding; it is shearing. Using a scraper requires lubrication. It should never be used on a dry surface. The cleaning cream or the baking soda paste acts as a lubricant, allowing the blade to glide smoothly. The motion should be a firm, forward push. Never drag the blade backward, as this can cause the edge to chip, and a chipped blade will scratch the glass. After each pass, wipe the debris from the blade. This process removes the physical mass of the burn that no amount of scrubbing could touch. Sugar There is, however, a specific type of spill that requires immediate, urgent attention: sugar. If a sugary liquid, such as syrup, jam, or the juice from a fruit pie, spills onto a hot glass stovetop, you must act while it is still hot. As sugar cools, it can form a bond with the glass that is so strong it can actually cause the surface to pit or crack upon contraction. Keeping a razor blade scraper handy and, while wearing an oven mitt, carefully scraping the hot sugar off the surface immediately is the only way to prevent this permanent damage. Beyond the dramatic spills, a glass stovetop is often plagued by a subtle, hazy white film. This is usually caused by two things: mineral deposits from hard water or the use of aluminum or copper-bottomed pans. When water boils over, the calcium and magnesium in the water are left behind, creating a cloudy residue. This mineral scale is alkaline, so it requires an acid to dissolve it. A wipe-down with a cloth soaked in white vinegar will usually cut through this haze instantly. Metal Deposits The marks left by aluminum or copper pans are different. They are not stains; they are microscopic metal deposits. When the soft metal of the pan rubs against the hard glass, it leaves a trace of itself behind, much like a pencil leaves graphite on paper. These silvery or coppery streaks cannot be removed with standard cleaners. They require a mild abrasive polish, such as the

How to Clean a Glass Stovetop: Your Secret Weapon for a Spotless Glass Stovetop Read More »

different types of erasers

Erasers in Cleaning: 7 Genius Tricks for Cleaning Your Home with an Eraser

Where does eraser fit into this? In the vast world of cleaning materials, filled with specialized sprays, powerful scrubs, and high-tech gadgets, one of the most effective and precise tools is often overlooked, relegated to the pencil case or a dusty desk drawer: the simple eraser. This humble instrument, designed to lift graphite from paper, possesses a unique set of properties that make it a surprisingly versatile and powerful secret weapon for tackling some of the most frustratingly stubborn messes around the home. The wonder of the eraser lies not in brute force, but in its gentle, targeted friction, allowing for a level of control and precision that larger tools simply cannot match. Melamine Foam Eraser The most famous and transformative of these tools is, of course, the melamine foam eraser, more commonly known by its brand name, the Magic Eraser. While it shares a name and function with its rubber counterparts, it is a completely different entity. A melamine foam eraser is not a chemical cleaner; it is a micro-abrasive. The foam itself is a unique, open-cell structure that, when wet, becomes as hard as glass on a microscopic level. It acts like an incredibly fine-grained sandpaper, gently abrading and lifting away surface-level grime and stains. This is the secret to its seemingly magical ability to remove marks that soaps and sprays cannot touch. Its most celebrated use is on painted walls and baseboards. The inevitable scuff marks from shoes, furniture, and daily traffic can make an otherwise clean room look tired and worn. Instead of resorting to touch-up paint, a dampened melamine foam eraser can lift these marks with astonishing ease. The process is simple: lightly wet the eraser and squeeze out all the excess water. The eraser should be damp, not dripping. Then, with very gentle pressure, rub the scuff mark. The mark will literally disappear as the micro-abrasive action lifts the transferred color from the surface of the paint. It is crucial to use light pressure, as scrubbing too hard can begin to remove the paint finish itself, leaving a burnished or dulled patch, especially on glossy or satin paints. This tool is also a parent’s best friend, capable of removing crayon, pencil, and some types of ink marker from walls with the same gentle rubbing motion. The power of melamine foam extends far beyond walls. In the kitchen, it can cut through the thin, sticky film of aerosolized cooking grease that builds up on stovetops and range hoods. It is incredibly effective at removing stubborn, baked-on tea and coffee stains from the inside of ceramic mugs, restoring them to their original pristine white. It can even be used to lift burnt-on food residue from glass bakeware and oven doors. In the bathroom, it is a champion against soap scum, scrubbing away the waxy, cloudy buildup from glass shower doors, tile, and fiberglass tubs where other cleaners have failed. It can even be used to restore the white grout between tiles, lifting the embedded grime with targeted scrubbing. The eraser’s ability to conform to surfaces and get into corners makes it a more effective tool than a simple cloth or sponge for these specific tasks. However, because it is an abrasive, it is critical to know where not to use a melamine foam eraser. You should never use it on delicate, high-gloss surfaces like a car’s paint finish, polished wood furniture, or natural stone countertops like marble and granite, as it can create microscopic scratches that will permanently dull the finish. Always test it on a small, inconspicuous area first if you are unsure. Traditional Rubber While melamine foam is the superstar, the traditional rubber or vinyl eraser-specifically a high-quality white vinyl one-has its own unique and surprising set of cleaning superpowers. Its magic lies not in abrasion, but in its “grippy,” slightly tacky texture. This property makes it the perfect tool for removing one of the most annoying household messes: sticky adhesive residue. After peeling a price tag or label off a new piece of glassware, a book cover, or a plastic item, you are often left with a stubborn, gummy residue that smears when you try to wipe it. A white vinyl eraser works wonders here. By rubbing the eraser over the adhesive, its rubbery texture grabs onto the sticky residue, causing it to ball up and lift cleanly from the surface. Keep rubbing, and the adhesive will roll itself into little clumps that can be brushed away, leaving a clean, non-sticky surface behind without the need for oily solvents. This same principle allows a classic eraser to clean other delicate surfaces. It can be used to lift dirt and scuffs from patent leather shoes and handbags without scratching the high-gloss finish. For suede and nubuck, a special suede eraser or a clean art gum eraser is a classic shoe care tool. Its crumbly texture gently lifts dirt out of the fine nap of the material without the use of water, which would stain and flatten the suede. An eraser can even be used for light cleaning on non-precious metals, lifting grime from the surface of hardware or decorative items. The friction and the grabbing power of the rubber can remove surface-level dirt and smudges from things like brass doorknobs or silver-plated picture frames. The Small Eraser At the end, we must not forget the most precise tool of all: the small eraser on the end of a pencil. Its tiny size makes it perfect for detailed cleaning in areas that are otherwise impossible to reach. It can be used to clean the accumulated grime from the crevices of intricate jewelry or around the clasps of a watch band. It is the perfect shape for getting into the tight corners of window tracks or for cleaning the gunk that builds up around the base of a kitchen or bathroom faucet. The pencil tip provides a level of targeted control that allows you to apply pressure to a very specific, small point, lifting a

Erasers in Cleaning: 7 Genius Tricks for Cleaning Your Home with an Eraser Read More »

Manage the Spring Thaw Mess

How to Manage the Spring Thaw Mess: A Step-by-Step Guide

How to Manage the Spring Thaw Mess: A Step-by-Step Guide The Canadian spring does not arrive gently. It arrives as weeks of melting snow, cold rain and relentless mud, and the front lines of that battle sit right inside your entryway. April is the month when salt-stained boots, wet paws and gritty slush threaten every clean floor in the house. Winning means more than one heroic cleaning session: it takes a defensive system that stops the mess at the door, cleans the gear that carries it and keeps the worst of the season outside where it belongs. This step-by-step guide covers the entryway, the two-mat system, winter gear storage and the garage sweep that together keep your home clean through the thaw. Step 1: Beat Salt Stains and Mud at the Entryway Start with a thorough dry clean. Vacuum the entire entryway with a crevice tool to pull loose salt crystals, sand and dried dirt out of the floor and deep grout lines before any liquid touches them. The chalky white stains left by winter salt are an alkaline residue, and the most effective remover is a mild acid: plain white vinegar. Mix equal parts white vinegar and warm water, apply it to the stained areas and let it sit for five to ten minutes so the acid can dissolve the salts. Agitate with a stiff-bristled scrub brush, then rinse with a mop or cloth dipped in plain clean water, because vinegar left to dry can leave a sticky film. When you use any cleaner near floors and walls, read the label and follow the household chemical safety tips from Health Canada, including ventilating the space and never mixing products. For tile and vinyl, frequent mopping prevents mud layers from being tracked deeper into the home. Hardwood entryways demand extra care: water is wood’s enemy, so use a microfiber mop only lightly dampened with a pH-neutral wood floor cleaner, and wipe up puddles from wet boots immediately before moisture seeps between the boards. Splattered walls and baseboards just need a quick pass with a damp cloth and a drop of mild dish soap. Step 2: Set Up a Two-Mat System A single doormat is not enough during the thaw. A two-mat system turns the doorway into a two-stage cleaning zone for footwear. Outside the door, place a coarse scraper mat of coir or grooved rubber, or another abrasive surface that shears heavy mud and slush off boot treads. Hose it down and scrub it with a stiff brush whenever it loads up. Just inside the door, place a highly absorbent mat with a non-slip rubber backing to trap fine dirt and moisture. Vacuum it daily during the messiest weeks and machine-wash or hose it down once it becomes saturated. Never let either mat stay soaking wet for long, since damp fabric is a perfect spot for mould, and Health Canada links moisture buildup directly to mould growth in the home. The two-mat system also keeps outdoor grit out of your indoor air. Dirt, salt dust and fine particles tracked past the door become household dust, one of the indoor air contaminants Health Canada tracks in Canadian homes, so scraping shoes twice before they hit the floor is a small habit with real benefits. Step 3: Clean Winter Boots and Gear Before Storage Putting boots and mats away dirty is a mistake you pay for next November. Salt residue keeps attacking leather and synthetic materials through months of storage, and embedded dirt can attract pests. Every pair of winter boots deserves one last clean before retirement: dry-brush caked mud off soles and uppers, wipe surfaces with a damp cloth and dab stubborn salt lines with a cloth barely dampened using that same 50/50 vinegar and water mix. Let boots air dry completely away from direct heat, stuff them with paper to hold their shape and store them in a cool, dry spot. Take the heavy boot trays outside, hose them off and scrub them clean before storing them too. Step 4: Do a Garage Spring Sweep If you park in an attached garage, that floor is a hidden source of tracked-in grime. All winter it collects the salt, sand and slush that drip off your car, and shoes carry that gritty residue straight into the house. A spring sweep cuts the flow dramatically. Move the vehicles and large items out to open the space, then work a heavy-duty push broom from the back wall forward, sweeping debris out the main door. For a deeper clean, hose down the concrete and push the dirty water out with a floor squeegee to remove the fine salty dust a broom leaves behind. Problem Area Main Culprit Best Fix Tile and grout lines Chalky salt stains Dry vacuum, 50/50 vinegar solution, scrub, plain-water rinse Entryway hardwood Puddles from wet boots Lightly damp pH-neutral mop, wipe spills instantly Doorway mats Mud and moisture Two-mat system, daily vacuum, regular washing Winter boots Salt and caked dirt Brush, vinegar wipe, air dry before storage Garage floor Salt, sand and slush Push-broom sweep, hose and squeegee rinse Step 5: Stay Ahead of the Mess All Season Spring thaw mess is not a one-week event, so treat these steps as a routine rather than a project. Keep the scraper mat loaded outside, vacuum the indoor mat daily, mop the entryway on schedule and clear the garage once the snow is gone. Containment at the source beats cleaning the whole house twice. When winter’s last traces have worked their way into carpets, upholstery and far corners, a professional reset helps you start the season fresh. Toronto Shine Cleaning serves homes across the GTA with deep cleaning, regular cleaning and move-in and move-out cleaning. Check our pricing page, then call (647) 424-0355 to book your spring clean. Frequently Asked Questions About the Spring Thaw Mess Why does vinegar remove salt stains from floors? Winter salt residue is alkaline, and white vinegar is a mild acid. Applied as a 50/50 mix with

How to Manage the Spring Thaw Mess: A Step-by-Step Guide Read More »

How to Deep Clean a Blender, Its Blades, and Gasket

How to Deep Clean a Blender, Its Blades, and Gasket

How to Deep Clean a Blender Without Wrecking the Seals A quick rinse after your morning smoothie keeps a blender presentable, but it is not a deep clean. Dried-on residue, absorbed smells, and grime packed into crevices need real attention. The good news: no specialty products are needed, since warm water, dish soap, baking soda, and white vinegar handle all of it in under an hour. Why Blender Deep Cleaning Actually Matters Blenders blend food, and food residue builds up. The trouble is where it hides: the crevices around the blade assembly and the rubber gasket that seals the blades to the jar. Liquid seeps into those gaps during blending, and the jar is rarely dried completely afterwards, so residue sits damp, dulling the flavour of whatever you make next and giving bacteria and mould somewhere comfortable to grow. Protein-heavy smoothies turn rancid quickly, and sweet fruit blends leave a sugary film that feeds mould and yeast. Odour transfer is the symptom you notice first: blend garlic, ginger, or onion and the next green smoothie tastes like last week’s curry. Safety First: Power Off, Parts Off, Fingers Clear Unplug the blender before you start, and never dunk the motorized base in the sink. The blades are extremely sharp, so never reach into an inverted jar carelessly. Check the user manual, especially which parts are dishwasher safe, since disassembly varies by model. Prep Work: Disassemble and Find the Gasket Deep cleaning only works once you can reach every surface. Detach the blade assembly from the jar if your model allows; many blenders have a removable rubber gasket or seal ring under the blades, the primary hiding spot for grime. The gasket comes off by hand or needs a flathead screwdriver or the tool shown in your manual. Some jars have a fixed blade assembly that cannot be separated, so give the visible areas extra care. Wipe away loose residue before soaking. The 60 Second Clean After Every Use The deep clean stays short if you rinse properly every time. Right after blending, fill the jar about halfway with warm water, add a couple of drops of dish soap, secure the lid, and run it for 30 to 60 seconds. Pour it out, rinse under the tap, and set the jar upside down to air dry. That one habit stops residue bonding to the blades and gasket, and wet residue is far easier to lift than baked-on film. Deep Cleaning, Step by Step 1. Soak and scrub the blades and gasket Fill a bowl or sink with warm soapy water and a few drops of degreasing dish soap, then soak the blade assembly and gasket for 20 to 30 minutes. Use a small brush or an old toothbrush to gently scrub around the blades and the crevice the gasket sits in. Rinse thoroughly and let the parts dry completely before reassembly. 2. Lift residue off the inside of the jar For stubborn spots on the bottom and sides, sprinkle baking soda onto the surface and scrub with a damp sponge in gentle circular motions. Baking soda rinses clean and deodorizes, tackling film and smell in one pass. 3. Wipe the exterior and the base Wipe the outside of the jar and the base with a damp cloth and a little mild dish soap, including the control panel and anywhere batter or juice has dripped. Sticky spots respond to rubbing alcohol or white vinegar on the cloth. Never immerse the base: it holds the motor and electronics. 4. Deodorize the jar Odours survive a visible clean. Add a cup of warm water with a tablespoon of baking soda or a splash of white vinegar, blend briefly, and let it sit in the jar for 15 to 30 minutes before rinsing. For resilient smells, smear a thick paste of baking soda and water inside the jar and leave it overnight with the lid off. 5. Descale with white vinegar Hard water leaves a cloudy mineral film on the jar over time. Fill it halfway with white vinegar, neat or with an equal part of water, let it sit 30 to 60 minutes, then blend for a few seconds and pour it out. The vinegar dissolves the deposits and the jar comes up clearer. 6. Reassemble and test Put it back together only when every part is dry, and make sure the gasket sits correctly so the jar does not leak later. Finish with a short run of clean water to flush any particles and confirm the seal. Which Pantry Cleaner Does What Problem Best agent Contact time Dried food on the jar bottom Baking soda with a damp sponge Scrub, then rinse Greasy film on blades and gasket Warm soapy water with degreasing soap 20 to 30 minutes Cloudy mineral haze White vinegar 30 to 60 minutes Onion, garlic, or curry odour Baking soda paste 15 to 30 minutes or overnight Sticky drips on the base Vinegar or alcohol on a cloth Wipe and dry at once How Often to Deep Clean, and What to Skip Give the blender a thorough deep clean at least once a month, and more often if you use it daily or lean on it for thick, pulpy, or dairy blends. Between deep cleans: Run the 60 second soap-and-water cycle straight after every use. Dry the jar fully before the lid goes back on, since a closed damp jar invites mould. Wash your hands before handling parts and after touching the gasket, the habit CDC handwashing guidance recommends for food equipment. Ventilate the sink area and never mix cleaners such as vinegar and bleach, per Health Canada’s household chemical safety advice. After mould or a bad smell, a dilute bleach soak works under the CDC’s guidance on cleaning with bleach, if you rinse extremely well. Frequently Asked Questions Can I put the blender jar in the dishwasher? Only if the manual says so. Glass jars usually survive a cycle, but heat can warp plastic jars and weaken blade

How to Deep Clean a Blender, Its Blades, and Gasket Read More »

5 Versatile Household Items That Save Time and Money

5 Versatile Household Items That Save Time and Money Managing a household is a constant balancing act of time, resources, and energy. The foundation of a well-run home is not an endless collection of specialized gadgets but a curated arsenal of simple, versatile tools that tackle many tasks with reliable results. These unsung heroes save space, reduce waste, and simplify the endless list of chores that keep a home clean, comfortable, and functional. Embracing versatility is the key to working smarter, not harder. White Vinegar: The Mineral Deposit Fighter The humble bottle of plain white vinegar may be the most underestimated tool in any home. Its gentle acidity makes it formidable against a specific category of grime: mineral deposits. In areas with hard water, the chalky buildup of limescale is a constant battle. A kettle crusted with scale is restored by boiling a solution of equal parts vinegar and water inside it, letting it sit, and rinsing it clean. A sputtering showerhead comes back to life after soaking overnight in a bag full of vinegar. Vinegar extends to the laundry room, where a cup added to the rinse cycle acts as a natural fabric softener, breaking down detergent residue without the waxy buildup of commercial softeners. As a cleaner, a 50/50 solution of vinegar and water in a spray bottle is an effective streak-free glass and mirror cleaner, disinfects countertops, cuts through soap scum on shower doors, and neutralizes odors. Baking Soda: The Gentle Alkaline Workhorse If vinegar is the master of acidic cleaning, baking soda is the master of alkaline cleaning. This simple white powder is a gentle abrasive and a phenomenal natural deodorizer. Its fine, gritty texture makes a perfect paste for scrubbing stubborn food residue from pots and pans or lifting light stains from countertops without scratching. A small dish of baking soda in the refrigerator or freezer absorbs ambient odors. Sprinkled liberally over a carpet before vacuuming, it lifts dirt and neutralizes pet or smoke smells settled deep in the fibers. For greasy messes, a sprinkle is a mild alkali that breaks down the fatty acids in grease for easier wiping. Microfiber Cloths: Built for Dust and Streak-Free Finishes A set of high-quality microfiber cloths is a non-negotiable upgrade over cotton rags and paper towels, and their effectiveness is rooted in their design. The fibers are incredibly fine and split into a star-like shape, creating an enormous surface area. Used dry for dusting, they generate a natural static charge that actively attracts and traps dust particles instead of pushing them around, so dusting actually removes allergens from the home. Used damp, the same fibers scrub grime and absorb spills efficiently, delivering streak-free windows, mirrors, and stainless steel. A color-coded set, for example blue for glass, green for general surfaces, and yellow for the kitchen, replaces an entire cabinet of disposable wipes, making it both an economical and an environmentally friendly choice. Cast Iron Skillet and Dutch Oven: Cook Once, Buy Well In the kitchen, the ultimate versatile tool is a well-seasoned cast iron skillet. One piece of equipment can sear a steak on the stovetop, transfer into the oven to finish cooking, bake cornbread or a fruit crumble, and even work over a campfire. It gets screaming hot and retains heat evenly. With simple care, scraping, rinsing with hot water, and a light application of oil, it develops a natural non-stick surface called seasoning that improves with every use, replacing a collection of frying and sauté pans for generations. A Dutch oven, typically enameled cast iron, complements the skillet as the master of slow, moist cooking. It is the perfect vessel for soups, stews, and braising tough cuts until tender, with a heavy lid that seals in moisture. It is also one of the best tools for baking crusty bread at home, trapping steam for a professional-quality crust, and it deep-fries, boils pasta, and serves large dishes at the table with excellent heat retention. One pot serves as stockpot, roaster, bread cloche, and serving dish. The Sturdy Basket: Instant Order for Everyday Chaos Finally, the simple, sturdy basket is a surprisingly versatile tool for the daily ebb and flow of household life. A large, attractive woven basket can be a clutter catch-all in the living room for stray toys, remote controls, and mail before guests arrive, a chic holder for rolled throw blankets by the sofa, a hamper or carrier for folded laundry, and a home by the entryway for shoes or library books to return. Its purpose can shift daily with the needs of the household, a low-tech solution to the perpetual problem of clutter. Item Best at Everyday use It replaces White vinegar Mineral deposits and limescale Glass cleaner, rinse-cycle softener Ammonia glass sprays, fabric softener Baking soda Odors and gentle abrasion Fridge deodorizer, cleaning paste Air fresheners, scouring powders Microfiber cloths Dust trapping and streak-free shine Dry dusting, damp scrubbing Paper towels, cotton rags Cast iron skillet High-heat searing and baking Stovetop to oven cooking Several frying and sauté pans Dutch oven Slow, moist cooking Stews, bread, deep frying Stockpot, roaster, bread cloche A well-managed home is not defined by the quantity of its possessions but by the quality and utility of its tools. Choosing simple, versatile items lets a household run more smoothly, more economically, and with far less clutter and stress. When a deeper, more comprehensive clean is needed, Toronto Shine Cleaning provides professional deep cleaning services and regular maid service that embody the same principles of efficiency and thoroughness. Our bonded and insured cleaners carry a $1,000,000 insurance policy; see pricing and client feedback on our reviews page. Call (647) 424-0355 to book. For more on keeping your home hygienic, see the CDC handwashing guidance and the Government of Canada guide on indoor air contaminants. Versatile Household Items FAQ Is white vinegar a good glass cleaner? Yes. A 50/50 solution of vinegar and water in a spray bottle cleans glass and mirrors without streaks, often outperforming ammonia-based products. It

5 Versatile Household Items That Save Time and Money Read More »

How to Clean a Front-Loading Washing Machine: A Step-by-Step Guide

How to Clean a Front-Loading Washing Machine: A Step-by-Step Guide Front-loading washers use less water and energy than top loaders, but the sealed, efficient design comes with a catch: it traps moisture. The airtight door gasket, the hidden folds of rubber and the dark drum create exactly the kind of damp environment where mould and bacteria thrive. Left alone, the machine develops a sour, musty odor, and the buildup can even redeposit grime on clothes you thought were clean. Keeping a front loader fresh takes two habits: a deep clean every few months and a few daily practices that starve mildew of the moisture it needs. This guide walks through both, from the gasket to the drain filter. Start With the Door Gasket, the Most Critical Area The thick rubber gasket around the door is the primary source of front-loader odors. After every wash, water, soap residue, lint and hair collect in its deep folds and congeal into a slimy, often black buildup. Pull the seal back to expose the crevice between the rubber and the drum, and wipe the whole interior channel with a cloth or sponge moistened with a half-and-half mix of white vinegar and water. Expect the cloth to come away filthy. For set-in mildew spots, switch to a cloth dipped in diluted bleach (one part bleach to ten parts water) or hydrogen peroxide, which kills mold spores more aggressively. Scrub the crevices and the lip of the seal with an old toothbrush, then wipe everything completely dry, because leaving the gasket wet invites mildew right back. Strip the Drum With a Hot Vinegar Cycle The drum itself collects soap scum and hard water mineral deposits that trap bacteria and feed odors. The easiest fix is the dedicated Tub Clean or Self Clean cycle most modern machines offer; follow the manufacturer’s instructions, which may call for a special tablet or liquid. No self-cleaning cycle? Use the manual version: pour two full cups of plain white vinegar into the detergent dispenser drawer, add no laundry and no detergent, and run the longest, hottest cycle available. The hot water and mild acid strip scale from the drum and internal hoses. Disinfect With Bleach, or Use a Gentler Alternative Once the vinegar cycle has finished completely, pour two cups of chlorine bleach into the dispenser drawer and run the longest, hottest cycle again to kill lingering mold and mildew spores. Never mix vinegar and bleach in the same load, because combining them creates toxic chlorine gas; keep the two cycles fully separate. Prefer a gentler option? A half-cup of baking soda in the same hot cycle scrubs the drum and neutralizes odors. When the cycle ends, open the door and let the drum air dry completely. If you choose bleach, follow the CDC’s safe-use guidance for cleaning and disinfecting with bleach, which stresses never mixing bleach with other cleaners and preparing only what you need. Soak the Dispenser Drawer and Wipe Its Cavity The detergent drawer collects its own buildup: powdered detergent cakes into a solid mass and liquid fabric softener congeals into mold-friendly sludge. Most front-loader drawers slide out once you press the small release tab, often labelled Push, inside the softener compartment. Soak the drawer in hot, soapy water, scrub every compartment with a bottle brush or old toothbrush and rinse well. While it soaks, wipe out the empty cavity with a damp cloth, since that recess grows mold too. Let the drawer dry fully before sliding it back in. Clean the Drain Pump Filter The most overlooked maintenance task is the drain pump filter, the small trap behind a hinged door at the bottom front corner. It catches coins, buttons, hairpins and lint before they reach the pump, and when it clogs, the machine drains slowly, leaves laundry sopping wet and smells foul from stagnant trapped water. Lay a shallow pan or thick towel underneath before opening, then unscrew the filter plug counter-clockwise slowly. Once the water drains, remove the filter, rinse it under running water to clear lint and debris, and wipe out the housing with a paper towel before screwing the plug back in tightly to prevent leaks. Wipe Down the Exterior Finish with a damp microfiber cloth over the front, sides and top of the machine, including the control panel, buttons and both sides of the door glass. Daily Habits That Prevent the Musty Smell Leave the washer door slightly ajar after every cycle so air circulates and dries the drum and gasket. Wipe the gasket dry with an old towel after your last load of the day. Use high-efficiency (HE) detergent in the recommended amount; too much soap leaves sticky residue that feeds mildew. Move wet clothes to the dryer promptly instead of letting them sit in the drum. Moisture is the root cause of front-loader odors, and Health Canada’s mould prevention guidance is clear: control dampness and mould has nowhere to grow. Keeping the machine dry between washes also protects indoor air quality, since mold in the home can affect health, especially for people with allergies or asthma. Component Why It Matters How to Clean It Door gasket Traps water, soap and lint; main odor source Wipe folds with 50/50 vinegar, scrub with toothbrush, dry fully Drum Builds soap scum and mineral scale Tub Clean cycle, or hot vinegar cycle then bleach cycle Dispenser drawer Caked detergent and softener sludge Remove, soak in hot soapy water, scrub compartments Drain pump filter Clogs cause slow drains and odors Drain, remove, rinse debris, wipe housing Exterior and glass Dust and fingerprints Damp microfiber cloth wipe-down A Fresh Machine for Fresh Laundry Deep cleaning a front loader every few months, paired with the daily habit of leaving the door ajar, keeps the machine efficient, odor-free and gentle on your clothes. If your laundry room or the rest of your home needs the same thorough attention, Toronto Shine Cleaning can help with a whole-home deep clean or ongoing regular cleaning visits. Browse our pricing and

How to Clean a Front-Loading Washing Machine: A Step-by-Step Guide Read More »

screen

Screen Cleaning: A Step-by-Step Guide to Cleaning Your Laptop and TV Screens

Screen Cleaning: A Step-by-Step Guide for Laptop and TV Screens Television, laptop, and monitor screens are our windows to work and entertainment, and they are magnets for dust, fingerprints, smudges, and the occasional sneeze. Keeping them clean is not just about looks: a clear display is easier on the eyes and more pleasant to use. Modern screens are delicate, often coated with anti-glare and anti-reflective layers, so the wrong tools or chemicals can cause scratches, stripped coatings, or streaks that are worse than the original smudges. This guide walks through what to avoid, the safest cleaning steps, and how to handle the frame, stand, and remote. Toronto Shine Cleaning can handle the rest of your home; call (647) 424-0355 for a deep cleaning service. What You Should Never Use on a Screen The most important lesson is what to keep away from your display. Never use cleaning solutions containing harsh chemicals such as ammonia, alcohol, acetone, or toluene. These ingredients, common in general-purpose glass cleaners, strip the delicate anti-glare and anti-reflective coatings and leave a cloudy, hazy finish. Health Canada’s household chemical safety guidance is a good reminder to read labels and use products only where they belong. Also skip paper towels, tissues, and facial tissue: their wood-pulp fibers are abrasive enough to leave fine micro-scratches, and they shed lint. Rough fabrics such as dish towels, t-shirts, and terry cloth are equally risky. Technique matters as much as tools. Never press hard on a screen, because pressure can damage the liquid crystals or pixels underneath and cause permanent dark spots. Never spray liquid directly onto a display: gravity pulls it into the bezel, where it can reach internal electronics and short out the device. Always apply moisture to the cloth first, never to the screen. Prepare the Screen Before You Clean Turn the device completely off and unplug it. This is a safety measure, and it is practical too: a black, unlit screen makes dust and smudges far easier to see than a bright display does. Let the screen cool to room temperature first, since cleaning a warm screen can cause streaking. Screen Cleaning Rules to Remember Always start dry: remove dust with a dry microfiber cloth before introducing any moisture. Work in one direction: broad, light strokes from a top corner beat scrubbing in circles every time. Never spray the screen: liquid belongs on the cloth, never on the display or its edges. Finish with a dry buff: a second, completely dry microfiber pass removes streaks and lingering moisture. Stay gentle: if a mark will not lift with light pressure, reach for a better solution, never more force. Step 1: Start With a Dry Microfiber Cloth For most cleaning sessions, a large, clean, dry microfiber cloth is all you need. Microfiber strands are far finer than a human hair, which makes them exceptionally soft, and dry fibers create a natural static charge that attracts and traps dust instead of pushing it around. Starting from a top corner, wipe the screen in broad, sweeping motions with light, even pressure; avoid scrubbing in small circles. This single step safely removes about ninety percent of the grime that builds up on a typical screen. Step 2: Add Distilled Water for Stubborn Smudges When fingerprints and oily smudges resist a dry wipe, introduce the smallest amount of moisture. The safest liquid is distilled or deionized water: tap water contains minerals such as calcium and magnesium that leave a chalky residue or streaks as they evaporate. Lightly dampen a clean microfiber cloth until it is barely moist, never wet, and repeat the same gentle sweeping motions. If you can wring drops out of the cloth, it is too wet. Step 3: Remove Greasy Marks With a Gentle Solution For greasy buildup that distilled water cannot shift, use a commercial screen cleaning spray formulated without harsh chemicals, or make your own with equal parts distilled water and plain white vinegar. The mild acetic acid cuts through the oils left by fingerprints. Apply the solution to the cloth, never to the screen, then follow immediately with a second, completely dry microfiber cloth. This final buff removes lingering moisture and prevents streaks, leaving a clear, uniform finish. The CDC’s home cleaning guidance includes electronics such as touch screens and remote controls and recommends following the manufacturer’s instructions for these delicate surfaces. Don’t Forget the Frame, Stand, and Remote Glossy plastic frames and stands respond well to the same routine: a dry microfiber cloth for dust, and a barely damp cloth with distilled water for smudges. Remote controls deserve special attention because they are among the most handled items in a home. Remove the batteries first, then wipe the whole remote with a cloth moistened in a 50/50 mix of isopropyl alcohol and water, working a cotton swab into the gaps around the buttons. Let everything dry completely before reinstalling the batteries. Screen Cleaning Cheat Sheet Surface Tool Solution Light dust on any screen Dry microfiber cloth None needed Fingerprints and smudges Barely damp microfiber cloth Distilled or deionized water Greasy marks Damp microfiber cloth plus dry buff 50/50 distilled water and white vinegar Plastic frame and stand Microfiber cloth Distilled water Remote control Cloth and cotton swabs 50/50 isopropyl alcohol and water Frequently Asked Questions Can I use Windex or glass cleaner on my TV screen? No. Glass cleaners contain ammonia and other harsh chemicals that strip the anti-reflective coating and leave a permanent haze. Stick to a dry or barely damp microfiber cloth, and use distilled water or a screen-specific cleaner for stubborn marks. Is it safe to use rubbing alcohol on screens? Not on the display itself, because alcohol can damage the coating. It is fine on the remote control and other plastic accessories when diluted to about 50 percent with water, as long as the device is unplugged and the batteries are removed. Can I use a paper towel on my laptop screen? Avoid it. Paper products contain abrasive wood fibers that cause

Screen Cleaning: A Step-by-Step Guide to Cleaning Your Laptop and TV Screens Read More »