Appliance Cleaning

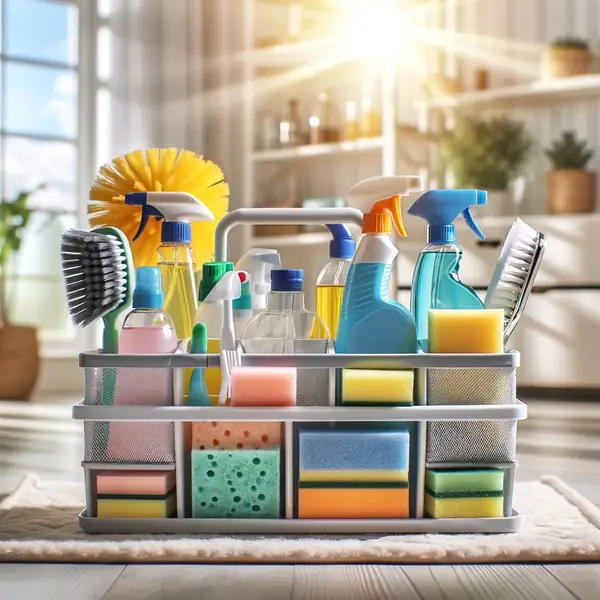
cleaning basket

7 Key Areas to Focus on for a True Deep Clean

All areas of your well-maintained home are often perceived through the lens of their daily upkeep. We wipe the counters, sweep the floors, and tidy the living room, creating a surface-level impression of cleanliness. This routine is essential for staving off daily chaos, but it is not the same as a true, deep clean. A deep clean is a more methodical and far-reaching process, a restorative act that targets the accumulated grime in the forgotten, neglected, and hard-to-reach areas of a home. It is in these overlooked spaces that dust, grease, and germs build up over time, contributing to poor air quality, unpleasant odors, and a general sense of dinginess that a simple surface wipe cannot erase. The Kitchen The kitchen is the undisputed epicenter of this hidden grime. It is a high-traffic, high-use environment where the byproducts of cooking—grease, steam, and food particles—settle on every conceivable surface. A routine clean addresses the countertops and sink, but a deep clean starts from the top down. The space above your upper kitchen cabinets is a notorious trap for a sticky, greasy film of dust. Out of sight and out of mind, this area accumulates a thick layer of grime that can contribute to kitchen odors and circulate dust throughout the room. A deep clean involves carefully clearing this space and using a powerful degreasing solution to cut through this stubborn layer, restoring a clean surface that no longer sheds dust onto the rest of your kitchen. 1.Oven The appliances themselves are a collection of deep cleaning challenges. The oven, a workhorse of the kitchen, gradually develops a blackened, carbonized layer of burnt-on food and grease. This is not just unsightly; it can smoke during cooking and affect the taste of your food. A deep clean goes beyond wiping the door; it involves a full interior restoration, often using a paste of baking soda and water left to dwell overnight to soften the carbonized layers, followed by a thorough scraping and wiping to reveal the clean enamel beneath. Similarly, the refrigerator requires more than just wiping up a spill. A true deep clean means removing every single item, taking out all the shelves and drawers, and washing them separately in hot, soapy water. The interior walls of the fridge should be wiped down to remove sticky residues and bacteria. 2.Appliances The spaces behind and underneath your major kitchen appliances are some of the most shocking areas to address during a deep clean. Pulling the refrigerator out from the wall will often reveal a startling landscape of dust bunnies, lost food items, and a thick layer of grime on the floor and walls. The refrigerator’s condenser coils, usually located at the back or bottom, are magnets for dust and pet hair. When these coils are clogged, the refrigerator has to work harder to stay cool, wasting energy and shortening the lifespan of the appliance. A deep clean involves vacuuming these coils clear. The same principle applies to the stove. The floor underneath and the wall behind it are catch-alls for splattered grease and fallen food. A thorough degreasing of these hidden surfaces is a quintessential deep cleaning task, as are the often-forgotten kick plates or toe kicks at the very bottom of your cabinets. Bathroom 1.Grout Lines The bathroom is another area where a deep clean is essential for both aesthetics and hygiene. Routine cleaning focuses on the visible surfaces of the toilet, sink, and shower, but the deep-seated grime lies elsewhere. The grout lines between floor and wall tiles are porous and readily absorb soap scum, dirt, and mildew, leading to discoloration. A deep clean involves a meticulous, hands-on scrubbing of every grout line, often with a specialized cleaner and a stiff-bristled brush, to restore its original color. The showerhead itself is a prime target. Over time, mineral deposits from hard water clog the small nozzles, reducing water pressure and creating an ideal environment for bacteria to grow. A deep clean involves unscrewing the showerhead and soaking it in a vinegar solution or, for a simpler method, filling a plastic bag with vinegar and securing it over the showerhead to soak overnight, dissolving the mineral buildup. 2.Toilet The toilet, while a focus of regular cleaning, has its own hidden areas. The base of the toilet, where it meets the floor, and the wall directly behind it are notorious for accumulating dust and unpleasant organic matter. The plastic caps covering the floor bolts are another forgotten spot that needs to be removed and cleaned. The bathroom exhaust fan is a critical but almost universally neglected component. Its cover becomes caked with a thick layer of dust, which not only looks terrible but severely impairs its ability to vent moisture, leading to a higher risk of mold and mildew growth. A deep clean requires removing this cover, washing it thoroughly, and vacuuming the fan blades and housing itself. The overflow hole in the sink basin is another small but important detail, which can be cleaned with a small bottle brush to remove the slimy buildup that contributes to odors. Living Areas 1.Fabrics Moving into the living areas and bedrooms, the primary enemy is dust and the allergens it contains. A routine clean might involve a quick pass with a vacuum, but a deep clean goes much further, starting with the textiles. Curtains and drapes act as giant air filters, trapping an enormous amount of dust, pollen, and pet dander over the winter months. A deep clean involves taking them down and laundering or dry-cleaning them according to their care instructions. Upholstered furniture requires a similar approach. This means removing all the cushions and using a vacuum’s crevice tool to get deep into the seams and under the frame, where years of crumbs, dust, and lost items accumulate. 2.Mattress The mattress is perhaps the most important yet most neglected item to deep clean in a bedroom. We spend a third of our lives on it, shedding dead skin cells that feed a population of

7 Key Areas to Focus on for a True Deep Clean Read More »

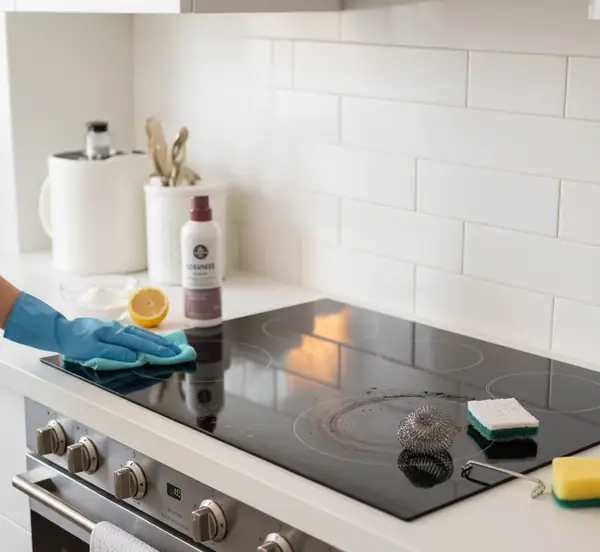
How to Clean a Glass Stovetop: Your Secret Weapon for a Spotless Glass Stovetop

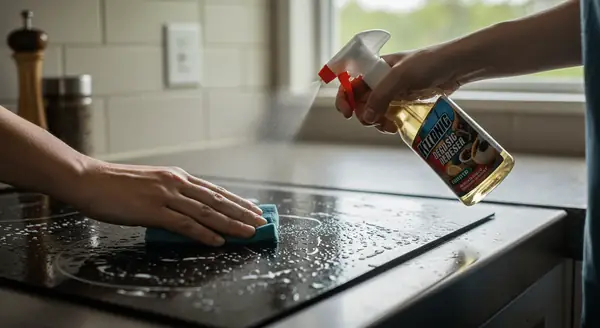
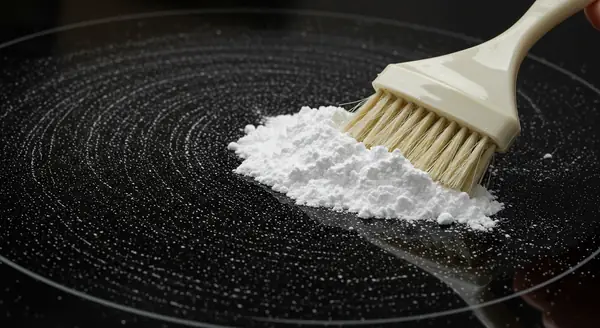
The glass stovetop, also known as the ceramic or glass-ceramic cooktop, is the epitome of modern kitchen design. Its sleek, black, uninterrupted surface offers a minimalist aesthetic that is both beautiful and, in theory, easy to clean. Unlike the coils and grates of traditional electric or gas ranges, which create a complex geography of hard-to-reach crevices, the flat plane of a glass stovetop promises a simple wipe-and-go experience. However, any owner of this appliance knows that this promise is conditional. While a brand-new glass stovetop is a joy to behold, a neglected one can quickly become a landscape of stubborn, baked-on messes, hazy white films, and microscopic scratches that permanently dull its shine. The key to maintaining that factory-new gleam lies in understanding the specific chemistry of the material and the physics of the soil that adheres to it. Cleaning a glass stovenol is not a battle of brute force; it is a science of solvency and precise mechanical leverage. Vitroceramic To clean a glass stovetop effectively, one must first appreciate the nature of the material. It is not ordinary window glass. It is a specialized ceramic glass engineered to withstand extreme and rapid temperature fluctuations without shattering. This “vitroceramic” material is incredibly hard and durable, but it is not impervious to damage. Its greatest vulnerability is scratching. The mistake that ruins most cooktops is the use of abrasive cleaners or scrubbing pads. A green scouring pad, a steel wool ball, or a powdered abrasive cleanser will act like sandpaper on the surface. While they may successfully remove the burnt-on food, they will leave behind a network of fine scratches. These micro-abrasions scatter the light, creating a dull, hazy appearance that can never be polished out. Furthermore, these scratches create microscopic valleys where future spills can get trapped, making the glass stovetop even harder to clean next time. The most common enemy of a glass stovetop is the boil-over. When a pot of starchy pasta water or sugary sauce bubbles over and hits the hot surface, the liquid evaporates instantly, leaving behind a carbonized crust that fuses to the glass. To the touch, this crust can feel as hard as concrete. The instinct is to scrub it, but the correct approach is a two-step process that combines chemical softening with mechanical shearing. The chemical softening phase involves using a specialized cleaner formulated for a glass stovetop. These are usually creamy, non-abrasive polishes that contain mild solvents and conditioners. The cream should be applied generously to the cool cooktop and spread over the burnt areas. The active ingredients need “dwell time” to work. They must sit on the stain for at least fifteen minutes to penetrate the carbon and begin to break down its molecular structure. Simply wiping the cleaner on and off immediately does nothing. Homemade Solution For those who prefer a pantry solution, a paste of baking soda and water is an excellent non-toxic alternative. The baking soda is alkaline, which helps to dissolve the acidic components of the burnt food, and its fine crystalline structure provides a gentle abrasion that is safe for the glass. This paste should also be allowed to sit and soften the debris. Some users enhance this method by spraying a light mist of white vinegar over the baking soda paste, creating a fizzing reaction that helps to lift the stain. However, the true power of the baking soda lies in its alkalinity and gentle scrubbing action. Once the chemical agents have had time to work, the mechanical shearing phase begins. This is where the single most important tool for glass stovetop maintenance comes into play: the razor blade scraper. While the idea of taking a metal razor to a glass surface sounds terrifying, it is the method recommended by almost every manufacturer. The key is that the steel of the razor blade is softer than the ceramic glass. When held at a shallow, forty-five-degree angle, the blade slides underneath the softened, burnt-on food, lifting it off the surface in a single sheet or flake. It does not scratch because it is not grinding; it is shearing. Using a scraper requires lubrication. It should never be used on a dry surface. The cleaning cream or the baking soda paste acts as a lubricant, allowing the blade to glide smoothly. The motion should be a firm, forward push. Never drag the blade backward, as this can cause the edge to chip, and a chipped blade will scratch the glass. After each pass, wipe the debris from the blade. This process removes the physical mass of the burn that no amount of scrubbing could touch. Sugar There is, however, a specific type of spill that requires immediate, urgent attention: sugar. If a sugary liquid, such as syrup, jam, or the juice from a fruit pie, spills onto a hot glass stovetop, you must act while it is still hot. As sugar cools, it can form a bond with the glass that is so strong it can actually cause the surface to pit or crack upon contraction. Keeping a razor blade scraper handy and, while wearing an oven mitt, carefully scraping the hot sugar off the surface immediately is the only way to prevent this permanent damage. Beyond the dramatic spills, a glass stovetop is often plagued by a subtle, hazy white film. This is usually caused by two things: mineral deposits from hard water or the use of aluminum or copper-bottomed pans. When water boils over, the calcium and magnesium in the water are left behind, creating a cloudy residue. This mineral scale is alkaline, so it requires an acid to dissolve it. A wipe-down with a cloth soaked in white vinegar will usually cut through this haze instantly. Metal Deposits The marks left by aluminum or copper pans are different. They are not stains; they are microscopic metal deposits. When the soft metal of the pan rubs against the hard glass, it leaves a trace of itself behind, much like a pencil leaves graphite on paper. These silvery or coppery streaks cannot be removed with standard cleaners. They require a mild abrasive polish, such as the

How to Clean a Glass Stovetop: Your Secret Weapon for a Spotless Glass Stovetop Read More »

different types of erasers

Erasers in Cleaning: 7 Genius Tricks for Cleaning Your Home with an Eraser

Where does eraser fit into this? In the vast world of cleaning materials, filled with specialized sprays, powerful scrubs, and high-tech gadgets, one of the most effective and precise tools is often overlooked, relegated to the pencil case or a dusty desk drawer: the simple eraser. This humble instrument, designed to lift graphite from paper, possesses a unique set of properties that make it a surprisingly versatile and powerful secret weapon for tackling some of the most frustratingly stubborn messes around the home. The wonder of the eraser lies not in brute force, but in its gentle, targeted friction, allowing for a level of control and precision that larger tools simply cannot match. Melamine Foam Eraser The most famous and transformative of these tools is, of course, the melamine foam eraser, more commonly known by its brand name, the Magic Eraser. While it shares a name and function with its rubber counterparts, it is a completely different entity. A melamine foam eraser is not a chemical cleaner; it is a micro-abrasive. The foam itself is a unique, open-cell structure that, when wet, becomes as hard as glass on a microscopic level. It acts like an incredibly fine-grained sandpaper, gently abrading and lifting away surface-level grime and stains. This is the secret to its seemingly magical ability to remove marks that soaps and sprays cannot touch. Its most celebrated use is on painted walls and baseboards. The inevitable scuff marks from shoes, furniture, and daily traffic can make an otherwise clean room look tired and worn. Instead of resorting to touch-up paint, a dampened melamine foam eraser can lift these marks with astonishing ease. The process is simple: lightly wet the eraser and squeeze out all the excess water. The eraser should be damp, not dripping. Then, with very gentle pressure, rub the scuff mark. The mark will literally disappear as the micro-abrasive action lifts the transferred color from the surface of the paint. It is crucial to use light pressure, as scrubbing too hard can begin to remove the paint finish itself, leaving a burnished or dulled patch, especially on glossy or satin paints. This tool is also a parent’s best friend, capable of removing crayon, pencil, and some types of ink marker from walls with the same gentle rubbing motion. The power of melamine foam extends far beyond walls. In the kitchen, it can cut through the thin, sticky film of aerosolized cooking grease that builds up on stovetops and range hoods. It is incredibly effective at removing stubborn, baked-on tea and coffee stains from the inside of ceramic mugs, restoring them to their original pristine white. It can even be used to lift burnt-on food residue from glass bakeware and oven doors. In the bathroom, it is a champion against soap scum, scrubbing away the waxy, cloudy buildup from glass shower doors, tile, and fiberglass tubs where other cleaners have failed. It can even be used to restore the white grout between tiles, lifting the embedded grime with targeted scrubbing. The eraser’s ability to conform to surfaces and get into corners makes it a more effective tool than a simple cloth or sponge for these specific tasks. However, because it is an abrasive, it is critical to know where not to use a melamine foam eraser. You should never use it on delicate, high-gloss surfaces like a car’s paint finish, polished wood furniture, or natural stone countertops like marble and granite, as it can create microscopic scratches that will permanently dull the finish. Always test it on a small, inconspicuous area first if you are unsure. Traditional Rubber While melamine foam is the superstar, the traditional rubber or vinyl eraser—specifically a high-quality white vinyl one—has its own unique and surprising set of cleaning superpowers. Its magic lies not in abrasion, but in its “grippy,” slightly tacky texture. This property makes it the perfect tool for removing one of the most annoying household messes: sticky adhesive residue. After peeling a price tag or label off a new piece of glassware, a book cover, or a plastic item, you are often left with a stubborn, gummy residue that smears when you try to wipe it. A white vinyl eraser works wonders here. By rubbing the eraser over the adhesive, its rubbery texture grabs onto the sticky residue, causing it to ball up and lift cleanly from the surface. Keep rubbing, and the adhesive will roll itself into little clumps that can be brushed away, leaving a clean, non-sticky surface behind without the need for oily solvents. This same principle allows a classic eraser to clean other delicate surfaces. It can be used to lift dirt and scuffs from patent leather shoes and handbags without scratching the high-gloss finish. For suede and nubuck, a special suede eraser or a clean art gum eraser is a classic shoe care tool. Its crumbly texture gently lifts dirt out of the fine nap of the material without the use of water, which would stain and flatten the suede. An eraser can even be used for light cleaning on non-precious metals, lifting grime from the surface of hardware or decorative items. The friction and the grabbing power of the rubber can remove surface-level dirt and smudges from things like brass doorknobs or silver-plated picture frames. The Small Eraser At the end, we must not forget the most precise tool of all: the small eraser on the end of a pencil. Its tiny size makes it perfect for detailed cleaning in areas that are otherwise impossible to reach. It can be used to clean the accumulated grime from the crevices of intricate jewelry or around the clasps of a watch band. It is the perfect shape for getting into the tight corners of window tracks or for cleaning the gunk that builds up around the base of a kitchen or bathroom faucet. The pencil tip provides a level of targeted control that allows you to apply pressure to a very specific, small point, lifting a

Erasers in Cleaning: 7 Genius Tricks for Cleaning Your Home with an Eraser Read More »

Manage the Spring Thaw Mess

How to Manage the Spring Thaw Mess: A Step-by-Step Guide

The Canadian spring is not a gentle awakening; it is a messy, protracted thaw. The transition from the frozen stillness of winter to the vibrant life of summer is a period defined by melting snow, persistent rain, and the unavoidable consequence of both: mud. For homeowners, the month of April is a constant battle fought at the entryways of the home, a relentless effort to keep the gritty, wet reality of the season from encroaching upon clean interior floors. Managing this seasonal mess is not about a single, grand cleaning effort, but about adopting a systematic, defensive strategy that contains the chaos at its source. Entryway The primary battleground is the entryway or mudroom. This high-traffic zone bears the brunt of the assault from salt-stained boots and muddy paws. The most visible and frustrating damage appears on the floors, particularly in the form of chalky, white salt stains on tile grout and floor mats. These stains are an alkaline residue, and they require a mild acid to be broken down effectively. The most effective tool for this is plain white vinegar. Before introducing any liquid, the first step is always a thorough dry clean. Vacuum the entire area meticulously, using a crevice tool to pull up all the loose salt crystals, sand, and dried dirt from the floor and especially from deep within the grout lines. Once the loose debris is gone, mix a solution of equal parts white vinegar and warm water in a bucket or spray bottle. Apply this solution directly to the salt-stained areas, letting it sit for five to ten minutes to allow the acid to work on dissolving the alkaline salt. Then, using a stiff-bristled scrub brush, agitate the grout lines and stained surfaces. You will see the stains begin to lift. The final, crucial step is to rinse the area with a mop or cloth using only plain, clean water. This removes any lingering vinegar solution, which can leave a sticky residue if left to dry. For general mud and grime on durable flooring like ceramic tile or vinyl, frequent mopping is key. The goal is to prevent layers of mud from being tracked further into the home. For hardwood floors in the entryway, extreme care must be taken. Water is the enemy of wood, so never use a soaking wet mop. Instead, use a microfiber mop that is only lightly dampened with a pH-neutral wood floor cleaner. Any spills or puddles from wet boots should be wiped up immediately to prevent moisture from seeping between the boards and causing them to warp or stain. The walls and baseboards in this area also take a beating, collecting splatters of mud and dirty water. A simple wipe-down with a damp cloth and a drop of mild dish soap is all that is needed to keep these surfaces clean and prevent staining. Doormat A highly effective strategy for managing the thaw is to implement a robust, two-mat system. This is not simply placing a mat at the door; it is creating a two-stage cleaning process for footwear. The first mat should be placed directly outside the door. Its sole purpose is to be a scraper. This should be a coarse, durable mat made of coir, rubber with deep grooves, or another abrasive material designed to shear off the heaviest mud, slush, and grit from the treads of boots. This mat will get filthy, and it should be cleaned regularly by hosing it down and scrubbing it with a stiff brush. The second mat is placed on the inside. Its purpose is absorption. This mat should be made of a highly absorbent fabric with a non-slip rubber backing, designed to trap the remaining fine dirt and moisture. This indoor mat should be vacuumed daily during the messiest weeks of spring and should be machine-washed or hosed down whenever it becomes saturated. This system ensures that by the time a foot steps onto your clean interior floor, it has already passed through two distinct cleaning zones. Winter Gear With the entryway fortified, the next step is to properly deal with the winter gear that is being retired for the season. Storing boots and mats while they are still dirty is a critical mistake. The salt residue will continue to degrade leather and synthetic materials over the long months in storage, and the dirt can attract pests. Every pair of winter boots should be thoroughly cleaned before being put away. Begin by dry-brushing all the caked-on mud from the soles and uppers. Then, wipe down the entire boot with a damp cloth to remove surface dirt. To treat stubborn salt stains, use a cloth lightly dampened with the same 50/50 vinegar and water solution, dabbing gently at the white lines until they disappear. Allow the boots to air dry completely, away from direct heat, before stuffing them with paper to help them hold their shape and storing them in a cool, dry place. The heavy-duty boot trays that have been collecting pools of dirty, salty water all winter should be taken outside, hosed off, and scrubbed clean before being stored. Garage For homes with an attached garage, the garage floor itself is an often-overlooked but significant source of tracked-in grime. Over the winter, the floor becomes a repository for all the salt, sand, and slush that drips off your vehicle. This gritty residue is then easily tracked into the house on the bottom of shoes. Performing a “spring sweep” of the garage is a deeply satisfying task that dramatically reduces the amount of dirt entering your home. Begin by moving the cars and any other large items out of the garage to give you a clear workspace. Using a heavy-duty push broom, start at the back wall and systematically sweep all the loose debris towards the main garage door and out onto the driveway. For a more thorough clean, you can hose down the concrete floor and use a floor squeegee to push the dirty water out. This

How to Manage the Spring Thaw Mess: A Step-by-Step Guide Read More »

How to Deep Clean a Blender, Its Blades, and Gasket

How to Deep Clean a Blender, Its Blades, and Gasket

A blender is a powerhouse of the modern kitchen, an appliance capable of transforming tough, fibrous vegetables and frozen fruits into silky smooth creations. But the very power that makes it so effective—the high-speed, vortex-creating blades—also makes it a uniquely challenging tool to clean. The narrow base of the jar, the intricate blade assembly, and the tight-fitting gaskets are all perfect traps for sticky smoothie residue, pungent food odors, and a cloudy film that can build up over time. A dirty blender is not just unsightly; it can harbor bacteria and transfer unpleasant flavors to your next recipe. Mastering the art of cleaning your blender is essential for hygiene, performance, and the longevity of the appliance. 60 Seconds The most important and transformative habit in blender care is the immediate, 60-second clean. This is the preventative measure that will save you from almost all future deep-scrubbing sessions. The moment you have poured the last of your smoothie, soup, or sauce from the blender jar, you must act. Do not place the jar in the sink to “soak.” This is the critical mistake that allows sugars to harden and residue to cement itself to the glass or plastic. Instead, immediately give the jar a quick rinse with warm water to flush out the majority of the contents. Then, fill the jar about halfway with warm water, add a single, small drop of mild dish soap, and place it back on the motor base. Secure the lid tightly, and blend on high for 30 to 60 seconds. The high-speed blending action creates a powerful vortex of soapy water that acts as an internal power-washer, scouring the walls of the jar and, most importantly, blasting away the residue from underneath and around the sharp, hard-to-reach blades. After blending, pour out the soapy water, give it one final, thorough rinse with clean water, and turn it upside down on a drying rack to air dry completely. This simple, one-minute ritual is the single most effective way to maintain your blender. Let’s get to Work! While the immediate clean is perfect for daily maintenance, a periodic deep clean is necessary to address the areas that the self-cleaning vortex cannot reach. This should be done at least once a month, or more often if you frequently blend sticky or oily ingredients like nut butters. This deep clean requires disassembly. First, ensure the motor base is unplugged. Then, carefully unscrew the base of the blender jar. This will allow you to remove the entire blade assembly. Pay close attention as you take it apart, as there is a small but crucial component that is the primary source of hidden grime: the rubber or silicone gasket. This O-ring sits between the blade assembly and the jar, creating a leak-proof seal. It is also the perfect trap for tiny food particles and moisture, making it a prime breeding ground for mold and mildew, which is often the source of a persistent musty odor. Carefully remove the gasket from its groove. Wash the blender jar, the blade assembly, the gasket, and the screw-on base separately in a sink of hot, soapy water. Use a bottle brush or a long-handled sponge to scrub the inside of the jar thoroughly. The blade assembly must be handled with extreme care due to its sharpness. Use a small scrub brush, like an old toothbrush, to meticulously clean around the blades, both on top and underneath, dislodging any impacted food particles. Pay special attention to the gasket and the groove it sits in. Scrub both with the small brush to remove any black, slimy buildup. Rinse every component meticulously with hot water. The most critical step of the deep clean is ensuring every single piece is completely and utterly dry before you reassemble it. Trapping even a small amount of moisture inside the base assembly will create the perfect humid environment for mildew to grow back immediately. Allow the parts to air dry completely on a rack for several hours before carefully putting them back together. Powerful Ingredients Over time, even a well-cleaned blender can fall victim to specific, stubborn problems that the standard cleaning methods cannot resolve. One of the most common issues, especially in areas with hard water, is a cloudy, hazy film that builds up on the blender jar, making it look perpetually dirty. This is not dirt, but a layer of mineral deposits. The solution is white vinegar. The mild acid in the vinegar is perfect for dissolving these alkaline mineral stains. To treat a cloudy jar, fill it halfway with a solution of equal parts white vinegar and warm water. Let this solution soak in the jar for several hours, or even overnight. After the soak, place the jar on the base and run it for a minute, then rinse it thoroughly. The cloudiness should be gone. Persistent odors from pungent ingredients like garlic, onion, or ginger can also linger in the plastic of a blender jar. To neutralize these smells, baking soda is an excellent tool. Create a paste of baking soda and water and use a cloth to coat the entire interior of the jar. Let this paste sit for at least thirty minutes before scrubbing and rinsing it away. For a more active approach, you can fill the jar halfway with warm water, add a quarter cup of baking soda, and blend for a minute. Let this solution sit in the jar for an hour before rinsing. Another effective deodorizer is lemon. Cut a lemon into quarters, place it in the jar with some water, and blend. The citric acid and natural oils in the lemon are powerful at cutting through and neutralizing stubborn smells. Tough, sticky residues from things like homemade nut butter or very thick, date-sweetened smoothies can also pose a challenge. After scraping out as much of the residue as possible with a silicone spatula, the 60-second self-clean is still your best bet, but you may need to use hotter water and let

How to Deep Clean a Blender, Its Blades, and Gasket Read More »

5 Versatile Household Items That Save Time and Money

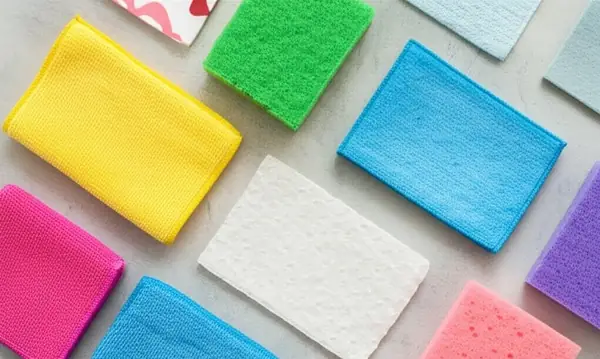
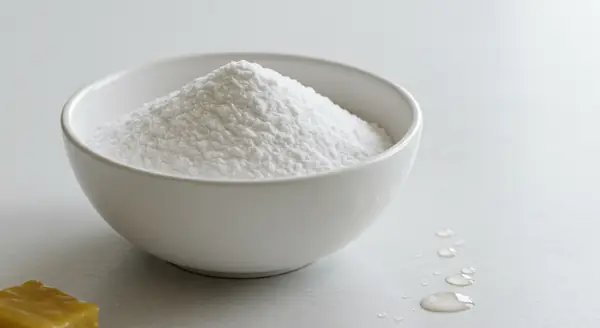
Managing a household is a masterclass in efficiency, a constant balancing act of time, resources, and energy. The foundation of a well-run home is not an endless collection of specialized gadgets, but a curated arsenal of simple, versatile tools that can tackle a multitude of tasks with unwavering reliability. These are the unsung heroes of daily life, the items that save space, reduce waste, and simplify the endless list of chores that keep a home clean, comfortable, and functional. Embracing this philosophy of versatility is the key to working smarter, not harder. White Vinegar The humble bottle of plain white vinegar is perhaps the most powerful and underestimated tool in any home. Its magic lies in its gentle acidity, which makes it a formidable opponent against a specific category of grime: mineral deposits. In areas with hard water, the chalky, white buildup of limescale is a constant battle. A kettle crusted with mineral scale can be restored to its original shine by simply boiling a solution of equal parts vinegar and water inside it, letting it sit, and rinsing it clean. A showerhead clogged and sputtering from the same mineral deposits can be brought back to life by soaking it overnight in a bag full of vinegar. Its power extends to the laundry room, where a cup added to the rinse cycle acts as a natural fabric softener, breaking down detergent residue and leaving clothes feeling softer without the waxy buildup of commercial softeners. As a cleaner, a 50/50 solution of vinegar and water in a spray bottle is the ultimate streak-free glass and mirror cleaner, outperforming many ammonia-based chemical products. It disinfects countertops, cuts through soap scum on shower doors, and neutralizes odors, proving itself to be a true multi-purpose champion. Baking Soda Just as vinegar is the master of acidic cleaning, its chemical counterpart, baking soda, is the master of alkaline cleaning. This simple white powder is a gentle but effective abrasive and a phenomenal natural deodorizer. Its fine, gritty texture is perfect for creating a cleaning paste to scrub away stubborn food residue from pots and pans or to lift light stains from countertops without scratching the surface. A small dish of baking soda left in the refrigerator or freezer will absorb ambient odors, keeping the space smelling fresh. Sprinkled liberally over a carpet before vacuuming, it can help to lift dirt and neutralize pet or smoke smells that have settled deep within the fibers. For greasy, grimy messes, a sprinkle of baking soda acts as a mild alkali, helping to break down the fatty acids that make up grease, making it easier to wipe away. Its versatility is quiet but profound, a gentle workhorse for a huge variety of cleaning and deodorizing tasks. Microfiber Cloth Moving from consumables to tools, a set of high-quality microfiber cloths is an absolute non-negotiable. They are vastly superior to old cotton rags or disposable paper towels, and their effectiveness is rooted in their scientific design. The fibers of a microfiber cloth are incredibly fine and are split into a star-like shape, creating an enormous surface area. When used dry for dusting, these fibers generate a natural static charge that actively attracts and traps dust particles, rather than just pushing them around as a cotton cloth would. This makes dusting faster, more effective, and actually removes allergens from the home instead of just displacing them. When used damp, the same fine fibers can scrub away grime and absorb spills with remarkable efficiency. They are the key to a streak-free finish on windows, mirrors, and stainless steel appliances. A good set of microfiber cloths, designated for different tasks (e.g., blue for glass, green for general surfaces, yellow for the kitchen), replaces an entire cabinet of disposable wipes and paper towels, making them both an economical and an environmentally friendly choice. Cast Iron Frying Pan In the kitchen, the ultimate versatile tool is a well-seasoned cast iron skillet. In an age of specialized, non-stick pans with limited lifespans, the cast iron skillet is a testament to durability and multi-functionality. It is a single piece of equipment that can sear a steak on the stovetop, be transferred directly into the oven to finish cooking, bake a perfect cornbread or a rustic fruit crumble, and even be used over a campfire. Its ability to get screaming hot and retain that heat evenly is unparalleled. With proper care, which involves simple scraping, rinsing with hot water, and a light application of oil, it develops a natural, non-stick surface called seasoning that only improves with every use. A single cast iron skillet can replace a collection of frying pans, sauté pans, and even some baking dishes. It is an heirloom piece, a tool that performs flawlessly for generations, representing the very essence of buying once and buying well. Building on the principle of durable, multi-purpose cookware, a high-quality Dutch oven, typically made of enameled cast iron, is another indispensable workhorse. While a cast iron skillet excels at high-heat searing and frying, the Dutch oven is the master of slow, moist cooking. It is the perfect vessel for making soups, stews, and braising tough cuts of meat until they are meltingly tender. Its heavy lid seals in moisture and heat, allowing for even, consistent cooking. But its versatility extends far beyond stews. A Dutch oven is one of the best tools for baking artisanal, crusty bread at home, trapping the steam to create a perfect rise and a professional-quality crust. It can be used for deep-frying, for boiling pasta, or for serving a large dish directly at the table, where its excellent heat retention will keep the food warm. It is a single pot that serves as a stockpot, a roaster, a bread cloche, and a beautiful serving dish, embodying the principle of investing in quality pieces that perform multiple functions flawlessly. Sturdy Basket At the end, the simple, sturdy basket is a surprisingly versatile tool for managing the daily ebb and flow of household life. A

5 Versatile Household Items That Save Time and Money Read More »

How to Clean a Front-Loading Washing Machine: A Step-by-Step Guide

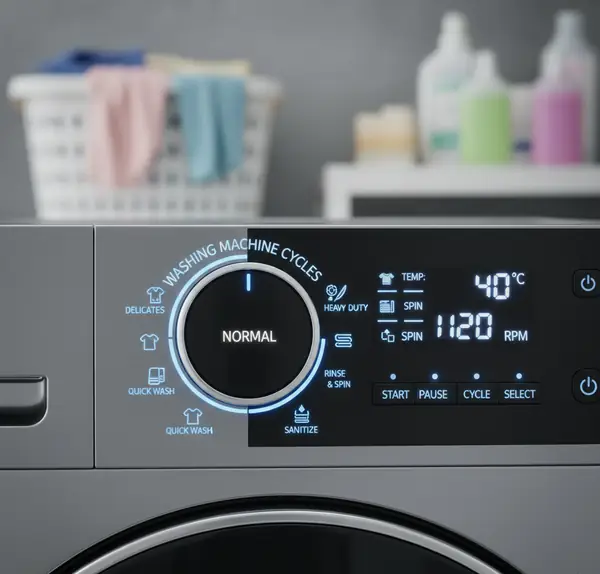
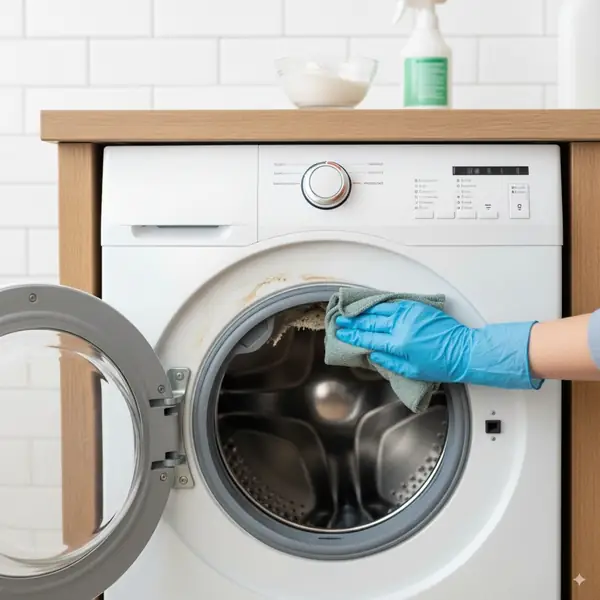
A front-loading washing machine is a marvel of efficiency, using less water and energy to deliver a superior clean. However, this same high-efficiency design creates a unique and persistent challenge: the tendency to develop a musty, mildewy odor. The airtight seal of the door, while essential for preventing leaks during a cycle, also traps moisture inside the machine, creating the perfect dark, damp environment for mold and bacteria to thrive. Keeping your front-loader smelling fresh and performing at its best requires a regular, methodical cleaning routine that addresses the hidden areas where this grime accumulates. The Most Critical Area The most critical area, and the primary source of odors, is the thick rubber gasket that forms the seal around the door. After every wash, water, soap residue, lint, and hair become trapped in its deep folds. Over time, this mixture congeals into a slimy, often black, buildup of mildew. The first step in any deep clean is to confront this gasket. Begin by gently pulling back the gray rubber seal to expose the crevice between it and the drum. Using a cloth or sponge dampened with a solution of equal parts white vinegar and water, thoroughly wipe out the entire interior of the gasket. You will likely be appalled at the amount of black gunk that comes away. For stubborn, set-in mildew spots, you may need to use a more potent cleaner. A cloth dipped in a diluted bleach solution (one part bleach to ten parts water) or hydrogen peroxide will be more effective at killing the mold spores. Use an old toothbrush to scrub deep into the crevices and under the lip of the seal where grime loves to hide. Once you have scrubbed the entire gasket clean, it is essential to wipe it completely dry with a clean cloth. Leaving it wet will only invite the mildew to return immediately. With the gasket clean, the next target is the wash drum itself. Even though it is constantly sloshed with soap and water, the drum can develop a buildup of soap scum and hard water mineral deposits. This film can trap bacteria and contribute to odors, and can even redeposit grime onto your “clean” clothes. The easiest way to clean the drum is to use the dedicated “Tub Clean” or “Self Clean” cycle that most modern machines feature. If your machine has this option, simply follow the manufacturer’s instructions, which may involve adding a specific cleaning tablet or liquid. Manual Cleaning If your machine lacks a self-cleaning cycle, you can perform a highly effective manual version using simple household products. This is a two-step process. The first step uses vinegar to dissolve mineral buildup and soap scum. Pour two full cups of plain white vinegar directly into the detergent dispenser drawer. Do not add any laundry or detergent. Select the longest, hottest wash cycle available on your machine and let it run to completion. The hot water and the mild acidity of the vinegar will work to strip away the scale and residue from the drum and the internal hoses. Disinfection The second step is for disinfection. It is crucial to note that you must never mix vinegar and bleach, as this creates toxic chlorine gas. After the hot vinegar cycle is completely finished and the machine is empty, you can proceed. For a deep sanitization that will kill any lingering mold or mildew spores, pour two cups of chlorine bleach into the dispenser drawer. Again, run the longest, hottest cycle available. This will thoroughly disinfect the interior of your machine, eliminating any remaining bacteria. If you are hesitant to use bleach, a half-cup of baking soda can be used as a gentler alternative, which will help to scrub the drum and neutralize odors. Once this second cycle is finished, open the door and let the drum air dry completely. The detergent dispenser drawer is another often-overlooked source of buildup. Over time, powdered detergent can cake into a solid mass, and liquid fabric softener can congeal into a thick, blue sludge that can harbor mold. Most front-loader dispenser drawers are designed to be removed for cleaning. Look for a small tab or button, often labeled “Push,” in the softener compartment. Pressing this will release the drawer, allowing you to slide it out completely. Take the drawer to a sink and soak it in hot, soapy water to loosen the residue. Use a bottle brush or an old toothbrush to scrub out every compartment, ensuring you remove all the caked-on gunk. While the drawer is soaking, take a damp cloth and wipe out the empty cavity in the machine where the drawer sits, as this area is also prone to mold growth. Rinse the drawer thoroughly and let it dry completely before reinserting it into the machine. Filter Cleaning One of the most important but least-known maintenance tasks for a front-loader is cleaning the drain pump filter. This small trap is designed to catch foreign objects like coins, buttons, hairpins, and excess lint before they can reach and damage the machine’s pump. If this filter becomes clogged, it can cause the machine to drain slowly, leave clothes excessively wet, and create foul odors from the stagnant, trapped water. The filter is typically located behind a small hinged door on the bottom front corner of the machine. Before you open it, be prepared. There will be water. Place a shallow pan or a thick towel directly under the access door. Slowly unscrew the filter plug, turning it counter-clockwise. Water will begin to trickle out. Once it has drained, you can fully remove the filter. You will likely find a surprising and unpleasant collection of debris. Rinse the filter thoroughly under running water, removing all the lint and any foreign objects. Before screwing it back in, use a paper towel to wipe out the filter housing. Reinsert the filter and screw it back in tightly to prevent leaks. With the interior components addressed, the final step is to clean the exterior.

How to Clean a Front-Loading Washing Machine: A Step-by-Step Guide Read More »

screen

Screen Cleaning: A Step-by-Step Guide to Cleaning Your Laptop and TV Screens

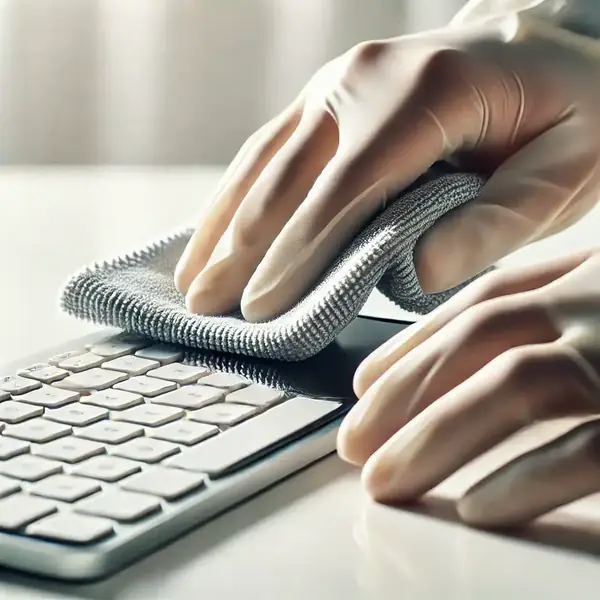
The screens on our televisions and computer monitors are our windows to the world of information and entertainment. They are high-precision pieces of technology that we interact with daily. As such, they are magnets for dust, fingerprints, smudges, and the occasional unfortunate sneeze. Keeping these screens clean is not just a matter of aesthetics; a clear, spotless display provides a better viewing experience and can even reduce eye strain. However, modern screens are incredibly delicate surfaces, often coated with sensitive anti-glare and anti-reflective layers. Cleaning them with the wrong tools or chemicals can lead to permanent damage, including scratches, stripped coatings, or streaks that are far more distracting than the original smudges. What you Shouldn’t use Before ever touching your screen, the most critical lesson is understanding what not to use. This is a situation where avoiding the wrong thing is more important than finding the right one. First and foremost, you must never use any cleaning solution that contains harsh chemicals like ammonia, alcohol, acetone, or toluene. These are the primary ingredients in most general-purpose glass cleaners, like Windex, and they are catastrophic for modern screens. These chemicals are designed to cut through grime on durable, non-porous glass like windows and mirrors. On a television or monitor, they will aggressively strip away the delicate anti-glare and anti-reflective coatings, leaving behind a cloudy, permanently hazy finish. The tool you use to wipe the screen is just as important as the liquid. Never use paper towels, toilet paper, or facial tissues. While they feel soft to our hands, paper products are made of wood pulp and contain abrasive fibers that can leave a network of fine, microscopic scratches on the screen’s surface. Over time, these tiny scratches will accumulate and create a noticeable dullness. They also have a frustrating tendency to shed lint, leaving behind more debris than you started with. Similarly, avoid using any kind of rough cloth, such as a dish towel, a t-shirt, or a terry cloth rag. The texture of these fabrics can also be abrasive and cause damage. At the end, the technique itself requires a gentle approach. You should never apply significant pressure while wiping, as this can damage the liquid crystals or pixels underneath the surface, leading to permanent dark spots or lines. And most importantly, never, under any circumstances, spray any liquid directly onto the screen. Gravity will cause the liquid to run down the surface and seep into the bezel at the bottom edge, where it can penetrate the internal electronics and cause irreversible damage, shorting out the device completely. Preparation With the warnings established, the correct process for cleaning your screen is a gentle, multi-step approach that starts with the least invasive method and only escalates as needed. The first step is always preparation. Turn off the device completely and unplug it from the wall. This is a crucial safety measure, but it also serves a practical purpose. A black, unlit screen makes dust, smudges, and fingerprints far more visible than a bright, active one. You should also let the screen cool down to room temperature, as cleaning a warm screen can sometimes lead to streaking. For the majority of cleaning situations, where the only issue is a light layer of dust and perhaps a few minor smudges, a dry wipe is all that is required. The undisputed champion for this task is a large, clean, dry microfiber cloth. Microfiber is a synthetic material with fibers that are incredibly fine, much thinner than a human hair. This structure makes them exceptionally soft and non-abrasive. Furthermore, when used dry, the fibers create a natural static charge that actively attracts and traps dust particles rather than just pushing them around the screen. Starting from one of the top corners, gently wipe the screen in a broad, sweeping motion, either horizontally or vertically. Do not scrub in small, tight circles. Use light, even pressure, letting the cloth do the work. This single, simple step will safely remove about ninety percent of the grime that accumulates on a typical screen. When a dry cloth is not quite enough to remove stubborn fingerprints or oily smudges, it is time to introduce a minimal amount of moisture. The best and safest liquid to use is distilled or deionized water. Tap water contains minerals like calcium and magnesium which, while harmless to drink, can leave behind a faint, chalky residue or streaks on the screen as the water evaporates. To use distilled water, you must never apply it directly to the screen. Instead, lightly dampen a clean microfiber cloth. The cloth should be just barely moist to the touch, not wet. If you can wring any drops out of it, it is too wet. Once the cloth is properly dampened, wipe the screen with the same gentle, sweeping motions you used for the dry wipe. Again, apply minimal pressure. This will be enough to break down and lift most common smudges. Greasy Marks For more stubborn, greasy marks that distilled water alone cannot handle, you may need a slightly stronger, yet still safe, cleaning solution. You can purchase commercially prepared screen cleaning sprays, which are specifically formulated to be free of harsh chemicals. Alternatively, you can create your own highly effective solution by mixing equal parts of distilled water and plain white vinegar. The mild acetic acid in the vinegar is excellent at cutting through oily residue from fingerprints. As with the water, this solution should be applied to your microfiber cloth, never directly to the screen. After wiping the smudges away with the lightly dampened cloth, it is an essential final step to immediately go over the screen again with a second, completely dry microfiber cloth. This final dry buff will remove any lingering moisture and prevent any streaks from forming as the solution dries, leaving a perfectly clear, uniform finish. The frame and stand of your television or monitor, often made of glossy plastic, can be cleaned with the same methods. A dry microfiber cloth

Screen Cleaning: A Step-by-Step Guide to Cleaning Your Laptop and TV Screens Read More »

Cleaning the Waffle Maker: The Best Way to Clean a Waffle Maker Without Damaging It

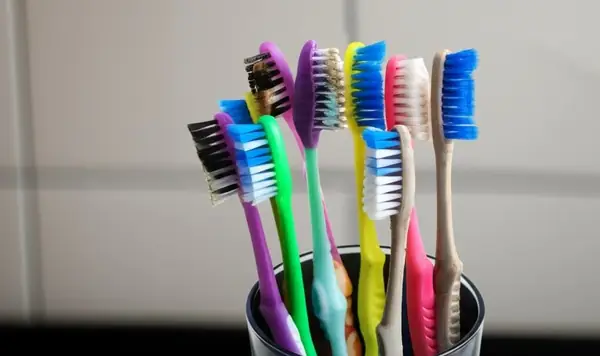
A waffle maker is a delightful appliance, a specialized tool dedicated to creating one of life’s simple pleasures. Yet, this single-purpose design is precisely what makes it notoriously difficult to clean. Its fixed, intricate grids, full of deep pockets and sharp corners, are perfect for creating crisp, golden-brown waffles, but they are equally perfect for trapping drips of batter, sticky sugar crystals, and baked-on oil. This residue can build up over time, not only looking unsightly but also causing future waffles to stick, cook unevenly, and even acquire a faint, burnt taste. Proper, regular cleaning is the key to preserving the non-stick surface, ensuring the longevity of the appliance, and guaranteeing that every waffle you make is as delicious as the first. Prevention The most effective strategy for cleaning a waffle maker begins before any mess has had a chance to set. Prevention and immediate care are the golden rules. While most modern waffle makers have a non-stick coating, a light application of oil is still recommended to ensure a clean release. The key is to apply it correctly. Instead of using aerosol cooking sprays, which often contain lecithin and other additives that can build up on the non-stick surface over time and become gummy, opt for a neutral oil with a high smoke point, like canola or grapeseed oil. Apply a very thin layer using a silicone pastry brush or a folded paper towel to evenly coat the grids. Over-oiling is a common mistake that leads to a sticky, polymerized residue that is incredibly difficult to remove. Equally important is using the correct amount of batter. Overfilling the grids is the primary cause of messy overflow that drips down the sides and hardens in the hinges of the appliance, the most challenging area to clean. It is better to have a slightly smaller waffle than to deal with the cleanup of a major spill. Once the last waffle has been cooked, the cleaning process should begin almost immediately. The most crucial element here is temperature. You must never attempt to clean a waffle maker while it is still plugged in or piping hot, but you also should not wait until it is completely cold. The ideal time is when it is still warm to the touch. In this state, any residual oil is still in a semi-liquid state and any rogue batter has not yet fully hardened into a stubborn crust. First, and most importantly, unplug the appliance. Then, while it is still warm, take a dry paper towel or a soft, dry cloth and wipe out any loose crumbs and blot up any excess pools of oil. This initial dry wipe removes the bulk of the debris with minimal effort. For the standard, after-use cleaning, a simple damp cloth is your most valuable tool. Take a soft cloth or a sponge and dampen it with warm water. It is critical that the cloth is only damp, not dripping wet. Remember, this is an electrical appliance, and excess water can seep into the internal components and cause damage or a safety hazard. Gently wipe down the interior of the grids. The warmth of the appliance combined with the moisture from the cloth will create a gentle steaming effect, helping to soften and lift any light batter residue. For slightly more stubborn spots, you can add a single, tiny drop of mild dish soap to your damp cloth, but be aware that you will then need to go over the surface again with a separate cloth dampened only with plain water to “rinse” away any soap residue. Finally, use the damp cloth to wipe down the exterior of the waffle maker, removing any drips, smudges, or fingerprints. Stubborn Messes For the truly baked-on, stubborn messes that a simple wipe-down cannot handle, a deep clean is necessary. This is where you can employ a few clever techniques to restore the grids to their original state. One of the most effective methods involves using the appliance’s own residual heat to create steam. After unplugging the waffle maker, while it is still quite warm, take a paper towel, saturate it with water, and wring it out so it is very damp but not sopping. Carefully lay the damp towel over the bottom grid, close the lid, and let it sit for ten to thirty minutes. The heat will turn the water into steam, which will be trapped inside the closed appliance. This steam is incredibly effective at softening and loosening even the most caked-on, sugary batter. After the steaming period, open the lid, remove the paper towel, and much of the grime should wipe away easily with a soft cloth. For any remaining particles in the deep pockets, a soft-bristled brush, like a clean toothbrush or a small kitchen brush, can be used to gently scrub them away. If steaming alone is not enough, a baking soda paste is the next level of cleaning power. Baking soda is a mild alkali and a gentle abrasive, perfect for scrubbing without scratching the delicate non-stick surface. To create the paste, mix a few tablespoons of baking soda with just enough water to form a thick, spreadable consistency. Using a soft cloth or your fingers, apply this paste to the problem areas on the cooled waffle maker grids. Let the paste sit for at least thirty minutes, or even up to an hour, to allow it to work on breaking down the grime. After the waiting period, use a damp cloth to gently scrub the area in a circular motion. The paste will lift the baked-on food. The most important part of this method is the removal. You must be meticulous in wiping away all traces of the baking soda residue with a clean, damp cloth. This may take several passes. Any paste left behind will affect the taste of your next batch of waffles. For a particularly greasy or sticky, brownish buildup from polymerized oil, a different approach is needed. The principle of “like

Cleaning the Waffle Maker: The Best Way to Clean a Waffle Maker Without Damaging It Read More »

Basic Things You Should Get Rid of at Home This Spring

Spring Declutter Checklist: 7 Basic Things You Should Get Rid of at Home This Spring

Spring Declutter Checklist to get you ready for this season, spring arrives with a specific, undeniable energy. It is a season defined by the return of light and the thawing of the earth, a biological signal for renewal that extends into our domestic lives. During the winter, our homes function as bunkers. We stockpile food, we layer ourselves in heavy textiles, and we accumulate items in a subconscious effort to create warmth and security against the cold. However, as the days lengthen and the sun begins to stream through the windows, that accumulated density shifts from being comforting to being suffocating. The light exposes the dust, the piles, and the excess. Spring cleaning is a time-honored tradition, but true restoration cannot begin with a mop or a vacuum. It must begin with subtraction. You cannot clean clutter. Trying to organize excess is a futile exercise in shuffling items from one pile to another. To truly embrace the season, one must engage in a ruthless, systematic purge of the items that have served their purpose and are now merely occupying valuable square footage and mental bandwidth. Entryway The most logical starting point for this seasonal excavation is the entryway, the transitional zone that has likely borne the brunt of winter’s logistical chaos. For months, this space has been a holding cell for bulky parkas, wool scarves, heavy boots, and the grit of road salt. As the temperature rises, the heavy winter gear becomes obsolete, yet it often lingers on hooks and racks well into May, creating a visual bottleneck every time you enter the house. The spring declutter demands a strict audit of this gear before it is packed away. Inspect every coat and pair of boots. If a zipper is broken, a sole is cracked, or a glove is missing its mate, it should not be stored. Storing broken items is simply deferring a decision until next November. Furthermore, the entryway often accumulates a sediment of “homeless” items—flyers, batteries, keys to unknown locks, and dried-out lip balms. Clearing these flat surfaces restores the flow of the home, allowing the energy of the new season to enter without obstruction. Wardrobe Moving from the door to the bedroom, the wardrobe presents the most significant psychological challenge. The “seasonal switch” is not just about moving wool sweaters to the top shelf and bringing linen shirts down; it is an opportunity to confront the reality of your lifestyle. We often hold onto clothes for the person we used to be or the person we aspire to be, rather than the person we are. As you handle each heavy winter garment, ask yourself if you actually wore it this season. If a sweater remained folded in the drawer through the coldest months of January and February, it is highly unlikely to be worn next year. It has become dead weight. Similarly, inspect your spring and summer wardrobe as you unpack it. Elastic degrades over time, and white fabrics often yellow in storage. There is no virtue in keeping a sundress that doesn’t fit or a t-shirt that is permanently stained. By culling the wardrobe now, you reduce the friction of getting dressed every morning, starting each day with a sense of abundance rather than scarcity. The Kitchen The kitchen, the engine room of the home, requires a forensic approach to decluttering, particularly within the pantry and the refrigerator. Winter is the season of comfort cooking and baking. We buy specific spices for holiday meals, bags of specialty flour for cookies, and jars of heavy sauces. By spring, many of these items are stale, expired, or simply forgotten in the dark recesses of the cupboards. An open bag of brown sugar that has turned into a rock, a jar of dried herbs that has lost all scent, or a bottle of festive sprinkles from three years ago are not assets; they are trash. They occupy space that could be used for fresh, seasonal ingredients. The refrigerator door is another common offender, often crowded with the dregs of condiments used for winter roasts. Clearing this space allows for better airflow and makes room for the lighter, fresher produce of spring. The plastic container drawer also demands attention. If a container has no matching lid, or if a lid has no matching bottom, it should be recycled immediately. The daily frustration of searching for a matching set is a micro-stressor that can be completely eliminated in ten minutes of sorting. Bathroom The bathroom medicine cabinet and vanity often escape scrutiny, yet they are repositories for expired chemistry. We tend to accumulate products in a linear fashion, buying new ones before finishing the old. Over the winter, you may have gathered half-empty bottles of heavy moisturizers, cold flu remedies, and chapsticks. Check the expiration dates on everything. Sunscreen from last summer has likely lost its efficacy and should be replaced. Mascara and liquid makeup harbor bacteria and have a short shelf life. Medications that have expired lose potency and can become chemically unstable. Disposing of these items safely clears the visual noise from your morning routine. A streamlined bathroom counter, free of dusty bottles and half-used products, creates a spa-like atmosphere that aligns with the refreshing nature of spring. Living Areas In the living areas, the clutter is often paper and technology. Winter is a time of hibernation, which often leads to the accumulation of “doom piles”—stacks of mail, catalogs, and school papers that we intend to deal with later. Spring, often coinciding with tax season, is the natural deadline for these piles. Be ruthless with paper. Most manuals, bills, and statements are available digitally. Shredding the physical copies liberates physical space and reduces dust, as paper piles are magnets for allergens. Technology clutter is the modern equivalent of the junk drawer. We hold onto cables for devices we no longer own, broken headphones, and old remote controls “just in case.” If you cannot identify what device a cable charges, or if you haven’t used a piece of

Spring Declutter Checklist: 7 Basic Things You Should Get Rid of at Home This Spring Read More »