Blog

Person holding basket with cleaning supplies and vacuum attachment.

6 Essential Supplies for Cleaning Every Home

Keeping your home spick and span is much easier when you have the right Supplies for Cleaning. With so many products on the market, it can be tough to know what’s truly essential. To help you out, we’ve put together a list of six must-have supplies for cleaning that every home should have. 1. Microfiber Cloths Microfiber cloths are a game-changer for cleaning. These versatile cloths are perfect for dusting, wiping down surfaces, and even tackling tough scrubbing jobs. What sets microfiber cloths apart is their super absorbent nature; they can pick up dust and dirt effortlessly, often without the need for any chemical cleaners. This makes them an excellent choice for those who prefer to keep their cleaning routine as natural and eco-friendly as possible. The tiny fibers in these cloths can reach into the smallest nooks and crannies, ensuring a thorough clean every time. One of the standout benefits of microfiber cloths is their reusability. Unlike disposable wipes or paper towels, microfiber cloths can be washed and reused many times, making them a cost-effective and environmentally friendly option. This durability doesn’t come at the expense of effectiveness; even after multiple washes, these cloths retain their ability to clean efficiently. For households looking to reduce waste and save money on cleaning supplies, microfiber cloths are an indispensable part of their supplies for cleaning arsenal. Microfiber cloths are incredibly versatile, they can be used dry for dusting or dampened with water for wiping down surfaces. When used with just a bit of water, they can clean mirrors, windows, and stainless steel appliances to a streak-free shine. Their gentle yet effective cleaning action makes them suitable for a wide range of surfaces, from delicate electronics screens to sturdy kitchen countertops. Investing in a good set of microfiber cloths can revolutionize your cleaning routine, making it easier and more efficient while being kind to the environment.     2. All-Purpose Cleaner An all-purpose cleaner is an indispensable component of any comprehensive collection of supplies for cleaning. This versatile product is designed to tackle a wide range of surfaces, making it perfect for use throughout the home. From kitchen counters, where food spills and grease can accumulate, to bathroom tiles that often face soap scum and grime, an all-purpose cleaner simplifies your cleaning routine by addressing multiple cleaning challenges with a single solution. This versatility means you can streamline your cleaning process, reducing the need for multiple specialized products. When selecting an all-purpose cleaner, it’s essential to choose one that is safe for various surfaces and possesses strong disinfecting properties. This ensures that not only are you removing visible dirt and grime, but you are also eliminating harmful bacteria and germs that can lurk on surfaces. This dual action of cleaning and disinfecting helps maintain a healthier home environment. Whether you’re wiping down high-touch areas like door handles and light switches or giving your kitchen and bathroom a thorough clean, an all-purpose cleaner can handle the job efficiently, saving you time and effort. Using an all-purpose cleaner can significantly reduce the clutter under your sink or in your cleaning closet. Instead of juggling multiple products for different surfaces, you have a single, reliable cleaner that can do it all. This not only makes the cleaning process more straightforward but also more cost-effective, as you are purchasing fewer products overall. For those looking to maintain a clean and sanitary home with minimal hassle, investing in a high-quality all-purpose cleaner is a smart choice. It’s a cornerstone of any well-stocked arsenal of supplies for cleaning, ensuring your home is both spotless and hygienic with minimal effort. 3. Vacuum Cleaner A reliable vacuum cleaner is an essential part of your supplies for cleaning, playing a vital role in maintaining the cleanliness and hygiene of your home. Floors, whether covered in carpets, hardwood, or tiles, can accumulate dust, dirt, and allergens that affect not only the appearance of your home but also the quality of the air you breathe. A good vacuum cleaner efficiently removes these particles, ensuring that your living spaces are spotless and healthier. The powerful suction of a quality vacuum can deeply clean carpets, lifting embedded dirt and pet hair, while gentle enough to care for delicate hardwood and tile surfaces without causing damage. In today’s market, vacuum cleaners come with a range of features designed to enhance their versatility and convenience. When choosing a vacuum, consider models that offer various attachments. These accessories, such as upholstery brushes, crevice tools, and stair attachments, significantly expand the vacuum’s capabilities. Upholstery attachments make it easy to clean furniture and curtains, removing dust and allergens that settle in fabric. Crevice tools are perfect for those narrow, hard-to-reach spots between furniture and along baseboards. Modern vacuum cleaners often come with advanced filtration systems, such as HEPA filters, that capture even the smallest particles and allergens, making them an excellent choice for households with allergy sufferers. Bagless models offer convenience with easy-to-empty dust bins, while bagged versions might be preferable for those looking to minimize exposure to dust during disposal. Investing in a high-quality vacuum cleaner is a smart move for maintaining a clean and healthy home environment.     4. Scrub Brushes Scrub brushes are a vital component in any effective set of supplies for cleaning, especially when it comes to dealing with tough stains and grime. These brushes are designed to provide the necessary scrubbing power to dislodge stubborn dirt that regular wiping can’t handle. For outdoor cleaning tasks, a stiff-bristled brush is indispensable. This type of brush can handle heavy-duty cleaning tasks such as scrubbing decks, patios, and driveways, where dirt and debris can accumulate and become embedded over time. Its robust bristles ensure that you can remove even the most stubborn grime with relative ease. When it comes to indoor cleaning, particularly in bathrooms, a softer scrub brush is essential. Bathrooms are prone to soap scum, mildew, and mineral deposits, especially in showers and bathtubs. A softer brush is gentle enough to use on


6 Essential Supplies for Cleaning Every Home Read More »

Professional maid in uniform diligently cleans office space with supplies.

How to Choose the Best Janitorial Services: 5 Key Factors

Keeping your workspace clean is crucial for maintaining a healthy and productive environment. However, finding the right janitorial services can be challenging with so many options available. To make the selection process easier, here are five key factors to consider. 1. Reputation and Reviews When choosing the best janitorial services, one of the most crucial factors to consider is the company’s reputation and reviews. A strong reputation often indicates high quality and reliability, which are essential for maintaining a clean and healthy workspace. To gauge a janitorial service’s reputation, start by researching online reviews and testimonials from previous clients. Websites like Google, Yelp, and the Better Business Bureau are excellent resources that provide valuable insights into customer experiences. By reading through these reviews, you can identify patterns of consistent positive feedback, which suggests a company that regularly meets or exceeds client expectations. However, it’s equally important to note any recurring issues mentioned in the reviews. These can be red flags that indicate potential problems you might encounter if you choose that service. Common complaints to watch out for include missed appointments, inconsistent cleaning quality, and poor customer service. Addressing these concerns early can save you from future headaches. In addition to online reviews, don’t hesitate to ask the janitorial services for references. Contacting these references can give you a firsthand account of their experiences. Speaking directly with current or past clients provides a more in-depth understanding of what you can expect. Ask specific questions about the reliability of the service, the professionalism of the staff, and how responsive the company is to any issues that arise. Taking these steps to thoroughly vet the reputation and reviews of janitorial services ensures you choose a reliable partner who will maintain high standards of cleanliness in your workspace. This due diligence not only helps in selecting a top-notch service provider but also gives you peace of mind knowing you’ve made an informed decision.     2. Range of Services Offered Different businesses have diverse cleaning needs, making it essential to choose janitorial services that offer a comprehensive range of services tailored to your specific requirements. A versatile janitorial service provider can handle everything from general cleaning tasks to more specialized jobs, ensuring your workspace remains immaculate and meets all necessary standards. By selecting a company that offers a broad spectrum of services, you can avoid the hassle of coordinating with multiple vendors and streamline your cleaning operations. For instance, general cleaning services typically include dusting, vacuuming, and trash removal, which are necessary for maintaining a basic level of cleanliness in any office environment. However, many businesses require more than just routine cleaning. Floor care, including carpet cleaning and hard floor maintenance, is crucial for preserving the longevity and appearance of your flooring. Window washing services can enhance the overall look of your building and improve natural light, contributing to a more pleasant working environment. Additionally, sanitation services are vital, especially in high-traffic areas or industries where hygiene is paramount. Consider a medical office as an example. Such environments demand specialized cleaning services that adhere to stringent health and safety standards. The janitorial services you choose should be equipped to handle these specific tasks, including the proper disposal of medical waste, sterilization of surfaces, and the use of disinfectants that meet healthcare regulations. This ensures that the cleaning processes do not just make the office look clean but also ensure it is safe and compliant with industry standards. By ensuring that the janitorial company you hire has experience and expertise in handling such specialized needs, you protect both your staff and your clients from potential health risks. 3. Experience and Expertise When it comes to selecting the best janitorial services, experience and expertise are paramount. Companies that have been in the industry for a significant amount of time are likely to have more refined processes, a better understanding of customer needs, and the ability to handle various cleaning challenges effectively. An experienced janitorial service provider has honed its techniques and developed a systematic approach to delivering high-quality cleaning results consistently. This level of proficiency ensures that your workspace is not only clean but also maintained to the highest standards. Evaluating the experience of a janitorial service involves more than just looking at the number of years they have been in business. It’s crucial to consider whether the company has experience in your particular industry or type of business. Different sectors have unique cleaning requirements, and a company that understands these nuances can provide more tailored and effective services. For example, a janitorial service with experience in healthcare facilities will be familiar with the rigorous sanitation protocols required, whereas one that primarily services office buildings may not. Ensuring that the janitorial services you choose have relevant industry experience can make a significant difference in the quality and appropriateness of the cleaning they provide. Another critical aspect of experience and expertise is the training and certifications of the janitorial staff. A well-trained team is essential for maintaining high cleaning standards and ensuring that all tasks are performed safely and efficiently. When evaluating janitorial services, inquire about the training programs they have in place for their employees. Do they provide ongoing education and certification opportunities to keep their staff updated on the latest cleaning techniques and safety protocols? A commitment to continuous training demonstrates a company’s dedication to excellence and ensures that their team is equipped with the knowledge and skills necessary to meet your cleaning needs effectively.     4. Customized Cleaning Plans Every business operates differently, with unique schedules, environments, and specific cleaning requirements. Because of this, a one-size-fits-all approach to cleaning is rarely effective. The best janitorial services understand this and offer customized cleaning plans tailored to fit the unique needs of each client. By providing flexibility in their services, these companies ensure that your workspace remains clean and well-maintained without disrupting your daily operations. A customized cleaning plan takes into account various factors specific to your business. For instance, high-traffic areas may

How to Choose the Best Janitorial Services: 5 Key Factors Read More »

Close-up of a hand holding a water bottle, dressed in casual attire.

How to Prevent Heatstroke with Cleaning: 5 Essential Tips

How to Prevent Heatstroke While Cleaning in Summer Heatstroke is a serious condition caused by your body overheating, usually after prolonged exposure to high temperatures or physical exertion in the heat. Cleaning is real physical work, and on the hottest days it can push your body too far. These five essential tips help you prevent heatstroke while keeping your home spotless, even in a summer heat wave. 1. Clean During the Coolest Hours of the Day Schedule the heaviest chores for early morning, just after sunrise, or late evening, when temperatures are lowest. Midday is the most dangerous window: exertion plus peak heat can quickly lead to dehydration and heat illness. Save lighter indoor tasks for the afternoon, and leave vacuuming, mopping, and whole-room resets for cooler hours. Shifting your cleaning routine by a few hours cuts your heat risk dramatically and keeps you more productive while you work. Your body also needs time to adjust at the start of the season. Health Canada advises easing into activity gradually during the first hot weeks rather than diving straight into a marathon cleaning session, so build up your tolerance before you tackle the big summer jobs. 2. Drink Water Before You Feel Thirsty Your body loses fluids and electrolytes through sweat during active cleaning, and thirst is not a reliable early signal. Keep a water bottle beside you and sip steadily, even if you do not feel dry. Skip caffeinated and alcoholic drinks while cleaning in the heat, since both act as diuretics and speed up dehydration. Adding a slice of lemon or cucumber makes water more appealing, and setting a reminder to pause for a drink every 20 to 30 minutes keeps your intake steady. Plain water is the best choice while you work. Fill a bottle before you start, keep a refill in the fridge, and finish a full glass whenever you take a break rather than waiting until the task is done. If you take daily medication, remember that many medicines can make you more prone to dehydration or overheating on hot days, so plan extra water breaks around them. 3. Wear Lightweight, Light-Coloured Clothing What you wear changes how fast you overheat. Choose loose-fitting cotton or other breathable fabrics that let air circulate, and favour light colours: dark fabric absorbs the sun’s heat, while light fabric reflects it. If you are cleaning outdoors or near sunny windows, add a wide-brimmed hat to shield your face, neck, and shoulders from direct sun and to lower the amount of heat your body absorbs. If your clothes become soaked with sweat, change into a dry layer before you keep going. Wet fabric clings to the skin and stops air from reaching it, which makes it harder for your body to cool itself and speeds up overheating. 4. Keep Air Moving With Fans or Air Conditioning A cool room makes strenuous cleaning far safer. If you have air conditioning, set it to a comfortable level before you start. Without AC, place fans near windows and doorways to pull in cooler air and push warm air out, ideally during the cooler morning and evening hours. Close blinds and curtains over sun-facing windows so direct sunlight cannot turn your workspace into an oven. Night-time helps as well: open windows after sunset to let cooler air in, then close the blinds again before the morning sun climbs. Starting the day with a cooler home means your cleaning session begins safely even if the afternoon turns hot. 5. Take Breaks and Know the Warning Signs Pause often, rest in the coolest room, and rehydrate during every break. A damp cloth or a wrapped ice pack on your forehead, neck, or wrists brings your core temperature down quickly. Most importantly, listen to your body and stop at the first sign of trouble. Headache, dizziness, or lightheadedness Nausea or muscle cramps Heavy sweating followed by cool, clammy skin Weakness or unusual fatigue Pace yourself and rest before you feel exhausted, not after. If you live with or care for older adults or young children, keep an eye on them too: the CDC notes that some people face greater heat risk than others, and checking on family, friends, and neighbours during hot spells is a simple way to keep everyone safe. Heat stroke is a medical emergency. As Health Canada explains in its extreme heat guidance, call 911 immediately if someone has a high body temperature and is confused, unconscious, or has stopped sweating. For everyday prevention, the CDC’s heat and health advice comes down to the same habits: stay cool, drink plenty of fluids, and know the symptoms of overheating. Time of day Why it is safer Best tasks Early morning Coolest air of the day Vacuuming, mopping, laundry Late evening Sun low and heat easing Bathrooms, kitchens, bedrooms Midday Hottest hours Rest, hydrate, light tasks near a fan Heat Safety FAQ What is the difference between heat exhaustion and heat stroke? Heat exhaustion is the milder stage, with heavy sweating, weakness, nausea, and headache. Heat stroke is a life-threatening emergency marked by a very high body temperature, confusion, or a stop in sweating; call 911 right away if you suspect it. Is it safe to clean during a heat warning? Yes, if you clean in the coolest hours, keep sessions short, drink water steadily, and rest in an air-conditioned or shaded spot. When the heat is extreme, let the chores wait and cool down instead. What should I do if I feel dizzy or nauseous mid-clean? Stop immediately, move to a cool place, and drink water. If symptoms worsen or you become confused, have someone call for emergency help while you cool down with damp cloths. Can I still catch up on chores during a heat warning? Yes, but keep sessions short and stick to the coolest hours and the most air-conditioned rooms. When a heat warning is in effect, staying cool matters more than finishing the to-do list. The safest way to get through

How to Prevent Heatstroke with Cleaning: 5 Essential Tips Read More »

Wet shower tiles in bathroom

How to Keep Your Bathroom Mold-Free: Top 5 Tips

How to Keep Your Bathroom Mold-Free: Top 5 Tips Bathrooms are the most moisture-prone room in any home, which makes them the most likely place for mold to take hold. Mold thrives in damp, humid conditions, and once it settles into grout, caulking, or a shower curtain, it can be stubborn to remove. Health Canada notes that people living in homes with mold and damp conditions are more likely to experience health effects, which is why prevention deserves a spot in your weekly routine. These five tips will help you keep your bathroom mold-free all year round. Tip 1: Ventilate After Every Shower Proper ventilation removes the excess humidity that mold needs to grow. Turn on the exhaust fan during and after showers, and leave it running for a while so the moist air is pulled out of the room instead of settling on walls and tiles. If your bathroom has no exhaust fan, consider installing one, especially if you deal with recurring mold. Opening a window or leaving the door slightly ajar also helps air circulate. Tip 2: Clean Tiles, Grout, and Curtains on a Schedule Tiles and grout retain moisture, so they are prime spots for mold. Scrub them regularly with a mixture of water and bleach, or use a specialized mold cleaner, and pay extra attention to corners and edges where mold tends to hide. The shower curtain needs attention too: wash or replace it regularly, and if you prefer fabric curtains, choose machine-washable ones and dry them completely after each wash. A simple weekly routine keeps the workload small: Squeegee the walls and glass after each shower. Wipe down wet surfaces with a dry cloth or towel. Scrub tiles and grout weekly with a mold cleaner. Wash or replace the shower curtain every few weeks. Tip 3: Fix Leaks and Seals Right Away Leaks create the damp conditions mold loves, and some leaks go unnoticed for a long time. Check faucets, pipes, and the base of the toilet for signs of water pooling, and inspect the seals around your bathtub and sink. Caulking can crack or peel over time, letting water seep into gaps, so reapply it as needed. Prompt fixes keep the bathroom dry and stop problems before they start. If keeping up with daily maintenance is a challenge, a regular maid cleaning visit keeps surfaces wiped and monitored between your own deep sessions. Tip 4: Choose Mold-Resistant Products Mold-resistant products make the bathroom less hospitable to spores. Mold-resistant paint on walls and ceilings contains antimicrobial agents that inhibit growth in moisture-exposed areas. Mold-resistant shower curtains are designed to repel water and dry quickly, and fast-drying bath mats with mold-resistant features stop water from soaking in. Small investments like these add a durable layer of protection on top of your cleaning routine. Tip 5: Keep Humidity Below 50 Percent Humidity control is the backbone of mold prevention. Use a dehumidifier in the bathroom after showers or baths, and monitor conditions with a hygrometer, aiming to keep humidity below 50 percent. Dry wet towels outside the bathroom instead of letting them sit on hooks. Health Canada’s guidance on mould and moisture makes the same point: fix moisture problems right away and control humidity to keep mold from growing. When to Call in the Professionals Even with the best habits, busy schedules make it hard to stay on top of every surface. That is where professional help comes in. Toronto Shine Cleaning’s deep cleaning services are designed to tackle mold-prone areas, scrubbing every corner of the bathroom so spores do not get a foothold. The team also handles everything from regular maintenance to move-in and move-out cleaning, so your whole home stays spotless. For extensive mold growth, Health Canada’s indoor air contaminants information recommends considering professional help, and a thorough clean is the right first step. Prevention comes down to one word: consistency. Ventilate, clean, fix leaks, choose mold-resistant products, and control humidity, and your bathroom will stay fresh and healthy. If you would rather leave it to the pros, call Toronto Shine Cleaning at (647) 424-0355 or read what local customers say in our reviews. Bathroom Mold Prevention at a Glance Prevention step What to do How often Ventilation Run the exhaust fan during and after showers Every shower Surface cleaning Scrub tiles and grout with bleach water or mold cleaner Weekly Curtain care Wash or replace the shower curtain, dry completely Every few weeks Leak checks Inspect faucets, pipes, toilet base, and caulking Monthly Humidity control Run a dehumidifier, keep a hygrometer below 50 percent After showers Frequently Asked Questions About Keeping Bathrooms Mold-Free How often should I clean my bathroom to prevent mold? Aim to wipe wet surfaces after every shower, scrub tiles and grout weekly, and wash or replace the shower curtain every few weeks. Monthly leak checks and caulking inspections close the gaps that moisture can sneak through. Is bleach the best way to remove mold from grout? A mixture of water and bleach is a common and effective choice for tile and grout, and specialized mold cleaners also work well. Test any product on a small area first, and always ventilate the room while you clean. What humidity level prevents bathroom mold? Keep humidity below 50 percent. A hygrometer gives you real-time readings, and a dehumidifier running after showers or baths removes excess moisture before mold can settle. Can professional cleaning remove bathroom mold? Yes. Professional deep cleaning scrubs mold-prone areas such as grout, corners, and fixtures with the right products and techniques. For very extensive mold growth, Health Canada recommends considering professional help beyond routine cleaning. Do exhaust fans really make a difference? They do. Fans pull moist air out of the room and expel it outside, so humidity does not settle on surfaces where mold can take root. Running the fan during and after every shower is one of the simplest prevention habits there is.

How to Keep Your Bathroom Mold-Free: Top 5 Tips Read More »

Color-coordinated closet with tidy clothes and organized shoe shelves.

How to Organize and Clean Closet in 5 Easy Steps

A clean closet is more than just an organized space-it’s a breath of fresh air every time you get dressed. If your closet has turned into a chaotic mess, don’t worry! With these five easy steps, you’ll transform your cluttered space into a neat and tidy haven. Step 1: Clear Out and Categorize First things first, empty your closet completely. Yes, everything needs to come out! This allows you to see exactly what you have and start fresh with a clean slate. Once everything is out, begin categorizing your items into distinct groups. These groups might include clothes, shoes, accessories, and seasonal items. By categorizing, you create a clear inventory of what you own, which not only helps in organizing but also makes it easier to decide what to keep and what to let go of. As you sort through each item, think about its purpose and place in your wardrobe. Do you have clothes that you wear regularly, or are there pieces that have been pushed to the back for years? Assess your shoes and determine which pairs you actually use versus those that are simply taking up space. For accessories, consider if they still complement your current style or if they could be better utilized by someone else. Seasonal items, such as winter coats or summer swimwear, should be grouped together so they can be stored more efficiently when not in use. This process might feel overwhelming at first, but taking the time to categorize and clear out your closet is an essential step towards achieving a truly clean closet. It provides a moment of reflection on your current wardrobe and helps you make more intentional choices about what you keep. Plus, with everything laid out in front of you, you’ll have a better understanding of what you have and what you might need, making future shopping trips more purposeful and less impulsive.     Step 2: Purge What You Don’t Need Now that you’ve categorized your items, it’s time to dive into the decluttering process to ensure you achieve a truly clean closet. This step involves some tough decision-making, but it’s essential for creating an organized space. Start by examining each item and asking yourself critical questions: Have I worn this in the last year? Does it still fit and flatter me? Is it in good condition? These questions help you assess the true value and utility of each piece in your wardrobe. As you go through your belongings, create three distinct piles. The first pile is for items you want to keep. These are pieces that you love, wear often, and that still look good on you. The second pile is for donations. These items might not work for you anymore, but they are still in good condition and could be useful to someone else. The third pile is for items that need to be tossed. These are the clothes, shoes, or accessories that are too worn out, damaged, or outdated to be worn again. Be honest with yourself during this process. It can be tempting to hold onto items for sentimental reasons or with the hope that they might come back into fashion or fit again someday. However, if you haven’t worn something in a year, it’s likely time to let it go. Holding onto unnecessary items only adds to the clutter and makes it harder to maintain a clean closet. This purging step is crucial because it dramatically reduces the amount of stuff in your closet, making it easier to organize what remains. A clean closet isn’t just about neatness-it’s about efficiency and functionality. By removing what you don’t need, you create space for the items you truly value and wear, making your daily routine smoother and more enjoyable. Step 3: Clean the Closet Space With your closet completely empty, now is the perfect time to give it a thorough cleaning. This step is essential to achieving a truly clean closet. Begin by dusting the shelves to remove any accumulated grime or cobwebs. Wipe down the walls to ensure that no dust or dirt remains, creating a fresh and clean surface for your belongings. Don’t forget to vacuum or sweep the floor, getting into all the nooks and crannies where dust might have settled. Once the major cleaning is done, consider adding a fresh scent to your closet to keep your clothes smelling wonderful. Cedar blocks are a fantastic option, as they not only impart a pleasant aroma but also help repel moths and other pests. You could also use sachets filled with lavender or other natural fragrances to maintain a fresh scent. A clean closet truly begins with a clean space. This deep cleaning step ensures that the environment where you store your clothes and accessories is hygienic and pleasant. It also sets the stage for maintaining a tidy and organized closet in the long term. With everything spotless and fresh, you’ll be motivated to keep your closet neat and orderly, making it a joy to use every day. So, take the time to clean every corner and surface of your closet space. This effort will pay off when you start placing your categorized items back into a pristine, clean closet, ready to be arranged in a way that maximizes both space and functionality.     Step 4: Organize Smartly Now that your closet is clean and your items are categorized, it’s time to put everything back in an organized manner to maintain a clean closet. Start by using uniform hangers for your clothes. This not only gives a tidy and cohesive look but also helps maximize the available space. Uniform hangers allow your clothes to hang at the same level, making it easier to browse through your wardrobe and find what you need quickly. Next, sort your clothes by category and color. Grouping similar items together, such as all shirts in one section and pants in another, makes it much easier to locate specific pieces. Within each category, arrange the items

How to Organize and Clean Closet in 5 Easy Steps Read More »

Cartoon man sweeping floor with focus on hands and broom.

How to Create a Weekly Cleaning Schedule: 5 Tips for Success

How to Create a Weekly Cleaning Schedule That Sticks A tidy home can feel out of reach when your calendar is full, but a well-designed weekly cleaning schedule changes that. Instead of vague intentions, you get a simple rotation of chores that keeps every room presentable without marathon cleaning sessions. These five steps help you create a weekly cleaning schedule that fits your real life and actually holds up. The payoff goes beyond appearances. With a plan, chores take less mental energy because you no longer decide on the spot what to clean, and nothing gets forgotten for weeks at a time. 1. Assess Your Home Room by Room Walk through your home before you plan anything and note what each space needs. Kitchens and bathrooms are high-traffic zones that demand frequent attention, while living rooms and bedrooms need lighter weekly upkeep plus occasional deeper sessions. Do not forget entryways and hallways: they are the first thing guests see and the easiest places for dirt to gather. Less-used rooms, such as guest bedrooms and storage areas, can go on a monthly rotation. This quick audit tells you exactly where your effort needs to go. It also helps to note how each room is used. A home with young children or pets will dirty floors and upholstery faster than a quieter household, and a home office needs its own light weekly upkeep. Match the schedule to the way your household actually lives rather than to a template you found online, and it will feel far less like a chore. 2. Split Chores by Frequency Not everything needs doing every day, and understanding that is the secret to a balanced schedule. Keep a few daily non-negotiables, protect the weekly chores that stop grime from building up, and let monthly tasks handle the rest. One note on technique: cleaning and disinfecting are different jobs. As the CDC explains in its home cleaning guidance, regular cleaning with soap or detergent removes most germs, and disinfecting is mainly needed when someone is sick or at higher risk. Frequency Typical tasks Goal Daily Dishes, countertops, quick tidy of living areas Stop mess from piling up Weekly Vacuum, mop, bathrooms, dusting Keep grime and allergens in check Monthly Windows, bedding, closets, vents Deep refresh of every room Write the list down before you schedule it, then trim it. Two or three daily tasks, four to six weekly chores, and a handful of monthly projects are enough to keep most homes genuinely clean. If your first draft looks longer than that, the schedule is probably too ambitious, and an ambitious schedule is the easiest one to abandon. 3. Set Realistic Goals for Each Day The fastest way to abandon a cleaning schedule is to make it too ambitious. Be honest about your time: if mornings only give you 15 minutes, plan a small task for that window instead of a full room reset. Focus on one room or one group of tasks per day, such as the kitchen on Monday and the bathrooms on Tuesday. Small wins completed regularly beat grand plans that collapse by week two. Monday: kitchen counters, appliances, floor Tuesday: showers, mirrors, toilets Wednesday: vacuum and dust living areas Thursday: bedrooms and change bedding Friday: entryway, hallway, quick floor mop Time-box each task so a single chore cannot eat the whole evening. Set a timer for 15 minutes of tidying, finish one room per session, and stop when the timer rings. You can always schedule a second pass later in the week, and starting becomes easier when every session has a clear ending instead of an open-ended to-do list. 4. Keep the Plan Flexible Life interrupts the best routines, so build in room to move. If Wednesday’s vacuuming gets bumped by a late meeting, shift it to Thursday and move on without guilt. A digital calendar or planner makes this easy: drag tasks to new days, set reminders, and keep one clear view of what is due. A flexible weekly cleaning schedule reduces stress instead of adding to it. Seasonal tweaks keep the plan honest. Summer adds patio furniture and ceiling fans to the list, fall brings leaf dust and muddy entry mats, and winter concentrates grime at doorways and on floors. Review the schedule monthly and adjust task lengths and frequencies whenever your energy or your home’s needs change. 5. Share the Load With a Chore Chart Cleaning does not have to be a solo act. Assign each household member specific tasks, which spreads the work and teaches kids organization and responsibility. Put a chore chart somewhere visible, rotate assignments weekly or monthly so nobody gets stuck with the worst jobs, and the whole house stays cleaner with far less resentment. Moisture and dust also deserve a spot on the chart: running the bathroom fan after showers and wiping wet surfaces are small habits that keep indoor air healthier, as Health Canada’s guide to indoor air contaminants notes. Make the chart concrete: list each person’s name, their tasks, and the day each job is due, then review it together once a week. When children help choose their own chores, they are far more likely to complete them, and rotating jobs teaches every skill in the house instead of typecasting one person as the cleaner. Cleaning Schedule FAQ What if I miss a scheduled cleaning day? Reschedule the task for the next open slot and do not stress about it. A schedule that allows catch-up days is far more sustainable than one that demands perfection. How many cleaning sessions do I need each week? Most homes do well with one focused room per day plus a 10-minute daily tidy. Adjust until the workload feels steady rather than overwhelming, and scale back if you keep skipping days. Should I clean or disinfect my bathrooms and kitchen? Clean these rooms regularly with soap or detergent to remove dirt and most germs, and disinfect high-touch spots when someone in the home is sick or has a weakened

How to Create a Weekly Cleaning Schedule: 5 Tips for Success Read More »

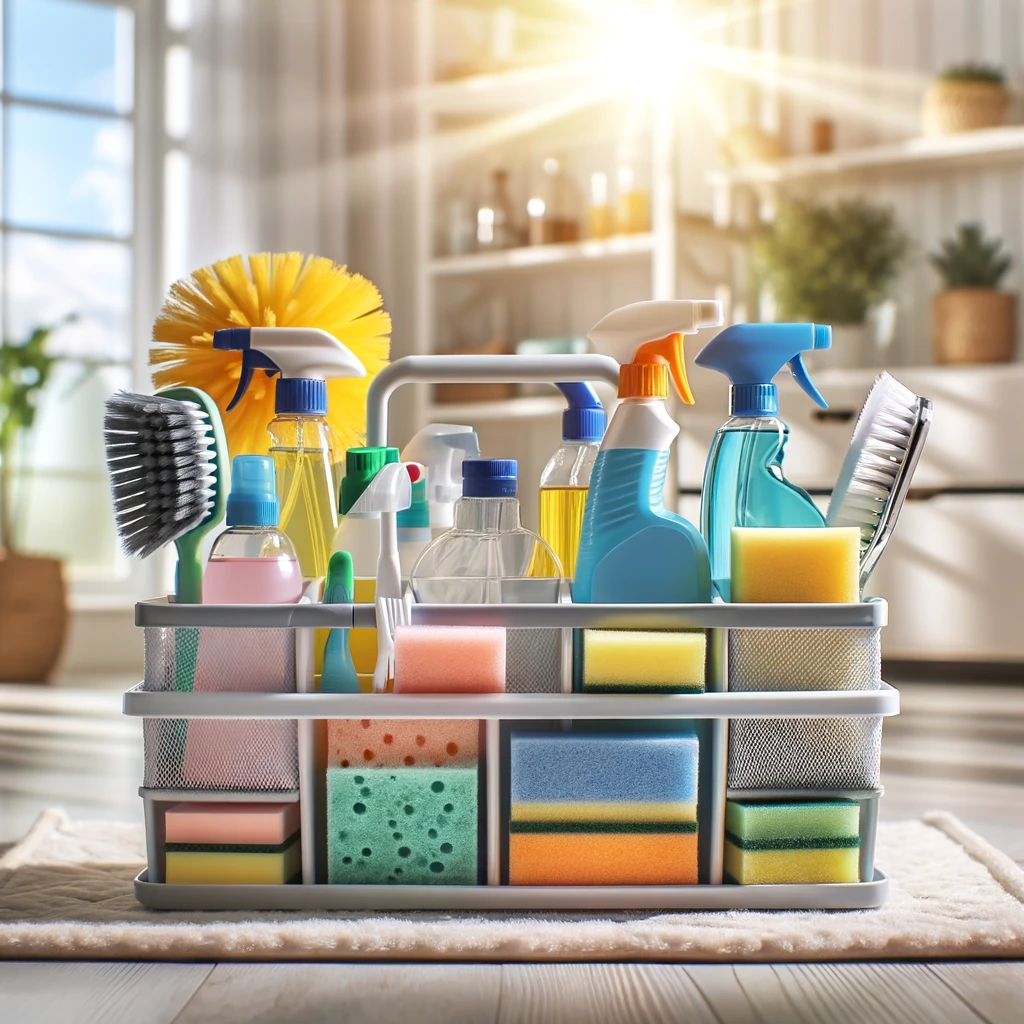
Organized cleaning caddy with supplies, sprays, and brushes.

How to Organize Cleaning Supplies: 6 Simple Tips

How to Organize Cleaning Supplies: Six Systems That Save Time When you organize cleaning supplies well, every chore gets faster: no hunting for the glass cleaner, no digging through a jumbled cabinet, no buying duplicates of what you already own. A few simple storage systems cut clutter, protect your products, and make the whole routine easier to start. Here are six practical tips to organize cleaning supplies and keep them that way. 1. Carry a Cleaning Caddy From Room to Room A caddy with compartments holds your everyday products and tools in one portable container, so you stop shuttling back and forth between rooms. Keep sprays, brushes, cloths, and sponges in separate compartments to prevent spills and lost items. One caddy per floor is a simple upgrade: grab it, clean, and return it to its spot when you finish. Restocking it after each use means it is always ready for the next session. Keep each caddy lean. An all-purpose cleaner, a glass cleaner, microfiber cloths, a scrub brush or sponge, and a pair of gloves cover almost every everyday job. If you reach for an extra product week after week, add it; if something never gets used, move it to the backup bin instead of letting the caddy turn into a junk drawer. 2. Label Bottles, Bins, and Shelves Labels remove guesswork for everyone in the household. Mark spray bottles, containers, and storage bins with their contents so family members can find what they need and put it back in the right place, which keeps clutter from creeping back. A label maker works well, but adhesive tape and a marker are just as effective. Labels also help you use products correctly: check the original label before mixing or diluting any cleaner, and keep products in their own containers. Keeping products in their original containers matters for safety. Transferring cleaners into food jars or unmarked bottles is risky in a busy household, because someone can easily mistake the contents, and original packaging preserves the instructions you need in an emergency. 3. Build a Dedicated Cleaning Closet or Cabinet Even a small closet or one section of a larger cabinet can become a proper home for your supplies. Use shelves for sprays and cloths, hooks for brushes and dusters, and bins to group similar items such as sponges and scrubbers. A tension rod mounted inside the door or between shelves holds spray bottles upright and frees floor space for the vacuum and mop. Safety comes first in this space: as Health Canada advises on household chemical safety, store cleaning products out of sight and reach of children, and never mix different products. Arrange the closet by how often you clean. Everyday items go at eye level, heavy bottles and the vacuum live on the floor, and seasonal or rarely used products sit on the top shelf. Grouping supplies into a bathroom kit and a kitchen kit also lets you grab a full set in one trip instead of hunting through the whole cabinet. 4. Use Clear Containers for Small Items Clear, stackable bins let you see what is inside without opening everything, which saves time and stops you from rebuying supplies you already have. They work well for sponges, brushes, cloths, and backup stock, and they protect smaller items from dust and moisture. Stack them in closets, under sinks, or on shelves to make the most of vertical space. Before buying organizers, measure the space and count what you actually store. Oversized bins waste shelf room, while undersized ones encourage stuffing, and matching container sizes stack neatly and make the whole cabinet look calmer. 5. Rotate Stock So Older Products Get Used First Disinfectant wipes, sprays, and cleaning solutions can lose strength over time, so place newest purchases at the back and older products at the front of the shelf. That way you naturally use the oldest stock first and throw away less. Extend the same habit to tools: rotate mop heads, sponges, and cloths so wear is spread evenly and nothing is overused. When you do disinfect, follow the product label; the CDC’s guidance on cleaning and disinfecting your home recommends cleaning surfaces first and using products according to their instructions. Make it a monthly habit to check dates on disinfectants and to pull anything cloudy, separated, or past its date. Cloths and wipes that smell sour should be washed or replaced, since a dirty tool simply spreads grime to the next surface it touches. 6. Hang Brooms, Mops, and Dustpans Long-handled tools stored on the floor get knocked over, trap moisture, and make a utility room look chaotic. Mount hooks, a pegboard, or a wall rack so brooms, mops, and dustpans hang off the ground and within easy reach. Pegboards are especially flexible: rearrange the hooks and shelves whenever your tool collection changes. Whatever system you choose, leave space between items so air can circulate and heads and bristles can dry between uses. Wet mop heads and sponges piled together are the fastest route to musty tools and a fresh smell problem in the closet. Round up stray products from every room into one pile Toss empty bottles and worn-out sponges and cloths Wipe down the caddy, shelves, and containers Return each item to its labeled, designated spot Supply type Best storage Tip Sprays and disinfectants Labeled caddy or tension-rod shelf Keep out of reach of children Backup stock Clear stackable bins Newest bottles to the back Cloths and sponges Clear containers or hooks Air-dry before storing Brooms and mops Wall hooks or pegboard Store off the floor Cleaning Supply Storage FAQ Where should I store cleaning supplies when I have young children? Put products on high shelves or in cabinets with child safety locks, out of sight and reach of kids. Never store cleaners next to food, and keep them in their original containers with labels intact. Do cleaning products go bad? Many disinfectants and cleaning solutions lose effectiveness over time, so check dates and use a first-in,

How to Organize Cleaning Supplies: 6 Simple Tips Read More »

Person scrubbing modern oven interior with gloves and cleaning spray.

How to Deep Clean Your Kitchen: 7 Expert Tips

Why Your Kitchen Needs a Deep Clean Your kitchen is the hardest-working room in the house, and grime builds up fast: grease around the stove, crumbs in drawers, sticky countertops, and a sink that sees more traffic than any other surface. A deep clean does more than make your space sparkle. It removes hidden bacteria and grease that everyday wiping misses, reduces the risk of foodborne illness, and helps your appliances last longer. Here is how to deep clean your kitchen with seven expert steps. Seven Expert Steps to Deep Clean Your Kitchen Set aside a few hours, gather your supplies, and work through the kitchen one zone at a time. Start with the highest points and finish with the floors so you never clean the same surface twice. 1. Gather Your Cleaning Supplies Stock up before you start: an all-purpose cleaner for most surfaces, a degreaser for the stove and backsplash, microfiber cloths, sponges, glass cleaner for windows and cabinet fronts, dish soap, and a mop and bucket for the floors. Having everything ready keeps the job moving and saves you time. 2. Declutter and Organize Clear everything off the countertops, cabinets, and pantry shelves. Throw away expired products and donate anything you no longer use. With clear surfaces you can reach every corner, and an organized kitchen is easier to keep clean day to day. 3. Tackle the Appliances Remove everything from the refrigerator and wipe the shelves, drawers, and handles with an all-purpose cleaner. Clean the oven with a commercial oven cleaner, letting it sit to loosen baked-on residue, and scrub the racks separately. For the microwave, wipe the interior with dish soap and water, then the buttons and handle. Run an empty dishwasher cycle with a dishwasher cleaner to remove odors and buildup. 4. Clean the Cabinets and Drawers Empty each cabinet and drawer, then wipe the interiors with a mild cleaner and a damp cloth. Use a degreaser on sticky buildup, and do not forget the cabinet doors and handles, which collect grime from constant touching. 5. Scrub the Surfaces Clean countertops with a product matched to the material: a stone cleaner for granite, for example, protects the finish and keeps its shine. Degreaser works best on the backsplash around the stove. Wipe the walls near cooking and food preparation areas, where splatters and grease settle. 6. Shine the Sink Scrub the basin and faucet with dish soap, then polish with glass cleaner for a streak-free shine. For stubborn stains, use a commercial sink cleaner, let it sit for a few minutes, and scrub again. A gleaming sink makes the whole kitchen feel clean. 7. Sweep and Mop the Floors Sweep or vacuum the entire floor, reaching corners and under appliances where dust collects. Mop with a solution suited to your flooring, working from the farthest corner toward the exit so you do not step on wet areas. Pay extra attention to high-traffic zones near the stove and sink. Kitchen Deep Cleaning Quick Reference Refrigerator: empty, wipe shelves and drawers, clean handles. Oven: commercial cleaner, let it sit, scrub the racks. Microwave: damp cloth with dish soap, then wipe the keypad. Dishwasher: run an empty cycle with a dishwasher cleaner. Cabinets and drawers: empty, wipe interiors, degrease handles. Countertops and backsplash: surface-matched cleaner plus degreaser. Sink: dish soap scrub, glass cleaner polish, spot treatment for stains. Floors: sweep first, then mop with a floor-appropriate solution. Kitchen Zone Main Task Best Tool Refrigerator Empty and wipe all surfaces All-purpose cleaner Oven and racks Loosen baked-on residue Commercial oven cleaner Microwave Remove food splatters Dish soap and damp cloth Countertops Deep clean the work surface Material-matched cleaner Backsplash Cut through grease Degreaser Sink Scrub and polish Dish soap plus glass cleaner Floors Remove ground-in dirt Mop and floor cleaner Frequently Asked Questions About Deep Cleaning a Kitchen How often should I deep clean my kitchen? A full deep clean every three to six months keeps grease and grime under control, while a lighter weekly clean handles counters, sink, and floors. High-use kitchens may need a deep clean every season, especially if you cook often or entertain regularly. What is the difference between daily cleaning and deep cleaning? Daily cleaning wipes surfaces and does the dishes. Deep cleaning moves everything out, cleans inside appliances, degreases the backsplash, scrubs drawers and cabinets, and washes the floors properly. It reaches the buildup that daily wiping misses and keeps the kitchen hygienic and fresh. Is a deep-cleaned kitchen really safer for food preparation? Yes. The CDC explains that following safe food handling and cleaning practices reduces the risk of food poisoning, and Health Canada publishes the same guidance for Canadian kitchens. Removing grease, crumbs, and bacteria from counters, sinks, and appliances keeps the surfaces where you prepare food much safer. Can professional cleaners deep clean my kitchen? Yes. Toronto Shine Cleaning provides a thorough deep cleaning service that covers appliances, cabinets, surfaces, and floors using professional products and techniques. It is a convenient option when you are short on time or the kitchen needs more than a weekend DIY session. Deep Clean Your Kitchen With Toronto Shine Cleaning A clean kitchen is healthier, more efficient, and more pleasant to cook in. If the job feels overwhelming, or you simply want it done right, the deep cleaning service from Toronto Shine Cleaning takes your kitchen from grimy to gleaming. Pair it with a regular maid service to keep it that way between visits. Find transparent pricing online and check if we clean in your area on our locations page. Call (647) 424-0355 today.

How to Deep Clean Your Kitchen: 7 Expert Tips Read More »

Person organizing room, separating items into Keep, Donate, Trash, Relocate boxes.

How to Declutter in Oshawa: 6 Tips for a More Organized Home

How to Declutter in Oshawa: Room-by-Room Tips Clutter builds up quietly: the drawer of odds and ends, the closet of clothes you never wear, the counter where mail lands and stays. Whether you are preparing for a move, welcoming a new family member, or simply craving a calmer space, decluttering in Oshawa does not require a full-weekend purge. These six practical tips will help you sort, donate, and organize your way to a more peaceful home. 1. Start Small and Stay Focused Attempting to declutter the whole house at once is a recipe for burnout. Pick one drawer, one closet, or one corner and finish it completely before moving on. A finished kitchen drawer gives you a quick win that builds momentum, and working one zone at a time stops you from simply shuffling items between rooms. Small, finished projects add up faster than an abandoned grand plan. 2. Sort With the Four-Box Method Label four boxes Keep, Donate, Recycle, and Trash, then handle every item once. Keep items you use regularly or truly value. Donate anything in good condition that you no longer need: in Oshawa, Goodwill, the Salvation Army, and local shelters accept clothing, household goods, and furniture that can serve someone else. Recycle paper, glass, and accepted plastics through Oshawa’s recycling program, and toss broken or unusable items according to the city’s waste disposal guidelines. Some clutter is hazardous, not just trash; Health Canada’s household chemical safety guidance covers how to handle old paints, cleaners, and similar products safely. Box What goes in it Where it ends up Keep Used regularly or deeply valued Stays in a designated home spot Donate Good condition, no longer needed Goodwill, Salvation Army, local shelters Recycle Paper, glass, accepted plastics Oshawa recycling programs Toss Broken or unusable items Oshawa waste disposal guidelines Anything that belongs elsewhere goes in a Relocate box and returns to its proper room before you start the next zone. 3. Digitize Documents and Photos Paper is one of the biggest sources of household clutter. Gather bills, receipts, medical records, legal papers, and printed photos, then scan them with a scanner or a mobile scanning app. Organize the files into clearly labeled folders on your computer or cloud storage, with separate folders for finances, records, and family photos. Digital copies protect important documents from loss, fire, and water damage, and they make sharing paperwork instant instead of a photocopying errand. Once files are backed up, shred the paper you no longer need to keep. 4. Maximize Storage in Every Room Good storage keeps clutter from returning. Wall shelves put vertical space to work in living rooms, kitchens, and bedrooms; labeled, stackable bins corral toys, books, and seasonal clothing under beds and in closets; and closet organizers add shelves, drawers, and rods that keep clothes and shoes visible and reachable. Hooks and racks on walls or behind doors hold coats, bags, and towels without eating up floor space. Think in zones when you set up storage. Keep things where they are used, such as charging stations and school bags near the entry, cleaning gear in a utility closet, and hobby items in one dedicated cupboard. When every category has a home, putting things away takes seconds instead of a decision. 5. Make Decluttering a Weekly Routine Decluttering is maintenance, not a one-time event. Block an hour each week or a longer session monthly and treat it like an appointment, starting with high-traffic areas such as the entryway, kitchen counters, and living room, then moving to bedrooms and closets. Small daily habits do most of the work: clear the counters before bed, sort mail straight over the recycling bin, and put clothes away the day you wear them. Clear kitchen counters and the sink before bed Open mail over the recycling bin and act on it immediately Keep one donation bag in the closet for items you spot during the week Hang coats and put shoes away as soon as you walk in 6. Enjoy the Calmer Space You Created A tidy home is not only easier to clean, it supports your well-being; the CDC’s overview of mental health describes well-being as a core part of overall health. Decluttering removes visual noise, cuts the time you spend searching for things, and makes daily life feel lighter. Celebrate each finished zone and keep the routine going so the clutter stays gone. Decluttering FAQ Where can I donate furniture and household items in Oshawa? Goodwill, the Salvation Army, and local shelters and charities accept clothing, household goods, and furniture in good condition. Contact the location first to confirm what it currently takes and any pickup options. What should I do with items Oshawa’s regular pickup will not collect? Check the city’s waste disposal guidelines for bulky items and special materials. Household chemicals such as old paints and cleaners should go through designated safe disposal rather than regular trash. How long does decluttering a whole house take? It depends on how much you own, but working zone by zone for an hour or two most weeks, most homes show real progress within a month. Consistency matters more than speed. Once the clutter is gone, a professional clean makes the space shine. Toronto Shine Cleaning offers deep cleaning and move-in and move-out cleaning across Oshawa and the GTA; see our service areas to confirm we cover your neighbourhood. Call (647) 424-0355 to book your visit.

How to Declutter in Oshawa: 6 Tips for a More Organized Home Read More »

Spotless modern bathroom with white tiles and clear mirror in Mississauga.

How to Easily Clean Your Bathroom in Mississauga: 6 Essential Tips

Why a Clean Bathroom in Mississauga Matters Cleaning your bathroom can feel like a chore, but with the right routine it is quick and manageable. Bathrooms face constant moisture, which leads to soap scum, hard water stains, and mildew if left unchecked. These six essential tips will help you keep your bathroom in Mississauga sparkling clean without spending hours scrubbing. For professional house cleaning in Mississauga, Toronto Shine Cleaning provides regular, deep, and move-in or move-out cleaning across Mississauga and the GTA. Six Essential Tips to Clean Your Bathroom in Mississauga Work in this order and the whole job becomes easier: supplies first, then the toilet, sink, mirror, shower, and floors. A clean bathroom also matters for health, since the CDC notes that regularly cleaning and disinfecting high-touch surfaces helps reduce the spread of germs. 1. Gather Your Cleaning Supplies Keep everything within arm’s reach before you begin: an all-purpose cleaner, a bathroom cleaner for tough buildup, glass cleaner for mirrors, microfiber cloths, a scrub brush, toilet cleaner and brush, and rubber gloves to protect your hands from harsh chemicals. 2. Start With the Toilet Apply toilet cleaner inside the bowl and let it soak while you clean the exterior. Wipe the tank, handle, seat, and base with a disinfectant wipe or a cloth dampened with cleaner, reaching into crevices and hinges that are often overlooked. Finish by scrubbing the bowl under the rim and at the water line, then flush to rinse everything away. 3. Tackle the Sink and Counter Spray an all-purpose or bathroom cleaner on the sink, faucet, and countertop. Scrub around the faucet and drain where buildup collects, and reach into the corners and edges. Then wipe everything with a microfiber cloth in a circular motion for a streak-free, spotless finish that leaves the whole vanity looking fresh. 4. Make the Mirror Sparkle Spray glass cleaner across the mirror and let it sit for a moment to break down fingerprints and grime. Wipe with a lint-free microfiber cloth in a circular motion, which prevents streaking. Pay extra attention to the edges and corners of the mirror, where dust and residue collect, for a truly immaculate finish. 5. Clean the Shower and Tub Spray bathroom cleaner on all shower and tub surfaces and let it sit for a few minutes to soften soap scum, mildew, and hard water stains. Scrub grout lines, corners, and the base of the tub with a brush, then rinse everything with warm water. For glass shower doors, use the same glass cleaner as your mirror and wipe with a microfiber cloth to remove water spots. 6. Finish With the Floors Sweep or vacuum the floor first to pick up hair, dust, and debris, then mop with a cleaner suited to your tile or vinyl flooring. Start at the farthest corner of the bathroom and work toward the door so you do not step on wet areas. Give extra attention to corners and the area around the toilet base, which collect the most dirt. Bathroom Cleaning Quick Reference Toilet: soak the bowl, wipe the exterior, scrub and flush. Sink and counter: spray, scrub the faucet area, wipe with microfiber. Mirror: glass cleaner, circular motion, clean the edges. Shower and tub: let the cleaner sit, scrub grout, rinse well. Glass doors: glass cleaner and a microfiber cloth. Floors: sweep first, then mop from the far corner to the door. Bathroom Area Key Step Pro Tip Toilet Soak, wipe, scrub, flush Clean hinges and crevices Sink and counter Spray and scrub Focus on the faucet and drain Mirror Glass cleaner and wipe Circular motion prevents streaks Shower and tub Let cleaner sit, then scrub Rinse with warm water Floors Sweep, then mop Finish near the toilet base Frequently Asked Questions About Bathroom Cleaning in Mississauga How often should I clean my bathroom in Mississauga? Wipe down high-touch surfaces weekly and do a deeper scrub every two to four weeks. Bathrooms that get heavy daily use, such as family bathrooms, may need attention more often to keep soap scum and mildew from building up between cleans. Why does my bathroom get mildew so fast? Bathrooms stay damp, and the CDC notes that mold grows wherever moisture collects, including around showers and on walls. Run the exhaust fan during and after showers, fix drips quickly, and dry surfaces after use to keep mildew from taking hold. What is the best way to clean glass shower doors? Spray the glass with a quality glass cleaner, let it sit briefly, and wipe with a microfiber cloth in a circular motion. Cleaning them regularly prevents hard water spots from etching the glass, and squeegeeing after every shower keeps them clearer for longer. Should I hire a professional bathroom cleaning service? If time is tight or the bathroom needs a deep refresh, professional help is a great option. Toronto Shine Cleaning offers regular, deep, and move-in or move-out cleaning in Mississauga, so you can choose the schedule that fits your home and your budget. Professional Bathroom Cleaning in Mississauga Even the best routine slips sometimes, and that is where Toronto Shine Cleaning comes in. Our regular maid service keeps bathrooms fresh on a schedule you choose, and our deep cleaning service handles soap scum, grime, and mildew buildup in one thorough visit. We clean across Mississauga and the GTA and we are bonded and insured for your peace of mind. See what our customers say on our reviews page, and call (647) 424-0355 to book your clean.

How to Easily Clean Your Bathroom in Mississauga: 6 Essential Tips Read More »