Blog

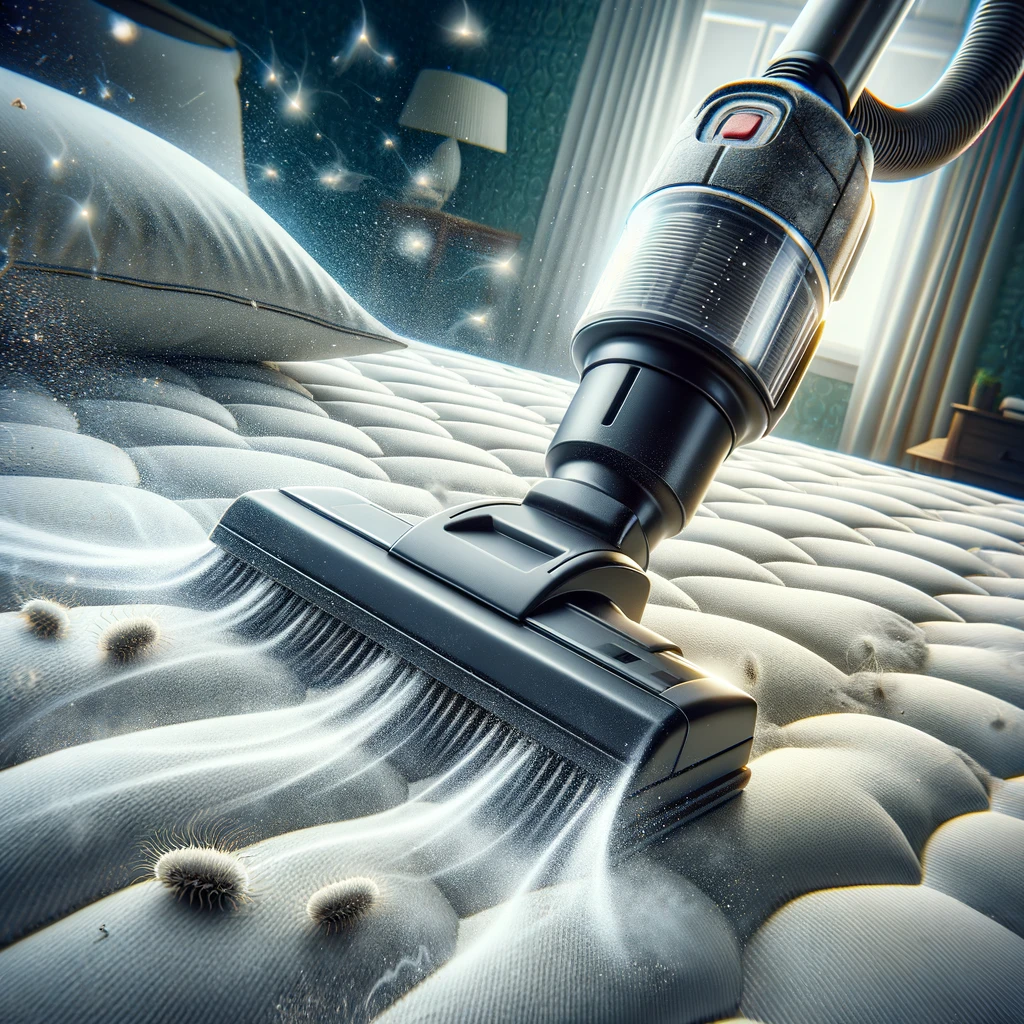
Powerful vacuum deep cleans mattress, highlighting the cleaners head in action.

5 Simple Steps to Clean Mattress: How to Refresh Your Bed Easily

5 Simple Steps to Clean Your Mattress and Refresh Your Bed Easily Your mattress collects dust, sweat, dead skin cells, and allergens over time. Regular cleaning improves sleep quality and extends the life of your bed. These five simple steps will refresh your mattress using common household supplies you already have on hand. Step 1: Strip the Bed and Vacuum Remove all bedding, including sheets, pillowcases, and mattress protectors. Wash them in hot water to kill dust mites and remove allergens. Then vacuum the entire mattress surface using your upholstery attachment. Pay special attention to seams, crevices, and tufted areas where dust and debris collect. Vacuum both sides if your mattress is double-sided. Regular vacuuming removes the particles that trigger allergies and affect breathing during sleep. The CDC recommends regular cleaning of soft surfaces to reduce allergens and improve indoor hygiene. Step 2: Treat Stains with a Baking Soda Paste Mix baking soda with a small amount of water to form a thick paste. Apply the paste directly to stains and let it sit for 30 minutes. Baking soda absorbs odors and lifts stains naturally without harsh chemicals. For sweat stains, add a few drops of mild dish soap to the paste for extra cleaning power. Gently scrub the paste into the stain using a soft brush or cloth. Step 3: Deodorize with Baking Soda Sprinkle a generous layer of dry baking soda over the entire mattress surface. Let it sit for at least two hours, or overnight for best results. Baking soda neutralizes odors by absorbing moisture and trapped smells. This step is especially helpful if you have pets, smoke indoors, or notice musty smells from humidity. For a pleasant scent, add a few drops of essential oil to the baking soda before sprinkling. Step 4: Vacuum Again Thoroughly After the baking soda has rested, vacuum the entire mattress again using the upholstery attachment. Work in slow, overlapping passes to ensure you remove all powder. Leftover baking soda can feel gritty against your sheets. Pay extra attention to edges and seams where baking soda tends to settle. Step 5: Protect with a Mattress Cover Once your mattress is clean and dry, put on a clean mattress protector or cover. A waterproof, breathable cover shields against spills, dust mites, and future stains. Wash the protector every month along with your sheets to maintain a clean sleep environment. Replace your mattress every 7 to 10 years for optimal comfort and support. Mattress Cleaning Checklist Strip and wash all bedding in hot water Vacuum both sides of the mattress Treat stains with baking soda paste Deodorize with dry baking soda for 2+ hours Vacuum again to remove all powder Install a clean waterproof mattress protector Recommended Cleaning Frequency Task Frequency Tips Vacuum mattress Every 3 months Use upholstery attachment Deep clean with baking soda Every 6 months Let baking soda sit for 2+ hours Wash mattress protector Monthly Use hot water cycle Replace mattress Every 7-10 years Check for sagging or lumps Keep Your Bedroom Fresh A clean mattress contributes to healthier indoor air and more restful sleep. Excess moisture in the bedroom can encourage mold growth, which is why controlling humidity and keeping bedding dry is important for your health. The Government of Canada offers guidance on reducing moisture and preventing mold in your home, which is especially relevant for bedrooms where humidity accumulates overnight. Keeping your mattress dry and well-ventilated prevents allergen buildup and extends its life. For a complete home refresh, consider professional cleaning services. Toronto Shine Cleaning offers deep cleaning for every room and regular maid services to keep your entire home spotless. Call (647) 424-0355 or visit their move-in and move-out cleaning page for thorough turnover cleaning. Check their pricing page to find a plan that fits your needs. FAQ How often should I clean my mattress? Vacuum every three months and perform a deep baking soda treatment every six months. Wash your mattress protector monthly and change sheets weekly. Can I use vinegar to clean mattress stains? Yes. Mix equal parts white vinegar and water in a spray bottle, lightly mist the stain, let it sit for 10 minutes, then blot dry with a clean cloth. Test on a small area first. Will baking soda damage my mattress? No. Baking soda is a gentle, non-toxic cleaner that is safe for all mattress types. Just vacuum thoroughly afterward to remove all powder. How do I get urine smells out of a mattress? Blot up as much moisture as possible, then apply baking soda liberally over the area. Let it sit overnight and vacuum. For stubborn odors, follow with an enzyme-based cleaner. Does sunlight help clean a mattress? Yes. If possible, move your mattress into direct sunlight for a few hours. UV rays help kill bacteria and dust mites naturally.

5 Simple Steps to Clean Mattress: How to Refresh Your Bed Easily Read More »
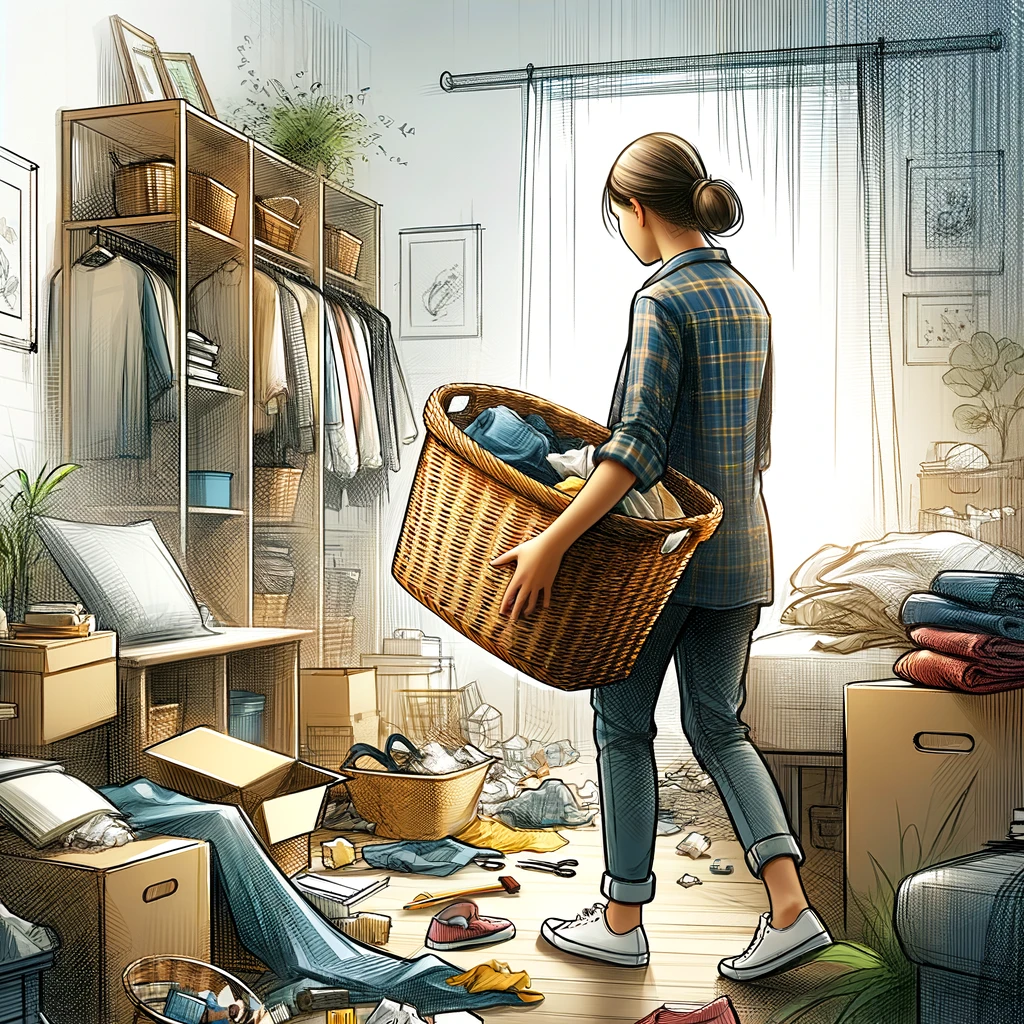
Person decluttering room with basket in hand.

How to Declutter Your Home for Spring: A Step-by-Step Guide

Turn Your Spring Reset Into a Room-by-Room Win Spring is when Toronto households finally face what winter let them ignore. Coats pile up by the door, drawers jam shut, and paper crests every counter. Decluttering does not have to consume the season. The seven steps below take you from goal setting to maintenance, so each session ends with visible progress instead of half-opened boxes. Step 1: Set Your Decluttering Goals Start with the end in mind. Picture how each room should function: floor space for family time in the living room, a calmer home office with a clear desk, a kitchen where dinner prep takes one trip to a drawer. Honest motivation, whether a serene place to unwind or support for busy weekdays, keeps you moving when old photos slow you down. Keep goals realistic: if your schedule is packed, aim for one drawer or shelf per day and let the small wins build momentum. Step 2: Walk Through Your Home and Build a Plan Take a notebook and tour every room. Mark the areas that feel heaviest and the ones needing only a quick tidy, then prioritize the spots that would change your daily routine most once cleared. Set a realistic timeline: a wardrobe or bookshelf can take a few hours, while a junk drawer usually closes in under one. Put sessions on your calendar so the work becomes routine rather than an afterthought, and schedule breaks, because decisions tire you out. Decide in advance where donations, electronics recycling, and sale items go so discard piles never become new clutter. Step 3: Gather Your Supplies Before Session One Set the toolkit up first so you never stop mid-room: Sturdy bags or boxes for donations, easy to carry to a charity shop Clear bins for items you plan to sell, kept separate from donations and trash Recycling bins, trash bags, and a marker or sticky labels to tag each container by destination A screwdriver for dismantling pieces, plus scissors or a box cutter for cardboard All-purpose cleaner, dusting cloths, and a vacuum for grime hiding behind things Shelf dividers, bins, and drawer organizers so kept items land in place right away Step 4: Sort Your Items Into Four Piles Sorting balances practicality against sentiment. The one-year rule is a solid filter: unused for a year, it becomes a candidate to leave. Items with real emotional value can be displayed, repurposed, or stored properly instead of binned. When you truly cannot decide, use the maybe box technique: pack uncertain items away for a few months, and if nothing is missed by the deadline, letting go gets easier. Make four piles, keep, donate, sell, and toss. Trust your first instinct, favor a few well-loved pieces over stacks of duplicates, and only donate items that are clean and working. Selling turns clutter into cash through online platforms and community boards, and worn-out things belong in the greenest recycling option available. Step 5: Organize What Stays Now every kept item gets an address. Store things where you use them, cooking utensils near the stove and linens near the bedrooms or bathrooms. Adjustable shelves handle varied sizes, boxes and baskets hide visual noise, clear bins end rummaging, and dividers tame the chaotic kitchen and bathroom drawers. Wall-mounted shelves and hooks use vertical space, freeing floors and drawing the eye upward, which matters in smaller apartments. Label bins and shelves so everyone knows where items return. Balance function with style, and revisit layouts as life changes; organization is ongoing. Step 6: Deal With the Discards Responsibly Closing the loop turns your effort into results for others too. Local charities, shelters, and community centers often welcome gently used clothing, furniture, and household goods, so check their current needs and drop-off guidelines first. Selling gives items a second life and returns cash through online marketplaces, local classifieds, or a garage sale, with clear photos and honest descriptions. For anything unusable, follow community recycling programs, especially for electronics, which harm the environment when binned with regular trash, and consider repurposing or upcycling fixable pieces. If sentimental goodbyes feel heavy, acknowledge the memory, let go, and make room for what fits your life now. Step 7: Maintain the Clutter-Free Space A tidy home survives on small habits. Hold a short weekly or monthly session so new accumulations never become mountains. Screen purchases before they enter: does it serve a purpose or bring joy? The one in, one out rule balances inventory automatically. Give each household member an area of responsibility, celebrate the wins, and explain the why, less stress and more freedom, because clutter-free living is a team effort. The payoff reaches past the surface, and public health guidance on mental health and well-being notes that healthy environments support healthy minds. Sorting sessions double as gentle movement, one of many easy ways to build physical activity into your week. A Sample Spring Decluttering Schedule Area Time estimate First move Junk drawer Under 1 hour Toss dead batteries and loose paper before sorting Wardrobe A few hours Pull everything out, then apply the one-year rule Bookshelves A few hours Keep only what you will truly reread, donate the rest Home office One weekend Clear the desk first, label boxes by destination Storage room or garage Multiple sessions Break down cardboard, stage donations by the door Spring Decluttering Questions How long does it take to declutter a whole house? It depends on your size and how many decisions each room holds. One drawer per day clears kitchen clutter within a week, and weekend wardrobe and storage sessions typically finish a house in three to four weeks without burnout. What is the fastest way to decide what to keep? Run the one-year test, then ask three follow-ups: is it useful, does it hold real sentimental value, and does it improve your space? Failing all three means donate, sell, or toss, while uncertain items go into a maybe box with a date on the lid. Should I clean while I declutter? Yes, clean

How to Declutter Your Home for Spring: A Step-by-Step Guide Read More »

Spring Cleaning: Bright, Organized Garage Transformation

How to Easy and Effectively Organize and Clean Your Garage This Spring

As spring is right around the corner, it’s the perfect time to organize and clean your garage, especially since, for many of us, it has become a catch-all for everything from holiday decorations to sports equipment that didn’t make it back into the house. But fear not! Spring cleaning isn’t just for your closets and kitchen. Your garage deserves some love, too. So, grab a cup of your favorite beverage, roll up your sleeves, and let’s dive into how you can transform your garage from cluttered chaos into an organized oasis. Start With a Plan Starting with a plan is like drawing a map before a road trip; it’s essential for reaching your destination efficiently and without unnecessary detours. Before you even pull on those rubber gloves or dust off the broom, take a thoughtful pause. Imagine walking into your garage a few weeks from now. What do you see? Is there a neatly organized space for your gardening tools, a wall-mounted rack for bicycles, or perhaps a dedicated area for your DIY projects? Maybe it’s as simple as wanting to come home to a garage that can comfortably fit your car without the obstacle course. This vision of your ideal garage isn’t just daydreaming; it’s a powerful tool in your spring cleaning arsenal. It frames what you’re working towards, giving you a concrete goal. But it’s not just about the end result. This mental image will influence each decision you make along the way, from what you decide to keep to how you choose to organize what remains. Keeping this vision front and center in your mind can be a massive boost to your motivation. Let’s be honest, the process of decluttering and cleaning can be daunting and, at times, downright unappealing. However, by continually reminding yourself of the serene, organized space you’re working towards, you can turn a chore into a mission. Declutter Like a Pro Decluttering is often the step that most of us dread, yet it’s undeniably the cornerstone of transforming any space from a cluttered mess into a functional area. Think of decluttering not just as getting rid of things, but as curating your garage to fit your current needs and lifestyle. The process is essentially about making decisions-what stays, what goes, and what finds a new home. When you begin, approach the task with the mindset of a professional organizer. Imagine you’re assessing someone else’s space; this can help you detach emotionally and make more objective decisions. Start by creating distinct zones in your garage for each category: keep, donate, sell, or toss. This physical separation allows you to see the progress you’re making and keeps the process organized. Being honest with yourself is crucial during this phase. It’s easy to hold onto items out of sentiment or the belief that they may come in handy “someday.” However, if “someday” has not come in the past few years, it might be time to reconsider its place in your garage. For instance, that broken lawnmower represents more than just physical clutter-it’s a task on your to-do list that you’re avoiding and a mental burden every time you see it. Decluttering is not just about discarding items. It’s an opportunity to give your belongings a second life elsewhere. The bike you no longer ride could become a cherished possession for someone in need. Tools and equipment that are surplus to your requirements could be sold to fund upgrades for your workshop. Even items that are no longer useful can be recycled, ensuring they don’t end up in a landfill unnecessarily.     Deep Clean Time Once the clutter has been cleared, your garage is primed for a deep cleaning session that will not only refresh the space but also protect and preserve it. This is your chance to tackle the grime and dust that’s been accumulating unnoticed for years. Start by sweeping out all the dust, spider webs, and leaves that have made your garage their home. This initial sweep is about removing the surface layer of dirt and making the deeper cleaning tasks more manageable. Next, shift your focus to the shelves and cabinets. These areas can accumulate a surprising amount of dust and debris over time. Empty each shelf, wipe it down with a damp cloth, and let it dry before putting anything back. This is also an ideal time to evaluate the condition of your storage solutions and consider replacements or upgrades if necessary. For the floor, which likely has seen its fair share of spills, stains, and wear, a more rigorous approach is required. Power washing can remove years of dirt build-up and stains, leaving your garage floor looking as good as new. If power washing isn’t an option, consider using a heavy-duty cleaner and a scrub brush to tackle tough stains. Remember to pay attention to the corners and edges where dirt tends to accumulate. While the focus is often on the cleaning itself, this is also an excellent opportunity to inspect your garage for any maintenance issues. Look for cracks in the concrete, signs of pests, or areas where water might be seeping in. Addressing these issues now can prevent more significant problems down the line. Smart Storage Solutions Shelving units are the backbone of an organized garage. They provide a home for everything from tools to seasonal decorations, ensuring that items are off the floor and in their designated spot. When selecting shelving, consider adjustable units that can adapt to your changing storage needs over time. This flexibility allows you to reconfigure your setup as your hobbies, tools, and storage requirements evolve. Ceiling-mounted storage is a game-changer for maximizing space. Ideal for items that are seldom used, such as holiday decorations or camping gear, these storage solutions take advantage of the vertical space in your garage, leaving the floor clear for your car and everyday items. Be sure to measure the height of your garage and the items you plan to store to ensure easy access and to

How to Easy and Effectively Organize and Clean Your Garage This Spring Read More »

Spring Cleaning in a Sunny Room Illustration, Easy Spring Cleaning Tasks

7 Easy Spring Cleaning Tasks You Can’t Afford to Skip

7 Easy Spring Cleaning Tasks You Can’t Afford to Skip Spring cleaning is about more than freshening up your space. It removes accumulated dust, allergens, and grime that affect indoor air quality and your family’s health. These seven essential tasks deliver the biggest impact for your effort. 1. Declutter Every Room First Before you clean, remove clutter from every surface. Sort items into keep, donate, and discard piles. Clearing countertops, shelves, and floors makes deep cleaning easier and faster. Less clutter also means fewer places for dust to settle. Focus on closets, drawers, and cabinets where items tend to pile up over winter. 2. Wash Windows and Window Treatments Winter leaves windows grimy with salt, dust, and condensation spots. Clean both the interior and exterior glass using a squeegee and a mild vinegar solution. Wash curtains, blinds, and sheers according to their care labels. Clean windows let in more natural light, which improves mood and reduces the need for artificial lighting. 3. Vacuum and Shampoo Carpets and Rugs Carpets trap dust, pet dander, and allergens deep in their fibers. Start with a thorough vacuum, then use a carpet cleaner or steam cleaner for a deep refresh. If you don’t own a machine, rental units are available at most grocery stores. For delicate rugs, check the manufacturer’s cleaning instructions or use a professional service. The CDC recommends cleaning soft surfaces regularly to reduce allergens and maintain a healthy home environment. 4. Deep Clean the Kitchen Appliances Wipe down the refrigerator interior, oven, microwave, and dishwasher. Pull appliances away from the wall to clean behind them, where crumbs and grease accumulate. Descale your coffee maker and dishwasher for better performance. Replace the refrigerator water filter if your model has one. A thorough kitchen clean prevents pest problems and keeps your appliances running efficiently. 5. Refresh Bathrooms and Sanitize Surfaces Scrub tiles, grout, and fixtures with a disinfecting cleaner. Wash shower curtains and bath mats. Replace worn caulk around tubs and sinks to prevent mold. Stock fresh towels and restock toiletries. Bathrooms are high-moisture areas that need extra attention during spring cleaning to prevent mold growth. Health Canada provides guidance on reducing moisture and preventing mold in your home. 6. Service HVAC Systems and Change Filters Replace furnace and air conditioning filters at the start of spring. Dirty filters reduce airflow, increase energy costs, and circulate dust through your home. Consider scheduling a professional duct cleaning if you notice excess dust settling shortly after cleaning. Better indoor air quality starts with a well-maintained HVAC system. The Government of Canada offers guidance on indoor air contaminants and how to minimize their impact on your health. 7. Flip and Clean Mattresses Rotate or flip your mattresses according to the manufacturer’s instructions. Vacuum the mattress surface to remove dust mites and dead skin cells. Spring is also a good time to wash all pillows (check labels for washability) and replace any that have lost their shape. A clean sleeping surface supports better rest and energy throughout the day. Spring Cleaning Checklist at a Glance Declutter every room before deep cleaning Wash windows, curtains, and blinds Vacuum and shampoo carpets and area rugs Deep clean kitchen appliances and pantry Scrub bathrooms and sanitize fixtures Replace HVAC filters and inspect ducts Flip mattresses and refresh bedding Recommended Cleaning Schedule Task Frequency Estimated Time Declutter and organize Seasonal 2-3 hours Deep clean kitchen Spring and fall 2 hours Wash windows Twice a year 1-2 hours Shampoo carpets Annually 3-4 hours Service HVAC Seasonal 30 minutes Make Spring Cleaning Easier Spring cleaning is physically active work. Stretching, lifting, and scrubbing all day can strain your body if you are not used to it. Take breaks, stay hydrated, and use proper lifting techniques. The CDC notes that regular physical activity improves health and reduces the risk of chronic disease, so consider the workout a bonus of your spring refresh. If tackling the full list feels overwhelming, professional cleaners can help. Toronto Shine Cleaning provides comprehensive deep cleaning and regular maid services for Toronto homes. Call (647) 424-0355 or visit their pricing page to find the right plan for your home. Their team handles the heavy lifting so you can enjoy a fresh, healthy home without the stress. FAQ What is the most important spring cleaning task? Changing HVAC filters and deep cleaning bathrooms rank highest because they directly affect indoor air quality and hygiene. How long does a full spring cleaning take? A thorough clean for an average 3-bedroom home takes 6 to 10 hours spread over several days. Breaking tasks into manageable chunks helps. Do I need special products for spring cleaning? Basic supplies like all-purpose cleaner, vinegar, baking soda, microfiber cloths, and a good vacuum handle most tasks. For carpets and upholstery, a steam cleaner is helpful. Is it worth hiring professional spring cleaners? Yes, if you lack time, tools, or physical stamina. Professionals complete the job faster with industrial-grade equipment and reach areas you might miss. Should I clean my air ducts every spring? Only if you see visible mold, heavy dust, or have allergy concerns. Annual duct cleaning is not usually necessary, but replacing filters every season is essential.

7 Easy Spring Cleaning Tasks You Can’t Afford to Skip Read More »

Modern living room with sleek synthetic couch centerpiece.

5 Essential Tips on How to Keep Your Synthetic Couch Spotless

Keep Your Synthetic Couch Spotless Synthetic couches are the unsung heroes of the living room: durable, pet-friendly, and often more affordable than natural fabrics. But they still need regular care to stay looking their best. Whether you are binge-watching your favourite series or hosting game night, these 5 essential tips will keep your synthetic couch spotless for years. Best of all, most of these habits take only a few minutes a week, so you can protect your furniture without turning couch care into a second job. 1. Vacuum Weekly With a Soft Brush Attachment Dust and dirt do not just sit on the surface; they work their way into the weave of the fabric. Vacuum your couch weekly using the soft brush attachment, which lifts grit without damaging the fibres. Do not forget the spots that hide the most debris: lift the cushions and vacuum the base and crevices underneath, where crumbs, pet hair, and the occasional lost remote collect. Adjust the suction for delicate fabrics, and make couch vacuuming part of your regular cleaning routine. 2. Blot Spills Immediately When a spill happens, speed is your best friend. Blot the liquid with a clean, dry cloth, pressing gently so the fabric absorbs it instead of rubbing it deeper. For water-based spills, a slightly damp cloth usually finishes the job. For tougher marks like food, ink, or coloured drinks, dab with a solution of mild detergent and water. Always test any cleaning solution on a hidden area first, like the back of a cushion, to confirm it will not cause discoloration. 3. Choose Couch-Safe Cleaning Products Harsh chemicals and abrasive cleaners can break down synthetic fibres, causing fading, weakening, and even disintegration over time. Reach for products designed for synthetic upholstery, or keep it simple with water and a mild detergent used sparingly. Over-wetting is the bigger risk: too much moisture soaks into cushions and the frame, where it can lead to odours, mildew, and structural damage. The CDC’s mold overview explains what mold is and how to prevent it, and its mold clean up guidelines cover safe removal if damp fabric ever becomes a problem. 4. Freshen Up Between Cleanings Keep your couch smelling fresh without fabric sprays. Sprinkle baking soda over the upholstery, let it sit for 15 to 30 minutes to absorb odours, then vacuum it up. For a custom scent, stir a few drops of essential oil, like lavender or citrus, into the baking soda before applying. This natural trick neutralizes odours and leaves a subtle fragrance, and you can switch scents with the seasons. 5. Protect Your Couch From Everyday Wear Prevention beats cleanup. A washable couch cover or a few well-placed throws take the brunt of spills, pet paws, and daily wear, and they come off for a quick machine wash. Waterproof covers offer maximum protection for homes with kids or pets, while decorative throws add style. Pair your covers with house rules like no food on the couch and you will dramatically cut down on stains. A Quick Couch Care Checklist Vacuum weekly, including under the cushions. Blot spills within minutes, never rub. Test cleaning products on a hidden spot first. Use baking soda monthly to absorb odours. Keep a washable cover or throw on high-use seats. Task Frequency What to Use Vacuum and dust Weekly Soft brush attachment Blot spills Immediately Dry cloth, then mild detergent and water Deodorize Monthly Baking soda, optional essential oils Deep clean Every 6 to 12 months Professional upholstery cleaning Keep Your Couch Looking Like New With consistent care, your synthetic couch will stay clean, comfortable, and stylish. When life gets busy or a stain is too stubborn, the professionals at Toronto Shine Cleaning can handle all your upholstery needs with fabric-friendly methods. Add a home deep clean or regular maid service to your routine, and check our pricing page for transparent rates. Call (647) 424-0355 to book, or browse our locations to find service near you. Synthetic Couch Care FAQ Can I use bleach on a synthetic couch? No. Bleach and other harsh chemicals can fade, weaken, or damage synthetic fibres. Use products labelled for synthetic upholstery, or a mild detergent and water solution, and always test on a hidden area first. How do I get pet hair off a synthetic couch? Vacuum with a soft brush attachment, or use a damp rubber glove or lint roller to gather hair from the surface. Washing machine-safe couch covers make cleanup even easier. Is baking soda safe for couch fabric? Yes. Baking soda is a gentle, natural deodorizer that is safe for most synthetic upholstery. Sprinkle it on, let it sit for 15 to 30 minutes, and vacuum thoroughly. When should I call a professional upholstery cleaner? Call a professional for set-in stains, odours, or a yearly deep clean. Professional equipment lifts dirt and allergens from deep in the fibres without the risk of over-wetting your couch.

5 Essential Tips on How to Keep Your Synthetic Couch Spotless Read More »

Elegant Cozy Living Room with Luxurious Deep Brown Leather Couch

How to Effectively Clean Your Leather Couch in 5 Simple Steps

How to Effectively Clean Your Leather Couch in 5 Simple Steps Leather furniture adds style and comfort to your home, but it requires proper care to stay beautiful. Dust, body oils, and spills can dull the finish over time. These five simple steps will clean your leather couch safely without damaging the material. Step 1: Vacuum Thoroughly Use your vacuum’s soft brush attachment to remove dust, crumbs, and pet hair from every surface. Pay close attention to crevices, seams, and the area between seat cushions. Dust and grit act like sandpaper on leather, causing micro-scratches over time. Regular vacuuming prevents this wear and keeps the leather smooth. The CDC recommends cleaning soft surfaces regularly to reduce allergens and maintain household hygiene. Step 2: Wipe with a Damp Cloth Dampen a soft microfiber cloth with distilled water and wring it out thoroughly. The cloth should be barely damp, not wet. Gently wipe the entire surface of the couch to remove surface dust and light residue. Wet leather can stain or warp, so use as little moisture as possible. Work in small sections to control moisture levels. Avoid using tap water if your area has hard water, as mineral deposits can leave marks on leather. Step 3: Clean with a Mild Leather Cleaner Apply a small amount of pH-balanced leather cleaner to a soft cloth. Test on a hidden area first, such as the back or underside of the couch, to check for colorfastness. Gently rub the cleaner into the leather using circular motions. Focus on high-contact areas like armrests and headrests where body oils build up. Never use harsh chemicals, bleach, or all-purpose cleaners on leather, as they can strip the finish and cause cracking. Step 4: Condition the Leather After cleaning, apply a leather conditioner to restore moisture and flexibility. Leather dries out naturally over time, especially in heated or air-conditioned homes. Conditioning prevents cracking and keeps the material supple. Apply conditioner with a soft cloth and buff gently. Let it absorb for the time recommended on the product label, then buff off any excess. Condition your leather couch every 6 to 12 months for best results. Step 5: Treat Stains Promptly Blot spills immediately with a dry cloth to prevent them from soaking into the leather. For oil-based stains, sprinkle cornstarch or baking soda over the area and let it sit for several hours before vacuuming. For ink stains, dab gently with a cotton swab dipped in rubbing alcohol and blot dry. Always test any stain treatment on a hidden area first. Prompt action prevents permanent staining and keeps your couch looking like new. Leather Care Checklist Vacuum with soft brush attachment weekly Wipe with damp microfiber cloth as needed Clean with pH-balanced leather cleaner every 3-6 months Condition leather every 6-12 months Blot spills immediately with a dry cloth Keep leather away from direct sunlight and heat sources Dos and Don’ts of Leather Cleaning Do Don’t Vacuum regularly with soft brush Use harsh chemicals or bleach Use pH-balanced leather cleaner Scrub aggressively with abrasive pads Condition every 6-12 months Saturate leather with water Blot spills immediately Leave spills to dry on the surface Keep out of direct sunlight Place near heat registers or fireplaces Protect Your Leather Investment Leather furniture is a long-term investment that rewards regular care. Avoid placing your couch in direct sunlight, which can fade and dry the material. Keep it at least three feet away from radiators, fireplaces, and air conditioning vents. Rotate cushions periodically to ensure even wear. For more tips on caring for household surfaces, Health Canada offers guidance on safe use of household products and furniture maintenance. If your leather couch needs professional attention, Toronto Shine Cleaning can help. Their team handles delicate upholstery with the right products and techniques. Visit their deep cleaning page or regular maid services page for more information. Call (647) 424-0355 or check their pricing to find a plan that suits your home. You can also read customer reviews to see why Toronto homeowners trust their team. FAQ How often should I clean my leather couch? Vacuum weekly and do a full clean-and-condition treatment every 6 to 12 months. Blot spills whenever they happen. Can I use baby wipes to clean leather? No. Baby wipes often contain alcohol, fragrances, and moisturizers that can damage leather over time. Use a dedicated pH-balanced leather cleaner instead. What is the best leather conditioner? Look for a conditioner with natural oils such as lanolin or beeswax. Avoid products with silicone, which can leave a sticky residue. How do I remove pet hair from leather? Use a vacuum with a soft brush attachment or a slightly damp rubber glove. The static from the glove lifts hair easily. Is it safe to steam clean leather furniture? No. Steam cleaning forces moisture into leather, causing it to warp, crack, or discolor. Stick to dry or damp methods only.

How to Effectively Clean Your Leather Couch in 5 Simple Steps Read More »

Elegant living room with plush velvet sofas exuding warmth and sophistication.

5 Simple Ways to Tackle Stains on Velvet Couches

Stains on Velvet Couches: 5 Simple Solutions A velvet couch is a luxurious centrepiece, but spills and blemishes are part of life. The good news: with the right techniques, you can remove most stains without damaging the fabric’s plush pile. These 5 simple methods will help you tackle stains on velvet couches and keep your favourite seat looking immaculate. 1. Know Your Velvet Before You Clean The right method depends on the fabric. Synthetic velvet, usually polyester or microfiber, is engineered for durability and handles water-based cleaning solutions well. Natural velvet, made from silk, cotton, or wool, is more delicate: water and harsh cleaners can leave marks or change the fabric’s softness and colour. Check the furniture tag for care instructions, or look up the manufacturer’s guidance with your model number. This one step tells you which methods below are safe for your couch. 2. Use a Dry Cleaning Powder for Fresh Stains Dry cleaning powder is a velvet-friendly option because it cleans without water, so there is no risk of watermarks. Choose a powder labelled safe for upholstery, sprinkle it lightly over the stain, and press it gently with a clean, dry cloth so it makes full contact. Let it sit for 30 minutes to a few hours, depending on the product instructions, then vacuum with an upholstery brush attachment. Dab, never rub, since rubbing pushes the stain deeper into the pile. 3. Brush Gently With the Nap A soft brush lifts surface dirt and restores the velvet’s plush texture. Use an upholstery brush or even a baby hairbrush, and work in light, sweeping motions in a single direction, following the nap of the fabric. Brushing before cleaning removes loose particles that would otherwise grind into the fibres, and brushing again after the area dries brings back the velvet’s luster. Never scrub against the pile, which can crush or flatten it. 4. Try a Specialty Velvet Cleaner Specialty velvet cleaners are formulated for the fabric’s dense pile and delicate nature. Read the label to confirm the product suits your velvet type, whether synthetic or natural, and spot test it on a hidden area first to rule out discoloration. Apply a small amount to a clean, dry cloth and dab it onto the stain. Less is more: saturating the velvet risks watermarks and can damage the cushion underneath. 5. Steam Clean With Caution, or Call a Professional Steam cleaning loosens dirt and grime embedded in velvet without harsh chemicals, but moisture control is everything. Too much steam saturates the fabric and causes watermarks that are very hard to remove, and damp conditions can invite mold. The CDC’s mold overview explains why controlling moisture matters in your home. For most velvet couches, professional steam cleaning is the safest choice: trained cleaners adjust temperature and pressure to your fabric type and dry the piece properly afterward. The CDC’s mold clean up guidelines are also worth reviewing if a couch has ever been soaked. Match the Method to the Stain Coffee or tea: blot immediately, then treat with dry cleaning powder. Grease or oil: sprinkle powder or cornstarch, let it sit, then vacuum. Ink or makeup: use a specialty velvet cleaner with light dabbing. Water rings: brush gently with the nap once fully dry. Stain Type Best Method Key Caution Fresh liquid Blot, then dry cleaning powder Never rub Grease and oil Absorbent powder Let it sit before vacuuming Ink and makeup Specialty velvet cleaner Spot test first Set-in stains Professional steam cleaning Avoid over-wetting Keep Your Velvet Couch Pristine Stains on velvet couches are manageable when you match the method to the fabric and act quickly. When the stain is stubborn or you want guaranteed results, Toronto Shine Cleaning specializes in luxury fabrics, including velvet, using fabric-friendly methods and professional equipment. Combine it with a deep cleaning of your home or a regular maid service, and check our pricing page for transparent rates. We serve homes across Toronto and the GTA. Call (647) 424-0355 to book your upholstery cleaning today. Velvet Couch Stain FAQ Can I use water on a velvet couch? It depends on the velvet. Synthetic velvet handles water-based cleaning well, but natural velvet can water-mark easily. When in doubt, use a dry cleaning powder or a specialty velvet cleaner instead. How do I remove watermarks from velvet? Let the area dry completely, then brush it gently with the nap using a soft upholstery brush or baby hairbrush. If the mark persists, a professional cleaner can often restore the pile. Can I vacuum a velvet couch? Yes, with a soft brush attachment and gentle suction. Vacuuming weekly removes dust and grit that can dull the pile, and it prepares the fabric for spot treatments. Should I steam clean velvet myself? Only with care. Household steamers easily over-wet velvet, causing watermarks and potential mold. Professional steam cleaning is safer for most velvet couches.

5 Simple Ways to Tackle Stains on Velvet Couches Read More »

Clean Living Room with Playful Dog and Cat

5 Cleaning Hacks for Pet Owners: How to Save Time and Effort

Cleaning With Pets Should Not Be a Full-Time Job Dogs and cats hand out endless joy, then quietly hand you a side of shedding, muddy paw tracks, and the mystery stain you find an hour later. Keeping a home fresh with pets around takes strategy more than elbow grease. The five hacks below target the exact messes pet owners face: floating fur, set-in odors, floor grime, and the dander that no surface wipe really removes. Each one saves minutes every day, and together they turn pet cleanup from constant crisis management into a short, boring routine. Hack 1: Rubber Gloves Magnetize Pet Hair Rubber gloves work because the material builds static electricity as it rubs across carpets, upholstery, and clothing, and that charge pulls pet hair off the fabric like a magnet. Where lint rollers and vacuums can miss fine hairs, a gloved hand reaches into seams, corners, and textured weave for a more complete grab. The gloves are reusable too: rinse them with soap and water and they are ready for the next session, unlike single-use adhesive sheets. For delicate spots, run gloved fingers around sofa buttons, cushion corners, and the patterns on decorative pillows so no clump survives. Hack 2: Baking Soda Neutralizes Odors Instead of Masking Them Sodium bicarbonate absorbs and eliminates smells rather than covering them, because it reacts with odorous substances and changes their pH so the odor is genuinely removed from the environment. Sprinkle it on carpets and upholstery, let it sit, then vacuum. Between litter box cleanings, a light sprinkle controls ammonia smell for both you and the cat. For set-in smells on bedding or fabric toys, mix baking soda with water into a paste, work it onto the soiled area, let it dry, and brush or vacuum it off. In the wash, a cup of baking soda added with your detergent boosts cleaning power on pet blankets. Baking soda is non-toxic, which is exactly what you want around curious noses, though you should still keep pets from ingesting large amounts directly. Hack 3: Mix a DIY Pet-Safe Floor Cleaner The whole recipe fits one spray bottle: Water plus white vinegar, whose acidity dissolves dirt, soap scum, and hard water deposits A few drops of liquid dish soap to cut grease and paw-track grime An optional lemon peel for a fresh scent and natural antibacterial and antifungal boost Beyond the bottle, the chemistry matters: vinegar works against bacteria and viruses, which is why the mix shines on kitchen and bathroom tile, while the dish soap handles the grease that paw pads track in. Spray lightly on tile or linoleum and mop as usual; no toxic residue is left behind, so paws can walk the floor soon after. One caution: vinegar’s acid can damage hardwood finishes over time, so on wood floors use a heavily diluted solution for occasional deep cleans or stick to a manufacturer-recommended, pet-safe product. Hack 4: Keep a Lint Roller in Every Room The lint roller is the fast-response tool bulky vacuums cannot match. Company is twenty minutes out and the favourite chair is a fur coat? A quick pass makes it guest-ready in seconds. The sticky sheets also work on lampshades, soft toys, car interior nooks, and even dry spills like scattered cat litter or kibble around feeding stations. Get the most from each sheet by rolling in multiple directions so hair is lifted from every angle, then peel to a fresh layer. Keep a mini roller in your bag or car to de-fur your coat before meetings, no outlet or batteries required. Hack 5: Vacuum Like Allergens Depend On It Strong suction is the foundation: it drags embedded hair and dirt from deep in carpet and upholstery, protecting both cleanliness and the lifespan of your furnishings. Motorized brush heads and specialized pet hair attachments agitate fur out of stairs, drapes, and couch weave where plain nozzles struggle. HEPA filtration matters most for the air you breathe, trapping 99.97% of particles at 0.3 microns, including dander, dust, pollen, and mold that drift airborne the moment your pet sheds. That is a genuine win for allergy-prone family members, and the CDC’s asthma resources point to cleaner indoor air as a core way to reduce flare-ups. Vacuum a few times a week to stay ahead of constant shedding, which also gives you a read on your pet’s coat health. Convenience features like cordless bodies, easy-empty dustbins, low noise, and app scheduling make the habit easier to keep. For deeper guidance on safe handling of pet waste and hygiene around animals, see the CDC’s healthy pets, healthy people page. Which Hack Handles Which Mess Mess Best hack How often Fur on sofas and beds Rubber glove pass, then lint roller finish As needed, weekly deep pass Carpet and litter box odors Baking soda sprinkle, sit, and vacuum Weekly, plus between scoops Muddy paw tracks on tile Vinegar, soap, and water mop solution As needed, no residue worries Airborne dander HEPA vacuum with motorized brush A few times per week Fur on coats and car seats Mini lint roller on the spot Daily, out the door Pet Cleaning Questions From Toronto Homes Is baking soda really safe around cats and dogs? Yes, it is non-toxic, which makes it a gentler option than many commercial deodorizers. The only sensible precaution is keeping pets off the area while it sits and is vacuumed, since inhaling or eating large quantities directly can upset them. Can I use vinegar on every floor in my home? Tile, linoleum, and vinyl handle a vinegar-and-dish-soap solution well. Hardwood is the exception: the acid can dull or damage the finish over time, so dilute heavily for rare deep cleans or use the cleaner your flooring manufacturer recommends. How often should I vacuum with a shedding pet? A few times a week is the working answer, hitting high-traffic zones daily if the shedding is seasonal. A HEPA filter keeps the fine dander you stir up from simply recirculating into the room

5 Cleaning Hacks for Pet Owners: How to Save Time and Effort Read More »

Spring cleaning concept with open window and billowing curtains.

The 2-Day Spring Cleaning Sprint: How to Easy Get It Done Fast and Effectively

The 2-Day Spring Cleaning Sprint: How to Get It Done Fast and Effectively Spring cleaning can feel overwhelming, especially when you only have a weekend to spare. The good news is that a focused 2-day plan can transform your home without burning you out. Whether you live in Toronto, Mississauga, or anywhere else in the GTA, this sprint breaks the work into two manageable days so your space feels fresh and organized by Sunday night. Day 1: Declutter and Dust Top to Bottom The living room, kitchen, and bedrooms are the main battlegrounds of any spring clean. These high-traffic zones collect the most clutter, so start there with the three-box method: one box for items you keep, one for donations, and one for things to toss. If you have not used something in over a year, it is likely safe to let it go. Keep decisions quick and keep your momentum, because decluttering is the foundation every other step builds on. Once rooms are decluttered, dust from the top down. Start with ceiling fans and light fixtures, then work down to furniture and floors, so dust that falls never lands on a surface you already cleaned. Pay special attention to neglected spots such as windows and under furniture, and use a damp cloth to capture dust instead of spreading it around. Dusting and vacuuming are also the core of the EPA’s indoor air quality advice, which links regular cleaning to fewer allergens in the home. Kitchen and Bathroom Deep Clean The kitchen deserves a thorough pass: empty the fridge and wipe it down, check expiration dates, and toss anything past its prime. Tackle countertops, cabinets, and appliances, and degrease the stove and microwave, which accumulate built-up grime over time. In the bathroom, scrub the shower, sink, and toilet until they sparkle, clear cabinets and drawers of expired products, and finish with mirrors and fixtures. When you use products such as bleach in these rooms, never mix them with other cleaners, because the Canadian Centre for Occupational Health and Safety warns that mixing bleach with other chemicals can release dangerous gases. Day 2: Floors, Bedrooms, and Finishing Touches Start the second day with sweeping, vacuuming, and mopping every inch of floor space, not just the visible areas. Move light furniture to reach the spots underneath, because that is where dust and debris hide. For carpets, a good vacuum pulls up embedded dirt and hair, and spot cleaning handles fresh stains. For a deeper refresh, renting a carpet cleaner can make carpets look, feel, and smell like new again. Bedrooms should feel like a sanctuary: change the sheets, dust the furniture, and organize closets if time allows. Gather all the washable items in the house, such as curtains, towels, and bed linens, and aim to have everything washed, dried, and put away by the end of the day. Finish with a walk-through, basket and cloth in hand, to catch missed spots, tidy remaining clutter, and give surfaces a final wipe. Outdoor Spaces and Entryways: Make the First Impression Count The entryway sets the tone for the whole home. Sweep patios, porches, and decks to remove debris and prevent slip hazards, wipe down outdoor furniture, and wash detachable cushions so the space is ready for entertaining. Inside, shake out or vacuum the welcome mat, polish the front door and hardware, and declutter the shoe and coat area so the transition into your home feels calm and ordered. In the evening, do a quick weeding and trimming session, and wash exterior windows so more natural light fills every room. When to Call in the Professionals A 2-day sprint is achievable, but some jobs are better left to a team. If the deep clean feels too big, a professional deep cleaning service can handle the heavy lifting in a single visit, and regular maid cleaning keeps the results going all year. Moving in or out? Move-in and move-out cleaning covers the transition, and Toronto Shine Cleaning serves homes across Toronto and the GTA. For a safer, smoother clean, follow the National Capital Poison Center’s spring cleaning safety tips, which cover product storage, ventilation, and keeping chemicals out of reach of children. Frequently Asked Questions What is the three-box method for decluttering? Sort every item into one of three boxes: keep, donate, or toss. The method forces quick decisions, prevents second-guessing, and keeps you moving through the home instead of getting stuck on any single item. Can I really finish a whole-house spring clean in two days? Yes, if you follow a plan: declutter and dust on day one, then floors, bedrooms, and laundry on day two. Focus on one room at a time and do not stop to deep-organize every drawer. Do I need to rent a carpet cleaner? Only if your carpets are heavily soiled or stained. Regular vacuuming plus spot cleaning handles most maintenance, while a rented machine is worth it once a year for a full refresh. How often should I do a spring cleaning sprint? Once a year is the classic rhythm, but a lighter version every season keeps dust, allergens, and clutter from building up between major cleans. With a clear two-day plan, spring cleaning stops being a chore and becomes a satisfying refresh. And when you need backup, the professionals at Toronto Shine Cleaning are one call away.

The 2-Day Spring Cleaning Sprint: How to Easy Get It Done Fast and Effectively Read More »

Pristine Home Exterior on Sunny Spring Day 2023

10 Essential Spring Cleaning Hacks to Refresh Your Home

10 Essential Spring Cleaning Hacks to Refresh Your Home Spring is here, and it is time to refresh your living space. Spring cleaning does not need to feel overwhelming. With the right approach and a few smart hacks, you can transform your home efficiently. Whether you live in Toronto, Mississauga, or anywhere across the GTA, these tips will help you clean smarter, not harder. A quick recap of the hacks covered below: Declutter before you clean to reduce obstacles Use natural cleaners like vinegar and baking soda Work from top to bottom in every room Reach hidden spots like air vents and window tracks Refresh bedding and organize as you go Declutter First for a Faster Clean Clearing out clutter before you start cleaning makes every step easier. Sort through your belongings and set aside items you no longer use. The one-year rule works well: if you have not used something in the past year and it does not spark joy or serve a purpose, consider donating or discarding it. A clutter-free home is not only easier to clean but also promotes a calmer mindset. Use Natural Cleaning Solutions Common pantry staples like vinegar, baking soda, and lemon are powerful natural cleaners. Vinegar cuts through grease and grime on glass and faucets. Baking soda acts as a gentle abrasive that lifts stains from sinks and bathtubs without scratching. Lemon brings natural acidity and antibacterial properties to countertops and cutting boards. These ingredients are economical, eco-friendly, and safer for households with pets and children. For more guidance on using household products safely, visit Health Canada’s chemical safety page. Work Top to Bottom Start with ceiling fans, light fixtures, and the tops of cabinets. Dust and debris that fall during cleaning will land on areas you have not yet cleaned, saving you from redoing work. Move to walls, windows, and furniture next. Finish with floors last. This methodical approach prevents resettling dust and makes your cleaning routine flow naturally. Use Microfiber Cloths Microfiber cloths attract and trap dust particles using static electricity rather than pushing them around. Use them dry for dusting electronics and delicate surfaces, or dampen them for grease splatters and soap scum. Unlike paper towels, microfiber cloths are reusable and reduce waste. They often require only water, cutting down on the need for chemical cleaners. Learn more about cleaning and disinfecting at CDC’s cleaning guidelines. Clean Air Vents Regularly Air vents collect dust and debris that can circulate allergens and reduce HVAC efficiency. Wrap a butter knife in a cloth to reach between slats, then vacuum the vent cover with a brush attachment. Clean vents improve indoor air quality, which is especially important for household members with allergies or asthma. Refresh Your Mattress Sprinkle baking soda over your mattress, add a few drops of lavender or citrus essential oil, and let it sit for one hour. The baking soda absorbs odors and moisture while the essential oil leaves a pleasant scent. Vacuum thoroughly afterward to remove dust mites and allergens. This simple hack keeps your bed fresh and hygienic between deep cleans. Hack Benefit Time Required Declutter first Faster cleaning, less stress 30-60 min Natural cleaners Safer, eco-friendly, cheaper Ongoing Top-to-bottom method No re-cleaning needed All-day clean Microfiber cloths Better dust removal Ongoing Mattress refresh Better sleep hygiene 1 hour Clean Window Tracks with Vinegar Window tracks collect dirt and grime that can interfere with operation. Dip a cotton swab or an old toothbrush in vinegar and scrub the crevices. The natural acidity breaks down buildup without harsh chemicals. This prevents mold growth and keeps windows sliding smoothly. Deodorize the Garbage Disposal with Lemon Cut lemon rinds into small pieces and run them through the garbage disposal with cold water. The natural acidity breaks down food residue while the citrus scent neutralizes odors. Run cold water afterward to flush loosened debris through the system. Do Not Forget Efficient Vacuuming Change your vacuum filter and empty the bag before a deep clean session. A well-maintained vacuum performs better and improves indoor air quality by capturing fine particles. Use attachments like the crevice tool for baseboards and upholstery for furniture. Proper vacuum care extends the life of your machine and saves time. Organize as You Go While cleaning, sort items into keep, donate, and discard piles. Use drawer dividers and storage boxes to assign a home for everything. This approach prevents clutter from returning and helps maintain the order you create. An organized home reduces daily stress and makes future cleaning sessions faster. Frequently Asked Questions How often should I do spring cleaning? Most homes benefit from a thorough spring cleaning once a year, though high-traffic homes may need a seasonal refresh. Can I use vinegar on all surfaces? Vinegar is safe for glass, tile, and stainless steel but should not be used on natural stone like granite or marble. What is the best order for cleaning a room? Always work top to bottom: ceiling fans and light fixtures first, then walls and windows, furniture, and floors last. Do I need professional help for spring cleaning? If your schedule is tight or the task feels overwhelming, consider hiring Toronto Shine Cleaning’s deep cleaning service. They handle every corner of your home so you can enjoy the season. Spring cleaning does not have to be a chore. With these hacks, you can refresh your home efficiently. For homes that need extra attention, Toronto Shine Cleaning offers regular cleaning services across the GTA. Check our pricing and see what our customers say. Call us at (647) 424-0355 to book your spring clean today.

10 Essential Spring Cleaning Hacks to Refresh Your Home Read More »