Blog

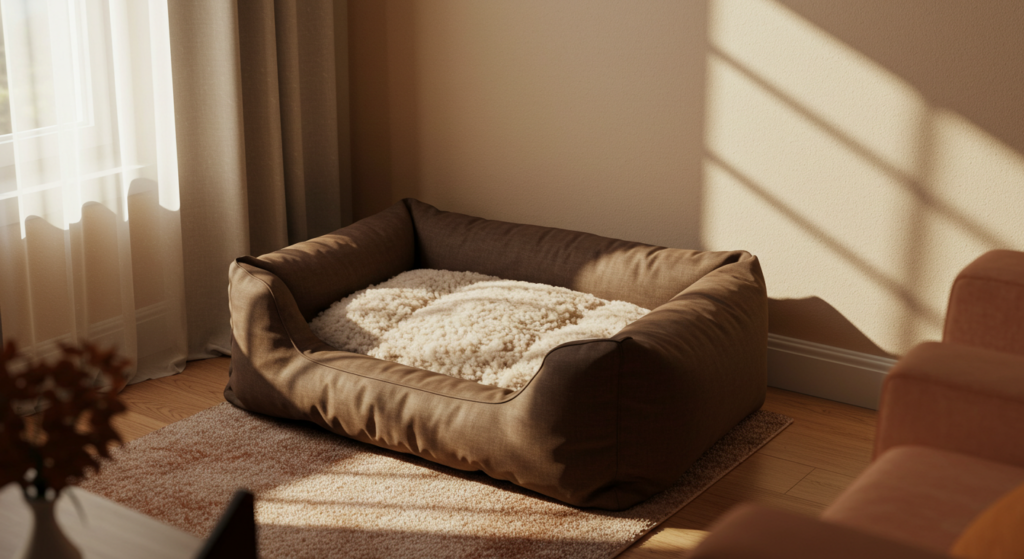
Brown dog bed inside a house

5 Easy Steps to Clean Dog Beds Without Harsh Chemicals

If your dog’s bed smells like drool, dirt, and fur, it’s time for a serious refresh. But reaching for harsh cleaning products isn’t the safest choice for your pup. Dogs lie, chew, and nap on their beds for hours-so how you clean their bed matters. Let’s talk about simple ways to clean dog beds without harsh chemicals that still get results and keep your furry friend comfortable. We’ll walk through five easy and pet-safe ways to clean dog beds naturally. These tips use things you probably already have at home, and they work without leaving behind strong smells or toxic residue. They’re perfect for dog owners who want a cleaner home without compromising their dog’s health. By following these steps, you’ll be able to keep your dog’s bed fresh and odor-free while avoiding ingredients that could irritate their skin or paws. Here’s how to clean a dog bed the safe way. 1. Vacuum the Dog Bed Weekly A simple way to clean a dog bed is by vacuuming it regularly. Pet hair, dried dirt, and dander build up fast, and if you don’t stay on top of it, your dog bed becomes a smell trap. Use a handheld vacuum or a brush attachment to get into seams and corners, where gunk tends to hide. This helps prevent odor and keeps allergens to a minimum. Vacuuming once a week is a great routine to help clean dog beds without much effort. It won’t remove deep grime, but it takes care of the surface mess and keeps the bed looking tidy. Think of it as preventative maintenance. The cleaner you keep the surface, the easier it is to deep clean later on. Plus, vacuuming helps extend the life of the dog bed. Dirt and fur trapped in the fabric can wear it out faster. So a quick vacuum doesn’t just help you clean the dog bed-it helps preserve it, too. 2. Wash with Mild, Fragrance-Free Detergent The best way to clean a dog bed thoroughly is by washing it with a mild, fragrance-free detergent. Many standard laundry products are loaded with perfumes and chemicals that can irritate your dog’s skin. Look for something gentle-something you’d use for a baby or someone with allergies. If the Clean Dog Bed has a removable cover, take it off and throw it in the washer. If the whole bed is machine washable, even better. Wash on a warm cycle to kill bacteria and remove grime. This is a super effective way to clean dog beds while keeping your home pet-friendly. When drying, use low heat or hang the bed to air dry. High heat can damage the fabric or shrink the bed. Washing is one of the easiest and most effective methods to clean a dog bed without using anything harsh-and it’ll leave your pup’s space smelling fresh and feeling comfy. 3. Sprinkle Baking Soda to Deodorize Sometimes, you don’t need to do a full wash to clean a dog bed-you just need to get rid of that smell. Baking soda is a natural deodorizer that’s totally safe for pets. Sprinkle a good layer over the bed and let it sit for 30 minutes or more. It soaks up bad odors and freshens things up without any fragrance or chemicals. After it sits, just vacuum it up. You’ll notice the Clean Dog Bed smells cleaner and feels fresher. This trick is perfect between washes, especially if your dog tracks in dirt or has a habit of rolling in questionable things. It’s a fast, easy way to clean dog beds naturally. You can do this weekly or anytime the bed starts smelling off. Baking soda is cheap, safe, and works wonders-plus, it gives your vacuuming routine a little boost. It’s one of the best low-effort ways to clean a dog bed without needing detergent or special tools. 4. Spot Clean with Castile Soap and Water Some messes don’t need a full wash-just a spot clean. To clean a dog bed after a small spill or muddy paw print, mix a little warm water with unscented castile soap. It’s gentle, plant-based, and doesn’t leave behind any harsh residue. Perfect for sensitive pups. Dab the stained area with a cloth dipped in the soap solution. Gently blot-don’t rub-to avoid spreading the mess or pushing it deeper into the fabric. Once the stain is lifted, use a damp cloth to rinse the area, then pat dry with a clean towel. This is a simple way to clean dog beds without tossing the whole thing in the wash. Spot cleaning is great for quick touch-ups in between regular washes. You can stay on top of little accidents, and your dog’s bed stays cleaner overall. If you’re trying to clean a dog bed without harsh chemicals, castile soap is a safe, pet-friendly staple to keep on hand. 5. Use a Steam Cleaner for Deep Cleaning A steam cleaner is an excellent tool when you need to clean a dog bed deep down. The high temperature lifts dirt, kills germs, and refreshes fabric-all without any cleaning products. It’s perfect for Clean Dog Beds that can’t go in the washer or for homes with dogs who have allergies. Start by vacuuming the bed to remove loose dirt. Then, slowly pass the steam cleaner over the entire surface. The heat will sanitize and help remove embedded smells and bacteria. This is one of the most effective ways to clean dog beds without introducing any chemicals at all. Let the bed dry fully before letting your dog back on it. Steam cleaning is powerful, safe, and doesn’t require any special soaps. If you’re serious about finding ways to clean a dog bed naturally and effectively, this is one method worth trying regularly. Need Help Keeping Things Clean? Call Toronto Shine Cleaning It’s easier than you think to clean dog beds without harsh chemicals. Whether you’re vacuuming weekly, washing with gentle detergent, or using natural deodorizers like baking soda, your dog’s bed can stay fresh without

5 Easy Steps to Clean Dog Beds Without Harsh Chemicals Read More »
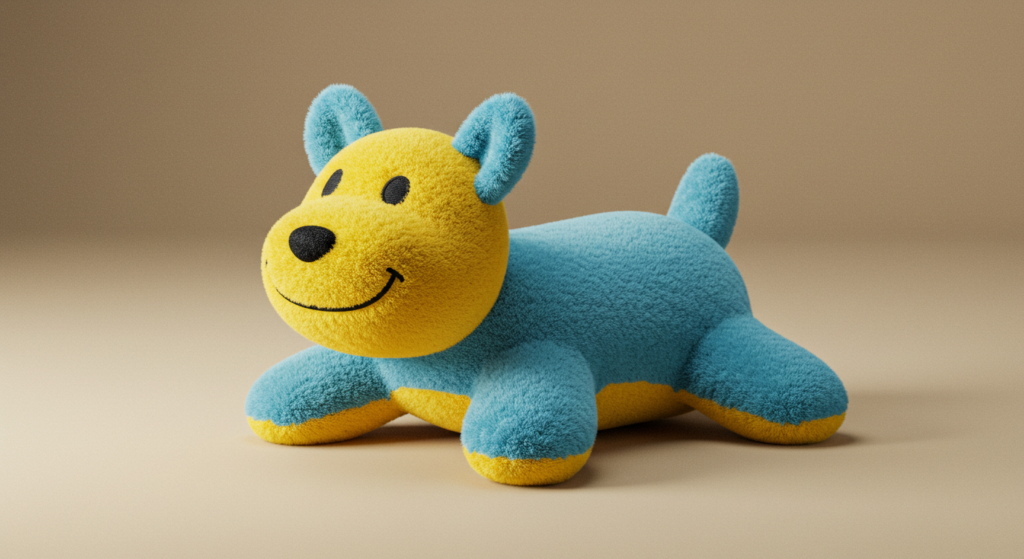
Plush animal toy yellow and blue for dogs

How to Clean Dog Toys Safely and Naturally

Dog toys get gross fast – and if you don’t clean dog toys regularly, they can collect bacteria, mold, and bad smells. Learning how to clean dog toys safely and naturally helps protect your pet’s health and keeps your home fresher. Most dogs chew, lick, and drag their toys everywhere, so they need frequent cleaning to stay safe. Using natural methods to clean dog toy collections avoids exposing your pup to harsh chemicals. You don’t need to overcomplicate things. The best way to clean dog toy surfaces is with hot water and a bit of gentle soap. Whether it’s a plush squeaky or a tough rubber chew, you can clean every type of dog toy using simple, safe ingredients. This guide breaks it down by toy type and helps you create a routine that’s easy to stick to – and your pup will thank you for it. Let’s go over how to clean dog toys step-by-step, using natural methods that work without leaving any harmful residue behind. Clean Plush Dog Toys in the Washing Machine If your dog loves soft, plush toys, you’ll want to know how to clean dog toy fabric safely. Most plush dog toys can be tossed right in the washing machine. Use a gentle cycle with warm water and skip the harsh detergents. Stick with a pet-safe laundry soap or something like Castile soap to avoid any irritating chemicals. For extra protection, place the toys in a laundry bag or pillowcase before washing. This helps prevent damage, especially if your dog’s favorite toy has a squeaker or delicate stitching. After the wash, always inspect the toy to make sure it hasn’t torn open. The last thing you want is your dog chewing on loose stuffing or a broken squeaker. Dry the toy thoroughly before giving it back to your pup. You can air-dry it or use a dryer on low heat. Drying is key – moisture inside a plush toy can cause mildew. By washing and drying regularly, you’ll clean dog toys effectively and help them last longer. Wash Rubber and Hard Dog Toys with Hot Water and Soap Rubber, nylon, and plastic dog toys get just as dirty – especially the ones your pup uses for fetch or food. To clean dog toy surfaces like these, soak them in hot water with a small amount of pet-safe dish soap. Let them sit for about 10 to 15 minutes to loosen drool, dirt, and any sticky food bits. After soaking, use a brush or sponge to scrub every groove and surface. This step is super important for puzzle toys or treat dispensers. You’d be surprised how much grime builds up. Rinse each toy well under warm water to remove all traces of soap before giving it back to your dog. That’s a simple and safe way to clean dog toys without using anything harmful. Let the toys dry completely before letting your dog play with them again. Air drying works best. Making this a weekly habit helps maintain your dog’s health and keeps your home from smelling like old chew toys. Regularly cleaning dog toys also cuts down on bacteria and allergens. Use a Toothbrush for Hard-to-Reach Spots Some toys have tricky grooves, holes, or raised textures that need more attention. If you want to really clean dog toys thoroughly, an old toothbrush is your best tool. Dip it in warm soapy water and use it to scrub those hard-to-reach areas where dirt and drool love to hide. This is perfect for toys with ridges or built-in treat holders. Focus on textured surfaces or spots where food might get stuck. Take your time and make sure to get into every corner. A quick toothbrush scrub can make a huge difference when you’re trying to completely clean dog toy surfaces without leaving behind germs. It’s also a good moment to check the toy for cracks or signs of wear. Once you’re done scrubbing, rinse the toy under warm water until it’s squeaky clean. Let it dry all the way before your dog gets it back. Doing this every week or so is a smart way to keep toys safe, clean, and fun for your pup. Skip the Bleach and Harsh Disinfectants If you’re tempted to use bleach or strong cleaners, don’t! These are not safe when you’re trying to clean dog toys – even a small leftover amount can make your dog sick. Your pet chews, licks, and carries their toys around, so anything left behind from cleaning goes straight into their system. Stick with gentle, pet-safe cleaners that do the job without the risks. Many common cleaners are packed with artificial scents and chemicals that are way too harsh for anything your dog touches. Even “green” cleaners aren’t always safe for pets. That’s why we always recommend warm water, mild soap, or Castile soap when you clean dog toys. It’s safer, cheaper, and gets the job done just as well. If you want an extra-deep clean, you can boil certain rubber toys – but make sure they’re heat-safe first. Check the packaging or manufacturer’s website. Boiling is a great chemical-free way to sanitize. Whatever method you choose, always think pet-safe first when you need to clean dog toy collections. Make Cleaning Dog Toys Part of Your Routine Just like washing dishes or vacuuming pet hair, taking time to clean dog toys should be part of your weekly routine. Toys collect bacteria, dirt, and even allergens. If your dog drags them around the house, those germs get everywhere. Regular cleaning not only helps your dog stay healthy but also keeps your home fresher. You don’t have to clean everything at once. Rotate toys – while some are being cleaned, others can stay in the toy bin. Focus on the ones your dog plays with the most. Weekly washing keeps the grime from building up too much. Once you get in the habit, it only takes a few minutes to clean dog toys every week. Clean toys

How to Clean Dog Toys Safely and Naturally Read More »

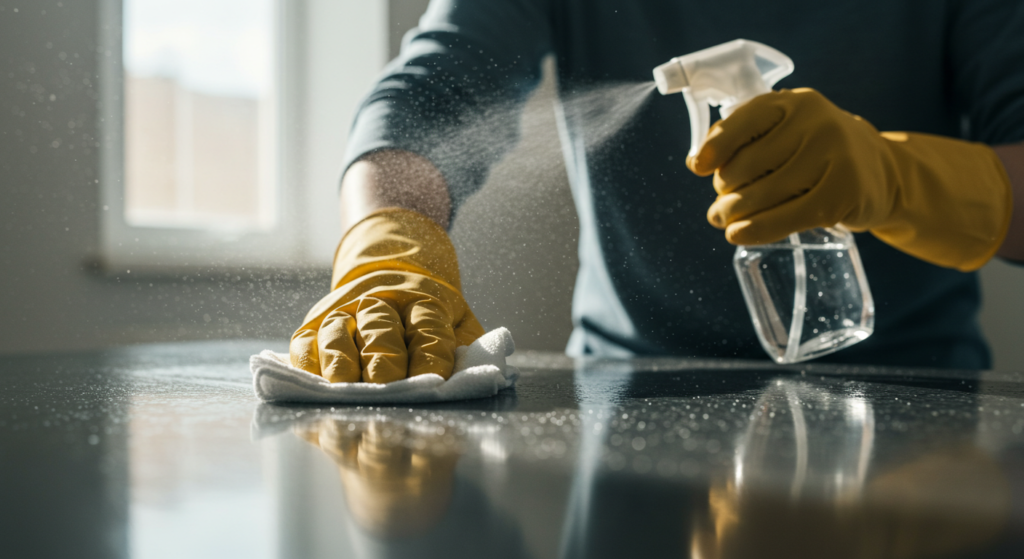
Cleaning with alcohol at home, spray bottle and cleaning gloves

7 Smart Ways to Clean with Alcohol at Home

Rubbing alcohol is one of those products we all have lying around but don’t always know how to use. Whether it’s 70% or 90% isopropyl, this simple product can actually be a cleaning superhero. When you clean with alcohol, you get fast-drying, streak-free results while also killing germs. From glass to electronics, there are tons of surfaces that benefit from cleaning with alcohol. Check out these 7 smart ways to use it around your home. 1. Clean and Sanitize Your Phone Our phones go with us everywhere, which means they pick up dirt, germs, and oils constantly. That’s why it’s so important to clean with alcohol regularly. A soft cloth or cotton pad with a small amount of rubbing alcohol can safely remove smudges and sanitize your phone. Since alcohol evaporates quickly, it won’t damage your screen or ports when used properly. Plus, you don’t have to worry about leftover moisture like with water-based cleaners. Just a light wipe-down leaves your phone cleaner and germ-free. Make it a habit to clean with alcohol at least once a week. It keeps your device looking great and helps prevent the spread of bacteria from one touch to the next. It’s one of the simplest ways to keep things clean without extra effort. 2. Disinfect High-Touch Surfaces Doorknobs, remotes, light switches-these spots get touched constantly and are easy to forget. When you clean with alcohol, you can disinfect them quickly without leaving a mess behind. It dries fast, kills bacteria, and doesn’t need rinsing, making it a perfect everyday cleaner. Spray a little alcohol onto a microfiber cloth and wipe down these high-traffic areas. It’s especially helpful if someone in your home is sick or if you’ve had guests over. Cleaning with alcohol is a smart way to keep surfaces safe and sanitized. This method also works well on electronics, like keyboards and controllers, that you can’t clean with soap and water. Keeping these items germ-free is simple when you regularly clean with alcohol. 3. Make Your Mirrors and Glass Shine If you’re tired of streaky glass and foggy mirrors, try switching up your routine and clean with alcohol instead. It cuts through fingerprints, hairspray, and toothpaste with zero streaks. Plus, it evaporates super fast, so you don’t have to worry about drip marks. Just mix equal parts alcohol and water in a spray bottle, spritz your mirror lightly, and wipe it down with a lint-free cloth. The result is a crystal-clear reflection with almost no effort. Cleaning with alcohol is especially useful in high-humidity spots like bathrooms. Use it on windows, glass tabletops, and even shower doors. Once you start to clean with alcohol, you’ll notice how easy it is to get that perfect shine-no extra scrubbing or polishing needed. 4. Remove Sticky Residue and Labels Sticker gunk, tape residue, and old labels can be super frustrating to clean. One of the easiest solutions is to clean with alcohol. Just apply some to a cotton pad or cloth and rub the sticky area gently. The adhesive starts to dissolve, making cleanup a breeze. This method is great on glass, plastic, metal, and even some finished wood. Always test a small spot first to be safe. If you’re removing labels from jars or price tags from new items, cleaning with alcohol gets the job done quickly. No more scraping with your fingernails or using harsh removers. When you clean with alcohol, the process is smooth, fast, and totally fuss-free. 5. Clean Your Makeup Tools Makeup brushes and beauty tools get dirty fast, and if you don’t clean them regularly, they can collect bacteria that ends up on your skin. That’s where cleaning with alcohol comes in handy. It’s perfect for a quick disinfect between deep washes. Spray your brushes lightly with alcohol and wipe them on a tissue to remove product buildup. You can also clean with alcohol on tools like tweezers, nail clippers, and eyelash curlers. It’s a fast way to keep everything sanitary and fresh. While it doesn’t replace a soapy deep clean, using alcohol in between keeps bacteria at bay and your tools ready to use. It’s another reason to always have rubbing alcohol on hand. 6. Freshen Up Bathroom Fixtures Faucets and towel bars can collect water spots and fingerprints fast. To bring back their shine, simply clean with alcohol using a soft cloth. It cuts through grime quickly and leaves chrome and stainless steel looking polished. Unlike soapy cleaners, cleaning with alcohol doesn’t leave a residue. It also helps prevent bacteria from building up, especially around sink handles and other high-touch areas. Since it dries instantly, there’s no need for rinsing or buffing. Add this to your weekly bathroom routine and your fixtures will always look fresh. It’s another simple reason to clean with alcohol when you want fast results and a cleaner look. 7. Disinfect Reusable Items Like Keys and Glasses You carry your keys, glasses, and wallet everywhere-so they’re bound to collect dirt and germs. It’s easy to overlook them, but taking a moment to clean with alcohol makes a big difference. A quick wipe-down can keep these everyday items cleaner and safer. Use a microfiber cloth with a little rubbing alcohol to clean glasses and sunglasses without streaks. For keys, just give them a good wipe to kill germs and remove any gunk from frequent handling. Cleaning with alcohol also works on headphones, debit cards, and your mouse. It only takes a minute to build this habit into your weekly routine. When you clean with alcohol, you’re staying ahead of the grime-and keeping your hands and face safer, too. Clean with Alcohol for the Small Stuff, Call Toronto Shine for the Big Stuff Knowing how to clean with alcohol gives you a powerful tool for quick, easy home cleaning. It’s affordable, fast-drying, and super effective for disinfecting and polishing everything from electronics to mirrors. Adding these habits to your weekly routine will help you stay on top of messes and keep germs at bay.

7 Smart Ways to Clean with Alcohol at Home Read More »

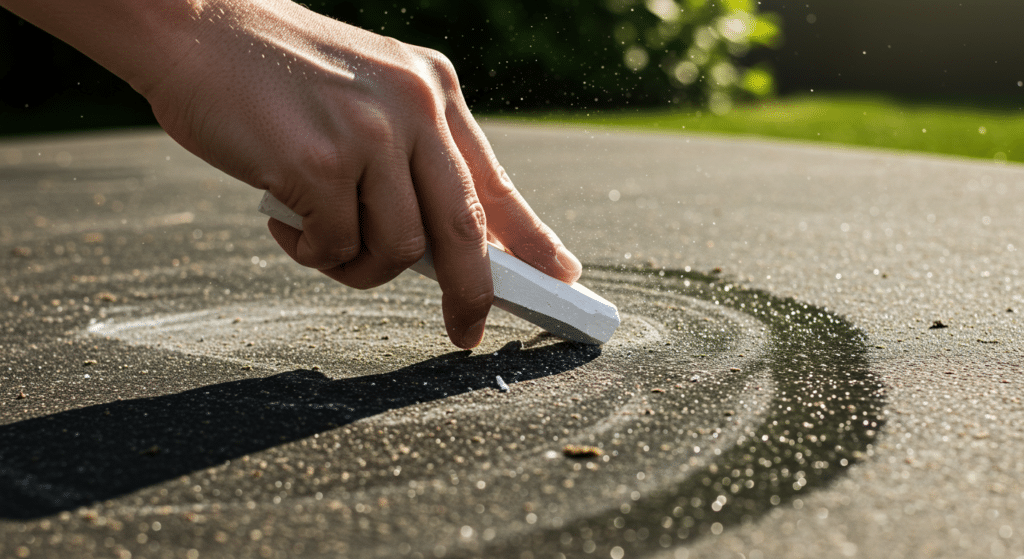
Cleaning while using chalk

6 Surprising Ways to Try Cleaning with Chalk Around the House

When people talk about natural cleaning methods, cleaning with chalk usually doesn’t come up. But maybe it should. This basic item sitting in your junk drawer or garage can actually tackle some sneaky household messes. From greasy laundry stains to musty closets, cleaning with chalk is a budget-friendly hack that’s surprisingly effective. Here are six ways to use it in your home. 1. Use Chalk to Absorb Grease Stains on Clothes If you spill oil or grease on your shirt, cleaning with chalk might save it. Just grab a stick of white chalk and gently rub it on the greasy spot. The chalk works fast to absorb the oil, making it easier to wash out later. Let it sit for a bit, then toss it in the wash like normal. One of the best things about cleaning with chalk is that it doesn’t involve harsh chemicals. It’s gentle on fabric and easy to use, especially if you catch the stain early. Avoid getting the spot wet before applying the chalk, or the grease might set deeper. You can also use this trick on napkins, cloth bags, or even furniture cushions. Chalk is a simple fix you can keep handy in your laundry room or purse for those “oops” moments. 2. Deodorize Musty Closets with Chalk If your closet smells musty or feels damp, cleaning with chalk might be the easy fix. Chalk naturally absorbs moisture, which helps control humidity and odor. Just bundle a few sticks in a sock or mesh bag and hang it in the closet. You’ll notice the difference in a few days. The great thing about cleaning with chalk in small spaces is that it’s completely mess-free. It doesn’t leak, stain, or require batteries. You can also use it in drawers, bathroom cabinets, or linen closets to fight off that damp, funky smell. Swap the chalk out once a month for best results. It’s a simple trick that helps protect your clothes, shoes, and linens from mold and moisture damage. 3. Prevent Silver from Tarnishing Tired of polishing silver? Cleaning with chalk can help prevent tarnish before it starts. Just place a few sticks of chalk in your jewelry box or silverware drawer. The chalk absorbs excess moisture from the air-one of the main reasons silver tarnishes. Cleaning with chalk doesn’t mean scrubbing or polishing; it’s a preventative trick. Over time, this habit will help your silver stay shinier without as much upkeep. It’s a small change with big results. You don’t need anything fancy. Even a couple of broken chalk pieces in a small container will do the trick. Just keep them out of direct contact with your jewelry to avoid dust buildup. 4. Clean Fingerprints Off Walls If you’ve got kids, pets, or just everyday smudges, you know the struggle of keeping walls clean. For small fingerprints, cleaning with chalk can help. Rub white chalk over the mark, then wipe with a soft, dry cloth. It lifts oils without damaging most paints. Always test it in a hidden spot first, but this method works well on matte or flat finishes where wet cleaners can make things worse. Cleaning with chalk works because the chalk powder acts like a gentle absorber that soaks up skin oils and dirt. You’ll love this trick for quick fixes before guests arrive or during routine touch-ups. It’s one of those cleaning secrets you’ll want to share. 5. Stop Toolbox Rust with Chalk If your tools are starting to rust, moisture might be the issue. Cleaning with chalk in your toolbox means placing a few chalk sticks in there to soak up the humidity. It’s a low-effort way to keep your tools in great shape. The chalk works like a mini moisture magnet. Just toss some in different corners of your toolbox, especially around metal tools. Replace them every month or so, depending on how damp your space is. Whether your tools live in the garage or the basement, cleaning with chalk helps avoid that orange rust buildup and keeps your equipment ready to use. 6. Remove Ring Marks from Walls or Wood Got ring marks on your coffee table or colored scuffs on the wall? Cleaning with chalk might help fade or even erase them. Gently rub white chalk over the mark, let it sit, then wipe away. It absorbs surface oils or residue, helping reduce the stain. This trick works best on fresh marks or shallow stains. While it won’t remove deep damage, cleaning with chalk gives you a simple first step before reaching for the heavy-duty stuff. It’s perfect for wooden tables, sideboards, or walls that get marked up by furniture. Keep some chalk nearby and you’ve got a fast solution ready whenever you need it. Let Chalk Help, But Leave the Big Jobs to Toronto Shine Cleaning Chalk is a surprisingly useful tool for a bunch of small cleaning tasks around the house. From lifting grease stains and reducing moisture to stopping rust and cleaning up marks, it does more than you’d expect for something so simple. And the best part? You probably already have some in a drawer somewhere. But for the deep cleans, the move-outs, or the days when life’s just too busy, let the pros step in. Toronto Shine Cleaning offers top-notch cleaning services across the GTA. Whether it’s your home, condo, or office, we bring the sparkle so you don’t have to lift a finger (except maybe to grab some chalk for a small mess!).

6 Surprising Ways to Try Cleaning with Chalk Around the House Read More »

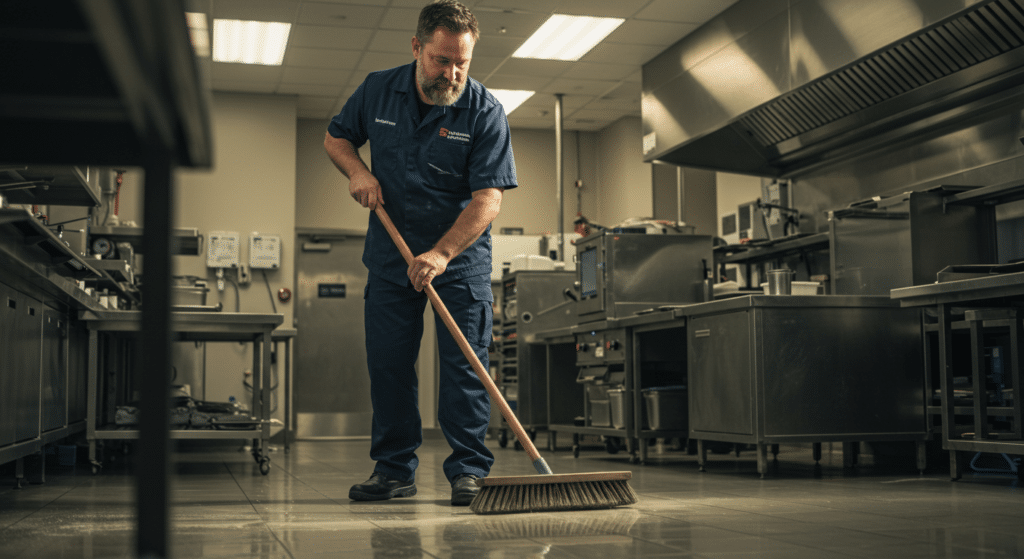
Middle aged man work as a professional cleaner while brooming

7 Must-Know Tips Before Hiring a Cleaning Service

7 Must-Know Tips Before Hiring a Cleaning Service Bringing a cleaning team into your home should take weight off your shoulders, not add worries. The right service saves hours every week and gives you time back for work, family, and rest, which is genuinely good for your mental health and wellbeing. The wrong choice, however, costs money and trust. These seven must-know tips before hiring a cleaning service will help you check the important boxes, ask the right questions, and book with confidence. Read Online Reviews and Look for Patterns Review sites such as Google, Yelp, and Facebook reveal how a company actually behaves between marketing pages. Look for repeated comments about punctuality, consistency, and attention to detail, and note whether customers book again and again. Happy repeat clients are a strong sign that results are reliable, not accidental. Negative feedback is just as informative. If several people mention missed spots, late arrivals, or weak communication, treat that as a warning. One bad day happens, but a pattern tells you how the business operates. Browse our customer reviews to see what regular clients say about our team. Confirm Insurance, Bonding, and Staff Screening Before anyone enters your home, ask whether the company is insured and bonded and request proof. Coverage protects you if an item is damaged or a worker is injured on the job, and bonding adds another layer of security. A professional firm shares this paperwork without hesitation; vagueness is a red flag. Toronto Shine Cleaning is fully bonded and insured, carrying a $1,000,000 insurance policy plus a $10,000 accidental breakage and surety bond, so your home and belongings are protected. Also ask how workers are screened and whether the same team returns each visit. Background checks and familiar faces make it easier to relax and enjoy the results. Ask What Supplies They Bring and What the Service Includes Some companies expect you to stock every spray, mop head, and cloth. A prepared team arrives with its own professional supplies and the know-how to match products to surfaces, which protects your countertops, floors, and fixtures. Health Canada’s household products information is a good reference for choosing safe, effective cleaners at home. Before booking, ask exactly what each visit covers. Basic packages may include dusting and vacuuming, while others go further into kitchen appliances and bathroom tile. Request a written or digital checklist so nothing is left to guesswork, and confirm whether extras such as inside-the-fridge cleaning or baseboard scrubbing are available as add-ons. Know Who Will Be in Your Home It is normal to feel hesitant about handing over your keys. Ask whether the company sends the same team every time or rotates staff, and whether workers are background-checked and professionally screened. Some services even introduce their cleaners by profile or photo before the first appointment, which turns a formal transaction into a comfortable relationship. When you know who is arriving, you can enjoy a clean home without hovering. Check Scheduling Flexibility and Compare Real Value Your calendar changes, and your cleaning plan should bend with it. Look for a company that offers weekly, bi-weekly, or one-time visits, allows rescheduling without penalty, and provides easy online booking. Life gets busy, and a regular cleaning service should simplify your week, not complicate it. Finally, compare value instead of chasing the lowest quote. A rock-bottom price often means cut corners, skipped details, or surprise fees. Weigh what is included: insurance, supplies, a clear checklist, guarantees, and responsive communication. Paying a fair price for a thorough, insured team is the better investment in the long run. Before you sign up, confirm these points with any candidate: Proof of insurance and bonding. Bring-your-own professional supplies and products. A written checklist of included tasks. Background-checked staff and consistent teams. Flexible scheduling with simple rescheduling. Clear, all-in pricing with no surprise fees. Responsive communication before and after visits. Use this cheat sheet during your phone interviews: Question What It Tells You Consider It a Red Flag If Are you insured and bonded? You are covered if something breaks The company will not provide proof Do you bring your own supplies? The right products are used on every surface You must buy all supplies yourself What is included in each visit? The scope of work is clear There is no checklist and answers stay vague Who will clean my home? Staff are screened and accountable Teams rotate with no notice or introduction Can I reschedule easily? The service fits your lifestyle Every change costs a fee or hassle Frequently Asked Questions About Hiring a Cleaning Service How much does a cleaning service cost in Toronto? Pricing depends on home size, visit frequency, and the condition of the space. Toronto Shine Cleaning’s regular cleaning rates before HST start at $212.63 for a studio or one-bedroom, with a two-bedroom home at $273 and a three-bedroom at $327; see our pricing page for full details. Do I need to be home during the cleaning? Many clients prefer to be present for the first visit, and after that the arrangement is flexible. Ask the company about entry options such as a spare key or building concierge access, and choose whatever makes you most comfortable. What happens if something is damaged during a visit? A properly insured and bonded company will walk you through its claims process. Toronto Shine Cleaning carries a $1,000,000 insurance policy and a $10,000 accidental breakage and surety bond to cover these situations. How do I know the cleaner will do a good job? Start with reviews, a written scope of work, and a clear checklist. After the first visit, inspect the results and give feedback, because a quality company uses your input to make the next clean even better. Choosing a cleaning service does not need to be a gamble. Check reviews, verify insurance and bonding, confirm the scope, and compare real value, and you will find a partner that respects your home and your time. Whether you need a one-time reset or ongoing

7 Must-Know Tips Before Hiring a Cleaning Service Read More »

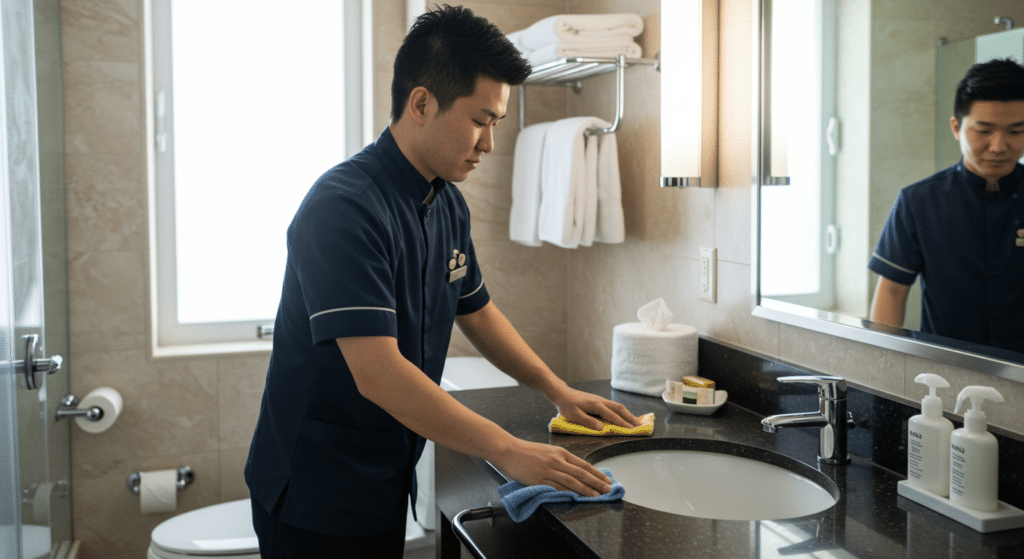
Housekeeping, cleaning with cloth

6 Housekeeping Tips That Will Instantly Make Your Home Feel Cleaner

6 Housekeeping Tips That Will Instantly Make Your Home Feel Cleaner If you want a home that looks fresh without spending hours cleaning, focus on high-impact areas that make your space feel cleaner fast. These six housekeeping tips are about working smarter, not harder, whether you are building a new housekeeping routine or just want some easy housekeeping ideas. 1. Focus on Entryways First The entryway is the first impression of your home. Tidy shoes, bags, and jackets every day, wipe down surfaces, and give the floor a quick sweep. Keep the space organized with bins for shoes and hooks for coats. Add a light-scented candle or diffuser so it smells as fresh as it looks. A quick tidy takes just five minutes, and done daily, it means you never dread surprise guests showing up. 2. Make the Beds Every Morning Making the bed instantly makes the bedroom look organized, even if other messes remain. Many professional cleaners say it is the first task of a daily housekeeping routine, because it sets the tone for a clean, productive day. Smooth the sheets, fluff the pillows, and straighten the blankets. A made bed anchors the room, gives you a sense of accomplishment right away, and influences the rest of your cleaning habits. 3. Wipe Down High-Touch Surfaces Light switches, doorknobs, counters, handles, remotes, cabinet pulls, and faucets get dirty quickly and can make a home feel grimy even when the rest is clean. Wipe these areas with a mild cleaner and a microfiber cloth as part of your daily housekeeping routine. You do not need to deep clean every day, but keeping these small zones clean adds a polished, professional finish and reduces germs at the same time. 4. Clear the Clutter Before You Clean Do not clean around the mess. Take five to ten minutes to clear surfaces before you start wiping or vacuuming: put away mail, fold throw blankets, and gather loose items into a catch-all tray or bin. Use small baskets to group items that belong together, and donate what you do not need. A clutter-free space automatically looks cleaner, even before you scrub a single thing, and it makes deep cleaning faster later on. 5. Keep Cleaning Supplies Within Reach If cleaning products are hard to get to, you are far less likely to use them. Store supplies in the rooms where they are needed: glass cleaner and wipes under the bathroom sink, kitchen spray under the counter. When your tools are close, it is easy to clean up little messes as they happen, like toothpaste on the mirror or spills on the counter. These mini cleanups save time, prevent big build-ups, and turn cleaning into a low-stress routine the whole family can join. 6. Vacuum or Sweep High-Traffic Areas Daily Hallways, kitchens, and living room rugs collect crumbs, dust, and pet hair fast. A quick daily sweep or vacuum of these zones, using a cordless vacuum or a broom, is one of the most impactful housekeeping habits you can follow. You do not need to do the whole house, just target the areas that get the most action. For pet owners this matters even more, because pet hair builds up fast and makes rooms feel messier than they are. The CDC’s cleaning guidance is a helpful reference for keeping a healthy home, Health Canada’s indoor air quality pages explain how regular cleaning reduces contaminants, and the CDC’s asthma trigger resources cover dust mites and pet dander. A five-minute daily housekeeping routine: Tidy the entryway and sweep the floor Make the bed Wipe high-touch surfaces with a microfiber cloth Clear clutter into a catch-all tray Sweep or vacuum high-traffic areas Habit Time Payoff Tidy the entryway 5 minutes Whole home feels cleaner instantly Make the bed 2 minutes Bedroom looks organized all day Wipe high-touch surfaces 3 minutes Polished finish, fewer germs Clear clutter 5 to 10 minutes Surfaces look clean before you scrub Sweep high-traffic zones 5 minutes Less dust and pet hair, fresher rooms Don’t Want to Handle It All? Call the Pros Sometimes life gets too hectic to keep up with even the best housekeeping tips. Toronto Shine Cleaning serves the GTA with reliable, detail-focused teams. Choose regular maid service for weekly upkeep or a home deep cleaning for a full reset, see pricing, and read what clients say on our reviews page. Call (647) 424-0355 to book. How long does it take to tidy an entryway? About five minutes. Put shoes in bins, hang coats on hooks, wipe the surfaces, and give the floor a quick sweep. Done daily, it keeps the whole home feeling cleaner and ready for surprise guests. Do I need to deep clean every day? No. Daily housekeeping is about high-impact maintenance: making the bed, wiping high-touch surfaces, and sweeping traffic areas. Save deep cleaning for weekly or seasonal sessions, or book a professional deep clean when needed. What is the best way to manage pet hair? Sweep or vacuum high-traffic areas daily, because pet hair builds up fast and makes rooms feel messier than they are. Keeping supplies within reach makes it easy to stay ahead between deeper cleans. Does Toronto Shine Cleaning offer regular housekeeping? Yes. Toronto Shine Cleaning offers regular maid service and full deep cleans across the GTA, and the team is known for being reliable, detail-focused, and friendly. Call (647) 424-0355 or book online.

6 Housekeeping Tips That Will Instantly Make Your Home Feel Cleaner Read More »

Cleaning with a dirty cloth and dirting ever more

5 Common House Cleaning Mistakes You Need to Stop Making

Keeping your home clean might seem simple, but many people unknowingly make house cleaning mistakes that make their efforts less effective. These errors can lead to wasted time, frustration, and even a dirtier home in the long run. The good news is that with a few small changes, you can clean smarter, not harder. Let’s take a look at five of the most common house cleaning mistakes and how to fix them. 1. Using Too Much Cleaning Product It’s easy to think that using extra cleaning products will make your home cleaner, but this is one of the biggest house cleaning mistakes you can make. Overusing cleaning solutions can leave behind sticky residues that attract dust and dirt, making surfaces look dull and grimy over time. This is especially true for floors, countertops, and glass surfaces, where too much cleaner creates a film that’s hard to remove. Another issue with using too much product is that it can take longer to clean. If you don’t rinse or wipe properly, you’ll be left with streaks or buildup, which means you’ll have to clean the same area again sooner than expected. Instead, always follow the recommended amounts on the label and use a damp microfiber cloth to remove any excess cleaner. For a more efficient clean, try using multi-purpose cleaners that require minimal effort. Microfiber cloths and steam cleaning can also help reduce the need for excessive chemicals. When it comes to house cleaning mistakes, remember that less is more-a small amount of the right product goes a long way! 2. Ignoring High-Touch Areas One of the most overlooked house cleaning mistakes is forgetting to clean high-touch areas. While most people focus on visible surfaces like floors, counters, and sinks, areas like door handles, light switches, remote controls, and refrigerator handles accumulate germs quickly. These spots are touched multiple times a day, making them breeding grounds for bacteria and viruses. Not cleaning these areas regularly can lead to the spread of illness among family members. Even if the rest of your home is spotless, ignoring these high-contact surfaces means germs can easily transfer from person to person. Using disinfectant wipes or a simple microfiber cloth with a sanitizing solution once a day can help keep germs at bay. To make sure you don’t forget, create a checklist of high-touch areas in your home and include them in your regular cleaning routine. A quick daily wipe-down can make a big difference in keeping your home healthier and safer for everyone. Avoiding this house cleaning mistake will help maintain a truly clean environment. 3. Cleaning from the Bottom Up If you’ve ever cleaned your floors first, only to find dust and crumbs falling from your countertops later, you’re not alone. Many people make the mistake of cleaning from the bottom up, which means they have to redo their work multiple times. This inefficient approach is one of the most common house cleaning mistakes that can make cleaning feel like an endless cycle. The correct cleaning order is to start from the top and work your way down. Begin by dusting ceiling fans, light fixtures, and shelves before wiping down furniture and countertops. This way, any dust or dirt that falls will be cleaned up when you vacuum or mop the floors last. This simple switch can save you time and ensure a more thorough clean. For even better results, use a microfiber duster to trap dust rather than spreading it around. When vacuuming, go from room to room systematically to prevent tracking dirt back into areas you’ve already cleaned. Following this step-by-step approach will leave your home cleaner and make your cleaning routine more efficient. 4. Using the Same Cloth for Everything Reusing the same cloth to clean different areas might seem convenient, but it actually spreads bacteria and dirt from one surface to another. For example, if you use the same rag to wipe down your bathroom sink and then move to your kitchen counters, you could be transferring germs from one area to a food preparation space. This is a major house cleaning mistake that many people don’t realize they’re making. To avoid this mistake, have separate cleaning cloths for different areas of your home. Use color-coded microfiber cloths-one color for the kitchen, another for the bathroom, and a different one for dusting furniture. This simple method ensures that germs stay contained and don’t spread throughout your home. Another great tip is to wash your cloths regularly. Dirty rags can hold bacteria, so make sure to toss them in the laundry after each use. Keeping a stash of fresh, clean cloths on hand will make cleaning more effective and help maintain a healthier home. Avoiding this house cleaning mistake will make a noticeable difference in your cleaning results. 5. Forgetting to Clean Your Cleaning Tools Cleaning tools themselves need to be cleaned! Sponges, mop heads, vacuum filters, and even brooms collect dirt, bacteria, and grime over time. If you don’t clean them regularly, you might just be spreading dirt around instead of removing it. A dirty sponge or mop can leave behind a foul odor and make your home less sanitary. This is one of the most overlooked house cleaning mistakes that can impact the cleanliness of your space. To keep your tools effective, wash sponges and dishcloths in hot water or replace them frequently. Mop heads should be cleaned after each use-many are machine washable, making it easy to maintain them. Vacuum filters should be emptied and cleaned to ensure optimal suction and prevent dust from being blown back into your home. By taking a few minutes to clean your tools after each use, you’ll ensure they work better and last longer. Plus, you’ll avoid the frustration of re-cleaning areas that didn’t actually get clean the first time! Avoiding this house cleaning mistake will make your cleaning routine more efficient and effective. Let Toronto Shine Cleaning Do the Hard Work for You! House cleaning takes time and effort, and avoiding

5 Common House Cleaning Mistakes You Need to Stop Making Read More »

Paper written home cleaning routine

6 Expert Tips for a Home Cleaning Routine

6 Expert Tips for a Home Cleaning Routine A clean home does not come from heroic weekend scrubbing; it comes from a system of small, repeated actions. A realistic home cleaning routine keeps dust, clutter, and grime from gaining ground, and it supports better indoor air quality because regular vacuuming and dusting remove particles that build up in carpets, bedding, and upholstery. Health Canada points to indoor air contaminants as a key factor in comfortable living spaces. The six expert tips below will help you build a routine that fits your household and stays easy to follow. Declutter First So Cleaning Goes Faster Clutter makes every cleaning task harder. Extra items collect dust, block surfaces, and turn a ten-minute wipe into a half-hour project. Start by going through each room and setting aside anything you have not used in the past year, then donate or discard it. Fewer belongings means less dust, better air circulation, and a calmer room. To keep things from piling up again, spend 10-15 minutes each day tidying one specific zone, such as a counter, a shelf, or a closet corner. This short daily habit prevents messes from compounding and keeps your main cleaning sessions focused on actual cleaning instead of shuffling stuff around. Create a Schedule With Daily, Weekly, and Monthly Tasks Consistency beats intensity. Divide chores into daily, weekly, and monthly buckets so no zone goes neglected. Daily tasks cover the essentials: wipe kitchen counters, wash dishes, and vacuum the floors people walk on most. Weekly jobs go deeper, with furniture dusting, bathroom scrubbing, and fresh bed linens. Monthly work such as washing windows, organizing closets, and steam-cleaning carpets keeps the whole home refreshed. A posted schedule turns cleaning from a chore into a habit, and it makes delegation easy. Assign each family member the tasks they can handle, and rotate regularly so nobody gets stuck with the same job forever. Choose the Right Cleaning Products for Every Surface The right tools make the routine faster and protect your surfaces. Microfiber cloths trap dust instead of pushing it around, which makes them ideal for dusting and polishing. Disinfecting products belong on high-touch points such as doorknobs, light switches, and countertops; the CDC’s guide to when and how to clean and disinfect your home explains how to use them safely. For stainless steel, granite, and hardwood, choose products made for those materials so you keep their finish looking new. If you prefer greener options, many plant-based cleaners deliver strong results without harsh ingredients. Matching the product to the task keeps your routine efficient and your family safe. Work From Top to Bottom in Every Room Order matters. When you dust ceiling fans, light fixtures, and shelves first, the falling debris lands on surfaces you have not cleaned yet. Move down to counters, tables, and appliances, and finish each room with the floors, either vacuuming or mopping last. This top-to-bottom flow prevents re-cleaning and makes the whole session feel shorter. Use the same sequence whether you are doing a quick daily pass or a full deep clean, and you will cover every level of the room exactly once. Give High-Traffic Areas Extra Attention and Share the Work The kitchen, bathrooms, and entryway take the most abuse, so they deserve the most attention. In the kitchen, disinfect counters, stovetops, and sinks daily, since food residue attracts bacteria quickly. In bathrooms, scrub showers and sink areas regularly to stop mold and mildew before they start. At the entryway, doormats trap dirt, and frequent vacuuming or mopping keeps it from traveling through the house. Finally, make the routine a team effort. Even young kids can take on simple tasks, and turning chores into a game, such as a 10-minute tidy-up race with a timer or a small reward, boosts participation. When everyone contributes, the workload shrinks and the habit sticks. A sample rhythm for a manageable routine looks like this: Frequency Core Tasks Focus Areas Daily Wipe kitchen counters, wash dishes, vacuum high-traffic floors Kitchen and entryways Weekly Dust furniture, scrub bathrooms, change bed linens Bathrooms and bedrooms Monthly Wash windows, organize closets, steam-clean carpets Whole home If you only have 15 minutes, this order delivers the biggest visible win: Tidy one cluttered zone and put stray items away. Wipe the kitchen counters and sink. Spot-clean the bathroom mirror and fixtures. Vacuum or sweep the busiest walkways. Empty trash bins that are nearly full. Set out supplies so tomorrow’s session starts instantly. Frequently Asked Questions About Cleaning Routines How much time should a daily cleaning routine take? Around 10-15 minutes of targeted tidying keeps messes under control between deeper sessions. Save the thorough work for a weekly block, and you will never face an overwhelming, all-day cleanup. Can a cleaning routine improve indoor air quality? Yes. Dust, allergens, and bacteria collect quickly in carpets, bedding, and soft furnishings. Consistent vacuuming, dusting, and laundering help keep those particles in check, and Health Canada’s indoor air contaminants guidance covers the basics of humidity and ventilation at home. What should I do when I fall behind on my routine? Shrink the list back to the essentials, ask family members to take two tasks each, and consider a professional catch-up visit. A deep cleaning service can reset the whole house, after which a lighter routine is much easier to maintain. How do I get my family to help with cleaning? Assign age-appropriate tasks, rotate responsibilities, and add a lighthearted element such as a timed tidy-up or a small reward. Shared ownership makes the routine faster and keeps resentment out of the chore chart. A good home cleaning routine is built from realistic steps: declutter, schedule, use the right products, work top to bottom, and share the load. If your household needs backup, Toronto Shine Cleaning offers regular home cleaning and one-time deep cleans at clear, published prices. Call (647) 424-0355 today, and let us help you keep the routine on track.

6 Expert Tips for a Home Cleaning Routine Read More »

Apartment cleaning mistake, cleaning purple paint spraying a cleaner

7 Common Apartment Cleaning Mistakes and How to Avoid Them

Keeping your apartment clean is essential for a healthy and comfortable living space. However, many people make simple apartment cleaning mistakes that can make the job harder, less effective, or even damaging to surfaces. Here are seven of the most common apartment cleaning mistakes and how to avoid them to keep your home fresh and spotless. 1. Using the Wrong Cleaning Products One of the biggest apartment cleaning mistakes people make is using the wrong products for specific surfaces. Not all cleaners are universal, and using a harsh chemical on delicate materials like wood or marble can cause permanent damage. For example, bleach-based cleaners can discolor granite countertops, while ammonia can strip the finish off wooden furniture. Always read the labels and ensure the cleaner is safe for the surface you are using it on. Another issue with the wrong cleaning products is that some cleaners may leave behind residue that attracts more dirt rather than removing it. Many multi-purpose sprays work well for quick cleans, but they might not be suitable for deep cleaning certain materials. Investing in high-quality, specialized cleaners can make a huge difference in the longevity and cleanliness of your apartment. For a more eco-friendly approach, look for non-toxic cleaners that are safe for both your home and the environment. Many commercial brands now offer plant-based options that effectively clean without harmful chemicals. Choosing the right product ensures your apartment remains fresh without unnecessary wear and tear on your belongings. 2. Skipping High-Touch Areas When cleaning, many people focus on visible areas like floors, countertops, and bathrooms but forget about high-touch surfaces. These areas include light switches, doorknobs, remote controls, and refrigerator handles. Since these spots are used frequently, they accumulate bacteria and germs quickly, making them a hotspot for potential illness. Ignoring these spots is a common apartment cleaning mistake that can compromise your home’s hygiene. To keep your apartment truly clean, make a habit of disinfecting these areas regularly. A simple wipe-down with a disinfectant cloth or spray can go a long way in maintaining a hygienic home. If you’re using reusable cloths, make sure to wash them frequently to prevent bacteria buildup. Especially during flu season or when guests come over, high-touch areas should be cleaned even more often. These small cleaning habits can significantly improve the overall cleanliness of your home and help prevent the spread of germs.     3. Forgetting to Dust Before Vacuuming Many people vacuum first and then dust, thinking they are being efficient. However, dusting after vacuuming can undo all your hard work by allowing dust particles to settle back onto freshly cleaned floors. Dust accumulates on surfaces like shelves, blinds, and furniture, and when disturbed, it becomes airborne, eventually settling on the floor again. This is a common apartment cleaning mistake that leads to more dust buildup. To clean effectively, always dust before you vacuum. Start with higher surfaces, like ceiling fans and shelves, then work your way down. Use a microfiber cloth or a duster that traps dust rather than just spreading it around. This method ensures that any dust that falls to the floor is picked up when you vacuum. In addition to dusting surfaces, don’t forget about vents and baseboards. These areas are often neglected but collect a surprising amount of dust over time. A regular dusting and vacuuming routine will keep your apartment looking fresh and help maintain good air quality. 4. Overloading the Dishwasher Cramming too many dishes into the dishwasher may seem like a time-saver, but it can actually prevent your dishes from getting properly cleaned. When dishes are packed too tightly, water and detergent can’t reach all surfaces, leaving behind food residue and soap buildup. This means you’ll have to rewash items, wasting both time and water. Overloading the dishwasher is another common apartment cleaning mistake that reduces efficiency. Instead, load your dishwasher efficiently by giving dishes enough space for water to circulate. Place larger items on the bottom rack and smaller, more delicate items on the top. If necessary, run two smaller loads instead of overloading one. Additionally, make sure to clean your dishwasher regularly. Food particles and grease can build up over time, reducing efficiency. Running a cleaning cycle with a dishwasher cleaner once a month will help keep it running smoothly and ensure your dishes come out sparkling clean.     5. Using Too Much Cleaning Product It’s common to think that using more cleaning product will make your apartment cleaner, but this is not the case. Overusing cleaning products can leave behind a sticky residue that attracts dirt and dust, making surfaces feel grimy faster than they should. This is one of the most overlooked apartment cleaning mistakes that can actually make your space dirtier. To avoid this mistake, always follow the recommended amount on the product label. Using too much can also make rinsing and wiping more difficult, leading to streaks and buildup. A little goes a long way when it comes to most cleaning solutions. If you notice streaks on glass, floors, or countertops, it may be a sign that you’re using too much product. Try using less and see if it makes a difference in the cleanliness of your space. 6. Ignoring Hidden Areas It’s easy to focus on visible areas like countertops and floors, but hidden spots often accumulate the most dirt. Under furniture, behind appliances, and inside cabinets are some of the most neglected areas in apartment cleaning mistakes. Dust, crumbs, and even mold can build up over time if these areas are ignored. Skipping these hidden areas is a major apartment cleaning mistake that can lead to long-term hygiene issues. Make it a habit to move furniture occasionally and vacuum or sweep underneath. Similarly, clean behind your stove and fridge at least once every few months to prevent grease and food debris from accumulating. Closets and storage areas should also be checked regularly. These spaces can collect dust and clutter, making them harder to clean later. A little

7 Common Apartment Cleaning Mistakes and How to Avoid Them Read More »

Cornstach being used for cleaning

6 Clever Uses for Cornstarch in Household Cleaning

Cornstarch isn’t just for cooking-it’s one of the most versatile household cleaning hacks you can use. If you’re looking for eco-friendly cleaning solutions, cornstarch can help remove grease, polish surfaces, and freshen up fabrics. Unlike harsh chemical cleaners, cornstarch is non-toxic, affordable, and highly effective at tackling common household messes. Want to know the best uses for cornstarch in cleaning? Here are six clever ways to use this simple ingredient for a spotless and fresh home. 1. Remove Grease Stains from Fabric One of the most effective uses for cornstarch is its ability to absorb grease stains from fabric. Whether it’s a cooking oil spill on your shirt or a greasy mark on your couch, cornstarch can lift stains without damaging the material. To start, sprinkle a generous amount of cornstarch for stain removal directly onto the affected area. Let it sit for at least 15 minutes so it can absorb the oil or grease. Then, gently brush off the excess powder with a dry cloth or vacuum. If the stain remains, repeat the process before washing the fabric as usual. This method works on clothing, upholstery, and carpets, making it one of the most useful household uses for cornstarch. Instead of reaching for chemical stain removers, try this natural and effective cleaning trick. 2. Polish Stainless Steel Without Streaks If you’re struggling with streaky stainless steel appliances, cornstarch is an excellent natural polisher. Many store-bought cleaners leave behind a residue, but cornstarch for cleaning stainless steel gives a streak-free shine. To use, mix a small amount of cornstarch with water to create a paste. Apply the mixture to your stainless steel fridge, sink, or faucets using a microfiber cloth. Gently buff the surface in circular motions, then wipe it dry with a clean cloth. Using cornstarch as a polishing agent is a great way to maintain your appliances without using harsh chemicals. It works wonders on kitchen appliances, cookware, and even stainless steel fixtures, making it a must-try in your cleaning routine. 3. Freshen Up Carpets and Rugs Did you know that one of the best deodorizing uses for cornstarch is freshening up carpets and rugs? Over time, carpets can trap odors from pets, food, and general foot traffic. Instead of using artificial deodorizers, cornstarch provides a natural way to eliminate odors. Simply sprinkle cornstarch generously over your carpet, focusing on high-traffic areas. Let it sit for 30 minutes to an hour, allowing it to absorb moisture and neutralize odors. Then, vacuum up the cornstarch to reveal a fresher, cleaner carpet. This technique is especially useful for pet owners looking for safe and non-toxic ways to deodorize carpets. Regular use of cornstarch will keep your rugs smelling clean without the need for artificial fragrances. 4. Clean Windows and Mirrors If you’re tired of streaky glass, cornstarch for window cleaning is a game-changer. Many commercial glass cleaners leave behind smudges, but cornstarch helps break down grime and prevents streaks. To make a DIY glass cleaner, mix cornstarch with water and a small amount of dish soap. Apply the mixture to windows, mirrors, and glass surfaces using a microfiber cloth. Gently wipe in circular motions to remove dust and fingerprints, then buff with a dry cloth for a streak-free shine. This trick works wonders for bathroom mirrors, shower doors, and glass tabletops. It’s one of the most underrated uses for cornstarch, but once you try it, you’ll never go back to store-bought glass cleaners. 5. Deodorize Shoes Naturally Smelly shoes? Cornstarch is a natural shoe deodorizer that absorbs moisture and eliminates odors without any artificial fragrances. To use, sprinkle a small amount of cornstarch inside your shoes before bed. Let it sit overnight so it can absorb sweat and neutralize odors. In the morning, shake out the excess powder or wipe the insides with a dry cloth. This method works well for sneakers, leather shoes, and even gym bags. Using cornstarch regularly will help keep your shoes fresh, dry, and odor-free. If you’re looking for simple yet effective uses for cornstarch, this one is a must-try. 6. Remove Furniture Polish Buildup Over time, excessive use of furniture polish can leave behind a dull residue on wooden surfaces. One of the best household uses for cornstarch is removing this buildup while restoring the natural shine of your furniture. Lightly sprinkle cornstarch onto wooden tables, cabinets, or shelves, then wipe it away with a soft cloth. The cornstarch will absorb excess oils and polish, leaving your furniture looking clean and refreshed. For deeper cleaning, mix cornstarch with a small amount of water to create a paste and gently rub it into the wood before wiping clean. This technique is safe for all types of wood surfaces and helps maintain your furniture without causing damage. Instead of relying on store-bought polish, use cornstarch for a natural and effective shine. Keep Your Home Clean with Toronto Shine Cleaning While cornstarch is an excellent natural cleaning solution, keeping up with household chores can be overwhelming. If you need professional help, Toronto Shine Cleaning offers top-quality cleaning services to keep your home spotless. Our expert team provides deep cleaning, regular home maintenance, and customized cleaning plans tailored to your needs. Whether you need a one-time deep clean or ongoing cleaning services, we’ve got you covered. Contact Toronto Shine Cleaning today for a cleaner, fresher home-so you can enjoy the benefits of a tidy space without the hassle!

6 Clever Uses for Cornstarch in Household Cleaning Read More »