Blog

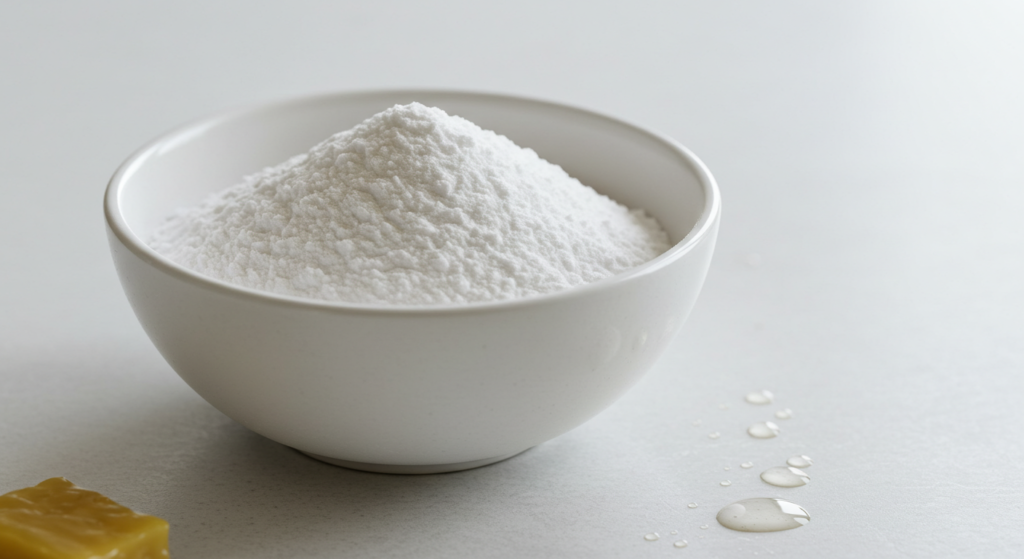
Baking soda used for cleanliness

6 Household Items To Remove Oil Stains Like Magic

6 Household Items To Remove Oil Stains Like Magic Oil stains are sneaky. A splash of cooking oil, a drip of dressing, or a smear of grease can soak into fabric within minutes, and it only gets tougher the longer it sits. No specialty removers required, though. The six household items below are probably already in your kitchen or laundry room, and each one attacks grease differently, either breaking it down or absorbing it out. Dish Soap Breaks Down Grease on Fabric and Counters Dish soap is built to defeat oil, which makes it a natural first choice. Squeeze a few drops straight onto the mark, massage the soap in with your fingertips or a soft brush, and give it about 10 minutes to break down the oil before rinsing with warm water and washing as usual. For set-in marks, repeat the treatment or soak the item about 30 minutes in warm, soapy water. On counters and stovetops, scrub spills with a sponge dipped in warm, soapy water; the grease lifts fast. For silk or wool, use a mild formula and test a hidden spot first, and always air-dry before applying heat, which can set an oil stain permanently. Baking Soda Absorbs Oil From Clothes, Carpets, and Concrete Baking soda is one of the best natural oil absorbers around. For fresh spills on fabric, carpet, or tile, cover the stain with a generous layer and leave it for 15-20 minutes, then scrub with a brush or vacuum up the residue. For deeper marks, blend it with a little water into a paste, apply, wait 15 minutes, then scrub before rinsing or washing. Baking soda also handles outdoor messes: spread a thick coat over a concrete driveway or garage floor stain, let it work overnight, then scrub the spot the next morning with warm water and a stiff brush. It is also non-toxic and gentle, which makes it ideal for homes with kids and pets. Cornstarch Lifts Grease When You Need a Backup Absorber Out of baking soda? Cornstarch works in much the same way. Sprinkle it generously over the stain and give it 30 minutes to an hour so it can pull the oil out of the material, then brush or vacuum it away. On clothing, press it into the fibers with fingers or the back of a spoon, let it sit, then brush off and launder. For furniture spills, dust it on, let it absorb the oil, and wipe away with a damp cloth. For carpets and rugs, blend a little cornstarch with mild detergent and scrub gently with a soft brush; the mix stays gentle for surfaces that cannot take harsher chemical cleaners. Chalk and Rubbing Alcohol Handle Fresh Spills and Hard Surfaces Plain white chalk is a surprising hero for fresh stains. Its calcium carbonate content naturally draws grease from fabric. Rub the chalk directly over a new oil spot, wait a few minutes, brush off the powder, and launder as usual. It is perfect for restaurant emergencies, like a dressing drip mid-meal, so tuck a stick into your bag. It suits lighter fabrics best; test dark clothing first for any residue. Rubbing alcohol dissolves grease and evaporates fast, leaving little behind. Blot the mark with an alcohol-dampened cloth or cotton ball, let it work briefly, then rinse or wash. On upholstery, dab gently instead of rubbing so the stain does not spread, and on glass or countertops it wipes away greasy fingerprints quickly. Because alcohol can fade some fabrics and finishes, always test a hidden area first, and follow Health Canada’s advice on household chemical safety for safe storage and use. Coca-Cola Loosens Stubborn Grease on Fabric and Driveways It sounds odd, but cola’s carbonation and mild acidity help break grease apart. Pour a small amount over an oil stain on a shirt, let it sit for about an hour, and then wash the garment normally. Outdoors, soak a driveway stain with cola overnight; by morning the loosened oil scrubs away with soap and water. Cola may not erase a deep, old stain completely, but it can lighten dark oil marks considerably. Rinse the area thoroughly afterward, since the sugar content will otherwise leave things sticky. For any fresh spill, follow this quick response sequence: Blot the excess oil with a clean cloth; do not rub it deeper. Sprinkle baking soda, cornstarch, or chalk over the stain. Let the powder sit so it can absorb the grease. Brush or vacuum away the powder. Treat the spot with dish soap before washing. Air-dry the item first; heat can set the stain. Compare your options at a glance, and consult Health Canada’s household products guidance when choosing what to use: Item Best For How to Use It Caution Dish soap Fabric, upholstery, counters Rub in drops, wait 10 minutes, rinse or wash Test delicate fabrics first Baking soda Clothes, carpets, concrete Sprinkle, wait 15-20 minutes, brush or vacuum Needs time to absorb Cornstarch Clothing, furniture, rugs Sprinkle, wait 30-60 minutes, brush off Works best on fresh stains Chalk Fresh spills on clothing Rub on, wait, brush off, then wash May show on dark fabric Rubbing alcohol Upholstery, glass, counters Blot with a damp cloth, then rinse Can fade some surfaces Coca-Cola Shirts, driveways Soak for an hour or overnight, then scrub Rinse away the sugar Frequently Asked Questions About Oil Stain Removal Why should I air-dry stained clothing before using heat? Heat can set an oil stain permanently, locking the grease into the fibers. Wash and air-dry the item first, and only apply heat once you are sure the mark is completely gone. Can these methods remove old, set-in oil stains? Old stains are harder but not hopeless. Repeat the treatment, let a baking soda paste sit longer, or soak the item in warm water with dish soap. For carpet and upholstery stains that will not budge, professional cleaning is the reliable option. Are these household items safe for silk or wool? With care, yes. Use a

6 Household Items To Remove Oil Stains Like Magic Read More »

Detergent being wasted while cleaning

7 Common Detergent Mistakes You Need to Avoid

Using detergent might seem straightforward, but small detergent mistakes can lead to ineffective cleaning, stubborn stains, or even damage to your clothes. Here are seven common detergent mistakes to avoid to keep your laundry fresh and clean. 1. Using Too Much Detergent More detergent doesn’t mean cleaner clothes. Excess detergent creates too many suds, trapping dirt and residue in fabrics. This buildup can make clothes feel stiff and cause skin irritation. Clothes may also develop a soapy residue that dulls colors and reduces fabric softness over time. Using too much detergent can also clog your washing machine, leading to mold and mildew growth. The excess soap may not fully rinse out, causing unpleasant odors in both your machine and clothes. If you notice a musty smell in your laundry, this might be the cause. To avoid this detergent mistake, always measure Detergent Mistakes according to the manufacturer’s instructions. If your clothes feel sticky or stiff after washing, try using less detergent and running an extra rinse cycle to remove any residue. 2. Not Using Enough Detergent On the flip side, using too little detergent won’t properly clean your laundry. Dirt and oils will remain trapped in the fabric, leading to dull-looking and smelly clothes. Skimping on detergent might also result in stubborn stains that require extra washes, wasting more water and energy in the long run. Using insufficient detergent can also allow bacteria and allergens to linger on your clothes. This is especially problematic for those with sensitive skin or allergies. Sweat, body oils, and everyday grime need an adequate amount of detergent to be fully removed. To avoid this detergent mistake, use the recommended amount based on the size of the load and the level of soiling. For extra-dirty laundry, pre-treat stains and increase detergent slightly instead of underusing it.     3. Pouring Detergent Directly on Clothes Pouring detergent straight onto clothes can lead to staining and uneven cleaning. Liquid detergent should go into the designated dispenser, while powder detergent should be evenly distributed in the drum before adding clothes. Failing to do so may result in Detergent Mistakes residue that sticks to fabrics and causes discoloration. Undissolved detergent can also leave behind a sticky residue, which attracts dirt and makes clothes feel rough. This buildup may cause irritation, especially for those with sensitive skin. Detergent stains are often difficult to remove and may require additional washes. To avoid this detergent mistake, always follow the washing machine’s guidelines. If your machine lacks a dispenser, mix detergent with water before adding it to your laundry. This ensures even distribution and thorough cleaning. 4. Ignoring Water Temperature Different detergents work best at specific water temperatures. Hot water is great for whites and heavily soiled items, while cold water is best for bright colors and delicate fabrics. Washing everything at the wrong temperature can lead to shrinkage, fading, or ineffective stain removal. Cold water saves energy but may not activate some detergents properly, leading to less effective cleaning. On the other hand, hot water can set certain stains, making them harder to remove. It can also damage delicate fabrics, causing them to wear out faster. To avoid detergent mistakes related to water temperature, always check clothing labels and choose the right water temperature for each load. Using a high-quality detergent designed for cold washes can help maintain fabric integrity while still getting clothes thoroughly cleaned. 5. Using the Wrong Detergent for Your Washer High-efficiency (HE) washers require HE detergent. Regular detergent produces too many suds, which can leave a residue in the washer and lead to buildup over time. This buildup can cause mechanical issues, foul odors, and inefficient cleaning performance. Using the wrong detergent can also shorten the lifespan of your washing machine. Excessive suds make it harder for the washer to drain properly, leading to mildew and unpleasant smells. If you’ve noticed your washer struggling or smelling bad, it might be due to improper detergent use. To prevent this detergent mistake, always check your washing machine’s manual and use the correct type of detergent. HE detergents are designed to work with less water and produce fewer suds, ensuring your washer runs efficiently and your clothes come out clean. 6. Overloading the Washing Machine Stuffing your washing machine to the brim prevents detergent from distributing evenly. Clothes won’t get properly cleaned, and detergent might not rinse out completely. Overloading can also strain the machine, leading to mechanical issues over time. When the drum is too full, clothes don’t have enough space to move around, causing dirt and detergent residue to get trapped in the fabric. This can make your laundry smell musty and look dull, even after washing. In severe cases, overloading can lead to unbalanced loads and excessive wear on your machine. To avoid this detergent mistake, fill your washing machine only up to three-quarters full. This allows enough room for water and detergent to circulate properly, ensuring a thorough and effective clean.     7. Skipping Fabric Softener or Additives While detergent is key, fabric softeners and stain removers can enhance your laundry results. Skipping these extras can leave your clothes feeling rough or looking dull. Fabric softeners help maintain softness, while additives like oxygen bleach can brighten colors and remove tough stains. Some people avoid fabric softener due to concerns about buildup, but using the right amount ensures your clothes stay fresh without residue. If you find your laundry feels stiff or loses its softness over time, consider adding a small amount of fabric softener to your routine. For stubborn stains, pre-treating with a stain remover before washing can make a big difference. Adding baking soda or borax to your wash can also help boost cleaning power and eliminate odors. Conclusion Avoiding these detergent mistakes can make a huge difference in the cleanliness and longevity of your clothes. Proper detergent use, the right water temperature, and balanced loads all contribute to better laundry results. Paying attention to these small details ensures your clothes stay fresh, bright,

7 Common Detergent Mistakes You Need to Avoid Read More »

Clean glass on the city

6 Expert Tips for Cleaning Glass Without Streaks

6 Expert Tips for Cleaning Glass Without Streaks Nothing brightens a room like a crystal-clear window or mirror, and nothing dulls it faster than a surface covered in smears and water spots. Streaks usually are not caused by dirty glass; they come from the wrong tools, the wrong timing, or too much product. With a few adjustments, you can clean glass like a professional. These six expert tips for cleaning glass without streaks will save you time and give every pane a flawless finish. Choose a Microfiber Cloth or Squeegee Over Paper Towels The tool matters as much as the solution. Paper towels often shed lint and push streaks around, while microfiber cloths trap dust and absorb moisture without leaving fibers behind. They are reusable, which makes them friendlier to your budget and the environment. For large windows, a squeegee is the pro choice. Pull it across the glass in one smooth motion, wiping the blade after every pass so you do not drag dirt back onto the pane. Keep separate cloths for glass duty only; cloths used on greasy counters can transfer residue and leave a cloudy film on your windows and mirrors. Use an Ammonia-Free Cleaner or a Simple Dish Soap Solution Many commercial glass cleaners rely on ammonia, which is effective but harsh on tinted windows and delicate surfaces. If you have children, pets, or a sensitive nose, choose an ammonia-free formula. A few drops of dish soap mixed into a spray bottle of water also cut through grease and grime without leaving sticky residue, and rubbing alcohol on a cloth dissolves stubborn spots before the final wipe. Whichever cleaner you pick, apply it to the cloth or squeegee rather than spraying the glass directly. Excess mist runs down the pane and creates new streaks, and a heavy layer of product leaves a film that attracts dust. Health Canada’s household products page offers useful guidance on choosing and using cleaners at home, while their household chemical safety tips cover safe handling and ventilation. Clean on Cloudy Days or Work in Small Sections Direct sunlight is the enemy of streak-free glass. When the sun beats down, the cleaning solution evaporates before you can wipe it, leaving spots and smears behind. Pick a cloudy day for window washing, or schedule the task for early morning or evening, when the sun is not strong enough to dry the glass mid-wipe. If you must clean in the sun, break the job into small sections: spray, wipe, and move on before the product dries. Keep a dry microfiber cloth close to buff away any streaks on the spot. For exterior windows, rinse away loose dust with a hose before you apply cleaner, so you are not smearing grit across the glass. Wipe in One Direction and Finish With a Dry Buff Random back-and-forth wiping spreads dirt and hides streaks until they dry. Instead, work in one consistent direction. A useful professional trick: wipe interior panes vertically and exterior panes horizontally. If streaks appear later, you will instantly know which side needs another pass. On mirrors and smaller panes, use long, even strokes rather than circles. Swap to a fresh cloth the moment yours feels damp or dirty, and finish every surface with a dry, lint-free cloth for a final buff. Some people swear by crumpled newspaper for this step, but certain inks can smudge or leave residue, so microfiber remains the more reliable bet. Keep the Cleaner Light and Set a Simple Glass Care Routine More product does not mean more shine. A light mist is enough to lift dust, fingerprints, and smudges; you can always reapply a tiny amount on stubborn spots. Heavy spraying sends drips onto sills and frames, where residue builds up over time. If you do overdo it, follow with a dry cloth or squeegee to remove the excess before it dries. Build glass care into your regular schedule: mirrors every week or two, windows seasonally, and shower doors whenever soap film appears. For large windows, second-storey panes, and awkward glass doors, a professional service saves the effort and delivers the finish. Toronto Shine Cleaning’s cleaners use professional tools and streak-free techniques on windows, mirrors, and glass doors, whether you book a deep home clean or regular maintenance visits. Your streak-free toolkit, at a glance: Dedicated microfiber cloths for glass only. A squeegee with a clean blade for large windows. Ammonia-free glass cleaner or dish soap and water. Rubbing alcohol for stubborn spots. A dry, lint-free cloth for the final buff. Overcast timing or small sections on sunny days. Common mistakes and the easy fix for each: Mistake Why Streaks Appear Better Approach Paper towels Lint and fibers left behind Microfiber cloth or squeegee Cleaning in direct sun Solution dries before wiping Overcast day or small sections Too much spray Soapy film and drips on frames Light mist on the cloth Random wiping motions Dirt smeared across the pane One consistent direction Skipping the final dry Water spots as droplets dry Buff with a dry lint-free cloth Frequently Asked Questions About Streak-Free Glass Why do my windows streak even after I clean them? The usual culprits are a dirty cloth, too much product, or cleaning while the sun is drying the solution too fast. Switch to a clean microfiber cloth, use a light mist, and wipe in one direction for an immediate improvement. Is ammonia-based glass cleaner safe on all windows? No. Ammonia can be too harsh for tinted windows and other treated glass. Choose an ammonia-free product or a few drops of dish soap in water, especially in homes with children or pets. Can I clean glass with just dish soap and water? Yes, for most everyday grime. A few drops of dish soap in a spray bottle cut through grease and fingerprints without leaving a sticky film, and rubbing alcohol handles spots that need extra help. Does cleaning with newspaper really work? Some people like the results, but newspaper inks can smudge or leave residue

6 Expert Tips for Cleaning Glass Without Streaks Read More »

Microfiber towel stored

6 Easy Steps to Clean Microfiber Cloths Properly

Clean Microfiber cloths are excellent for cleaning, but if not washed correctly, they lose their effectiveness. Follow these six simple steps to keep them in top condition and ensure you always clean microfiber cloths the right way. Shake Off Dirt and Debris Before washing, shake out any dust, dirt, or debris from your microfiber cloths. This prevents particles from embedding into the fibers during washing and keeps them working efficiently. A quick shake outside or over a trash can removes loose debris, ensuring a cleaner wash. For heavily soiled cloths, consider rinsing them under warm water before tossing them into the wash. This helps to remove excess grime that could otherwise spread during the washing cycle. Avoid scrubbing them aggressively, as this can damage the delicate fibers. If the microfiber cloths have been used for greasy or oily messes, soaking them in warm water with a small amount of mild detergent before washing can help break down residues. This pre-treatment step ensures a thorough clean without leaving behind unwanted build-up. Separate from Other Fabrics Wash microfiber cloths separately from cotton, towels, or lint-producing fabrics. Mixing them with other materials can cause them to trap lint, reducing their cleaning power. Microfiber is designed to attract dust and debris, so washing them alone prevents unwanted fibers from clinging to them. Additionally, keeping microfiber separate from rough or abrasive fabrics prevents potential damage to the fibers. Rough materials can cause microtears in the cloth, making them less effective over time. The softer and smoother the microfiber remains, the better it will perform in cleaning tasks. For best results, sort your microfiber cloths by usage. For example, cloths used for glass cleaning should be washed separately from those used for dusting or mopping. This prevents cross-contamination and maintains their specialized cleaning abilities. Always clean microfiber cloths separately to maximize their lifespan.     Use a Gentle Detergent Use a mild, liquid detergent free from bleach and fabric softeners. Harsh chemicals can damage the microfiber fibers, reducing their ability to pick up dust and absorb liquids effectively. Bleach can break down the fibers, while fabric softeners leave a residue that diminishes their absorbency. When selecting a detergent, opt for one labeled as free of dyes and fragrances. These additives can leave a coating on microfiber, affecting its performance. A simple, gentle detergent will keep your microfiber cloths in optimal condition for longer. Avoid using powder detergents, as they can leave behind particles that may get trapped in the fibers. Liquid detergents dissolve more easily, ensuring a thorough clean without residue buildup. Using too much detergent can also clog the fibers, so a small amount is sufficient. Always clean microfiber cloths with the right detergent to keep them in top shape. Choose the Right Washing Method For best results, wash microfiber cloths in warm water on a gentle cycle. If hand-washing, soak them in a sink with warm water and detergent, then rinse thoroughly to remove all soap residue. Proper washing prevents fiber damage and maintains the cloth’s effectiveness. When machine washing, select a cycle with minimal agitation to avoid fraying the fibers. A mesh laundry bag can also help protect Clean Microfiber Cloths during the wash. This is especially useful if you have delicate microfiber used for glass or electronics cleaning. If hand-washing, be sure to rinse the cloths multiple times to remove any detergent completely. Soap residue can make microfiber feel stiff and reduce its absorbency. A final rinse with clean water ensures the cloths remain soft and effective. The key to maintaining high-quality cleaning is knowing how to properly clean microfiber cloths. Air Dry or Low Heat Avoid high heat when drying Clean Microfiber Cloths. Air drying is best, but if using a dryer, select a low heat or no heat setting. Excessive heat can melt the fibers and reduce their effectiveness. Hanging microfiber cloths to dry ensures they retain their soft texture and absorbency. If drying in a machine, avoid using dryer sheets, as they contain fabric softeners that coat the fibers. Instead, tumble dry on low or use an air-only setting to protect the integrity of the microfiber. The less heat exposure, the longer the cloths will maintain their quality. To speed up air drying, hang microfiber cloths in a well-ventilated area. They dry quickly due to their synthetic nature, making them ready for use in no time. Keeping them properly dried prevents mildew growth and maintains their superior cleaning performance. If you clean microfiber cloths correctly, they will last much longer and perform better.     Store Clean Microfiber Cloths Properly Once your Clean Microfiber Cloths are completely dry, proper storage is essential to maintain their cleaning power. Store them in a clean, dry place away from dust and dirt. Keeping them in an airtight container or resealable bag can prevent unwanted debris from sticking to the fibers. Avoid folding them too tightly, as this can cause creases that reduce their effectiveness. Instead, lay them flat or roll them up for easy access. Designating separate storage areas for different types of microfiber cloths, such as glass-cleaning cloths and dusting cloths, helps keep them organized and ready for use. Never store Clean Microfiber Cloths in damp or humid areas, as moisture can lead to mold growth. Keeping them in a well-ventilated space ensures they remain fresh and absorbent, ready to tackle any cleaning task. By following these six easy steps, your Clean Microfiber Cloths will stay soft, and ready to tackle any mess. Proper care ensures they last longer and maintain their superior cleaning ability. If you want expert cleaning services that use high-quality microfiber cloths and the best cleaning techniques, consider Toronto Shine Cleaning. Their professional team ensures spotless results for homes and businesses, so you don’t have to worry about the hassle of cleaning!

6 Easy Steps to Clean Microfiber Cloths Properly Read More »

Hand-painted image about rosedale, landscape format

House Cleaning Services in Rosedale: Get a Spotless Home Today!

Keeping your home clean in Rosedale can be a challenge, especially with a busy schedule. That’s where professional house cleaning services in Rosedale come in! Whether you need a deep clean, regular maintenance, or a post-renovation cleanup, hiring experts ensures your home stays spotless without the hassle. In this guide, we’ll explore why professional house cleaning services in Rosedale are a must, what services you can expect, and how to choose the best cleaning team for your needs. Why Choose Professional House Cleaning in Rosedale? Rosedale is one of Toronto’s most prestigious neighborhoods, known for its stunning homes and luxurious residences. Maintaining these beautiful spaces requires more than just a quick sweep. Professional cleaning services in Rosedale have the skills, equipment, and expertise to keep your home pristine, removing dust, dirt, and allergens while ensuring every corner sparkles. Here are some key reasons why hiring a professional cleaning service in Rosedale is a smart choice: Time-Saving Convenience: With a packed schedule, finding time for deep cleaning can be difficult. Professional cleaners handle everything, allowing you to focus on what matters most. High-Quality Cleaning Standards: Experienced cleaners use industry-grade tools and products to provide a thorough clean that’s hard to achieve on your own. Healthier Living Environment: A professionally cleaned home reduces dust, allergens, and bacteria, improving indoor air quality and overall health. Preserves Your Home’s Beauty: Luxury homes require special care. Professional cleaners use safe and effective methods to maintain the condition of high-end furnishings, hardwood floors, and delicate surfaces. Stress Reduction: A clean home brings peace of mind, making it easier to relax and enjoy your space.     What’s Included in a House Cleaning Service in Rosedale? A standard house cleaning service in Rosedale typically includes a variety of tasks to keep your home looking its best. Here’s what you can expect: General Cleaning Tasks: Dusting and wiping down surfaces (tables, shelves, countertops) Vacuuming and mopping floors Emptying trash bins and replacing liners Tidying up living spaces Kitchen Cleaning: Wiping down countertops, cabinets, and backsplashes Cleaning sinks and faucets Sanitizing kitchen appliances (exterior) Sweeping and mopping floors Bathroom Cleaning: Scrubbing sinks, toilets, showers, and bathtubs Disinfecting high-touch areas Cleaning mirrors and glass surfaces Restocking toiletries (if requested) Bedroom Cleaning: Making beds and changing linens (if requested) Dusting furniture and decor Vacuuming carpets and rugs Organizing clutter For a more thorough clean, deep cleaning services in Rosedale can target baseboards, inside appliances, light fixtures, and hard-to-reach areas. If you’re moving in or out, a detailed cleaning service ensures the home is spotless for the next occupant. The Benefits of Hiring Professional Cleaning Services in Rosedale Investing in professional house cleaning services in Rosedale comes with numerous benefits beyond just a tidy home. Here are some of the top advantages: 1. Saves Time and Effort Cleaning an entire house is time-consuming and physically demanding. By hiring professionals, you free up hours in your week to focus on work, family, or leisure activities. 2. Professional-Grade Cleaning Products and Equipment Many store-bought cleaning products don’t provide the same results as professional-grade solutions. Cleaning services in Rosedale use high-quality, eco-friendly products that effectively remove dirt and stains without damaging surfaces. 3. Customized Cleaning Plans Every home has unique cleaning needs. Whether you require a weekly cleaning, bi-weekly service, or a one-time deep clean, professional cleaning services in Rosedale can tailor their services to fit your requirements. 4. Better Air Quality Dust, pet dander, and allergens accumulate over time, affecting air quality. Professional cleaners remove these irritants, creating a fresher and healthier environment. 5. A Stress-Free Home Clutter and mess can contribute to stress and anxiety. A professionally cleaned home promotes relaxation and enhances your overall well-being.     How to Choose the Best Cleaning Services in Rosedale Not all cleaning services in Rosedale are the same. Here’s how to ensure you hire the best one: 1. Check Reviews and Testimonials Look for companies with positive customer reviews and testimonials. A reputable cleaning service in Rosedale will have a track record of satisfied clients. 2. Verify Experience and Training Choose a company with experienced and trained cleaning professionals. Ask if they provide background checks on their staff for added security. 3. Ask About Cleaning Products If you prefer eco-friendly or hypoallergenic products, check whether the cleaning company offers these options. 4. Get a Transparent Pricing Quote Avoid hidden fees by requesting a detailed quote upfront. A professional cleaning service in Rosedale will provide clear pricing based on the size of your home and cleaning requirements. 5. Ensure They Offer the Services You Need Not all companies provide deep cleaning, post-renovation cleaning, or move-in/move-out services. Confirm that the company can meet your specific cleaning needs.     Book Your Rosedale House Cleaning Today! If you’re looking for expert house cleaning services in Rosedale, now’s the perfect time to schedule a cleaning. Whether you need a routine clean or a deep refresh, professional cleaning services in Rosedale can make your home shine. Let the experts handle the dirty work while you enjoy a fresh, spotless space! For the best house cleaning services in Rosedale, we highly recommend Toronto Shine Cleaning. With a reputation for excellence, attention to detail, and outstanding customer service, Toronto Shine Cleaning ensures your home is left spotless and fresh. Their experienced team uses high-quality products and industry-leading techniques to deliver the best results. Contact Toronto Shine Cleaning today to book your professional house cleaning in Rosedale and experience the benefits of a pristine home!

House Cleaning Services in Rosedale: Get a Spotless Home Today! Read More »

Hand painted image about Leslieville

Deep Cleaning Services in Leslieville, We Do It Right!

Deep Cleaning Services in Leslieville for a Spotless Home Leslieville is one of Toronto’s most vibrant neighborhoods, with its trendy cafes, historic homes, and lively community spirit. But busy city life can make it hard to keep your home truly clean. That is where professional deep cleaning services in Leslieville come in. Toronto Shine Cleaning specializes in transforming your living space by tackling the embedded dirt, dust, and grime that accumulate over time. Whether you need a one-time refresh or ongoing care, our team delivers results that last. Our bonded and insured professionals bring over a million dollars in insurance coverage and a ten thousand dollar accidental breakage surety bond, so your home is in safe hands. Why Choose Professional Deep Cleaning in Leslieville? Standard cleaning keeps surfaces tidy, but deep cleaning reaches the hidden spots that collect grime. Our trained professionals go beyond surface-level dusting to scrub, sanitize, and restore every corner of your home. Here is why Leslieville residents trust us: Experienced Professionals — Our skilled cleaners know how to handle even the most stubborn messes safely and effectively. Eco-Friendly Products — We use non-toxic cleaning supplies that are safe for your family and the environment. For guidance on safe household cleaning, the Government of Canada offers tips on using household products safely. Customizable Service — Need extra attention on a specific area? We tailor every cleaning to your needs. Satisfaction Guaranteed — We do not leave until the job is done right and you are happy with the result. What Our Deep Cleaning Service Covers Our deep cleaning service covers every inch of your home, focusing on areas often missed in routine cleaning. Proper cleaning and disinfecting of high-touch surfaces is key to a healthy home, and the CDC recommends a clean-first approach followed by disinfection when needed. Area What We Clean Kitchen Countertops, backsplash, sinks, stovetops, oven, microwave, refrigerator shelves, cabinets, and drawers Bathroom Toilets, tubs, showers, tiles, grout, sinks, mirrors, and high-touch surfaces like light switches and doorknobs Living Areas & Bedrooms Furniture dusting, vacuuming under furniture, window washing, upholstery and mattress vacuuming, floor mopping Floors & Carpets Carpet vacuuming, stain treatment, hardwood and tile mopping, high-traffic area care Dust & Cobwebs Baseboards, vents, ceiling fans, door frames, window sills, and cobweb removal Benefits of Regular Deep Cleaning Investing in professional deep cleaning services in Leslieville pays off in several ways: Healthier Home — Deep cleaning removes allergens, bacteria, and dust mites, significantly improving indoor air quality for your family. This is especially valuable for households with children, seniors, or pets who are more sensitive to airborne irritants. The Health Canada offers guidance on indoor air contaminants to help families breathe easier at home. Extends Longevity — Regular deep care preserves floors, furniture, and appliances, saving money on repairs and replacements. When you protect your investment in your home, every cleaning session adds years to your furnishings and finishes. Stress-Free Living — A thoroughly clean home promotes relaxation and peace of mind without the hassle of doing it yourself. Coming home to a sparkling space after a long day makes a real difference in your quality of life. Ready for Any Occasion — Hosting guests or preparing to sell? A deep clean ensures your home looks its absolute best and makes a lasting impression on visitors or potential buyers. How Often Should You Book a Deep Clean? For most homes, scheduling a deep clean every three to six months keeps things fresh. Households with pets, allergy sufferers, or young children may benefit from more frequent service. We also offer regular maid cleaning to maintain your home between deep sessions, keeping surfaces tidy and clutter under control. If you are moving in or out, our move-in/out cleaning ensures a completely fresh start in your new space. Who Needs Deep Cleaning in Leslieville? Our deep cleaning services in Leslieville are perfect for busy professionals who lack time for thorough cleaning, families with kids and pets who need extra help managing fur and spills, homeowners preparing to sell who want a spotless impression, new homeowners and renters starting fresh, and anyone recovering from a renovation who needs construction dust removed. No matter your situation, we customize our approach to match your home and your schedule. Frequently Asked Questions How is deep cleaning different from regular cleaning? Deep cleaning reaches areas that standard cleaning skips, such as inside appliances, behind furniture, baseboards, and grout. It is a more thorough, detail-oriented service that restores rather than maintains. Do I need to be home during the cleaning? Not at all. Many clients provide access instructions and return to a spotless home. Our team is bonded and insured for your complete peace of mind. What products do you use? We use eco-friendly, non-toxic cleaning products that are safe for children, pets, and anyone with sensitivities. Let us know if you have specific requirements and we will accommodate them. Can I add extra services to my deep clean? Yes. Our services are fully customizable. Whether you need oven cleaning, window washing, or carpet treatment, we can tailor every visit to your needs. How do I get a quote for deep cleaning in Leslieville? Call us at (647) 424-0355 or visit our pricing page for transparent rates. We serve Leslieville and all of Toronto. Ready to give your home the deep clean it deserves? Contact Toronto Shine Cleaning at (647) 424-0355 to book your appointment today. You can also find your location to confirm we serve your area and read what our customers say on our reviews page.

Deep Cleaning Services in Leslieville, We Do It Right! Read More »

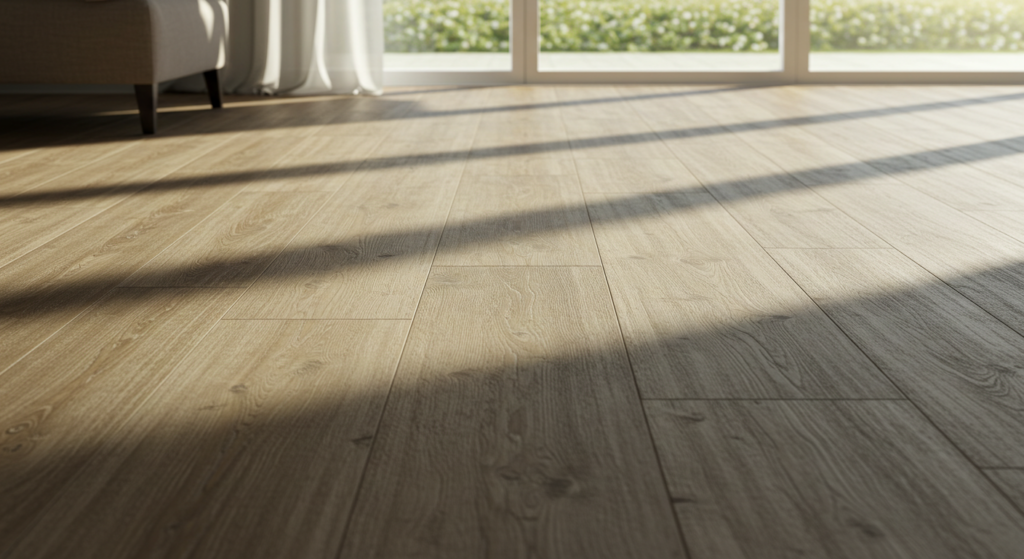
Clean faux wood floor with a couch

Quick and Simple Faux Wood Floor Cleaning Routine for Busy Homes

A Faux Wood Floor Cleaning Routine That Fits Busy Homes Faux wood flooring, whether you have laminate, vinyl plank, or engineered wood, is one of the most forgiving surfaces you can install. It shrugs off everyday wear better than solid hardwood and never needs special oils or buffers. What it does need is a short, repeatable routine. A few minutes of dust mopping each day, one careful damp mop each week, fast attention to spills, and a monthly refresh will keep the planks looking streak-free and new for years. Here is a simple five-step system, plus a schedule you can post inside a cabinet door. Step 1: Dust Daily So Grit Never Settles In Loose dust, sand, and pet dander act like sandpaper underfoot. Every step grinds those particles into the wear layer, which is how faux wood floors lose their shine before they ever look dirty. Run a dry microfiber mop over the main walkways once a day, and use a vacuum on its hard-floor setting to pull grit from corners and edges. Skip the beater bar, because the spinning brush can scuff the planks. If your household has pets or kids, hit high-traffic zones twice a day. Keeping dust down is also good for the air you breathe, and Health Canada’s overview of indoor air contaminants explains how household dust affects air quality. Step 2: Damp Mop Once a Week, Not Once a Day Weekly mopping removes the footprints, splashes, and dull films that dust mopping misses. The method matters more than the muscle. Lightly spray a pH-neutral cleaner formulated for laminate or vinyl plank onto the floor, then mop in small sections with a well-wrung microfiber mop. Standing water is the biggest risk to faux wood, because moisture can creep into the seams and swell the edges. Mop damp, never wet, and leave steam mops and abrasive scrubbers in the closet, since both break down the protective coating over time. A final pass with a dry cloth buffs away streaks and adds shine back. If weekly floor care keeps sliding off your list, a regular house cleaning service can fold it into a standing visit. Step 3: Handle Spills and Scuffs the Moment You Notice Them Faux wood flooring is water-resistant, not waterproof, so speed wins. Blot liquids with a soft cloth or paper towel right away, then go over the spot with a slightly damp microfiber to lift any residue. Sticky messes loosen up with a small amount of mild floor cleaner. For black scuff marks, a melamine sponge works if you rub gently, because aggressive scrubbing thins the finish and leaves a dull patch you cannot polish back. When you keep a dedicated floor cleaner on hand, follow the label and store it out of reach of children, as Health Canada recommends in its tips for using household chemicals safely. A small caddy with cloths, cleaner, and a sponge under the sink turns every one of these fixes into a thirty-second job. Step 4: Protect the Finish From Scratches Cleaning works hardest when damage never arrives. Four prevention habits do most of the heavy lifting: Stick felt pads under the legs of sofas, chairs, and tables that get moved often. Place a protective mat under any rolling office chair. Layer area rugs or runners in hallways, in front of the sink, and by entryways. Ask family and guests to remove shoes at the door so grit never reaches the planks. Rugs add style, but rotate them every few months so the covered planks do not fade differently from the exposed ones. Step 5: Do a Monthly Deep Clean for Lost Shine Once a month, take a little longer. Work a quality faux wood floor cleaner and a soft mop across the whole surface, including edges, corners, and the lines along the baseboards where dust waits. If the floor looks flat or hazy, a polish labeled safe for your specific flooring type can bring the gloss back. Skip wax-based products, which pile up into a sticky residue that mop water cannot lift. Homes with pets, kids, or frequent guests should never skip this step. When a monthly session starts feeling like a full weekend, booking a professional deep clean a couple of times a year resets everything your routine cannot reach. Faux Wood Floor Care Schedule at a Glance Frequency Task Tools to Use Daily Dust mop main walkways, twice a day in homes with pets or kids Dry microfiber mop Every other day Vacuum corners and edges with the brush off Hard-floor vacuum setting Weekly Damp mop in sections, then buff dry for shine pH-neutral laminate or vinyl cleaner Monthly Full clean along baseboards and corners, polish if dull Soft mop, flooring-safe polish Yearly Replace felt pads, rotate rugs, clean under moved furniture Felt pads, melamine sponge Faux Wood Floor Cleaning Questions Answered Can I use a steam mop on faux wood floors? No. Steam drives heat and moisture into the seams, which can loosen the locking system, lift plank edges, and damage the wear layer. Stick to a barely damp microfiber mop and a cleaner made for laminate or vinyl. What is the best cleaner for faux wood flooring? A pH-neutral product labeled for laminate or vinyl plank. Avoid anything abrasive, wax-based, or strongly acidic, because those attack the finish instead of the dirt sitting on top of it. How often should laminate floors be mopped? Once a week is enough for most homes, with daily dust mopping in between. Mop more often only if you have toddlers or pets, and always wring the mop until it is barely damp so water never pools. Why do my floors look streaky after mopping? Usually too much water or too much cleaner. Spray lightly, mop in small sections, and finish with a dry microfiber cloth to lift moisture before it evaporates into visible lines. Spotless Faux Wood Floors Without the Squeeze on Your Evenings A short daily routine, one careful weekly mop, and a monthly

Quick and Simple Faux Wood Floor Cleaning Routine for Busy Homes Read More »

A clean white sunroom with some plants

Sunroom Cleaning 101: The Ultimate Guide for a Sparkling Space

Sunroom Cleaning 101: Keep Your Brightest Room Sparkling A sunroom is the best seat in the house for morning light and afternoon naps, and also the fastest place for dust, pollen, and window streaks to pile up. All that glass turns every smudge into an announcement. The good news: a sunroom does not need heroic effort, just a regular loop of dusting, glass work, floor care by material, and a moisture check before mold gets a foothold. Follow the seven steps below and your four-season room stays bright, fresh, and inviting all year, with a deeper reset only a couple of times a year. 1. Dust and Vacuum Before You Touch Anything Wet Dust lands fast in a room with big windows and constant sun. Start high and work down so falling particles never re-contaminate cleaned surfaces: ceiling fan blades and light fixtures first, then shelves, window sills, furniture, and decor. A microfiber cloth or duster traps dust instead of pushing it around. Vacuum floors, rugs, and upholstered pieces with a handheld vacuum and brush attachment to reach corners and crevices, and run a lint roller or upholstery tool over fabric furniture to pull out embedded dirt and pet hair. A quick weekly pass keeps dust from building into film, and it helps the air too, since household dust is one of the common indoor air contaminants Health Canada tracks. 2. Wash Sunroom Windows on a Cloudy Day Windows are the focal point, and streaked glass makes an otherwise clean room look neglected. Spray a quality glass cleaner and wipe from the top down in a zig-zag or circular motion with a microfiber cloth, then chase the moisture with a rubber squeegee for a flawless finish. Time your wash for a cloudy day: sunlight dries the solution before you can buff it, which is exactly what causes streaks and residue. Scrub the edges next, because grit collects where panes meet frames; a soft toothbrush clears tracks and corners, and an extendable tool reaches tall or awkward windows. Consistent glass care also protects the panes themselves, since long-term grime can gradually etch the surface. Keep a small window kit ready so the whole pass takes minutes: Two clean microfiber cloths, one for the solution and one for the final buff. A rubber squeegee for large fixed panes and patio doors. A soft toothbrush and a small brush for tracks, weep holes, and corners. An extendable tool or step stool so tall glass never gets skipped. 3. Wipe Down Walls and Ceilings Cobwebs and dust settle along the joints where walls meet the ceiling, so run an extendable duster across those seams first. For painted walls and ceilings, mix warm water with a gentle detergent, dip a microfiber cloth, wring it out well, and wipe from one corner across for even coverage. Too much moisture leaves streaks and can lift paint, so keep the cloth barely damp. Stubborn scuffs respond to a melamine sponge used softly. If you spot discoloration or any fuzzy growth, treat it immediately with a mildew remover before it spreads. 4. Deep Clean Sunroom Floors by Material The right floor method depends on what the sunroom was built with: Floor Type Best Method Watch Out For Tile or vinyl Sweep, then mop with a gentle floor cleaner and a microfiber mop Leftover moisture; dry the floor right after mopping to prevent streaks Hardwood Sweep often and damp mop with a wood-safe cleaner Standing water, which dulls and warps the finish Carpet Vacuum slowly in two directions; steam clean for a refresh Embedded dirt causing odors; blot spills immediately Rugs Shake outside, spot clean, machine wash only if the label allows Uneven wear and sun fading; rotate every few months A light dusting of baking soda on carpets before vacuuming helps neutralize stale smells. 5. Refresh Furniture and Cushions Sunroom furniture collects grime from both sun and snacks. Wipe plastic and metal pieces with a damp cloth and mild soap, and use a wood-safe cleaner on wooden frames to preserve the finish, working with a microfiber cloth so nothing waterspots. Vacuum fabric cushions on a schedule and spot-clean stains as they appear; removable covers should go to the laundry following the care label. Sun exposure fades upholstery unevenly, so flip and rotate cushions every few weeks. If your seating takes a beating, washable slipcovers are the cheapest protection you can buy, and they keep pieces looking newer for longer. 6. Check Corners for Mold and Mildew Glass rooms trap humidity, and condensation on cold panes can quietly feed fungal growth. Smell is often the first alarm: a musty note means investigate corners, window sills, and the backs of furniture. The CDC’s guidance on mold explains that mold needs moisture to grow, which is exactly what a leaky window seam or steamy winter day supplies. Clean small patches with mild detergent and warm water, scrubbing gently with a soft-bristled brush or sponge so surfaces stay unharmed. If damp keeps returning, run a dehumidifier, open windows regularly for airflow, and set out moisture-absorbing products through the humid months. 7. Keep the Air Smelling Fresh A clean sunroom should smell like fresh air, not cleaner. Open opposite windows on breezy days to flush out stale odors, and consider an air purifier to capture drifting dust and allergens. Well-maintained plants such as aloe vera, spider plants, and peace lilies add greenery and help the space feel alive, though keep their soil tidy to avoid earthy smells. For a finishing note, a lightly scented candle or an essential oil diffuser with citrus, lavender, or eucalyptus sets a calm mood without overpowering the room. Sunroom Cleaning Questions Answered How often should a sunroom be cleaned? Dust and vacuum weekly, wipe surfaces as needed, and wash windows every few weeks. Add a full reset of walls, floors, and furniture once or twice a year. Why does my sunroom get so dusty? Large windows, frequent ventilation, and sunlight all accelerate dust buildup, and pollen drifts in

Sunroom Cleaning 101: The Ultimate Guide for a Sparkling Space Read More »

A cleaning setup featuring a blue bucket with a microfiber cloth

Spring Is Coming! Top Things to Clean in March

March is the perfect time to shake off the winter blues and get your home ready for spring. The changing season means more sunlight, warmer temperatures, and a fresh start. A deep clean in March will help you clear out winter dust, refresh your space, and prepare for the months ahead. Here are seven essential areas to focus on during your March cleaning routine. 1. Wash Your Windows Inside and Out Winter weather leaves behind streaks, dirt, and dust on windows, making them look dull and blocking natural light. That’s why one of the first things to clean in March should be your windows. Grab a microfiber cloth and a streak-free glass cleaner to give them a thorough clean. For extra shine, use a squeegee to remove any remaining residue. Don’t forget about the window tracks and sills! These areas collect dust, grime, and even dead bugs over time. Use a vacuum attachment or an old toothbrush to scrub away dirt before wiping everything down. If you have screens, take them out and rinse them with soapy water to remove built-up dust. A proper clean in March will ensure your windows let in more natural light, instantly brightening your home. With longer days ahead, you’ll want to enjoy all the sunshine you can get! 2. Deep Clean Carpets and Rugs Your carpets and rugs have taken a beating over the winter months, collecting dirt, pet hair, and dust from heavy foot traffic. Even if you vacuum regularly, a deep clean in March is essential to remove embedded dirt and allergens. A steam cleaner or professional carpet cleaning service can make a huge difference. Before deep cleaning, move furniture to vacuum underneath and along baseboards where dust collects. If you notice any stains, treat them with a carpet stain remover and let it sit before scrubbing gently. Baking soda is also great for freshening up carpets-just sprinkle it on, let it sit for 15 minutes, and vacuum thoroughly. A thorough clean in March will not only make your carpets look better but also improve indoor air quality. With allergy season approaching, getting rid of dust and allergens now will help you breathe easier in the coming months. 3. Declutter and Organize Closets Spring is the perfect time to go through your closets and get rid of clothing you no longer wear. One key step to clean in March is decluttering your wardrobe. Start by taking everything out and sorting items into keep, donate, and discard piles. If you haven’t worn something in over a year, it’s probably time to let it go. Once you’ve sorted your clothes, organize them by category or season to make finding outfits easier. Store away heavy winter coats, boots, and scarves to free up space for lighter clothing. Investing in storage bins or vacuum-sealed bags can help keep everything tidy and protected. A well-organized closet saves time and makes getting dressed in the morning much less stressful. Plus, donating clothes you no longer need helps others in need and gives your wardrobe a fresh start for spring. A proper clean in March will leave your space looking neat and refreshed. 4. Clean Out Your Fridge and Pantry March is a great time to go through your kitchen and clear out expired or unused food. A kitchen clean in March should start by emptying your fridge and wiping down shelves and drawers with warm, soapy water. Toss anything past its expiration date and reorganize what’s left to make it easier to access. The pantry needs attention too! Go through dry goods like pasta, rice, and canned foods, checking for anything expired. Wipe down shelves and organize items so you can easily see what you have. This is also a good time to plan meals using ingredients you already own, reducing food waste. A clean and organized kitchen makes meal prep easier and ensures that your food stays fresh. With warmer weather coming, you’ll want a refreshed space to start making lighter, healthier meals. Prioritizing a kitchen clean in March will set you up for a fresh and organized spring. 5. Wash Bedding and Rotate Your Mattress Your bed is where you spend a lot of time, and it collects dust, sweat, and bacteria over time. One of the most important things to clean in March is your bedding. Strip all your pillowcases, sheets, and comforters, and wash them in hot water. If you have a mattress cover, wash that too for an extra layer of cleanliness. While your bedding is in the wash, take time to rotate or flip your mattress. This helps prevent uneven wear and extends its lifespan. If you notice any stains, spot clean them with a mild detergent or upholstery cleaner. Sprinkling baking soda over the mattress and vacuuming it up after 30 minutes can also help eliminate odors. Fresh bedding and a clean mattress improve sleep quality and make your bedroom feel more inviting. After all, there’s nothing better than climbing into a crisp, clean bed at the end of the day. A proper clean in March will ensure your sleep space is fresh and hygienic. 6. Scrub Baseboards and Walls Baseboards and walls often get overlooked, but they collect dust, dirt, and scuff marks over time. To properly clean in March, use a damp microfiber cloth or a mild soap solution to wipe down baseboards, removing built-up grime. Pay special attention to corners and edges where dust accumulates. Walls also need a refresh, especially in high-traffic areas like hallways and kitchens. A gentle wipe with a damp cloth can remove fingerprints, stains, and dust. If you have stubborn marks, try using a magic eraser for a deeper clean. A good clean in March will instantly brighten up your home, making it feel fresh and well-maintained. It’s a simple but effective way to prepare for the new season while eliminating winter grime. 7. Refresh Outdoor Spaces As the weather warms up, you’ll want to spend more time outside, so now is

Spring Is Coming! Top Things to Clean in March Read More »

A cheerful spring scene featuring a broom leaning against a bucket with a cloth draped over it. The setting is an outdoor porch with warm sunlight, su

Preparing for Spring Cleaning: What to Do Before You Start

Preparing for Spring Cleaning: What to Do Before You Start Spring cleaning is a wonderful way to refresh your home after a long winter, but diving in without a plan can quickly become overwhelming. Proper preparation makes the entire process more efficient and far less stressful. By following a few simple steps before you pick up a sponge, you set yourself up for a successful and satisfying clean. Toronto Shine Cleaning shares these preparation tips to help you get started on the right foot. Declutter Your Space First Before you can deep clean, you need to clear out the clutter. Go through closets, drawers, cabinets, and shelves to identify items you no longer use. Sort everything into four piles: keep, donate, recycle, and trash. If you have not used something in over a year, it is probably time to let it go. A clutter-free home not only looks better but also makes cleaning faster and more effective. Tackle one room at a time, starting with high-clutter areas like pantries, storage closets, and home offices, to keep the task manageable. Gather Your Cleaning Supplies Nothing slows down spring cleaning like hunting for supplies mid-task. Stock up on essentials before you begin. Here is a quick checklist of what you will need for a thorough spring clean: Category Recommended Items Surface Cleaners Microfiber cloths, all-purpose cleaner, glass cleaner, disinfectant spray Floor Care Vacuum with attachments, mop, bucket, hardwood or tile cleaner Tools & Accessories Sponges, scrub brushes, squeegee, duster with extension handle Specialty Products Degreaser for kitchen, grout cleaner for bathroom, stain remover for carpets and upholstery Safety & Disposal Rubber gloves, garbage bags, masks if using strong cleaners Consider using eco-friendly cleaning products to protect your home and the environment. Many conventional cleaners contain harsh chemicals that can irritate skin and lungs. The Government of Canada provides resources on using household products safely to help you choose wisely. Make a Room-by-Room Checklist A detailed checklist keeps you organized and ensures no area gets missed. Write down tasks for each room and prioritize areas that need the most attention. Breaking the work into manageable sections makes the job feel less daunting and helps you track your progress. Include tasks like dusting ceiling fans, wiping baseboards, cleaning windows, washing curtains, vacuuming under furniture, and disinfecting high-touch surfaces like light switches and door handles. The CDC recommends cleaning surfaces first with soap and water before disinfecting for the most effective results. Pre-Treat Stubborn Stains Tough stains on carpets, upholstery, and kitchen surfaces need time to break down. Apply stain remover or pre-treatment solutions before you start cleaning so they can work while you tackle other tasks. For kitchen grease, use a degreaser on stovetops and range hoods. In the bathroom, apply grout cleaner to tile and let it sit before scrubbing. Carpet stains should be treated with an appropriate remover and left to absorb before blotting. These pre-treatment steps make deep cleaning much more effective and save you from scrubbing later. Set a Schedule and Enlist Help Spring cleaning does not have to be a one-day marathon. Spread tasks over several days or a weekend to avoid burnout. Assign specific chores to each household member to speed things up: Kitchen — Degrease stovetop, wipe cabinets, organize pantry, clean refrigerator shelves and drawers. Bathroom — Scrub tiles and grout, disinfect toilet and sink, descale showerhead, wash bath mats. Living Areas — Dust ceiling fans and light fixtures, vacuum upholstery, wash windows and curtains, wipe baseboards. Bedrooms — Flip mattress, wash bedding and duvet covers, organize closets, vacuum under furniture. Floors — Vacuum carpets and area rugs thoroughly, mop hard floors, spot-treat any stains. Children can help with dusting, sorting laundry, and wiping surfaces. If spring allergies are a concern, the Health Canada recommends cleaning to reduce indoor allergens during spring as part of your seasonal refresh. If you need help with the heavy lifting, consider booking professional deep cleaning services. Toronto Shine Cleaning offers thorough deep cleaning for your home that covers the tasks you might not have time or energy for, such as carpet cleaning, window washing, and upholstery care. Frequently Asked Questions What is the best order to clean a room? Always work top to bottom. Start with ceiling fans and high shelves, then move to counters and furniture, and finish with floors. This way dust and debris fall onto surfaces you will clean last. How long should spring cleaning take? For a typical home, plan on 6-12 hours spread over a weekend. If you break it into room-by-room sessions of 1-2 hours each, the work feels much more manageable. Do I need to wash my curtains during spring cleaning? Yes, curtains and drapes collect dust, pet dander, and allergens over time. Check the care label and launder or steam clean them as part of your spring refresh. Should I hire professional cleaners for spring cleaning? If you are short on time or dealing with tough jobs like deep carpet cleaning, oven cleaning, or post-winter grime, professional help can be a smart investment. Contact Toronto Shine Cleaning at (647) 424-0355 to discuss your needs. How do I maintain a clean home after spring cleaning? Establish a weekly routine of quick tidying, dusting, and vacuuming. Book a regular cleaning service to keep everything fresh between deep cleans. Spring cleaning does not have to be stressful. With the right preparation, you can transform your home efficiently and enjoy the fresh, clean results. For expert help with the hardest tasks, call Toronto Shine Cleaning at (647) 424-0355 or visit our pricing page to learn more.

Preparing for Spring Cleaning: What to Do Before You Start Read More »