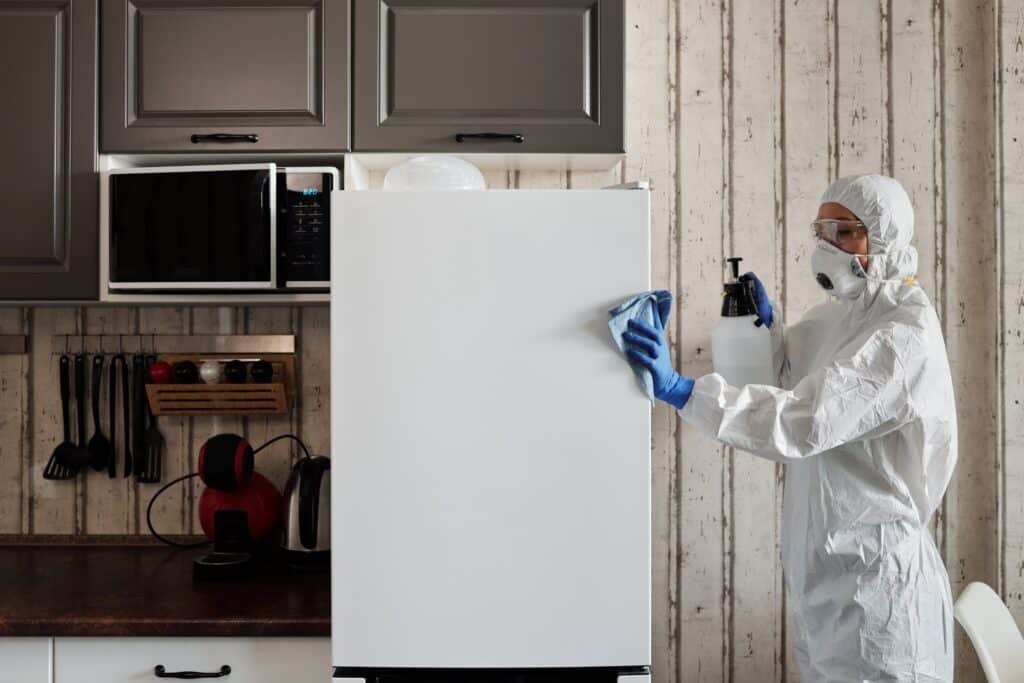
Kitchen Cleaning

Cleaning with blue cleaning gloves furnitures, deep cleaning

New Build, New Clean: How to Tackle Post-Construction Cleaning Like a Pro

New Build, New Clean: How to Tackle Post-Construction Cleaning Like a Pro Congratulations on your new build or renovation. The dust has settled and the last step before enjoying your space is post-construction cleaning. This is not your typical tidy-up. It requires thoroughness and the right approach to remove all traces of construction debris, dust, and residues. A proper post-construction clean transforms your space from a work zone into a healthy, move-in-ready home. What Is Post-Construction Cleaning? Post-construction cleaning is a deep clean that removes all remnants of building work. This includes sawdust, drywall dust, paint splatters, adhesive residue, and debris like nails and screws. Beyond aesthetics, this cleaning is essential for health and safety. Construction dust can linger in the air and irritate respiratory systems, while chemical residues from paints and sealants need proper removal. If moisture from construction is left unchecked, mold can develop in hidden areas. Fine particles can also damage HVAC systems if they circulate through the home. Phase 1: The Rough Clean Start by removing large debris such as wood scraps, drywall chunks, and packaging materials. Wear protective gear including gloves, a mask (N95 recommended), and safety glasses. Use a heavy-duty vacuum with a HEPA filter to capture fine dust from floors, walls, and surfaces. A regular household vacuum will not cut it for this stage because construction dust is finer and denser than everyday household dust. Empty the vacuum frequently to maintain suction power. Remove all protective plastic sheeting and tape from floors, windows, and fixtures. This phase prepares the space for detailed work. Phase 2: The Detailed Clean Wipe down every surface including walls, countertops, windowsills, and cabinets. Construction dust settles on vertical surfaces just as much as horizontal ones. Use a damp microfiber cloth to capture dust without spreading it. Pay special attention to baseboards, window tracks, and corners where dust accumulates. Each flooring type needs specific care: hardwood requires gentle dust removal with a soft mop, tile needs streak-free cleaning with a neutral pH cleaner, and carpets benefit from steam cleaning to extract deep particles. Clean inside cabinets, closets, and behind fixtures where construction dust settles. Remove sawdust from electrical outlets, switch plates, and light fixtures. Indoor air quality can improve significantly when construction residues are thoroughly removed. Phase 3: The Final Polish Do a room-by-room walkthrough to spot missed smudges, paint flecks, or dusty corners. Clean windows and mirrors until streak-free using a quality glass cleaner and lint-free cloth. Perform a final vacuum and mop to capture any residual particles that settled during the detailed clean. This finishing stage transforms a space from construction site to move-in ready home. Touch up baseboards and door frames where cleaning may have revealed hidden dust. Check all vents and registers one last time. Phase Tasks Tools Needed Rough Clean Remove debris, vacuum dust HEPA vacuum, gloves, mask Detailed Clean Wipe surfaces, scrub grout, clean tracks Microfiber cloths, scrub brushes Final Polish Windows, mirrors, floor finishing Glass cleaner, mop, lint-free cloths Why Hire Professionals for Post-Construction Cleaning? Professional cleaners bring industrial-grade vacuums, steam cleaners, and specialized solutions that most homeowners do not own. They are trained to handle hazardous materials safely and know exactly where construction dust hides. A pro team can complete in one day what might take you an entire weekend. They also handle proper disposal of construction waste and know which cleaning agents work on each surface type without causing damage. Professional deep cleaning services ensure every surface is safe and spotless. DIY Tips for Post-Construction Cleaning Invest in a HEPA-filter vacuum for fine particle removal Use microfiber mops and cloths to trap dust instead of pushing it Break the work into manageable stages one room at a time Wear N95 masks, gloves, and safety goggles throughout Be patient and plan to go over areas multiple times Change vacuum filters partway through the job Frequently Asked Questions How long does post-construction cleaning take? For a standard condo or home, expect 4-8 hours. Large homes may take a full day or more. Do I need to clean before the post-construction team arrives? No, professional post-construction cleaners are equipped to handle every stage from rough debris removal to final polish. Is post-construction cleaning included in standard move-in cleaning? No. Post-construction cleaning is more intensive and requires different equipment. Move-in/out cleaning covers general household soiling, while post-construction targets builder residue. Can I move in right after post-construction cleaning? Yes. Once the cleaning is complete and all residues are removed, the space is safe and ready for occupancy. Post-construction cleaning is the final step in making your new space feel like home. If the job feels too big to tackle alone, trust the team at Toronto Shine Cleaning. We provide move-in/out cleaning and deep cleaning tailored to your needs. Check our pricing and call (647) 424-0355 to schedule your post-construction clean today.

New Build, New Clean: How to Tackle Post-Construction Cleaning Like a Pro Read More »
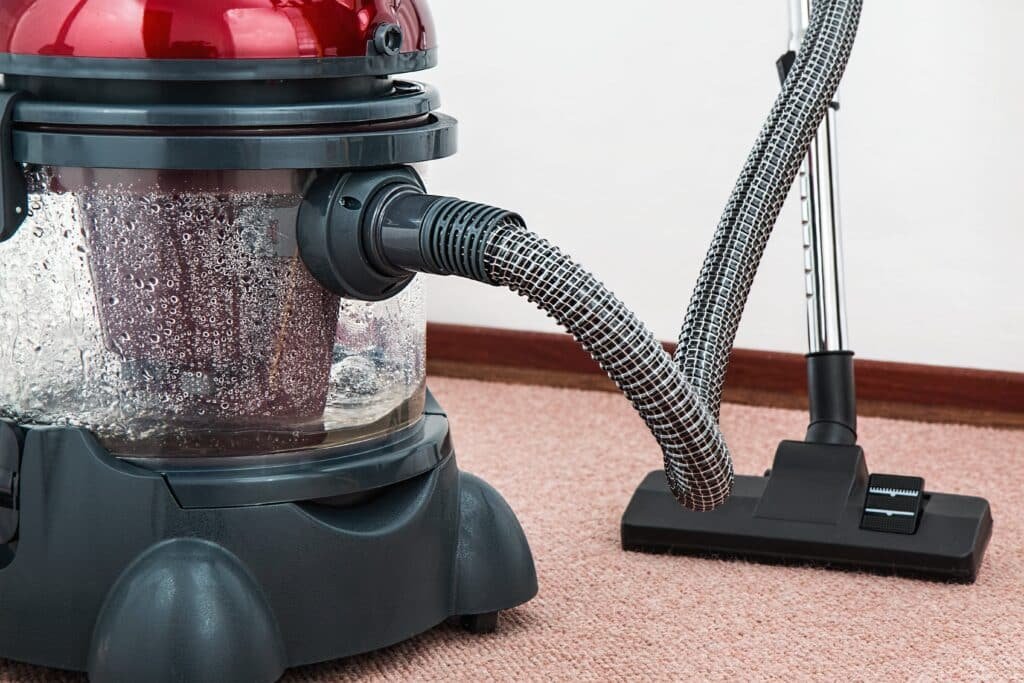
Professional vacuuming in home office setup.

How to Transform Your Space with Turn-Over Cleaning: A Step-by-Step Guide for Spotless Results

How to Transform Your Space with Turn-Over Cleaning: A Step-by-Step Guide Turn-over cleaning is the reset that happens between guests: the full clean that takes a rental suite, guest room, or Airbnb unit from just-vacated to ready-to-welcome. Done well, it is invisible; every guest simply finds a space that feels fresh and cared for. Done poorly, it shows up in reviews. This guide walks through the professional sequence, room by room, so your next turn-over is fast, thorough, and stress free. What Turn-Over Cleaning Actually Means A turn-over is more than a tidy up. It is a complete reset of a lived-in space: linens changed, kitchen and bathroom sanitized, floors redone, and every surface a guest will touch brought back to day-one condition. The window is usually tight, sometimes just a few hours between check-out and check-in, which is exactly why a repeatable checklist matters. With a system, you never stand in the middle of the unit wondering what comes next. Why Bother with a Real Turn-Over First impressions set the tone for an entire stay, and cleanliness is the first thing guests notice, before the view or the coffee machine. It is also the detail guests mention most in reviews, so consistent turn-overs protect your ratings directly. There is a health angle too: shared spaces pass germs easily, and health authorities recommend cleaning surfaces first and then disinfecting, which is the sequence the CDC’s clean and disinfect guidance lays out for high touch areas. Step 1: Plan and Prep Before You Start Build a checklist for the specific unit and keep a copy in the property, on paper or on your phone. Gather your supplies in one caddy so nothing sends you hunting mid-clean: microfiber cloths, sponges, an all-purpose cleaner, glass cleaner, a duster, a toilet brush, and trash bags. Wear gloves, and if you plan to use bleach-based disinfectants, read the label first; the CDC’s bleach safety page covers ventilation and the combinations to avoid. Budget your time per room before you begin. Step 2: Declutter Everything First Walk the unit and collect anything guests left behind: chargers in drawers, snacks in cabinets, socks under the bed. Empty every trash can, including bathroom bins, and replace liners. Tidy drawers and closets so they close the way a guest expects to find them, and sweep under the bed, the classic lost-sock zone. Decluttering first means the cleaning that follows never has to stop and restart around someone’s abandoned suitcase. Step 3: Dust from the Top Down Gravity is your coworker: start with ceiling fans, light fixtures, and shelves so falling dust lands on surfaces you have not cleaned yet, then work down to counters, baseboards, window sills, and door frames. Get the corners, the tops of picture frames, and the space behind appliances where dust settles quietly. Finish with the doorknobs and handles, which will get a second pass during disinfecting anyway. Step 4: Deep Dive the Kitchen and Bathroom These two rooms decide most reviews, so give them the full treatment. In the kitchen, wipe the appliances inside and out: the fridge shelves, the microwave, the kettle, the coffee maker. Clean the sink until it shines and clear the drain area completely. In the bathroom, the toilet, sink, and shower are the three benchmarks every guest checks. Scrub each properly, polish the mirror and fixtures, and lay out fresh toilet paper within easy reach. Step 5: Floors and Linens Last With surfaces done, sweep or vacuum every floor, then mop hard surfaces and let them dry while you handle linens. Strip and replace all bedding, from sheets to duvet covers, and set out fresh bath towels, hand towels, and face cloths. Fresh linens are both a hygiene requirement and one of the strongest signals of a cared-for space, so never try to stretch a set to a second guest. Step 6: The Guest-Ready Walkthrough Final touches turn a clean unit into a welcome: fluff the pillows, fold the towel corners, set the welcome note where it cannot be missed. Before you leave, do one walkthrough starting at the front door and moving through the space exactly as a guest would. Everything you would notice in a hotel, they will notice too. Between guests, pay special attention to the touch points everyone shares: Doorknobs and handles, entry to bathroom Light switches and lamp bases TV remotes and game controllers Faucet handles and toilet flush buttons Kettle, coffee maker, and fridge handles Room Non-Negotiables Before Check-In Kitchen Appliances inside and out, sink shining, dishes put away, trash emptied Bathroom Toilet, sink, shower scrubbed, mirror polished, fresh towels and toilet paper Bedroom Fresh linens, under-bed swept, surfaces dusted, closets tidy Living area Floors redone, cushions straightened, remotes wiped, decor aligned Turn-Over Cleaning FAQs How long does a turn-over clean take? It depends on the size of the unit and how the last guests left it. A studio with a good system is often done in an hour or two; larger multi-bedroom units take proportionally longer. Professional teams with a fixed checklist move faster because nothing gets revisited. How is a turn-over different from regular cleaning? A regular clean maintains a home you live in on a schedule. A turn-over rebuilds a like-new condition for a stranger arriving within hours, which adds linen changes, full sanitizing, and a hotel-style presentation standard on a deadline. Should linens really be changed after every single guest? Yes. It is the hygiene baseline guests assume, and protecting that assumption is what earns five star mentions for cleanliness. A spare, sealed set per bed keeps the turn-over fast even on back-to-back bookings. When does it make sense to hire professionals? When you manage more than one property, host back-to-back bookings, or simply want the guarantee of a hotel standard every time. A team turns the turn-over from a scramble into a scheduled, reliable service. Book the Reset, Skip the Scramble Toronto Shine Cleaning handles turn-overs across the city with the same checklist discipline described above. For

How to Transform Your Space with Turn-Over Cleaning: A Step-by-Step Guide for Spotless Results Read More »

Cleaning, cloth, hand - Hand holding a cloth cleaning an item

Regular Cleaning VS Deep Cleaning: What’s The Difference?

Regular Cleaning VS Deep Cleaning: What’s The Difference? Many homeowners wonder what separates regular cleaning from deep cleaning. Both are essential for a healthy home, but they serve different purposes. Understanding the difference helps you choose the right service for your home in Toronto or anywhere in the GTA. Regular cleaning maintains daily order while deep cleaning resets your home from accumulated grime. Each service plays a distinct role in keeping your home clean, healthy, and comfortable throughout the year. What Is Regular Cleaning? Regular cleaning is the maintenance routine that keeps your home tidy week to week. It focuses on visible surfaces and high-traffic areas. Tasks include dusting furniture, vacuuming floors, wiping countertops, cleaning sinks and toilets, and making beds. Regular cleaning prevents dirt from building up and keeps your home comfortable for daily life. The CDC recommends regular cleaning to remove most germs from household surfaces. A weekly regular clean takes about one to two hours for a typical home. It covers the tasks that keep your home presentable for everyday living and unexpected guests. Think of it as the daily hygiene routine for your living space, much like brushing your teeth for your own health. Consistent regular cleaning also makes deep clean sessions faster and less intensive because dirt has less time to accumulate. What Is Deep Cleaning? Deep cleaning is an intensive, thorough clean that reaches areas regular cleaning misses. It includes cleaning ceiling fans, baseboards, window tracks, inside appliances, grout and tile, behind furniture, and under appliances. Deep cleaning removes built-up grime, allergens, and dust from hard-to-reach places. It improves indoor air quality and extends the life of your surfaces and appliances. A deep clean can take three to eight hours depending on your home size. It targets the areas where dust and allergens accumulate over months, such as the top of refrigerator coils, behind the toilet, and inside oven cavities. After a deep clean, your home feels noticeably fresher and surfaces look renewed. Using the right cleaning products safely is important during deep cleaning, since you will be working with stronger solutions on grout, ovens, and tile. Key Differences at a Glance Aspect Regular Cleaning Deep Cleaning Frequency Weekly or bi-weekly Monthly, quarterly, or seasonally Time per session 1-2 hours 3-8 hours depending on home size Focus areas Visible surfaces, floors, bathrooms, kitchen counters Baseboards, window tracks, grout, inside appliances, behind furniture Cost Lower, more frequent Higher, less frequent investment When to Choose Regular Cleaning Choose regular cleaning if you have a busy schedule and need consistent upkeep. It is ideal for maintaining a presentable home between deeper sessions. Regular cleaning services are affordable and keep your space guest-ready at all times. Regular cleaning prevents small messes from becoming big problems. When you wipe down surfaces weekly, you reduce the buildup of grease, soap scum, and dust that would otherwise require hours of scrubbing later. Regular cleaning also ensures that high-traffic areas like entryways and kitchens remain sanitary between deep clean sessions. It is the most cost-effective way to keep your home looking its best every day. When to Choose Deep Cleaning Deep cleaning is right for seasonal refreshes, before or after hosting events, when allergies flare up, or when moving into a new home. Professional deep cleaning targets allergens and deeply embedded dirt that regular cleaning cannot reach. It also prepares your home for special occasions and improves overall hygiene. If you notice dust accumulating on baseboards within days of dusting, or if the grout in your shower looks dull, it is time for a deep clean. Deep cleaning also addresses odors caused by trapped dirt and moisture in carpets, upholstery, and behind appliances, leaving your home smelling genuinely fresh. Regular cleaning maintains daily order and prevents mess buildup Deep cleaning resets the home and addresses neglected areas Both services are important for a well-maintained home The right choice depends on your schedule, budget, and needs Frequently Asked Questions Can I do deep cleaning myself? Yes, but it requires time, specialized tools, and thorough effort. Professional services save hours and deliver deeper results. How often should I deep clean my home? Most homes benefit from deep cleaning once per season. Homes with pets or allergies may need it more often. Do I need regular cleaning if I get deep cleaning? Yes. Regular cleaning keeps your home tidy between deep cleans and prevents deep dirt buildup, making each deep clean easier. What does deep cleaning include that regular cleaning does not? Deep cleaning covers baseboards, inside appliances, window tracks, ceiling fans, grout, blinds, and behind large furniture. Both regular and deep cleaning play vital roles in home maintenance. Combining both services ensures your home stays healthy and beautiful year-round. Toronto Shine Cleaning offers transparent pricing for both services. See why customers trust us across the GTA. Call (647) 424-0355 to schedule your service today.

Regular Cleaning VS Deep Cleaning: What’s The Difference? Read More »

broom, wood floor, sweeping, bucket

How Much Does Deep Cleaning Cost in Canada?

How Much Does Deep Cleaning Cost in Canada? Most Canadian households pay somewhere between CAD 100 and CAD 400 or more for a professional deep clean, but the honest answer is that the final number depends on the size of your home, its condition, your city, and the work you ask for. This guide breaks down realistic price ranges, the five factors that move the number up or down, and how a flat-rate quote compares with a ballpark estimate, so you can budget for a whole-home reset without surprises. What Does a Deep Clean Actually Include? A deep clean goes well beyond surface tidying, especially in kitchens and bathrooms, the rooms most prone to dirt and bacteria buildup. Crews scrub tile, clean behind appliances, and descale faucets and showerheads. The insides of ovens, refrigerators, and dishwashers get attention they rarely receive between routine visits. Windows are washed inside and out, and blinds, curtains, and window sills are cared for as well. Floors get intensive work rather than a quick sweep: thorough mopping, deep carpet cleaning, and attention to corners and the spaces under furniture. Dusting targets spots regular cleaning skips, such as high shelves, ceiling fans, and the tops of door frames, and walls are wiped down to lift dust, fingerprints, and marks. For the difference between a reset visit and routine upkeep, see our regular maid service page, and follow the CDC’s guidance on when and how to clean and disinfect your home. Five Factors That Influence Deep Cleaning Costs Size of the space. A spacious four-bedroom house takes far more time than a cozy studio, so larger layouts cost more. Current condition. A regularly maintained home needs a touch-up, while a neglected one needs extra tender loving care and a higher price. Location. The cost of living and doing business varies widely across Canada, so downtown Toronto carries a premium over smaller towns. Frequency. A one-time deep clean costs more per session than an ongoing schedule, which often comes with long-term discounts. Custom requests. Delicate surfaces, specific products, or special-attention areas add time and equipment. If you handle those products yourself, Health Canada’s rules for using household chemicals safely are worth reading first. Average Deep Cleaning Costs in Canada Ballpark figures for smaller spaces, such as a studio or one-bedroom apartment, sit around CAD 100 to CAD 200. For medium to large homes, such as a three-bedroom house, expect CAD 200 to CAD 400 to cover the extra area and work. Luxury or larger properties start around CAD 400 and climb from there based on size, complexity, and special requirements. Treat every one of these as an estimate, because the most accurate way to price your home is a personalized quote. The table compares the national ballparks with the flat, before-HST rates on our pricing page. Property type Typical Canadian estimate Toronto Shine deep clean, before HST Studio or 1 bedroom CAD 100 to CAD 200 from $270.38 3 bedroom home CAD 200 to CAD 400 $441 Luxury or 4+ bedrooms CAD 400 and up $527.63 for a 4 bedroom How Often Should You Book a Deep Clean? Cost looks far more reasonable when you spread it over the year, because a deep clean is not a weekly chore. Most Canadian homes need a full reset one or two times a year. A spring clean is the classic choice, and a pre-holiday reset is a close second. Book a fresh session whenever life creates a deadline: a renovation that leaves fine dust in every crack, a new baby arriving, a wedding or house party on the calendar, a seasonal allergy flare-up that routine dusting cannot fix, or simply the realization that the oven has not been opened in a year. Households with pets, hardwood floors, or multiple kids tend to need resets closer to every six months. Between those appointments, a scheduled maid visit keeps grime from reaching the level that drives a quote upward, which is the single most effective way to pay less per session. Why the Investment Pays Off Health and hygiene Deep cleaning targets the spots where allergens, mold, and bacteria collect: under beds, behind appliances, and inside air vents. Reaching those areas improves indoor air quality, one of the concerns Health Canada tracks in its guide to indoor air contaminants and health. For households managing allergies or respiratory issues, a reset clean can make a noticeable difference. Maintenance and peace of mind Removing built-up grime protects finishes and can prolong the life of furniture, carpets, and appliances, which means fewer repairs and replacements over time. Advanced techniques such as steam cleaning for carpets and upholstery, pressure washing for outdoor areas, and detailed hand-washing of delicate items deliver a level of clean a routine cannot match. There is also a psychological return: coming home to a deeply cleansed, orderly space reduces stress and helps you relax. Deep Cleaning Cost FAQs Is a deep clean worth the extra cost over regular cleaning? Yes, whenever your home needs work a routine visit does not cover, such as inside appliances, descaled fixtures, washed walls, and cleaned carpets. Many households pair a one-time reset with recurring visits through our deep cleaning services in Toronto and maintain the result with scheduled housekeeping. How much does deep cleaning a three-bedroom house cost? Across Canada, three-bedroom homes typically fall between CAD 200 and CAD 400. Condition and add-ons swing that number, so the final quote depends on an assessment of your actual space rather than the bedroom count alone. Does timing affect the price? It can. Move-in and move-out dates are one of the most common reasons Canadians book a deep clean, and end-of-tenancy work follows its own checklist. See our move-out cleaning service for the deposit-focused version of this reset. How do I get an exact price? Request a personalized quote that reflects the services and level of attention your home actually needs, so you pay for exactly what you need and nothing you do not. What is included

How Much Does Deep Cleaning Cost in Canada? Read More »

Sink, clean

Sink Cleaning Simplified: Easy Tips to Make Your Sink Gleam

Hey there, sink cleaning enthusiasts! If you’ve ever found yourself staring at a sink wondering how to get it sparkling clean, you’re in the right place. Cleaning a sink might seem straightforward, but there are some cool tips and tricks to make your sink shine like new. So, let’s dive into the best way to clean sinks! Quick and Easy Steps to a Sparkling Sink   1. Gather Your Supplies Gathering the right supplies before you start cleaning your sink is crucial for an effective and efficient cleaning process. Each item in your cleaning toolkit has a specific role that contributes to not only making your sink look clean but also ensuring it’s hygienically safe and maintained well. Starting with mild dish soap, it acts as the cornerstone of your cleaning process. Dish soap is designed to fight grease and grime, which are commonly found in kitchen sinks due to food residue and cooking oils. The mild nature of the soap ensures that while it’s tough on dirt, it’s gentle on your sink’s surface. This balance is important because harsh chemicals can damage the finish of your sink, whether it’s made of stainless steel, porcelain, or other materials. Using a mild dish soap helps preserve the integrity and appearance of your sink over time. Baking soda comes into play as your go-to for tackling stubborn stains. Its mild abrasiveness allows it to scrub away tough marks without leaving scratches, preserving the sink’s finish. Moreover, baking soda is a natural deodorizer, meaning it doesn’t just clean the surface, but it also neutralizes odors, leaving your sink smelling fresh. This dual action makes baking soda an invaluable part of your cleaning arsenal. White vinegar, with its natural disinfectant properties, addresses another critical aspect of sink cleaning: hygiene. Its acidity is effective against water spots and mineral deposits, which are particularly problematic in areas with hard water. For stainless steel sinks, vinegar can restore shine by breaking down grime and soap residues, making your sink look almost new. The use of vinegar highlights the importance of using natural, non-toxic cleaning agents, especially in areas where food is prepared. The tools you use for applying and scrubbing these cleaning agents-such as a sponge or soft cloth, and an old toothbrush-are equally important. A sponge or soft cloth is versatile, suitable for both applying cleaning agents and for the gentle scrubbing of various surfaces. Using a soft cloth for drying and polishing helps avoid water marks, enhancing the sink’s shine. An old toothbrush proves indispensable for detailed cleaning around faucets and sink edges, areas where grime accumulates but is often overlooked. Rubber gloves protect your hands throughout the cleaning process. Hot water and cleaning agents, even mild ones, can irritate or dry out your skin, especially with prolonged exposure. Gloves keep your hands safe, allowing you to clean more thoroughly without worrying about skin irritation. Lastly, olive oil serves an unconventional yet effective role in your cleaning process. After cleaning, a small amount of olive oil can be used to polish stainless steel sinks, leaving them shining and resistant to future water spots and fingerprints. This natural polishing agent is safe, effective, and adds a finishing touch to your cleaning routine, emphasizing the role of natural products in maintaining a clean and healthy home. 2. Rinse and Scrub   Rinse the Sink: Turn on the tap and let warm water run all over the sink. Use your hand or a cup to splash water into corners and around the faucet where water might not reach directly. Apply Dish Soap: Put a small amount of dish soap onto your sponge or cloth. You don’t need a lot – a little goes a long way! How to Scrub: This is where the actual cleaning happens. Scrubbing with soap removes stains, food particles, dusties and unseen bacteria. It’s essential for a thorough clean. Start at the top of the sink and work your way down. Pay special attention to areas where grime accumulates, like around the drain and the edges of the sink. Use circular motions for a more effective scrub. For stainless steel sinks, follow the grain to prevent scratches. 3. Target Those Stains   Baking Soda: Baking soda is mildly abrasive, making it great for tackling tough stains without scratching your sink’s surface. Mix about three parts baking soda to one part water. You’re aiming for a thick, spreadable paste – not too watery, but not too dry. Use a small bowl to mix the baking soda with water. Stir it until it reaches the right consistency. How to Apply: Scoop some of the paste with your fingers, a cloth, or a sponge, and spread it directly onto the stains in your sink. Make sure the paste fully covers the stained areas. You can apply a thick layer if the stains are particularly stubborn. 4. Use Vinegar for Shine   Why Rinse First: White vinegar is a fantastic natural disinfectant. It kills most bacteria and viruses due to its acetic acid content. After using the baking soda paste, it’s important to thoroughly rinse the sink. This removes any residual baking soda, as mixing it with vinegar can neutralize both their cleaning effects. Use warm water to rinse and ensure that all the baking soda is washed away. How to Apply: Soak a soft cloth or sponge in white vinegar. You don’t need to dilute the vinegar unless you’re sensitive to the smell. Wipe down the entire sink with the vinegar-soaked cloth. Make sure to cover all areas, including those around the faucet and the drain. Allow the vinegar to sit on the surface of the sink for a few minutes. This duration helps in disinfecting the surface and enhancing the shine. 5. Clean Around the Faucet     Accumulation of Grime: The area around the faucet tends to accumulate grime and mineral deposits, especially in hard water areas. Using an Old Toothbrush: Its small size and bristles make an old toothbrush ideal for getting into

Sink Cleaning Simplified: Easy Tips to Make Your Sink Gleam Read More »

cleaning kitchen rust and aplliances rusted

Battling Kitchen Rust: 7 Tips and Tricks for Keeping Your Cookware and Appliances Rust Free

Ever pulled out your favorite skillet only to find it’s got more rust than a rainy day in April? Keeping your kitchen essentials rust free is crucial, ensuring they’re always ready for action without the unwanted crunchy bits! Or maybe you’ve spotted those pesky orange spots creeping up on your trusty toaster? Rust in the kitchen is like that uninvited guest who just won’t leave. But fear not! I’ve got some super tips, tricks, and ways to remove rust to keep your cookware and appliances sparkling like new. Let’s dive in and tackle those uninvited guests with some rust-free magic! Why Does My Kitchen Gear Get Rusty? Understanding the Enemy  Rust, technically known as iron oxide, forms through a chemical reaction called oxidation. When iron (present in most cookware and appliances) comes into contact with oxygen and water or moisture, it undergoes this reaction. Let’s break it down: The Reaction: Iron (Fe) reacts with oxygen (O2) in the presence of water (H2O) to form iron oxide (Fe2O3), aka rust. Speed of Reaction: This process can happen quickly, especially if the metal is constantly exposed to water and air. That’s why wet environments accelerate rusting. Factors Contributing to Rusting: Moisture: Even high humidity can be enough for rust to form. Contact with Water: Repeated exposure to water, like in washing or cooking, increases the risk. Scratches and Chips: Any damage to the protective coating of your cookware or appliances can expose the underlying metal to air and moisture. Stop Rust Before It Starts: Proactive Prevention   The best way to deal with rust is to prevent it from forming in the first place. Regular cleaning services can help with prevention. Here’s is other tips that can help: Thorough Drying Importance: Even a small amount of lingering moisture can start the rusting process. How to Dry: Use a clean, dry towel to thoroughly wipe down your cookware and appliances after washing. For hard-to-reach areas, consider using a hairdryer on a cool setting. Smart Storage with Paper Towels Role of Paper Towels: They act as moisture absorbers, keeping your cast iron and other metal cookware dry. How to Use: Place a paper towel inside your cookware before stacking or storing them. This is especially important for cast iron items which are prone to rusting. Using a Dehumidifier Why Use a Dehumidifier: It reduces the overall moisture level in your kitchen, making it less hospitable for rust to form. Benefits: This is particularly crucial in areas with high humidity. By keeping the air dry, you significantly lower the risk of rust developing on your kitchen tools and appliances. DIY Rust Busters: Your Go-To Solutions Vinegar Soak How It Works: The acetic acid in vinegar works wonders on rust. It helps break down the rust, making it easier to scrub off. This acids work for industrial rust too. Step-by-Step: Submerge the rusty item in a container filled with white vinegar. Make sure it’s completely covered. Wait for a few hours, or even overnight for tougher rust. Scrub: After soaking, take a non-metallic brush (an old toothbrush works great) and gently scrub the rust away. Rinse and Dry: Rinse and dry make the item with water dry it immediately to prevent new rust. Baking Soda Paste How It Works: Baking soda is mildly abrasive, making it perfect to remove rust from metal without damaging it. Step-by-Step: Mix baking soda with water to create a thick paste. Apply the paste generously over the rusted area. Let it Sit: Leave the paste on for about an hour. Scrub: Use a brush or sponge to scrub the rust off. Rinse and Dry: Wash off the residue and dry the item. Potato Trick How It Works: The oxalic acid in potatoes helps dissolve rust. When combined with a mild abrasive like dish soap or baking soda, it’s effective on smaller rust spots. Step-by-Step: Cut a potato in half. Dip the cut side in dish soap or sprinkle it with baking soda. Rub the potato over the rusted area. You’ll see the rust diminish. Repeat if necessary, and then rinse and dry the item. Loving Your Rust-Prone Items: Special Care Tips Cast Iron Pans After Use Care: Clean immediately after use. Avoid soaking in water. Dry Thoroughly: Use a towel or put it on the stove for a few minutes to evaporate any moisture. Oil It Up: Apply a thin layer of cooking oil to the surface. This creates a protective layer that prevents rust. Storing: Store in a dry place. If stacking pans, place a paper towel between them to absorb moisture. Steel Utensils Cleaning and Drying: Hand Wash rather than using a dishwasher to maintain the integrity of the steel. Dry Immediately: Use a towel or leave them in a drying rack. Storage Tips: Separate Storage: Keep them separate from other utensils that might scratch or damage them. Avoid Humidity: Store in a dry area to prevent moisture buildup. To Replace or Not to Replace: Making the Call Deciding whether to replace or restore your rusted cookware can be a bit of a conundrum. Here’s how to make that decision: Assess the Damage: Look at how deep and extensive the rust is. Surface rust, which is just on the top layer, can often be cleaned. However, if the rust has pitted the metal, compromising its integrity, it’s time for a replacement. Consider the Value: If the item is expensive or has sentimental value (like Grandma’s old cast iron skillet), it might be worth the effort to restore. On the other hand, if it’s a low-cost item, replacing might be more cost-effective. Health and Safety: Cookware with deep rust can harbor bacteria and may not be safe for cooking. Safety first! Restoration Effort: Think about the time and effort required to remove the rust. If it’s going to take a lot of elbow grease and the outcome is still uncertain, replacement might be the better option. Recommended Rust Removers: Store-Bought Solutions When DIY solutions don’t cut it, or you’re

Battling Kitchen Rust: 7 Tips and Tricks for Keeping Your Cookware and Appliances Rust Free Read More »

House cleaner inside a home

How to Choose the Right Professional House Cleaning Service in Yorkville: 5 Essential Tips

Choosing the right professional house cleaning service can feel like a daunting task, especially with the multitude of options available out there. You want a service that will leave your home sparkling without breaking the bank or causing you any stress. Whether you’re in the bustling streets of Toronto or nestled in a quiet suburb, these five essential tips will guide you through selecting the perfect cleaning service to meet your needs. Looking for professional house cleaning in Yorkville? Toronto Shine Cleaning provides regular, deep, and move-in or move-out cleaning across Yorkville and the GTA. 1. Define Your Cleaning Needs Defining your cleaning needs is the crucial first step in finding a professional house cleaning service that ticks all your boxes. It’s like setting the destination in your GPS before hitting the road. Start by assessing the state of your home and what you hope to achieve with a professional cleaning service. Are there specific areas in your home that require extra attention, such as the kitchen or bathrooms? Perhaps you have high ceilings and windows that are difficult to reach and clean on your own. Or, you might be dealing with the aftermath of a recent home improvement project and need someone skilled in removing dust and debris from every nook and cranny. Your lifestyle and schedule could greatly influence the type of cleaning service you require. For busy families, a regular maintenance cleaning might be a lifesaver, keeping your home consistently clean and hygienic without you having to lift a finger. On the other hand, if you’re someone who entertains guests frequently, you might prefer scheduling deep cleanings before and after events to ensure your home is always ready to impress. Consider the frequency of the service you need. Some people prefer having a cleaning crew come in weekly to handle the upkeep, while others might find a bi-weekly or monthly service more suited to their needs and budget. Seasonal cleaning, such as spring or fall cleaning, can also be an excellent choice for those looking to refresh their space periodically without committing to a regular schedule.       2. Research and Reviews Diving deeper into the research and review process is akin to detective work, where every clue can lead you closer to finding the ideal cleaning service for your home. This step is about gathering as much information as possible to make an informed decision. Beyond just skimming through ratings, take the time to read the detailed reviews left by previous customers. These can offer insights into the company’s strengths and weaknesses, the professionalism of their staff, and the thoroughness of their cleaning. Pay attention to mentions of reliability, punctuality, and flexibility, as these are crucial traits for a smooth and stress-free cleaning experience. Expanding your research beyond the basic review platforms can also be incredibly beneficial. Social media channels, forums, and local community boards can provide unfiltered feedback and experiences from real customers. These platforms often feature more candid discussions about services, and you might even stumble upon personal recommendations and advice from people in your own neighborhood. Another valuable step is to look at before-and-after photos, if available, either on the company’s website or social media profiles. Visual evidence of their work can be a powerful testament to their ability to transform a space, giving you a clearer expectation of the results you can anticipate in your own home. Additionally, consider reaching out directly to the company with any questions or concerns you might have. This interaction can give you a sense of their customer service approach and responsiveness. How they handle your inquiries-whether they’re eager to provide information, transparent about their process, and courteous in their communication-can significantly influence your comfort level with them. 3. Ask for Proof of Insurance and Bonding Understanding the types of insurance a cleaning service should have can also guide you in making a more informed decision. For instance, liability insurance is crucial as it covers any damage that might occur to your property during the cleaning process. Worker’s compensation is another essential coverage, protecting the workers and you in case someone gets injured while cleaning your home. Bonding, on the other hand, offers protection against theft, ensuring that you are compensated if anything goes missing. Requesting proof of these assurances should be a standard part of your vetting process. A professional cleaning service will understand the importance of this request and be prepared to present the necessary documents. This transparency is a sign of their professionalism and their willingness to establish a trust-based relationship with their clients. Taking this step not only provides you with peace of mind but also reflects on the company’s internal practices. It indicates that they are likely to have well-defined protocols and standards for their cleaning services, which translates into a higher quality of service for you. It shows that they value and respect their employees by providing them with a safe working environment, which in turn can lead to more motivated and diligent cleaners taking care of your home. 4. Check for Experience and Expertise Delving deeper into the significance of experience and expertise in selecting a professional cleaning service illuminates the nuanced aspects of house cleaning that go beyond the basic dusting and vacuuming. A company’s longevity in the business often speaks volumes about its ability to adapt, grow, and refine its services to meet the evolving needs of its clientele. It’s a testament to their reliability and the quality of work they consistently deliver. When a company has been around for years, it’s likely that they’ve encountered and successfully managed a plethora of cleaning challenges, equipping them with the knowledge to tackle a wide range of situations. The expertise of a cleaning service isn’t just about the years it has under its belt; it’s also about the depth of its service offerings. Specialization is key in areas that require a particular set of skills and tools. Post-construction cleaning, for instance, is a labor-intensive process that involves removing

How to Choose the Right Professional House Cleaning Service in Yorkville: 5 Essential Tips Read More »

white wooden cabinet near window

Post Renovation Cleaning in Scarborough

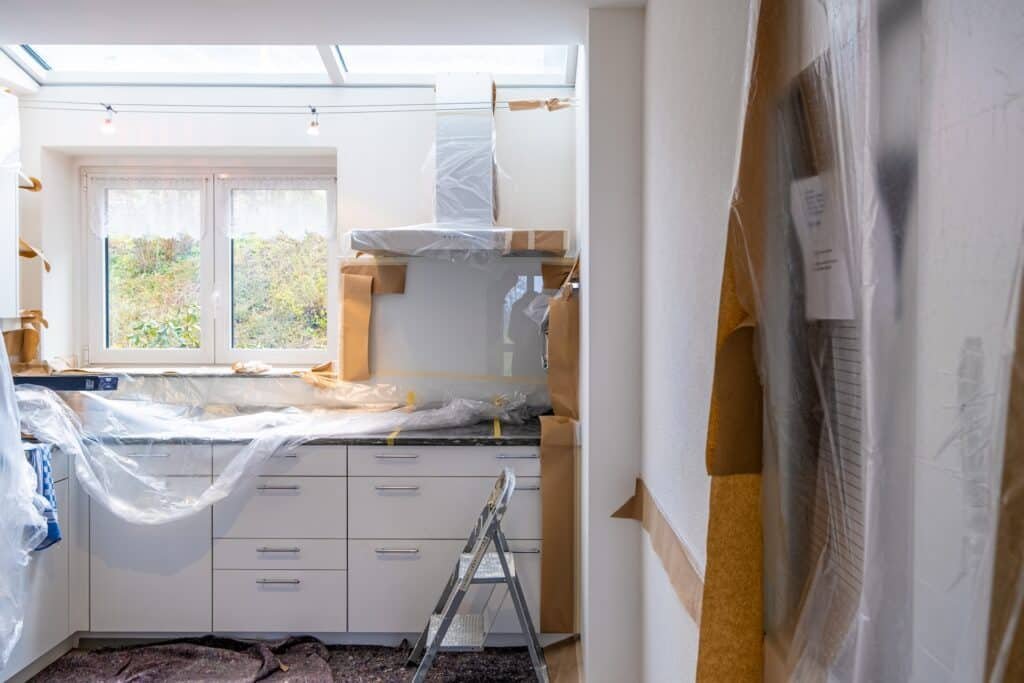
Post Renovation Cleaning in Scarborough After months of planning and construction, your Scarborough home renovation is finally complete. But before you can enjoy your new space, a thorough post-renovation cleaning is essential. Construction dust, debris, and hazardous materials can linger on every surface. Professional post-renovation cleaning ensures your home is safe, spotless, and ready for move-in. Toronto Shine Cleaning specializes in post-renovation cleaning across Scarborough, removing every trace of construction residue so you can enjoy the full beauty of your newly renovated space. Why Post-Renovation Cleaning Matters Renovations leave behind fine dust particles that settle on floors, walls, cabinets, and inside HVAC vents. Drywall dust, sawdust, and paint splatters can spread throughout the home and affect indoor air quality. These fine particles are small enough to remain airborne for hours after work ends, settling on every horizontal surface. Beyond dust, sharp objects such as nails, staples, and broken tiles pose safety risks, especially in households with children or pets. Leftover adhesive, caulk residue, and paint drips can also mar new surfaces if not cleaned promptly and properly. A thorough cleaning removes these hazards and reveals the true beauty of your renovated space. Indoor air quality is a primary concern after any renovation. Construction dust contains silica, gypsum, and other particles that can irritate the respiratory system. According to the Canada.ca guide on reducing humidity and mould, poor ventilation combined with construction dust can contribute to indoor air contaminants. Professional cleaning with HEPA-filtered vacuums captures these fine particles and prevents them from recirculating. Key Benefits of Professional Post-Renovation Cleaning Thorough dust removal: HEPA-filtered vacuums capture fine drywall dust, silica particles, and sawdust that household vacuums simply recirculate into the air. Surface protection: Professional cleaners use the right techniques for new paint, fresh grout, and sealed hardwood to avoid damage or discolouration during the cleaning process. Time savings: A full post-renovation clean can take four to eight hours. Hiring professionals frees you to focus on unpacking, decorating, and settling into your renovated home. Health and safety: Removal of sharp debris, chemical residues, and airborne dust protects your family from injury and respiratory irritation after construction ends. Common Post-Reno Contaminants Where They Accumulate Why They Need Removal Drywall dust Floors, shelves, inside cabinets, window sills Irritates respiratory system, causes scratching on finished surfaces Paint splatters and adhesive Window frames, baseboards, door hardware Affects finish appearance, can harden and become permanent stains Sharp debris (nails, staples) Carpets, corners, under appliances Safety hazard for bare feet and pets; can damage vacuum cleaners Construction dust in vents HVAC registers, ductwork, ceiling fans Recirculates fine dust every time the system runs Step-by-Step Cleaning Process A complete post-renovation clean follows a logical progression. Start by clearing all large debris and construction waste from every room. Next, dust from the top down: ceilings, ceiling fans, light fixtures, and window frames. Use a damp microfiber cloth or HEPA vacuum attachment so dust is captured rather than scattered. Wipe walls gently with a barely damp cloth to collect fine drywall dust without damaging fresh paint. Clean all doors, handles, and frames, as these high-touch areas collect the most residue. Once vertical surfaces are clean, move to floors. Vacuum carpets and hard floors thoroughly, then mop hard surfaces with appropriate cleaners for tile, hardwood, or laminate. Pay special attention to corners and edges where debris accumulates. In kitchens and bathrooms, sanitize all surfaces including countertops, sinks, and cabinets inside and out. Clean inside appliances such as the oven, refrigerator, and microwave, which may have collected dust during construction. Wipe down all switch plates, outlet covers, and door handles. Finally, wipe down HVAC vents and replace filters to prevent construction dust from circulating through your home. A final walk-through ensures every room is inspected for missed spots. Why Hire Professionals for Post-Renovation Cleaning Professional cleaners bring industrial-grade vacuums with HEPA filtration, specialized cleaning solutions, and the expertise to tackle stubborn post-renovation residue. They can reach high corners, clean inside ductwork, and safely dispose of construction debris. DIY attempts often miss the fine dust that settles on horizontal surfaces and inside cabinets, which may resurface days later and undo the sense of freshness you expect from a new renovation. Professional teams also know which cleaning agents work safely on new paint, fresh grout, and sealed hardwood without causing damage or discolouration. For Scarborough homeowners, booking a professional post-renovation clean saves time and guarantees a truly spotless result. Frequently Asked Questions How long does a post-renovation cleaning take? For an average Scarborough home, expect four to eight hours depending on the scope of the renovation and the amount of debris left behind. Should I clean before or after the renovation crew leaves? After. The renovation crew should handle their own debris removal, and then a deep clean addresses the fine dust and hidden grime they leave behind. Is post-renovation cleaning safe for pets? Yes. Professional cleaners use eco-friendly, non-toxic products that are safe for pets and children once all surfaces are dry. Do you clean windows after renovation? Yes. Post-renovation cleaning includes interior window cleaning to remove dust, paint splatters, and adhesive residue from glass surfaces and frames. Ready for a fresh start in your newly renovated Scarborough home? Call (647) 424-0355 to schedule your post-renovation cleaning. We offer deep cleaning, regular maintenance, and move-in/out cleaning across Scarborough. Check our pricing for transparent rates. Serving all GTA locations. For indoor air quality information, read the CDC guidelines on cleaning and disinfecting your home.

Post Renovation Cleaning in Scarborough Read More »

woman in white long sleeve shirt and blue denim jeans standing beside white wooden framed glas

Deep Cleaning Services for Etobicoke Homes

Deep Cleaning Services for Etobicoke Homes Keeping an Etobicoke home truly clean means going beyond the weekly sweep and mop. Deep cleaning tackles the hidden dirt, grease, and allergens that regular cleaning misses. Toronto Shine Cleaning offers thorough deep cleaning services designed to refresh every corner of your Etobicoke home, from the kitchen backsplash to the bedroom baseboards. Our professional team uses eco-friendly products and commercial-grade equipment to deliver results that standard household cleaning cannot match. Whether your home is a century-old house in The Kingsway or a modern condo near Humber Bay Shores, our deep cleaning service adapts to the specific cleaning needs of your property and lifestyle. What Deep Cleaning Covers A deep cleaning service addresses areas that accumulate grime over time and are often neglected during routine cleaning. In the kitchen, we clean inside and outside all appliances including ovens, microwaves, and refrigerators. We scrub cabinet fronts and interiors to remove cooking grease and food residue, degrease backsplashes thoroughly, and sanitize countertops, sinks, and faucets. In bathrooms, we scrub tile and grout lines with specialized brushes to remove soap scum and mildew, clean shower doors and tracks, sanitize toilets including the base and behind, clean vanity cabinets inside and out, and polish mirrors to a streak-free shine. For living areas and bedrooms, we dust ceiling fans, window sills, blinds, light fixtures, picture frames, and baseboards. We vacuum under and behind furniture, clean door frames and switch plates, and detail every high-touch surface. We also pay special attention to staircases, handrails, and entryways that see heavy daily traffic and accumulate dirt faster than other areas. Benefits of Deep Cleaning Your Etobicoke Home Healthier indoor air: Deep cleaning removes dust mites, pollen, pet dander, and mould spores trapped in carpets, upholstery, and HVAC vents. This significantly reduces allergy and asthma triggers for your family and creates a fresher, more breathable environment. Extended lifespan of surfaces: Regular deep cleaning prevents dirt and grime from wearing down carpets, hardwood floors, tile grout, and appliance seals. This protects your home investment and delays the need for expensive replacements or refinishing. Reduced stress: A deeply cleaned home feels calmer, more organized, and more inviting. The psychological benefit of a clean environment directly improves your daily well-being and productivity, making your home a true sanctuary. Long-term savings: Removing dust build-up from appliance coils, filters, and seals helps appliances run efficiently and last longer. Well-maintained appliances consume less energy and require fewer repairs, saving you money month after month. Area Deep Cleaning Tasks Recommended Frequency Kitchen Inside oven, fridge, microwave; cabinet fronts and interiors; backsplash degreasing; counter sanitizing Every 3 to 4 months Bathroom Grout scrubbing; shower head descaling; toilet base and tank cleaning; mirror polishing Quarterly Living areas Under furniture dusting; ceiling fans; window tracks; baseboards; light fixtures Every 6 months HVAC vents Register cleaning; filter inspection; duct surface wipe-down Seasonally Why Etobicoke Homeowners Trust Professional Deep Cleaning Etobicoke homes have their own character. Older homes feature original hardwood floors, ornate woodwork, and classic tile that require gentle, specialized handling. Newer condos and townhouses feature stainless steel appliances, glass shower enclosures, and quartz countertops that need streak-free, non-abrasive care. Professional cleaners bring the right tools and expertise for every surface type. They use food-safe disinfectants in the kitchen, non-abrasive cleaners for tile and stone, and HEPA-filtered vacuums to capture fine particles that household vacuums recirculate. A professional deep cleaning also saves hours of physical effort and delivers results that are difficult to achieve with off-the-shelf cleaning supplies alone. How Deep Cleaning Differs from Regular Cleaning Understanding the difference between deep cleaning and standard housekeeping helps you choose the right service. A standard cleaning focuses on visible surfaces: countertops, floors, sink fixtures, and high-traffic areas. Deep cleaning goes further, targeting the grime that accumulates in hidden spaces. For example, while a regular cleaning wipes down the exterior of kitchen cabinets, a deep clean addresses the interior shelves and door tracks. Where standard service dusts visible shelves, deep cleaning reaches ceiling fan blades, window tracks, and under heavy furniture. Both services are valuable, but deep cleaning provides the comprehensive refresh that homes need periodically to stay truly clean and healthy. Frequently Asked Questions How is deep cleaning different from a standard clean? A standard clean addresses visible surfaces like counters, floors, and sinks. Deep cleaning includes detailed work on grout, inside and behind appliances, under furniture, baseboards, light fixtures, and window tracks for a comprehensive refresh. Do I need to be home during the cleaning? No. Many Etobicoke clients provide access instructions, and our bonded, insured team cleans while you are at work or running errands. What cleaning products do you use? We use eco-friendly, non-toxic cleaning products that are safe for children, pets, and all common home surfaces. We can also accommodate specific product requests or sensitivities. How long does a deep cleaning take? For a typical two-bedroom Etobicoke home, expect approximately three to five hours. Larger homes or homes with significant build-up may require more time. Transform your Etobicoke home with a professional deep cleaning today. Call (647) 424-0355 or visit our deep cleaning page to book. Our team also offers regular cleaning services for ongoing maintenance. View pricing and packages and read customer reviews on our reviews page. Serving all GTA locations including Etobicoke. For safe cleaning guidance, refer to the CDC guide on home cleaning and disinfection and the Canada.ca tips on household chemical safety.

Deep Cleaning Services for Etobicoke Homes Read More »

Cleaning Services East York

5 Good Reasons Why You Should Use Apartment Cleaning Services in Toronto

5 Good Reasons to Hire Apartment Cleaning Services in Toronto Living in a bustling city like Toronto means balancing work, social life, and personal time. Keeping your apartment clean often takes a back seat to more pressing priorities. Professional apartment cleaning services offer a practical solution that goes beyond surface tidiness. Here are five compelling reasons to let the experts handle the dusting, scrubbing, and vacuuming. 1. Save Valuable Time Every Week Time is your most non-renewable resource. Between commuting, career demands, and family obligations, finding hours to deep clean your apartment can feel impossible. A professional cleaning team can accomplish in two hours what might take you an entire Saturday. That reclaimed time can go toward hobbies, exercise, time with loved ones, or simply resting. Regular cleaning services work around your schedule, arriving when it suits you so you never have to sacrifice another weekend to scrubbing floors. 2. Achieve a Professional-Grade Clean Everyday cleaning routines miss the hidden spots where dust and grime accumulate. Professional cleaners bring commercial-grade equipment and specialized techniques to reach behind appliances, inside cabinets, and into corners that regular mopping and dusting skip. They use high-quality products that break down grease, remove stubborn stains, and sanitize surfaces more effectively than typical store-bought supplies. Many services now offer eco-friendly options that keep your apartment fresh without introducing harsh chemicals into your living space. Depending on the plan you choose, a typical visit can include: Kitchen detailing: counters, sinks, appliance exteriors, and cabinet fronts Bathroom sanitizing: tubs, showers, toilets, and sinks Dusting: baseboards, window sills, light fixtures, and vents Floor care: vacuuming carpets and mopping hard floors 3. Customized Plans That Fit Your Lifestyle No two apartments are alike, and neither are cleaning needs. Professional services tailor their approach to your specific situation. Whether you need a weekly refresh, a bi-weekly deep clean, a one-time move-out service, or extra attention on the kitchen and bathroom, a customized cleaning plan adapts to you. You can adjust frequency, skip weeks when hosting guests, or add extra services for seasonal deep cleaning. This flexibility ensures you only pay for what you actually need. Cleaning Plan Type Best For Frequency Regular maintenance Busy professionals, small families Weekly or bi-weekly Deep cleaning Seasonal refresh, allergy sufferers Monthly or quarterly Move-in or move-out Renters, new homeowners One-time service Custom focus areas Kitchens, bathrooms, specific rooms As needed 4. Support a Healthier Living Environment A clean apartment directly affects your physical well-being. Dust mites, pet dander, mold spores, and airborne bacteria accumulate in carpets, upholstery, and hard-to-reach corners. Professional cleaning reduces these irritants, improving indoor air quality and lowering the risk of allergy flare-ups and respiratory issues. Kitchens and bathrooms receive special attention with sanitizing treatments that eliminate harmful germs. According to the CDC, regular cleaning and disinfecting of high-touch surfaces is one of the most effective ways to prevent the spread of illness in your home. The Government of Canada also emphasizes the importance of using household cleaning products safely to maintain a healthy indoor environment. A professionally cleaned space reduces your exposure to allergens and creates a sanctuary where you can truly relax. 5. Reduce Stress and Improve Mental Well-Being Cluttered, messy spaces contribute to feelings of overwhelm and anxiety. Walking into a tidy, organized apartment at the end of a long day has a measurable calming effect. Outsourcing your cleaning removes a major source of daily stress, freeing mental energy for more meaningful activities. Knowing your home will be consistently maintained regardless of how busy your schedule gets provides peace of mind that is hard to put a price on. Frequently Asked Questions How much do apartment cleaning services cost in Toronto? Pricing varies based on apartment size and cleaning type. Regular cleaning for a studio or one-bedroom typically starts around $212.63 before HST, while deep cleaning begins at approximately $270.38. Visit the pricing page for current rates. Are professional cleaners bonded and insured? Yes, reputable services like Toronto Shine Cleaning carry a $1,000,000 insurance policy and a $10,000 accidental breakage and surety bond, protecting both you and your property. What areas of Toronto do apartment cleaning services cover? Services extend across Toronto and the GTA, including Scarborough, North York, Etobicoke, Mississauga, Markham, Richmond Hill, Vaughan, and many more neighbourhoods. Check the locations page to confirm coverage in your area. Can I book a one-time clean instead of a regular schedule? Absolutely. Many providers offer one-time deep cleaning, move-in or move-out cleaning, and post-event cleaning alongside recurring plans. What if I need to change my cleaning schedule? Plans are flexible. You can skip a week, add an extra session, or adjust the focus of a particular clean with minimal notice. Make Your Apartment Shine Professional apartment cleaning services in Toronto deliver more than just a tidy space. They save you time, improve your health, reduce stress, and provide customized care for your home. Whether you need regular upkeep or a one-time deep clean, regular maid service or a thorough deep cleaning can transform your living experience. Call Toronto Shine Cleaning today at (647) 424-0355 to schedule your appointment.

5 Good Reasons Why You Should Use Apartment Cleaning Services in Toronto Read More »