Post Renovation/Construction Guide

Organizing a Small Kitchen

Organizing a Small Kitchen in 5 Easy Steps

A small kitchen demands a different mindset. It is not about lack of space, but about inefficient use of it. The primary goal in organizing a small kitchen is to create a highly functional workspace where every item is accessible and every movement has a purpose. This process begins not with a trip to a container store, but with a critical and unsentimental evaluation of everything you own. 1.Everyday Items Your countertops are the most valuable real estate in your small kitchen. They must be cleared. Remove every single item, from appliances to utensil crocks and decor. The only items that should earn their place back are those used multiple times every single day. For most, this means a coffee maker or an electric kettle, and perhaps a knife block if you cook daily. The toaster, the blender, the stand mixer these items, if used only weekly, must be housed in an easily accessible cabinet. If used monthly or for special occasions, they belong on a higher shelf or in a different storage area altogether. A small kitchen cannot afford to have its limited counter surfaces function as a storage shelf. Once cleared, clean the surfaces thoroughly. This clear, open space is your new baseline, the standard to which you will return after every use. Now, you must address your cabinets and drawers, one by one. Do not attempt to shuffle items around. Empty the entire contents of a single cabinet onto your cleared counter. This physical act forces a reckoning with each object. Group all like items together: all the mugs, all the drinking glasses, all the dinner plates. The redundancy will become immediately apparent. A household of two or three people does not require twenty mugs. In a small kitchen, such excess is a critical error. Select the best six or eight, the ones you genuinely love and use, and pack the rest for donation. Apply this same ruthless logic to your plates, bowls, and glassware. Discard anything that is chipped, cracked, or stained. This is non-negotiable in a small kitchen, where every item must be perfectly functional. 2.Conteiners Pay special attention to food storage containers. This is a common point of chaos in any kitchen, but it is catastrophic in a small kitchen. Match every single container to its corresponding lid. Any container without a lid, or any lid without a container, must be discarded. Any container that is warped, stained, or retains a food odor must also go. Investing in a single, uniform set of glass or plastic containers that nest and stack will reclaim an astonishing amount of cabinet space. The efficiency gained by using square or rectangular containers over round ones in the tight confines of a small kitchen cabinet cannot be overstated. 3.Kitchen Utensils Next, attack the utensil drawers. Empty everything out. Separate your everyday flatware forks, knives, spoons from the larger cooking tools and single-purpose gadgets. Analyze your tools with a critical eye. You do not need four different vegetable peelers or three separate can openers. Keep the best one or two of each essential tool and donate the duplicates. The vast collection of specialized gadgets, from apple corers to garlic presses, needs to be questioned. If you haven’t used it in six months, you likely won’t miss it. These items are space thieves in a small kitchen. A simple expandable bamboo or plastic drawer divider is essential for keeping cutlery organized and separate. For larger tools, a deep drawer with vertical dividers or a slim utensil crock (if you have the counter space) can work. The goal is to eliminate the tangled mess that makes finding the right tool a frustrating search. The pantry area, whether it is a dedicated closet or a few food cupboards, requires the same systematic approach. Remove every can, box, and bag. Check every single expiration date and discard anything that is past its prime without a second thought. Be honest about the food you will actually eat. That tin of specialty artichoke hearts or bag of quinoa you bought with good intentions a year ago? If you haven’t used it by now, donate it to a food bank while it’s still in date. The transformation of a small kitchen pantry comes from decanting. Remove grains, pastas, cereals, sugars, and flours from their bulky, inefficient original packaging. Transfer them into clear, airtight, stackable containers. This not only protects your food but allows you to see your inventory at a glance and creates a modular, space-saving system. Label every container clearly with its contents and the date it was opened or its expiration date. This structured system is vital for managing inventory in a small kitchen. With the purge complete, you can redesign your small kitchen based on workflow and function. Create zones. The area immediately surrounding your stove is your cooking zone. The cabinets and drawers here should hold your pots, pans, baking sheets, cooking oils, and most-used spices. The area around the sink is the cleaning zone. Store dish soap, sponges, dishwasher detergent, and trash bags under the sink. The section of counter with the most open space is your preparation zone. The drawers and cabinets here should contain your cutting boards, mixing bowls, measuring cups, and knives. Finally, establish a storage zone for everyday dishes and cutlery, ideally located near the dishwasher or drying rack to make unloading a quick and simple task. A well-designed small kitchen feels intuitive because everything is right where you need it. 4.Maximizing Space Now, focus on maximizing the volume of the space you have. Think vertically. The empty air between shelves is wasted space. Use under-shelf baskets that hang from the shelf above to create a second tier for small, flat items. Use stackable shelf risers to double the storage surface within a single cabinet, allowing you to store bowls on top and plates underneath without having to unstack everything. The limited cabinet space in a small kitchen makes this vertical strategy essential. Use your walls. A

Organizing a Small Kitchen in 5 Easy Steps Read More »

closet

How To Organize Your Closet The Easy Way – 4 Incredible Tips

A closet should be a functional space, not a source of stress. When it becomes a jumble of clothing and forgotten items, finding what you need turns into a daily chore. The path to an organized closet is a systematic process that begins with a complete reset. It requires time and a decisive mindset, but the result is a space that simplifies your routine and brings a sense of calm to your environment. The first step is not to buy storage bins or new hangers. The first step is to allocate a block of uninterrupted time. This is not a task to be squeezed into a spare thirty minutes. Depending on the state of your closet, you may need a full afternoon or even an entire day. Prepare for the task by gathering essential supplies: heavy-duty trash bags for items to be thrown away, separate bags or boxes for donations, and perhaps another box for items that need mending or dry-cleaning. You will also need basic cleaning supplies: a vacuum with attachments, microfiber cloths, and an all-purpose cleaner. 1.Empty The Closet Once you are prepared, the real work begins. You must empty the closet completely. Every single item must come out. Take out all the clothes from the rod, remove every shoe from the floor, clear every shelf, and empty every drawer or basket. Pile everything onto your bed. This act is crucial for two reasons. First, it forces you to confront the sheer volume of what you own. Seeing it all in one place provides a powerful perspective that is lost when items are hidden away. Second, it gives you a truly blank slate. You cannot properly organize a space that is still partially full, and you cannot properly clean it. The initial sight of the pile can be overwhelming, but this is a necessary stage of the process. With the closet now empty, you can see the space itself for what it is. This is the time for a deep clean. Start from the top and work your way down to manage dust and debris effectively. Dust the top shelves and the clothing rod. Wipe down all surfaces walls, shelves, and baseboards with a damp microfiber cloth and a suitable cleaner. Pay attention to corners where dust and cobwebs accumulate. Use a vacuum with a crevice tool to get into all the nooks and crannies. At the end, vacuum the floor of the closet thoroughly. A clean foundation is essential; putting items back into a dusty space defeats the purpose of the effort. This is also an opportunity to inspect for any issues like dampness, mold, or pests that might have gone unnoticed. 2.The Screening Now, turn your attention to the mountain of items on your bed. This is the most challenging and time-consuming part of the process: the sorting. Work through each item one by one. There is no shortcut. For every piece of clothing, every pair of shoes, and every accessory, you must make a decision. Create distinct piles for your sorted items: Keep, Donate, and Trash. A fourth pile, for items needing Repair, can also be useful. To make an effective decision for each item, ask yourself a series of direct questions. Be honest in your answers. First, have you worn it in the last year? If the answer is no, the reason why is important. If it’s a seasonal item like a heavy winter coat, that’s understandable. But if it’s a regular shirt or pair of pants you haven’t touched in over twelve months, it is unlikely you will wear it again. Second, does it fit you right now? Not if you lose ten pounds, and not if you gain some back. An organized closet is for the person you are today. Clothing that doesn’t fit takes up valuable real estate and can be a source of guilt or pressure. If it’s a high-quality item you truly love, and the size is only slightly off, you might consider a separate storage box for these “aspirational” pieces, but they should not live in your primary closet space. Third, what is its condition? Look for permanent stains, irreparable holes, significant pilling, or stretched-out fabric. If an item is past its prime and cannot be repaired, it belongs in the trash or textile recycling pile. Don’t donate items that are in poor condition. Similarly, if an item just needs a button sewn on or a small tear mended, place it in the repair pile, but commit to getting it fixed within a specific timeframe, such as the next two weeks. If you don’t, it’s just clutter in a different form. Fourth, does it align with your current lifestyle and personal style? Tastes and circumstances change. The suit you wore for a job you left five years ago may no longer be necessary. The trendy pieces from a few seasons ago might no longer feel like “you.” Your wardrobe should reflect who you are now and the life you currently lead. At the end, how does it make you feel when you wear it? Clothing should be comfortable and make you feel confident. If an item is itchy, pinches, or you are constantly adjusting it, it’s not serving you. If you put something on and immediately feel self-conscious, it has no place in your streamlined wardrobe. The goal is to open your closet and see only things you would be happy to wear. Be particularly ruthless with duplicates. Do you really need six similar black t-shirts or four pairs of nearly identical blue jeans? Keep the best one or two the ones that fit best and are in the best condition and donate the rest. Dealing with sentimental items can be difficult. A dress from a special occasion or a sweater inherited from a loved one holds meaning beyond its function. If you don’t wear it but cannot part with it, consider creating a separate memory box for these few precious items. They are keepsakes, not active

How To Organize Your Closet The Easy Way – 4 Incredible Tips Read More »

Labeling Kitchen Items – 4 Easy and Fast Tips

Kitchen product labeling is not merely a formality; it is a critical pillar of safety, health, and efficiency in any space where food is prepared, stored, or cleaned. The seemingly small details printed on a package or affixed to a container carry immense weight, guiding decisions that impact well-being, prevent waste, and ensure smooth operations. Without clear, accurate labeling, a kitchen, whether professional or domestic, quickly descends into a realm of uncertainty and potential hazards. 1.Food Allergies Consider the immediate and profound impact on safety. Allergens, for instance, represent a constant, invisible threat without proper labeling. For individuals with severe food allergies to peanuts, tree nuts, dairy, gluten, soy, eggs, fish, or shellfish, the absence of explicit allergen warnings on food packaging can mean the difference between a safe meal and a life-threatening anaphylactic shock. This isn’t just about avoiding discomfort; it’s about preventing medical emergencies. Labels clearly state “contains” or “may contain” information, allowing consumers to make informed choices that protect their health. This responsibility extends beyond the original packaging. Once a product is opened and transferred to another container, or if ingredients are portioned out, the new container must be meticulously labeled with its contents and, crucially, any allergen information relevant to those ingredients. Imagine a kitchen where flour is stored next to gluten-free flour without distinction, or where sugar is confused with salt; such errors are not just inconvenient but can render food inedible or, worse, dangerous. 2.Validity Data Expiry dates and best-before dates are another fundamental safety component. These dates are not arbitrary; they are meticulously determined by manufacturers based on product stability and safety. Consuming food past its expiry date significantly increases the risk of foodborne illnesses, ranging from mild digestive upset to severe bacterial infections like salmonella or E. coli. Labels on perishable items like dairy, meats, and prepared foods dictate the window within which they are safest to consume. For shelf-stable goods, a best-before date indicates optimal quality rather than immediate danger, but ignoring it can still lead to diminished taste, texture, and nutritional value. The absence of these dates, or their illegibility, creates a guessing game, leading to either unnecessary waste due to premature disposal or dangerous consumption of spoiled goods. Effective labeling ensures that a rotation system, like “First-In, First-Out” (FIFO), can be accurately implemented, minimizing spoilage and optimizing inventory. 3.Cleaning Products Beyond food, the kitchen is also home to various cleaning products, each with its own set of risks and specific usage instructions. A cleaning product label is a comprehensive safety manual. It details active ingredients, potential hazards (corrosive, irritant, flammable), and crucial first aid measures in case of accidental contact or ingestion. It specifies appropriate personal protective equipment (gloves, eye protection), ventilation requirements, and compatible surfaces. Using the wrong cleaner on a surface, applying an undiluted concentrate, or mixing incompatible chemicals can lead to damage to kitchen surfaces, toxic fumes, or even explosive reactions. Imagine mistaking a strong oven cleaner for a dish soap; the consequences could be severe for both the user and the kitchen environment. Clear, persistent labeling on these products is not merely a recommendation; it is an absolute necessity for safe handling and preventing chemical burns, respiratory issues, or other serious injuries. Nutritional information on food labels serves a vital health function. For many, dietary choices are not just about taste but about managing chronic health conditions like diabetes, heart disease, or hypertension. The nutrition facts panel provides detailed breakdowns of calories, fats, carbohydrates, sugars, sodium, and protein, empowering individuals to make informed decisions that align with their specific health needs or dietary goals. Labels also list vitamins and minerals, helping to identify nutrient-dense options or potential deficiencies. Without this information, individuals are left guessing, making it incredibly difficult to maintain a balanced diet or adhere to medically advised restrictions. Furthermore, ingredient lists are crucial for those avoiding specific components for ethical reasons, such as animal products for vegans, or for those with sensitivities to certain additives, preservatives, or artificial colors. The transparency provided by comprehensive labeling fosters trust and enables consumers to exercise genuine autonomy over what they consume. 4.Storage Proper storage instructions, frequently found on labels, are essential for maintaining food quality and preventing spoilage. Labels dictate whether a product requires refrigeration, freezing, or pantry storage, and often specify conditions like “store in a cool, dry place away from direct sunlight” or “refrigerate after opening.” These instructions are not arbitrary suggestions but are based on scientific understanding of how different ingredients react to temperature, light, and air exposure. Ignoring these guidelines can lead to rapid degradation of food quality, nutrient loss, and bacterial growth. An opened jar of sauce, for instance, might have a short “use within X days of opening” recommendation due to increased exposure to air and potential contaminants. Labeling ensures that these critical details are not overlooked, extending the useful life of food and preventing unnecessary waste. Efficiency in a kitchen, particularly in a professional setting, relies heavily on organized processes, and labeling is central to this. Knowing exactly what is in every container, when it was prepared, and when it expires streamlines inventory management, reduces preparation time, and minimizes cross-contamination risks. For dry goods like spices, flours, or grains, labeling prevents mix-ups that could ruin a dish or, again, pose an allergen risk. Imagine a busy kitchen without labels on containers of baking soda and baking powder; the subtle difference could lead to a collapsed cake or an inedible one. Even for homemade items like sauces, stocks, or prepped vegetables, clear labels indicating content and date of preparation are indispensable for maintaining freshness and ensuring proper rotation. This not only saves money by preventing spoilage but also saves time by eliminating guesswork. The legal and regulatory framework underpinning product labeling underscores its importance. Governments worldwide mandate specific labeling requirements for food and cleaning products to protect consumers. These regulations cover everything from ingredient disclosure and nutritional information to allergen warnings and handling instructions. Manufacturers are legally obligated to

Labeling Kitchen Items – 4 Easy and Fast Tips Read More »

How Mental Health and House Cleaning are Completely Linked

Do you know why mental health and house cleaning are completely linked? It’s where we spend most of our time and where we give it the least value. The state of our living space is often a direct reflection of our internal world. When we feel overwhelmed, stressed, or lost, our homes can begin to mirror that chaos. Piles of mail accumulate on the counter, laundry remains unfolded in baskets, and a thin layer of dust settles on surfaces we no longer have the energy to notice. Conversely, when we feel in control and at peace, our surroundings tend to be more orderly and calm. This connection is not a coincidence; it is a profound and interactive relationship. The act of cleaning, often dismissed as a mundane chore, is one of the most accessible and powerful tools we have for managing our mental health. It is a physical activity that produces tangible results, creating a positive feedback loop that can quiet an anxious mind, restore a sense of agency, and pave the way for clearer thinking. 1.Sense of Control One of the most significant psychological benefits of cleaning is the restoration of a sense of control. Life is inherently unpredictable. We cannot control global events, the economy, the actions of others, or the unexpected challenges that arise in our careers and personal lives. This lack of control can be a major source of anxiety and feelings of helplessness. In the face of such large, unmanageable forces, the home becomes a sanctuary, a small, manageable universe where our actions have direct and immediate consequences. When you decide to scrub the kitchen floor, you are the sole agent of that change. You choose the cleaner, you apply the effort, and you witness the transformation from grimy to gleaming. This simple act reinforces a powerful truth: you are capable of creating order out of chaos. You can effect positive change. This feeling of efficacy, cultivated in the small sphere of your home, can then ripple outward, bolstering your confidence to tackle other, more complex challenges in your life. The methodical task of sorting a messy closet or organizing a chaotic pantry provides a contained problem with a clear solution, a satisfying and rare experience in a world full of complex, ambiguous issues. The physical process of cleaning itself is a form of active meditation. Repetitive motions, such as scrubbing, wiping, sweeping, or folding, can be incredibly grounding. When the mind is racing with anxious thoughts, looping over past regrets or future worries, it is difficult to break the cycle. The physical demands of cleaning force your attention into the present moment. You become focused on the task at hand: the feeling of the warm, soapy water on your hands, the rhythmic back-and-forth motion of a vacuum cleaner, the faint scent of lemon polish, the sound of a cloth wiping across a glass surface. This sensory engagement is a core principle of mindfulness. It anchors you in the “now,” providing a temporary respite from the mental chatter that fuels anxiety. For the duration of the task, you are not ruminating; you are simply doing. This period of focused activity allows the nervous system to calm down, lowering cortisol levels and reducing the physiological symptoms of stress, such as a rapid heart rate and shallow breathing. It is an accessible way to achieve a state of flow, where you are so immersed in an activity that time seems to fade away, leaving you feeling refreshed and centered afterward. 2.Dopamine Furthermore, completing a cleaning task triggers a genuine neurological reward. Our brains are wired to feel pleasure from accomplishment. When you look at a cluttered, dirty room and then see it transformed into a clean, orderly space through your own efforts, you receive a potent dose of dopamine. This neurotransmitter is associated with pleasure, motivation, and satisfaction. The “before and after” effect is not just visually pleasing; it is chemically rewarding. It provides tangible proof of your productivity and competence. This is why making your bed in the morning can have such a positive impact on the rest of your day. It is the first completed task, the first small victory that sets a precedent for further accomplishment. Each cleared counter, organized shelf, and polished surface becomes a small monument to your effort, reinforcing a sense of capability. This process helps to counteract feelings of depression, which are often characterized by lethargy, apathy, and a sense of futility. By engaging in a purposeful activity with a clear and positive outcome, you actively fight against the inertia of a low mood. Conversely, living in a cluttered and disorganized environment exacts a constant, low-level toll on our mental resources. Clutter is more than just an aesthetic issue; it is a source of excessive sensory input. Every object in our field of vision sends a signal to our brain. In a tidy space, these signals are manageable. In a cluttered space, the brain is bombarded with stimuli. Piles of paper signal unfinished tasks, overflowing laundry baskets are a reminder of pending chores, and disorganized surfaces create a sense of visual noise that is difficult to ignore, even on a subconscious level. This constant overstimulation makes it difficult to relax and focus. It can lead to a persistent state of low-grade stress, keeping cortisol levels slightly elevated. The mind is perpetually distracted, unable to fully rest because the environment is signaling that work is never done. This can drain cognitive resources, making it harder to concentrate on work, enjoy a hobby, or even engage in a meaningful conversation. The simple act of decluttering removes this visual noise, giving your mind the clear space it needs to function effectively and peacefully. 3.Better Focus A clean and organized environment also directly supports better focus and productivity. When your physical space is in order, your mental space tends to follow. Imagine trying to write an important report or study for an exam at a desk covered in old mugs, stray papers, and

How Mental Health and House Cleaning are Completely Linked Read More »

disorganized home

Why Hiring A Professional Organizer Is Important – 5 Key Factors

Thinking about hiring a professional organizer? Then we will help you. The sheer weight of accumulated belongings can become a quiet, pervasive burden in any home. It starts subtly, an item here, a stack there, until spaces that once felt open and functional begin to feel constricted, heavy. This isn’t just about untidiness; it’s about the way clutter can insidiously affect daily life, breeding a sense of low-grade stress, making simple tasks feel more complicated, and, critically, turning the act of cleaning into a monumental, often futile, effort. When surfaces are obscured and floors are pathways through obstacles, true cleanliness remains elusive. Dust settles not just on shelves, but within an environment of disorder, making it harder to breathe easy, both literally and figuratively. Many find that no matter how much they wipe, scrub, or vacuum, the underlying disarray prevents a feeling of genuine, lasting cleanliness. This is often the point where the realization dawns that something more fundamental than cleaning is required; a strategic approach to the items themselves. This is where the expertise of a professional organizer becomes invaluable. These individuals are more than just people who like to tidy; they are specialists in creating order from chaos, developing sustainable systems, and transforming living spaces into environments that support, rather than hinder, daily life. Their work is a methodical process, beginning with an in-depth consultation. This initial step involves understanding your specific challenges, how you use your space, what your frustrations are, and what your vision is for a more functional home. They assess the scope of the clutter, the types of items involved, and the underlying habits or circumstances that may have contributed to the situation. It’s a non-judgmental exploration designed to tailor a plan that aligns with your lifestyle and goals. 1.Do You Need All The Objects? The heart of the organizing process, and often the most daunting phase for homeowners, is decluttering. A professional organizer acts as a calm, objective guide through this potentially emotional journey. They help you confront your possessions, item by item or category by category, and make decisions about what stays and what goes. This isn’t about indiscriminately throwing things away; it’s about thoughtful evaluation. Questions like “Do I use this?”, “Do I love this?”, “Do I need this?” become central. For sentimental items, which often carry the heaviest emotional weight, organizers provide strategies for honoring memories without being overwhelmed by physical objects. They might suggest digitizing photos or letters, or creating a dedicated, contained memory box. For general household clutter, from overflowing kitchen cabinets to jumbled linen closets, they bring a systematic approach, helping you to see your belongings with fresh eyes and make choices that serve your current life, not a past or imagined future one. They also assist with the responsible disposal of unwanted items, coordinating donations to charities, identifying items for sale, or ensuring proper recycling and waste removal.   2.Sorting And Categorizing Once the excess is cleared, the next stage involves sorting and categorizing what remains. Items are grouped logically, all baking supplies together, all office stationery in one area, all cleaning products consolidated. This “like with like” principle is fundamental to creating intuitive systems. It might sound simple, but in a home where items have migrated and been stashed haphazardly over years, this step alone can be revealing, showing you exactly what you own and highlighting redundancies. With items sorted, the professional organizer then moves into space planning and system implementation. This is where their strategic thinking truly shines. They analyze the available space, closets, cabinets, shelves, drawers, even vertical space and design solutions to store items efficiently and accessibly. In a kitchen, this might involve reconfiguring pantry shelves, introducing clear, stackable containers for dry goods, implementing a first-in-first-out system to reduce food waste, using drawer dividers for utensils and gadgets, or finding clever solutions for awkward items like pot lids or baking sheets. The goal is to create a workflow that makes cooking and cleaning smoother. 3.Closets In closets, organizers might introduce uniform hangers to save space and create visual calm, demonstrate effective folding techniques that maximize drawer capacity, suggest shoe storage solutions that keep pairs together and visible, and implement systems for accessories like scarves, belts, and jewelry. They often help with seasonal wardrobe rotation, ensuring that out-of-season clothes are stored properly and easily retrieved when needed. For home offices, the focus is on creating an environment conducive to productivity. This can involve setting up effective paper management systems (e.g., action files, reference files, archives), advising on digital organization strategies, optimizing desk layout for ergonomic comfort, and ensuring essential supplies are within easy reach. Children’s playrooms and bedrooms benefit immensely from an organizer’s touch. Systems are designed to make it easier for children to find their toys and, crucially, to put them away. This often involves clear bins, picture labels for younger children, and strategies for toy rotation to prevent overwhelm and keep engagement high. Even daunting spaces like garages, basements, or attics are tackled methodically. Organizers can help install heavy-duty shelving, utilize clear, durable storage bins, and create designated zones for tools, sporting equipment, holiday decorations, and long-term storage, transforming these areas from dumping grounds into functional extensions of the home. 4.Labeling A critical component of any organizing system is labeling. Clear, consistent, and easy-to-read labels are the signposts that help everyone in the household understand where things belong. This simple step is vital for the long-term maintenance of order, preventing items from slowly migrating back into disorganized piles. The professional organizer doesn’t just set up these systems and leave; a key part of their service often involves coaching on how to maintain them. They understand that lasting organization requires a shift in habits. They might provide tips for quick daily or weekly resets, help establish routines for managing incoming mail or putting away groceries, and sometimes offer follow-up sessions to tweak systems as needs evolve or to provide a refresher. The benefits of engaging a professional organizer extend far beyond

Why Hiring A Professional Organizer Is Important – 5 Key Factors Read More »

bottle of vinegar

How To Use Vinegar For Cleaning, Do You Know? – 6 Expert Tips

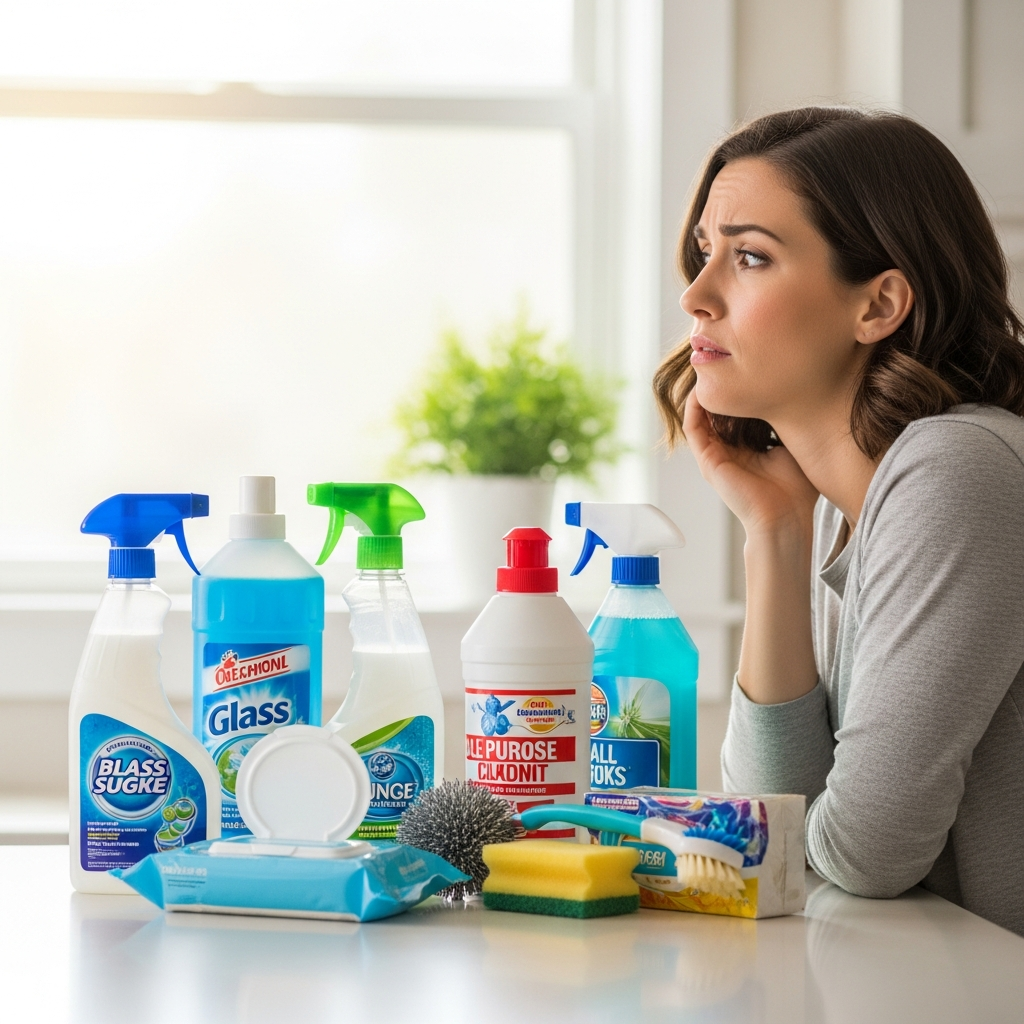
Unveiling the Cleaning Power of Vinegar Here today to shine a spotlight on one of the most versatile, effective, and surprisingly simple cleaning agents available: plain old vinegar. Tucked away in most kitchen pantries, this humble liquid, often associated primarily with salad dressings and pickling, harbors an impressive array of cleaning capabilities that have been relied upon for generations. Long before the advent of specialized chemical cleaners, vinegar was the go-to solution for a multitude of household chores, and its popularity endures for very good reasons. We’re going to explore the remarkable benefits of incorporating vinegar into your cleaning routine, demonstrating how this readily available and inexpensive product can tackle grime, banish odors, and leave your home sparkling, all without the harshness of many modern concoctions.   As a cleaner, the main reason for this is its composition. Most household white vinegar, the kind we typically recommend for cleaning, contains about 5% acetic acid. It’s this acetic acid that gives it its characteristic tart smell and, more importantly, its cleaning ability. Acetic acid is a mild acid, but it’s strong enough to dissolve mineral deposits, remove grease, and even act as a mild disinfectant on many surfaces. Its acidic nature allows it to break down the molecular structure of many types of dirt and buildup, making them easier to clean. Understanding this basic principle helps us understand why it’s so effective at tackling such a wide range of cleaning challenges throughout the home, from the kitchen to the bathroom and beyond.   One of its most celebrated benefits is its remarkable degreasing abilities. In the kitchen, where grease inevitably builds up, vinegar can be a real winner. Splatters on the stove, greasy residue on the backsplash, or that sticky film that can build up on range hoods and cabinet doors often yield to a simple solution. When sprayed onto a greasy surface and left to sit for a few moments, the acetic acid begins to break down the grease, loosening its grip. A quick wipe with a cloth afterward usually reveals a surprisingly clean surface. This makes it an excellent choice for everyday kitchen cleaning, helping to prevent grease from building up into a more formidable cleaning task over time. Its effectiveness on grease means that you can often reduce your reliance on stronger solvent-based degreasers for everyday kitchen cleaning. In addition to cutting through grease, it also offers valuable benefits as a gentle disinfectant and sanitizer. While it’s not a hospital-grade disinfectant that can kill all pathogens, acetic acid does have antimicrobial properties. It can effectively kill a variety of common household bacteria and mold spores on a variety of surfaces. This makes it a useful ally for wiping down countertops, especially after food preparation, or for cleaning the inside of your refrigerator. In the bathroom, it can help inhibit the growth of mold and mildew in shower stalls or on tile grout. When used properly, usually diluted with water in a spray bottle, it can help maintain a more hygienic environment throughout your home. It’s important to remember to rinse surfaces after using the disinfectant, especially food preparation areas, to remove any residue and odor.   Another significant advantage of using vinegar in your cleaning arsenal is its power as a natural deodorizer. Unlike many commercial air fresheners that simply mask unpleasant smells with strong perfumes, vinegar works by neutralizing odor-causing bacteria and molecules. If you have a lingering cooking smell in the kitchen, placing a small bowl of vinegar on the counter for a few hours can help absorb and eliminate the odor. It can be used to freshen up drains by pouring a cup down, followed by hot water after about 30 minutes. Even musty smells in closets or basements can sometimes be diminished by wiping down surfaces with a vinegar solution or by leaving an open container of vinegar in the area to absorb the airborne odors. The vinegar smell itself dissipates relatively quickly once dry, leaving behind a genuinely fresher, neutral scent. Perhaps one of vinegar’s most well-known cleaning talents is its efficacy as a mineral deposit remover and descaler. Households with hard water are all too familiar with the unsightly white, chalky build-up that can appear on faucets, showerheads, and inside appliances. This is lime scale, primarily calcium carbonate, and vinegar’s acetic acid is excellent at dissolving it. You can soak a showerhead in a bag filled with vinegar to unclog its nozzles, or run a cycle with vinegar in your coffee maker or kettle to remove internal scale build-up, which can improve their efficiency and longevity. Faucets can be wrapped with a vinegar-soaked cloth for a few hours to dissolve deposits around the base and spout. This ability to tackle mineral stains makes vinegar an indispensable tool for keeping bathroom fixtures and kitchen appliances looking their best and functioning properly. For those seeking a streak-free shine, vinegar is a time-tested solution, particularly for glass and other reflective surfaces. When diluted with water, typically in a 50/50 solution, and sprayed onto windows, mirrors, or even stainless steel appliances, vinegar effectively cuts through grime and fingerprints without leaving behind the streaks that some commercial glass cleaners can. The acetic acid helps to break down residues, and as it evaporates, it leaves the surface clear and sparkling. Many people find that wiping with a microfiber cloth or even crumpled newspaper after spraying with a vinegar solution yields the best streak-free results on glass surfaces, making it a simple and economical way to achieve crystal-clear views and gleaming reflections. Furthermore, while vinegar itself is not an abrasive, it can contribute to a gentle scrubbing action when combined with other natural ingredients, most notably baking soda. When vinegar (an acid) is mixed with baking soda (an alkali), they react to create carbon dioxide gas, which results in a satisfying fizzing action. This fizzing can help to lift and loosen grime from surfaces, providing a gentle scouring effect without being harsh. This combination is popular for cleaning oven interiors, stained sinks,

How To Use Vinegar For Cleaning, Do You Know? – 6 Expert Tips Read More »

white wooden cabinet near window

Post Renovation Cleaning in Scarborough

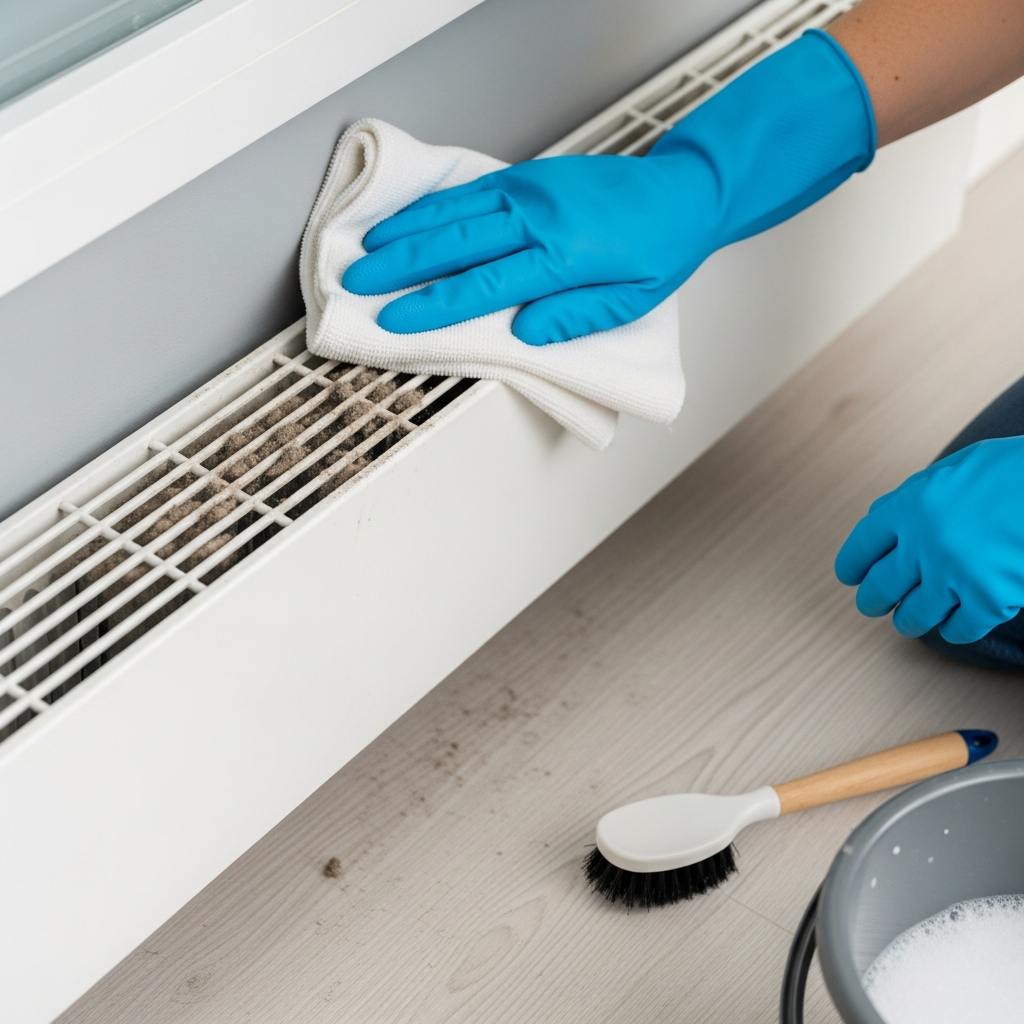
Hey there, Scarborough residents! Just finished a home renovation and staring at the mess left behind? I feel you. That dust and debris aren’t going to clean themselves, right? Well, don’t fret, because I’ve got the ultimate guide to post-renovation cleaning in Scarborough. Let’s dive in and turn that construction chaos into a sparkling sanctuary! Why Is Post Renovation Cleaning a Must? Safety First: Imagine walking around your newly renovated space, admiring the fresh paint and shiny floors, and then ouch! You step on a nail or a piece of broken glass. Not the kind of “sharp” design you had in mind, right? That’s where safety comes into play. Post-renovation, your space could be a minefield of various hazards – think sharp objects, loose wires, or even slippery surfaces from all those spilled materials. A thorough cleaning isn’t just about making the place look neat; it’s about ensuring that you and your family can move around safely. It’s about meticulously combing through each room, ensuring that every last nail, shard, or potentially dangerous item is removed. It’s about peace of mind, knowing that your beautiful space is also a safe haven. Dust Begone: Now, let’s talk about dust. If you’ve ever seen the aftermath of a renovation, you know we’re not talking about a light sprinkle of dust here. We’re talking about layers upon layers of it settling on every possible surface. This isn’t just an aesthetic issue. This dust can be a real troublemaker, especially for those with allergies, asthma, or other respiratory issues. It can linger in the air, on your furniture, and even sneak into the nooks and crannies you didn’t know existed. Getting rid of this dust is crucial to maintain a healthy living environment. It’s not just about dusting off surfaces; it’s about ensuring the air you breathe is as clean and fresh as your new space. Protect Your Investment: Finally, let’s talk about the joy of showcasing your newly renovated home. You’ve invested time, money, and probably a lot of emotion into this project. It’s a reflection of your taste and style. But if it’s covered in post-renovation grime and dust, you’re not really seeing the true outcome of your hard work. Proper cleaning is like the grand unveiling of your project. It reveals the vibrant colors, the sheen of the new materials, and the beauty of your design. It’s about giving your investment the respect it deserves and ensuring that every detail, big or small, shines through. After all, what’s the point of a beautiful renovation if you can’t see it in its full glory? Step-by-Step Cleaning Guide     1. Dusting Off the Basics Embarking on the cleaning journey Post Renovation Cleaning begins at the top – literally. The first step is to tackle the ceilings, light fixtures, and fans. Why start here, you ask? Well, gravity is not just a law; it’s also a cleaning strategy. Dust and debris naturally fall downwards, so starting at the highest points ensures you’re not redoing work. Imagine dusting your shelves only to find them dusty again after you clean the ceiling fan. Frustrating, right? So, grab a ladder, an extendable duster, or whatever tool you need to reach those lofty places. Carefully remove the dust from these areas, watching it fall away, clearing the stage for the next cleaning act. Next up are your walls. They might not seem like dust magnets, but trust me, post-renovation, they can hold more dust than a desert road. But here’s the trick – be gentle. Walls can be delicate, especially if they’re freshly painted or wallpapered. Grab a damp (not soaking wet) cloth and gently caress your walls. Think of it as a soft hug, removing the dust without damaging the paint or paper. This step is crucial for breathing life back into your rooms, making them feel fresh and new. Now, about detailing – the step where your cleaning truly shines. This is where you open up all the cabinets, closets, and drawers and face the hidden dust. These areas are often overlooked but imagine the horror of finding a thick layer of dust on your freshly cleaned dishes or clothes. Use a damp cloth or a suitable cleaner to gently wipe down the insides of these storage spaces. Paying attention to these details makes a world of difference. It’s not just about making everything look clean; it’s about making everything feel clean. 2. Floors and Carpets Sweep It Up: Once you’ve tackled the high points and details, it’s time to focus on the groundwork – your floors. This is where a lot of the renovation residue ends up. Starting with a thorough sweep or vacuum across all floor surfaces is crucial. It’s about more than just pushing a broom or running a vacuum cleaner; it’s about methodically moving through each room, ensuring every inch of the floor space is covered. This is where you’ll encounter everything from fine dust to larger debris, remnants of your renovation journey. The goal here is to capture all these particles, leaving your floors clean and ready for the next step. It’s satisfying, almost therapeutic, to see the transformation from dusty to debris-free. Mop Time: Next up, let’s bring in the mop brigade! Hard floors require a different kind of TLC. Here’s where you bring out your mops and the appropriate cleaners for your specific floor type – be it tile, hardwood, or laminate. Mopping isn’t just about splashing water and soap around. It’s a careful process of ensuring that every square inch gets the attention it deserves. Use the right cleaner to avoid damaging your floors and ensure they not only look clean but feel clean underfoot. This stage is crucial for removing any stubborn or sticky substances that sweeping or vacuuming might have missed. It’s the step that really starts to bring back the shine to your renovated space. Carpet Care: And now, let’s talk carpets. If your renovation left your carpets looking more like a dust

Post Renovation Cleaning in Scarborough Read More »