Blog

Toronto apartment cleaning

How to Tackle Allergens in Your Home with 6 Simple Changes

Tackle Allergens in your home doesn’t have to feel like a never-ending battle against invisible enemies. With a few simple changes, you can significantly reduce your exposure to common allergens and enjoy a cleaner, healthier living space. Let’s dive into six easy steps you can take to keep those sneeze-inducing culprits at bay, making your home a sanctuary for comfort, not sniffles. 1. Regular Dusting and Vacuuming First off, understand that dust mites are tiny creatures that aren’t just chilling in the corners; they’re pretty much partying it up all over your home. They particularly adore fabrics and upholstered furniture, where they can burrow deep and multiply. This is why simply moving a duster around on the surface isn’t enough. To really kick these gatecrashers out, you need to be a bit more strategic. When you’re dusting, start from the top of a room and work your way down. This method ensures that any dust you’ve dislodged from higher places doesn’t settle on freshly cleaned lower surfaces. Ceiling fans, bookshelves, and picture frames are often overlooked havens for dust. Using a microfiber cloth can be a game changer here. These cloths are designed to trap dust rather than just moving it around. They can be used dry or slightly dampened with water or a suitable cleaning solution, depending on the surface you’re tackling. Now, about vacuuming – this is where you can really make a significant impact. Vacuuming isn’t just for carpets and rugs; it’s also crucial for floors, sofas, and even curtains. If your vacuum comes with attachments, use them. They’re not just fancy extras; they’re designed to help you reach into nooks and crannies where dust mites and their allergen-packed droppings like to hide. For households particularly sensitive to allergens, vacuuming once a week might not cut it. High-traffic areas might need a run-over more frequently, and don’t forget to vacuum under furniture and in other out-of-sight areas where dust bunnies like to multiply. Speaking of vacuums, HEPA filters are indeed your best friend in the fight against indoor allergens. These filters can capture particles as small as 0.3 microns – that’s way smaller than the average dust mite. However, to keep them performing at their best, you need to maintain them. Follow the manufacturer’s guidelines for cleaning or replacing the HEPA filter. A clogged filter won’t just fail to trap allergens; it can also reduce the efficiency of your vacuum cleaner, making your cleaning efforts less effective. 2. Keep the Windows Closed High pollen seasons can vary depending on where you live, but they typically occur during spring, summer, and fall. During these times, trees, grasses, and weeds release tiny grains into the air to fertilize other plants, and unfortunately, these grains can wreak havoc on allergy sufferers. Opening windows, even for a short while, can invite these pollen particles inside, where they settle on surfaces and linger in the air, waiting to trigger your allergies. It’s not just pollen you have to worry about either. Urban areas can have additional pollutants and particulates from traffic and industry, while rural areas might introduce mold spores and other agricultural allergens into your home. So, what’s the alternative? Air conditioning can be a lifesaver. It allows you to keep your indoor environment comfortable without opening your home to outdoor allergens. However, this is where it gets a bit more technical. Air conditioning systems circulate air through filters that can trap pollen and other particulates, but these filters need attention to keep working effectively. Regular maintenance is key. Replacing or cleaning air conditioner filters as recommended by the manufacturer is critical. A dirty or clogged filter not only reduces the efficiency of your air conditioning system but can also become a source of air pollution inside your home. Some filters are reusable and can be cleaned with water, while others need to be replaced altogether. Investing in high-quality filters can also make a significant difference in improving indoor air quality. Consider the use of air purifiers with HEPA filters in rooms where you spend a lot of time, such as bedrooms or home offices. These devices can further reduce the concentration of pollen and other allergens in indoor air, complementing the work of your air conditioning system. For those exceptionally sensitive to indoor air quality, monitoring outdoor air quality reports can be beneficial. On days when the pollen count or pollution levels are particularly high, you can take extra precautions, such as running air purifiers more frequently and avoiding opening doors unnecessarily.     3. Use Allergen-Proof Bedding Investing in allergen-proof covers is a proactive step toward creating a healthier sleeping environment. These covers are designed with tightly woven fabric that dust mites and their allergens cannot penetrate. Encasing your mattress, pillows, and duvets in these barriers effectively locks out mites, denying them the cozy habitat your bedding offers. It’s a simple solution that can significantly reduce your exposure to these allergens. However, it’s not just about blocking allergens out; maintaining a clean sleeping area is equally critical. Regular washing of your bedding in hot water (at least 130°F or 54°C) is essential for killing dust mites and removing the allergens they leave behind. While allergen-proof covers protect your mattress and pillows, your sheets, pillowcases, and duvet covers are still exposed and can accumulate allergens. Weekly washing, therefore, becomes a crucial part of your allergen reduction strategy. It’s also beneficial to extend this cleaning regime beyond just your bedding. Consider curtains, area rugs, and any fabric-based decorations in your bedroom as potential allergen accumulators. Washing or cleaning these items regularly can further reduce the overall allergen load in your sleeping environment. For those with severe allergies, additional steps can be taken to minimize exposure. Replacing upholstered furniture with non-upholstered alternatives, opting for hardwood floors over carpets, and using air purifiers with HEPA filters can all contribute to a cleaner, less allergen-rich bedroom. 4. Control Indoor Humidity Controlling indoor humidity, therefore, isn’t just a recommendation; it’s a necessity for a

How to Tackle Allergens in Your Home with 6 Simple Changes Read More »

Powerful eco-friendly symbol with green elements for sustainability.

5 Easy How-To Eco-Friendly Tips for Making Your Cleaning Routine More Green

Oh, who doesn’t love a Eco-Friendly Tips for a sparkling clean home? Making your cleaning routine eco-friendly isn’t just good for the planet; it can also be gentle on your wallet and health. Whether you’re in Toronto, Mississauga, or anywhere else in the GTA, these eco-friendly tips will help you make your cleaning routine more sustainable. Let’s dive into these green cleaning strategies that are as easy on the Earth as they are effective! 1. Embrace DIY Cleaning Solutions A simple mix of vinegar and water is indeed a powerhouse cleaner, effective for shining up glass surfaces and leaving them streak-free. But did you know that the same mixture can help in removing soap scum from your bathroom tiles and fixtures? That’s right! For tougher grime, heating the vinegar before mixing it with water can boost its cleaning power. Just be sure to let it cool a bit before you start scrubbing away. Baking soda, on the other hand, is a mild abrasive, making it perfect for tackling tough stains on hard surfaces. But its talents don’t end there. Mixed into a paste with a bit of water, it can brighten up dull stainless steel sinks and cookware. Even more, sprinkle it on your carpets before vacuuming to neutralize pet odors and freshen up the room. Now, let’s talk about essential oils. Adding a few drops of essential oils like lavender, lemon, or tea tree to your DIY cleaners isn’t just about leaving behind a pleasant scent. These oils have natural antibacterial and antifungal properties, boosting the cleaning power of your homemade concoctions. Imagine disinfecting your surfaces and air with the soothing aroma of lavender or the refreshing scent of lemon – it’s like giving your home a spa day! Experimenting with these basic ingredients can lead to a variety of cleaning solutions for different purposes around your house. For example, combining lemon juice with salt creates a gentle abrasive paste perfect for removing rust stains or reviving brass fixtures. Or, for a natural fabric softener, add a cup of white vinegar to your laundry rinse cycle; it softens clothes and removes any soap residue without the need for synthetic chemicals. The beauty of DIY cleaning solutions is in their simplicity and versatility. With just a handful of ingredients, you can create a suite of products that are safe for your family, gentle on the environment, and effective in keeping your home clean. 2. Say Goodbye to Single-Use Plastics Making the switch to reusable spray bottles and concentrated cleaning solutions is a fantastic step toward a more sustainable lifestyle. But the advantages of this simple change extend far beyond just reducing plastic waste. By investing in durable, reusable spray bottles, you’re not only cutting down on the amount of plastic that could end up in landfills and oceans, but you’re also embracing a more minimalist approach to your household products. Reusable bottles can be refilled countless times, which means you’ll be buying less and saving more in the long run. This move away from single-use plastics aligns perfectly with a zero-waste lifestyle, where the goal is to minimize our environmental impact through mindful consumption and sustainable practices. The switch to concentrated cleaning solutions is equally impactful. These concentrates often come in smaller, more eco-friendly packaging, significantly reducing the amount of plastic used compared to traditional cleaning products. Furthermore, because you’re adding water at home, these concentrates are lighter and more efficient to transport, leading to lower carbon emissions during shipping. This not only helps in reducing your carbon footprint but also supports a more sustainable global logistics system. Another aspect of this approach is the quality and composition of the concentrated solutions themselves. Eco-conscious companies are not only focused on reducing packaging but also on creating products that are free from harmful chemicals and safe for your family and pets. These concentrated solutions often use natural and plant-based ingredients that are gentler on the environment without sacrificing cleaning power. Embracing reusable containers and concentrated solutions encourages a more conscious approach to shopping, too. It prompts us to seek out brands that prioritize sustainability, both in their products and their practices. This consumer demand for eco-friendly products can drive more companies to consider their environmental impact and work towards greener solutions. This shift can spark creativity and a do-it-yourself spirit. Some eco-warriors go one step further by using their reusable bottles to mix their own homemade cleaning solutions, combining the best of both worlds—reducing plastic waste and controlling the ingredients that go into their cleaners.     3. Choose Eco-Friendly Cleaning Tools Washable microfiber cloths, are not only more absorbent than their disposable counterparts but also have a longer lifespan. This means you’ll be purchasing fewer products over time, which is both cost-effective and environmentally friendly. Microfiber cloths can be used for a variety of tasks, from dusting and wiping surfaces to cleaning windows and polishing furniture, making them a versatile addition to your cleaning arsenal. And since they can be washed and reused hundreds of times, their impact on the environment is significantly lower than that of paper towels. When it comes to sweeping and dusting, tools made from sustainable materials like bamboo or recycled plastic offer a win-win situation. Bamboo is a highly renewable resource, growing quickly with minimal water and no pesticides. It’s also naturally antimicrobial, making it an excellent material for cleaning tools. On the other hand, products made from recycled plastic give a second life to materials that might otherwise end up in landfills, oceans, or incinerators. By choosing tools made from these materials, you’re supporting industries that prioritize sustainability and innovation in product design. But the commitment to eco-friendly cleaning tools doesn’t stop at the materials they’re made from. It’s also about their design and functionality. Many eco-friendly tools are designed to be more effective, requiring less effort and fewer cleaning products to get the job done. For example, high-quality dusters made from natural fibers can attract and hold dust better than synthetic versions,

5 Easy How-To Eco-Friendly Tips for Making Your Cleaning Routine More Green Read More »

Morning-lit living room with polished plywood floors.

How to Keep Your Plywood Floor Sparkling: 5 Easy Steps

Transforming your Plywood Floor Sparkling doesn’t have to be a chore. With the right products and a touch of TLC, you can easily keep them in tip-top shape. Here are five steps to ensure your plywood floors stay sparkling, accompanied by specific product recommendations and usage tips. Step 1: Gentle Daily Dusting Kickstarting your plywood floor care with gentle daily dusting is akin to setting a strong foundation for a skyscraper—it’s essential. The key here is the choice of tool: a microfiber mop or dust mop specifically tailored for hardwood floors. These tools are designed with the delicate nature of wood in mind, ensuring they pick up and trap dust, pet hair, and everyday debris efficiently without leaving a single scratch behind. Products like the Swiffer Sweeper are particularly adept at this task. They come equipped with disposable or reusable cloths that have an electrostatic charge, which acts like a dust magnet. This technology ensures that even the smallest particles are captured, leaving your floor spotless. The beauty of using such a mop lies in its ease of use; you simply attach the cloth, sweep across the floor in smooth, gentle motions, and voila, your floor remains in pristine condition. This daily ritual not only maintains the aesthetic appeal of your plywood floors but also significantly reduces allergens and dust in your home environment. Moreover, this process isn’t time-consuming. Spending just a few minutes each day can prevent the buildup of grime and dirt that, over time, can become more challenging to remove and potentially damage the floor’s finish. It’s a simple yet effective practice that extends the life of your flooring and keeps it looking as good as new. Plus, it sets the stage for a cleaner, healthier living space, reinforcing the importance of this foundational step in your floor care routine. Step 2: Weekly Mild Mopping Water, in excess, is the archenemy of plywood, capable of seeping into the layers and causing swelling, warping, or even mold growth. To navigate this, the choice of mop and cleaning solution becomes paramount. Enter the flat mop equipped with a microfiber pad, your ally in this cleaning mission. The design of such mops allows for even distribution of moisture across the floor, eliminating the risk of over-wetting any area. The microfiber material, known for its softness and high absorbency, ensures that the cleaning process is gentle yet effective, lifting dirt without scratching the surface or leaving behind streaks. The cleaning solution you pair with your mop is just as important. A gentle, pH-neutral cleaner like Bona Hardwood Floor Cleaner is ideal for this purpose. Its formula is specifically designed to clean without damaging the delicate surface of plywood floors. By mixing this cleaner with water as directed, you create a solution that is tough on dirt and grime but gentle on the floor itself. When it comes to the actual mopping, precision is key. Start by lightly dampening the microfiber pad with your cleaning solution, ensuring it’s moist but not dripping. Then, mop the floor in sections, using smooth, even strokes. This methodical approach allows you to control the amount of moisture on the floor, ensuring that each section is cleaned effectively without exposing the plywood to excess water. By moving systematically across the floor, you also ensure that no area is missed or overly saturated. This weekly ritual of mild mopping is more than just a cleaning task; it’s a preventative measure that maintains the integrity and beauty of your plywood floors. It removes the dirt and spills that daily dusting can’t tackle, all the while preserving the floor’s natural finish.     Step 3: Immediate Spill Management Navigating the unpredictable world of spills and spots on your plywood floors requires a swift and strategic response. The moment a spill occurs, the clock starts ticking, making immediate action essential to prevent the stain from becoming a permanent fixture in your home. Armed with a clean, damp cloth, your first move is to tackle the spill head-on, dabbing gently to absorb the liquid rather than rubbing, which can spread the stain or push it deeper into the wood. When you’re dealing with non-water-soluble substances like oil or grease, the challenge intensifies. These spills demand a slightly different approach to ensure they don’t leave a lasting mark. A simple solution of dish soap and water becomes your best friend in these scenarios. Just a drop of dish soap in a cup of water creates a mild, effective cleaning agent that can break down the grease, making it easier to lift from the surface of your plywood floor. Apply this mixture lightly to the affected area and watch as the dish soap does its magic, cutting through the grease without harming the floor’s finish. For those stubborn, tougher stains that seem to resist initial cleaning efforts, a more targeted approach is necessary. This is where a specialized wood floor cleaner, like Method Squirt + Mop Wood Floor Cleaner, comes into play. Designed specifically for wood floors, these cleaners offer a gentle yet effective solution to stubborn stains. Applying the cleaner directly to a soft cloth, rather than pouring it onto the floor, allows for precise control over the amount used and prevents unnecessary moisture from compromising the plywood. Gently dabbing the cloth on the stained area can gradually lift the stain, restoring the floor’s natural beauty without resorting to harsh scrubbing. It’s crucial, however, to steer clear of abrasive pads or scrubbers, which might seem like suitable tools for tackling tough stains but can actually cause more harm than good. These abrasive materials can scratch the surface of the plywood, leaving it vulnerable to further damage and wear. Instead, the emphasis should always be on gentle, non-abrasive methods of stain removal, safeguarding the integrity and appearance of your plywood floors. Step 4: Strategic Mat Placement By positioning floor mats at all entry points, you create a barrier that captures much of the grime and wetness that would otherwise find its way onto

How to Keep Your Plywood Floor Sparkling: 5 Easy Steps Read More »

Homemade natural cleaning solutions displayed on a sunny kitchen countertop.

How to Refresh Your Home: 5 Essential Oil Recipes for Natural Cleaning

Hey there! Ready to give your home that Essential Oil Recipes for Natural Cleaning? inviting vibe without resorting to harsh chemicals? Let’s dive into the world of essential oils and whip up some natural cleaning solutions that not only cleanse but also leave your space smelling divine. Essential oils are not just about the aroma; they come packed with powerful cleaning properties too. Here are 5 essential oil recipes to refresh your home naturally: 1. All-Purpose Lemon Lavender Cleaner Let’s expand further on the All-Purpose Lemon Lavender Cleaner with a detailed breakdown that highlights each component and step in the process, providing you with a deeper understanding and appreciation for this natural, aromatic cleaner: 1 cup of water: Acts as the base for the cleaner, diluting the vinegar and essential oils to make them safe for use on various surfaces. Water helps in spreading the cleaning solution evenly. 1 cup of white vinegar: A powerful natural disinfectant, vinegar cuts through grease, grime, and dirt with ease. Its acidic nature makes it effective against bacteria and viruses, ensuring your surfaces are not just clean but sanitized. 15 drops of lemon essential oil: Known for its refreshing scent and strong antibacterial properties, lemon essential oil is a key ingredient in combating kitchen messes and brightening surfaces. It leaves behind a clean, invigorating aroma that uplifts the mood. 15 drops of lavender essential oil: Adds a calming, floral scent to the mix, transforming cleaning into a more pleasant, stress-free experience. Lavender’s natural antiseptic properties complement the lemon and vinegar, enhancing the cleaner’s effectiveness. A spray bottle: The perfect container for your homemade cleaner, making it easy to mix, store, and use. A spray bottle allows for convenient application, ensuring you cover the desired areas with just the right amount of cleaner. How to Make It: Begin by pouring water, vinegar, and the carefully measured drops of essential oils directly into your spray bottle. This method ensures that the blend achieves a harmonious balance, maximizing both the cleaning capabilities and the aromatic benefits of the ingredients. Given the natural tendency of essential oils to separate from the vinegar and water mixture, it’s crucial to give the bottle a good shake prior to each use. This step guarantees that the oils are evenly dispersed throughout the solution, allowing for consistent application and effectiveness. When it comes to using this cleaner, its versatility truly shines. Designed for hard, non-porous surfaces, it works wonders on countertops, kitchen tables, appliances, and bathroom fixtures. The application process couldn’t be simpler: just spray the mixture onto the surface in question and wipe it down with a cloth or sponge to achieve a clean and shining finish. The benefits of this homemade cleaner extend far beyond its surface-cleaning prowess. The lemon essential oil and vinegar join forces to offer robust antibacterial and antiviral properties, forming a formidable barrier against the spread of common household germs. Meanwhile, the lavender essential oil envelops your space in its calming scent, transforming routine cleaning into a more pleasant and stress-relieving activity. This concoction is not only effective but also non-toxic and eco-friendly, ensuring it’s a safe choice for homes with children, pets, and a preference for green living solutions. 2. Peppermint Window and Mirror Cleaner Diving into the Peppermint Window and Mirror Cleaner, let’s unfold each element and the crafting process that combines to form a sparkling, pest-repellent marvel for your glass surfaces: 1 ½ cups of water: Serves as the foundation of this cleaner, effectively diluting the vinegar and essential oil to ensure they’re gentle yet effective on glass surfaces. Water facilitates the even distribution of the cleaning mixture, ensuring a streak-free shine. ½ cup of white vinegar: This ingredient is a cleaning powerhouse, renowned for its ability to dissolve grime, combat streaks, and leave a crystal-clear finish. Its natural acidity is hostile to germs, making it an excellent disinfectant for windows and mirrors. 10 drops of peppermint essential oil: Far more than a fresh scent, peppermint oil is a natural deterrent against spiders and ants. Its inclusion turns this cleaner into a dual-threat against dirt and unwanted critters, leaving behind a refreshing minty aroma that revitalizes your home environment. A spray bottle: An essential tool for this homemade concoction, the spray bottle ensures easy mixing, storage, and application. It allows for a fine mist that evenly coats windows and mirrors without over-saturating them, making your cleaning efforts more efficient and effective. How to Make It: Initiate the process by combining the water and white vinegar in your spray bottle, followed by the peppermint essential oil. This preparation strategy ensures a well-balanced mix, leveraging the cleaning strength and aromatic benefits of the components in equal measure. Because essential oils can separate from their water and vinegar base, a vigorous shake before use is imperative. This action guarantees the essential oil’s thorough integration, offering consistent cleaning power and fragrance with every spray. In application, the Peppermint Window and Mirror Cleaner shines with versatility. It’s specifically formulated for use on glass, making it your go-to for leaving windows and mirrors without smudges or streaks. Simply spray a light coating on the glass surface and wipe away with a cloth or sponge for an immediate gleam. But the advantages of this homemade cleaner go beyond mere aesthetics. The peppermint essential oil’s inclusion serves a dual purpose, not only imparting a clean, uplifting scent but also acting as a natural repellant against common household pests like spiders and ants. Additionally, the non-toxic and environmentally friendly nature of this cleaner makes it a safe and responsible choice for households, ensuring cleanliness doesn’t come at the cost of health or the planet. Equally effective in enhancing the ambiance of your living space, the Peppermint Window and Mirror Cleaner introduces a minty freshness that can energize and refresh. This blend doesn’t just clean; it transforms the act of cleaning into an enjoyable, beneficial task. Its utility extends across the home, from living room windows to bathroom mirrors, making it an

How to Refresh Your Home: 5 Essential Oil Recipes for Natural Cleaning Read More »

Sparkling clean bathroom drain amid glossy tiles.

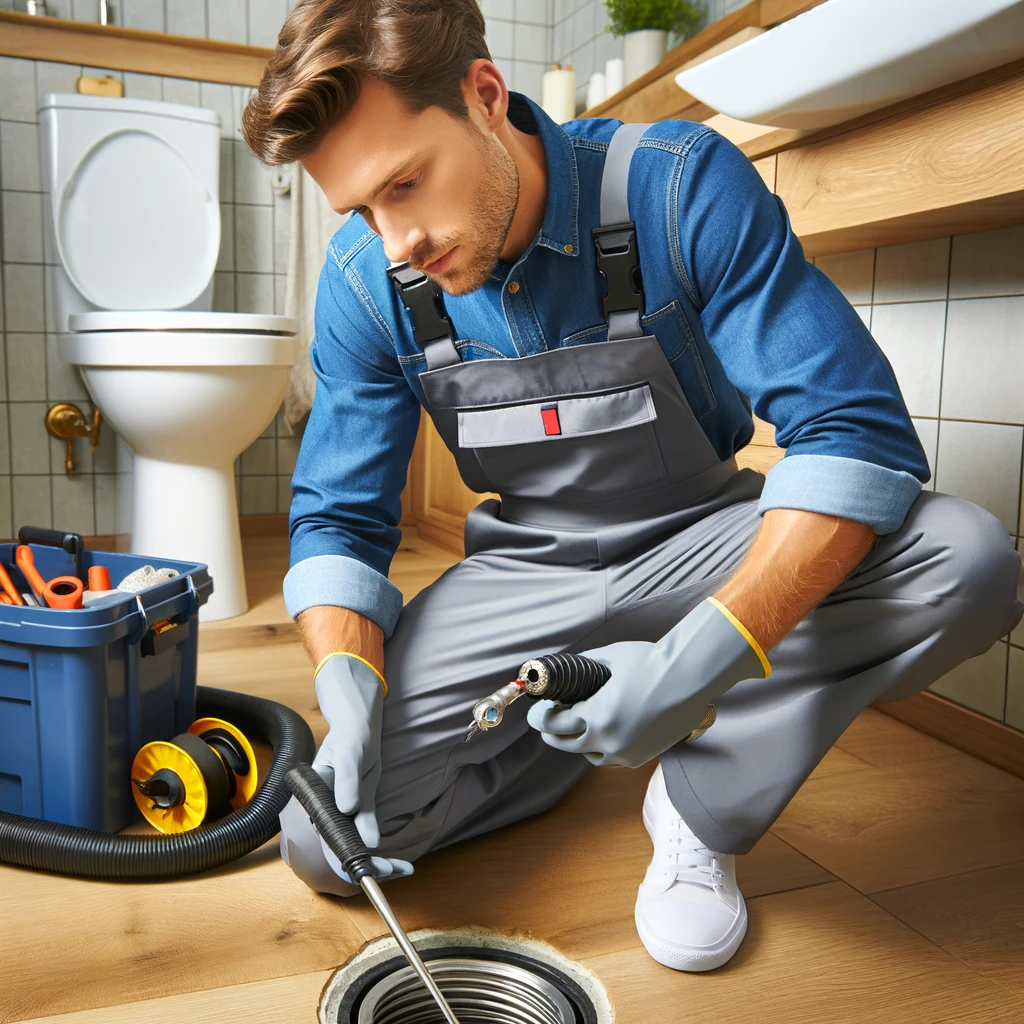
7 Easy Tips for Keeping Your Bathroom Drain Sparkling Clean

A Bathroom Drain Sparkling Clean: that unsung hero of plumbing that we only notice when it’s too late and we’re standing in an unexpected puddle during our shower. Keeping it sparkling clean not only saves us from waterlogged feet but also keeps our bathroom smelling fresh and functioning well. Here are seven simple, yet super effective tips to keep your bathroom drain not just clear, but sparkling clean! 1. Boiling Water This simple yet powerful cleaning hack doesn’t require any fancy equipment or harsh chemicals, making it an eco-friendly choice for those of us looking to maintain our homes in a more sustainable way. To get the most out of this method, consider making it a regular part of your weekly bathroom maintenance. For instance, you could choose a specific day of the week to “boil the troubles away.” However, it’s important to exercise caution with this method, especially around bathroom fixtures made of delicate materials like porcelain. These can be susceptible to damage from sudden temperature changes. To mitigate this risk, you can pour the boiling water directly into the drain rather than letting it splash over the surrounding areas. Alternatively, if your sink or tub is particularly sensitive, consider using very hot water from the tap instead of boiling water to avoid any potential damage. For those hard-to-reach areas or stubborn buildup, you might follow up the boiling water with a plunger or a plumber’s snake to ensure everything is flowing smoothly. This one-two punch is often enough to keep your drains clear and functional without resorting to harsh chemicals or professional intervention. 2. Daily Flushing with Cold Water While it may seem counterintuitive, especially after discussing the benefits of boiling water, flushing your bathroom drain with cold water on a daily basis can also contribute significantly to keeping it clear and clean. Cold water, especially after using the sink or shower, can help solidify and flush away any residual oils or products that have been used. These substances, which might include hair conditioners, body oils, or shaving creams, often cling to the sides of pipes when they’re in their warmer, more viscous state. By running cold water through the drain for a minute or so, you’re essentially helping to harden these residues. This practice is particularly useful after shaving or washing hair in the sink, as it helps ensure that loose hairs are fully flushed away rather than getting caught in the drain. Over time, this can reduce the likelihood of clogs forming, maintaining a smoother flow of water through your pipes. Incorporating this simple step into your daily routine requires minimal effort but can have a meaningful impact on the maintenance of your bathroom’s plumbing. It’s an easy, yet effective strategy to complement the more intensive cleaning measures, ensuring that your bathroom drain remains as clear and functional as possible. 3. Old Toothbrush Beyond just the practicality, repurposing old toothbrushes for cleaning tasks is a nod towards environmental sustainability. Instead of contributing to landfill waste by throwing them away, you’re giving them a second life. This approach aligns with eco-friendly cleaning practices, emphasizing reuse and reducing waste without compromising on cleanliness. To effectively use an old toothbrush for cleaning your drain, start by dipping it in a cleaning solution. The liquid will help dissolve the grime, while the mechanical action of the toothbrush bristles works to scrub it away. For tougher buildup, consider using the toothbrush in conjunction with a plunger or drain snake for a comprehensive clean. The toothbrush’s design, initially intended for meticulous dental hygiene, translates well to meticulous home hygiene. Its handle offers a comfortable grip for sustained scrubbing sessions, while the varied bristle lengths typically found on toothbrushes can reach uneven surfaces within the drain area. Regular use of an old toothbrush for cleaning around the drain cover and inside visible parts of the drain can significantly reduce the likelihood of clogs forming. By incorporating this simple tool into your cleaning arsenal, you’re not just taking care of your home in an effective manner; you’re also doing your part for the planet by reusing and recycling what might otherwise be considered waste.     4. Hair Catcher This straightforward yet effective device is designed to fit snugly over the drain, trapping hair, soap scum, and any other debris that could potentially lead to blockages. By capturing these elements before they have a chance to enter your plumbing system, a hair catcher significantly reduces the risk of clogs forming deep within the pipes. The beauty of using a hair catcher lies in its simplicity and ease of use. Installation typically requires no tools or plumbing expertise; you simply place it over or inside your drain. Despite its simple design, the impact on your drain’s health and functionality is profound. With this guardian in place, water continues to flow freely, and the need for chemical cleaners or professional plumbing services can be drastically reduced. Regular maintenance of your hair catcher is crucial to ensure its effectiveness. This involves a simple routine of removing the catcher, discarding the collected debris, and giving it a quick clean. Depending on your household’s needs, this could be a weekly task, ensuring that the catcher remains efficient at trapping debris without impeding water flow. For an even deeper clean, soaking the hair catcher in a vinegar solution can help dissolve any soap residue or buildup, keeping it in top condition. Investing in a hair catcher is a proactive step towards sustainable home maintenance. Not only does it save you the hassle and expense of dealing with clogs, but it also reduces the need for potentially harmful chemical drain cleaners, aligning with eco-friendly cleaning practices. Moreover, the hair catcher’s longevity and reusability make it an economical choice, offering lasting protection for your drains with minimal environmental impact. 5. Professional Drain Cleaner The chemical composition of many professional drain cleaners allows them to power through tough blockages, but this potency also means they can be quite harsh on your plumbing

7 Easy Tips for Keeping Your Bathroom Drain Sparkling Clean Read More »

Hourglass in sunlight symbolizing efficient time management.

How to Conquer Your Spring Cleaning in Just One Day: 5 Time-Saving Tips

Spring Cleaning in Just One Day! That time of year when the flowers start blooming, the birds start chirping, and our homes… well, they need a bit of a refresh. But who says you need to spend all week scrubbing and dusting? Not us! Let’s dive into how you can conquer your spring cleaning in just one day with these 5 time-saving tips. Ready to reclaim your weekend? Let’s get started! 1. Plan and Prioritize Start by walking through your home with a critical eye—think of yourself as a guest seeing it for the first time. Notice what areas catch your attention first. Is it the pile of shoes by the front door? Or maybe the dust bunnies partying under the living room couch? These areas that jump out at you should be at the top of your list because they’re likely to have the biggest impact on the overall feel of your home. Next, consider the tasks that traditionally take up the most time but are essential for a thorough clean. These might not be the first things a guest notices but think about what makes you feel like your home is truly clean. For some, it’s having sparkling windows that let the spring sunshine in. For others, it’s ensuring the bathroom is so clean it practically sparkles. Identify these tasks and slot them into your priority list, keeping in mind the balance between impact and effort. As you’re creating your checklist, be realistic about what you can achieve in a day. It’s easy to get carried away and list every single cleaning task imaginable, but remember, the goal is a refresh, not a deep dive into every corner of your home. If your list starts getting too long, take another look and ask yourself, “Will completing this task make a significant difference in how my home feels?” If the answer is no, maybe it’s something that can wait for a regular cleaning day. Finally, once you have your list, organize it in a way that makes sense for your cleaning flow. Some people like to tackle room by room, while others prefer to do all of one type of task at a time (like dusting every room before moving on to vacuuming). Consider what will work best for you and your home’s layout. 2. Gather Your Tools and Supplies Each room you enter has its own mini checklist of tasks. Wouldn’t it be convenient if your caddy or bucket was organized in a way that aligns with these tasks? Start by categorizing your cleaning products and tools based on their use. Keep glass cleaners, microfiber cloths, and squeegees in one section of your caddy for easy access when you hit the windows and mirrors. Have another section dedicated to surfaces, stocked with multi-surface cleaners, disinfectants, and dusters. If you’re using eco-friendly homemade solutions, make sure they’re clearly labeled and stored safely to avoid any mix-ups. Don’t overlook the importance of having the right tools for specific tasks. Specialized brushes for grout cleaning, extendable dusters for those hard-to-reach cobwebs, and scrub brushes for tile and tubs can make a world of difference in both your effort and the end result. Investing in these tools and having them at the ready can transform a daunting task into a manageable one. Consider the logistics of your cleaning day. Are there supplies that are used in nearly every room, like trash bags or paper towels? Make sure these are plentiful and placed where they can be easily grabbed without disrupting your flow. It might even be helpful to have a small stockpile in multiple locations around your house if your space is large. Wear comfortable, moveable clothing and sturdy shoes to keep you in top form as you clean. You might also want to keep a small notepad and pen in your caddy for jotting down any reminders or supplies you notice running low on. This preemptive measure keeps you one step ahead, ensuring you’re not caught off guard by an empty bottle of cleaner halfway through your day. By optimizing your collection of cleaning supplies not just for accessibility but for strategic use, you transform your toolkit from a mere collection of products into a streamlined extension of your cleaning prowess.     3. Multi-Task and Set Timers consider the layout of your home and the tasks at hand to sequence your activities logically. For instance, if you’re planning to clean the kitchen and the bathroom, you can apply cleaner to the kitchen counters and bathroom tiles and then work on vacuuming the living room while the cleaner does its magic. This approach ensures that you’re always moving forward, even when you’re waiting for something else to complete. Leveraging the power of timers goes beyond merely preventing procrastination. Use them to create mini-deadlines that can help you stay focused and motivated. For example, challenge yourself to complete the dusting of one room within 10 minutes or to declutter a particular area in 15 minutes. These short bursts of focused activity, often referred to as the Pomodoro Technique, can dramatically increase your productivity by creating a sense of urgency and accomplishment. Another aspect to consider is the psychological benefit of multitasking with timers. It can turn the cleaning process into a game, where you race against the clock to beat your previous times. This gamification of mundane tasks makes them more engaging and less of a chore. You can even reward yourself with short breaks or a small treat after completing a set number of tasks or “levels,” providing additional motivation to keep going. While multitasking, it’s crucial to balance tasks that require different levels of energy and concentration. Pair a physically demanding task, like scrubbing floors, with a lighter, more automated task, such as running the laundry machine. This balance helps in managing your energy levels throughout the day, preventing exhaustion and ensuring a steady pace of work. Lastly, don’t underestimate the power of a well-timed break. Use your timer

How to Conquer Your Spring Cleaning in Just One Day: 5 Time-Saving Tips Read More »

Person cleaning a sparkling white bathtub in a bright, airy bathroom.

7 Natural and Effective Ways to Clean Your Bathtub

Ready to sparkling Clean Your Bathtub without the harsh chemicals? You’re in the right place! Whether you’re tackling soap scum, hard water stains, or just giving your tub a regular refresh, natural solutions can be surprisingly effective and much kinder to the environment. Let’s dive into seven natural and effective ways to get your bathtub looking brand new. 1. Baking Soda Paste Baking soda, also known as sodium bicarbonate, is a versatile ingredient that shines beyond the kitchen. When it comes to cleaning, particularly your bathtub, it stands out for its gentle yet effective abrasive properties. The magic begins when you create a simple paste by mixing baking soda with a bit of water. This unassuming mixture transforms into a mighty cleaning agent that can tackle various issues, from everyday grime to more stubborn spots. Applying this paste directly onto the surface of your bathtub allows it to work its magic, particularly on soap scum and light stains that can dull the appearance of your bathroom centerpiece. The paste’s texture provides just the right amount of abrasiveness to scrub away these nuisances without scratching or damaging the tub’s surface. It’s a delicate balance that baking soda strikes perfectly, offering a safe and effective way to maintain the cleanliness and shine of your bathtub. After letting the paste sit on the surface for about 15 to 20 minutes, the baking soda has ample time to penetrate and break down the grime. This waiting period is crucial as it allows the natural chemical reaction of baking soda with the stains to loosen their grip on the tub’s surface. When it’s time to scrub, using a sponge or a soft brush ensures that you can effectively remove the softened grime without exerting too much force or causing any harm. The final step of rinsing the tub thoroughly is satisfying, as you wash away the residue and reveal a cleaner, more inviting bathtub. The beauty of this method lies in its simplicity and the fact that it relies on a non-toxic, environmentally friendly ingredient. It’s a testament to the power of natural cleaning solutions and their place in our homes for maintaining cleanliness in a safer, more sustainable manner.     2. Vinegar and Dish Soap Solution The simple act of mixing equal parts white vinegar and dish soap creates a potent cleaning solution that harnesses the strengths of both ingredients. The vinegar, known for its acidic properties, is a natural descaler and disinfectant. It effortlessly cuts through tough grime, dissolving the bonds that hold dirt and soap scum to your bathtub’s surface. On the other hand, dish soap brings its grease-fighting power to the mix. It’s designed to break down oils and fats, which makes it incredibly effective at tackling the oily residues that can accumulate in a bathtub from body washes, shampoos, and conditioners. When combined, these two household staples form a cleaning solution that’s not only easy to make but also hard on grime and gentle on your tub’s finish. Applying this solution is just as straightforward as making it. By storing it in a spray bottle, you’re equipped with a convenient and efficient tool for coating the bathtub’s surface evenly. This ensures that every nook and cranny is covered, allowing the solution to work its magic uniformly. Letting it sit for about an hour is crucial. This dwell time gives the acidic vinegar and the surfactants in the dish soap enough time to penetrate and break down the grime and soap scum. It’s this waiting period that really leverages the chemical capabilities of your solution, making the scrubbing process that follows much less laborious. When it’s time to scrub, the grime that once clung stubbornly to your bathtub’s surface will now be loosened and much easier to remove. A brush, especially one with stiff bristles, becomes an effective tool for this task, allowing you to target even the most persistent areas of buildup without damaging the tub. Rinsing away the solution after scrubbing reveals a clean, revitalized surface, often with minimal effort compared to conventional cleaning methods. This vinegar and dish soap solution stands out not only for its cleaning prowess but also for its accessibility and environmental friendliness. Almost every household has vinegar and dish soap, making this method cost-effective and easy to adopt. Additionally, it’s a more health-conscious choice, avoiding the harsh chemicals found in many commercial cleaners. 3. Lemon and Salt Scrub Using a lemon, a fruit celebrated for its high citric acid content, is key to this approach. Citric acid is a natural chelating agent, which means it’s capable of binding with minerals in the hard water stains, effectively loosening their grip on the surfaces of your bathtub. This action makes the stains much easier to remove without the need for harsh chemicals. By cutting a lemon in half, you directly apply these natural acids onto the stained areas, maximizing the lemon’s cleaning potential. Sprinkling salt onto the cut side of the lemon before scrubbing introduces a gentle abrasive element to this cleaning duo. Salt, being granular and somewhat coarse, works excellently in conjunction with the lemon’s acidity to physically break down and scrub away the stain particles. This combination ensures that you’re not just chemically loosening the stains but also physically removing them from the surface. Moreover, the lemon and salt scrub is a delightfully fragrant way to clean. Unlike the overpowering or chemical smells associated with traditional cleaners, this method leaves behind a fresh, citrusy scent that can make your bathroom feel cleaner and more inviting. It’s a natural deodorizer, ensuring that not only does your bathtub get a thorough clean, but your entire bathroom benefits from a fresher atmosphere. This approach is especially appealing for those seeking sustainable and non-toxic cleaning solutions. Lemons and salt, common kitchen staples, are readily biodegradable and safe for most surfaces, making this method a responsible choice for the environment and a safer option for homes with children or pets. In addition to its effectiveness and eco-friendliness,

7 Natural and Effective Ways to Clean Your Bathtub Read More »

Person savoring coffee near a Nescafe machine in a cozy setting.

How to Deep Clean Your Nescafe Machine in 5 Simple Steps

Deep clean your Nescafe machine isn’t just about keeping your coffee tasting great—it’s also about ensuring your machine lasts as long as possible. Coffee lovers know the difference a clean machine can make to their morning cup. So, let’s dive into how you can get your Nescafe machine sparkling clean with these five simple steps. Trust me, it’s easier than you think, and your taste buds will thank you! Step 1: Unplug and Disassemble Stepping into the process of deep cleaning your Nescafe machine starts with the fundamental and crucial step of ensuring your safety by unplugging the machine. This initial action sets the stage for a hazard-free cleaning session, ensuring that there’s no risk of electrical shock as you delve into the nooks and crannies of your beloved coffee companion. Once the machine is safely disconnected from its power source, the disassembly begins. This part of the process might feel a bit like a puzzle, carefully removing each piece that can be detached. Typically, the parts you’ll be looking to remove include the drip tray, which catches any coffee drips or spills during brewing, ensuring your counter stays clean. The water reservoir, which holds the water needed for brewing your coffee, also needs to be detached and is often one of the larger components of the machine. The pod holder, a critical piece where the coffee pod sits during brewing, will also need to be removed. Disassembling your Nescafe machine is not just about taking it apart; it’s a crucial step that allows you to access all the areas where coffee oils and residue can build up over time. These residues, if not cleaned, can affect the taste of your coffee and the efficiency of your machine. By breaking down the machine into its components, you’re able to give each part the thorough cleaning it deserves. Think of it as a spa day for your Nescafe machine, where each component gets the attention it needs to function at its best.   Step 2: Soak and Scrub This step is akin to giving your machine a luxurious bath, designed to tackle the stubborn coffee oils and residues that have built up over time. Start by filling your sink with warm, soapy water—think of it as preparing a relaxing bubble bath, but for your coffee machine’s components. The warmth of the water combined with the soap acts as a gentle yet effective means to soften and break down the oils and residues that cling to the surfaces and hidden corners of each part. Once your sink is ready, immerse the disassembled parts into this soothing bath, letting them soak for about 20 minutes. This soaking period is crucial as it allows the warm soapy water to work its magic, loosening the grime and making it easier to remove. It’s a moment where patience pays off, as giving the parts enough time to soak can significantly reduce the effort needed to clean them. After the soaking time is up, it’s time to roll up your sleeves and get scrubbing. Armed with a soft sponge or brush, begin the meticulous process of cleaning each piece. This is where your attention to detail really shines. As you scrub, focus on the nooks and crannies of each component. These areas can often harbor hidden coffee residues that, if left uncleaned, can affect the taste of your coffee or even the efficiency of your machine. Approach this task like a treasure hunt, where instead of seeking out gold or jewels, you’re on a mission to find and eliminate all traces of old coffee bits. Step 3: Rinse and Dry This stage is about ensuring that all the effort you’ve put into cleaning does not get compromised by leftover soap residue or moisture that could invite unwanted guests, like mold or bacteria, into your coffee machine. Start by rinsing each scrubbed part under running water. The aim here is to be thorough and meticulous, making sure that no nook or cranny retains any soap. This step washes away the last remnants of grime and cleaning solution, clearing the stage for a fresh coffee brewing experience. The running water acts like a final sweep, ensuring that each component is primed and ready for the next step in its cleaning journey. Once the rinse is complete, the drying process begins. This is where patience and attention to detail come into play again. You have two choices here: let the parts air dry or help them along with a clean, dry towel. If you choose to air dry, arrange the parts on a drying rack or a clean surface where they can sit undisturbed, allowing air to circulate freely around them. This natural drying process is gentle and effective, ensuring that every drop of moisture evaporates. Alternatively, patting the parts dry with a towel can speed up the process, allowing you to reassemble your machine faster. Whichever method you choose, the goal is to ensure that every component is thoroughly dry. Step 4: Descale the Machine The descaling process can be approached in two ways, offering flexibility based on your preferences and what you have on hand. For those who prefer ready-made solutions, commercial descaling products are designed specifically for this purpose, formulated to effectively dissolve calcium deposits without harming your machine’s internal components. Alternatively, for a more natural and readily available option, a homemade mixture of equal parts water and white vinegar serves as an effective DIY descaling solution. Vinegar, with its acetic acid content, is naturally adept at breaking down limescale, making it a potent ally in the maintenance of your Nescafe machine. Filling the water reservoir with your chosen descaling solution is the first step in this detox process. Then, initiate the brewing cycle several times without a coffee pod in place. This allows the solution to circulate throughout the machine, ensuring that it reaches all areas where calcium deposits may have formed. As the solution moves through the machine, it works to dissolve and lift

How to Deep Clean Your Nescafe Machine in 5 Simple Steps Read More »

Person joyfully cleaning a sunny, cozy living room floor.

“How to Find the Best Maid Services Near Me” A 5-Step Guide

Ever felt overwhelmed by the sheer amount of cleaning tasks piling up at your home? “I need to find the best maid services near me!” But how do you sift through the sea of options to find the perfect match for your cleaning needs? Don’t sweat it; I’ve got you covered with a handy 5-step guide that’ll make finding your cleaning superhero as easy as pie. Step 1: Define Your Needs When you start thinking about hiring a maid service, the variety of options available can be overwhelming. It’s like going to a restaurant with a 10-page menu—where do you even start? This is why knowing your specific needs is akin to narrowing down your meal choices to what you’re really in the mood for, making the selection process much more manageable. First off, consider the size and layout of your space. A sprawling home with multiple bedrooms will have different needs compared to a cozy, one-bedroom apartment. Are there areas that require special attention, like antique furniture or high ceilings? Identifying these nuances will ensure the service you choose can handle your particular challenges. Next, think about the frequency of service. This isn’t just about how often you’d like them to come but also about fitting into your lifestyle and schedule. Some people prefer a thorough clean once a week to reset their space, while others might opt for less frequent visits, focusing on deeper cleaning tasks. Your work schedule, social commitments, and personal preference for privacy will all play a part in deciding this. Another factor to weigh is your budget. Maid services can range from budget-friendly to premium, depending on the scope and frequency of cleaning. Being clear about how much you’re willing to spend will help you avoid falling in love with a service that’s outside your budget. Also, consider the reason behind seeking a maid service. For instance, if you’re aiming for that end-of-tenancy clean, you’ll want a service that specializes in detailed, deep-cleaning tasks designed to make your space look as good as new. On the other hand, if you’re hosting an event and need your place to be spotless, look for services that offer customized cleaning packages tailored to these one-off needs. Think about your personal preferences and requirements. Do you prefer eco-friendly cleaning products due to allergies or environmental concerns? Do you have pets that might influence the type of cleaning needed or the products used? These details are key in finding a service that not only cleans your home but also respects and aligns with your values and lifestyle.     Step 2: Start Your Search After you’ve tapped into your personal network and done a preliminary internet search, it’s time to delve deeper. Social media platforms can be incredibly useful in this phase. Many local community groups on platforms like Facebook or Nextdoor allow you to post inquiries or search for recommendations on maid services. These groups often have real-time feedback and experiences shared by members, giving you insights into the reliability and quality of services from a more personal perspective. Professional platforms like LinkedIn can also offer clues to the reputation and professionalism of the cleaning services you’re considering. A company with a well-maintained LinkedIn profile may indicate a higher level of professionalism and commitment to their business image. Don’t forget about the power of local bulletin boards, both online and in physical spaces like community centers or grocery stores. Local businesses often advertise their services there, and you might find a flyer for a cleaning service that’s exactly what you’re looking for but hasn’t shown up in your online searches. Review sites specifically dedicated to service industries, such as Angie’s List or HomeAdvisor, are also invaluable resources. These sites not only list local cleaning services but also provide detailed reviews, ratings, and sometimes even pricing information. They can offer a more comprehensive view of what each service offers and how they stack up against each other in terms of customer satisfaction. Another often-overlooked method is directly contacting real estate agents or property management companies in your area. Given their involvement in property turnovers and maintenance, they likely have a list of trusted cleaning services that they use regularly and can recommend based on their experiences. Step 3: Check Reviews and Ratings After identifying potential maid services, it’s essential to analyze the feedback they’ve received from various sources. While independent review sites and social media are great starting points, there are additional strategies to get a comprehensive view of a service’s reputation. One effective method is to visit the company’s website and look for a testimonials section. Businesses often showcase their best reviews here, which can give you insight into the strengths they pride themselves on. However, remember that these are selected highlights, so it’s important to balance this information with reviews from third-party sites. Another approach is to engage with the community on social media platforms where the service is active. Observing how they interact with customers, respond to feedback, and address concerns can offer valuable insights into their customer service approach and commitment to satisfaction. Look for responsiveness and a willingness to engage constructively with both positive and negative comments. Don’t hesitate to reach out directly to reviewers, if possible. Some platforms allow you to message users who have left reviews. This can provide an opportunity to ask specific questions about their experience, particularly if they’ve posted about a situation similar to what you’re seeking help with. Direct feedback can often be more detailed and candid, giving you a clearer picture of what to expect. Furthermore, consider the context and details in each review. Pay attention to the nature of complaints or praise. For example, if negative reviews consistently mention issues that wouldn’t bother you as much, such as minor scheduling mishaps in an otherwise stellar cleaning service, you might decide those aren’t dealbreakers. Conversely, if you notice repeated mentions of aspects that are crucial to you, like the use of eco-friendly products or the ability

“How to Find the Best Maid Services Near Me” A 5-Step Guide Read More »

Ergonomic Gaming Chair in Sleek White Room Design

How Often Should You Clean a Gaming Chair? A Detailed Schedule

Hey, fellow gamers and cleanliness enthusiasts! Ever wondered how often you should Clean a Gaming Chair to keep it in prime condition? Well, you’re in luck because I’ve got a detailed schedule just for you. Let’s keep that throne of yours looking and feeling fresh, so you can focus on those epic gaming sessions without any distractions. Immediate Clean-ups: Spills and Smudges When it comes to immediate clean-ups for spills and smudges on your gaming chair, acting fast is key to preventing any long-term damage. It’s all about having the right tools and products at your disposal to effectively tackle whatever mess comes your way, ensuring your chair remains in top-notch condition. For spills that are water-based—like sodas, energy drinks, or just plain water—a clean, damp cloth is your first line of defense. It’s important to blot the spill rather than rubbing it, as rubbing can push the liquid deeper into the fabric or upholstery, making it harder to remove. For these types of spills, microfiber cloths are particularly effective. They’re super absorbent and gentle on all types of materials, from leather to fabric. In cases where water alone isn’t enough, a mild detergent solution can be used. Mixing a small amount of dish soap with water creates a gentle cleaning solution that can lift more stubborn stains. Always use the solution sparingly to avoid saturating the chair too much. Oil-based spills, which can come from foods, lotions, or other greasy substances, require a different approach. For these, you’ll need a cleaner that’s specifically designed to break down oils. Krud Kutter Original Concentrated Cleaner/Degreaser is a great option here. It’s a versatile, water-based cleaner that can tackle grease, oil, and grime without harsh chemicals. Apply it to a cloth and gently dab at the spill, ensuring not to spread the stain further. As always, doing a spot test on a hidden part of your chair before using any new product is crucial to ensure it won’t damage the material. One of the most important steps in dealing with any spill or smudge is to consult the manufacturer’s cleaning guidelines for your specific gaming chair. These guidelines can provide valuable insights into what products and methods are safe to use on the chair’s material, whether it’s leather, mesh, fabric, or a synthetic blend. Ignoring these recommendations can lead to discoloration, material breakdown, or other types of damage, compromising the look and lifespan of your chair. To make future spills easier to handle, consider using a fabric protector on your gaming chair, if the material and manufacturer’s guidelines allow it. Products like Scotchgard Fabric & Upholstery Protector can create a repellent barrier on fabrics, making it more difficult for spills to penetrate the material and cause stains. This can be a game-changer, especially for those who frequently snack or drink at their gaming setup.     Weekly Wipe-downs Starting with the basics, the microfiber cloth stands out as an essential tool in your cleaning kit. Its super-fine fibers are perfect for picking up dust, dirt, and even microscopic debris without the need for chemical cleaners or leaving any scratches on your chair’s surface. For the best results, lightly dampen one corner of the cloth with water to tackle any stubborn spots or smudges, then use the dry part to buff the area to a shine. This method ensures you’re not introducing too much moisture to your chair, which could seep into the cushioning and potentially cause damage over time. When it comes to products, especially for those with leather chairs, choosing the right leather conditioner is crucial. Leather Honey Leather Conditioner is a highly recommended option, known for its long-lasting formula that penetrates deep into the leather to protect it from drying out and cracking. Another great choice is the Weiman Leather Cleaner and Conditioner, which offers a dual-action formula that cleans and conditions in one step, making it a time-saver during your cleaning routine. For fabric chairs, a gentle fabric cleaner like Scotchgard Fabric & Upholstery Cleaner not only cleans but also adds a protective layer to repel future spills and stains. Remember, whatever product you choose, always perform a spot test in an inconspicuous area to ensure there’s no adverse reaction to the material. In addition to these products, consider incorporating a soft-bristled brush into your routine for fabric chairs. This can help loosen any particles trapped in the weave of the fabric, making them easier to vacuum or wipe away. It’s a gentle yet effective way to deep clean without resorting to harsh chemicals or vigorous scrubbing, which could damage the fabric. Monthly Deep Cleans When the calendar flips to a new month, it’s the perfect reminder for a deeper dive into cleaning your gaming chair, going beyond the surface to ensure every part of your throne is pristine. This monthly ritual is about giving your chair the spa treatment it deserves, ensuring longevity and maintaining that brand-new feel. Kicking off your monthly deep clean, a vacuum cleaner equipped with a brush attachment becomes your best tool. This setup is ideal for coaxing out the dust, crumbs, and other debris hiding in the chair’s crevices, seams, and under the cushions. The brush attachment is gentle enough not to damage the fabric or leather but effective in dislodging particles that have settled over the month. A vacuum like the Dyson V15 Detect, known for its powerful suction and soft brush attachment, can make light work of this task, ensuring no corner is left untouched. For those with fabric gaming chairs, finding a cleaner that can handle spots and odors without harming the material is crucial. The Bissell Pet Stain Eraser is a portable and effective option, designed to tackle stains and smells with ease. Its formula is gentle on fabrics, making it a safe choice for your chair. Another great option is the Folex Carpet Spot Remover, which is celebrated for its ability to remove tough stains without the need for rinsing or vacuuming after application, making it a

How Often Should You Clean a Gaming Chair? A Detailed Schedule Read More »