Blog

Organizing living room with basket for toy and magazine clutter.

How to Declutter and Clean Your Home in 5 Easy Steps

Ah, Declutter and Cleaning  – the duo that promises a fresher, tidier home but often ends up on our “I’ll do it tomorrow” list. Whether you’re in Toronto, bracing against a brisk wind, or elsewhere, enjoying a sunnier clime, the steps to declutter and clean your space remain universally straightforward. Let’s dive into how you can transform your home into a sanctuary of calm and cleanliness in just five easy steps, so you can kick back and enjoy a well-deserved break in a space you love. 1. Set Your Goals and Make a Plan Imagine your ideal living space. Maybe it’s a minimalist haven with sleek surfaces and strategically placed art. Or perhaps it’s a cozy, book-filled nook with warm lighting and plush pillows. Whatever your vision, hold onto it tightly because this image is your guiding star through the process. Let’s break down the planning part. It’s all about approachability. Think about how eating a pizza slice by slice is less daunting than trying to eat the whole pie at once. Apply the same principle here. By breaking down your space into manageable sections, you’re making the task less intimidating and more doable. It could be as detailed as starting with a single drawer or shelf. The key is to create a sequence that logically flows from one area to the next, ensuring you’re not just moving clutter around but actually clearing it out. Setting realistic timelines is another cornerstone of this step. While we’d all love to wave a magic wand and have everything sorted in an afternoon, the reality is that decluttering and cleaning can take time, especially if you’re doing a thorough job. Be kind to yourself and set achievable goals. If Saturdays are your free days, perhaps dedicate a couple of hours each Saturday to tackle a new area. Progress is progress, no matter how small. One final tip for this planning stage is to consider the challenges you might face. Maybe you struggle to let go of items for sentimental reasons, or you find it hard to stay motivated. Anticipate these hurdles and plan ways to overcome them. This might mean inviting a friend to help and offer moral support, or rewarding yourself after completing each section of your home.     2. The Four-Box Method The four-box method transforms what can often feel like an overwhelming chore into a manageable, almost game-like process. It’s about creating a physical and mental space that reflects your current needs and joys. Each box or bin becomes a decision point, guiding you towards a clearer, more intentional living environment. When you start with this method, it’s like setting up a personal sorting station, where every item in your home has to make a case for its continued place in your life. The “Keep” box is for those items that still have a role to play, whether it’s practical use or emotional value. This is where your favorite kitchen gadgets, cherished photographs, and cozy sweaters will end up. The “Donate/Sell” box is your opportunity to give your items a second life with someone else. It’s a reminder that what no longer serves you might be exactly what someone else is looking for. Whether it’s clothes that don’t fit, books you’ve finished reading, or duplicate kitchen tools, this box helps you lighten your load while offering up possibilities for others. Then there’s the “Recycle” box, a nod to our environmental responsibilities. This is where you place items that shouldn’t go to the landfill but can be transformed into something new. Think of old magazines, electronics that have seen better days, and glass jars from gone-off condiments. Recycling is a critical step in decluttering responsibly, ensuring that we’re not just clearing our homes but also contributing positively to our planet. Lastly, the “Trash” bin is the final resort for items that have outlived their usefulness and can’t be repurposed or recycled. Worn-out shoes, broken electronics, and expired medications are examples of what might end up here. While it’s the least desirable outcome, it’s an essential part of decluttering, helping us fully let go of what’s no longer needed. 3. Deep Clean After Decluttering Once the clutter has been cleared, and your space starts to resemble the tidy haven you’ve envisioned, the next step is to deep clean your home. This isn’t just about making things look nice; it’s about creating a healthier, more inviting environment for you and anyone who steps through your door. By starting from the top and working your way down, you ensure that no nook is left untouched and that your efforts are as efficient as they are effective. Beginning with the ceilings and light fixtures might seem a bit counterintuitive at first. After all, these areas aren’t typically the dirtiest parts of our homes. However, you’d be surprised by how much dust can accumulate on ceiling fans, in light fixtures, and along crown moldings. By tackling these areas first, you ensure that any dust or dirt that falls during the cleaning process won’t settle on already cleaned surfaces. For those braving the diverse weather of Toronto, the cleaning process includes some specific challenges. The changing seasons bring a mix of humidity, rain, snow, and everything in between, affecting different parts of your home. Windows, for instance, can become grimy from precipitation and changing temperatures. Giving them a thorough clean not only brightens your rooms but also enhances your view of the outside world, no matter the season. Furnace filters are another area that shouldn’t be overlooked. These work tirelessly to filter out dust, pollen, and other airborne particles from your heating system, ensuring the air in your home is as clean as possible. Over time, however, they can become clogged, reducing their efficiency and potentially circulating dirty air throughout your home. Checking and replacing these filters as part of your deep cleaning process can make a significant difference in your home’s air quality. Areas prone to dampness or mold, such as bathrooms, basements, and

How to Declutter and Clean Your Home in 5 Easy Steps Read More »
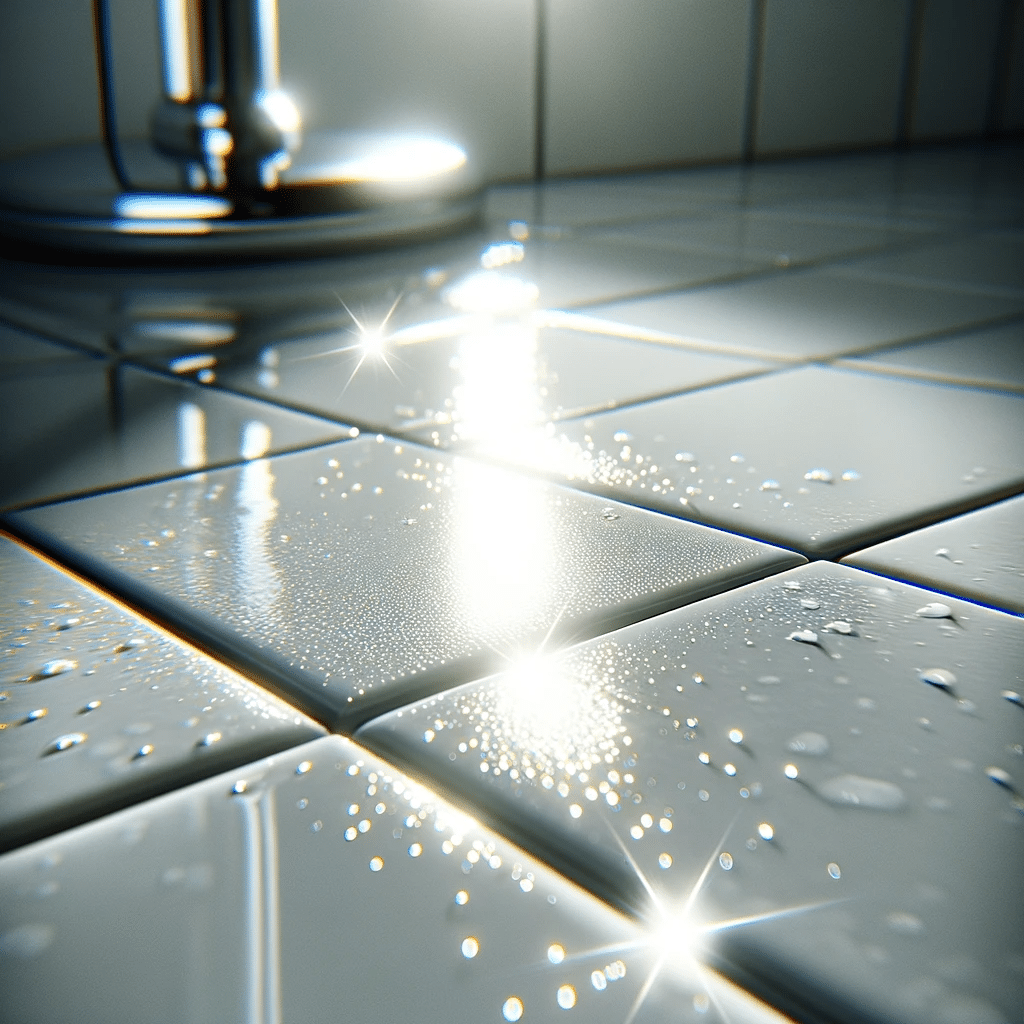
Wet shower tiles in bathroom

7 Effective Ways to Clean Up Water-Based Stains from Every Surface | Toronto Shine Cleaning

Seven Effective Ways to Clean Water-Based Stains From Every Surface Coffee on the couch, finger paint on the hallway wall, rain tracked across the floor: water-based spills look harmless and still set in fast. Almost every one lifts cleanly when you match technique to material. These seven methods cover the surfaces your household touches all day, with supplies you likely own. One rule comes before every step, and the CDC’s home cleaning guidance backs it: clean promptly, before soil has a chance to set. Blot with a clean cloth the moment the spill lands; rubbing grinds it in. Start with cool or lukewarm water, because heat sets most water-based marks. Work from the outside edge inward so the stain cannot grow. Rinse every trace of soap away, then dry the area fully. Quick Reference Table Surface First move Skip this Fabric and upholstery Blot, then mild detergent in cool water Rubbing and hot water Carpet Baking soda, vinegar spray, then blotting Walking on wet pile Hardwood Blot dry, hardwood cleaner on a cloth Soaked mops, pouring cleaner on the floor Tile and grout Lemon-and-salt paste, soft brush Steel wool, harsh abrasives Painted walls Damp microfibre, drop of dish soap Scouring pads Vinyl and laminate Sweep, well-wrung damp mop Puddles at seams and baseboards Clothing Pre-treat, wash per the care label Drying before the stain is gone 1. Fabric and Upholstery: Blot First, Then Mild Detergent Blot the moment the spill lands so liquid cannot sink into the fibres. Mix a squirt of gentle detergent into cool or lukewarm water, since hot water can set the mark. Dip a colourfast soft cloth, wring it until barely damp, and dab from the outer edge inward so the stain cannot spread. When it lifts, dab again with clean cool water until no soap remains. Let the area air dry: skip direct heat, and if the fabric allows, press a cool iron through a clean cloth to draw out the last moisture. 2. Carpets: Baking Soda and White Vinegar Cover the damp patch with baking soda and give it about ten minutes to pull up moisture and odour. Spray a half-and-half mix of white vinegar and water over the top; the fizz signals the reaction at work. Vinegar’s acidity lifts the mark while the dilution keeps the colour safe. Wait for the bubbling to stop, then blot with a clean dry cloth, dabbing and never rubbing. Let it dry completely: damp carpet invites mold and mildew, a risk the CDC’s mold and health pages explain. Vacuum last to lift the fibres back up. Delicate or specialty carpets belong with professionals. 3. Hardwood Floors: Immediate Wipe, Then a Floor-Specific Cleaner Wood warps and discolours when liquid slips into the seams, so blot any spill with a soft dry cloth the moment you notice it, pressing rather than rubbing so moisture cannot travel along the grain. If a mark stays, choose a cleaner made for hardwood and matched to your finish; the Health Canada household products pages are a good label-reading reminder. Pour it onto the cloth or mop instead of the floor so the wood never soaks, wipe along the grain, let the product sit briefly on stubborn spots, then dry with a clean cloth so no moisture lingers. 4. Tile and Grout: Lemon Juice and Salt Paste Lemon juice earns its place for more than smell: its acidity acts as a natural bleach against food, soap scum, and mildew, and helps sanitise. Salt adds a soft abrasive that breaks stains down without gouging the tile. Stir the two into a paste, spread it over the mark, and work it in with an old toothbrush. Leave it five to ten minutes, longer on old marks, then scrub lightly and rinse with warm water, which dissolves the mixture better than cold. Towel dry so new moisture does not soak into porous grout. 5. Painted Walls: Damp Microfibre and Patience Rain marks and splashes on painted drywall respond well to a microfibre cloth wrung out in warm water with a drop of dish soap. Wipe in light circles, working outward from the edge of the mark, and rinse the cloth often. Skip scouring pads and strong cleaners, which polish dull streaks into the paint. 6. Vinyl and Laminate: A Damp Mop, Never a Wet One These floors tolerate water better than hardwood, but liquid creeping into seams can lift edges and swell planks. Sweep first, then mop with a pad wrung nearly dry using a laminate-safe product or diluted vinegar solution. Towel up dampness along baseboards and seams, where moisture hides longest. 7. Clothing: Pre-Treat Before the Wash Water-based marks on laundry usually vanish with one extra step. Work a drop of liquid detergent, or a dab of vinegar-and-water mix, into the stain, let it sit ten to fifteen minutes, then wash at the temperature the care label permits. Check the spot before the dryer runs: machine heat sets any stain left behind. Frequently Asked Questions Do water-based stains really need same-day attention? Fresh marks sit on the surface, where blotting lifts them easily. Once dry, a stain bonds with fibres and grout, so the same job takes stronger products and several rounds. Speed is the cheapest protection there is. Can I reach for bleach to speed things up? Not on every material. Bleach can strip fabric colour, harm wood finishes, and dull coloured grout. Reserve it for bleach-safe surfaces, diluted as the label directs, in a ventilated room. Why does my carpet look clean but smell damp? Moisture lingers in the pad beneath the pile long after the surface feels dry. Point a fan at the area, open a window, or run a dehumidifier until fully dry. A lasting damp smell means professional extraction is the right call. When should I stop scrubbing and call for help? If a mark survives two or three rounds of the correct method, more scrubbing endangers the fibre rather than the stain. A deep cleaning visit extracts what household

7 Effective Ways to Clean Up Water-Based Stains from Every Surface | Toronto Shine Cleaning Read More »

Vibrant cityscape at sunset by Ceyda Ciftci.

Macrame Wall Hanging Clean: 5 Steps to Perfectly Take Care | Toronto Shine Cleaning

Macrame Wall Hanging Care: Five Steps to Keep It Perfectly Clean Macrame wall hangings have claimed a permanent spot in modern homes, layering boho texture and knotted pattern over bare walls. Like anything built from kilometres of cord, they also catch dust faster than a flat shelf ever could. The five steps below take you from routine dusting to a full bath and a refresh ritual, without fraying a single fringe in the process. Step 1: Dust It Off, Gently Dust is the first battle, and the easiest to win. Take the piece outside and give it a good shake: the motion frees settled dust and wakes up the knots at the same time. When a shake is not enough, run a soft-bristle brush along the contours of the weaving, letting each stroke comb grit out of the deepest crevices. The modern shortcut is a hand vacuum on its lowest power setting, glided slowly through the weaves with a soft nozzle so suction lifts dust without grabbing fibres. The guiding principle through all three options is gentleness. Knotted cord is durable and delicate at once, and heavy pressure or harsh tools will distort the shape and fray the strands. Step 2: Spot Clean Stains Calmly A stain on macrame is an inconvenience, not a disaster. Mix a small squirt of mild detergent into a bowl of water and treat it as your first-aid kit for the piece. Dip a soft cloth, wring it well, and dab at the mark with a light hand, coaxing it out rather than demanding its departure. Skip harsh chemicals entirely: they promise speed and deliver frayed, discoloured fibres. For a mark that fights back, sprinkle baking soda on a damp cloth and work it in softly, letting the gentle abrasive break the stain down where chemicals should not go. Buying tips for safer cleaners, including how to read labels, are on the Health Canada household products pages. Step 3: Wash Gently When It Is Time A full wash is a slow ritual, and that is the point. Fill a basin or tub with lukewarm water and a whisper of mild detergent, then submerge the hanging and let it soak so the water can travel into every twist and loosen accumulated grime. Swish the piece softly through the bath, a near-meditative motion that releases dirt while the structure holds its shape. Rinse under a gentle but thorough stream of clean water until no soap remains, because detergent residue dulls the fibres and attracts fresh dust. Nothing here should be hurried or aggressive. Step 4: Dry It Properly Drying decides whether the piece comes back to life or comes back misshapen. Start by squeezing gently, cradling the wet macrame and pressing out water without twisting the form. Lay the piece flat on a clean towel, which acts as a sponge while supporting the whole hanging so nothing stretches out of shape. Large pieces can hang outside to dry for the fresh-air bonus, but keep them out of direct sun, whose rays fade colour as surely as they brighten a room. Before anything goes back on the wall, confirm the piece is dry through and through: trapped moisture breeds mildew, and the CDC’s overview of mold and health explains why damp textiles are worth taking seriously indoors. Step 5: Maintain and Refresh Between Washes Long life comes from small, repeated gestures. Give the hanging an occasional shake to dislodge new dust before it settles. When fibres start to droop and lose their crispness, a gentle spritz of water acts like morning dew: the cords tighten and regain elasticity as they dry. Follow the mist with a pass of your fingers through the fringe to untangle knots and re-fluff the pattern. This routine is less about cleaning and more about conversation with the piece, reading its needs before problems appear. A Simple Care Schedule Task How often What you need Outdoor shake Weekly or fortnightly Just your hands Brush or low-power vacuum Monthly Soft-bristle brush or hand vacuum Spot treatment As soon as a mark appears Mild detergent, soft cloth, baking soda Full gentle wash Yearly, or when visibly dull Lukewarm water, mild detergent, clean towels Refresh spritz and finger-comb Whenever fibres droop Water spray bottle Keep the routine light by doing only what the piece asks for: Shake and brush before any wet step, since dry dust turns to mud when it meets water. Test every cleaning mixture on a hidden knot before it touches the front of the work. Never wring, scrub hard, or use a high-suction nozzle on loose fringe. Dry flat and fully, away from direct sun, before rehanging. Frequently Asked Questions Can a macrame hanging go in the washing machine? Hand washing is the safer habit for knotted, textured work. A machine agitates exactly what makes the piece: the loops and twists that hold the pattern. A basin soak with mild detergent gets the same refresh with none of the distortion risk. Is baking soda really enough for stubborn spots? On most household marks, yes. Its mild abrasiveness lifts grime without stripping colour the way solvent cleaners can. Work it on a damp cloth in soft circles, let the area dry, and brush the residue away before evaluating once more. How long does a washed piece need to dry? Flat drying on towels commonly takes a day or more depending on thickness and room humidity. Thicker cords hide dampness long after the surface feels dry, so press a towel into the densest knots and wait for a fully dry result before rehanging. Can I skip washing and only dust? Regular shaking and brushing carries a lightly used piece for years. When the whole hanging looks grey or feels gritty despite dusting, the fibres have collected more than surface dust and the gentle bath is due. Handing the Busy Households a Break Caring for handmade art deserves time, and life often does not hand out extra hours. That is where a helping routine earns

Macrame Wall Hanging Clean: 5 Steps to Perfectly Take Care | Toronto Shine Cleaning Read More »

Elegant metal geometric candle holder with intricate design.

5 Cheap and Chic Home Decor Finds

Hey there, Cheap and Chic Home Decor enthusiasts! On the hunt for some affordable yet stylish home decor finds? You’re in luck! Decorating your space doesn’t have to break the bank. I’ve scoured the market to bring you five chic home decor finds under $20 that will add a touch of personality and style to any room without draining your wallet. So, let’s dive in and give your home the makeover it deserves, all while keeping it budget-friendly! 1. Geometric Candle Holders Priced around a sweet spot of $15, these contemporary beauties are not just candle holders; they’re pieces of art that blend seamlessly with any decor style, from ultra-modern to comfortably traditional. The charm of geometric candle holders lies in their versatility and visual appeal. They come in an array of shapes – think spheres, hexagons, and even intricate polyhedrons, offering you a playground of design options. Each shape can interact with light in its unique way, creating patterns and shadows that dance on the walls as the evening sets in. This interplay of light and shadow adds an extra layer of ambiance and mood to your room, perfect for those evenings when you’re looking to unwind in a cozy, yet stylish setting. When it comes to material, there’s a world of choice. Metallic finishes, for instance, can introduce a sleek and sophisticated touch. Imagine a rose gold geometric candle holder softly illuminating your reading nook or a silver one on your dining table, setting the stage for a chic dinner party. The reflection of candlelight on metal not only enhances the light but also adds a luxurious feel to your space. On the other hand, opting for matte black geometric candle holders can anchor your room with a bold yet understated elegance. Matte black as a choice brings a contemporary edge, making it an excellent counterpoint to more vibrant decor elements. It’s perfect for those who appreciate the minimalist design philosophy, where simplicity and functionality reign supreme. But it’s not just about the candlelight. During the day, these geometric candle holders stand as sculptural elements that attract the eye, serving as conversation starters. You can even repurpose them as small plant holders for succulents or air plants, merging functionality with aesthetic appeal.     2. Decorative Throw Pillow Covers Which range in price from an accessible $10 to $20, we uncover the simplicity and effectiveness of this decor strategy. Changing out your throw pillow covers is not just a matter of aesthetics; it’s a way to periodically reinvent your living spaces without committing to a full redesign or significant expenditure. The beauty of throw pillow covers lies in their diversity. Whether your taste gravitates towards the intricate patterns and vibrant hues of bohemian chic or the clean lines and muted tones of Scandinavian minimalism, there’s a throw pillow cover that speaks to your style. This versatility makes them an indispensable tool in the home decorator’s arsenal. Imagine the instant lift a set of sunny, yellow pillow covers can give to a room on a drab, rainy day, or the cozy, inviting ambiance created by rich, textured covers in deep blues or greens during the colder months. The seasonal adaptability of throw pillow covers means you can play with colors and textures to suit the weather outside or the mood you want to create inside. Throw pillow covers are not just about color. They introduce texture and pattern into your spaces, adding layers of depth and interest. A mix of materials, from smooth silk to coarse linen, can stimulate the senses, while patterns can guide the eye and tie together disparate elements of your room’s decor. They can act as the unifying piece in a room, bringing together various colors found in your space, or they can stand out as a bold statement piece against a more neutral background. The practicality of throw pillow covers cannot be overstated. Easy to remove and wash, they are ideal for homes with pets or children, where spills and stains are part of everyday life. They allow for a quick change of scenery or mood, without the need to invest in new pillows entirely. This not only makes economic sense but also appeals to the environmentally conscious, as it encourages reuse over purchasing new items. 3. Floating Shelves Exploring the multifaceted utility and aesthetic appeal of floating shelves, which are priced around an inviting $20, reveals their capacity to elevate both the functionality and style of any room. Beyond their practical application of saving floor space and minimizing clutter, floating shelves serve as a dynamic platform for personal expression and decorative display. Floating shelves offer a sleek, minimalist design that seamlessly integrates into a variety of decor styles, from rustic to modern and everything in between. The choice of material and finish-be it a warm, rich wood that adds a cozy, natural touch to a space, or a sleek, industrial metal for a more contemporary edge-allows these versatile pieces to become a harmonious part of your home’s aesthetic rather than just a storage solution. Their application in different rooms highlights their versatility. In the bathroom, floating shelves can transform into an elegant storage solution for towels, toiletries, and decorative items, keeping essentials at arm’s reach while decluttering the space. This can create a spa-like atmosphere, turning an ordinary bathroom into a retreat. In the living room, floating shelves offer a stage to showcase personal treasures, from family photos to cherished collectibles. They can be arranged creatively to form a unique gallery wall that reflects your personality and tastes, or used to keep books and magazines organized in a stylish manner. This not only adds character to your living space but also invites conversation and interest. The kitchen, too, benefits immensely from the addition of floating shelves. They provide a practical and accessible place to store spices, jars, and even small kitchen appliances, freeing up valuable counter space. Moreover, they can be used to display decorative items or collections, such as vintage cookware

5 Cheap and Chic Home Decor Finds Read More »

Spotless modern balcony with sleek furniture at dusk.

7 Tricks to Keep Your Balcony Clean and Inviting

Keeping your balcony clean and inviting is essential, especially if you love spending time outdoors, basking in the sun, or enjoying a quiet evening under the stars. Whether you’re in the heart of Toronto or enjoying the outskirts, a clean balcony can serve as your personal oasis. Here are seven tricks to make your balcony the envy of the neighborhood and a cozy retreat for yourself. 1. Start with a Deep Clean Starting with a deep clean really sets the stage for a balcony that feels like a breath of fresh air. First things first, sweeping the floor is crucial. You’d be surprised at how much dust, leaves, and random bits can accumulate over time. It’s like giving your balcony a fresh canvas to work with. Next, tackling the floor and railings with a mild soap solution can do wonders. A soft scrub brush is your best friend here, helping you get rid of any stubborn spots or grime that’s decided to make your balcony its home. But it’s not just the floors and railings that need attention. Those light fixtures and outdoor furniture can harbor dust and cobwebs, making your outdoor retreat less than inviting. Wiping them down with the right cleaners can make them shine and feel new again. And here’s a little tip: for glass surfaces or mirrors, a vinegar and water solution works miracles for that streak-free shine. 2. Opt for Easy-to-Clean Furniture Opting for easy-to-clean furniture for your balcony can significantly lighten your maintenance load, letting you focus more on relaxation and less on upkeep. When selecting pieces, consider materials like metal, teak, and all-weather wicker. These materials are not just durable against various weather conditions, but their maintenance is as simple as a quick wipe down. Whether it’s an unexpected rain shower or a dust storm, furniture made from these materials can be easily cleaned and ready for use in no time. Incorporating outdoor cushions adds another layer of comfort to your balcony setup. However, the trick to keeping things low-maintenance even with cushions is to ensure they are covered in weather-resistant fabric. These fabrics are designed to repel water, resist stains, and fend off fading under the sun. So, even after a summer of bright, sunny days or a damp, rainy season, your cushions will still look vibrant and inviting without requiring extensive cleaning efforts. The choice of easy-to-clean furniture is not just about practicality; it’s about creating a balcony space that’s always ready for you to enjoy. Imagine being able to spontaneously decide to have your morning coffee or an evening glass of wine outside without first having to clean or dry your furniture. This simplicity keeps your balcony looking fresh and inviting with minimal effort, ensuring it’s always a place of retreat and relaxation. 3. Incorporate Weather-Resistant Décor Incorporating weather-resistant décor into your balcony setup is a game-changer for both aesthetics and functionality. By choosing accents that can withstand the elements, you minimize upkeep and ensure your outdoor space remains inviting, regardless of the season. Durable outdoor rugs are a perfect example; they can add a splash of color and pattern to your balcony while being designed to resist fading and mold. This means they look great all year round, even after being exposed to the sun’s harsh rays or the occasional rain. Solar-powered lights are another fantastic addition, offering a sustainable lighting solution that enhances your balcony’s ambiance without adding to your electric bill. These lights charge during the day and illuminate your space automatically as the sun sets, creating a cozy atmosphere that’s perfect for evening relaxation. The best part? They require virtually no maintenance and are designed to endure outdoor conditions. Synthetic plants bring the beauty of greenery to your balcony without the upkeep associated with real plants. They stay vibrant and lush through extreme temperatures, require no watering, and won’t attract insects. This means you can enjoy the aesthetic benefits of plants without the hassle of regular care or the disappointment of seeing them wilt. Adding these weather-resistant décor elements to your balcony not only reduces the need for regular cleaning and maintenance but also ensures your outdoor space remains a beautiful, inviting extension of your home.     4. Regular Maintenance is Key Emphasizing the importance of regular maintenance for your balcony cannot be overstated. Consistent upkeep ensures that your outdoor space remains a welcoming retreat at all times. Setting aside just a few minutes each week for basic chores like sweeping the floor, wiping down surfaces, and organizing can significantly impact the overall cleanliness and appeal of your balcony. This routine prevents the accumulation of dirt, dust, and debris, which, if left unattended, can turn into stubborn grime that’s much harder to clean later on. Moreover, incorporating these simple maintenance tasks into your weekly routine can vastly extend the life and appearance of your balcony furniture and decorations. By promptly addressing spills, stains, and potential rust spots on metals, you avoid long-term damage that could otherwise lead to costly replacements or repairs. Regular cleaning also helps in identifying any minor issues before they become major problems, such as loose fittings or early signs of wear and tear on your outdoor textiles. This proactive approach to balcony maintenance not only saves you time and energy in the long run but also enhances your outdoor living experience. Knowing that your balcony is always ready for use, whether for a morning coffee, an impromptu get-together with friends, or a quiet evening enjoying the city lights, brings a sense of peace and satisfaction. 5. Protect Your Space from the Elements Protecting your balcony space from the elements is a proactive measure that can greatly extend the lifespan and maintain the appearance of your outdoor oasis. Utilizing protective covers for your furniture and grill is a simple yet effective strategy to shield these items from rain, snow, sun, and wind. These covers are designed to fit snugly over your outdoor pieces, keeping them dry and preventing damage from UV

7 Tricks to Keep Your Balcony Clean and Inviting Read More »

Mopping floor with organized cleaning supplies.

5 Innovative Ways to Clean Floors: Save Time and Effort | Toronto Shine Cleaning

Five Innovative Ways to Clean Floors and Save Time and Effort Floor cleaning has a reputation as a never-ending war against dust, crumbs, and one mysterious sticky patch that always returns. The good news is that the tools have quietly changed. Five approaches below, from robot helpers to a pair of slippers, turn the chore into something faster, lighter, and occasionally even fun. 1. Robotic Vacuum Cleaners and Mops This is where technology meets housekeeping. You stay on the sofa with your morning coffee while a quiet machine works the rooms behind you, sucking up crumbs and pet hair and, on combo models, mopping the coffee drip and the muddy paw print in the same run. Sensors steer the unit around furniture and stop it at stairs. When the battery runs low, many models return to their charging dock on their own and top up for the next session. App connectivity means you can schedule a clean while you are out and come home to finished floors. Modern units handle hardwood, tile, and low-pile carpet, and models with HEPA filters keep fine allergens inside the machine instead of blowing them back into your air. 2. Microfibre Mop Slippers Slip them on and the house gets cleaner the more you live in it. The high-performance microfibre soles pick up dust, hair, and surface dirt with every step, so breakfast-to-couch traffic becomes a free cleaning pass. The real trick is what they do to the mood: shuffle competitions, kitchen dance-offs, and slide-across-the-hallway challenges turn mopping into a family game that teaches kids tidiness through play. No bucket, no wringing: wear them, then toss the covers in the washing machine. They suit quick clean-ups between deeper sessions, and the movement is a small honest bit of daily activity, which the CDC’s physical activity basics page counts as worthwhile. 3. Eco-Friendly Reusable Mop Pads Reusable pads are a small tool attached to a big idea: less waste per clean. Made from durable, high-quality microfibre, they survive countless wash cycles where disposable pads stack up in the landfill. The tightly woven fibres grip and hold dirt, dust, and spills better than traditional cotton mops or single-use sheets, so many jobs need nothing but water. Fewer disposables means less plastic and a lighter household footprint. Pair the pads with natural solutions such as diluted vinegar or an essential-oil blend, and lean on Health Canada’s household products guidance whenever you compare commercial cleaners at the store. 4. Steam Mops A steam mop trades bottles of cleaner for a kettle’s worth of physics. Heated water produces vapour hot enough to loosen stubborn spills, sticky residue, and ground-in grime on hard floors, lifting them with no chemical cleaners involved. Less chemical also means less environmental load and fewer concerns for kids and pets who live close to the floor. The heat brings sanitising power with it: steam at working temperature kills a wide range of bacteria, viruses, and other pathogens, making them a sensible pick through cold-and-flu season and in allergy-sensitive homes. Because the vapour evaporates fast, floors dry in minutes rather than hours, shrinking the slip-and-fall window in a busy home. Adjustable steam settings make them suitable for tile, hardwood, and laminate, and swivel heads with extendable handles reach under furniture without any bending and stretching. 5. DIY Natural Cleaning Solutions Your kitchen cupboard already stocks a respectable cleaning arsenal. Vinegar’s acidity cuts grease and soap scum, deodorises as it goes, and works as a natural disinfectant when diluted with water for everyday surfaces. A few drops of lavender, lemon, or tea tree oil add fresh scent plus extra antibacterial and antiviral character. Baking soda thickens into a gentle abrasive paste for tough spots, and a dash of castile soap sharpens the grease-fighting mix. Making your own solutions trims the bottle-shopping habit, saves real money, declutters the storage cupboard, and lowers chemical exposure in homes with children, pets, or sensitive members. The CDC’s home cleaning guidance is worth a skim for the moments that still call for a proper disinfectant. Which Method Fits Which Floor Method Best for Keep in mind Robot vacuum and mop Daily upkeep across hard floors and low-pile carpet Clear cords and clutter before the run Mop slippers Quick maintenance between real cleans Maintenance only, not deep cleaning Reusable microfibre pads Everyday mopping with little or no chemical Wash pads regularly, swap when worn Steam mop Tile, laminate, sealed hard floors, sanitising passes Check the finish, use the right steam level DIY natural solutions General cleaning on many surfaces Some moments still need a real disinfectant Mixing methods is allowed, and usually smart: Let the robot hold the baseline on high-traffic days. Keep slippers by the door for spills and surprise guests. Run the steam mop monthly on tile and laminate. Reserve the DIY bucket for weekly full-floor sessions. Frequently Asked Questions Can a robot vacuum fully replace a normal vacuum? It handles daily crumbs and dust beautifully, but edges, corners, furniture legs, and sudden messes still need your regular machine. Think of the robot as the daily shift and your upright as the specialist called in for the deep job. Are steam mops safe on every hard floor? No. Sealed floors generally cope well, while waxed, unsealed, or sensitive surfaces can be damaged by heat and moisture. Start at the lowest steam setting, test a hidden corner first, and follow your flooring maker’s care advice above all. Do microfibre slippers actually clean or just push dust around? On dry surface dust and hair they genuinely lift debris into the fibres, which is why they work between proper mops. Greasy or dried messes are beyond them, and forcing the issue only relocates the problem. Is a vinegar-and-water floor mix enough for a healthy home? For routine cleaning on most floors, yes, and it keeps chemical exposure low. High-touch moments and shared spaces deserve proper cleaning and, when needed, an approved disinfectant alongside the DIY routine. Tired of Being the Floor-Cleaning Department? Hand the

5 Innovative Ways to Clean Floors: Save Time and Effort | Toronto Shine Cleaning Read More »

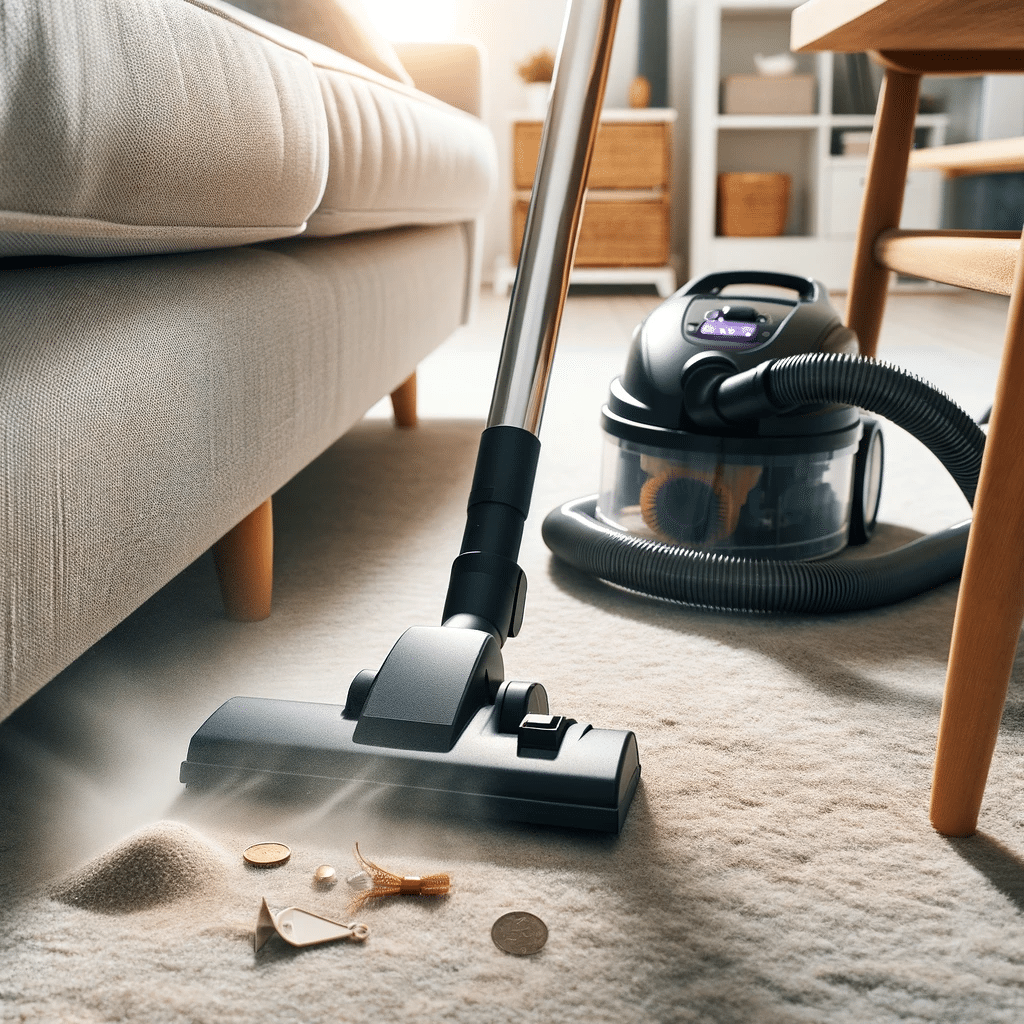
Cleaning under the furniture, Vacuuming

Expert Tips for Immaculate High Traffic Areas Cleaning | Toronto Shine Cleaning

Expert Tips for Keeping High Traffic Areas Spotlessly Clean Entryways, kitchens, living rooms, and bathrooms carry the household’s foot traffic, so they collect dirt like uninvited guests who overstayed. Keeping those zones spotless feels like a losing battle when the schedule is full. These five tips make it manageable: smaller habits, better tools, and a home that helps a little more than you expect. 1. Build a Daily Quick-Clean Routine Pick the hours of the day you can actually rely on and attach a short tidy to them. Morning types can do a fast sweep after coffee; evening people can make the reset part of winding down: plumping cushions, folding throws, leaving the room calm for tomorrow. Then use the gaps you already own. While the tea steeps or the oven works, unload the dishwasher, wipe the counters, or sort the day’s mail. Keep tasks short so they read as habits, not chores. After meals, spread the work: one person clears, another loads the dishwasher, a third wipes surfaces. The team approach lightens the load and teaches everyone to own a piece of it. 2. Use the Right Cleaning Supplies Microfibre cloths earn their reputation: the weave traps dust, dirt, and microscopic germs instead of smearing them, and they rinse and return. Floors need their own strategy. A quality vacuum with surface attachments lifts dirt out of the home rather than shuffling it around, and HEPA-filter models capture allergens. Eco-friendly cleaners matter just as much: conventional formulas can leave residues that are hard on family and pets, while natural-ingredient products achieve the same results, extend the life of your surfaces, and reduce toxic runoff into waterways. Organization tools belong on the list too, because clutter is friction: a basket for shoes, hooks for coats, a tray for keys and mail, and a dedicated home for the cleaning supplies themselves. When shared spaces need more than a wipe, the CDC’s cleaning and disinfecting guide settles what deserves what. 3. Set Up Cleaning Stations High-traffic zones collect germs and bacteria faster than any other room, and supplies within arm’s reach turn “I will get to it later” into a quick fix now, before a spill sets or travels. Make each station blend in: decorative baskets or stylish containers hide the supplies yet keep them grabbable. Customize by location. The entryway station leans on wipes and hand product for shoes and hands; the kitchen stock adds stainless polish and a grease-fighting dish soap; the bathroom corner keeps toilet cleaner, a brush, and disposable towels ready. The deeper genius is participation. When supplies sit everywhere, the inconvenience excuse dies, kids join in, and cleaning up after yourself becomes a normal, teachable reflex rather than a parental solo act. Hand hygiene is the anchor of any entryway station, and the CDC’s handwashing pages explain why clean hands stay the first line of defence in the busiest rooms. 4. Protect the Zones Before Dirt Arrives The cheapest clean is the dirt that never lands. Floor mats built for high-traffic zones outlast ordinary area rugs: they shrug off heavy footfall, resist stains, wipe clean easily, and suit any room’s style, so entryways and hallways get first claim. On hardwood and tile, a fresh finish or sealant adds a sacrificial layer against scratches, scuffs, and spills, extending floor life. A no-shoes rule does quiet miracles too, and slippers or shoe covers for guests turn it into hospitality instead of fussiness. Then maintain: wipe spills before they set, match cleaners to each floor type, and deep clean rugs, carpets, and floors periodically so the protection holds. 5. Get the Whole Household Participating When everyone contributes, the home runs smoother and the work stops landing on one person’s evening. Technology helps: apps that schedule, assign, and track tasks land especially well with pre-teens and teens, turning “helping out” into something visible and acknowledged. Leading by example does the rest: children copy adults who clean, and knowing a tidy space feels calmer and more productive plants the same value in them. Finally, match tasks to temperaments. Some people love the instant gratification of vacuuming; others find sorting and organizing more satisfying. Aligned work stops feeling like a tax. A Weekly Rhythm for the Busy Zones Zone Daily Weekly Entryway Shoes to the basket, quick sweep Mats shaken or vacuumed, hooks decluttered Kitchen Counters wiped after dinner Floor deep mop, appliance fronts polished Living room Cushions and throws reset Vacuum with attachments, high-touch surfaces wiped Bathroom Quick wipe after morning rush Full clean from the stocked station Small kit, stocked once, keeps every zone ready: Microfibre cloths, one colour per room to avoid bathroom-to-kitchen tours. A vacuum with surface tools and, ideally, a HEPA-grade filter. Eco-friendly cleaner matched to each floor and surface type. Wipes and hand product at the entryway for the five-second fixes. Frequently Asked Questions How many minutes should the daily routine take? Ten to fifteen spread across the day is plenty. Two minutes while the kettle boils and five after dinner beat a heroic Saturday marathon, because dirt that never accumulates never needs heavy removal. Do eco-friendly cleaners really perform like conventional ones? On everyday soil, well-formulated natural products achieve the same or better results without harsh residues, and they are gentler on surfaces and waterways. Proper disinfection during illness still deserves label-checked products used as directed. What belongs in a cleaning station? Only what that room actually needs: wipes and hand product at the door, surface spray and cloth in the kitchen, bowl, brush, and towels in the bathroom. A spare caddy keeps stock one trip away. Is a no-shoes policy worth the awkwardness? Floor mats plus a slipper basket make the habit feel welcoming rather than strict, and the drop in tracked-in grit shows up within a week, especially on hardwood and tile. When does a routine stop being enough? When the weekly rhythm slips for a month and grime returns faster than you can chase it, a scheduled clean resets the baseline. A deep

Expert Tips for Immaculate High Traffic Areas Cleaning | Toronto Shine Cleaning Read More »

Pristine marble or granite kitchen countertop with reflective surface.

How to Tackle Stubborn Stains on Countertops in 4 Steps | Toronto Shine Cleaning

How to Tackle Stubborn Countertop Stains in Four Simple Steps A coffee bloom on the island, a sauce splash beside the stove: countertop stains are inevitable in a kitchen that gets used. What separates a stressed twenty minutes from a clean five is method rather than muscle. Four steps, plus one preventative bonus, have your counters looking installed-new again without an accidental renovation. Step 1: Identify Your Countertop Material Reaching for a cleaner before knowing your surface is like grabbing soap without knowing whether it is for hands, dishes, or laundry. Granite, marble, quartz, and laminate differ far more in chemistry than in looks. Marble drinks up liquids almost like a sponge, so common pantry acids such as vinegar or lemon juice can stain or dull it. Granite is sturdy but sulks around harsh chemicals. Quartz behaves like the superhero of the group, resisting most stains and damage, yet high-pH cleaners are its kryptonite. Laminate is the easygoing friend that tolerates many cleaners but never forgives an abrasive scrub, which leaves it scratched and permanently dull. Naming your material first is how you avoid converting a cleaning session into a countertop replacement. Step 2: Prepare the Right Cleaning Solution The mix depends entirely on what the surface is made of, so craft a solution that answers the stain without offending the material. For granite or marble, warm water with mild dish soap lifts most marks gently, and when a stain digs in, a paste of baking soda and water applied with care coaxes it out without harshness. Quartz asks only for a soft touch: glass cleaner or a squirt of dish soap in water handles daily spills, and a stain that laughs at both can face a gentle degreaser, used sparingly, as the secret weapon that spares the quartz’s integrity. Laminate accepts a vinegar-and-water mix, or baking soda dissolved in water for persistent spots, cleaning within its limits without harm. Whatever the recipe, apply it with a soft cloth or sponge in gentle circles, imagining a fine paintbrush rather than a scouring pad. Step 3: Rinse, Dry, and Repeat If Needed Once the solution has talked to the stain, wash away every trace. A thorough rinse with clean water is the cool-down after the workout, because sticky, soapy, or gritty residue will dull the very surface you just saved. Dry with a soft towel: this is not only about water marks, but about denying lingering moisture any chance to sit into the material. If the stain survives the first round, that is not defeat but part of the plan. Repeat the cycle with the same care, because persistence beats force. Some marks simply need several application, rinse, and dry cycles. Step 4: Use Natural Light and a Keen Inspection The step that separates clean from pristine is seeing. Open the curtains and let daylight flood the counter, because natural light exposes hidden smudges, streaks, and dull patches that artificial lighting happily hides. Then inspect slowly from several angles, with purpose rather than a glance. Any area that still looks flat or shadowed gets a targeted touch-up: a little more solution, a soft cloth, a second pass of paste where a mark lingers. The detail pass costs minutes and decides the final result. Bonus Step: Prevent Tomorrow’s Stains Today Coasters are not politeness but a shield against the rings that etch into material over years. Trivets and heat mats do the same job against the heat that discolours and cracks natural stone and laminate alike. Accidents still happen in any lived-in kitchen, so the real secret weapon is speed: wiping a spill the moment it lands is the difference between a two-second habit and a future stain-removal campaign. For marble and granite owners, sealing the stone once a year works like armour, an invisible barrier that repels spills and resists stains before they ever start. Match the Cleaner to the Stone Material Safe first choice Never reach for Marble Mild dish soap in warm water; baking soda paste for marks Vinegar, lemon juice, other acids Granite Soapy warm water, gentle baking soda paste Harsh or abrasive chemicals Quartz Glass cleaner or soapy water; mild degreaser sparingly High-pH cleaners Laminate Vinegar-water mix; dissolved baking soda for spots Scouring pads and abrasive scrubs Keep the kit soft and the results bright: Two soft cloths: one for solution, one for clean-water rinsing. A soft towel for drying, so no water marks get an invitation. Baking soda on hand for every stone-friendly paste moment. Coasters, trivets, and a sealant schedule for natural stone. For broader guidance on choosing and using surface cleaners safely, Health Canada publishes practical references on household products. And when a recipe does call for bleach elsewhere in the kitchen, the CDC’s bleach cleaning guidance covers the dilution and ventilation basics worth following. Frequently Asked Questions How do I know what my countertop is if nobody told me? Natural stone feels cool and shows veins or speckle patterns, quartz looks consistent with fine aggregate, and laminate has a printed layer with a visible seam edge. When still unsure, ask your installer or test a hidden section with a drop of water and watch how it behaves. Is baking soda safe on every countertop? As a soft paste with water, it is the gentle option for stone and laminate alike. The risk is concentration and pressure, so keep the paste wet, work softly, and rinse fully rather than scrubbing dry powder across the finish. My stain is gone but a dull patch remains. What now? Dullness usually means residue or a tired seal rather than leftover stain. Re-rinse thoroughly, dry completely, and inspect in daylight. On natural stone, an annual sealant refresh is often what the surface is actually asking for. Do I really need to seal stone every year? For marble and granite, yes, an annual sealant is the routine maintenance that keeps spills beading instead of soaking. It is prevention priced far below a refinishing job, and it makes every

How to Tackle Stubborn Stains on Countertops in 4 Steps | Toronto Shine Cleaning Read More »

Elegant room interior with gleaming, sparkling plywood floors.

How to Keep Your Home Comfortable: Controlling Humidity from Basement to Attic 101

Keep Your Home Comfortable isn’t just about adjusting the thermostat; it involves maintaining the right balance of humidity throughout your home, from the basement to the attic. Too much moisture can make your home feel stuffy and can lead to mold and mildew issues, while too little can cause dry skin and respiratory problems. Let’s dive into how you can control humidity levels across different areas of your home, ensuring a comfortable living environment year-round. In the Basement: Combat Moisture at Its Source Basements often bear the brunt of humidity issues in a home due to their below-ground location, making them inherently prone to dampness and mustiness. Addressing humidity in the basement is crucial not only for the comfort and usability of the space itself but also for the overall air quality and structural integrity of your entire home. Here are some effective strategies to keep your basement dry and comfortable: Deploying a Dehumidifier is among the most direct and effective methods to manage moisture levels in your basement. A high-quality dehumidifier can significantly reduce humidity, making the air feel cooler and more comfortable while also preventing the growth of mold and mildew, which thrive in moist environments. It’s important to choose a dehumidifier that is appropriately sized for your basement area and to empty the collected water regularly to ensure it continues to operate efficiently. Sealing Leaks plays a pivotal role in moisture control. Basements are particularly vulnerable to water seepage due to their proximity to the ground. This moisture can enter through cracks in the foundation walls or floor, contributing to the overall humidity level of the space. Regular inspections can help identify any new cracks or leaks early on. Once found, these should be sealed with appropriate waterproofing materials. Not only does this prevent moisture from entering, but it also contributes to the structural health of your home. Improving Drainage around your property is essential to divert water away from your foundation, preventing it from collecting around your home and eventually finding its way into your basement. This might involve regrading the soil around your home’s foundation to slope away from the house, ensuring that downspouts extend several feet from the house, and keeping gutters clean and free of debris. These measures help to ensure that rainwater and melting snow are directed away from your home, reducing the likelihood of it seeping into the basement. Additionally, Ventilating the Space effectively can aid in reducing moisture levels. If your basement has windows, opening them during dry, sunny days can help lower humidity by allowing fresh air to circulate. For basements without windows, installing a ventilation system or using fans can help move air through the space, preventing it from becoming stagnant and moist. Finally, consider the Use of Waterproofing Paints and Sealants on interior basement walls and floors. These products can provide an additional layer of protection against moisture, preventing it from seeping through the porous concrete and into your basement. While not a solution for major leaks or flooding, they can be effective for controlling dampness and condensation.     On the Main Floors: Maintain a Balanced Environment Maintaining a balanced environment in the living areas of your home, where humidity levels are kept between 30% and 50%, is vital for both comfort and health. Achieving this balance involves a combination of techniques that manage moisture and ensure a pleasant living space. Ventilating your space effectively is key. Kitchens and bathrooms are hotspots for humidity, thanks to activities like cooking, dishwashing, and showering. Utilizing exhaust fans in these areas can significantly help in mitigating moisture accumulation. These fans work by pulling the humid air out of your home, preventing it from circulating and settling in your living spaces. Ensuring that these fans vent outside and not just into your attic or another room is crucial for this strategy to be effective. Incorporating houseplants into your decor can also play a role in humidity control. Certain plants have the natural ability to absorb moisture from the air through a process known as transpiration. By placing these plants around your home, you can harness this natural process to help regulate indoor humidity levels. Not only do these plants help in controlling moisture, but they also add to the aesthetic appeal of your space and improve air quality by removing toxins. Leveraging your air conditioning system is another effective way to manage humidity. Air conditioners don’t just cool the air; they also remove moisture as part of the cooling process. Running your air conditioning system during hot, humid days can help maintain a comfortable indoor climate, reducing humidity levels. It’s important to keep your air conditioning unit well-maintained, ensuring that filters are clean and the system is functioning efficiently for optimal moisture removal. Furthermore, strategic use of fans can assist in maintaining a balanced environment. Ceiling fans or standing fans improve air circulation, helping to distribute and mix the air evenly throughout your living spaces. This doesn’t directly reduce humidity but can make the environment feel cooler and more comfortable by facilitating the evaporation of moisture on the skin. Regular maintenance of indoor fabrics also contributes to a balanced humidity level. Upholstery, drapes, and carpets can absorb moisture, affecting the overall humidity level of your home. Cleaning and vacuuming these materials regularly can help minimize their moisture retention, contributing to a more balanced indoor environment. Managing activities that produce moisture is crucial. Simple changes like covering pots while cooking to reduce steam, taking shorter showers, and drying clothes outdoors or in a well-ventilated area can significantly reduce indoor humidity levels. In the Attic: Prevent Excess Moisture Build-Up The attic is a critical area in your home when it comes to controlling temperature and humidity. Due to its location, the attic is subject to wide fluctuations in both, which can significantly impact the overall comfort and air quality of your living spaces below. Managing humidity in the attic is essential for preventing structural damage, mold growth, and inefficient energy use

How to Keep Your Home Comfortable: Controlling Humidity from Basement to Attic 101 Read More »

Toronto apartment cleaning

How to Tackle Allergens in Your Home with 6 Simple Changes | Toronto Shine Cleaning

How to Tackle Allergens in Your Home with 6 Simple Changes Sneezing the moment you sit on the sofa, itchy eyes after bed, a nose that runs all winter: indoor allergies rarely come from nowhere. Dust mites, pet dander, pollen, and mold spores settle into fabric, floors, and still corners, and every one of them has a fix. These six changes cut the allergen load in your home without turning cleaning into a full-time job. 1. Dust Top to Bottom, Then Vacuum Everything Fabric Dust mites burrow into fabric and upholstery, so moving a duster across a shelf only shifts them around. Work from the top of each room downward, ceiling fans, bookshelf tops, and picture frames first, so falling dust does not land on surfaces you have already cleaned. The CDC’s home cleaning guidance makes the same case for regular cleaning: remove dirt and allergens before they build up, and surfaces become much easier to keep clean. Vacuuming earns its place in every room, not just over carpet. Floors, sofas, and curtains all hold dander and mite waste, and the attachments exist for the seams and corners where it gathers. Plan at least one pass a week, more in busy rooms or homes with pets, and do not skip under the bed or behind furniture. A HEPA filter captures particles as small as 0.3 microns, well under the size of a dust mite, but only while it is maintained: clean or replace it on the manufacturer’s schedule, because a clogged filter stops trapping allergens and drags the vacuum’s suction down with it. 2. Keep Windows Shut When Pollen Is High Pollen seasons run through spring, summer, and fall, and each one sends tree, grass, or weed grains drifting on the air. An open window invites them in, where they settle onto surfaces and linger for hours. Air conditioning is the practical alternative, keeping the house comfortable while its filters capture pollen, provided you clean or replace those filters as the maker advises. A clogged filter cuts cooling efficiency and can become a source of indoor pollution itself. 3. Choose Allergen-Proof Bedding and Wash It Hot You spend a third of your life in bed, which makes bedding prime mite territory. Zippered covers woven tightly enough that mites and their allergens cannot pass through, fitted over the mattress, pillows, and duvet, lock them out of the soft habitat they prefer. The covers protect the core, but sheets, pillowcases, and duvet covers still collect allergens, so wash them weekly in water of at least 130 F (54 C) to kill mites and rinse the residue away. Where allergies hit hardest, smooth-surfaced furniture and hard flooring beat upholstery and wall-to-wall carpet, and a HEPA purifier keeps working while you sleep. 4. Hold Indoor Humidity Between 30% and 50% Dust mites and mold both need moisture, and humidity between 30% and 50% leaves them least comfortable. A dehumidifier handles basements, crawl spaces, and ground floor rooms that run damp; empty the tank on a schedule. Where humidity is a year-round problem, a whole-home dehumidifier ties into the HVAC system and treats the entire house at once. Ventilation covers the rest: run exhaust fans while you cook or shower, keep them on long enough to clear the steam, and confirm the clothes dryer vents outside. The CDC’s guidance on mold is blunt about why it matters: mold grows wherever moisture lingers, including on wood, fabric, and household dust. 5. Declutter So Allergens Have Fewer Hiding Places Every knickknack is a landing strip for dust, and every crowded shelf is a spot the vacuum cannot reach. Decluttering is not about an empty house; it is about keeping what serves a purpose or earns its place, which cuts both the surfaces that collect allergens and the time you spend cleaning around them. Start with one zone at a time, clear counters, coffee tables, and desks first, and add storage that keeps things off the floor. 6. Groom Pets and Give Them Boundaries Pets bring dander indoors, and their coats ferry in pollen, mold, and dust from outside. Regular baths and brushing remove much of it, though over-bathing dries the skin and produces more dander, so ask your veterinarian what schedule suits your pet’s coat. Boundaries help too: keep pets out of bedrooms and off upholstered furniture so part of the home stays low-allergen, and wash pet bedding and toys regularly. Managing pet allergens is about reduction, not elimination, and consistent habits get you most of the way. Allergen Hotspots at a Glance Hotspot What collects there The fix Bedding and pillows Dust mites and their allergens Allergen-proof covers and weekly hot washes at 130 F (54 C) Carpets, rugs, upholstery Dander, mite waste, tracked-in pollen HEPA vacuuming weekly or more, plus periodic deep cleaning Bathrooms and basements Mold spores in damp air Exhaust fans and dehumidifiers; humidity at 30%-50% Cluttered surfaces Settled dust that vacuuming misses Decluttering plus storage that frees open surfaces A Weekly Allergen Checklist Dust top to bottom with a microfiber cloth. Vacuum floors, sofas, curtains, under beds, and behind furniture. Wash bedding in water of at least 130 F (54 C). Check that humidity sits between 30% and 50%. Brush pets and keep them out of the bedroom. Frequently Asked Questions How often should I vacuum to control allergens? Once a week is the floor, not the target. Sensitive households and homes with pets do better with two or more passes in busy rooms, plus attention under furniture and along baseboards. Do I really need to wash bedding in hot water? Yes, if dust mites are a concern. Water of at least 130 F (54 C) kills mites and removes the allergens they leave behind. Allergen-proof covers protect the mattress and pillows, but sheets, pillowcases, and duvet covers still need a weekly hot wash. Can professional cleaning help with allergies? It can, because the biggest gains come from the spots people skip: under beds, behind furniture, along baseboards, and around vents.

How to Tackle Allergens in Your Home with 6 Simple Changes | Toronto Shine Cleaning Read More »