Blog

Brick grout, wall grout

5 Easy How-To Tips for Effectively Cleaning Grout

5 Easy How-To Tips for Effectively Cleaning Grout Grout has a way of aging a whole room. The tile may be spotless, but dark, grimy lines make a bathroom or kitchen floor look tired no matter how much you mop. Because grout is porous, it absorbs whatever touches it: soap scum, hard water minerals, grease, and moisture that feeds mildew. The five methods below move from gentle to heavy duty, and together they cover almost every grout problem a Toronto home can throw at you. Your Grout Cleaning Kit Everything on this list is inexpensive, and most of it is already in your home: An old toothbrush or small scrub brush with stiff bristles Baking soda and white vinegar A bottle of hydrogen peroxide A spray bottle and a few microfiber cloths Rubber gloves to protect your hands Tip 1: Start with a Baking Soda Paste Baking soda is slightly abrasive, so it scrubs away surface stains without scratching the tile, and it doubles as a natural deodorizer for musty smells. Mix a few tablespoons with just enough water to make a thick paste, then apply it along the grout lines with gloved fingers, a small spatula, or the toothbrush. Let it sit for at least 10 minutes, or up to an hour for stubborn grime, so it can penetrate the pores and draw the dirt out. Scrub in a circular motion, spritzing a little water if the paste dries out, then rinse. It is safe for homes with kids, pets, or anyone sensitive to strong products. Tip 2: Spray Vinegar on Soap Scum and Hard Water Vinegar’s natural acidity breaks down the set-in film that makes grout look aged, especially soap scum and hard water stains. Combine equal parts white vinegar and warm water in a spray bottle, coat the lines generously, and give it a few minutes of dwell time, up to 10 minutes on tough spots. Scrub back and forth with the brush, rinse with clean water, and the grout should look noticeably brighter. One caution: never combine vinegar with bleach or chlorine products, and keep bleach-based cleaners strictly separate. Mixing them produces toxic gas, which is exactly the kind of hazard Health Canada covers in its household chemical safety guidance. Tip 3: Bring In Hydrogen Peroxide for Stains and Mildew For discoloration that survives vinegar, hydrogen peroxide is the stain buster. Its bleaching and disinfecting action works directly on mold and mildew in damp areas. Pour or spray it straight onto the lines for general discoloration, or mix it with baking soda into a fizzy paste for the stubborn cases; the reaction helps lift the stain while the soda adds gentle abrasion. Let it work for several minutes, up to 30 for deep stains, then scrub and rinse thoroughly so no residue remains to attract fresh dirt. A second application usually finishes what the first one started. Tip 4: Steam the Grout Clean Steam cleaning is the chemical free option that also sanitizes. High temperature steam penetrates deep into the porous surface, loosening embedded grime, and it kills most bacteria, mold, and mildew on contact. Since water is the only ingredient, it is a smart choice for households worried about indoor air quality or chemical residues, which can actually attract more dirt over time. Most machines sell grout attachments that direct the steam along the lines; move slowly, then wipe the loosened dirt away as you go. Tip 5: Seal the Grout So It Stays Clean Sealer is the step most people skip, and it is the reason grout gets dirty again so fast. A quality sealer forms a protective barrier that repels spills, steam, and foot traffic instead of letting them soak in. Start with grout that is completely clean and dry, since anything trapped under the sealer causes problems later. Choose a water based or solvent based formula that suits your tile and the room’s moisture level, apply it along the lines with a small brush, roller, or applicator bottle, and keep it off the tile faces. Let it dry per the manufacturer’s instructions, and plan on a second coat for showers and other high moisture areas. Method Best For Dwell Time Baking soda paste Surface dirt and light stains 10 to 60 minutes Vinegar spray Soap scum and hard water marks 5 to 10 minutes Hydrogen peroxide Mold, mildew, deep stains Up to 30 minutes Steam Sanitizing without chemicals Pass by pass, then wipe Sealer Preventing the next round of stains Dry per label, cure before use Grout Cleaning FAQs Why does grout get so much dirtier than tile? Tile surface is dense and glassy, while grout is porous, so it absorbs spills, oils, and moisture instead of letting them wipe away. That is why the same spill beads on tile but stains the line beside it, and why sealing makes such a difference. How often should I clean my grout? Wipe the lines with your regular bathroom or kitchen routine weekly, and run a baking soda or vinegar treatment monthly in wet areas. Deep treatments and resealing are worth doing a couple of times a year, or whenever the lines start darkening again. If I use bleach on moldy grout, anything to know? Yes: ventilate the room, wear gloves, follow the label, and never let bleach meet vinegar, ammonia, or other cleaners. Health Canada’s guidance above and the CDC’s bleach safety page both stress that combination risks. Used carefully, bleach products can disinfect, but they are rarely necessary after peroxide. When is professional grout cleaning worth it? When stains survive all five methods, when mildew keeps returning despite real effort, or when the area is simply too large to tackle on your hands and knees. Professionals bring commercial steam equipment and the right sealers, which resets the surface completely. Fresh Lines Without the Weekend Lost These five tips will handle the majority of grout problems, but some jobs deserve professional gear and hands. Toronto Shine Cleaning’s deep cleaning service restores tiles

5 Easy How-To Tips for Effectively Cleaning Grout Read More »
Remove Pet Stains Easily

7 Simple Steps to Eliminate Pet Stains from Your Hardwood Floors

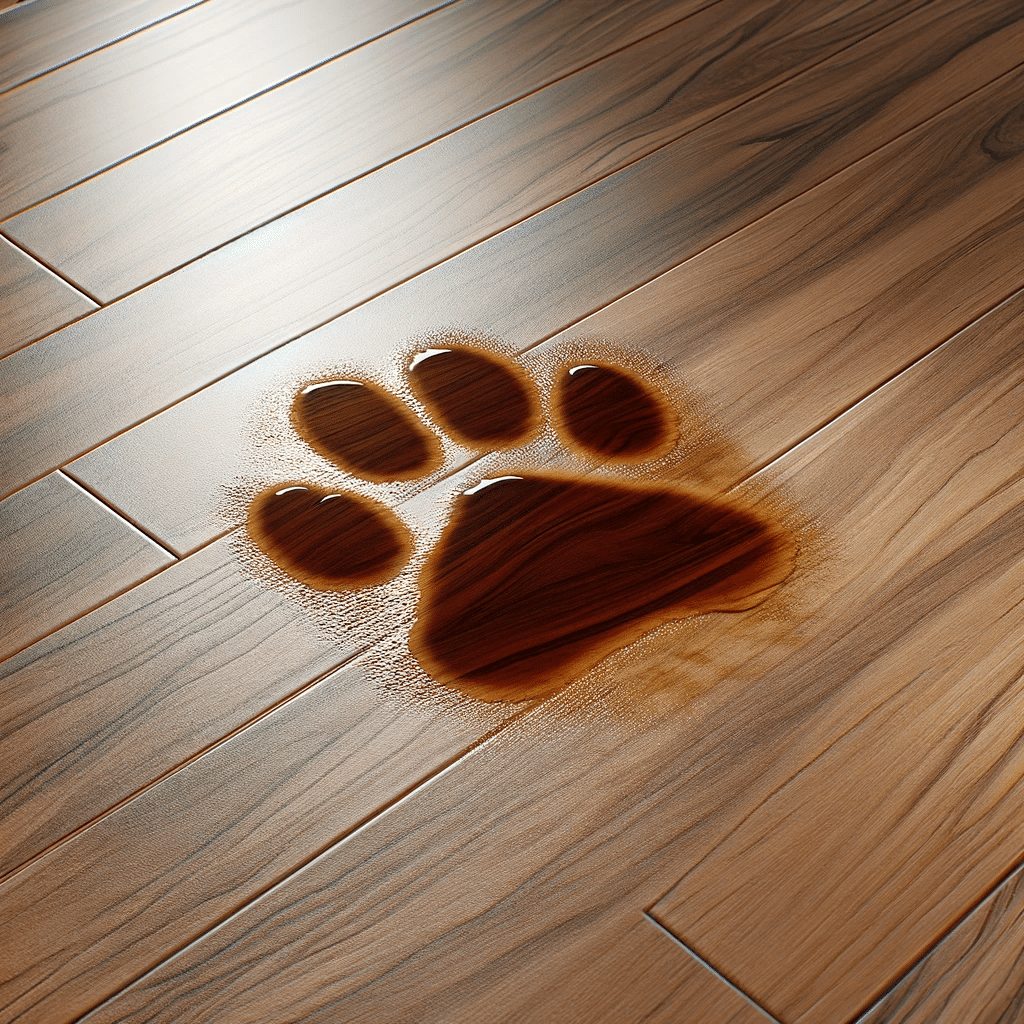
Why Pet Stains on Hardwood Floors Need Fast Action Every pet owner knows the sinking feeling of spotting a wet patch on a beautiful hardwood floor. Wood is porous, so urine, vomit, and muddy paw prints sink in quickly and leave behind stains, odors, and dull discoloration. The good news is that a calm, methodical cleanup can save your floors. The seven steps below walk you through the full process, from catching the mess early to confirming the finish is intact, and they work on urine, drool, and food accidents alike. Step 1: Identify Pet Stains Early Timing decides everything. A fresh stain mostly sits on the surface, while an old one has already soaked deep into the grain. Catching accidents early brings three clear benefits: Less absorption: wipe within minutes and the liquid never reaches the seams where swelling begins. Color prevention: acids in urine dull and darken wood over time, so speed preserves the natural tone of your floors. Odor control: bacteria multiply in organic messes, and fast cleanup stops smells before they set in. Keep an emergency kit near the areas your pet favors: absorbent cloths for quick blotting, an enzyme based cleaner rated safe for sealed wood, and a flashlight or black light that reveals dried spots you would otherwise miss. Step 2: Blot, Do Not Rub Rubbing pushes liquid down into the grain and outward across the boards, the exact opposite of what you want. Take a clean, absorbent cloth or paper towels and press straight down, lifting repeatedly, until no more moisture transfers. Blotting stops the stain from spreading and protects the finish, because wood that drinks too much liquid can swell, warp, or discolor permanently. Nobody attacks a treasured wooden table with a scouring pad, and your floor deserves the same respect. Step 3: Apply a Pet Safe Cleaner Strong solvents and harsh chemicals can irritate paws, skin, and lungs, since pets live inches above the floor and groom residue right off their coats. The CDC healthy pets guidance reminds owners to choose and handle cleaning products carefully around animals and to follow label directions. Enzyme formulas are the workhorses for pet accidents because they digest the urine crystals that trigger repeat marking instead of merely masking them. Pet safe cleaners use non toxic ingredients that break down organic stains, and they are also gentler on wood finishes, cutting the risk of clouding or discoloration. Health Canada’s page on household products explains how to read labels and store these supplies safely. You can find pet safe options at most pet stores and online retailers. Step 4: Scrub Gently in Circular Motions Armed with a soft brush or soft cloth, work the cleaner into the spot using light pressure and small circles, almost like massaging lotion into skin. Aggressive scrubbing scratches the protective finish and leaves a dull patch that makes every future spill more visible. If the mark resists, do not press harder; reapply the cleaner and keep going gently. Patience removes stains that brute force would turn into floor damage. Step 5: Rinse With a Damp Cloth Cleaner left on the floor keeps working long after you have walked away. Residue attracts dirt, dulls the sheen, and can turn sticky or discolored over the following weeks. Wipe the area with a cloth moistened, never dripping, in fresh water, and rinse or swap the cloth often so you lift solution away rather than spread it around. When the surface no longer feels soapy or sticky, rinsing is done. Step 6: Dry the Floor Thoroughly Water is wood’s quiet enemy. Pat the cleaned zone with a dry cloth until the cloth picks up nothing more, swapping to a fresh one as needed, and let the area air out afterward. Trapped moisture can creep into seams and cracks, causing warping, swelling, and even rot that surfaces months later as a costly repair. Step 7: Check for Lasting Damage Inspect the spot in good light once everything is fully dry. Is the color even with the surrounding boards? Is the finish clear and intact rather than cloudy or peeling? Stubborn or long old stains can leave bleached patches or raised grain that no household method reverses. Persistent discoloration, warping, or swelling is your cue to call professional help, whether a flooring specialist or a deep cleaning service experienced with tired wood. The Seven Steps at a Glance Step Action Why It Matters 1. Identify Scan with a black light, keep a kit ready Fresh stains clean far easier than set ones 2. Blot Press down, lift, repeat Rubbing drives liquid deeper into the grain 3. Clean Apply an enzyme, pet safe formula Digests urine crystals and protects paws 4. Scrub Soft brush, light circular motions Lifts marks while preserving the finish 5. Rinse Damp cloth, fresh water often Removes residue that dulls and attracts dirt 6. Dry Dry cloths until no moisture remains Prevents swelling, warping, and rot 7. Inspect Check color and finish closely Catches damage that needs a professional Frequently Asked Questions Can vinegar and water remove pet stains from hardwood? Diluted vinegar can freshen a surface, but it does not digest urine crystals the way an enzyme cleaner does, and strong acid can dull a wood finish. Use gentle products and save enzyme formulas for accidents that have already soaked in. How fast should I clean a pet stain? Within minutes if at all possible. The first stretch of time decides whether the mess stays on the surface or reaches the seams between boards, which is why your cloths and enzyme cleaner should live within arm’s reach of the spots your pet uses most. Can an old pet stain be fixed without refinishing? Sometimes. Several gentle enzyme applications over a few days can lift older marks. However, if urine has reached the subfloor or blackened the wood, professional deep cleaning or localized refinishing is the honest answer. How do I keep floors stain free between accidents? Wipe paws at entryways, trim foot

7 Simple Steps to Eliminate Pet Stains from Your Hardwood Floors Read More »

Professional cleaning specialist providing top-notch sanitization services.

Hiring a Maid in Toronto: 7 Easy Key Factors to Consider

Hiring a Maid in Toronto: 7 Easy Key Factors to Consider Thinking about hiring a maid in Toronto to take cleaning off your to-do list? It is one of the best lifestyle upgrades a busy household can make, but the experience is only as good as the provider you choose. A great service hands back your weekends, keeps your home genuinely healthy, and works around your real schedule. A poor one leaves you stressed and re-cleaning after the cleaner. Toronto Shine Cleaning is a bonded and insured company serving Toronto and the GTA, and the seven factors below apply to every provider, including us. Trustworthiness and reliability, checked through references and reviews Experience and expertise with your floors, surfaces, and fabrics Cleaning supplies and equipment, including eco-friendly options Flexibility and availability that match your schedule Cost and value rather than the cheapest quote Insurance and bonding that protect your home and belongings Personal preferences, from chat level to having the same cleaner each visit Trustworthiness, Insurance, and Peace of Mind Letting someone into your home is personal. You need a provider who cleans well and also respects your space and privacy, so ask for references from previous clients and actually follow up on them. Did the cleaner ever miss a scheduled session? How were delicate or valuable items handled? Online reviews are a goldmine for the same reasons: honest customers flag reliability problems quickly, and a recurring pattern of complaints about trust is a reason to keep looking. An established company adds structure: it screens staff, conducts background checks, and keeps supervision and quality checks in place. See what clients say on the reviews page. Insurance and Bonding Are Non-Negotiable Accidents happen even with careful, experienced cleaners: a fragile item can break, or a spill can land on a valuable rug. An insured service carries a policy that covers accidental damage or injuries during the visit, so you are not out of pocket. A bonded service goes further, securing a financial guarantee against dishonest acts such as theft. Toronto Shine Cleaning carries a $1,000,000 insurance policy and a $10,000 accidental breakage and surety bond. This protection matters most on large jobs like move-in or move-out and post-construction cleaning, where crews handle many belongings and work around dust and debris. Experience, Expertise, and the Right Supplies Experience is not just years spent cleaning. It is knowing that hardwood floors need a different approach than tile, that marble and antique wood call for special care, and that pet hair and stubborn stains each respond to different techniques. Ask any service which tasks they specialize in, and whether they can handle the materials in your home. Specialized work proves the difference: a deep cleaning service is a systematic process that removes the dust, grime, and allergens that build up over time in nooks a routine wipe-down never reaches. The CDC guidance on cleaning and disinfecting your home explains that regular, thorough cleaning removes most germs from surfaces, and trained crews work from that playbook. Who Brings the Cleaning Supplies? Decide early whether the maid will use your products or bring their own. Professional services arrive with commercial-grade supplies and equipment that typically outperform what most homes keep under the sink, and that saves you the cost and hassle of stocking everything yourself. If your household has allergies, scent sensitivities, or environmental priorities, confirm the team can work with your preferred products; Toronto Shine Cleaning offers eco-friendly options on request. Health Canada’s overview of household product safety covers the hazards of common cleaning items, a standard professional crews are trained to manage. Flexibility, Availability, and Personal Fit Flexibility is about more than picking a convenient slot. A last-minute family gathering or a heavy work week can force a reschedule, so choose a service that adapts to the changing rhythms of your life. Availability matters just as much: confirm they cover the times you actually need, whether that is early mornings, evenings, weekends, or fixed weekly days. Then match the frequency to your life, from weekly upkeep to occasional specialized cleans such as post-construction or move-in and move-out jobs. Our regular maid cleaning plans keep the same familiar team returning, and consistency means the cleaners learn where you keep things and how you like the bed made. Share your preferences up front, including a nervous pet or a dislike of strong fragrances, and every visit runs on your terms. Cost and Value: Look Past the Cheapest Quote You often get what you pay for. The cheapest service can mean compromises in thoroughness, reliability, and coverage, while the priciest option does not automatically guarantee quality. Value is where cost and quality intersect: consider the hours you save, the commercial-grade equipment included, and the repairs a well-maintained home avoids over the years. Also check what the quoted price includes, because basic packages may cover routine cleaning while extras like window washing or post-renovation work cost more. Toronto Shine Cleaning publishes base rates, before HST, on its pricing page so you can compare on facts: Service type Studio or 1 BR (before HST) Larger homes Regular maid cleaning $212.63 2 BR $273, 3 BR $327 Deep cleaning $270.38 2 BR $393.75, 3 BR $441, 4 BR $527.63 Move-in or move-out cleaning $242.63 Quoted by home size with a deposit-focused checklist Maid Service FAQs for Toronto Homeowners What is the biggest red flag when hiring a maid service? A refusal to provide references or proof of insurance and bonding. Any established company can show both right away, along with review history you can verify for yourself before the first visit. Should I hire an independent maid or a cleaning company? An independent cleaner can feel personal and occasionally costs less, but a company brings background checks, regular supervision, quality checks, and insured accountability. Weigh those protections against the price difference before you commit. Do I have to provide cleaning products and equipment? No. Most services, including ours, bring commercial-grade supplies that outperform typical household products. If you prefer

Hiring a Maid in Toronto: 7 Easy Key Factors to Consider Read More »

Mopping floor with organized cleaning supplies.

Mississauga’s Move-Out Cleaning: Common Mistakes to Avoid

Mississauga’s Move-Out Cleaning: Common Mistakes to Avoid Move-out day in Mississauga mixes excitement about your next chapter with one very unglamorous task: leaving the old place spotless. Done well, a thorough move-out clean protects your security deposit and your peace of mind. Done in a panicked rush, it invites surprise deductions. Almost every move-out disaster traces back to one of seven predictable mistakes that Toronto Shine Cleaning crews see weekly across Mississauga and the GTA. Here is how to sidestep them. Procrastinating the clean-up until the final weekend Overlooking what your rental agreement actually requires Skimping on the right cleaning supplies Missing the details landlords check on inspection day Trying to do the entire deep clean alone Forgetting the balcony, patio, and entrance Skipping the final walk-through Start Early and Read the Fine Print Mistake 1: Procrastinating the Clean-Up Most tenants underestimate the sheer volume of work between sorting what to keep, packing years of memories, and making every surface shine. Start weeks early and break the job into chunks: dedicate one weekend to decluttering, another to the kitchen and living room. As moving day approaches, set aside 15 to 30 minutes a day for one task, like bathroom mirrors today and the kitchen backsplash tomorrow. Steady progress shrinks moving anxiety and leaves flexibility for jobs that never happen in a rush, like cleaning behind appliances or touching up wall scuffs. Mistake 2: Overlooking the Rental Agreement Your lease, not your memory, defines what “clean” means. Before you pack the first dish, revisit the agreement for clauses about the condition in which the property must be returned. Some landlords require professional carpet cleaning, steam cleaning, wall washing, or specific repairs, and a surface-level tidy will not satisfy them. If those requirements exist, book the services well ahead of your move-out date, because peak seasons fill professional calendars fast, and knowing the rules lets you budget for them. If anything seems unclear or unreasonable, talk to your landlord early: a quick conversation often reveals the real concern and ends in a compromise instead of a deduction. The Supplies and Details That Decide Your Deposit Mistake 3: Skimping on Cleaning Supplies One all-purpose spray and a single rag can double your work. Glass streaks, stainless dulls, and harsh chemicals can damage the very surfaces they were never meant for. A modest, targeted kit covers almost everything: glass cleaner for streak-free windows and mirrors, a tile scrub for bathroom grout, wood polish for floors, stainless cleaner for appliances, plus a squeegee, microfiber cloths, and a good mop. Some of the strongest tools are cheap, like vinegar and baking soda. A stocked kit also cuts store runs, speeds the process, and makes tasks easy to hand to helpers. Mistake 4: Missing the Details Floors, counters, and toilets get cleaned by reflex; the forgotten spots are what cost deposits. The inside of the oven, the tops of cabinets, light fixtures, and ceiling fans collect astonishing grime precisely because they sit below daily attention. Build a checklist that goes beyond the obvious: behind appliances, baseboards, window blinds, door handles, vents, and any built-in storage you are leaving empty, then work room by room. Damp corners deserve special attention: Health Canada’s advice on reducing humidity, moisture, and mould explains why lingering dampness under sinks breeds mould an inspection will catch. In kitchens and bathrooms, follow the CDC advice to clean surfaces first and disinfect where needed. A detail-first clean signals respect for the property that landlords remember. Area Commonly missed spots landlords check Kitchen Oven and fridge interiors, cabinet tops, behind appliances, backsplash grease Bathrooms Grout lines, limescale, vents, under-sink cabinets Bedrooms and living areas Baseboards, blinds, light fixtures, ceiling fans, wall scuffs Entrance and storage Door handles, closet rails, built-in shelving, threshold dirt Why You Should Not Do It Alone Move-out cleaning is a deep clean of every corner in a home you are simultaneously packing, and the time, energy, and expertise it takes are exactly what a move depletes. Enlisting friends and family makes the job faster and turns it into one last gathering in a home full of memories; assign tasks by strength. When the scope outruns your volunteers, professionals bring the tools and techniques for baked-on grease and the carpet steam cleaning leases so often demand. Booking an end-of-tenancy cleaning service frees you to handle the rest of the move while delivering a result built around landlord expectations. Toronto Shine Cleaning serves rentals across Mississauga and the GTA. Finish Outside, Then Walk Through Mistake 6: Forgetting the Exterior Balconies, patios, and yards collect a surprising layer of dirt, debris, and weather wear, and they are the first thing your landlord sees on the walk-through. Sweep decks and balconies, wash down built-up dust, clean glass railings, and wipe any outdoor furniture you are leaving behind. Then check the entrance: sweep the front steps, wipe down the door, make sure outdoor light fixtures are clean and working, and tend any garden covered by your agreement instead of leaving it overgrown. In Mississauga, where outdoor living spaces are prized, an unkempt exterior can undo a sparkling interior. Mistake 7: Overlooking the Final Walk-Through Skipping the joint inspection leaves room for disputes you will lose in writing. Arrange a final walk-through with your landlord to inspect each room, show the effort you put in, and discuss damage versus normal wear face to face, which beats decoding an unexpected deduction weeks later. Bring your checklist and photos of the property from move-in day so discrepancies get clarified, not argued. Schedule the inspection a few days before you leave: that buffer lets you fix anything flagged and closes the tenancy on good terms. Move-Out Cleaning FAQs How early should I start move-out cleaning? Weeks ahead if possible: declutter and pack first, then clean in room-sized chunks with 15 to 30 minutes a day. Save the final pass for when the home is empty, so every cabinet and appliance interior is reachable. Do I have to hire professionals to

Mississauga’s Move-Out Cleaning: Common Mistakes to Avoid Read More »

Essential cleaning tools and products

5 Essential Cleaning Products for a Sparkling Spring Clean

5 Essential Cleaning Products for a Sparkling Spring Clean Spring cleaning season is here, and having the right products makes all the difference. Whether you are doing a light refresh or a full deep clean, these five essential cleaning products will help you achieve a sparkling home from kitchen to bathroom. Stock your cleaning kit with these must-haves and you will be ready for any mess your home throws at you. These products are versatile, effective, and trusted by professional cleaners across Toronto and the GTA. Here is what a well-stocked kit looks like: An all-purpose cleaner for counters and sinks Microfiber cloths for dusting and drying A scrub brush for grout and stubborn stains Disinfectant spray for high-touch surfaces Glass cleaner for windows and mirrors All-Purpose Cleaner An all-purpose cleaner is the workhorse of any cleaning kit. It handles countertops, stovetops, bathroom sinks, and more. Look for a formula that balances strength with surface safety. A good all-purpose cleaner cuts through grease and grime without dulling delicate materials. Many options now include pleasant scents that leave your home feeling fresh long after you finish cleaning. It works on sealed wood, laminate, tile, and stainless steel. Keep one under the sink and one in the bathroom for quick touch-ups throughout the day. Using the same product everywhere simplifies your routine and ensures consistent results across every room. All-purpose cleaners save you from buying separate products for kitchen counters, bathroom sinks, and stovetops, making them a cost-effective choice for any household. Microfiber Cloths Microfiber cloths outperform traditional rags and paper towels by a wide margin. The ultra-fine fibers reach into tiny crevices to trap dust rather than moving it around. These cloths can absorb several times their weight in liquid, making them ideal for spills, drying dishes, and mopping. They are washable and reusable, which saves money and reduces household waste. Use different colors for different rooms to avoid cross-contamination: blue for glass, green for kitchen, yellow for bathrooms. A set of twelve cloths can last a full year when washed properly. Avoid using fabric softener when washing microfiber, as it coats the fibers and reduces their cleaning ability. For more information on safe household cleaning practices, see Health Canada’s guide to household products. Scrub Brush A sturdy scrub brush is essential for tackling stubborn stains on bathtubs, sinks, and tile grout. Choose a brush with comfortable grip handles to reduce strain on your wrists during extended cleaning sessions. Curved brushes work well for bathtub corners, while brushes with pointed tips reach narrow spaces such as faucet bases and shower track crevices. Using the right brush for each surface saves time and delivers better results. A medium-stiffness brush works for most jobs, while a soft brush is better for delicate surfaces and a stiff brush handles baked-on grime on stovetops and oven racks. Replace brushes when bristles become bent or frayed. Investing in a set of brushes means you always have the right tool for every cleaning challenge. Disinfectant Spray Disinfectant spray targets germs and bacteria on high-touch surfaces like doorknobs, light switches, and countertops. To use it effectively, clean the surface first with soap and water, then spray until visibly wet. Allow the recommended dwell time so the disinfectant can kill pathogens before wiping. Follow CDC guidelines for cleaning and disinfecting to keep your home healthy. Kitchens and bathrooms benefit most from regular disinfection. Keep disinfectant spray near entryways for quick sanitizing of keys, phones, and bags. Check the label to confirm it kills the specific germs you are targeting, such as influenza, rhinovirus, or E. coli. During cold and flu season, increase disinfection frequency to protect your household. Glass Cleaner A streak-free glass cleaner brings windows, mirrors, and glass doors to a brilliant shine. The best formulas dissolve fingerprints, smudges, and grime without leaving residue that attracts more dirt. Pair your glass cleaner with a lint-free microfiber cloth for the best results. For homes with children or pets, consider eco-friendly formulations that avoid harsh chemicals. Clean mirrors in a zigzag pattern to spot streaks easily. For windows, clean on a cloudy day so the solution does not dry too fast and leave streaks. A good glass cleaner also works on glass tabletops, picture frames, and shower doors. Using a dedicated glass cleaner rather than all-purpose spray ensures a streak-free finish every time. Product Best For Key Feature All-Purpose Cleaner Counters, stovetops, sinks Balanced strength and safety Microfiber Cloths Dusting, spills, drying Reusable, high absorbency Scrub Brush Tough stains, grout, tile Ergonomic, durable bristles Disinfectant Spray High-touch surfaces Kills germs and bacteria Glass Cleaner Windows, mirrors, glass Streak-free shine Frequently Asked Questions Can I use all-purpose cleaner on every surface? Most all-purpose cleaners work on sealed surfaces but avoid unsealed wood, natural stone, and electronic screens. How often should I replace microfiber cloths? Replace microfiber cloths after 50-100 washes or when they lose their texture and absorbency. Do disinfectants work immediately? Disinfectants need dwell time usually 3-10 minutes to kill germs effectively. Always check the label. What is the best way to store cleaning products? Store products in a cool, dry place out of reach of children and pets. Never mix bleach with other cleaners. Stocking these five essentials sets you up for a successful spring clean. When the job feels too big, Toronto Shine Cleaning’s regular cleaning or deep cleaning services can take it off your hands. We serve Toronto, Mississauga, and the entire GTA. View our pricing and call (647) 424-0355 to schedule your spring clean today.

5 Essential Cleaning Products for a Sparkling Spring Clean Read More »

Maid cleaning and organizing bed, professional cleaners

Top 10 Skills for Professional Cleaners: Boosting Efficiency and Client Satisfaction

Hey there! If you’re diving into the world of professional cleaning or just curious about what makes a pro cleaner stand out, you’re in the right place. Cleaning is so much more than just a swipe here and a dust there. It’s an art and a science, blended with a dash of elbow grease. So, let’s get into the top 10 skills that can turn any cleaner into a super cleaner, ensuring efficiency and leaving clients with beaming smiles. 1. Professional Cleaners: Attention to Detail When we talk about attention to detail in the cleaning world, we’re really talking about creating that ‘wow’ moment for clients. It’s that feeling when they walk into a room and can almost sense the cleanliness. This skill isn’t just about doing the basics; it’s about elevating cleaning to an art form. Imagine this: you’re cleaning a living room. Attention to detail means you’re not just vacuuming around the furniture; you’re moving things around to get every bit of dust underneath. It’s checking the tops of picture frames, the edges of the baseboards, and even the ceiling fan blades – places that are often overlooked. But it’s not just about what you clean; it’s also about how you clean it. It involves being methodical in your approach, ensuring that you have a system in place so that you never miss a spot. Maybe you start in one corner of the room and work your way around, or maybe you have a checklist of items to go through for each room. Whatever your method, the goal is the same: leaving no stone unturned in your quest for cleanliness. Attention to detail also extends to the little touches that make a big difference. It’s arranging the cushions just right, folding the end of the toilet paper into a neat triangle, or lining up items on the bathroom counter symmetrically. These might seem like small things, but they add up to create an overall impression of meticulous care and professionalism. And let’s not forget about the sensory experience. Ensuring that the room not only looks clean but also smells fresh and feels airy can transform a space completely. This could mean opening windows to let in fresh air during cleaning, using subtly scented cleaning products, or incorporating natural elements like flowers or plants to enhance the ambiance. 2. Time Management Let’s break it down. Effective time management in cleaning starts with planning. Before even touching a mop or a duster, a professional cleaner assesses the space. What areas need the most attention? Is there a particular order that would make the job go smoother? Planning your route through a space can save heaps of time. For instance, starting from the top (like dusting) and working your way down to the floors means you’re not redoing work. Then there’s the aspect of multitasking, but not the kind that leaves you frazzled. It’s about smart multitasking. Let’s say you’ve got a cleaning solution doing its magic in the bathroom. While it sits, you’re not just waiting around; you’re vacuuming the living room or dusting the shelves. It’s like a well-oiled machine where every moment is utilized efficiently. Another key factor is setting realistic time goals. This comes with experience. Knowing how long it takes to clean certain areas or perform specific tasks can help you gauge your time better. It’s about setting a steady pace that ensures thorough cleaning without rushing through it. But what about those unexpected hiccups? A professional cleaner with good time management skills knows how to adapt quickly. Maybe a room is dirtier than expected, or there are more knick-knacks to dust around than usual. Adapting on the fly and rejigging your plan without getting flustered is part of the skill. And, of course, there’s the importance of not compromising quality. Rushing through a job is a no-go. The goal is to find that sweet spot – being efficient without sacrificing the standard of cleaning. This means being thorough in your work, but also knowing the tricks and techniques that can save time without cutting corners. 3. Knowledge of Cleaning Products and Tools In the world of professional cleaning, knowledge of the right products and tools is akin to an artist knowing their brushes and paints – it’s essential for creating a masterpiece. Each cleaning task has its unique requirements, and using the right tool or product can significantly enhance the quality and efficiency of the work. Consider the vast array of cleaning products available. There are all-purpose cleaners, glass cleaners, disinfectants, and many more, each designed for specific surfaces and types of dirt. A professional cleaner knows that using a glass cleaner on a wooden table could potentially damage the surface. Similarly, an all-purpose cleaner might not be effective for tough bathroom mold. Understanding the chemistry of these products, such as which ones are abrasive, acidic, or alkaline, and where they are best applied, is crucial. It’s not just about making things look clean; it’s also about preserving surfaces and materials in the long run. Then there are the tools of the trade. From microfiber cloths and squeegees to mops and high-powered vacuums, each tool has its purpose. For example, microfiber cloths are great for dusting and polishing because they trap dirt and reduce the spread of allergens. Squeegees are ideal for leaving streak-free finishes on windows and glass. Knowing when and how to use these tools can make a significant difference in the outcome of your cleaning efforts. Safety is another critical aspect. Professional cleaners must know how to handle and store cleaning products safely. This includes understanding which products should not be mixed, how to ventilate areas when using strong chemicals, and the importance of wearing protective gear like gloves or masks when necessary. Staying updated with the latest products and tools in the market is also part of this skill. The cleaning industry is constantly evolving, with new, more efficient, and eco-friendly products being introduced. Keeping abreast of these developments and

Top 10 Skills for Professional Cleaners: Boosting Efficiency and Client Satisfaction Read More »

Boost your efficiency with productivity techniques and tools.

5 Essential Tips: How to Skyrocket Your Cleaning Productivity

Clean Smarter, Not Harder Cleaning that eats your entire weekend usually means the process, not the dirt, is the problem. With a little structure, the same house can stay fresh in a fraction of the time. The five essential tips below cover planning, tools, decluttering, prioritizing busy rooms, and racing the clock, so you can trade marathon scrub sessions for short, satisfying bursts that keep your home consistently tidy. Tip 1: Plan Your Cleaning Around Your Life A cleaning schedule works when it fits the life you already live. If mornings energize you, a quick sweep with your coffee sets a productive tone for the day. If evenings are calmer, fifteen minutes of decluttering after dinner can be your wind down routine. Busy households often do best with short bursts spread across the week instead of one exhausting weekend blitz, while people who find cleaning therapeutic may prefer a few dedicated weekend hours. Whatever shape it takes, consistency is what turns chores into an automatic routine. Break tasks into small slices Trying to clean an entire house in one go is like eating a whole pizza in a single bite. Slice it up instead: Mondays for mopping, Tuesdays for the bathroom, and so on. Smaller assignments feel less daunting, give every room equal attention over time, and are far easier to hand to family members or roommates. Nobody dodges a request to spend ten minutes on one sink the way they dodge a request to clean a whole bathroom. Tip 2: Use the Right Tools for the Job Cleaning with weak tools is like painting with a toothbrush. Invest in equipment that is effective and durable rather than the priciest item on the shelf. A reliable vacuum with strong suction makes a real difference in homes with pets or large carpeted areas, and a HEPA filter helps control allergens. Microfiber cloths trap dust and grime almost like magnets, cut the elbow grease you need, and wash for reuse, which is a win for your budget and the planet. Then keep everything within reach so momentum never dies: One dedicated storage spot, such as a laundry room cupboard or pantry shelf, so nothing is ever scattered across the house. A portable caddy loaded with cleaners, sponges, gloves, and brushes, so multi level homes do not require stair runs for supplies. Fresh cloths and a bucket staged before you start, because hunting for tools mid task is what turns thirty minutes into two hours. Health Canada’s resource on household products is a useful reference for choosing and storing cleaning chemicals safely. Tip 3: Declutter Before You Clean You cannot wipe what you cannot reach. Trying to clean a counter buried under appliances, mail, and gadgets is like mowing a lawn full of garden gnomes, so clear the stage first. Put away the toaster you rarely use, store the spare spices, and find homes for the paper piles before a cloth ever touches the surface. Then make decluttering a habit instead of a yearly panic. Ten minutes a day, or thirty minutes a week, through one drawer or one shelf is enough. Ask two questions about each object: do I need this, and have I used it in the past year? Fewer objects on surfaces means less to clean around, a space that stays tidier on its own, and a clearer mental inventory that stops duplicate purchases. Tip 4: Focus on High Traffic Areas Treat your home like a city: the busiest streets need the most maintenance. The kitchen is your downtown, hosting every meal and gathering, so it demands the most frequent attention. The bathroom sees daily use and needs regular work to stay hygienic, and the living room collects dust, crumbs, and wear from everyone who relaxes there. Prioritizing these hubs does not mean ignoring the rest of the house; it means spending finite energy where it shows most. Pair that priority with spot cleaning, the proactive move of handling messes the moment they appear. Spilled cereal gets swept now, mirror fingerprints get wiped now, and small messes never graduate into weekend sized projects. Since the CDC notes the health benefits of everyday physical activity, these quick active laps around the house pay you back twice. Tip 5: Time Yourself and Make It Fun A timer converts cleaning into a friendly competition with yourself. Set twenty minutes, challenge your household to finish as much as possible before the buzzer, and watch sidetracking vanish. Tasks that normally sprawl across an hour routinely collapse into a fraction of that when the clock is ticking, because decisions get faster and focus gets sharper. Then attach the fun. A favorite playlist turns mopping into a dance break, and podcasts or audiobooks keep your mind busy while your hands scrub. Pairing the chore with something you already enjoy builds a positive association, which is the quiet secret behind every routine that actually sticks. A Sample Weekly Productivity Plan Day Focus Time Box Monday Floors: sweep and mop 20 minute timer sprint Tuesday Bathroom fixtures and mirror 15 minutes after dinner Wednesday Kitchen counters and appliance fronts 20 minute timer sprint Thursday Declutter one drawer or shelf 10 minutes Friday Dust high traffic surfaces 15 minutes Saturday Deeper vacuum pass and spot checks 30 to 60 minutes Sunday Rest, or reset the coming week Optional Frequently Asked Questions How long should a daily cleaning session last? Fifteen to twenty minutes is plenty for maintenance when it happens daily. The point of short sessions is preventing buildup, which is what makes weekend cleaning marathons necessary in the first place. What if I miss a scheduled day? Simply fold the missed task into the next open slot and keep moving. A flexible schedule absorbs a missed day without collapsing, which is exactly why task slicing beats all or nothing weekend plans. Do timer sprints really work? They work because deadlines force prioritization. You stop reorganizing one shelf and start covering the room. Most people are surprised how much

5 Essential Tips: How to Skyrocket Your Cleaning Productivity Read More »

Clean oven, cleaning products, gloves and sponges.

How to Clean Your Oven Quickly and Efficiently: A Step-by-Step Guide

How to Clean Your Oven Quickly and Efficiently: A Step-by-Step Guide An oven hides its mess in plain sight. Every roast, pizza, and pie leaves a thin layer of baked-on grease, and layer by layer it turns into the smoke smell that greets you at preheat. The method below is the low-effort classic: a baking soda paste that works overnight while you sleep, then a fast wipe down the next day. No harsh fumes, no heroic scrubbing, and no commercial cleaner required unless you want one for the racks. Gather Your Supplies First Everything you need fits in one drawer: Half a cup or more of baking soda White vinegar in a spray bottle A damp dishcloth and a few rags A plastic or silicone spatula Rubber gloves, because oven grime is grim Why baking soda instead of a commercial oven cleaner? Those products often contain harsh, caustic chemicals with strong odors that linger in the kitchen. Baking soda is non-toxic, inexpensive, and already in your pantry, which makes it the friendlier choice for households with pets, kids, or sensitive noses. Step 1: Empty the Oven Completely Pull out the racks, pizza stones, baking sheets, and any thermometer so you can reach every surface. Give each item the care it needs: racks do best soaking in soapy water while you work, pizza stones are porous and should just be brushed out and baked dry at high heat, and gadgets stay gentle. Before anything else, sweep out loose crumbs with a dry cloth or handheld vacuum. With the cavity bare, also take a second to inspect for issues such as a worn heating element, which you would rather discover now than mid roast. Step 2: Mix the Paste Start with about half a cup of baking soda and add water gradually until you have a spreadable consistency, something like frosting. Too runny and it slides off the walls; too thick and it will not spread or penetrate. The paste is the perfect medium because it clings to vertical surfaces and stays where you put it, holding the mild abrasive and the alkaline chemistry right against the baked-on grime for hours. Step 3: Coat the Cavity and Wait Gloves on. Spread the paste over every interior surface you can reach, but keep it off the heating elements; baking soda can corrode them, and they rarely need cleaning anyway. Do not be surprised when the paste turns brown as you work. That discoloration is the reaction doing its job, lifting grease and carbonized spills out of the surface. Close the door and leave the paste for at least 12 hours, or overnight. This is the efficient part of the method: the chemistry works for you while you do nothing at all. Step 4: Handle the Racks While the paste sits, deal with the racks. After a couple of hours in hot, soapy water, the grease softens enough that a stiff brush takes it off without much fight; scrub both sides, rinse, and dry. If a rack is truly encrusted, a commercial oven cleaner is an acceptable last resort. Use it in a well-ventilated space with gloves on and follow the label exactly, since those formulas are strong. The same rule applies to any chemical you use for housework: Health Canada’s household chemical safety page is a good pre-job read. Step 5: Wipe It All Down The next day, use a damp cloth to wipe out the dried paste; the moisture rehydrates it, and it comes away carrying the loosened grime with it. For stubborn patches, scrape gently with the plastic or silicone spatula, never metal, which can scratch enamel or protective coatings. Finish by spritzing a little vinegar over any white residue: it fizzes on contact with the baking soda and wipes clean. Give everything a final rinse with a fresh damp cloth and let the cavity dry with the door open. Task Time Effort Empty and sweep the cavity 10 minutes Light Mix and spread the paste 15 minutes Light Wait for the chemistry 12 hours, hands off None Soak and scrub the racks 45 minutes, mostly soaking Moderate Wipe out and vinegar rinse 20 minutes Moderate Oven Cleaning FAQs How often should an oven get this treatment? A deep clean every few months keeps smoke and off smells away in a normal household. If you roast often or notice smoke at preheat, treat it as the sign to mix a fresh batch of paste. Wiping spills once the oven cools stretches the interval nicely. Can I use the self-cleaning function instead? You can, but know what you are signing up for: very high heat, strong odors, and a locked oven for hours. The baking soda method achieves a comparable result with none of that, which is why it remains the go-to for a quick, low-fuss clean. Why keep paste off the heating elements? Baking soda’s alkalinity can corrode exposed elements and shorten their life, and paste caked on them can burn and smell the next time you cook. They also rarely collect grime, so there is no benefit to justify the risk. Wipe around them carefully instead. Is commercial oven cleaner ever the right call? Yes, mainly for racks and heavy carbon that soaking and scrubbing cannot touch. Treat it as a targeted tool: gloves on, windows open, label followed to the letter. The same clean-first mindset health authorities apply to surfaces, as in the CDC’s cleaning guidance, applies here: remove the bulk physically before any chemical does the fine work. Prefer Someone Else Does It? An overnight paste is easy, but a full kitchen reset is a bigger job. Toronto Shine Cleaning’s deep cleaning service takes on kitchens top to bottom, and recurring maid service keeps them that way. A deep studio or one bedroom clean starts at $270.38 before HST, with every option listed on the pricing page. Call (647) 424-0355 and let the oven be our problem.

How to Clean Your Oven Quickly and Efficiently: A Step-by-Step Guide Read More »

Maid organizing a bed with white gloves

Elevate Your Space with Our Maid Cleaning Services in Toronto

Maid Cleaning Services in Toronto That Give Your Home Back to You Between work, family, and everything else on the calendar, most Toronto households run out of hours long before they run out of chores. That is exactly where professional help earns its keep. Toronto Shine Cleaning provides regular, deep, and move-in or move-out cleaning across Toronto and the GTA, and our crews shape every visit around how your home actually lives. A good maid service does more than tidy up. It turns “I should really clean that” into “someone already did,” and that change of feeling starts the moment you walk through the door. Why Hire a Maid Cleaning Service? Reclaim the hours you were spending on scrubbing Every hour we spend dusting, sweeping, and organizing is an hour you get back for the people and hobbies that matter. Quality time with loved ones, a project you have been putting off, or simply curling up with a good book all benefit when chores stop eating your evenings. The relief of knowing the scrubbing, sweeping, and tidying are handled is one of the fastest ways to lighten a busy week. Come home to a space that lifts your mood There is a real difference between a house that is merely livable and one where every corner sparkles, the air smells fresh, and each item sits in its rightful place. A cluttered space tends to create a cluttered mind, while a neat, orderly home fosters calm and creativity. There is a health side too: the CDC recommends cleaning high-touch surfaces regularly as the first step in keeping germs from spreading, and a scheduled maid service is the easiest way to stay consistent with it. Keep cleanliness from sliding back One heroic Saturday of scrubbing never lasts. Life refills the laundry basket and redisCOVERS the kitchen grease. Regular visits stop mess from compounding, so your home holds its standard without you having to plan anything. What Our Maid Cleaning Services Include Our philosophy starts with the idea that every home tells its own story. Whether it is keeping the gleam on a cherished family heirloom or organizing a home office to support real productivity, the plan gets tailored to your specifics. A typical visit covers: Dusting of furniture, shelves, blinds, and decor Vacuuming and mopping of floors, including high-traffic areas Kitchen counters, cabinet fronts, and appliance exteriors Bathroom scrubbing, disinfecting, and mirror polishing Tidy-up, trash removal, and fresh linens straightened Every element is adjustable. Tell us what matters in your home and it becomes part of the checklist on every visit. Eco-friendly products, used with care We select eco-friendly products that are tough on grime yet gentle on surfaces, chosen to minimize environmental impact without compromising effectiveness. Your home stays clean and it stays a safe haven for the people in it. Safety still matters with any cleaner, which is why we follow Health Canada’s guidance on using and storing household chemicals safely, keeping products labeled, ventilated, and out of reach. How It Works: Three Simple Steps Step 1: Reach out. Call (647) 424-0355 or fill in our online form at your leisure. This first conversation tells us about your home, your priorities, your lifestyle, and your budget, so the quote matches reality instead of guesswork. Step 2: Get a custom plan. Our expertise and your preferences merge into a cleaning strategy: a regular schedule that maintains your home’s sparkle, a bi-weekly refresh, a one-time deep clean, plus the specific rooms and special instructions you want handled. Step 3: Sit back and let us work. Our professional team arrives equipped with tools and eco-friendly products, and you get a well-deserved break from the hustle of daily chores. You can see the full scope of options on our regular maid cleaning service page. Regular Maid Cleaning Rates in Toronto We believe in transparency from the first quote. You get a detailed breakdown of services and pricing, with no hidden fees or surprise charges: what we quote is what you pay. Current published base rates for regular cleaning, before HST, look like this: Home size Regular cleaning from Typical fit Studio or 1 bedroom $212.63 Condos and busy professionals 2 bedroom $273 Small families and shared rentals 3 bedroom $327 Growing families with two baths Deep cleans start from $270.38 for a studio or one-bedroom home, and you can compare every package on our house cleaning pricing page or ask us to build around a seasonal deep clean. Why Toronto Homeowners Choose Us We are part of the local fabric, your neighbors on the same streets and in the same parks, and that connection drives the standard of work we deliver. Our teams are seasoned professionals who treat routine cleaning as a craft, and our plans flex with real life: adjust visit frequency, scale up before a special occasion, or scale back when things quiet down. Every cleaner we send is bonded and insured, backed by a $1,000,000 insurance policy and a $10,000 accidental breakage and surety bond, so trust is built into the arrangement from day one. Maid Cleaning Services FAQ How often should I book maid cleaning in Toronto? Most condos and smaller homes are happy with bi-weekly visits, while busy family homes often choose weekly service. You can also keep a lighter schedule and add a deep clean a few times a year. We help you pick the rhythm during your first quote and the plan can change whenever your life does. Do I need to provide cleaning supplies or equipment? No. Our crews arrive with their own tools and eco-friendly products. If you prefer a specific product on a delicate surface, leave it out and mention it in the plan and we will happily use it. Can I adjust the schedule after we start? Absolutely. Unexpected guests, sudden schedule changes, and holidays all happen, so frequency shifts are part of normal service. A quick call gives us the heads-up and the plan adapts around your life, not the other

Elevate Your Space with Our Maid Cleaning Services in Toronto Read More »

Disorganized book in a bookshelf

How to Declutter Your Home in 5 Simple Steps This Weekend

Hey there! Ready to reclaim your space and feel the joy of a clutter-free home? Let’s dive into how you can declutter your home in just 5 simple steps this weekend. It’s all about making your space more inviting and less of a “Where did I put that again?” kind of place. Step 1: Set How to Declutter Your Home When you’re thinking about decluttering, it’s like setting the stage for a home makeover show starring you. First, picture what you want each space to look like. Is it turning your living room into a cozy, magazine-worthy space? Or maybe you’re dreaming of a kitchen where you can actually see the countertop (imagine that!). But here’s the kicker: be specific with your goals. Instead of just saying, “I want a cleaner bedroom,” how about, “I want a bedroom with enough space to do my morning yoga.” This way, you’re not just decluttering; you’re creating a vision of your ideal home lifestyle. Visualize the End Result: Close your eyes and imagine walking into your newly decluttered space. What does it look like? How does it make you feel? Visualization is a powerful motivator. It’s like giving yourself a sneak peek of the rewards waiting for you at the end of this decluttering journey. Set Realistic and Achievable Goals: Rome wasn’t decluttered in a day! Set goals that you can realistically achieve over the weekend. If your home office is overflowing with papers and random gadgets, maybe aim to create a clear workspace and an organized shelf. You don’t have to go full Marie Kondo in one go – small victories matter! Consider Your Lifestyle: Your decluttering goals should align with your lifestyle. If you’re a busy bee, creating a low-maintenance and minimalist space might be the way to go. Love cooking? An organized pantry and accessible kitchen tools should be your target. Tailor your decluttering to suit how you live. Write It Down: Grab a notepad or your phone and jot down these goals. Seeing them in black and white makes them more real and gives you a clear roadmap. Plus, ticking off completed tasks? Super satisfying!     Step 2: Break It Down The thought of decluttering your entire house might sound as fun as a trip to the dentist, but here’s a game-changer – break it down, room by room. Think of it like episodes of your favorite TV show; each room is a new episode in your decluttering saga. Creating a Decluttering Schedule: Grab your calendar or planner and let’s get scheduling. Allocate specific times for each room. Maybe Saturday morning is perfect for sprucing up the living room, while Sunday afternoon is ideal for giving your bedroom some love. By scheduling, you’re not just wishing for a cleaner home; you’re planning for it. Start with the Easiest Room: Kick off with a room that feels less daunting. Maybe it’s the bathroom, where you can toss empty bottles and old toiletries, or perhaps it’s the dining area, where reorganizing a few things can make a big difference. Starting easy gives you a quick win and sets a positive tone for the rest of the project. Use Timers for Focused Bursts: Set a timer for each decluttering session. Maybe give yourself 30 minutes per room. This creates a sense of urgency and helps you stay focused. Plus, it’s kinda fun to race against the clock! Involve the Family or Roommates: Make it a group activity! Assign tasks to family members or roommates. Kids can sort through their toys, while your partner tackles a different area. It’s like having your own decluttering crew, and it makes the task more enjoyable. Decluttering Categories: In each room, focus on specific categories. In the living room, deal with magazines, books, and DVDs. In the bedroom, focus on clothes and accessories. This categorical approach prevents you from feeling overwhelmed and keeps you on track. Step 3: Mastering Your System The ‘Keep’ Pile Items in the ‘Keep’ pile are the easy ones. These are your go-to items, things you use regularly, or those with sentimental value that genuinely make you happy. A good rule of thumb is the 90/90 rule: if you haven’t used it in the last 90 days and don’t plan to in the next 90, maybe it’s not a keeper. Remember, ‘keep’ doesn’t mean hoard – be selective! The ‘Donate’ Pile The ‘Donate’ pile is for items that are still in good condition but no longer serve a purpose in your life. Clothes that don’t fit, books you’ve read and won’t revisit, or that kitchen gadget you never used – these items can find a new home and be useful to someone else. Consider local charities, shelters, or community centers. Donating not only declutters your home but also helps others and is good for the environment. Win-win! The ‘Trash’ Pile This one’s for items that are beyond repair or use – broken appliances, worn-out clothes, outdated electronics, etc. It’s important to dispose of these responsibly. Recycle what you can and be mindful of the environment. This pile might also include items that hold no value, even for donation, like old papers or broken items. The ‘Maybe’ Box Sometimes, there are items you’re just not sure about. For these, create a ‘Maybe’ box. Store these items out of sight and set a reminder for, say, six months. If you haven’t needed or thought about them by then, it’s safe to say you can let them go. Be Honest and Realistic This step requires honesty. Ask yourself hard questions about why you’re holding onto things. Is it for sentimental reasons, guilt, or the ‘just in case’ mindset? Remember, your goal is a clutter-free space that brings peace and joy, not stress. One Room at a Time Apply this system room by room. Don’t move to the next room until you’ve sorted through everything in the current one. This keeps the process organized and prevents you from feeling overwhelmed. Involve Others If you live

How to Declutter Your Home in 5 Simple Steps This Weekend Read More »