Hey there, Toronto! Are you struggling with grubby grout that’s putting a damper on your tile’s vibe? Fear not! I’ve got some super simple, effective tips to cleaning grout from grimy to gleaming. Let’s dive in!
1. Start with the Basics: Baking Soda and Water
Here’s the scoop: baking soda is slightly abrasive, which makes it perfect for scrubbing away surface stains and dirt without scratching your tiles. Plus, it’s a natural deodorizer, so it’s great for getting rid of any musty or damp smells that might be lurking in your bathroom or kitchen tiles.
To get started, you’ll want to create a paste. Just mix a few tablespoons of baking soda with a bit of water. The consistency should be like a thick paste – not too runny, but not too dry. Once you’ve got your paste, apply it directly onto the grout lines. You can use your fingers (wear gloves if you have sensitive skin), or for a less messy approach, a small spatula or an old toothbrush works great.
Now, patience is key. Let the baking soda paste sit on the grout for at least 10 minutes. This waiting time is crucial as it allows the baking soda to penetrate the grime and start breaking it down. If you’re dealing with particularly stubborn stains, you can even let it sit for up to an hour. During this time, the baking soda works its magic, drawing out dirt and grime from the porous grout.
After you’ve let it sit, it’s time to get scrubbing. Using a brush (a toothbrush works perfectly for getting into those grout lines), scrub the grout in a circular motion. You’ll start to see the dirt lifting away. If you find the paste has dried out a bit, you can add a spritz of water to keep things moist as you scrub.
Once you’ve given all your grout a good scrub, rinse the area with water. You’ll be amazed at how much brighter and cleaner your grout looks with just this simple, eco-friendly solution. And the best part? You’ve avoided using harsh chemicals, making this method safe for homes with kids, pets, or anyone with sensitivities to strong cleaning products.
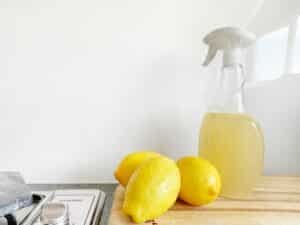
2. Vinegar: Your Grout’s New Best Friend
Vinegar’s secret weapon is its natural acidity. This acidity is fantastic for breaking down the more stubborn, set-in dirt and grime that can make your grout look aged and dirty. It’s particularly effective against soap scum and hard water stains, which are common culprits in bathrooms and kitchens.
To harness the power of vinegar for grout cleaning, you’ll want to start by mixing a solution of equal parts white vinegar and warm water. The warm water helps to dissolve the vinegar evenly, creating a potent cleaning mixture. Pour this solution into a spray bottle for easy application. This not only makes it more convenient to apply but also helps you cover more area with less effort.
Once your solution is ready, spray it generously over the grout lines. Don’t be shy; the area should be well-coated with the vinegar solution for the best results. The key here is to let the solution sit on the grout for a few minutes. This dwell time is crucial as it gives the vinegar a chance to work its magic on the stains. For really stubborn stains, you might want to wait up to 10 minutes.
After the solution has had time to sit, it’s scrubbing time. Use a scrub brush – an old toothbrush works perfectly – and start working on the grout lines in a back-and-forth motion. You’ll notice that the grime and dirt start to break down and lift away from the grout. For tougher stains, you may need to put in a bit more elbow grease, but the vinegar solution will have already done much of the heavy lifting.
Once you’re done scrubbing, rinse the area with clean water. You should see a noticeable difference in the appearance of your grout. It will look cleaner, brighter, and much more like it did when it was new.
3. Hydrogen Peroxide: The Stain Buster
Hydrogen peroxide is known for its antiseptic properties, but its chemical makeup also makes it fantastic for bleaching and disinfecting, hence its prowess in tackling tough stains. It’s especially effective against mold and mildew, which can be a real nuisance in damp areas like bathrooms.
To use hydrogen peroxide for grout cleaning, you have a couple of options. For direct application, simply pour or spray hydrogen peroxide directly onto the grout lines. This method is straightforward and works well for surface stains and general discoloration. The peroxide starts to work on contact, breaking down the stains through oxidation. This reaction lifts the stains from the grout, making them easier to scrub away.
For an added boost, especially for those really challenging stains, you can create a paste by mixing hydrogen peroxide with baking soda. This combination creates a fizzy reaction that not only helps to lift stains but also adds a gentle abrasive quality from the baking soda, making it easier to scrub away grime. To make this paste, mix hydrogen peroxide with baking soda until you achieve a thick, spreadable consistency. Apply this paste directly to the stained grout and let it sit for several minutes. For particularly stubborn stains, you might leave it on for up to 30 minutes.
After the hydrogen peroxide has had time to work its magic, take a brush (an old toothbrush is ideal) and scrub the grout lines. You should notice that the stains begin to diminish, and the grout starts to return to its original color. If the stain is deeply set, a second application might be necessary, but in many cases, one round of treatment does the trick.
Once you’ve finished scrubbing, rinse the area thoroughly with water. This step is crucial to ensure that no residue from the hydrogen peroxide or baking soda is left behind, which could attract more dirt over time.
4. Steam Cleaning Grout
One of the biggest advantages of steam cleaning is its ability to penetrate deeply into the porous surface of grout. Grout, by nature, is quite absorbent, which means it can easily trap dirt, grime, and bacteria. Over time, this can lead to discoloration and a generally unclean appearance. Steam cleaning uses high-temperature steam to reach deep into these pores, effectively loosening and lifting dirt and grime from within.
The high temperature of the steam also offers the added benefit of sanitization. It kills most bacteria, mold, and mildew, making it an excellent choice for bathrooms and kitchens where these types of contaminants are common. For households concerned about indoor air quality or for those with allergies, steam cleaning is a great way to maintain a healthy living environment.
Another significant aspect of steam cleaning is its eco-friendliness. Since it only uses water, there are no harsh chemicals involved, making it safe for your family, pets, and the environment. This method reduces the need for chemical cleaners, which can sometimes leave behind residues that attract more dirt over time.
When it comes to the actual process of steam cleaning, it’s relatively straightforward. Many steam cleaners come with attachments specifically designed for grout and tile, making it easier to target these areas. The steam is directed through a nozzle, which you move along the grout lines. As the steam comes into contact with the grout, it loosens the dirt, which can then be wiped away easily.
5. Seal the Deal
Think of grout sealer as a protective layer, a barrier that shields your grout from the myriad of elements it’s exposed to daily. From accidental spills to steam and regular foot traffic, unsealed grout can easily absorb stains and dirt, making it look dingy much faster. A good sealer repels these elements, preventing them from penetrating the porous surface of the grout.
Applying a grout sealer is a straightforward process but requires a bit of precision. Firstly, ensure your grout is completely clean and dry – any moisture or dirt trapped underneath the sealer can lead to problems down the line. Choose a high-quality grout sealer for the best protection. There are various types available, including water-based and solvent-based sealers, so select one that best suits your tile type and the area’s usage (e.g., high moisture areas like bathrooms may require a different sealer than kitchen backsplashes).
To apply the sealer, you can use a small brush, a roller, or a sealer applicator bottle, depending on the product’s instructions. Carefully apply the sealer along the grout lines, taking care not to get too much on the tiles themselves. It’s a meticulous process but well worth the effort. Once applied, the sealer usually needs to dry for a certain period – this can vary, so check the manufacturer’s instructions. Some sealers may also require a second coat for optimal protection.

Conclusion
Grout cleaning might seem like a daunting task, but with these five easy methods, you can transform your tiled areas from grimy to gleaming. It’s amazing how a little bit of elbow grease, coupled with some household items, can rejuvenate your tiles and grout, making them look brand new. However, it’s important to remember that regular maintenance is the real secret to keeping those tiles looking terrific. A consistent cleaning schedule prevents grout stains from becoming too stubborn and keeps your tiled surfaces in top-notch condition.
But let’s face it, life gets busy, and sometimes these cleaning tasks can fall by the wayside. Maybe you’re juggling work, family, and other responsibilities, and finding the time for thorough grout cleaning is just not feasible. Or perhaps you’ve tackled your grout with all these methods, but there are still some stubborn stains that refuse to budge. That’s where professional help comes in handy. Toronto Shine Cleaning specializes in turning even the most challenging cleaning tasks into sparkling successes. Our expert team has the skills, experience, and the right tools to make your grout and tiles look as good as new.
Choosing Toronto Shine Cleaning means opting for a hassle-free, efficient cleaning experience. We understand the nuances of different types of tiles and grout, and we use the most effective, yet safe cleaning methods to protect your surfaces while delivering outstanding results. Our attention to detail ensures that no spot is missed, and we pride ourselves on leaving your home not just clean, but hygienically clean. Whether it’s a one-time deep clean or regular maintenance, our team is equipped to handle all your grout and tile cleaning needs, freeing up your time to focus on what matters most to you.