Cleaning Guide

Wet shower tiles in bathroom

5 Quick and Easy Ways to Remove Soap Scum from Shower Tiles

How to Remove Soap Scum from Shower Tiles: 5 Quick and Easy Ways Soap scum is the cloudy, streaky film that builds up on shower tiles when soap mixes with hard water minerals and body oils. It is one of the most common bathroom frustrations in Toronto, where hard water makes the buildup worse. The good news: you do not need harsh chemicals to beat it. These five methods use things you probably already own, plus a few store-bought options, to leave your tiles sparkling. Whichever method you choose, test it on a small, hidden section of tile first. 1. White Vinegar and Water Mix equal parts white vinegar and water in a spray bottle. Spray the tiles generously and let the solution sit for about 10 minutes so the acid can break down the scum. Scrub lightly with a non-abrasive brush or sponge, then rinse with water. The difference is immediate, and the solution is gentle on tile finishes. For stubborn rings along the waterline, spray the vinegar solution onto a cloth, wrap it around the area, and let it sit for a few minutes before scrubbing. 2. Baking Soda Paste Mix baking soda with a little water until it forms a thick, frosting-like paste. Spread it over the tiles, scrub gently in circular motions with a soft brush or sponge, and rinse. Baking soda’s fine grit lifts the scum without scratching, and it is a great option if you want to avoid chemical smells entirely. 3. Commercial Shower Cleaners Store-bought bathroom cleaners are formulated to dissolve soap scum quickly. Spray, follow the label’s dwell time, and rinse. Two safety rules matter: Keep the bathroom ventilated: open a window or run the exhaust fan while you clean. Never mix cleaning products. The Canadian Centre for Occupational Health and Safety warns that mixing bleach with other cleaners can produce toxic gases, and Health Canada’s household chemical safety guide gives the same warning: never mix bleach with other products. 4. Lemon Oil for a Streak-Free Finish After cleaning with any method, put a few drops of lemon oil on a soft cloth and wipe the tiles down. The oil cuts through remaining water marks and streaks, leaves a light citrus scent, and adds a subtle sheen that makes the whole bathroom feel fresh. 5. Dish Soap and Warm Water Dish soap is designed to cut grease, and soap scum is exactly that: oily residue. Mix a few drops of dish soap with warm water in a spray bottle, spray the tiles, let it sit for a few minutes, scrub gently, and rinse. This method is mild, safe for all tile types, and leaves no harsh chemical smell. Warm water helps the soap dissolve evenly, and the same mix works on glass shower doors, not just tiles. Method Supplies Best For Vinegar and water Spray bottle, white vinegar Everyday buildup on glazed tiles Baking soda paste Baking soda, water Stubborn spots, chemical-free households Commercial cleaner Store-bought spray Quick results on heavy scum Lemon oil Soft cloth, lemon oil Streaks and finishing shine Dish soap and water Dish soap, spray bottle Gentle regular maintenance Stop Soap Scum Before It Starts Prevention beats scrubbing: Squeegee the tiles after every shower, it takes 20 seconds. Run the exhaust fan during and after showers to lower humidity. Use liquid soap instead of bar soap, which leaves more residue. Clean the shower weekly so buildup never gets a chance to set. Give the tiles a quick 30 second rinse after each shower to wash away fresh soap residue before it dries into film. Keeping moisture in check matters beyond looks: the CDC notes that mould grows wherever there is moisture, so a well-ventilated bathroom protects your health as well as your tiles. When to Bring in the Pros If scum has built up for months, or you are moving out of a Toronto rental and need the bathroom to pass inspection, professional help saves the day. Toronto Shine Cleaning offers deep cleaning services that tackle showers, grout, and tile, move-in and move-out cleaning for tenants and landlords, and regular residential cleaning to keep bathrooms fresh between deep cleans. Clients rate us 4.9 out of 5 on Google, as you can see on our reviews page. Call 647-424-0355 to book. Is vinegar safe on all shower tiles? Vinegar is safe on glazed ceramic and porcelain tile, but avoid it on natural stone like marble, limestone, and travertine, since acid can etch the surface. Use dish soap or a stone-safe cleaner on those materials. Why does soap scum keep coming back? Soap scum returns because soap residue combines with hard water minerals every time you shower. Daily squeegeeing, weekly cleaning, and running the exhaust fan all slow the buildup significantly. Can I mix vinegar and baking soda for soap scum? Mixing them creates foam but mostly neutralizes both, so the cleaning power is weaker than using either one alone. Use them separately: vinegar first, then a baking soda paste for stubborn spots. How often should I clean my shower tiles? A quick wipe or squeegee daily, plus one weekly clean with your preferred method, keeps scum from building up. Monthly deep cleaning of grout and corners prevents the toughest buildup.

5 Quick and Easy Ways to Remove Soap Scum from Shower Tiles Read More »
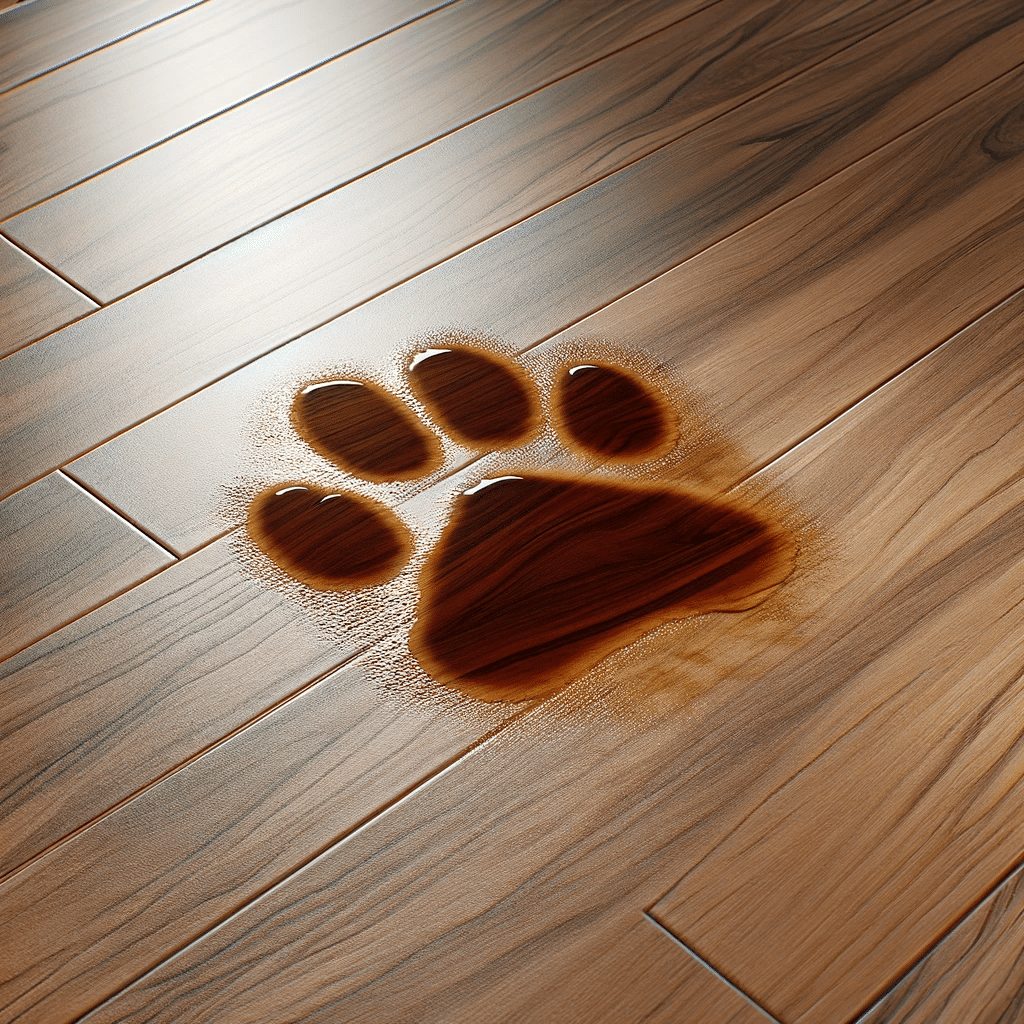
Remove Pet Stains Easily

7 Simple Steps to Eliminate Pet Stains from Your Hardwood Floors

Why Pet Stains on Hardwood Floors Need Fast Action Every pet owner knows the sinking feeling of spotting a wet patch on a beautiful hardwood floor. Wood is porous, so urine, vomit, and muddy paw prints sink in quickly and leave behind stains, odors, and dull discoloration. The good news is that a calm, methodical cleanup can save your floors. The seven steps below walk you through the full process, from catching the mess early to confirming the finish is intact, and they work on urine, drool, and food accidents alike. Step 1: Identify Pet Stains Early Timing decides everything. A fresh stain mostly sits on the surface, while an old one has already soaked deep into the grain. Catching accidents early brings three clear benefits: Less absorption: wipe within minutes and the liquid never reaches the seams where swelling begins. Color prevention: acids in urine dull and darken wood over time, so speed preserves the natural tone of your floors. Odor control: bacteria multiply in organic messes, and fast cleanup stops smells before they set in. Keep an emergency kit near the areas your pet favors: absorbent cloths for quick blotting, an enzyme based cleaner rated safe for sealed wood, and a flashlight or black light that reveals dried spots you would otherwise miss. Step 2: Blot, Do Not Rub Rubbing pushes liquid down into the grain and outward across the boards, the exact opposite of what you want. Take a clean, absorbent cloth or paper towels and press straight down, lifting repeatedly, until no more moisture transfers. Blotting stops the stain from spreading and protects the finish, because wood that drinks too much liquid can swell, warp, or discolor permanently. Nobody attacks a treasured wooden table with a scouring pad, and your floor deserves the same respect. Step 3: Apply a Pet Safe Cleaner Strong solvents and harsh chemicals can irritate paws, skin, and lungs, since pets live inches above the floor and groom residue right off their coats. The CDC healthy pets guidance reminds owners to choose and handle cleaning products carefully around animals and to follow label directions. Enzyme formulas are the workhorses for pet accidents because they digest the urine crystals that trigger repeat marking instead of merely masking them. Pet safe cleaners use non toxic ingredients that break down organic stains, and they are also gentler on wood finishes, cutting the risk of clouding or discoloration. Health Canada’s page on household products explains how to read labels and store these supplies safely. You can find pet safe options at most pet stores and online retailers. Step 4: Scrub Gently in Circular Motions Armed with a soft brush or soft cloth, work the cleaner into the spot using light pressure and small circles, almost like massaging lotion into skin. Aggressive scrubbing scratches the protective finish and leaves a dull patch that makes every future spill more visible. If the mark resists, do not press harder; reapply the cleaner and keep going gently. Patience removes stains that brute force would turn into floor damage. Step 5: Rinse With a Damp Cloth Cleaner left on the floor keeps working long after you have walked away. Residue attracts dirt, dulls the sheen, and can turn sticky or discolored over the following weeks. Wipe the area with a cloth moistened, never dripping, in fresh water, and rinse or swap the cloth often so you lift solution away rather than spread it around. When the surface no longer feels soapy or sticky, rinsing is done. Step 6: Dry the Floor Thoroughly Water is wood’s quiet enemy. Pat the cleaned zone with a dry cloth until the cloth picks up nothing more, swapping to a fresh one as needed, and let the area air out afterward. Trapped moisture can creep into seams and cracks, causing warping, swelling, and even rot that surfaces months later as a costly repair. Step 7: Check for Lasting Damage Inspect the spot in good light once everything is fully dry. Is the color even with the surrounding boards? Is the finish clear and intact rather than cloudy or peeling? Stubborn or long old stains can leave bleached patches or raised grain that no household method reverses. Persistent discoloration, warping, or swelling is your cue to call professional help, whether a flooring specialist or a deep cleaning service experienced with tired wood. The Seven Steps at a Glance Step Action Why It Matters 1. Identify Scan with a black light, keep a kit ready Fresh stains clean far easier than set ones 2. Blot Press down, lift, repeat Rubbing drives liquid deeper into the grain 3. Clean Apply an enzyme, pet safe formula Digests urine crystals and protects paws 4. Scrub Soft brush, light circular motions Lifts marks while preserving the finish 5. Rinse Damp cloth, fresh water often Removes residue that dulls and attracts dirt 6. Dry Dry cloths until no moisture remains Prevents swelling, warping, and rot 7. Inspect Check color and finish closely Catches damage that needs a professional Frequently Asked Questions Can vinegar and water remove pet stains from hardwood? Diluted vinegar can freshen a surface, but it does not digest urine crystals the way an enzyme cleaner does, and strong acid can dull a wood finish. Use gentle products and save enzyme formulas for accidents that have already soaked in. How fast should I clean a pet stain? Within minutes if at all possible. The first stretch of time decides whether the mess stays on the surface or reaches the seams between boards, which is why your cloths and enzyme cleaner should live within arm’s reach of the spots your pet uses most. Can an old pet stain be fixed without refinishing? Sometimes. Several gentle enzyme applications over a few days can lift older marks. However, if urine has reached the subfloor or blackened the wood, professional deep cleaning or localized refinishing is the honest answer. How do I keep floors stain free between accidents? Wipe paws at entryways, trim foot

7 Simple Steps to Eliminate Pet Stains from Your Hardwood Floors Read More »

Professional cleaning specialist providing top-notch sanitization services.

Hiring a Maid in Toronto: 7 Easy Key Factors to Consider

Hiring a Maid in Toronto: 7 Easy Key Factors to Consider Thinking about hiring a maid in Toronto to take cleaning off your to-do list? It is one of the best lifestyle upgrades a busy household can make, but the experience is only as good as the provider you choose. A great service hands back your weekends, keeps your home genuinely healthy, and works around your real schedule. A poor one leaves you stressed and re-cleaning after the cleaner. Toronto Shine Cleaning is a bonded and insured company serving Toronto and the GTA, and the seven factors below apply to every provider, including us. Trustworthiness and reliability, checked through references and reviews Experience and expertise with your floors, surfaces, and fabrics Cleaning supplies and equipment, including eco-friendly options Flexibility and availability that match your schedule Cost and value rather than the cheapest quote Insurance and bonding that protect your home and belongings Personal preferences, from chat level to having the same cleaner each visit Trustworthiness, Insurance, and Peace of Mind Letting someone into your home is personal. You need a provider who cleans well and also respects your space and privacy, so ask for references from previous clients and actually follow up on them. Did the cleaner ever miss a scheduled session? How were delicate or valuable items handled? Online reviews are a goldmine for the same reasons: honest customers flag reliability problems quickly, and a recurring pattern of complaints about trust is a reason to keep looking. An established company adds structure: it screens staff, conducts background checks, and keeps supervision and quality checks in place. See what clients say on the reviews page. Insurance and Bonding Are Non-Negotiable Accidents happen even with careful, experienced cleaners: a fragile item can break, or a spill can land on a valuable rug. An insured service carries a policy that covers accidental damage or injuries during the visit, so you are not out of pocket. A bonded service goes further, securing a financial guarantee against dishonest acts such as theft. Toronto Shine Cleaning carries a $1,000,000 insurance policy and a $10,000 accidental breakage and surety bond. This protection matters most on large jobs like move-in or move-out and post-construction cleaning, where crews handle many belongings and work around dust and debris. Experience, Expertise, and the Right Supplies Experience is not just years spent cleaning. It is knowing that hardwood floors need a different approach than tile, that marble and antique wood call for special care, and that pet hair and stubborn stains each respond to different techniques. Ask any service which tasks they specialize in, and whether they can handle the materials in your home. Specialized work proves the difference: a deep cleaning service is a systematic process that removes the dust, grime, and allergens that build up over time in nooks a routine wipe-down never reaches. The CDC guidance on cleaning and disinfecting your home explains that regular, thorough cleaning removes most germs from surfaces, and trained crews work from that playbook. Who Brings the Cleaning Supplies? Decide early whether the maid will use your products or bring their own. Professional services arrive with commercial-grade supplies and equipment that typically outperform what most homes keep under the sink, and that saves you the cost and hassle of stocking everything yourself. If your household has allergies, scent sensitivities, or environmental priorities, confirm the team can work with your preferred products; Toronto Shine Cleaning offers eco-friendly options on request. Health Canada’s overview of household product safety covers the hazards of common cleaning items, a standard professional crews are trained to manage. Flexibility, Availability, and Personal Fit Flexibility is about more than picking a convenient slot. A last-minute family gathering or a heavy work week can force a reschedule, so choose a service that adapts to the changing rhythms of your life. Availability matters just as much: confirm they cover the times you actually need, whether that is early mornings, evenings, weekends, or fixed weekly days. Then match the frequency to your life, from weekly upkeep to occasional specialized cleans such as post-construction or move-in and move-out jobs. Our regular maid cleaning plans keep the same familiar team returning, and consistency means the cleaners learn where you keep things and how you like the bed made. Share your preferences up front, including a nervous pet or a dislike of strong fragrances, and every visit runs on your terms. Cost and Value: Look Past the Cheapest Quote You often get what you pay for. The cheapest service can mean compromises in thoroughness, reliability, and coverage, while the priciest option does not automatically guarantee quality. Value is where cost and quality intersect: consider the hours you save, the commercial-grade equipment included, and the repairs a well-maintained home avoids over the years. Also check what the quoted price includes, because basic packages may cover routine cleaning while extras like window washing or post-renovation work cost more. Toronto Shine Cleaning publishes base rates, before HST, on its pricing page so you can compare on facts: Service type Studio or 1 BR (before HST) Larger homes Regular maid cleaning $212.63 2 BR $273, 3 BR $327 Deep cleaning $270.38 2 BR $393.75, 3 BR $441, 4 BR $527.63 Move-in or move-out cleaning $242.63 Quoted by home size with a deposit-focused checklist Maid Service FAQs for Toronto Homeowners What is the biggest red flag when hiring a maid service? A refusal to provide references or proof of insurance and bonding. Any established company can show both right away, along with review history you can verify for yourself before the first visit. Should I hire an independent maid or a cleaning company? An independent cleaner can feel personal and occasionally costs less, but a company brings background checks, regular supervision, quality checks, and insured accountability. Weigh those protections against the price difference before you commit. Do I have to provide cleaning products and equipment? No. Most services, including ours, bring commercial-grade supplies that outperform typical household products. If you prefer

Hiring a Maid in Toronto: 7 Easy Key Factors to Consider Read More »

Maid cleaning and organizing bed, professional cleaners

Top 10 Skills for Professional Cleaners: Boosting Efficiency and Client Satisfaction

Hey there! If you’re diving into the world of professional cleaning or just curious about what makes a pro cleaner stand out, you’re in the right place. Cleaning is so much more than just a swipe here and a dust there. It’s an art and a science, blended with a dash of elbow grease. So, let’s get into the top 10 skills that can turn any cleaner into a super cleaner, ensuring efficiency and leaving clients with beaming smiles. 1. Professional Cleaners: Attention to Detail When we talk about attention to detail in the cleaning world, we’re really talking about creating that ‘wow’ moment for clients. It’s that feeling when they walk into a room and can almost sense the cleanliness. This skill isn’t just about doing the basics; it’s about elevating cleaning to an art form. Imagine this: you’re cleaning a living room. Attention to detail means you’re not just vacuuming around the furniture; you’re moving things around to get every bit of dust underneath. It’s checking the tops of picture frames, the edges of the baseboards, and even the ceiling fan blades – places that are often overlooked. But it’s not just about what you clean; it’s also about how you clean it. It involves being methodical in your approach, ensuring that you have a system in place so that you never miss a spot. Maybe you start in one corner of the room and work your way around, or maybe you have a checklist of items to go through for each room. Whatever your method, the goal is the same: leaving no stone unturned in your quest for cleanliness. Attention to detail also extends to the little touches that make a big difference. It’s arranging the cushions just right, folding the end of the toilet paper into a neat triangle, or lining up items on the bathroom counter symmetrically. These might seem like small things, but they add up to create an overall impression of meticulous care and professionalism. And let’s not forget about the sensory experience. Ensuring that the room not only looks clean but also smells fresh and feels airy can transform a space completely. This could mean opening windows to let in fresh air during cleaning, using subtly scented cleaning products, or incorporating natural elements like flowers or plants to enhance the ambiance. 2. Time Management Let’s break it down. Effective time management in cleaning starts with planning. Before even touching a mop or a duster, a professional cleaner assesses the space. What areas need the most attention? Is there a particular order that would make the job go smoother? Planning your route through a space can save heaps of time. For instance, starting from the top (like dusting) and working your way down to the floors means you’re not redoing work. Then there’s the aspect of multitasking, but not the kind that leaves you frazzled. It’s about smart multitasking. Let’s say you’ve got a cleaning solution doing its magic in the bathroom. While it sits, you’re not just waiting around; you’re vacuuming the living room or dusting the shelves. It’s like a well-oiled machine where every moment is utilized efficiently. Another key factor is setting realistic time goals. This comes with experience. Knowing how long it takes to clean certain areas or perform specific tasks can help you gauge your time better. It’s about setting a steady pace that ensures thorough cleaning without rushing through it. But what about those unexpected hiccups? A professional cleaner with good time management skills knows how to adapt quickly. Maybe a room is dirtier than expected, or there are more knick-knacks to dust around than usual. Adapting on the fly and rejigging your plan without getting flustered is part of the skill. And, of course, there’s the importance of not compromising quality. Rushing through a job is a no-go. The goal is to find that sweet spot – being efficient without sacrificing the standard of cleaning. This means being thorough in your work, but also knowing the tricks and techniques that can save time without cutting corners. 3. Knowledge of Cleaning Products and Tools In the world of professional cleaning, knowledge of the right products and tools is akin to an artist knowing their brushes and paints – it’s essential for creating a masterpiece. Each cleaning task has its unique requirements, and using the right tool or product can significantly enhance the quality and efficiency of the work. Consider the vast array of cleaning products available. There are all-purpose cleaners, glass cleaners, disinfectants, and many more, each designed for specific surfaces and types of dirt. A professional cleaner knows that using a glass cleaner on a wooden table could potentially damage the surface. Similarly, an all-purpose cleaner might not be effective for tough bathroom mold. Understanding the chemistry of these products, such as which ones are abrasive, acidic, or alkaline, and where they are best applied, is crucial. It’s not just about making things look clean; it’s also about preserving surfaces and materials in the long run. Then there are the tools of the trade. From microfiber cloths and squeegees to mops and high-powered vacuums, each tool has its purpose. For example, microfiber cloths are great for dusting and polishing because they trap dirt and reduce the spread of allergens. Squeegees are ideal for leaving streak-free finishes on windows and glass. Knowing when and how to use these tools can make a significant difference in the outcome of your cleaning efforts. Safety is another critical aspect. Professional cleaners must know how to handle and store cleaning products safely. This includes understanding which products should not be mixed, how to ventilate areas when using strong chemicals, and the importance of wearing protective gear like gloves or masks when necessary. Staying updated with the latest products and tools in the market is also part of this skill. The cleaning industry is constantly evolving, with new, more efficient, and eco-friendly products being introduced. Keeping abreast of these developments and

Top 10 Skills for Professional Cleaners: Boosting Efficiency and Client Satisfaction Read More »

Boost your efficiency with productivity techniques and tools.

5 Essential Tips: How to Skyrocket Your Cleaning Productivity

Clean Smarter, Not Harder Cleaning that eats your entire weekend usually means the process, not the dirt, is the problem. With a little structure, the same house can stay fresh in a fraction of the time. The five essential tips below cover planning, tools, decluttering, prioritizing busy rooms, and racing the clock, so you can trade marathon scrub sessions for short, satisfying bursts that keep your home consistently tidy. Tip 1: Plan Your Cleaning Around Your Life A cleaning schedule works when it fits the life you already live. If mornings energize you, a quick sweep with your coffee sets a productive tone for the day. If evenings are calmer, fifteen minutes of decluttering after dinner can be your wind down routine. Busy households often do best with short bursts spread across the week instead of one exhausting weekend blitz, while people who find cleaning therapeutic may prefer a few dedicated weekend hours. Whatever shape it takes, consistency is what turns chores into an automatic routine. Break tasks into small slices Trying to clean an entire house in one go is like eating a whole pizza in a single bite. Slice it up instead: Mondays for mopping, Tuesdays for the bathroom, and so on. Smaller assignments feel less daunting, give every room equal attention over time, and are far easier to hand to family members or roommates. Nobody dodges a request to spend ten minutes on one sink the way they dodge a request to clean a whole bathroom. Tip 2: Use the Right Tools for the Job Cleaning with weak tools is like painting with a toothbrush. Invest in equipment that is effective and durable rather than the priciest item on the shelf. A reliable vacuum with strong suction makes a real difference in homes with pets or large carpeted areas, and a HEPA filter helps control allergens. Microfiber cloths trap dust and grime almost like magnets, cut the elbow grease you need, and wash for reuse, which is a win for your budget and the planet. Then keep everything within reach so momentum never dies: One dedicated storage spot, such as a laundry room cupboard or pantry shelf, so nothing is ever scattered across the house. A portable caddy loaded with cleaners, sponges, gloves, and brushes, so multi level homes do not require stair runs for supplies. Fresh cloths and a bucket staged before you start, because hunting for tools mid task is what turns thirty minutes into two hours. Health Canada’s resource on household products is a useful reference for choosing and storing cleaning chemicals safely. Tip 3: Declutter Before You Clean You cannot wipe what you cannot reach. Trying to clean a counter buried under appliances, mail, and gadgets is like mowing a lawn full of garden gnomes, so clear the stage first. Put away the toaster you rarely use, store the spare spices, and find homes for the paper piles before a cloth ever touches the surface. Then make decluttering a habit instead of a yearly panic. Ten minutes a day, or thirty minutes a week, through one drawer or one shelf is enough. Ask two questions about each object: do I need this, and have I used it in the past year? Fewer objects on surfaces means less to clean around, a space that stays tidier on its own, and a clearer mental inventory that stops duplicate purchases. Tip 4: Focus on High Traffic Areas Treat your home like a city: the busiest streets need the most maintenance. The kitchen is your downtown, hosting every meal and gathering, so it demands the most frequent attention. The bathroom sees daily use and needs regular work to stay hygienic, and the living room collects dust, crumbs, and wear from everyone who relaxes there. Prioritizing these hubs does not mean ignoring the rest of the house; it means spending finite energy where it shows most. Pair that priority with spot cleaning, the proactive move of handling messes the moment they appear. Spilled cereal gets swept now, mirror fingerprints get wiped now, and small messes never graduate into weekend sized projects. Since the CDC notes the health benefits of everyday physical activity, these quick active laps around the house pay you back twice. Tip 5: Time Yourself and Make It Fun A timer converts cleaning into a friendly competition with yourself. Set twenty minutes, challenge your household to finish as much as possible before the buzzer, and watch sidetracking vanish. Tasks that normally sprawl across an hour routinely collapse into a fraction of that when the clock is ticking, because decisions get faster and focus gets sharper. Then attach the fun. A favorite playlist turns mopping into a dance break, and podcasts or audiobooks keep your mind busy while your hands scrub. Pairing the chore with something you already enjoy builds a positive association, which is the quiet secret behind every routine that actually sticks. A Sample Weekly Productivity Plan Day Focus Time Box Monday Floors: sweep and mop 20 minute timer sprint Tuesday Bathroom fixtures and mirror 15 minutes after dinner Wednesday Kitchen counters and appliance fronts 20 minute timer sprint Thursday Declutter one drawer or shelf 10 minutes Friday Dust high traffic surfaces 15 minutes Saturday Deeper vacuum pass and spot checks 30 to 60 minutes Sunday Rest, or reset the coming week Optional Frequently Asked Questions How long should a daily cleaning session last? Fifteen to twenty minutes is plenty for maintenance when it happens daily. The point of short sessions is preventing buildup, which is what makes weekend cleaning marathons necessary in the first place. What if I miss a scheduled day? Simply fold the missed task into the next open slot and keep moving. A flexible schedule absorbs a missed day without collapsing, which is exactly why task slicing beats all or nothing weekend plans. Do timer sprints really work? They work because deadlines force prioritization. You stop reorganizing one shelf and start covering the room. Most people are surprised how much

5 Essential Tips: How to Skyrocket Your Cleaning Productivity Read More »

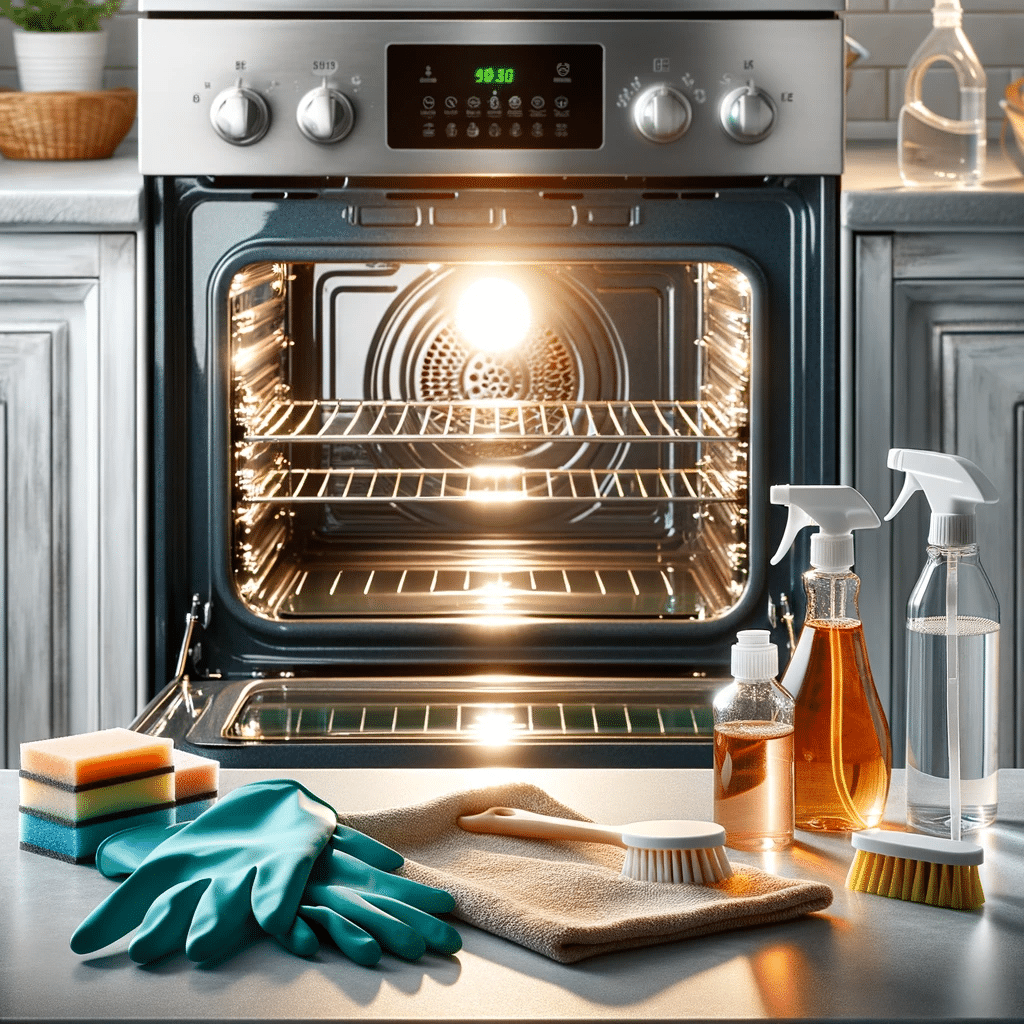
Clean oven, cleaning products, gloves and sponges.

How to Clean Your Oven Quickly and Efficiently: A Step-by-Step Guide

How to Clean Your Oven Quickly and Efficiently: A Step-by-Step Guide An oven hides its mess in plain sight. Every roast, pizza, and pie leaves a thin layer of baked-on grease, and layer by layer it turns into the smoke smell that greets you at preheat. The method below is the low-effort classic: a baking soda paste that works overnight while you sleep, then a fast wipe down the next day. No harsh fumes, no heroic scrubbing, and no commercial cleaner required unless you want one for the racks. Gather Your Supplies First Everything you need fits in one drawer: Half a cup or more of baking soda White vinegar in a spray bottle A damp dishcloth and a few rags A plastic or silicone spatula Rubber gloves, because oven grime is grim Why baking soda instead of a commercial oven cleaner? Those products often contain harsh, caustic chemicals with strong odors that linger in the kitchen. Baking soda is non-toxic, inexpensive, and already in your pantry, which makes it the friendlier choice for households with pets, kids, or sensitive noses. Step 1: Empty the Oven Completely Pull out the racks, pizza stones, baking sheets, and any thermometer so you can reach every surface. Give each item the care it needs: racks do best soaking in soapy water while you work, pizza stones are porous and should just be brushed out and baked dry at high heat, and gadgets stay gentle. Before anything else, sweep out loose crumbs with a dry cloth or handheld vacuum. With the cavity bare, also take a second to inspect for issues such as a worn heating element, which you would rather discover now than mid roast. Step 2: Mix the Paste Start with about half a cup of baking soda and add water gradually until you have a spreadable consistency, something like frosting. Too runny and it slides off the walls; too thick and it will not spread or penetrate. The paste is the perfect medium because it clings to vertical surfaces and stays where you put it, holding the mild abrasive and the alkaline chemistry right against the baked-on grime for hours. Step 3: Coat the Cavity and Wait Gloves on. Spread the paste over every interior surface you can reach, but keep it off the heating elements; baking soda can corrode them, and they rarely need cleaning anyway. Do not be surprised when the paste turns brown as you work. That discoloration is the reaction doing its job, lifting grease and carbonized spills out of the surface. Close the door and leave the paste for at least 12 hours, or overnight. This is the efficient part of the method: the chemistry works for you while you do nothing at all. Step 4: Handle the Racks While the paste sits, deal with the racks. After a couple of hours in hot, soapy water, the grease softens enough that a stiff brush takes it off without much fight; scrub both sides, rinse, and dry. If a rack is truly encrusted, a commercial oven cleaner is an acceptable last resort. Use it in a well-ventilated space with gloves on and follow the label exactly, since those formulas are strong. The same rule applies to any chemical you use for housework: Health Canada’s household chemical safety page is a good pre-job read. Step 5: Wipe It All Down The next day, use a damp cloth to wipe out the dried paste; the moisture rehydrates it, and it comes away carrying the loosened grime with it. For stubborn patches, scrape gently with the plastic or silicone spatula, never metal, which can scratch enamel or protective coatings. Finish by spritzing a little vinegar over any white residue: it fizzes on contact with the baking soda and wipes clean. Give everything a final rinse with a fresh damp cloth and let the cavity dry with the door open. Task Time Effort Empty and sweep the cavity 10 minutes Light Mix and spread the paste 15 minutes Light Wait for the chemistry 12 hours, hands off None Soak and scrub the racks 45 minutes, mostly soaking Moderate Wipe out and vinegar rinse 20 minutes Moderate Oven Cleaning FAQs How often should an oven get this treatment? A deep clean every few months keeps smoke and off smells away in a normal household. If you roast often or notice smoke at preheat, treat it as the sign to mix a fresh batch of paste. Wiping spills once the oven cools stretches the interval nicely. Can I use the self-cleaning function instead? You can, but know what you are signing up for: very high heat, strong odors, and a locked oven for hours. The baking soda method achieves a comparable result with none of that, which is why it remains the go-to for a quick, low-fuss clean. Why keep paste off the heating elements? Baking soda’s alkalinity can corrode exposed elements and shorten their life, and paste caked on them can burn and smell the next time you cook. They also rarely collect grime, so there is no benefit to justify the risk. Wipe around them carefully instead. Is commercial oven cleaner ever the right call? Yes, mainly for racks and heavy carbon that soaking and scrubbing cannot touch. Treat it as a targeted tool: gloves on, windows open, label followed to the letter. The same clean-first mindset health authorities apply to surfaces, as in the CDC’s cleaning guidance, applies here: remove the bulk physically before any chemical does the fine work. Prefer Someone Else Does It? An overnight paste is easy, but a full kitchen reset is a bigger job. Toronto Shine Cleaning’s deep cleaning service takes on kitchens top to bottom, and recurring maid service keeps them that way. A deep studio or one bedroom clean starts at $270.38 before HST, with every option listed on the pricing page. Call (647) 424-0355 and let the oven be our problem.

How to Clean Your Oven Quickly and Efficiently: A Step-by-Step Guide Read More »

Disorganized book in a bookshelf

How to Declutter Your Home in 5 Simple Steps This Weekend

Hey there! Ready to reclaim your space and feel the joy of a clutter-free home? Let’s dive into how you can declutter your home in just 5 simple steps this weekend. It’s all about making your space more inviting and less of a “Where did I put that again?” kind of place. Step 1: Set How to Declutter Your Home When you’re thinking about decluttering, it’s like setting the stage for a home makeover show starring you. First, picture what you want each space to look like. Is it turning your living room into a cozy, magazine-worthy space? Or maybe you’re dreaming of a kitchen where you can actually see the countertop (imagine that!). But here’s the kicker: be specific with your goals. Instead of just saying, “I want a cleaner bedroom,” how about, “I want a bedroom with enough space to do my morning yoga.” This way, you’re not just decluttering; you’re creating a vision of your ideal home lifestyle. Visualize the End Result: Close your eyes and imagine walking into your newly decluttered space. What does it look like? How does it make you feel? Visualization is a powerful motivator. It’s like giving yourself a sneak peek of the rewards waiting for you at the end of this decluttering journey. Set Realistic and Achievable Goals: Rome wasn’t decluttered in a day! Set goals that you can realistically achieve over the weekend. If your home office is overflowing with papers and random gadgets, maybe aim to create a clear workspace and an organized shelf. You don’t have to go full Marie Kondo in one go – small victories matter! Consider Your Lifestyle: Your decluttering goals should align with your lifestyle. If you’re a busy bee, creating a low-maintenance and minimalist space might be the way to go. Love cooking? An organized pantry and accessible kitchen tools should be your target. Tailor your decluttering to suit how you live. Write It Down: Grab a notepad or your phone and jot down these goals. Seeing them in black and white makes them more real and gives you a clear roadmap. Plus, ticking off completed tasks? Super satisfying!     Step 2: Break It Down The thought of decluttering your entire house might sound as fun as a trip to the dentist, but here’s a game-changer – break it down, room by room. Think of it like episodes of your favorite TV show; each room is a new episode in your decluttering saga. Creating a Decluttering Schedule: Grab your calendar or planner and let’s get scheduling. Allocate specific times for each room. Maybe Saturday morning is perfect for sprucing up the living room, while Sunday afternoon is ideal for giving your bedroom some love. By scheduling, you’re not just wishing for a cleaner home; you’re planning for it. Start with the Easiest Room: Kick off with a room that feels less daunting. Maybe it’s the bathroom, where you can toss empty bottles and old toiletries, or perhaps it’s the dining area, where reorganizing a few things can make a big difference. Starting easy gives you a quick win and sets a positive tone for the rest of the project. Use Timers for Focused Bursts: Set a timer for each decluttering session. Maybe give yourself 30 minutes per room. This creates a sense of urgency and helps you stay focused. Plus, it’s kinda fun to race against the clock! Involve the Family or Roommates: Make it a group activity! Assign tasks to family members or roommates. Kids can sort through their toys, while your partner tackles a different area. It’s like having your own decluttering crew, and it makes the task more enjoyable. Decluttering Categories: In each room, focus on specific categories. In the living room, deal with magazines, books, and DVDs. In the bedroom, focus on clothes and accessories. This categorical approach prevents you from feeling overwhelmed and keeps you on track. Step 3: Mastering Your System The ‘Keep’ Pile Items in the ‘Keep’ pile are the easy ones. These are your go-to items, things you use regularly, or those with sentimental value that genuinely make you happy. A good rule of thumb is the 90/90 rule: if you haven’t used it in the last 90 days and don’t plan to in the next 90, maybe it’s not a keeper. Remember, ‘keep’ doesn’t mean hoard – be selective! The ‘Donate’ Pile The ‘Donate’ pile is for items that are still in good condition but no longer serve a purpose in your life. Clothes that don’t fit, books you’ve read and won’t revisit, or that kitchen gadget you never used – these items can find a new home and be useful to someone else. Consider local charities, shelters, or community centers. Donating not only declutters your home but also helps others and is good for the environment. Win-win! The ‘Trash’ Pile This one’s for items that are beyond repair or use – broken appliances, worn-out clothes, outdated electronics, etc. It’s important to dispose of these responsibly. Recycle what you can and be mindful of the environment. This pile might also include items that hold no value, even for donation, like old papers or broken items. The ‘Maybe’ Box Sometimes, there are items you’re just not sure about. For these, create a ‘Maybe’ box. Store these items out of sight and set a reminder for, say, six months. If you haven’t needed or thought about them by then, it’s safe to say you can let them go. Be Honest and Realistic This step requires honesty. Ask yourself hard questions about why you’re holding onto things. Is it for sentimental reasons, guilt, or the ‘just in case’ mindset? Remember, your goal is a clutter-free space that brings peace and joy, not stress. One Room at a Time Apply this system room by room. Don’t move to the next room until you’ve sorted through everything in the current one. This keeps the process organized and prevents you from feeling overwhelmed. Involve Others If you live

How to Declutter Your Home in 5 Simple Steps This Weekend Read More »

Clean kitchen with a plant at the table

How to Organize and Clean Your Kitchen Efficiently

Start With a Clear Slate: Declutter First A kitchen cannot be cleaned efficiently while every surface is buried, so decluttering comes first. Begin with the countertops: remove everything, appliances, jars, and decor, and wipe the bare surface as you go. Warm water with mild dish soap handles most countertop materials, and a baking soda paste, gently applied and wiped away, lifts tougher stains. Then make each item earn its place back: do you use it daily, is it functional, does it even belong in the kitchen? Fewer objects mean faster wipe downs and more room to cook. The cabinet crusade Give your cabinets a proper block of time. Empty them, lay the contents out in view, and keep a box ready for donations and discards. Daily items move to easy reach; occasional items migrate to higher shelves or the back. Wipe the empty interiors with an all purpose cleaner or a vinegar and water mix, and condition wooden cabinets with a wood cleaner. Group like with like as things go back, baking supplies in one zone, pots and pans in another. Clean From the Top Down Dirt falls, so clean in the direction gravity is already working. Start at the highest points: cabinet tops, the refrigerator top, and upper shelves, where dust quietly accumulates. A microfiber cloth or an extendable duster picks dust up instead of scattering it. Near the stove, where grease glues grime to cabinet tops, switch to warm soapy water or a natural one part vinegar to one part water solution. Then descend level by level to shelves and counters, and any debris that dropped earlier still gets swept up in a later pass. Finish with the deep cleaning zones nobody enjoys: under the sink and behind small appliances. Give Every Appliance a Deep Clean Appliances collect grease, food particles, and residue that quietly hurt performance and lifespan. Each one rewards a specific approach: Refrigerator: remove food and shelves, wash the interior with one tablespoon of baking soda per quart of water to clear odors and stains, then clean the rubber door seals and exterior. Oven: apply an oven cleaner per the product instructions, or spread a baking soda and water paste and leave it overnight before wiping. Degrease the stovetop and control panels. Microwave: heat a bowl of water with lemon juice for a few minutes and let the steam loosen hardened grime so it wipes right off. Dishwasher: run it empty with a specialized cleaner or a cup of vinegar to clean and deodorize. Small appliances: unplug toasters, blenders, and coffee makers first, then run a vinegar water mix through the coffee maker and wipe toasters and blenders with a damp cloth. Because kitchens are where food is handled, the CDC food safety prevention tips are a smart companion to appliance cleaning, and Health Canada’s household products guidance covers safe use of the cleaners themselves. Store Smarter With Containers and Labels Containers turn a chaotic pantry into a system. Clear, airtight containers for pasta, rice, and cereal let you see contents without opening anything, keep food fresher, and stack neatly to use vertical space. Choose square or rectangular shapes, which fit together without dead gaps, and pick glass for health and durability or BPA free plastic when weight and breakage matter more. Labeling multiplies the benefit. Write the item name plus the date stored or the expiry date on every container, especially leftovers in the fridge and anything in the freezer, where forgotten food turns into freezer burn and waste. A label maker, a marker, or chalkboard labels all work. Labeled spice jars end the rummage through lookalike containers and add a professional touch. Fridge and Freezer Reset Sweep the fridge and freezer for expired items often, checking dairy, meat, leftovers, and frozen goods; clearing them protects food safety, sharpens meal planning, and cuts waste. Turn the sweep into a wipe down with a water and baking soda mix, and give the freezer a gentle defrost if needed. Then restock by category: a shelf for dairy, crispers for vegetables, the door for condiments, and bins in the freezer grouped by vegetables, meat, and ready meals so nothing gets buried. Stackable containers keep leftovers visible in both. Tame the Small Stuff Utensils and spices are minor objects with major clutter potential. Spread utensils out and sort honestly, keeping what you use, in good condition, and without duplicates, then corral winners in drawer organizers or a countertop holder. For spices, choose alphabetical order or frequency of use, with daily jars out front. Cabinet door racks, tiered shelves, and drawer inserts keep jars visible, and uniform jars beat mismatched packets. The Routine That Holds It Together Frequency Tasks Payoff Daily Dishes, wipe counters and stovetop after cooking, sweep floors Mess never accumulates into a weekend project Weekly Mop, clean microwave and dishwasher inside and out, wipe cabinet fronts, refresh counters and backsplash Grease and grime stay thin and easy Monthly Clean oven, defrost and wipe freezer, organize the pantry, deep clean the fridge, hit cabinet tops and under sink Long term maintenance without a crisis clean Four habits keep the routine alive: be consistent so tasks never balloon, involve the whole household so the load stays light, keep supplies organized and within reach, and stay flexible enough to adapt the schedule when life happens. Add Personal Touches Last A clean kitchen should also feel like yours. Herbs add greenery and snippable flavor, succulents suit anyone without a green thumb, and artwork, family photos, colorful towels, or a distinctive light fixture turn everyday items into decor that fits your theme. Frequently Asked Questions How do I clean laminate or stone countertops safely? Stick to warm water with mild dish soap for routine cleaning and a gentle baking soda paste for stubborn spots. Skip abrasive scrubs and harsh acids, which dull laminate and etch many natural stones. What is the fastest way to clean a smelly fridge? Empty it, wash shelves with one tablespoon of baking soda per quart

How to Organize and Clean Your Kitchen Efficiently Read More »

Vision from the ground of a corridor with carpet

How to Keep Your Carpets Looking New: Expert Advice on Carpet Care

How to Keep Your Carpets Looking New: Expert Advice on Carpet Care Carpets add warmth, comfort, and style to a home, but they also collect dust, dirt, and allergens with every step. Without regular care, fibers flatten, colours fade, and stains set in. The good news is that properly maintained carpets can last for years, even decades. This expert guide covers the routines that keep your carpets looking new, from daily habits to periodic deep cleaning. Why Carpet Care Matters Carpet fibers trap dust, pet dander, and other particles that settle into the pile. Left alone, that buildup dulls the look of the carpet and can affect the air you breathe indoors. Health Canada’s overview of indoor air contaminants explains why controlling dust and allergens in the home matters, and regular vacuuming is the single most effective way to keep them from building up in your flooring. Vacuum on a Schedule That Matches Your Household A good vacuum makes all the difference. Look for strong suction and rotating brushes that lift dirt from deep within the fibers. If you have pets, choose a model designed for pet hair and dander, and consider a HEPA filter, which traps fine particles and allergens instead of recirculating them. How often you vacuum depends on your household: Household type High-traffic areas Entire carpet Homes with pets or kids Every couple of days At least once a week Less busy homes As needed Weekly Empty the canister or change the bag regularly, because a full vacuum loses suction and picks up less dirt. Handle Spills by Blotting, Not Rubbing Spills happen, and how you react in the first minutes decides whether a stain sets. Keep a clean, absorbent cloth or paper towels handy, and blot gently. Rubbing pushes the stain deeper into the fibers, so resist the urge to scrub. For tougher stains, use a quality carpet cleaner or spot remover matched to your carpet type, whether that is a pet-stain formula, a heavy-traffic formula, or a gentle option for delicate carpets. Always test the cleaner on a small, inconspicuous area first to make sure it does not cause discolouration, and follow the product instructions. Deep Clean Carpets Periodically Even with diligent vacuuming, embedded dirt accumulates over time. A carpet cleaner machine injects a mix of water and cleaning solution into the fibers, loosens the dirt and grime that have settled deep down, then extracts the dirty water along with the loosened soil. It is an effective way to refresh your carpet at home, provided you choose a solution suitable for your carpet’s material and colour and spot-test first. Professional deep cleaning goes a step further. Powerful equipment and specialized solutions remove deeply embedded dirt and address specific problems like pet odours, tough stains, and delicate fibers. Toronto Shine Cleaning’s deep cleaning services give carpets the thorough treatment they need to stay fresh and last longer. Prevent Wear With Mats, Rugs, and Smart Habits Prevention is cheaper than repair. A few simple habits protect your carpet every day: Place mats and rugs at entrances, hallways, and in front of sofas, where foot traffic is heaviest. Choose durable mats with non-slip backing that are easy to clean. Vacuum the mats regularly, and deep clean them with a mild detergent or carpet cleaner when they get dirty. Spot-test any cleaner in an inconspicuous area before applying it to the full carpet. These first-line defenses absorb the brunt of daily wear so your main carpet stays vibrant underfoot. Build a Carpet Care Routine That Lasts Caring for your carpet is not complicated, but consistency matters. Vacuum on a schedule, blot spills the moment they happen, deep clean periodically, and protect high-traffic zones with mats. The payoff is a carpet that stays soft, colourful, and comfortable for years. If the job feels overwhelming, or you simply prefer to leave it to the professionals, Toronto Shine Cleaning can handle all your carpet care needs. A regular maid cleaning visit keeps daily dust in check, and our pricing page shows transparent base rates before HST. To keep your carpets looking new without lifting a finger, call (647) 424-0355 or browse our customer reviews to see why local homeowners trust us. Health Canada’s healthy living resources are a helpful reminder that a clean, comfortable home supports your family’s well-being, and well-cared-for carpets are part of that picture. Frequently Asked Questions About Carpet Care How often should I vacuum my carpets? In homes with pets or kids, vacuum high-traffic areas every couple of days and the entire carpet at least once a week. In less busy households, a weekly vacuum of the whole carpet usually keeps fibers clean and fresh. Should I rub a spill to clean it up? No. Rubbing pushes the stain deeper into the carpet fibers. Blot gently with a clean, absorbent cloth or paper towel, working from the outside in, and use a carpet cleaner matched to your carpet type for tougher stains. Can I deep clean my carpets myself with a machine? Yes. A carpet cleaner machine injects water and cleaning solution into the fibers, then extracts the dirty water along with loosened dirt. Choose a solution suited to your carpet’s material and colour, and spot-test in an inconspicuous area first. How long do carpets last with proper care? With regular vacuuming, prompt spill treatment, periodic deep cleaning, and protective mats in high-traffic zones, carpets can stay in great shape for years, even decades, instead of wearing out and needing early replacement.

How to Keep Your Carpets Looking New: Expert Advice on Carpet Care Read More »

deep and thorough cleaing

How a Spotless Home Impacts Your Move-Out Experience in Toronto

How a Spotless Home Impacts Your Move-Out Experience in Toronto Moving out is a whirlwind of packing, logistics, and saying goodbye. In Toronto’s fast-moving rental market, the last thing any tenant wants is a surprise deduction from a security deposit or a landlord who hesitates to give a reference. Yet the single factor that most reliably turns a stressful exit into a smooth one is staring you in the face: the cleanliness of the home you are leaving. Here is how a truly spotless finish changes the entire move-out experience. Why Cleanliness Matters on Move-Out Day Less stress from the start A tidy, organized home acts as a natural stress reducer during a period when pressure runs high. Sorting through belongings in a calm space makes it easier to decide what to pack, donate, or discard, and eliminates the frantic last-minute searches for important papers that so often plague moving day. The mental clarity of an orderly environment helps you plan the move efficiently, and that sense of control does a lot to cut through the anxiety of leaving one chapter and starting another. Protecting your security deposit In Toronto’s competitive rental market, the security deposit often represents a significant financial stake. Landlords assess the unit’s condition during the final walkthrough, looking for damage, grime, and neglect that would require repairs or professional cleaning. A thorough clean reduces the chance of deductions, giving you the best shot at recovering the full deposit. The kitchen and bathroom are the rooms that draw the most scrutiny because they accumulate grease, mold, and lime scale over a tenancy. Paying special attention there can be the difference between a full refund and a costly invoice. Building a landlord reference you can use Landlords talk to one another, and a positive reference from a previous rental is invaluable when securing the next one. Demonstrating care for the property by leaving it as close to move-in condition as possible sends a signal of responsibility and reliability. Many former tenants who take the extra step of booking a professional clean receive noticeably stronger references, and in a tight rental market that boost counts for a lot. What Landlords Look For on the Final Walkthrough Area What gets checked Why it matters Kitchen Oven hood, stovetop, counters, sink, cabinet interiors Grease and stuck-on grime are the most common deposit deductions Bathroom Tile grout, fixtures, mirrors, behind the toilet Mold, lime scale, and soap scum signal neglect and require deep cleaning Floors and carpets Stains, scuffs, and debris under furniture Carpet cleaning is often mandatory per the lease Windows and blinds Dust and marks on frames and sills Visible dust makes the whole unit feel half-finished Storage and closets Empty shelves, vacuumed floors, no personal items left behind Left-behind junk eats into deposit and annoys the landlord Seven Steps to a Spotless Move-Out Start early. Begin decluttering and cleaning at least two weeks before moving day. A rushed, last-minute clean always misses corners. Focus on kitchens and bathrooms first. These rooms need degreasing, mold control, and thorough scrubbing. Check for standing moisture that can feed mildew: Health Canada recommends fixing moisture problems right away to prevent mould growth, so make sure leak-prone areas are dry and clean. The CDC recommends cleaning household surfaces regularly with soap or detergent to reduce the spread of germs, an approach that applies equally to a unit you are handing over to the next tenant. Build a cleaning schedule. Assign each room to a specific day so nothing gets skipped and the last few days before you hand over the keys are purely for finishing touches. Enlist help. A friend or family member who can handle one room while you handle another cuts the total time in half. Hire professional movers but also book a pro cleaner. A company that specializes in move-in and move-out cleaning brings equipment and skills for steam-cleaning carpets, removing stubborn lime scale, and tackling the hard-to-reach spots that everyday tools miss. Do the final sweep. The morning of handover, check inside cabinets, closets, behind the fridge, and behind furniture. Empty all storage. A quick vacuum and dust catch anything that settled overnight. Document your work. Take photos after the clean. Many landlords appreciate seeing the effort and it gives you proof if a dispute arises later. The Cost of Peace of Mind Professional move-in or move-out cleaning for a studio or one-bedroom starts at $242.63 before HST, and most tenants find that spending this small amount saves far more in avoided deposit deductions. Compare the full move-out cleaning rates on our pricing page and see how a few hours of pro-grade work protects hundreds of dollars of deposit money while giving you one less thing to worry about on moving day. Our bonded and insured teams cover all of Toronto and the GTA, so no matter which neighborhood you are leaving, there is a local crew ready. Move-Out Cleaning FAQ How thorough does move-out cleaning need to be? The bar is the condition the unit was in when you moved in. Kitchens, bathrooms, and flooring receive the most scrutiny, but every room needs to be dust-free, vacuumed, and free of personal belongings. Will professional move-out cleaning guarantee I get my deposit back? No cleaning service can promise a specific outcome, but a detailed clean eliminates most of the reasons landlords deduct. Many tenants who book a pro clean recover 100% of their deposit. When should I book move-out cleaning? Ideally 24 to 48 hours before the final walkthrough. That gives the unit time to air out and lets you spot any small touch-ups the cleaner might have missed. Do I need to be present during the cleaning? Not at all. Many tenants hand over the keys to the cleaner and come back for the walkthrough. Our crews are bonded and insured, and you can see how other clients rate the experience on our reviews page. Leave Toronto Spotless, Move On with Confidence Walking away from a rental on

How a Spotless Home Impacts Your Move-Out Experience in Toronto Read More »