Floor Cleaning

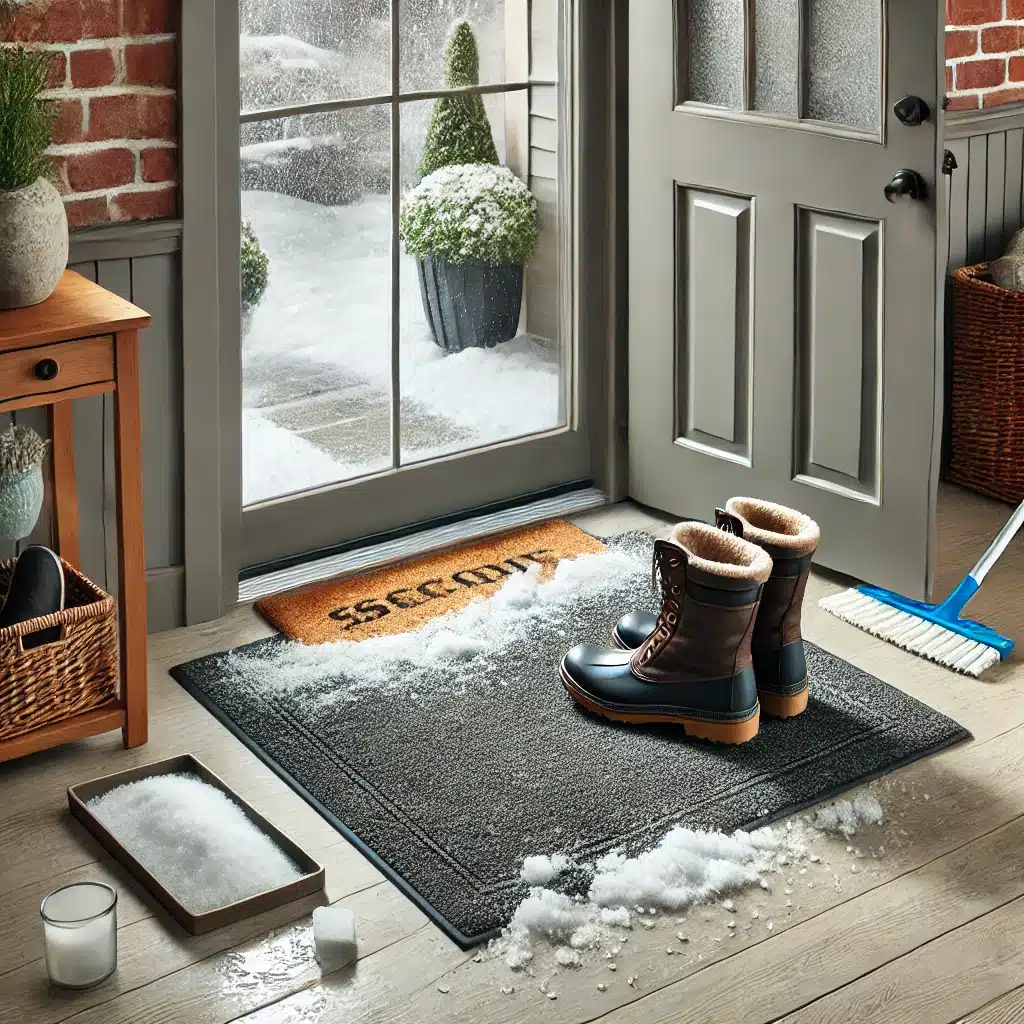
Cleaning snow mess before it gets salt stains

Salt and Snow Mess? 5 Best Cleaning Solutions for Winter

5 Best Cleaning Solutions for Winter Messes in Toronto Toronto winters bring snow, ice, and road salt through the door no matter how careful you are. Salt residue, slush puddles, and gritty dirt do more than dull your floors: left unattended they can etch finishes, stain carpet fibres, and streak window glass. The right cleaning solutions for winter stop that damage early and keep your home presentable through the whole season. These five approaches target the messes winter actually creates, from salt-crusted entryways to condensation-covered windows, so your surfaces stay protected and your cleaning stays manageable. 1. Remove Salt Stains From Hardwood and Tile Floors Road salt ground into flooring acts like fine sandpaper, and the meltwater that carries it can cloud tile grout and dull wood finishes. Wipe fresh salt away as soon as it appears using a microfiber mop dipped in warm water with a few drops of dish soap or a pH-neutral cleaner. For stubborn white marks, add a splash of rubbing alcohol to the water, which dissolves the residue quickly. Dry the floor immediately after mopping so moisture cannot soak into seams or damage the finish. Prevention makes removal easier. Lay absorbent mats at every exterior door, ask guests to leave boots at the entrance, and sweep high-traffic zones daily through January and February. A quick daily pass stops salt from being ground into the floor, protects the finish, and reduces how often you need stronger cleaners. 2. Deep Clean Carpets and Rugs Before Salt Sets In Snow and salt carried onto carpet can crystallize deep inside the fibres, and trapped moisture invites musty odours and bacteria. Vacuum two or three times a week with a HEPA filter model so fine salt particles are captured instead of pushed deeper into the pile. When you notice a salt line, blot it right away with a damp cloth and a neutral-pH carpet cleaner; blotting lifts the residue while scrubbing only grinds it in. Once or twice a season, book a professional deep home cleaning so carpets and area rugs get the hot-water extraction that removes salt and grit home vacuums miss. Use a quality rug pad beneath area rugs to keep moisture away from the backing, rotate rugs every few months so wear stays even, and spot-treat every new stain the day it appears. 3. Keep the Entryway Dry and Mud Free Everything that comes into your home passes through the entryway, which makes it the busiest cleaning zone in winter. Trap snow outside with a heavy-duty doormat, then catch what is left with an absorbent runner just inside the door. Shake both mats out weekly, launder them whenever they feel saturated with salt, and keep a boot tray or rack nearby so wet footwear never drips onto the floor. Entryways stay damp all winter, and moisture combined with warm indoor air is the ideal recipe for mould. Running a small dehumidifier in the entry or mudroom, and wiping door frames and walls down weekly, keeps condensation and salt film under control; the CDC explains how mould grows wherever dampness lingers and why that matters for your health. Keep a spray bottle of floor cleaner and a stack of towels by the door so post-storm cleanups take minutes, not hours. 4. Keep Floors Dry and Slip Resistant Melted snow tracking across tile, hardwood, or vinyl leaves wet patches that are a genuine slip hazard for children, seniors, and pets. Mop high-traffic areas with warm water and a gentle floor cleaner, then dry the wettest spots near doors with a towel rather than waiting for the air to do the job. Microfiber mops lift fine salt and moisture in a single pass, which makes them the better winter choice. For extra traction, apply a non-slip floor treatment or wax to smooth tile and lay rubber-backed runners along the paths people walk most. Encourage indoor slippers or non-slip socks on hard floors, and dry puddles promptly to protect flooring from warping and water stains. 5. Clean Windows and Door Frames Warm indoor air meets freezing glass all winter, and the condensation that forms leaves streaks on windows, grime on sills, and moisture on metal and wood frames. Wipe glass with a lint-free microfiber cloth and a glass cleaner or warm water with a drop of dish soap; rubbing alcohol cuts through stubborn mineral deposits left behind by evaporating water. Finish with a dry cloth so no streaks remain. Door frames collect salt spray and moisture from damp mittens and boots. Wash them with a damp cloth and mild soap, dry wood frames immediately so they do not swell, and inspect the weather stripping around doors and windows. Sealing gaps cuts condensation, holds in heat, and reduces the cleaning you will need all season; Health Canada’s indoor air contaminants guidance shows what builds up inside homes sealed tight against winter. Weekly Winter Cleaning Checklist Sweep or vacuum entryways daily and after every storm Wash entry mats weekly and replace any that stay soggy Mop hard floors with a pH-neutral cleaner and dry them well Blot salt spots on carpets the moment they appear Wipe window sills, door frames, and light switches weekly Winter Cleaning Solutions at a Glance Winter problem Best solution Frequency Salt marks on floors Warm water with dish soap or pH-neutral cleaner, then dry Sweep daily, mop weekly Salt lines on carpets Blot with neutral-pH carpet cleaner and HEPA vacuum Vacuum 2-3 times weekly Wet entryway floors Boot tray, absorbent mats, entryway dehumidifier Shake mats weekly Slippery hard floors Non-slip treatment and rubber-backed runners Mop and dry after storms Condensation on windows Glass cleaner, lint-free cloth, sealed weather stripping Wipe weekly Frequently Asked Questions About Cleaning Solutions for Winter What is the fastest way to remove salt stains from floors? Mop with warm water and a few drops of dish soap, add rubbing alcohol for stubborn crust, and dry the floor immediately so the salt cannot re-crystallize or damage the finish. Why do salt stains keep coming

Salt and Snow Mess? 5 Best Cleaning Solutions for Winter Read More »

Shovels and Snow Blowers testing who is better

Shovels or Snow Blowers: Which Is the Best for Snow Removal?

Winter in Toronto brings heavy snowfall, making snow removal an essential task for homeowners. Deciding Shovels or Snow Blowers depends on various factors, such as property size, snowfall frequency, and the level of physical effort required. Each method has its advantages and drawbacks, and understanding them will help you choose the best tool for keeping your driveway and walkways clear. A shovel is a traditional and budget-friendly method of clearing snow, but it requires physical effort and can be time-consuming. On the other hand, a snow blower is faster and more efficient but requires an upfront investment and regular maintenance. By evaluating your specific needs, you can determine which option is best suited for your winter snow removal routine. For homeowners who prefer a hassle-free solution, professional snow removal services in Toronto offer a reliable alternative. Hiring a team of experts can save time and effort while ensuring that your property remains clear and safe throughout the winter season. The Benefits and Drawbacks of Using a Snow Shovel A snow shovel is one of the most affordable and widely used tools for snow removal. It requires no electricity, fuel, or maintenance, making it a cost-effective and eco-friendly option. With a shovel, homeowners have greater control over where the snow is placed, which is particularly useful for clearing narrow walkways, stairs, and small driveways. For those who enjoy a winter workout, shoveling can also serve as a form of physical exercise. However, using a shovel can be physically demanding, especially after a heavy snowfall. Lifting and pushing snow can strain the back and shoulders, increasing the risk of injuries such as muscle pulls or joint pain. This is especially concerning for individuals with pre-existing health conditions or limited mobility. Additionally, the process of manually shoveling a large driveway or sidewalk can take a significant amount of time and energy, making it impractical for those with busy schedules. Another major drawback of shoveling is its inefficiency when dealing with wet, heavy snow. When snow accumulates quickly, it can become compacted and difficult to remove with a standard shovel. In extreme weather conditions, shoveling alone may not be sufficient to keep up with ongoing snowfall, requiring frequent and exhausting efforts throughout the day. Shovels or Snow Blowers and the Better Option A snow blower is a powerful and efficient tool designed to clear large areas quickly. Unlike a shovel, which requires manual effort, a snow blower uses a motorized system to lift and throw snow off driveways and sidewalks. This significantly reduces the strain on the body, making snow removal a faster and more manageable task. For homeowners with large properties, a snow blower can save hours of labor during the winter season. The efficiency of Shovels or Snow Blowers is particularly evident after a heavy snowfall. While shoveling may take multiple sessions to fully clear a driveway, a snow blower can complete the job in a fraction of the time. This is especially useful for individuals who need to clear their driveways quickly before heading to work or running errands. With different models available, from single-stage to three-stage snow blowers, homeowners can choose a machine that best suits their snowfall conditions. Despite its advantages, a snow blower does come with some downsides. The initial purchase cost is significantly higher than a shovel, and the machine requires regular maintenance, such as oil changes, fuel refills, and blade replacements. Additionally, storing a snow blower can be challenging, especially for homeowners with limited garage space. However, for those dealing with frequent heavy snowfalls in Toronto, the benefits of a snow blower often outweigh the costs. Understanding the Different Types of Snow Blowers Not all snow blowers are created equal, and choosing the right one depends on the amount and type of snowfall in your area. Single-stage snow blowers are ideal for light snowfall and work best on paved surfaces. They are lightweight, easy to maneuver, and suitable for small driveways and sidewalks. However, they may struggle with deep or heavy snow. Two-stage snow blowers are more powerful and designed for moderate to heavy snowfall. They feature an auger and impeller system, allowing them to handle deeper snow and clear larger driveways efficiently. Unlike single-stage models, they can work on both paved and gravel surfaces, making them a versatile choice for homeowners who experience frequent snowfall in Toronto. For the most extreme winter conditions, a three-stage snow blower provides the highest level of performance. These machines are built to handle deep, wet, and icy snow, making them perfect for large properties and areas with intense winter storms. While they are the most expensive option, they offer maximum efficiency and reduce the need for additional snow removal efforts. Dealing with Ice Buildup During Winter While Shovels or Snow Blowers are effective for clearing snow, ice buildup can still pose a safety hazard. Slippery driveways and sidewalks increase the risk of falls and injuries, making proper ice removal techniques essential for winter maintenance. Using the right de-icing methods can help keep surfaces clear and prevent accidents. One of the most effective ways to combat ice is by using calcium chloride or magnesium chloride-based ice melt. These products work by breaking down ice and preventing refreezing, making it easier to remove with Shovels or Snow Blowers. Unlike rock salt, which can damage concrete and harm plants, calcium chloride is a safer alternative for both your property and the environment. Another method for improving traction on icy surfaces is by spreading sand or kitty litter. These materials do not melt the ice but provide a rough surface that helps prevent slips and falls. Regularly clearing snow before it has a chance to compact and freeze is also an effective way to minimize ice formation. However, for those who want a more thorough approach, hiring a professional snow and ice removal service in Toronto is the best way to ensure safety throughout the winter. Choosing the Best Snow Removal Option Selecting between a Shovels or Snow Blowers depends on your property size, snowfall frequency,

Shovels or Snow Blowers: Which Is the Best for Snow Removal? Read More »

Cleaning snow with a snow shovel

The Best Ways to Remove Snow: Stay Safe and Efficient

Winter brings beautiful snowfall, but it also means dealing with snow-covered driveways and sidewalks. Removing snow efficiently while staying safe is essential to prevent injuries and excessive strain. Here are the best ways to remove snow while keeping safety a top priority. 1. Use the Right Snow Shovel A lightweight, ergonomic snow shovel can reduce strain on your back and arms. Choose a shovel with a curved handle and a non-stick blade to make lifting and pushing snow easier. Avoid overloading the shovel to prevent muscle strain and fatigue. A well-designed shovel can significantly ease the burden of snow removal and reduce the risk of injury. Shoveling can be physically demanding, so it’s crucial to take breaks and pace yourself. Overexertion in cold weather can lead to health risks such as heart strain and hypothermia. Working steadily and not rushing the process will help keep you safe and make removing snow more efficient. Consider using an aluminum or plastic shovel instead of a metal one, as they tend to be lighter and easier to maneuver. Additionally, ergonomic shovels with adjustable handles can help you maintain a proper posture, reducing the risk of back pain and discomfort when you remove snow.     2. Shovel in Intervals Instead of waiting for heavy snow buildup, shovel periodically during snowfall. Removing snow in smaller amounts at a time reduces the risk of injury and makes the process more manageable. This method is particularly useful for large driveways and walkways. Snow is often heavier when compacted, so tackling it in layers can help prevent excessive strain when you remove snow. Timing is key when it comes to shoveling in intervals. Start early and continue at regular intervals to prevent snow from accumulating too much. If possible, check the weather forecast to anticipate heavy snowfall and prepare accordingly. Shoveling before the snow gets packed down can make removing snow much easier. It’s also important to be mindful of your technique while shoveling in intervals. Avoid sudden, jerky movements and try to maintain a steady, controlled pace. This will help conserve energy and reduce the likelihood of experiencing muscle soreness or fatigue after removing snow from your walkways. 3. Apply a Snow Melt Product Using a high-quality snow melt product before and after shoveling helps prevent ice formation. Choose an environmentally friendly de-icer to protect pets, plants, and driveways. Avoid rock salt, as it can damage concrete and harm vegetation. Proper application of snow melt products ensures safer surfaces and reduces the chances of slipping while you remove snow. Applying snow melt before snowfall can prevent ice from bonding to the ground, making it easier to remove snow when shoveling. After clearing snow, applying another layer can help maintain traction and prevent refreezing. Look for calcium chloride-based or magnesium chloride-based de-icers, which are more effective at lower temperatures than traditional salt. When using snow melt products, be sure to follow the manufacturer’s instructions for application. Overuse of these products can lead to runoff issues, which may affect nearby soil and water sources. Sweeping up excess granules after they’ve done their job can help mitigate environmental impact while keeping surfaces clear for removing snow. 4. Invest in a Snow Blower A snow blower is an excellent investment for those dealing with frequent heavy snowfall. Electric and gas-powered options are available, making snow removal faster and less physically demanding. Ensure proper maintenance to keep it running efficiently throughout the winter. Regular servicing can prolong the life of your equipment and ensure it operates at peak performance when you remove snow. Choosing the right snow blower depends on your specific needs. Single-stage snow blowers are lightweight and best for light snowfall, while two-stage or three-stage models can handle deeper, heavier snow. Consider factors such as driveway size and snow conditions when selecting the most suitable machine for removing snow efficiently. Operating a snow blower safely is essential. Always clear any debris from the area before use, and be mindful of where you direct the discharged snow. Wearing protective eyewear and gloves can help shield you from flying ice and cold temperatures, making your snow removal process safer and more effective.     5. Dress Properly for Snow Removal Wearing insulated gloves, waterproof boots, and layered clothing helps keep you warm and protected. Choose slip-resistant footwear to prevent falls on icy surfaces. Staying dry and warm is essential for maintaining comfort while removing snow. Proper attire not only increases comfort but also reduces the risk of hypothermia and frostbite. Layering is the key to dressing properly for removing snow. Start with a moisture-wicking base layer to keep sweat off your skin, add an insulating middle layer for warmth, and finish with a waterproof outer layer to protect against wind and snow. This combination allows you to regulate body temperature effectively. Don’t forget to protect your extremities. A good pair of insulated, waterproof gloves will keep your hands warm and maintain grip on the shovel. A hat or earmuffs will help retain body heat, and a scarf or face mask can shield your skin from the biting cold and wind while you remove snow. 6. Use Proper Shoveling Techniques Push snow rather than lifting it whenever possible. When lifting, bend at your knees and use your legs instead of your back. Switching hands periodically can help distribute effort evenly and reduce strain on one side of your body. Good technique is essential to efficiently and safely remove snow. Engaging your core muscles while shoveling can provide additional support and stability. Avoid twisting your torso while lifting, as this can strain your lower back. Instead, turn your entire body in the direction where you intend to deposit the snow to minimize stress on your spine and make removing snow safer and more effective. Using a rhythmic, controlled motion will also help maintain endurance. Avoid overexertion by taking breaks as needed and staying hydrated, even in cold weather. Proper technique, combined with a good shovel, will make removing snow much safer, easier,

The Best Ways to Remove Snow: Stay Safe and Efficient Read More »

Person preparing a move out cleaning

5 Reasons Why Move-In & Move-Out Cleaning is a Must

Why Move-In and Move-Out Cleaning Is a Must for a Smooth Move Skipping move-in and move-out cleaning can lead to unwanted stress, lost security deposits, and even health risks. Whether you are buying, selling, or renting, a professional reset of an empty home is what separates a chaotic move from a smooth transition. Here are five reasons the deep clean before and after a move is not optional. Reason 1: A Fresh, Hygienic Start in Your New Home Moving into a new place should feel refreshing, but leftover dirt, dust, and bacteria from previous occupants can create an unsanitary environment. A thorough move-in clean eliminates allergens, germs, and unpleasant odors so you start in a genuinely spotless home. Neglecting it can trigger respiratory issues and allergic reactions from accumulated dust and pet dander, and even if the previous residents cleaned superficially, deep sanitization is still necessary for peace of mind. Professional cleaners use specialized tools and products to target hidden bacteria and mold. There is a practical bonus, too: cleaning an empty house is significantly easier than maneuvering around furniture and boxes, so tackling it before unpacking saves time and effort in the long run. Reason 2: Increase Your Chances of a Full Security Deposit For renters, leaving a home in pristine condition is crucial to getting the deposit back. Many landlords require professional move-out cleaning to ensure the property is rental-ready for the next tenant, and they conduct detailed inspections before releasing funds. Stains on carpets, grease buildup in kitchens, and soap scum in bathrooms all invite deductions and disputes. A thorough move-out clean, covering carpet care, kitchen scrubbing, and bathroom sanitizing, minimizes that financial risk. There is a longer game as well: leaving a clean space enhances your rental history, future landlords often ask for references, and a positive review from your previous landlord improves your chances of securing the next rental. Reason 3: Save Time and Reduce Moving Stress Moving is already a stressful process of packing, organizing, and setting up, and handling a deep clean on top of it is overwhelming. Cleaning a home thoroughly takes hours, from scrubbing floors to washing windows and dusting every surface, and adding that burden to a packed schedule leads to exhaustion and delays. Professional cleaners handle the workload efficiently, so every corner goes spotless without costing you a weekend. Outsourcing also frees you for the other critical tasks of moving week: Setting up and transferring utilities. Coordinating with movers and scheduling truck access. Addressing mail forwarding and change-of-address steps. Unpacking and settling in without a chore list hanging over you. A clean home eases the transition and provides a real sense of relief at both ends of the move. Reason 4: Enhance Property Value and Appeal For homeowners selling, a deep move-out clean makes a lasting impression on potential buyers. Sparkling floors, sanitized bathrooms, and dust-free surfaces create an inviting atmosphere, while lingering odors, dusty corners, and grimy kitchens deter buyers and slow the sale. First impressions are crucial in real estate, and buyers are more likely to place competitive offers on a home that appears move-in ready. A well-cleaned property also showcases responsible homeownership: buyers appreciate a home maintained with care, which increases their confidence in the purchase and speeds up the selling process. Reason 5: Eliminate Hidden Dirt, Germs, and Stale Air The spots routine cleaning misses Move-in and move-out cleaning reaches what daily habits overlook: grime behind appliances, residue inside cabinets, and dirt deep within carpets. Hidden buildup accumulates over years and can invite pest infestations and mold growth, especially in kitchens, under sinks, and around air vents where dirt and moisture collect unnoticed. Addressing those neglected areas prevents long-term damage and keeps the space safer for families with children or allergy sufferers, since dust mites, pet dander, and bacteria thrive in unclean environments and can be targeted with the right approach to mold cleanup and health. The air you breathe Indoor air quality directly affects health and well-being. Dust, pet dander, mold spores, and other airborne particles accumulate over time, and Health Canada’s guide to indoor air contaminants and health covers the respiratory and allergy effects of that buildup, including volatile organic compounds (VOCs) that linger from harsh cleaning products. Carpets, curtains, and upholstery trap those particles, so a comprehensive move clean with deep carpet cleaning and dusting of hard-to-reach areas significantly improves the air, which matters most for people with asthma or allergies. Proper ventilation during the clean and eco-friendly product choices keep the result even healthier. Move Clean vs. Regular Housekeeping Task Regular cleaning Move-in or move-out clean Cabinets and drawers Exterior wipe-down Emptied, interior degreased and sanitized Appliances Surface polish Ovens, fridges, and microwaves cleaned inside and out Floors and carpets Quick sweep and vacuum Deep carpet cleaning, edges, and under furniture Why it happens Maintenance of a lived-in home Deposit protection, sale appeal, or a fresh start Move-In and Move-Out Cleaning FAQs Is move-out cleaning really required by landlords? Many leases require the property returned in rental-ready condition, and landlords run detailed inspections before returning deposits. Even where professional cleaning is not explicitly demanded, a documented thorough clean minimizes deduction risk and protects your rental reputation. What is the best time to schedule each clean? Book the move-out clean for the final days of your tenancy, once the home is empty, and the move-in clean before you unpack, so crews can work wall to wall, floor to ceiling, around nothing but the space itself. Does a move-in clean help with allergies? Yes. Removing the previous occupants’ dust, pet dander, mold spores, and bacteria before you settle in reduces common indoor triggers, and a healthier home is a genuine, noticeable perk of the service. How much does move-in and move-out cleaning cost in Toronto? Toronto Shine Cleaning charges flat rates before HST, starting at $242.63 for a studio or one-bedroom, with the full list on our pricing page. Larger homes and add-on services scale the quote from that base. Can one

5 Reasons Why Move-In & Move-Out Cleaning is a Must Read More »

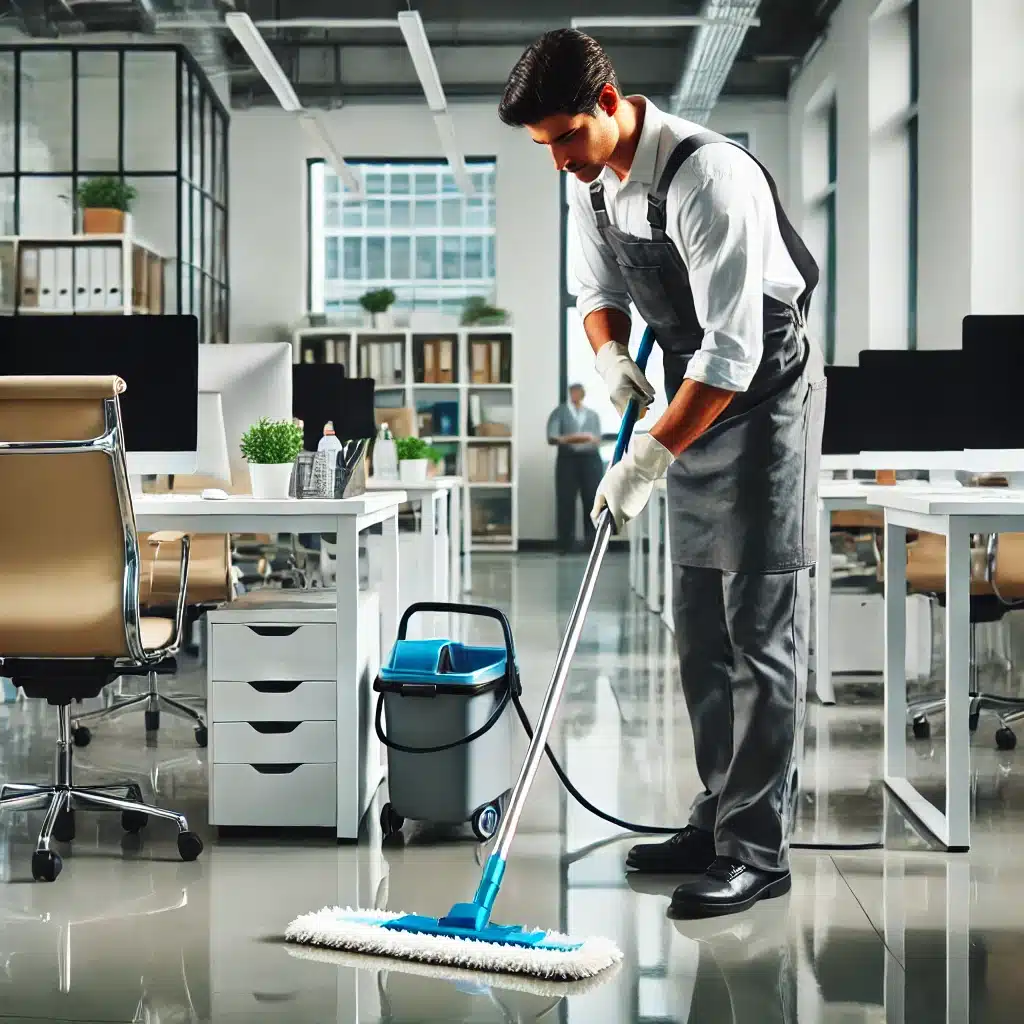
Janitor cleaning office floor with mop.

5 Benefits of Professional Janitorial Cleaning

Keeping your workspace clean and organized is essential for maintaining a productive and healthy environment. Professional janitorial cleaning services offer numerous benefits that go beyond what regular cleaning can achieve. Let’s dive into the top five benefits of hiring professional janitorial cleaning for your business. 1. Healthier Work Environment A healthier work environment is one of the most significant advantages of professional janitorial cleaning. In an office setting, the accumulation of dust, allergens, and germs can create a breeding ground for illness. Professional janitorial cleaning services use high-quality products and advanced equipment to thoroughly eliminate these harmful contaminants. This meticulous approach ensures that every nook and cranny of your workspace is free from the elements that can compromise the health of your employees. By reducing the presence of these allergens and pathogens, janitorial cleaning significantly lowers the risk of illnesses spreading among staff members. Moreover, professional janitorial cleaning goes beyond surface-level cleanliness. It involves deep cleaning practices that address areas often overlooked in regular cleaning routines, such as air ducts, carpets, and upholstery. These areas can harbor dust mites, mold spores, and bacteria, contributing to poor indoor air quality and potential respiratory issues. By targeting these hidden hazards, professional cleaners create a healthier indoor environment that promotes better breathing and overall well-being. This proactive approach not only safeguards the health of your employees but also demonstrates your commitment to their welfare, fostering a positive and supportive workplace culture. The health benefits of professional janitorial cleaning extend to reducing the frequency of sick days among employees. When the workplace is consistently cleaned and sanitized, the spread of contagious diseases is minimized. This leads to fewer instances of colds, flu, and other illnesses circulating within the office. As a result, employees are less likely to take time off due to sickness, maintaining higher levels of productivity and reducing the disruption caused by absenteeism.     2. Enhanced Productivity Enhanced productivity is another notable benefit of professional janitorial cleaning. A clean and organized workspace plays a crucial role in boosting employee productivity. When an office is cluttered and dirty, it can become a source of distraction and stress for employees. The visual noise of clutter can make it difficult for individuals to concentrate on their tasks, leading to decreased efficiency and output. By hiring professional janitorial cleaning services, you can ensure that your office remains spotless and well-organized. This not only helps in maintaining a tidy environment but also allows employees to focus solely on their work without being sidetracked by mess and disorder. Furthermore, a clean workspace fosters a positive mindset among employees. Walking into a well-maintained and hygienic office can significantly uplift one’s mood and motivation. The psychological impact of a clean environment cannot be understated. It creates a sense of order and calm, which is conducive to better concentration and creativity. Employees are more likely to feel valued and respected when their workplace is kept in top condition. This positive atmosphere encourages a higher level of engagement and enthusiasm, which directly translates into improved performance and efficiency. Professional janitorial cleaning services contribute to overall efficiency by implementing systematic and thorough cleaning routines. These services ensure that high-traffic areas, common spaces, and individual workstations are regularly cleaned and sanitized. By removing dust, dirt, and clutter, they create an environment where employees can easily locate necessary tools and documents, thus saving time and reducing frustration. The presence of a consistently clean office also sets a standard for employees to maintain cleanliness in their personal work areas, promoting a culture of organization and efficiency. 3. Professional Appearance Maintaining a professional appearance is crucial for any business, and a professional plays a vital role in achieving this. First impressions are often lasting, especially in a business setting where clients and visitors form opinions based on their initial observations. A clean and well-maintained office reflects a high level of professionalism and attention to detail. It signals that the company values its work environment and is dedicated to providing a pleasant experience for both employees and visitors. By employing professional janitorial cleaning services, businesses can ensure that every aspect of their office, from the reception area to the restrooms, is immaculate and inviting. Professional janitorial cleaning services provide a comprehensive approach to maintaining cleanliness, which is essential for upholding a professional appearance. These services cover all areas of the office, ensuring that even the most frequently overlooked spots are cleaned thoroughly. High-traffic areas such as lobbies, conference rooms, and restrooms are given special attention to ensure they are always presentable. Clean floors, dust-free surfaces, and sanitized restrooms all contribute to an environment that reflects positively on the business. This meticulous cleaning helps create an atmosphere of order and efficiency, which can significantly enhance the company’s reputation. The impact of a spotless office goes beyond impressing clients and visitors; it also boosts employee morale and pride in their workplace. When employees work in a clean and well-organized environment, they are more likely to feel a sense of pride and responsibility towards their job. This positive sentiment can translate into better work performance and a more collaborative and motivated team. Moreover, a professional appearance maintained through regular janitorial cleaning can lead to increased client trust and satisfaction.     4. Cost Savings in the Long Run Investing in professional janitorial cleaning may initially seem like an added expense, but it can lead to significant cost savings in the long run. One of the primary ways it achieves this is by maintaining the condition of your office furniture, carpets, and equipment. Regular and thorough cleaning prevents the buildup of dirt, dust, and grime, which can cause wear and tear over time. By keeping these items in good condition, professional services extend their lifespan, meaning you won’t need to replace them as frequently. This reduction in replacement costs translates directly into financial savings for your business. Furthermore, a well-maintained office environment reduces the risk of accidents and injuries, which can be costly in terms of both money and employee

5 Benefits of Professional Janitorial Cleaning Read More »

Wet shower tiles in bathroom

How to Keep Your Bathroom Mold-Free: Top 5 Tips

How to Keep Your Bathroom Mold-Free: Top 5 Tips Bathrooms are the most moisture-prone room in any home, which makes them the most likely place for mold to take hold. Mold thrives in damp, humid conditions, and once it settles into grout, caulking, or a shower curtain, it can be stubborn to remove. Health Canada notes that people living in homes with mold and damp conditions are more likely to experience health effects, which is why prevention deserves a spot in your weekly routine. These five tips will help you keep your bathroom mold-free all year round. Tip 1: Ventilate After Every Shower Proper ventilation removes the excess humidity that mold needs to grow. Turn on the exhaust fan during and after showers, and leave it running for a while so the moist air is pulled out of the room instead of settling on walls and tiles. If your bathroom has no exhaust fan, consider installing one, especially if you deal with recurring mold. Opening a window or leaving the door slightly ajar also helps air circulate. Tip 2: Clean Tiles, Grout, and Curtains on a Schedule Tiles and grout retain moisture, so they are prime spots for mold. Scrub them regularly with a mixture of water and bleach, or use a specialized mold cleaner, and pay extra attention to corners and edges where mold tends to hide. The shower curtain needs attention too: wash or replace it regularly, and if you prefer fabric curtains, choose machine-washable ones and dry them completely after each wash. A simple weekly routine keeps the workload small: Squeegee the walls and glass after each shower. Wipe down wet surfaces with a dry cloth or towel. Scrub tiles and grout weekly with a mold cleaner. Wash or replace the shower curtain every few weeks. Tip 3: Fix Leaks and Seals Right Away Leaks create the damp conditions mold loves, and some leaks go unnoticed for a long time. Check faucets, pipes, and the base of the toilet for signs of water pooling, and inspect the seals around your bathtub and sink. Caulking can crack or peel over time, letting water seep into gaps, so reapply it as needed. Prompt fixes keep the bathroom dry and stop problems before they start. If keeping up with daily maintenance is a challenge, a regular maid cleaning visit keeps surfaces wiped and monitored between your own deep sessions. Tip 4: Choose Mold-Resistant Products Mold-resistant products make the bathroom less hospitable to spores. Mold-resistant paint on walls and ceilings contains antimicrobial agents that inhibit growth in moisture-exposed areas. Mold-resistant shower curtains are designed to repel water and dry quickly, and fast-drying bath mats with mold-resistant features stop water from soaking in. Small investments like these add a durable layer of protection on top of your cleaning routine. Tip 5: Keep Humidity Below 50 Percent Humidity control is the backbone of mold prevention. Use a dehumidifier in the bathroom after showers or baths, and monitor conditions with a hygrometer, aiming to keep humidity below 50 percent. Dry wet towels outside the bathroom instead of letting them sit on hooks. Health Canada’s guidance on mould and moisture makes the same point: fix moisture problems right away and control humidity to keep mold from growing. When to Call in the Professionals Even with the best habits, busy schedules make it hard to stay on top of every surface. That is where professional help comes in. Toronto Shine Cleaning’s deep cleaning services are designed to tackle mold-prone areas, scrubbing every corner of the bathroom so spores do not get a foothold. The team also handles everything from regular maintenance to move-in and move-out cleaning, so your whole home stays spotless. For extensive mold growth, Health Canada’s indoor air contaminants information recommends considering professional help, and a thorough clean is the right first step. Prevention comes down to one word: consistency. Ventilate, clean, fix leaks, choose mold-resistant products, and control humidity, and your bathroom will stay fresh and healthy. If you would rather leave it to the pros, call Toronto Shine Cleaning at (647) 424-0355 or read what local customers say in our reviews. Bathroom Mold Prevention at a Glance Prevention step What to do How often Ventilation Run the exhaust fan during and after showers Every shower Surface cleaning Scrub tiles and grout with bleach water or mold cleaner Weekly Curtain care Wash or replace the shower curtain, dry completely Every few weeks Leak checks Inspect faucets, pipes, toilet base, and caulking Monthly Humidity control Run a dehumidifier, keep a hygrometer below 50 percent After showers Frequently Asked Questions About Keeping Bathrooms Mold-Free How often should I clean my bathroom to prevent mold? Aim to wipe wet surfaces after every shower, scrub tiles and grout weekly, and wash or replace the shower curtain every few weeks. Monthly leak checks and caulking inspections close the gaps that moisture can sneak through. Is bleach the best way to remove mold from grout? A mixture of water and bleach is a common and effective choice for tile and grout, and specialized mold cleaners also work well. Test any product on a small area first, and always ventilate the room while you clean. What humidity level prevents bathroom mold? Keep humidity below 50 percent. A hygrometer gives you real-time readings, and a dehumidifier running after showers or baths removes excess moisture before mold can settle. Can professional cleaning remove bathroom mold? Yes. Professional deep cleaning scrubs mold-prone areas such as grout, corners, and fixtures with the right products and techniques. For very extensive mold growth, Health Canada recommends considering professional help beyond routine cleaning. Do exhaust fans really make a difference? They do. Fans pull moist air out of the room and expel it outside, so humidity does not settle on surfaces where mold can take root. Running the fan during and after every shower is one of the simplest prevention habits there is.

How to Keep Your Bathroom Mold-Free: Top 5 Tips Read More »

Person scrubbing modern oven interior with gloves and cleaning spray.

How to Deep Clean Your Kitchen: 7 Expert Tips

Why Your Kitchen Needs a Deep Clean Your kitchen is the hardest-working room in the house, and grime builds up fast: grease around the stove, crumbs in drawers, sticky countertops, and a sink that sees more traffic than any other surface. A deep clean does more than make your space sparkle. It removes hidden bacteria and grease that everyday wiping misses, reduces the risk of foodborne illness, and helps your appliances last longer. Here is how to deep clean your kitchen with seven expert steps. Seven Expert Steps to Deep Clean Your Kitchen Set aside a few hours, gather your supplies, and work through the kitchen one zone at a time. Start with the highest points and finish with the floors so you never clean the same surface twice. 1. Gather Your Cleaning Supplies Stock up before you start: an all-purpose cleaner for most surfaces, a degreaser for the stove and backsplash, microfiber cloths, sponges, glass cleaner for windows and cabinet fronts, dish soap, and a mop and bucket for the floors. Having everything ready keeps the job moving and saves you time. 2. Declutter and Organize Clear everything off the countertops, cabinets, and pantry shelves. Throw away expired products and donate anything you no longer use. With clear surfaces you can reach every corner, and an organized kitchen is easier to keep clean day to day. 3. Tackle the Appliances Remove everything from the refrigerator and wipe the shelves, drawers, and handles with an all-purpose cleaner. Clean the oven with a commercial oven cleaner, letting it sit to loosen baked-on residue, and scrub the racks separately. For the microwave, wipe the interior with dish soap and water, then the buttons and handle. Run an empty dishwasher cycle with a dishwasher cleaner to remove odors and buildup. 4. Clean the Cabinets and Drawers Empty each cabinet and drawer, then wipe the interiors with a mild cleaner and a damp cloth. Use a degreaser on sticky buildup, and do not forget the cabinet doors and handles, which collect grime from constant touching. 5. Scrub the Surfaces Clean countertops with a product matched to the material: a stone cleaner for granite, for example, protects the finish and keeps its shine. Degreaser works best on the backsplash around the stove. Wipe the walls near cooking and food preparation areas, where splatters and grease settle. 6. Shine the Sink Scrub the basin and faucet with dish soap, then polish with glass cleaner for a streak-free shine. For stubborn stains, use a commercial sink cleaner, let it sit for a few minutes, and scrub again. A gleaming sink makes the whole kitchen feel clean. 7. Sweep and Mop the Floors Sweep or vacuum the entire floor, reaching corners and under appliances where dust collects. Mop with a solution suited to your flooring, working from the farthest corner toward the exit so you do not step on wet areas. Pay extra attention to high-traffic zones near the stove and sink. Kitchen Deep Cleaning Quick Reference Refrigerator: empty, wipe shelves and drawers, clean handles. Oven: commercial cleaner, let it sit, scrub the racks. Microwave: damp cloth with dish soap, then wipe the keypad. Dishwasher: run an empty cycle with a dishwasher cleaner. Cabinets and drawers: empty, wipe interiors, degrease handles. Countertops and backsplash: surface-matched cleaner plus degreaser. Sink: dish soap scrub, glass cleaner polish, spot treatment for stains. Floors: sweep first, then mop with a floor-appropriate solution. Kitchen Zone Main Task Best Tool Refrigerator Empty and wipe all surfaces All-purpose cleaner Oven and racks Loosen baked-on residue Commercial oven cleaner Microwave Remove food splatters Dish soap and damp cloth Countertops Deep clean the work surface Material-matched cleaner Backsplash Cut through grease Degreaser Sink Scrub and polish Dish soap plus glass cleaner Floors Remove ground-in dirt Mop and floor cleaner Frequently Asked Questions About Deep Cleaning a Kitchen How often should I deep clean my kitchen? A full deep clean every three to six months keeps grease and grime under control, while a lighter weekly clean handles counters, sink, and floors. High-use kitchens may need a deep clean every season, especially if you cook often or entertain regularly. What is the difference between daily cleaning and deep cleaning? Daily cleaning wipes surfaces and does the dishes. Deep cleaning moves everything out, cleans inside appliances, degreases the backsplash, scrubs drawers and cabinets, and washes the floors properly. It reaches the buildup that daily wiping misses and keeps the kitchen hygienic and fresh. Is a deep-cleaned kitchen really safer for food preparation? Yes. The CDC explains that following safe food handling and cleaning practices reduces the risk of food poisoning, and Health Canada publishes the same guidance for Canadian kitchens. Removing grease, crumbs, and bacteria from counters, sinks, and appliances keeps the surfaces where you prepare food much safer. Can professional cleaners deep clean my kitchen? Yes. Toronto Shine Cleaning provides a thorough deep cleaning service that covers appliances, cabinets, surfaces, and floors using professional products and techniques. It is a convenient option when you are short on time or the kitchen needs more than a weekend DIY session. Deep Clean Your Kitchen With Toronto Shine Cleaning A clean kitchen is healthier, more efficient, and more pleasant to cook in. If the job feels overwhelming, or you simply want it done right, the deep cleaning service from Toronto Shine Cleaning takes your kitchen from grimy to gleaming. Pair it with a regular maid service to keep it that way between visits. Find transparent pricing online and check if we clean in your area on our locations page. Call (647) 424-0355 today.

How to Deep Clean Your Kitchen: 7 Expert Tips Read More »

Spotless modern bathroom with white tiles and clear mirror in Mississauga.

How to Easily Clean Your Bathroom in Mississauga: 6 Essential Tips

Why a Clean Bathroom in Mississauga Matters Cleaning your bathroom can feel like a chore, but with the right routine it is quick and manageable. Bathrooms face constant moisture, which leads to soap scum, hard water stains, and mildew if left unchecked. These six essential tips will help you keep your bathroom in Mississauga sparkling clean without spending hours scrubbing. For professional house cleaning in Mississauga, Toronto Shine Cleaning provides regular, deep, and move-in or move-out cleaning across Mississauga and the GTA. Six Essential Tips to Clean Your Bathroom in Mississauga Work in this order and the whole job becomes easier: supplies first, then the toilet, sink, mirror, shower, and floors. A clean bathroom also matters for health, since the CDC notes that regularly cleaning and disinfecting high-touch surfaces helps reduce the spread of germs. 1. Gather Your Cleaning Supplies Keep everything within arm’s reach before you begin: an all-purpose cleaner, a bathroom cleaner for tough buildup, glass cleaner for mirrors, microfiber cloths, a scrub brush, toilet cleaner and brush, and rubber gloves to protect your hands from harsh chemicals. 2. Start With the Toilet Apply toilet cleaner inside the bowl and let it soak while you clean the exterior. Wipe the tank, handle, seat, and base with a disinfectant wipe or a cloth dampened with cleaner, reaching into crevices and hinges that are often overlooked. Finish by scrubbing the bowl under the rim and at the water line, then flush to rinse everything away. 3. Tackle the Sink and Counter Spray an all-purpose or bathroom cleaner on the sink, faucet, and countertop. Scrub around the faucet and drain where buildup collects, and reach into the corners and edges. Then wipe everything with a microfiber cloth in a circular motion for a streak-free, spotless finish that leaves the whole vanity looking fresh. 4. Make the Mirror Sparkle Spray glass cleaner across the mirror and let it sit for a moment to break down fingerprints and grime. Wipe with a lint-free microfiber cloth in a circular motion, which prevents streaking. Pay extra attention to the edges and corners of the mirror, where dust and residue collect, for a truly immaculate finish. 5. Clean the Shower and Tub Spray bathroom cleaner on all shower and tub surfaces and let it sit for a few minutes to soften soap scum, mildew, and hard water stains. Scrub grout lines, corners, and the base of the tub with a brush, then rinse everything with warm water. For glass shower doors, use the same glass cleaner as your mirror and wipe with a microfiber cloth to remove water spots. 6. Finish With the Floors Sweep or vacuum the floor first to pick up hair, dust, and debris, then mop with a cleaner suited to your tile or vinyl flooring. Start at the farthest corner of the bathroom and work toward the door so you do not step on wet areas. Give extra attention to corners and the area around the toilet base, which collect the most dirt. Bathroom Cleaning Quick Reference Toilet: soak the bowl, wipe the exterior, scrub and flush. Sink and counter: spray, scrub the faucet area, wipe with microfiber. Mirror: glass cleaner, circular motion, clean the edges. Shower and tub: let the cleaner sit, scrub grout, rinse well. Glass doors: glass cleaner and a microfiber cloth. Floors: sweep first, then mop from the far corner to the door. Bathroom Area Key Step Pro Tip Toilet Soak, wipe, scrub, flush Clean hinges and crevices Sink and counter Spray and scrub Focus on the faucet and drain Mirror Glass cleaner and wipe Circular motion prevents streaks Shower and tub Let cleaner sit, then scrub Rinse with warm water Floors Sweep, then mop Finish near the toilet base Frequently Asked Questions About Bathroom Cleaning in Mississauga How often should I clean my bathroom in Mississauga? Wipe down high-touch surfaces weekly and do a deeper scrub every two to four weeks. Bathrooms that get heavy daily use, such as family bathrooms, may need attention more often to keep soap scum and mildew from building up between cleans. Why does my bathroom get mildew so fast? Bathrooms stay damp, and the CDC notes that mold grows wherever moisture collects, including around showers and on walls. Run the exhaust fan during and after showers, fix drips quickly, and dry surfaces after use to keep mildew from taking hold. What is the best way to clean glass shower doors? Spray the glass with a quality glass cleaner, let it sit briefly, and wipe with a microfiber cloth in a circular motion. Cleaning them regularly prevents hard water spots from etching the glass, and squeegeeing after every shower keeps them clearer for longer. Should I hire a professional bathroom cleaning service? If time is tight or the bathroom needs a deep refresh, professional help is a great option. Toronto Shine Cleaning offers regular, deep, and move-in or move-out cleaning in Mississauga, so you can choose the schedule that fits your home and your budget. Professional Bathroom Cleaning in Mississauga Even the best routine slips sometimes, and that is where Toronto Shine Cleaning comes in. Our regular maid service keeps bathrooms fresh on a schedule you choose, and our deep cleaning service handles soap scum, grime, and mildew buildup in one thorough visit. We clean across Mississauga and the GTA and we are bonded and insured for your peace of mind. See what our customers say on our reviews page, and call (647) 424-0355 to book your clean.

How to Easily Clean Your Bathroom in Mississauga: 6 Essential Tips Read More »

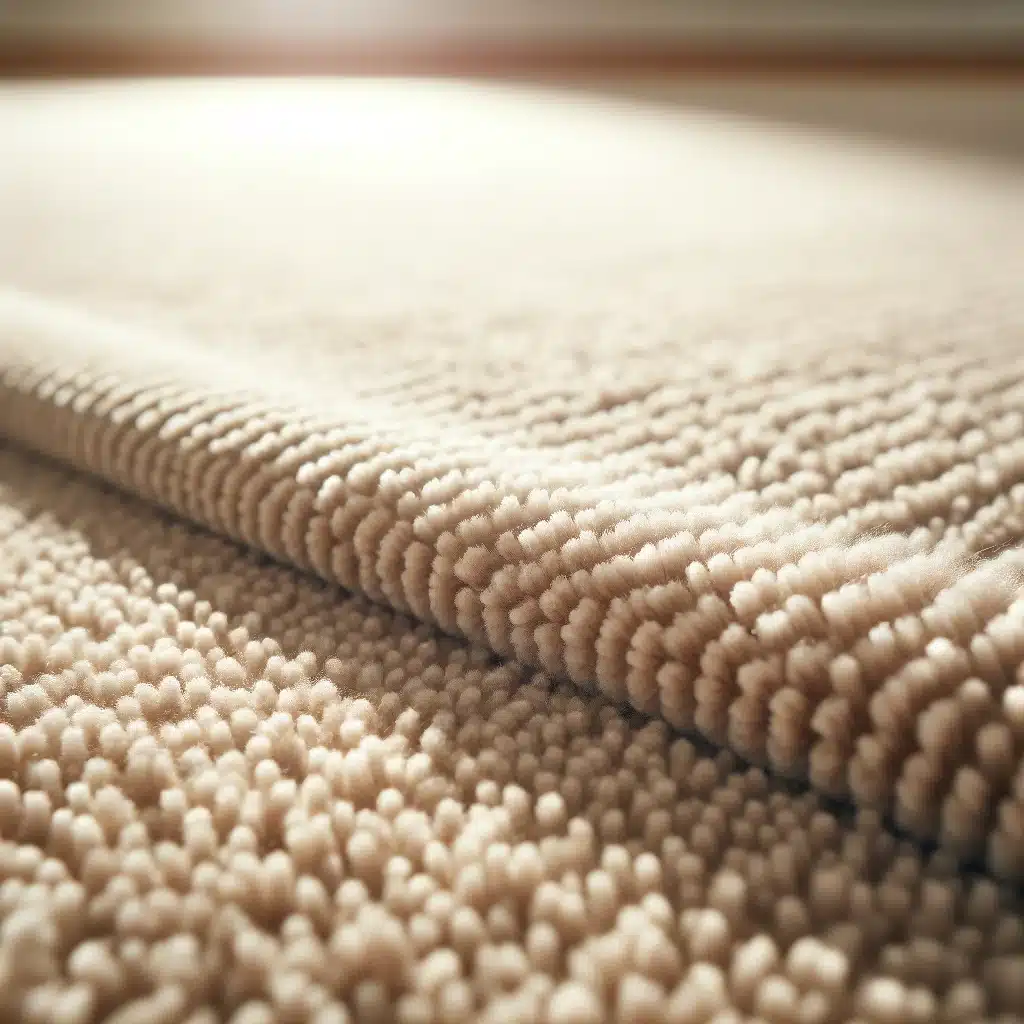
Pristine beige carpet close-up, freshly vacuumed and spotless.

How to Clean Stains on Carpets in Richmond Hill: Top 5 Expert Tips

How to Clean Stains on Carpets in Richmond Hill: 5 Expert Tips Carpets add a cozy, luxurious feel to any home, but they also attract stains. A wine spill at a dinner party, muddy footprints from the park, or a coffee mishap at the desk can all leave their mark. With the right technique, you can tackle even tough stains and keep your carpet looking fresh. These five expert tips cover the full routine for carpet stain removal in Richmond Hill homes. Tip 1: Act Fast and Blot, Never Rub Speed is everything. The longer a stain sits, the deeper it settles into the fibers, so respond the moment you notice a spill. Gently blot with a clean white cloth to absorb as much liquid as possible; a white cloth prevents any color transfer from the fabric itself. Work from the outer edges of the stain toward the center to contain it, and never rub, since rubbing pushes the stain deeper and spreads it further. Quick action also reduces the risk of permanent discoloration. Tip 2: Match the Cleaning Solution to the Stain Different stains need different treatments. A mixture of white vinegar and water works well for coffee and tea stains, breaking down the pigments and lifting them from the fibers. Greasy stains from food respond to a solution of dish soap mixed with warm water, which cuts through the oil. Before using any solution on a visible area, test it on a small, inconspicuous section to confirm it will not discolor or damage the fibers. For store-bought carpet cleaners, follow the manufacturer’s instructions carefully. When you clean, keep these basics on hand: White cloths or paper towels for blotting White vinegar and water for coffee and tea stains Dish soap and warm water for greasy stains A fan or hairdryer on a cool setting for drying Tip 3: Blot, Don’t Scrub Scrubbing feels natural, but it damages carpet fibers, leading to fraying and wear, and it pushes the stain deeper. Instead, press gently with a clean, absorbent cloth, using a fresh section each time so you never reapply the stain. Blotting lifts the stain out of the fibers without grinding it in. Be patient: depending on the size and type of stain, it may take several rounds of blotting with fresh cloths to remove it completely. Tip 4: Rinse and Dry Properly After the stain is gone, rinse the area with clean water using a damp cloth or sponge. Leftover cleaning residue attracts dirt, so the carpet will look dirty again quickly if you skip this step. Then dry thoroughly: blot with a dry cloth, and use a fan or a hairdryer on a cool setting to remove remaining moisture. Damp carpet can lead to mold and mildew growth and unpleasant odors, and walking on wet carpet pushes dirt back into the fibers. Since mold thrives where moisture lingers, the CDC’s mold overview and Health Canada’s guidance on controlling moisture and mould both stress fixing moisture problems quickly and keeping humidity in check. Tip 5: Know When to Call a Professional Some stains are simply too old or too stubborn for DIY methods. Professional cleaners bring powerful machines that penetrate deep into the carpet fibers, removing dirt, stains, and allergens that vacuuming and home remedies miss. This deep cleaning also contributes to a healthier indoor environment and extends the life of the carpet. If you live in Richmond Hill, scheduling regular professional cleanings is a proactive way to keep carpets vibrant and make future stain removal easier. Stain Type DIY Solution Technique Wine or juice White vinegar and water Blot from edges to center, repeat Coffee or tea White vinegar and water Blot, then rinse with clean water Grease or food Dish soap and warm water Blot, then rinse and dry fully Mud Let dry, then vacuum Vacuum first, blot remaining mark Keep Your Carpets Fresh in Richmond Hill A proactive approach to carpet care preserves the beauty of your home and extends the life of your flooring. Act quickly on spills, use the right solutions, blot instead of scrubbing, dry thoroughly, and call in professionals when a stain wins. For stubborn marks and deep-seated dirt, Toronto Shine Cleaning provides professional carpet care across Richmond Hill and surrounding areas, with trained teams and eco-friendly solutions. Book a regular cleaning service to keep carpets and floors on schedule, or a deep cleaning service for a full home reset. Call (647) 424-0355 or see what Richmond Hill clients say in our customer reviews. Carpet Stain Removal FAQ How quickly should I treat a carpet stain? As soon as possible. Fresh stains lift easily, while dried stains bond to the fibers and may become permanent. Blot immediately, then treat with the right solution. Does vinegar damage carpet? Used diluted and rinsed well, white vinegar is safe for most carpets. Always spot-test on an inconspicuous area first, and blot rather than soak the carpet. Can all carpet stains be removed? Most fresh stains can be removed completely. Old, set-in stains and some dyes may fade but not disappear entirely, which is where professional cleaning equipment makes the difference. How often should carpets be professionally cleaned? Most homes benefit from a professional deep carpet cleaning once or twice a year, with more frequent visits for high-traffic homes or households with pets and allergies.

How to Clean Stains on Carpets in Richmond Hill: Top 5 Expert Tips Read More »

Person using hose to clean stone patio with greenery and furniture.

5 Steps to Effective Patio Cleaning with Hose

Cleaning with Hose your patio clean is essential for creating an inviting outdoor space, especially during the warm months when you want to enjoy your backyard to the fullest. One of the simplest and most effective ways to maintain your patio is by cleaning with a hose. Here’s a step-by-step guide to make your patio sparkle: 1. Clear the Patio To kick off your patio cleaning session, it’s essential to start with a clear space. Begin by removing all furniture and accessories. This includes chairs, tables, potted plants, and any decorative items that might be adorning your patio. Clearing the area not only gives you full access to every nook and cranny of your patio but also prevents any accidental damage to your belongings while cleaning with a hose. By taking a few extra minutes to move everything out of the way, you set the stage for a thorough and efficient cleaning process. Once your patio is cleared, the next step is to address the loose debris. Grab a broom and start sweeping away any leaves, dirt, or small branches that have accumulated. This step is crucial because it removes the bulk of the dry debris that could otherwise turn into a muddy mess when water is introduced. A clean sweep ensures that when you start cleaning with a hose, the water can work directly on the surface dirt and grime without being hindered by loose particles. It might seem like a simple step, but thorough sweeping makes a significant difference in the overall cleanliness of your patio. Cleaning with a hose becomes much more effective once the patio is free from loose debris. Without small twigs and leaves getting in the way, the water can flow smoothly across the surface, targeting stubborn dirt and stains more directly. This preparatory step not only makes the hosing down process more efficient but also reduces the amount of time and effort required for scrubbing later on. So, taking a few minutes to clear and sweep your patio sets a strong foundation for a successful and satisfying cleaning session.     2. Pre-Treat Stains Before diving into the main cleaning with a hose, it’s essential to identify and pre-treat any stubborn stains on your patio. These stains might come from various sources such as spilled drinks, food, or natural elements like moss and algae that have taken hold over time. Thoroughly inspecting your patio and pinpointing these problem areas is the first step. Once identified, use a suitable cleaning solution to tackle these stains. A popular and effective choice is a mixture of baking soda and water, which is both gentle on surfaces and tough on stains. Apply this solution generously to the stained areas and allow it to sit for about 10-15 minutes to break down the grime. After giving the cleaning solution enough time to penetrate and loosen the stains, it’s time to roll up your sleeves and scrub. Use a scrub brush with stiff bristles to gently work on the stained areas. The key here is to scrub gently but thoroughly, ensuring you do not damage the surface of your patio while effectively lifting the stains. This preparatory scrubbing is crucial because it helps to break down the most stubborn spots, making them much easier to rinse away later when you start cleaning with a hose. The effort you put into pre-treating and scrubbing the stains will significantly enhance the overall cleanliness of your patio. Cleaning with a hose after pre-treating stains is much more effective. The combination of a high-pressure water stream and the pre-treated areas ensures that even the toughest grime and stains are washed away. By addressing stains beforehand, you ensure that your patio will look uniformly clean and refreshed once the entire cleaning process is complete. This method not only saves you time in the long run but also guarantees a more polished and professional finish, making your patio a pleasant and welcoming outdoor space. 3. Start Hosing Down Now that your patio is prepped and ready, it’s time to begin the main cleaning process. Start by attaching a nozzle to your hose. This small but crucial step allows you to control the water pressure, making your cleaning with a hose more efficient and effective. High-pressure settings are excellent for dislodging embedded dirt and grime, which can accumulate over time and become quite stubborn. Conversely, a gentle setting is ideal for rinsing away loose debris and ensuring that the surface remains intact without causing any damage. With the nozzle attached and adjusted to the appropriate setting, begin spraying the entire patio. This initial rinse helps to loosen any remaining dirt and debris, making it easier to clean the surface thoroughly. Start from one end of the patio and work your way systematically to the other, ensuring that every inch is covered. This methodical approach ensures that no area is missed and that the water pressure can effectively reach all the dirty spots. For areas that are particularly dirty or have more stubborn stains, you may need to go over them a few times. This repetition helps to ensure that all the grime is adequately loosened and ready to be washed away. Cleaning with a hose can be quite satisfying as you see the immediate impact of your efforts. As you spray, watch for areas where the dirt is particularly stubborn and adjust your water pressure accordingly. A high-pressure blast can break up tough dirt, while a gentle spray can be used to rinse off the loosened debris. This combination of techniques ensures a thorough cleaning. As you continue to work your way across the patio, the transformation will become evident, leaving you with a cleaner and more inviting outdoor space. 4. Apply a Cleaning Solution With the initial hosing down complete, it’s time to apply a cleaning solution tailored to your patio’s material. The choice of cleaning solution is crucial for achieving the best results without damaging your patio. For concrete and stone surfaces, a

5 Steps to Effective Patio Cleaning with Hose Read More »