Floor Cleaning

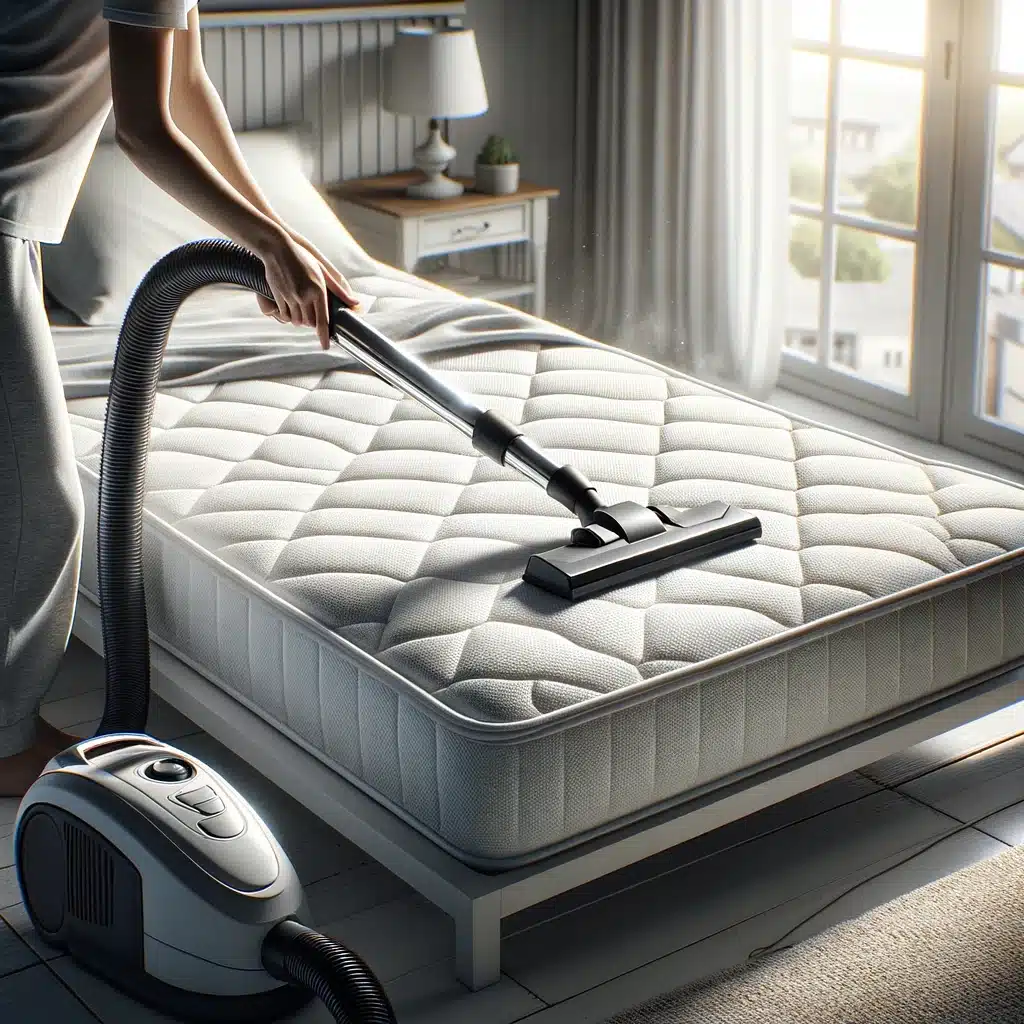
Person cleaning mattress with vacuum in sunny bedroom.

6 Easy Steps on How to Clean with Vacuum Cleaner

How to Clean with a Vacuum Cleaner: 6 Easy Steps Keeping your home clean and dust-free is much easier when you know how to use your vacuum cleaner effectively. Whether you are a cleaning pro or a first-time owner, these six simple steps will help you get the most out of every vacuuming session and keep your floors looking their best. Step 1: Choose the Right Vacuum Cleaner Start with the right tool for your floors: Upright vacuum. Best for homes with large carpeted areas, thanks to powerful suction and a wide cleaning path. Canister vacuum. Versatile for mixed surfaces and hard-to-reach spots, sliding easily under furniture and along baseboards. Stick vacuum. Lightweight and easy to store, perfect for quick clean-ups and small apartments. Robot vacuum. Hands-off daily maintenance that navigates around obstacles while you do other things. The right pick depends on your layout and needs. For households with allergies or asthma, a model with a HEPA filter makes a real difference, because the EPA explains how HEPA filters capture the fine particles that standard filters let back into the air. Step 2: Prepare the Area Before you vacuum, remove small objects such as toys, clothes, and cords that could clog the machine. Dust surfaces like shelves and tables first, so any dust that falls gets picked up by the vacuum instead of settling on the floor. Move light furniture, including chairs, small tables, and floor lamps, to reach the spots that are usually missed during a standard cleaning session. Step 3: Check and Clean the Vacuum A well-maintained vacuum cleans better and lasts longer. Empty the dust bag or canister regularly, because a full bag significantly reduces suction power. Check and clean or replace the filters to keep airflow strong, since clogged filters hinder performance and shorten the life of the machine. Inspect the brush roll for tangled hair and debris, which can affect pickup and even damage the motor if left unattended. Step 4: Vacuum Strategically Start in the farthest corner of the room and work back toward the exit, so you never walk over freshly vacuumed floor. Use straight, slightly overlapping strokes to cover every inch without gaps, and adjust the height and suction settings when moving between carpet and hardwood. Tailoring the settings helps the vacuum perform efficiently on each surface. Step 5: Focus on High-Traffic Areas Hallways and living rooms collect the most dirt and debris. Move the vacuum slowly over heavily soiled carpet so it has time to lift deeply embedded dust, and vacuum in two directions, north-south and then east-west, to pull particles out from every angle. Go over spots and stains several times, slowing down to let the vacuum work. These are also the areas where allergens settle, and Asthma Canada recommends vacuuming with a HEPA filter to control indoor triggers such as dust mites and pet dander, which the National Institute of Environmental Health Sciences lists among the most common household allergens. Step 6: Finish Up and Store Properly After the last pass, inspect the rooms for missed spots and go over them again. Empty the canister even if it is not completely full, so the vacuum keeps optimal suction for next time. Wipe down the exterior, check the filters and brush roll for lingering debris, and store the vacuum in a dry place with the cord wound neatly to avoid tangles and fraying. When to Let the Professionals Handle the Vacuuming Even the best home routine has limits. Professional crews bring commercial-grade equipment, HEPA filtration, and the experience to vacuum, dust, and sanitize a whole home efficiently. Toronto Shine Cleaning’s regular maid cleaning includes thorough vacuuming on a schedule that fits your life, while a deep cleaning service tackles the build-up that daily vacuuming misses, such as under beds, behind appliances, and along baseboards. Check the house cleaning prices to find a plan that fits your home and budget. Frequently Asked Questions How often should I vacuum? High-traffic areas deserve vacuuming two to three times a week, while low-traffic rooms can go weekly. Homes with pets or allergy sufferers benefit from more frequent passes, ideally with a HEPA-filtered vacuum. Why does my vacuum lose suction? The most common causes are a full bag or canister, a clogged filter, or a blockage in the hose or brush roll. Empty the bin, clean the filters, and clear the brush roll, and suction usually returns. Is a HEPA filter worth it? For households with allergies or asthma, yes. HEPA filters capture tiny particles such as dust mite debris and pet dander and keep them from being blown back into the air. Can a robot vacuum replace a full clean? Not entirely. Robot vacuums are excellent for daily maintenance, but a full-size vacuum with attachments is still needed for deep cleaning carpets, edges, and upholstery. With the right machine and a consistent routine, vacuuming becomes quick and effective. And when the job calls for professional tools and a trained crew, Toronto Shine Cleaning is ready to help.

6 Easy Steps on How to Clean with Vacuum Cleaner Read More »
Clean laminate flooring with light wood finish reflecting natural light.

How to Clean Laminate Floor: 7 Simple Steps for a Shiny Finish | Toronto Shine Cleaning

How to Clean Laminate Floors: 7 Simple Steps for a Shiny Finish Laminate flooring looks its best for years when you treat it gently. The surface is tough but not indestructible: too much water, gritty dirt, and harsh products all leave their mark. Follow these seven steps to keep the shine without scratches, streaks, or swollen seams. 1. Gather the Right Supplies Good results start before the cleaning does. Pick up a microfiber mop, which grabs dust without scratching the finish, plus a soft-bristle broom or a vacuum with a soft brush attachment. Add a spray bottle, a bottle of white vinegar, and a supply of soft, dry cloths. Vinegar earns its place in the kit because it breaks down everyday grime without leaving residue behind. Skip harsh chemicals and soap-based cleaners at the store; they can damage the protective finish over time. A cleaner made specifically for laminate is also a fine choice, as long as you read its label before use. 2. Sweep or Vacuum Before Anything Else Loose dirt is the enemy of a shiny floor. Tracked-in grit grinds against the surface like fine sandpaper, dulling the shine and adding small scratches with every step. Removing it first protects the floor’s appearance and lifespan, so keep a broom or vacuum handy for a regular pass between deeper cleanings. It also makes the washing that follows far more effective, since the mop is not dragging particles around the room. It follows the same rhythm the CDC recommends: clean surfaces before dirt builds up. 3. Mix a Simple Cleaning Solution Fill your spray bottle with one part white vinegar and three parts warm water. The mild acidity loosens grime, and the warm water boosts its cleaning power, all without the sticky film that soap leaves behind. That residue matters more than it sounds: soapy cleaners build up on laminate, dull the finish, and cause long-term damage that no amount of polishing can fix. A commercial product works too, if it is formulated for laminate; follow its directions closely. Health Canada’s tips for using household products safely are worth checking while you stock up. 4. Mop With a Damp Mop, Section by Section Spray your solution over a small section and wipe it with the microfiber mop, working along the grain of the planks to avoid streaks. The word to remember is damp, never soaking. Wring the mop out thoroughly before it touches the floor, because excess water seeps into the seams between planks and causes the edges to swell. Work in sections rather than flooding the whole floor at once, keeping the moisture under control. 5. Dry the Floor Straight Away Go over each freshly mopped area with a soft dry cloth or a dry mop head. Standing moisture is what leaves water spots and streaks behind, and it is also what finds its way into the seams and starts the swelling that ruins laminate edges. Drying as you go takes less than a minute per section and delivers the even, polished finish you are after. 6. Spot Clean Spills and Stains Promptly Treat whatever lands on the floor right away rather than waiting for cleaning day. Spritz the spot with your vinegar solution, let it sit for a few minutes to break the stain down, then gently rub it away with a soft cloth or sponge. Skip abrasive scouring pads and stiff brushes entirely; they scratch the protective layer and do more harm than the stain ever would. Handling spills quickly keeps the floor pristine instead of permanently blemished. 7. Keep Up With a Simple Routine Consistency protects the shine more than any single deep clean. Sweep or vacuum regularly so grit never gets a chance to settle, and mop weekly with the vinegar solution to lift the film that ordinary traffic leaves behind. Place doormats at entryways to cut tracked-in dirt, and fit pads under chair and table legs so furniture glides instead of scratching. Your Laminate Cleaning Kit A microfiber mop plus a dry mop head or soft cloths A soft-bristle broom or a vacuum with a soft brush attachment A spray bottle for the vinegar and water solution White vinegar, plus a laminate-specific cleaner if you prefer Doormats and furniture pads for everyday protection Quick Reference: Do It Right Task Do this Why it matters Routine clean Sweep or vacuum with a soft brush Grit acts like sandpaper and dulls the finish Mopping Damp microfiber mop, working along the grain Avoids streaks and keeps water out of the seams Drying Follow straight away with a dry cloth Stops water spots, streaks, and edge swelling Spills Blot and spot clean with vinegar solution Stains lift easily before they set Protection Doormats at entries, pads under furniture Fewer scratches and less tracked-in dirt Frequently Asked Questions Can I use vinegar to clean laminate floors? Yes. One part white vinegar to three parts warm water lifts everyday dirt without residue, avoiding the sticky film that soap-based products leave. Keep the mop damp rather than wet, dry each section as you finish, and the mix is both safe and effective for regular use. How often should I mop laminate floors? Weekly mopping with the vinegar solution keeps them looking fresh, supported by sweeping or vacuuming on a more regular rhythm so grit never settles in. Prompt spot cleaning of spills matters more than any schedule. A spill left waiting sets and takes permanent hold, so treat it the day it happens. Why do my floors look streaky after mopping? Streaks usually come from too much water on the mop, a dirty mop head, or wiping across the planks instead of along the grain. Wring the mop out thoroughly before each pass, follow the direction of the planks, and finish each section with a dry cloth so no moisture is left to dry unevenly. Can water damage laminate flooring? It can. Laminate tolerates a damp mop, but standing water slips into the seams and makes the edges swell, damage

How to Clean Laminate Floor: 7 Simple Steps for a Shiny Finish | Toronto Shine Cleaning Read More »

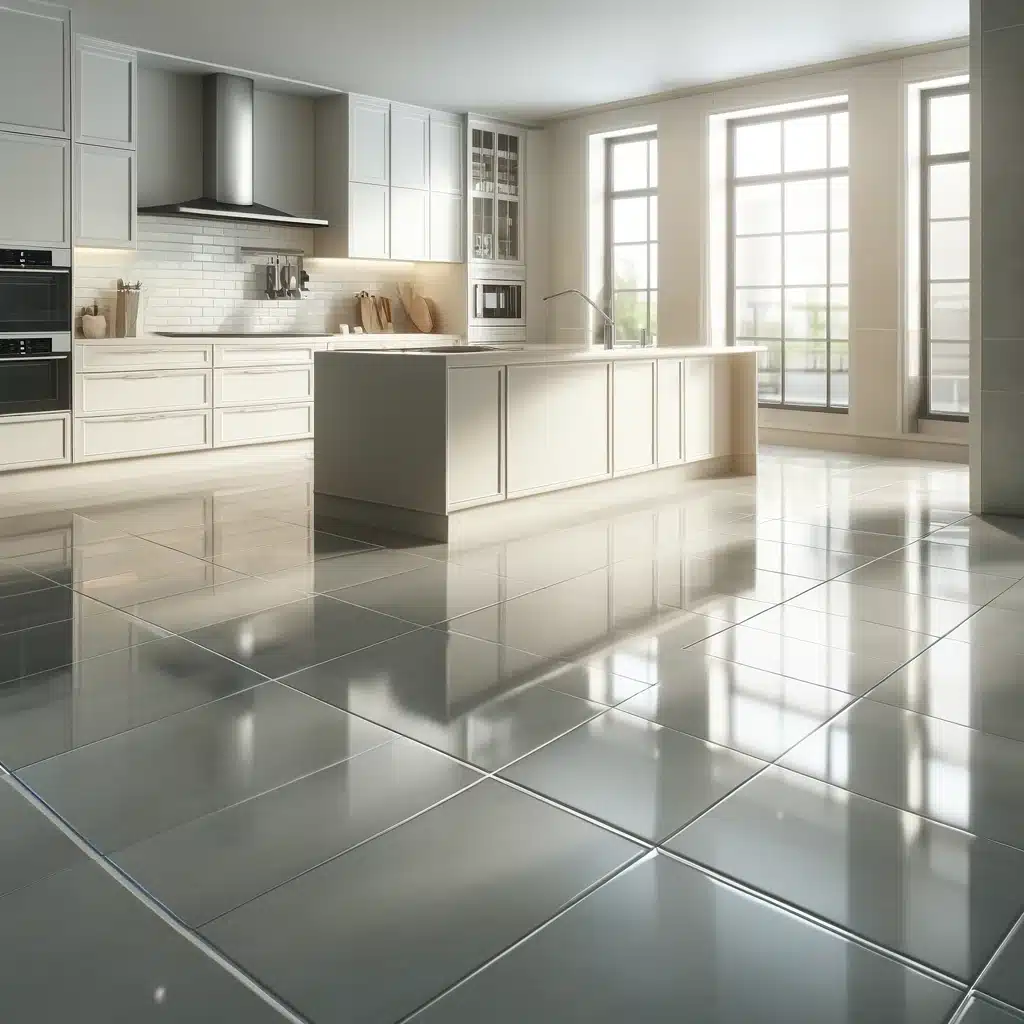
Modern kitchen with gleaming light ceramic tiles and natural illumination.

How to Clean Ceramic Floors: 7 Easy Steps for a Sparkling Home | Toronto Shine Cleaning

Ceramic tile rewards a gentle, repeatable routine Ceramic flooring stays bright for decades when you clean it with the right tools and skip anything aggressive. A broom, a mop, a bucket, warm water, and a mild detergent handle nearly every mess a household throws at tile. This seven-step routine takes you from prep to the final dry pass, leaving floors polished instead of streaky. The approach matches public-health guidance, too. The CDC treats floors as hard surfaces that do well with soap and water or a suitable product, and notes that regular cleaning removes most germs, so consistency beats chemical strength. If a weekly mop keeps slipping off your calendar, a regular cleaning plan can carry the routine for you. Step 1: Gather everything before water hits the tile Assemble your kit up front to avoid mid-mop scavenger hunts. You will need: A broom or vacuum to lift loose debris before washing A mop and bucket for the wet pass A mild detergent or a cleaner made specifically for ceramic tile Warm water to help dissolve stuck-on residue A microfiber cloth or towel that soaks moisture fast without streaks A scrub brush for spots the mop cannot shift Skip harsh chemicals. Strong products can damage both tile and grout surfaces, so a gentle formula is the smarter pick. Step 2: Sweep or vacuum to protect the glaze Clearing dust, crumbs, and grit first is not just a warm-up. Loose particles act like abrasives, and a wet mop drags them across the surface, causing scratches that dull the tiles and lead to long-term damage. A broom handles open floor well, while a vacuum pulls tiny particles out of grout lines where they hide. Daily sweeping also keeps buildup low, turning weekly or bi-weekly mop sessions into quick jobs. Step 3: Mix a cleaning solution that is kind to tile Fill the bucket with warm water and add a few drops of mild detergent or a cleaner formulated for ceramic floors. Warmth helps break down clinging residue so it mops away easily. Harsh chemicals, by contrast, can discolor tiles and wear down the protective sealant, leaving the floor dull and tired over time. Stir until the detergent is fully dispersed: an even mix cleans consistently and lifts dirt without leaving a film. Health Canada keeps a helpful reference on using household products safely if you want guidance on handling the liquids under your sink. Step 4: Mop with a figure-eight, not a scrub Dip the mop, then wring out the excess: a soaking-wet floor slows the job and invites streaks and water spots. Start at one corner and work toward the opposite side so every stretch gets covered. Push the mop in a figure-eight pattern rather than circles or straight passes. That motion lifts soil and traps it in the mop head instead of smearing it into cleaned areas. Give high-traffic lanes extra passes and ease over grout lines, where dirt packs into the crevices. Rinse and wring the mop often so you never spread grey water. Step 5: Spot-treat stubborn marks by hand Even a well-kept floor develops stubborn spots. Apply extra cleaner straight onto the mark and work it in with a scrub brush in small circles, helping the solution penetrate the stain. Keep pressure light and bristles soft: hard scrubbing can scratch or dull the finish. If a stain refuses to budge, let the cleaner sit a few minutes to break down the dirt. Once the spot lifts, wipe the area with a damp cloth; leftover cleaner attracts fresh dirt and can discolor the tile over time. Step 6: Rinse away the invisible film Empty and rinse the soapy bucket, then refill with clean warm water. This pass matters because detergent left behind dries into a dull, sticky residue that grabs dirt. Mop the same corner-to-corner path with water only, rinsing and wringing the mop often so you never reintroduce soap. Warm water lifts the last of the residue, leaving the ceramic’s natural shine visible instead of hazy. Step 7: Dry the floor for a true sparkle Dry it the moment rinsing ends. Microfiber drinks water fast and finishes streak-free, preventing the spots that spoil an otherwise pristine floor. Work section by section and check edges and corners where moisture collects. Thorough drying also removes the slip hazard wet tile creates. If you own a floor protector, apply it now, while the surface is clean and bare. It adds shine and forms a barrier against future spills and stains, keeping the luster and making later clean-ups easier. Ceramic floor care at a glance Task When to do it Why it matters Sweep or vacuum Daily Keeps grit from scratching the glaze and shortens mop days Mop with mild solution Weekly or bi-weekly Removes ground-in dirt before it dulls the tiles Spot-treat stains As they appear Stops marks from setting in tile or grout Rinse with clean water Every wash Removes sticky soap film that attracts dirt Dry with microfiber Every wash Prevents water spots and slip hazards Apply floor protector After deep rinses, as needed Shields the surface from spills and future stains Frequently asked questions What cleaner is safest for ceramic floors? Mild detergent diluted in warm water, or a product formulated for ceramic tile. Harsh chemicals discolor the surface and wear down the sealant over time, so the gentle option is also the one that protects your investment. Why do my tiles look dull after mopping? Leftover soap is the usual culprit. Residue dries into a sticky film that attracts dirt and clouds the shine. Fix it with a rinse pass of clean warm water and no cleaner, then dry with a microfiber towel. Can I let the mop soak the floor? No. Oversaturation slows drying and leaves streaks and water spots without cleaning any better. Wring the mop until damp rather than dripping, and rinse it often so you never reapply dirty water. Do I really need to dry the floor by hand? It is

How to Clean Ceramic Floors: 7 Easy Steps for a Sparkling Home | Toronto Shine Cleaning Read More »

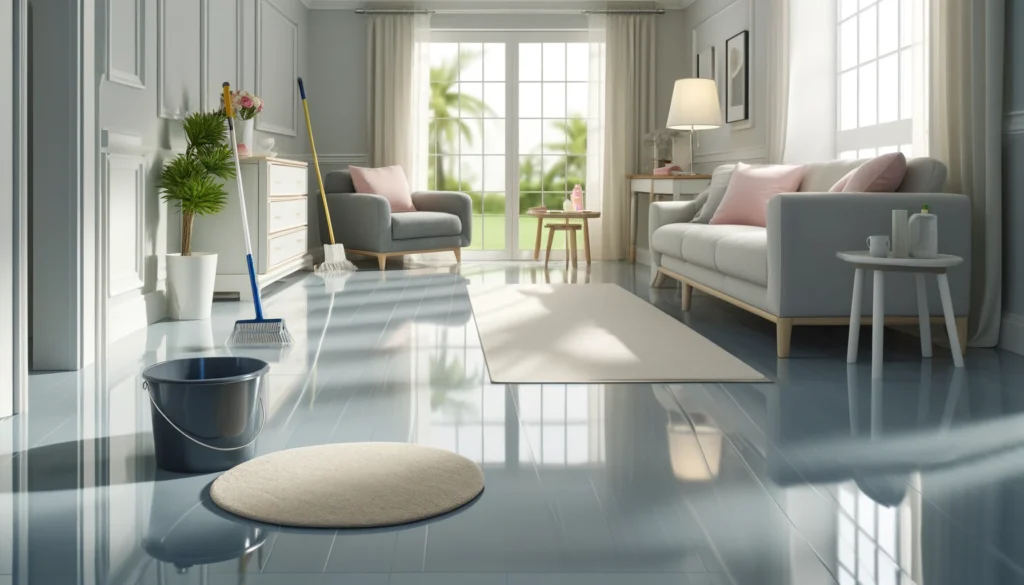
Modern furnished room with shiny vinyl flooring and cozy rug.

6 Easy Ways to Keep Your Vinyl Floors Looking New | Toronto Shine Cleaning

Vinyl floors are tough, but they still need smart care Homeowners love vinyl for its durability, friendly price tag, and good looks. Even so, grit, water, and heavy furniture can quickly dull the surface. The six habits below cover daily upkeep and long-term protection without special equipment. The CDC counts floors among the hard surfaces that respond well to regular soap-and-water cleaning, which is exactly what these habits deliver. 1. Sweep and vacuum on a regular schedule Dirt, dust, and debris grind against vinyl like fine sandpaper, scratching and dulling the surface over time. A soft-bristle broom lifts that grit gently, and a vacuum built for hard floors, with the right setting or attachment, picks debris up without harming the vinyl. A dust mop reaches corners and spots under furniture that other tools miss. Pet owners should sweep or vacuum often, since hair and dander build up quickly. In busy homes or near construction sites, cleaning more frequently keeps abrasive particles from settling in. 2. Mop with a vinyl-safe cleaner only Vinyl carries a protective layer, and harsh or abrasive cleaners can compromise it, causing discoloration and damage. Mix warm water with a little mild dish soap instead: it lifts dirt and grime without attacking the coating. Wring the mop well before it touches the floor. Standing water seeps into the seams, where it can weaken the adhesive, and that is how planks begin to lift or warp. A microfiber mop is a smart upgrade because it traps dust, needs less liquid, and can be washed and reused. For stubborn spots, switch to a stronger vinyl-safe cleaner, test it on a hidden patch first, scrub gently with a soft cloth or sponge, then rinse and dry. Health Canada’s guide to using household products safely is a useful reference for picking and storing cleaners. 3. Wipe up spills the moment they happen Kitchen spills and hallway accidents are inevitable; what matters is speed. Blot the liquid with a damp cloth, then dry the area with a soft towel, because moisture that lingers can work its way into the seams and threaten the adhesive underneath. Some liquids do more harm than others: acidic spills such as vinegar or tomato sauce can discolor vinyl if left unattended, while oily or greasy spots leave residue that attracts fresh dirt. Keep a mild vinyl floor cleaner on hand for the tougher ones. Moisture matters for a bigger reason too: the CDC notes that mold grows where dampness persists, so a dry floor is a healthier floor. 4. Build a barrier with doormats and rugs Mats at every entrance and rugs in walkways act as your first line of defense, capturing the grit and mud that would otherwise wear down the vinyl. Choose entrance mats with coarse, sturdy textures that scrape shoes clean, and add non-slip backings so the mats and rugs stay put instead of sliding and scratching the floor themselves. Rugs in walkways also absorb spills and soften the impact of constant foot traffic. Shake, vacuum, or wash them regularly so they do not become dirt sources themselves. 5. Protect the surface from heavy furniture Chairs, sofas, and tables press their weight into vinyl and leave dents and marks that spoil the look. Felt or rubber furniture pads spread that load, cushioning each contact point so it cannot sink into the floor. Check them periodically, because flattened pads stop working, and rotate heavy pieces now and then to spread wear evenly. When rearranging, lift furniture rather than dragging it; dragging invites deep scratches or tears that are expensive to repair. If an item is too heavy to lift, slide it on moving blankets or hard-floor sliders instead. For office chairs with casters, a protective mat under the desk shields vinyl from constant rolling pressure. Keep these three protectors on hand: Felt or rubber pads for heavy furniture legs A hard protective mat for caster chairs Moving blankets or sliders for relocations 6. Finish with a vinyl floor polish A good vinyl floor polish adds a glossy layer that makes floors look new again, fills minor scratches, and stands between the surface and future wear. Apply it according to the manufacturer’s instructions: start with a thoroughly clean, dry floor, spread the polish evenly with a clean mop or applicator, and work in small sections to avoid streaks. Let it dry fully before walking on it. Depending on the product and the traffic in the room, reapply periodically to maintain the shine. Polished floors resist stains and scratches better, and make routine cleaning simpler, which pays off in busy homes with kids and pets. Vinyl floor protection cheat sheet Habit Frequency The payoff Sweep or vacuum Daily Stops grit from acting like sandpaper Mop with a vinyl-safe solution Regularly Keeps seams safe from standing water Wipe spills Immediately Prevents stains, warping, and lifting Clean mats and rugs As needed Stops them becoming dirt sources Check furniture pads Periodically Prevents dents and scratches Reapply polish Per product and traffic Restores shine and adds protection Frequently asked questions What is the best way to mop vinyl floors? Use warm water with a few drops of mild dish soap, and wring the mop until it is barely damp. Harsh chemicals and soaking-wet mopping are the two biggest mistakes, since they attack the protective layer and push water into the seams. Can water damage vinyl flooring? Yes. Vinyl is water-resistant, not waterproof at the edges. Standing water seeps into seams, damages the adhesive, and can make the floor lift or warp, which is why mopping should stay damp rather than wet and spills should be dried promptly. Do I need to polish new vinyl floors? It is optional but worthwhile. Polish adds shine, hides minor scratches, and creates a protective layer that makes cleaning easier. Reapply it periodically based on the product instructions and how much traffic the room sees. How do I stop furniture from denting my vinyl? Put felt or rubber pads under the legs of heavy

6 Easy Ways to Keep Your Vinyl Floors Looking New | Toronto Shine Cleaning Read More »

Tiles, Bathroom floor

5 Effective Ways to Clean Your Tile Floors

Why Tile Floors Need a Regular Cleaning Routine Tile floors are a popular choice for many Toronto homeowners because they are durable and easy to maintain. Even so, keeping them looking their best takes a little planning. Dust, pet hair, and everyday debris settle into the surface, while spills can stain porous grout in minutes. The five methods below will help you keep your tile floors shining and extend their lifespan, whether you clean weekly or bring in a professional cleaning team for a deeper refresh. 1. Sweep or Vacuum Before You Mop Start every cleaning session by sweeping or vacuuming. A soft-bristle broom collects loose dirt and pet hair without scratching the tile surface, and it is gentle on grout lines. If you prefer a vacuum, switch to the hard floor setting so the brush roll does not abrade the finish. Removing surface grit first means your mop water stays cleaner and you avoid pushing sand and debris into the grout. 2. Mop With the Right Cleaning Solution For routine mopping, mix a mild detergent with warm water. Warm water dissolves grease and grime faster than cold water, and a gentle detergent protects the tile’s finish. Use a microfiber mop or a soft rag, since microfiber lifts and holds particles instead of smearing them. Adding a capful of white vinegar to the bucket boosts cleaning power on kitchen tiles and entryways, cuts oily residue, and leaves a streak-free shine. Skip harsh chemicals and abrasive scrubbers, which can dull the surface over time. 3. Tackle Stains Immediately Time is everything when a spill lands on tile. Wipe up everyday messes with a damp cloth right away so liquids cannot seep into porous grout. For tougher spills like coffee, wine, or grease, make a paste from baking soda and water, spread it over the stain, and let it sit for about 15 minutes. Then scrub gently with a soft brush and rinse with clean water. This lifts deep-set discoloration without harming the tile’s finish. 4. Clean Grout Before It Discolors Grout is porous, which means it absorbs dirt, spills, and grime and discolors faster than the tile around it. A paste made from hydrogen peroxide and baking soda works well for grout lines: apply it, let it sit for several minutes, then scrub with a grout brush or an old toothbrush and wipe clean with a damp cloth. Regular grout care keeps bathroom and kitchen floors looking fresh and prevents the buildup that attracts mold in damp areas. For guidance on handling mold safely at home, see the CDC’s mold clean up guidelines. 5. Schedule a Seasonal Deep Clean Even with weekly care, tiles and grout build up layers of grime that regular mopping cannot fully remove. Every few months, bring out a steam cleaner or book a professional deep cleaning. Steam penetrates the tile and the pores of the grout, loosening dirt, grease, and bacteria without harsh chemicals, and the high heat sanitizes surfaces and helps control mold spores that thrive in damp bathrooms and kitchens. The CDC’s mold overview explains what mold is and how to prevent it. Steam cleaning is environmentally friendly, restores the tile’s natural shine, and keeps your floors in excellent condition. Protect Your Tile Floors Between Cleanings Prevention cuts down the amount of scrubbing you need. Simple habits keep dirt and grit off your tile: Place doormats at every entrance to catch sand and grit before it reaches the tile. Use rugs or floor mats in high-traffic areas and near the kitchen sink or dining table. Attach felt pads to furniture legs so chairs and tables cannot scratch the floor. Check the sealant on porous tile such as natural stone and reapply it as needed. Task How Often Best Tools Sweep or vacuum 2 to 3 times a week Soft-bristle broom or vacuum on hard floor setting Mop Once a week Microfiber mop, mild detergent, warm water Spot clean spills Immediately Damp cloth or baking soda paste Grout cleaning Monthly Hydrogen peroxide and baking soda paste Deep clean Every few months Steam cleaner or professional service Keep Your Tile Floors Looking New Maintaining clean tile does not have to be a big project. Regular sweeping, smart mopping, quick stain removal, and seasonal deep cleaning will keep your floors beautiful and reduce allergens in your home. If you would rather leave it to the experts, Toronto Shine Cleaning offers tile and grout cleaning with state-of-the-art equipment and environmentally friendly solutions. Pair it with a regular maid service or a full home deep clean to keep every surface fresh, and check our pricing page to plan your cleaning budget. Call (647) 424-0355 for a quote, or find a location near you. Tile Floor Cleaning FAQ Can I use vinegar to clean tile floors? Yes. A capful of white vinegar added to a bucket of warm water and mild detergent helps cut grease and leaves a streak-free finish on most glazed tile. Avoid vinegar on unsealed natural stone, since the acid can etch the surface. How often should I mop tile floors? Once a week is a good baseline for most homes, with extra attention after heavy foot traffic or cooking. Sweep or vacuum between mopping sessions to keep grit from scratching the surface. What is the best way to clean grout? A paste of hydrogen peroxide and baking soda is a proven DIY option. Apply it to the grout lines, let it sit for several minutes, scrub with a grout brush or old toothbrush, then rinse with a damp cloth. Is steam cleaning safe for tile floors? Yes, for most ceramic, porcelain, and stone tile. Steam sanitizes without harsh chemicals, but avoid using it on unsealed or cracked grout, and check your tile manufacturer’s care instructions first.

5 Effective Ways to Clean Your Tile Floors Read More »

Dusty attic interior with visible beams and sunlit window.

6 Essential Tips for Efficient Attic Cleaning | Toronto Shine Cleaning

A Tidy Attic Pays for Itself in Space, Air, and Peace of Mind An attic that has drifted into chaos quietly taxes the whole house. Boxes lean against rafters, dust blankets every surface, and a search for one bin of holiday lights can swallow an entire Saturday. A focused attic clean fixes far more than appearances. It frees storage, improves air quality above your ceilings, and exposes leaks, pests, or mold while those problems are still small and cheap to repair. The six tips below follow the same sequence a seasoned crew uses, from the first plan to year-round upkeep. 1. Begin With a Written Plan Decide your mission before you pull down the ladder. Are you decluttering, hunting for a specific box of keepsakes, or attempting a full deep clean? That answer shapes every later choice. Next, break the space into zones: one corner for sorting boxes, another for stored furniture, a third for items that need repair or a deeper scrub. Working one zone at a time keeps a mountain of stuff from feeling like a mountain, and visible progress in each zone keeps you moving when the dust starts to test your patience. 2. Dress Like the Attic Is a Job Site Attics rarely receive the care that living rooms do, so expect dust, debris, and insulation fibers floating in still air. Wear long sleeves and long pants to keep those abrasives off your skin and reduce the chance of irritation or an allergic reaction. Sturdy gloves guard your hands against splinters, sharp metal edges, and whatever the last decade left behind. A dust mask filters the fine particulates you will inevitably stir loose, which matters extra if mold or mildew spores are anywhere in the space. 3. Carry Every Tool Up Before You Start Trips back downstairs kill momentum and stretch a half-day job into a full weekend. Load up first with everything you will need: Heavy-duty garbage bags tough enough for broken items, old cardboard, and dusty textiles without tearing on sharp edges Sorting boxes labeled keep, donate, sell, and toss so every object lands in its fate immediately A vacuum with a HEPA filter, which traps fine dust and allergens instead of puffing them back into the enclosed air A mold and mildew cleaning spray for moisture-prone corners and rafters A sturdy step ladder for high shelves and deep corners, so you never over-reach from the joists 4. Sort Every Item Into Four Buckets The fastest way through the piles is a ruthless four-way decision on every single object. Keep covers things you use regularly, hold real sentimental value, or will genuinely need later. Donate takes items that are usable but no longer serve you; someone else will thank you. Sell is for pieces with resale value that can return some cash for the effort. Toss is the home for anything damaged beyond repair or refused by charities. A sorted attic is not just easier to walk through. Less clutter means fewer hiding spots for pests and a much better chance of noticing a leak stain or mold patch early. 5. Clean From the Rafters Down With the clutter gone, work top to bottom. Dust the overlooked spots first: rafter undersides, door frame tops, window sills, and light fixtures, all of which collect cobwebs and grey fur. Then vacuum the floor, pressing into crevices and corners where insects and rodents like to nest and breed. Watch closely for mold or mildew, which thrives where ventilation is poor and moisture settles. Treat any patch right away with a labeled mold-killing product and follow the instructions exactly. The CDC guide on mold health explains why disturbing or breathing mold is worth avoiding, particularly for children, older adults, and anyone with a sensitive airway or weakened immune system. Before buying any heavy-duty disinfectant for the job, skim Health Canada’s household products guidance on reading labels and using cleaners without wrecking your indoor air. 6. Protect Your Work With Light Yearly Upkeep A spotless attic left alone slowly reverts. A simple maintenance rhythm keeps clutter and dust from rebuilding, protects the things you store up there, and gives you regular chances to spot roof leaks or pest entries before they become expensive repairs. Task Frequency Why It Matters Visual scan for stains, damp, and pests Every season Catches costly damage while it is tiny Quick dust and cobweb sweep Twice a year Keeps air quality and light levels up Full sort and vacuum session Once a year Stops clutter from stacking back up Label and log stored boxes At first store Future searches take minutes, not hours Hand Over the Ladder When the Attic Wins Some attics outgrow a weekend: decades of accumulation, large suspected mold areas, or an access hatch that worries you alone with a ladder. Toronto Shine Cleaning brings bonded, insured crews, backed by a $1,000,000 insurance policy plus a $10,000 accidental breakage and surety bond, to homes across the city. The deep cleaning service starts at $270.38 for a studio or one-bedroom home before HST, with every rate listed on the pricing page. Frequently Asked Questions How long does an attic clean take? For a moderately loaded attic, plan roughly half a day with a helper. Denser accumulations stretch into a full weekend because sorting decisions, not dusting, eat the clock. Zoning the space and using the four-bucket method are the two biggest time-savers. Do I really need a dust mask up there? Yes. Attics trap fine dust, insulation fibers, and sometimes mold spores in still air with little ventilation. A mask filters what you would otherwise breathe in a closed space while you agitate months or years of settled particles. Can I store my belongings right after cleaning? Once the space is fully dry, yes. Prefer sealed bins over open piles so dust cannot settle back onto your things, and leave walking paths clear to the walls so future inspections and vacuuming stay easy. What signs mean I should call a professional?

6 Essential Tips for Efficient Attic Cleaning | Toronto Shine Cleaning Read More »

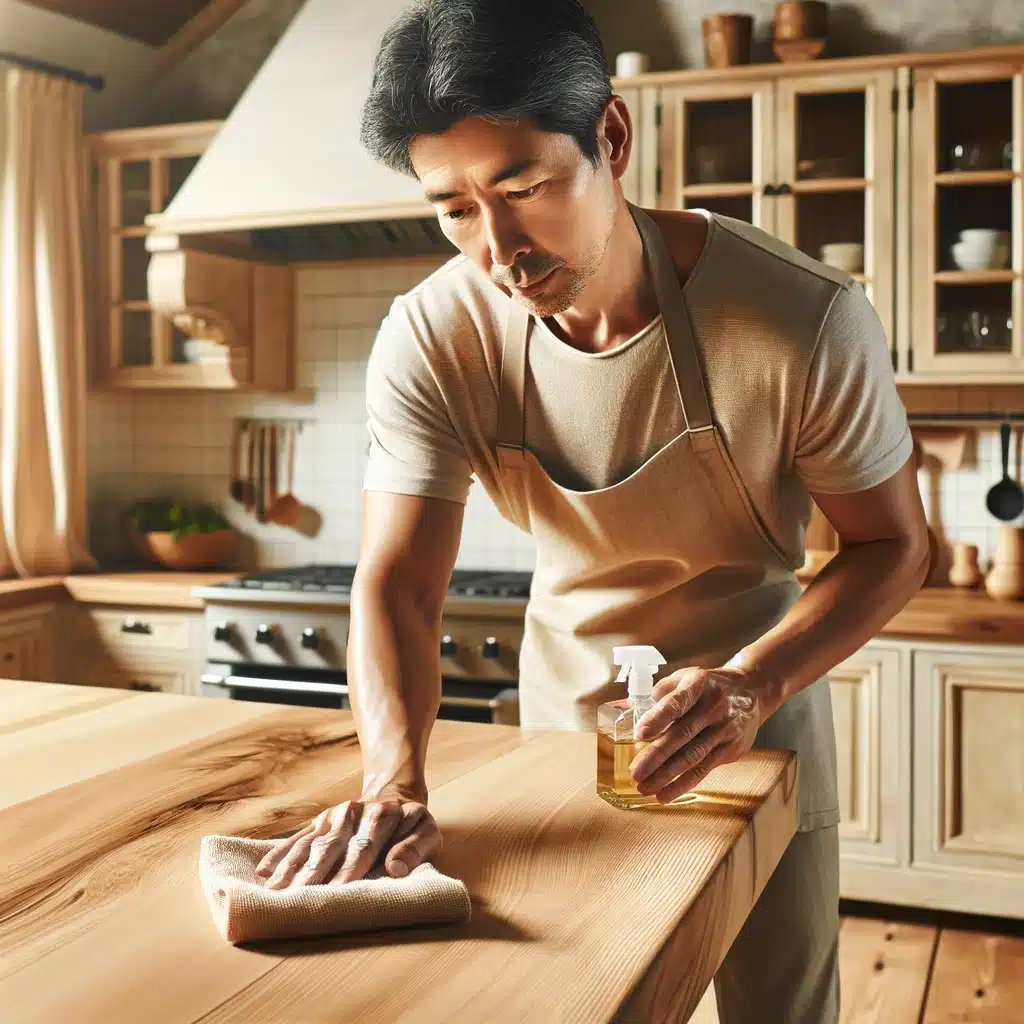
Person polishing wooden island with essential oils in sunny kitchen.

7 Natural Ways to Clean and Polish Wood for a Lasting Shine

Wood furniture and surfaces add warmth and elegance to any home, but keeping them in pristine condition can be a bit of a challenge. Fortunately, you don’t have to rely on harsh chemicals to keep your wood items looking their best. Here are seven natural methods to clean and polish wood that not only bring out its beauty but are also eco-friendly and gentle on your furniture. 1. Vinegar and Olive Oil Mixture One of the most effective and gentle ways to care for your wood furniture is by using a mixture of vinegar and olive oil. This combination is not only simple to prepare but also highly effective in maintaining the luster and health of wood surfaces. The acidity of the vinegar gently cleanses the wood, removing dirt and grime without damaging the wood’s natural structure. Meanwhile, the olive oil acts as a nourishing polish, deeply conditioning the wood and enhancing its inherent shine. To make this natural wood cleaner and polish, combine one part white vinegar with three parts olive oil in a bowl or a jar. This ratio ensures that the oil sufficiently coats and protects the wood while the vinegar keeps it clean and bright. Before applying, it’s essential to stir the mixture thoroughly to blend the ingredients well. Using a soft, lint-free cloth, dip it into the mixture and wring out any excess liquid. Gently apply the solution to your wood furniture, always rubbing gently in the direction of the wood grain. This technique ensures that the oil penetrates evenly and prevents any cross-grain scratches that could mar the surface. After applying, take another clean cloth and buff the wood lightly to bring out a more vibrant shine and ensure that no excess oil remains on the surface. This method is particularly beneficial for wood items that are handled frequently or exposed to the elements, as it not only cleans but also provides a protective layer that enhances the wood’s durability and appearance.     2. Lemon Juice and Olive Oil This natural polish not only cleans effectively but also leaves a delightful, citrusy aroma that invigorates any space. Lemon juice, known for its potent cleaning properties, cuts through dirt and buildup without harsh chemicals. It’s particularly effective at tackling greasy residues that can accumulate on kitchen tables and cabinets, making it an excellent choice for areas where food is prepared. When combined with olive oil, this mixture does more than just clean. Olive oil acts as a natural conditioner, penetrating deep into the pores of the wood to restore moisture and protect it from drying out or cracking. This is especially important for wood that may be exposed to heat or air conditioning, which can sap the moisture from wood and leave it looking dull. To prepare this wood polish, mix one part freshly squeezed lemon juice with two parts olive oil. It’s important to use fresh lemon juice rather than bottled for the best results, as fresh lemon juice contains natural enzymes that are effective at breaking down grime. After mixing, apply the solution to a soft cloth, making sure the cloth is damp but not overly wet, which could saturate and damage the wood. Gently rub the cloth over the wood surfaces in your home, following the grain of the wood to avoid any scratches. The olive oil will nourish the wood, while the lemon juice enhances its color and sheen. 3. Beeswax Polish Beeswax polish is an exceptional choice for maintaining and enhancing the natural beauty of wood furniture. This traditional method goes beyond mere surface cleaning to provide a protective barrier that safeguards wood against scratches, moisture, and everyday wear and tear. When beeswax is combined with a nourishing carrier oil like jojoba or coconut oil, it creates a robust polish that not only enhances the wood’s appearance but also fortifies its durability. To prepare your own beeswax wood polish, start by sourcing natural beeswax, which can typically be found at craft stores or online. Melt the beeswax in a double boiler until it becomes liquid. Carefully blend in your choice of carrier oil-jojoba oil is especially good for its long shelf life and mimicking the natural oils found in wood, while coconut oil offers a slightly sweet fragrance and additional antibacterial properties. A good ratio to maintain is one part beeswax to three parts oil, which ensures that the mixture is easy to apply while still being rich enough to penetrate deeply into the wood. Once the beeswax and oil have fully integrated, allow the mixture to cool slightly; it should still be warm enough to be malleable. Using a soft, lint-free cloth, work the warm polish into the wood surfaces, rubbing in circular motions to ensure that the mixture covers evenly. This method allows the wax to fill in tiny pores and scratches, creating a smooth, even surface. After applying the beeswax polish, allow it to sit on the wood for a few minutes to ensure deep penetration. Then, with another clean, soft cloth, buff the wood to a high shine. This final buffing step not only enhances the wood’s natural luster but also helps to harden the protective wax coating, forming a durable seal that repels dust, water, and stains. 4. Tea Brewing Tea brewing offers a surprisingly effective method for cleaning and enriching the appearance of wood furniture. The natural tannins found in black tea make it an excellent choice for gently cleansing and enhancing the natural grain of wood surfaces. These tannins, which give tea its characteristic color and astringency, also have properties that can help to lift dirt and residue without the harsh effects associated with chemical cleaners. To use tea as a cleaning solution for wood, start by brewing a strong pot of black tea. Typically, using one or two more tea bags than you would for drinking creates the ideal concentration for cleaning. Allow the tea to steep until it’s very strong, then let it cool to room temperature to prevent

7 Natural Ways to Clean and Polish Wood for a Lasting Shine Read More »

Person sneezing indoors as sunlight reveals dust particles in the air.

5 Cleaning Tips to Reduce Asthma Triggers in Your Home | Toronto Shine Cleaning

A Home That Breathes Easy Starts With How You Clean It For someone living with asthma, a house can flip from sanctuary to hazard zone without warning. Dust, pet dander, mold, and strong fumes lurk in plain sight, and each one can escalate a quiet afternoon into an attack. The leverage point is your cleaning routine: done deliberately, it removes the triggers instead of aerosolizing them. These five core tips, plus two deeper dives on soft furnishings and pets, build a home where lungs of every sensitivity can relax. 1. Chase Dust Before It Settles Dust mites are among the most notorious asthma aggravators, so a dust-controlled home is step one. Ditch the feather duster and wipe surfaces with a damp cloth: moisture captures and removes dust rather than launching it back into the air you breathe. Vacuum faithfully with a machine fitted with a HEPA filter, because those filters capture the finest particles instead of puffing them out the exhaust. Then wash bedding weekly in hot water, which kills the mites thriving in warm, fibrous linens and strips out the allergens they leave behind. 2. Keep Humidity Below Fifty Percent Mold and dust mites both throw parties when indoor air turns humid, and both are major asthma escalators. Holding indoor humidity under 50 percent suppresses both at the source. The direct tool is a dehumidifier, which pulls excess moisture from the air and holds the house at a healthier level, ideally checked with a simple hygrometer. Ventilate the wet rooms: exhaust fans in bathrooms and kitchens, or a cracked window, move air before mold and mildew can colonize. Fix every leak the moment you spot it, because damp surfaces are mold’s launchpad, and unchecked mold is exactly the kind of trigger the CDC’s mold health resource warns sensitive airways about. 3. Choose Gentle, Low-Fume Products The cleaner you spray is itself a potential trigger. Many commercial formulas lean on strong fragrances and harsh chemistry that irritate reactive airways, so choose unscented or naturally scented products made for sensitive households. Skip aerosol cans entirely: the fine mist they launch is built for deep inhalation. Liquid concentrates and pump sprays do the same cleaning work with far less airborne payload, and a DIY mix of vinegar and baking soda handles surface grime and bathroom mildew without adding any synthetic trigger to your air. Health Canada’s household products hub is the right reference for reading labels and choosing safer chemistry. If you do reach for bleach occasionally, follow the CDC’s bleach guidance: dilute properly, ventilate hard, and never mix it with other products, because bleach fumes are a textbook asthma trigger. 4. Respect Your Filters Your heating and cooling system circulates whatever its filters fail to catch: pollen, dust, dander, all of it, straight into every room. Change or clean HVAC filters on the manufacturer’s schedule, which protects both your air and the system’s efficiency. Then add a HEPA air purifier in the rooms where you actually spend your hours, especially the bedroom, since you cannot breathe clean air selectively while asleep for eight hours. 5. Declutter Without Mercy Every knickknack, stack, and pile is a dust exhibition with extra surfaces. Clear surfaces shrink the places allergens can camp, which is why regular decluttering sessions, parting with what you no longer use, pay off in easier cleaning all year. Store what stays inside closed containers instead of leaving it open to the air, so dust never accumulates on the things themselves. A starter shopping list for an asthma-focused cupboard: A vacuum sealed with a true HEPA filter for weekly whole-floor sessions A hygrometer and dehumidifier for any basement or damp-prone room Unscented, dye-free surface cleaners and pump sprays instead of aerosols Zip-seal storage bins for off-season clothes, books, and keepsakes Bonus Focus: Soft Furnishings and Carpets Carpets, sofas, and curtains are allergen reservoirs the daily eye never sees. Vacuum carpet with your HEPA machine regularly to drag out embedded dust and dander, and steam clean carpets and upholstery periodically to cook off dust mites and lift what vacuuming misses. If asthma runs severe in the house, trade heavy drapes for washable curtains or blinds, and where you can, trade carpet for hard flooring; each swap permanently shrinks the home’s allergen load. Bonus Focus: Pets and Their Passengers Pets deliver joy and allergens in the same package: dander, fur, and the dust they trail in. Brush them outdoors where possible so loose fur never becomes indoor air, and keep animals off furniture and out of the bedroom so sleeping hours stay low-exposure, which matters because sleep is when airways recover. Vacuum more often in the pet’s favourite zones, run a purifier there too, and wash pet bedding and toys frequently so dander never piles up. Trigger Where It Hides Your Counter-Move Dust mites Bedding, upholstered furniture Hot-water weekly wash, HEPA vacuum Mold spores Bathroom, leaks, humid corners Humidity under 50 percent, fix leaks fast Pet dander Sofas, pet beds, carpets Outdoor grooming, purifier, off the bed Fumes and aerosols Cleaning cupboard Unscented liquids, pump sprays, ventilation Frequently Asked Questions and Answers How often should an asthmatic home be cleaned? Dust and vacuum weekly at minimum, wash bedding weekly in hot water, and deep-clean soft furnishings a few times a year. During pollen season or flare-ups, add sessions rather than stretching them. Are natural cleaners always safe for asthma? Not automatically. Vinegar has strong fumes too, so dilute it, ventilate while using it, and patch-test your reaction. Unscented, dye-free formulas designed for sensitive users remain the safest default. Does a HEPA filter really matter in a vacuum? Yes. Without one, the vacuum exhausts the finest particles straight back into the room air, which is precisely the fraction that reaches deep lungs. Sealed HEPA systems are the standard for allergen households. Can professional cleaning genuinely help? Regular visits keep dust, dander, and clutter from rebuilding between your own sessions, and a seasonal deep clean hits the reservoirs people miss. Toronto Shine Cleaning’s regular service

5 Cleaning Tips to Reduce Asthma Triggers in Your Home | Toronto Shine Cleaning Read More »

Person joyfully dancing and sweeping with headphones on.

How to Combine Home Cleaning and Exercise: 5 Ways to Stay Fit While You Tidy

How to Combine Home Cleaning and Exercise: 5 Ways to Stay Fit While You Tidy Finding time for both a clean home and a workout feels impossible on a busy schedule. The solution is to combine them. Housework is real movement, and it counts toward your activity goals. Canada’s physical activity guidance recommends that adults get at least 150 minutes of moderate-to-vigorous activity per week, and everyday activities at home count. These five ways to combine home cleaning and exercise will help you stay fit while you tidy, no gym required. 1. Turn Vacuuming Into a Power Walk Transform your vacuuming into a brisk power walk. Push and pull the vacuum at a steady pace, and you work your arms and shoulders just like a gym row. Keep your posture straight and engage your core as you move. To raise the intensity, add a lunge every few steps: step forward with one leg, bend both knees to lower your hips, and push back up. Keep your back straight and your knees in line with your toes to protect them, and your glutes and quads will feel the difference. 2. Dance While You Do the Dishes Dishwashing is a perfect stage for a dance party. Put on an upbeat playlist and let the music guide your movements: sway side to side, twist your hips, or add a few shimmy shakes. Dancing while you scrub raises your heart rate, improves circulation, and burns more calories than standing still at the sink. The mental bonus is real too, because the endorphins from dancing lift your mood and make the chore feel like fun instead of work. 3. Build Staircase Circuits If you have stairs, you have a free fitness machine. Set a timer for 15 to 20 minutes and use trips up and down as structured workout intervals, whether you are carrying laundry or moving items between floors. Change your movement every few trips to keep it interesting: run up the stairs for a cardiovascular boost, add a hop on each step to challenge balance and power, or take two steps at a time to engage your glutes and thighs more forcefully. Use the railing for balance whenever you need it. 4. Do Counter-Top Push-Ups While You Wait Kitchens are full of waiting time, and every minute counts. While the kettle boils, the microwave beeps, or the oven preheats, stand a few feet from the counter, plant your feet, and keep your body in a straight line. Place your hands on the counter edge and perform push-ups: easier than floor versions, but still effective for your chest, arms, and core. A quick set of 10 to 15 reps per waiting period adds up across the day, and it turns idle time into progress. 5. Squat While You Wash Windows and Mirrors Window washing and surface wiping become a leg workout when you add squats. Every time you dip your cloth in the bucket or rinse your sponge, lower into a squat: feet shoulder-width apart, back straight, hips lowered as if you are sitting back into a chair. Rise as you swipe the glass. For extra intensity, hold the squat position for a few seconds before standing. Proper form maximizes the strength-building effect and protects your back and knees from strain. Make a Cleaning Workout Routine That Sticks Consistency beats intensity. Fifteen to twenty minutes of movement a few times a week adds up quickly, and because the cleaning still gets done, you never lose time. Pair each chore with its exercise and rotate through them so no muscle group is neglected: Chore Exercise move Muscles targeted Vacuuming Brisk power walk with lunges Arms, shoulders, core, glutes, quads Dishwashing Dancing and swaying Full body, heart rate, flexibility Stair trips Staircase circuits, two steps at a time Legs, glutes, thighs, cardiovascular system Kitchen waits Counter-top push-ups Chest, arms, core Window washing Squats with a hold Legs, glutes, core A few safety reminders keep your cleaning workout injury-free: Keep your back straight during lunges, squats, and push-ups. Align your knees with your toes on every lunge and squat. Use the railing on stairs whenever you feel off balance. Start slowly and build up reps and speed over several weeks. Let the Professionals Handle the Deep Clean Your daily cleaning workout keeps your home tidy, but a professional deep clean takes it to the next level. Toronto Shine Cleaning offers everything from regular house cleaning to specialized deep cleaning services, so you can focus your energy on fitness while the experts handle the heavy lifting. Transparent base rates are published on our pricing page, and our reviews show why Toronto homeowners keep coming back. Health Canada’s healthy living resources are a great place to start if you want more ideas for building activity into daily life. Combining home cleaning and exercise turns two obligations into one habit. Vacuum with purpose, dance at the sink, work the stairs, push off the counter, and squat as you shine, and you will stay fit while you tidy. For a deeper clean, call Toronto Shine Cleaning at (647) 424-0355 and let the pros take it from there. Frequently Asked Questions About Cleaning and Exercise Can housework really count as exercise? Yes. Canada’s physical activity guidance recommends at least 150 minutes of moderate-to-vigorous activity per week for adults, and everyday activities such as brisk vacuuming, stair climbing, and dancing count toward that goal. How long should a cleaning workout session last? Fifteen to twenty minutes is a solid session, and the staircase circuit method works especially well with a timer. Even several shorter bursts of movement spread across the day deliver real benefits. Is it safe to exercise while cleaning? Yes, if you use proper form. Keep your back straight, align your knees with your toes on lunges and squats, use the railing on stairs, and start slowly before building up reps and intensity. How many push-ups should I do while waiting? Ten to fifteen reps per waiting period, such as

How to Combine Home Cleaning and Exercise: 5 Ways to Stay Fit While You Tidy Read More »

Wet shower tiles in bathroom

7 Effective Ways to Clean Up Water-Based Stains from Every Surface | Toronto Shine Cleaning

Seven Effective Ways to Clean Water-Based Stains From Every Surface Coffee on the couch, finger paint on the hallway wall, rain tracked across the floor: water-based spills look harmless and still set in fast. Almost every one lifts cleanly when you match technique to material. These seven methods cover the surfaces your household touches all day, with supplies you likely own. One rule comes before every step, and the CDC’s home cleaning guidance backs it: clean promptly, before soil has a chance to set. Blot with a clean cloth the moment the spill lands; rubbing grinds it in. Start with cool or lukewarm water, because heat sets most water-based marks. Work from the outside edge inward so the stain cannot grow. Rinse every trace of soap away, then dry the area fully. Quick Reference Table Surface First move Skip this Fabric and upholstery Blot, then mild detergent in cool water Rubbing and hot water Carpet Baking soda, vinegar spray, then blotting Walking on wet pile Hardwood Blot dry, hardwood cleaner on a cloth Soaked mops, pouring cleaner on the floor Tile and grout Lemon-and-salt paste, soft brush Steel wool, harsh abrasives Painted walls Damp microfibre, drop of dish soap Scouring pads Vinyl and laminate Sweep, well-wrung damp mop Puddles at seams and baseboards Clothing Pre-treat, wash per the care label Drying before the stain is gone 1. Fabric and Upholstery: Blot First, Then Mild Detergent Blot the moment the spill lands so liquid cannot sink into the fibres. Mix a squirt of gentle detergent into cool or lukewarm water, since hot water can set the mark. Dip a colourfast soft cloth, wring it until barely damp, and dab from the outer edge inward so the stain cannot spread. When it lifts, dab again with clean cool water until no soap remains. Let the area air dry: skip direct heat, and if the fabric allows, press a cool iron through a clean cloth to draw out the last moisture. 2. Carpets: Baking Soda and White Vinegar Cover the damp patch with baking soda and give it about ten minutes to pull up moisture and odour. Spray a half-and-half mix of white vinegar and water over the top; the fizz signals the reaction at work. Vinegar’s acidity lifts the mark while the dilution keeps the colour safe. Wait for the bubbling to stop, then blot with a clean dry cloth, dabbing and never rubbing. Let it dry completely: damp carpet invites mold and mildew, a risk the CDC’s mold and health pages explain. Vacuum last to lift the fibres back up. Delicate or specialty carpets belong with professionals. 3. Hardwood Floors: Immediate Wipe, Then a Floor-Specific Cleaner Wood warps and discolours when liquid slips into the seams, so blot any spill with a soft dry cloth the moment you notice it, pressing rather than rubbing so moisture cannot travel along the grain. If a mark stays, choose a cleaner made for hardwood and matched to your finish; the Health Canada household products pages are a good label-reading reminder. Pour it onto the cloth or mop instead of the floor so the wood never soaks, wipe along the grain, let the product sit briefly on stubborn spots, then dry with a clean cloth so no moisture lingers. 4. Tile and Grout: Lemon Juice and Salt Paste Lemon juice earns its place for more than smell: its acidity acts as a natural bleach against food, soap scum, and mildew, and helps sanitise. Salt adds a soft abrasive that breaks stains down without gouging the tile. Stir the two into a paste, spread it over the mark, and work it in with an old toothbrush. Leave it five to ten minutes, longer on old marks, then scrub lightly and rinse with warm water, which dissolves the mixture better than cold. Towel dry so new moisture does not soak into porous grout. 5. Painted Walls: Damp Microfibre and Patience Rain marks and splashes on painted drywall respond well to a microfibre cloth wrung out in warm water with a drop of dish soap. Wipe in light circles, working outward from the edge of the mark, and rinse the cloth often. Skip scouring pads and strong cleaners, which polish dull streaks into the paint. 6. Vinyl and Laminate: A Damp Mop, Never a Wet One These floors tolerate water better than hardwood, but liquid creeping into seams can lift edges and swell planks. Sweep first, then mop with a pad wrung nearly dry using a laminate-safe product or diluted vinegar solution. Towel up dampness along baseboards and seams, where moisture hides longest. 7. Clothing: Pre-Treat Before the Wash Water-based marks on laundry usually vanish with one extra step. Work a drop of liquid detergent, or a dab of vinegar-and-water mix, into the stain, let it sit ten to fifteen minutes, then wash at the temperature the care label permits. Check the spot before the dryer runs: machine heat sets any stain left behind. Frequently Asked Questions Do water-based stains really need same-day attention? Fresh marks sit on the surface, where blotting lifts them easily. Once dry, a stain bonds with fibres and grout, so the same job takes stronger products and several rounds. Speed is the cheapest protection there is. Can I reach for bleach to speed things up? Not on every material. Bleach can strip fabric colour, harm wood finishes, and dull coloured grout. Reserve it for bleach-safe surfaces, diluted as the label directs, in a ventilated room. Why does my carpet look clean but smell damp? Moisture lingers in the pad beneath the pile long after the surface feels dry. Point a fan at the area, open a window, or run a dehumidifier until fully dry. A lasting damp smell means professional extraction is the right call. When should I stop scrubbing and call for help? If a mark survives two or three rounds of the correct method, more scrubbing endangers the fibre rather than the stain. A deep cleaning visit extracts what household

7 Effective Ways to Clean Up Water-Based Stains from Every Surface | Toronto Shine Cleaning Read More »