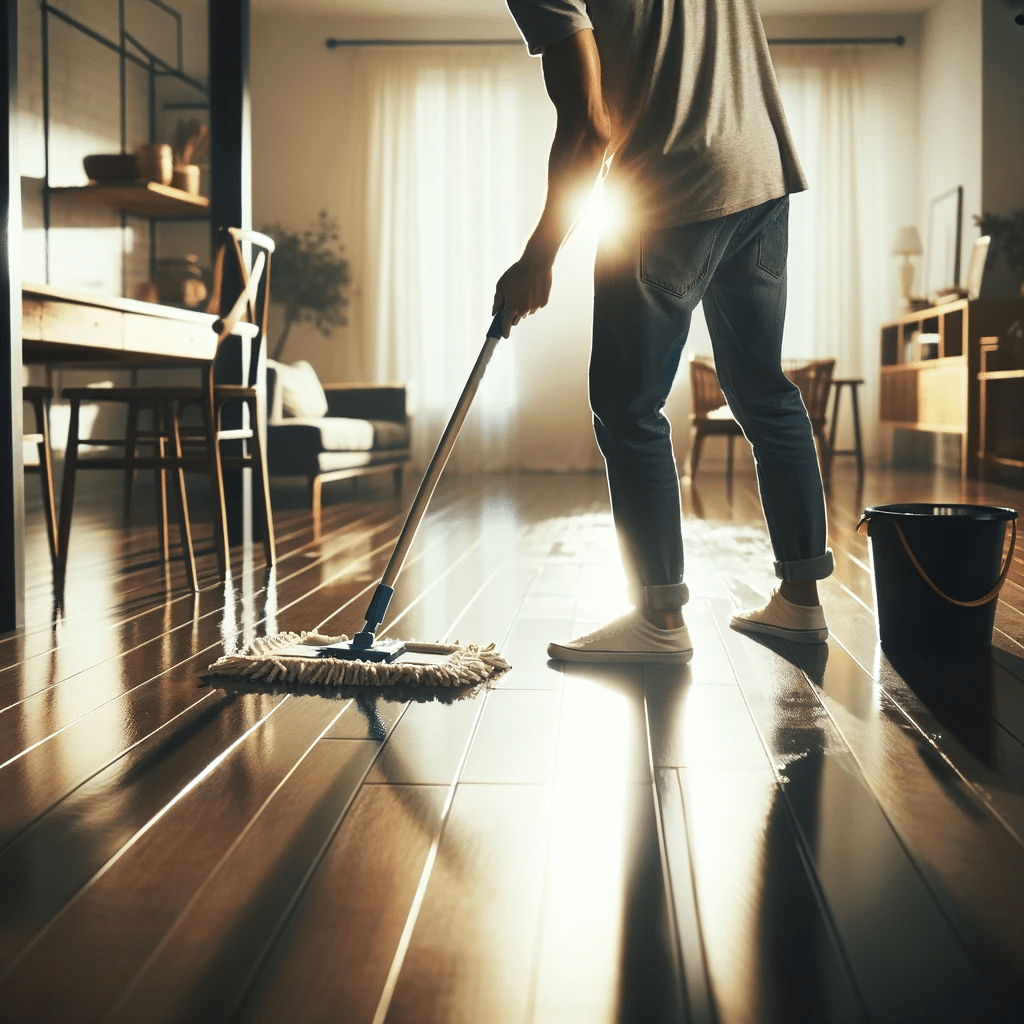
Floor Cleaning

Mopping floor with organized cleaning supplies.

5 Innovative Ways to Clean Floors: Save Time and Effort | Toronto Shine Cleaning

Five Innovative Ways to Clean Floors and Save Time and Effort Floor cleaning has a reputation as a never-ending war against dust, crumbs, and one mysterious sticky patch that always returns. The good news is that the tools have quietly changed. Five approaches below, from robot helpers to a pair of slippers, turn the chore into something faster, lighter, and occasionally even fun. 1. Robotic Vacuum Cleaners and Mops This is where technology meets housekeeping. You stay on the sofa with your morning coffee while a quiet machine works the rooms behind you, sucking up crumbs and pet hair and, on combo models, mopping the coffee drip and the muddy paw print in the same run. Sensors steer the unit around furniture and stop it at stairs. When the battery runs low, many models return to their charging dock on their own and top up for the next session. App connectivity means you can schedule a clean while you are out and come home to finished floors. Modern units handle hardwood, tile, and low-pile carpet, and models with HEPA filters keep fine allergens inside the machine instead of blowing them back into your air. 2. Microfibre Mop Slippers Slip them on and the house gets cleaner the more you live in it. The high-performance microfibre soles pick up dust, hair, and surface dirt with every step, so breakfast-to-couch traffic becomes a free cleaning pass. The real trick is what they do to the mood: shuffle competitions, kitchen dance-offs, and slide-across-the-hallway challenges turn mopping into a family game that teaches kids tidiness through play. No bucket, no wringing: wear them, then toss the covers in the washing machine. They suit quick clean-ups between deeper sessions, and the movement is a small honest bit of daily activity, which the CDC’s physical activity basics page counts as worthwhile. 3. Eco-Friendly Reusable Mop Pads Reusable pads are a small tool attached to a big idea: less waste per clean. Made from durable, high-quality microfibre, they survive countless wash cycles where disposable pads stack up in the landfill. The tightly woven fibres grip and hold dirt, dust, and spills better than traditional cotton mops or single-use sheets, so many jobs need nothing but water. Fewer disposables means less plastic and a lighter household footprint. Pair the pads with natural solutions such as diluted vinegar or an essential-oil blend, and lean on Health Canada’s household products guidance whenever you compare commercial cleaners at the store. 4. Steam Mops A steam mop trades bottles of cleaner for a kettle’s worth of physics. Heated water produces vapour hot enough to loosen stubborn spills, sticky residue, and ground-in grime on hard floors, lifting them with no chemical cleaners involved. Less chemical also means less environmental load and fewer concerns for kids and pets who live close to the floor. The heat brings sanitising power with it: steam at working temperature kills a wide range of bacteria, viruses, and other pathogens, making them a sensible pick through cold-and-flu season and in allergy-sensitive homes. Because the vapour evaporates fast, floors dry in minutes rather than hours, shrinking the slip-and-fall window in a busy home. Adjustable steam settings make them suitable for tile, hardwood, and laminate, and swivel heads with extendable handles reach under furniture without any bending and stretching. 5. DIY Natural Cleaning Solutions Your kitchen cupboard already stocks a respectable cleaning arsenal. Vinegar’s acidity cuts grease and soap scum, deodorises as it goes, and works as a natural disinfectant when diluted with water for everyday surfaces. A few drops of lavender, lemon, or tea tree oil add fresh scent plus extra antibacterial and antiviral character. Baking soda thickens into a gentle abrasive paste for tough spots, and a dash of castile soap sharpens the grease-fighting mix. Making your own solutions trims the bottle-shopping habit, saves real money, declutters the storage cupboard, and lowers chemical exposure in homes with children, pets, or sensitive members. The CDC’s home cleaning guidance is worth a skim for the moments that still call for a proper disinfectant. Which Method Fits Which Floor Method Best for Keep in mind Robot vacuum and mop Daily upkeep across hard floors and low-pile carpet Clear cords and clutter before the run Mop slippers Quick maintenance between real cleans Maintenance only, not deep cleaning Reusable microfibre pads Everyday mopping with little or no chemical Wash pads regularly, swap when worn Steam mop Tile, laminate, sealed hard floors, sanitising passes Check the finish, use the right steam level DIY natural solutions General cleaning on many surfaces Some moments still need a real disinfectant Mixing methods is allowed, and usually smart: Let the robot hold the baseline on high-traffic days. Keep slippers by the door for spills and surprise guests. Run the steam mop monthly on tile and laminate. Reserve the DIY bucket for weekly full-floor sessions. Frequently Asked Questions Can a robot vacuum fully replace a normal vacuum? It handles daily crumbs and dust beautifully, but edges, corners, furniture legs, and sudden messes still need your regular machine. Think of the robot as the daily shift and your upright as the specialist called in for the deep job. Are steam mops safe on every hard floor? No. Sealed floors generally cope well, while waxed, unsealed, or sensitive surfaces can be damaged by heat and moisture. Start at the lowest steam setting, test a hidden corner first, and follow your flooring maker’s care advice above all. Do microfibre slippers actually clean or just push dust around? On dry surface dust and hair they genuinely lift debris into the fibres, which is why they work between proper mops. Greasy or dried messes are beyond them, and forcing the issue only relocates the problem. Is a vinegar-and-water floor mix enough for a healthy home? For routine cleaning on most floors, yes, and it keeps chemical exposure low. High-touch moments and shared spaces deserve proper cleaning and, when needed, an approved disinfectant alongside the DIY routine. Tired of Being the Floor-Cleaning Department? Hand the

5 Innovative Ways to Clean Floors: Save Time and Effort | Toronto Shine Cleaning Read More »
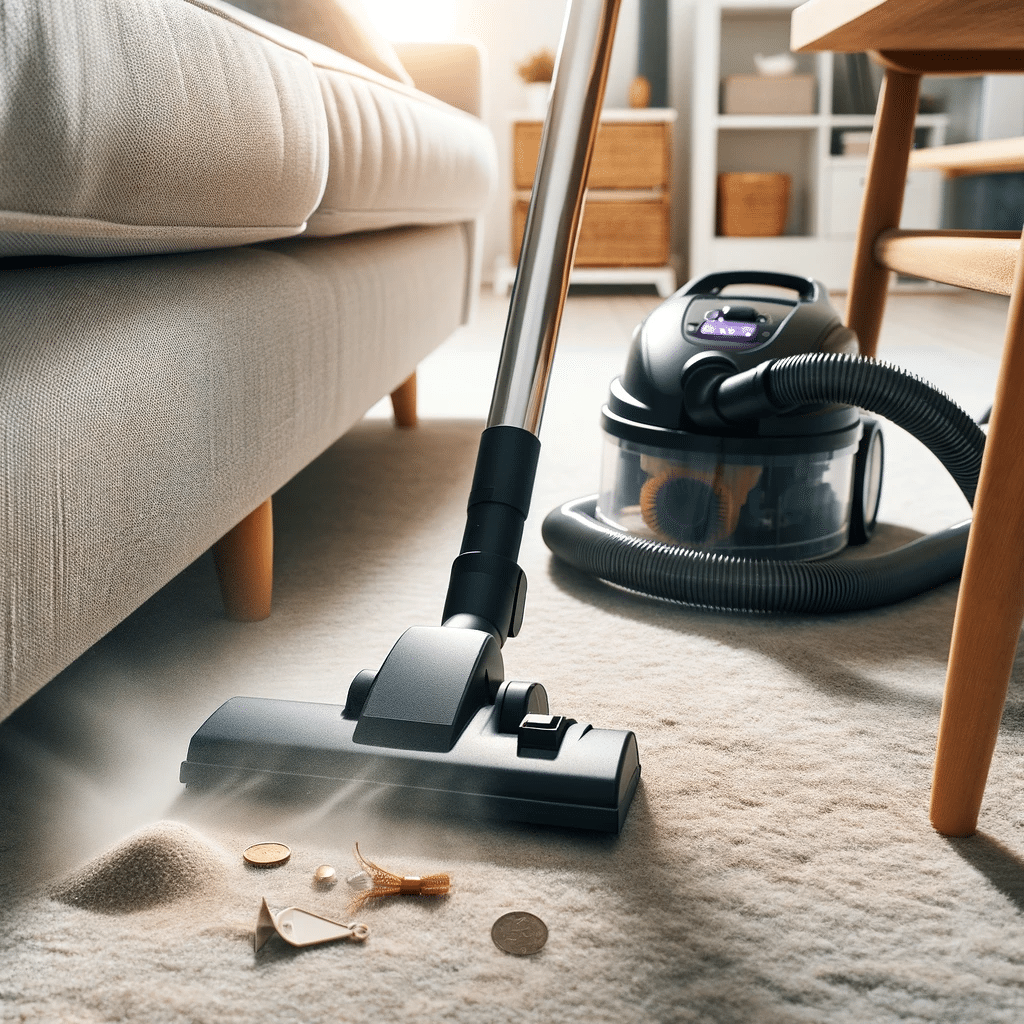
Cleaning under the furniture, Vacuuming

Expert Tips for Immaculate High Traffic Areas Cleaning | Toronto Shine Cleaning

Expert Tips for Keeping High Traffic Areas Spotlessly Clean Entryways, kitchens, living rooms, and bathrooms carry the household’s foot traffic, so they collect dirt like uninvited guests who overstayed. Keeping those zones spotless feels like a losing battle when the schedule is full. These five tips make it manageable: smaller habits, better tools, and a home that helps a little more than you expect. 1. Build a Daily Quick-Clean Routine Pick the hours of the day you can actually rely on and attach a short tidy to them. Morning types can do a fast sweep after coffee; evening people can make the reset part of winding down: plumping cushions, folding throws, leaving the room calm for tomorrow. Then use the gaps you already own. While the tea steeps or the oven works, unload the dishwasher, wipe the counters, or sort the day’s mail. Keep tasks short so they read as habits, not chores. After meals, spread the work: one person clears, another loads the dishwasher, a third wipes surfaces. The team approach lightens the load and teaches everyone to own a piece of it. 2. Use the Right Cleaning Supplies Microfibre cloths earn their reputation: the weave traps dust, dirt, and microscopic germs instead of smearing them, and they rinse and return. Floors need their own strategy. A quality vacuum with surface attachments lifts dirt out of the home rather than shuffling it around, and HEPA-filter models capture allergens. Eco-friendly cleaners matter just as much: conventional formulas can leave residues that are hard on family and pets, while natural-ingredient products achieve the same results, extend the life of your surfaces, and reduce toxic runoff into waterways. Organization tools belong on the list too, because clutter is friction: a basket for shoes, hooks for coats, a tray for keys and mail, and a dedicated home for the cleaning supplies themselves. When shared spaces need more than a wipe, the CDC’s cleaning and disinfecting guide settles what deserves what. 3. Set Up Cleaning Stations High-traffic zones collect germs and bacteria faster than any other room, and supplies within arm’s reach turn “I will get to it later” into a quick fix now, before a spill sets or travels. Make each station blend in: decorative baskets or stylish containers hide the supplies yet keep them grabbable. Customize by location. The entryway station leans on wipes and hand product for shoes and hands; the kitchen stock adds stainless polish and a grease-fighting dish soap; the bathroom corner keeps toilet cleaner, a brush, and disposable towels ready. The deeper genius is participation. When supplies sit everywhere, the inconvenience excuse dies, kids join in, and cleaning up after yourself becomes a normal, teachable reflex rather than a parental solo act. Hand hygiene is the anchor of any entryway station, and the CDC’s handwashing pages explain why clean hands stay the first line of defence in the busiest rooms. 4. Protect the Zones Before Dirt Arrives The cheapest clean is the dirt that never lands. Floor mats built for high-traffic zones outlast ordinary area rugs: they shrug off heavy footfall, resist stains, wipe clean easily, and suit any room’s style, so entryways and hallways get first claim. On hardwood and tile, a fresh finish or sealant adds a sacrificial layer against scratches, scuffs, and spills, extending floor life. A no-shoes rule does quiet miracles too, and slippers or shoe covers for guests turn it into hospitality instead of fussiness. Then maintain: wipe spills before they set, match cleaners to each floor type, and deep clean rugs, carpets, and floors periodically so the protection holds. 5. Get the Whole Household Participating When everyone contributes, the home runs smoother and the work stops landing on one person’s evening. Technology helps: apps that schedule, assign, and track tasks land especially well with pre-teens and teens, turning “helping out” into something visible and acknowledged. Leading by example does the rest: children copy adults who clean, and knowing a tidy space feels calmer and more productive plants the same value in them. Finally, match tasks to temperaments. Some people love the instant gratification of vacuuming; others find sorting and organizing more satisfying. Aligned work stops feeling like a tax. A Weekly Rhythm for the Busy Zones Zone Daily Weekly Entryway Shoes to the basket, quick sweep Mats shaken or vacuumed, hooks decluttered Kitchen Counters wiped after dinner Floor deep mop, appliance fronts polished Living room Cushions and throws reset Vacuum with attachments, high-touch surfaces wiped Bathroom Quick wipe after morning rush Full clean from the stocked station Small kit, stocked once, keeps every zone ready: Microfibre cloths, one colour per room to avoid bathroom-to-kitchen tours. A vacuum with surface tools and, ideally, a HEPA-grade filter. Eco-friendly cleaner matched to each floor and surface type. Wipes and hand product at the entryway for the five-second fixes. Frequently Asked Questions How many minutes should the daily routine take? Ten to fifteen spread across the day is plenty. Two minutes while the kettle boils and five after dinner beat a heroic Saturday marathon, because dirt that never accumulates never needs heavy removal. Do eco-friendly cleaners really perform like conventional ones? On everyday soil, well-formulated natural products achieve the same or better results without harsh residues, and they are gentler on surfaces and waterways. Proper disinfection during illness still deserves label-checked products used as directed. What belongs in a cleaning station? Only what that room actually needs: wipes and hand product at the door, surface spray and cloth in the kitchen, bowl, brush, and towels in the bathroom. A spare caddy keeps stock one trip away. Is a no-shoes policy worth the awkwardness? Floor mats plus a slipper basket make the habit feel welcoming rather than strict, and the drop in tracked-in grit shows up within a week, especially on hardwood and tile. When does a routine stop being enough? When the weekly rhythm slips for a month and grime returns faster than you can chase it, a scheduled clean resets the baseline. A deep

Expert Tips for Immaculate High Traffic Areas Cleaning | Toronto Shine Cleaning Read More »

Morning-lit living room with polished plywood floors.

How to Keep Your Plywood Floor Sparkling: 5 Easy Steps | Toronto Shine Cleaning

How to Keep Your Plywood Floor Sparkling: 5 Easy Steps Plywood floors deliver the warmth of wood at a friendlier price, but water and grit are their sworn enemies. A handful of consistent habits keeps the surface smooth and the finish intact for years. These five steps, from daily dusting to a periodic refresh, cover everything a plywood floor needs to stay in top shape. Step 1: Dust Daily With a Soft, Electrostatic Tool Gentle daily dusting is the foundation of plywood care. Choose a microfiber mop or a dust mop made for wood floors: the fibers lift dust, pet hair, and everyday debris without dragging scratchy grit across the finish. Electrostatic sweepers such as the Swiffer Sweeper work especially well, because their charged cloths act like a dust magnet that catches even fine particles. The CDC’s cleaning guidance takes the same line: regular cleaning is what keeps dust and dirt under control in the first place. Step 2: Mop Weekly With Barely Any Water Water is the one thing plywood layers cannot forgive: let it seep between them and you risk swelling, warping, and mold growth. That makes your mop and solution the real tools of the job. A flat mop with a microfiber pad spreads moisture evenly instead of leaving wet pools, and its soft surface lifts dirt without scratches or streaks. For the solution, use a pH-neutral cleaner such as Bona Hardwood Floor Cleaner, mixed with water as the label directs. Dampen the pad until it is moist but not dripping, then work across the floor in sections with smooth, even strokes. Going section by section keeps the moisture controlled, so nothing is missed and nothing gets soaked. The CDC’s information on mold explains why the caution is worth it: mold grows wherever moisture lingers, and wood is on its menu. Step 3: Treat Spills on Contact A spill starts a clock, and dabbing with a clean, damp cloth is the fastest way to stop it. Press and blot rather than rub, since rubbing spreads the liquid and pushes it deeper into the wood. Grease and oil need one extra step: mix a drop of dish soap into a cup of water, apply the mild solution, and let it cut the grease before you wipe it away. For a stain that shrugs off the first attempt, use a dedicated wood floor cleaner such as Method Squirt + Mop Wood Floor Cleaner. Apply it to a soft cloth rather than pouring it onto the floor, and dab gently until the mark lifts. Keep abrasive pads and scrubbers away entirely, because they scratch the finish and open the surface to worse damage. Products work best when used as directed, and Health Canada’s guidance on using household products safely is a solid reference for cleaning and storing them. Step 4: Put Mats Where Traffic and Water Land Mats at every entry point stop grime and moisture before they reach the floor. Choose versions made for hardwood, with a non-slip backing that holds them steady and a design that lets air flow underneath so trapped dampness cannot harm the plywood. Extend the strategy indoors: hallways, the stretch in front of the kitchen sink, and any spot where feet travel often. Under heavy furniture, area rugs and protective pads spread the weight more evenly, which curbs indentations and scratches. Step 5: Refresh the Top Coat Every Few Years A new coat of polyurethane every few years restores the original luster and adds a layer of protection against daily life. Pick a water-based product: it dries fast, so the floor is out of service for less time, and it releases far fewer odors and volatile organic compounds than oil-based finishes, which matters in homes with children, pets, or sensitive noses. The order of work matters. Clean the floor thoroughly first, then sand it lightly with fine-grit paper, working evenly so the fresh coat has a surface to grip. Apply the polyurethane in thin, even layers with a quality brush or roller, following the grain and starting at the farthest corner so you can walk out without touching the wet finish. Several thin coats usually beat one thick one, with the label’s drying time between rounds. The payoff is a floor that looks refreshed and resists scratches, scuffs, and stains. Plywood Floor Care at a Glance Task How often The critical detail Dusting Daily Microfiber or electrostatic cloth, gentle strokes Mopping Weekly Microfiber pad moist, not dripping; pH-neutral cleaner Spill care Immediately Dab, never rub; dish soap solution for grease Mats and rugs Ongoing Clean them regularly; airflow backing prevents trapped damp Refinishing Every few years Water-based polyurethane in thin coats Five Rules That Prevent Damage Never wet-mop; keep the pad moist, not dripping. Never rub a spill; dab it the moment it happens. Never pour cleaner directly onto the floor. Never use abrasive pads or scrubbers on the finish. Never skip the light sanding before a new top coat. Frequently Asked Questions Can plywood floors handle a wet mop? No, so keep water to a minimum. A microfiber pad that is moist but not dripping, paired with a pH-neutral cleaner, cleans the floor without letting moisture seep between the layers. Excess water is what causes swelling, warping, and mold, so the weekly mop should leave the surface nearly dry. What is the best cleaner for plywood floors? A pH-neutral floor cleaner mixed with water as directed is the safe default. For grease, a drop of dish soap in a cup of water cuts through it. For stubborn stains, reach for a dedicated wood floor cleaner applied to a cloth, not the floor itself. How do I stop spills from staining? Speed and technique. Blot with a clean, damp cloth right away, pressing instead of rubbing so the liquid does not spread or sink deeper. Grease gets the dish soap treatment; anything stubborn gets a wood floor cleaner dabbed on gently. Abrasive scrubbers only make the damage worse. When does a plywood floor

How to Keep Your Plywood Floor Sparkling: 5 Easy Steps | Toronto Shine Cleaning Read More »

Spring cleaning concept with open window and billowing curtains.

The 2-Day Spring Cleaning Sprint: How to Easy Get It Done Fast and Effectively

The 2-Day Spring Cleaning Sprint: How to Get It Done Fast and Effectively Spring cleaning can feel overwhelming, especially when you only have a weekend to spare. The good news is that a focused 2-day plan can transform your home without burning you out. Whether you live in Toronto, Mississauga, or anywhere else in the GTA, this sprint breaks the work into two manageable days so your space feels fresh and organized by Sunday night. Day 1: Declutter and Dust Top to Bottom The living room, kitchen, and bedrooms are the main battlegrounds of any spring clean. These high-traffic zones collect the most clutter, so start there with the three-box method: one box for items you keep, one for donations, and one for things to toss. If you have not used something in over a year, it is likely safe to let it go. Keep decisions quick and keep your momentum, because decluttering is the foundation every other step builds on. Once rooms are decluttered, dust from the top down. Start with ceiling fans and light fixtures, then work down to furniture and floors, so dust that falls never lands on a surface you already cleaned. Pay special attention to neglected spots such as windows and under furniture, and use a damp cloth to capture dust instead of spreading it around. Dusting and vacuuming are also the core of the EPA’s indoor air quality advice, which links regular cleaning to fewer allergens in the home. Kitchen and Bathroom Deep Clean The kitchen deserves a thorough pass: empty the fridge and wipe it down, check expiration dates, and toss anything past its prime. Tackle countertops, cabinets, and appliances, and degrease the stove and microwave, which accumulate built-up grime over time. In the bathroom, scrub the shower, sink, and toilet until they sparkle, clear cabinets and drawers of expired products, and finish with mirrors and fixtures. When you use products such as bleach in these rooms, never mix them with other cleaners, because the Canadian Centre for Occupational Health and Safety warns that mixing bleach with other chemicals can release dangerous gases. Day 2: Floors, Bedrooms, and Finishing Touches Start the second day with sweeping, vacuuming, and mopping every inch of floor space, not just the visible areas. Move light furniture to reach the spots underneath, because that is where dust and debris hide. For carpets, a good vacuum pulls up embedded dirt and hair, and spot cleaning handles fresh stains. For a deeper refresh, renting a carpet cleaner can make carpets look, feel, and smell like new again. Bedrooms should feel like a sanctuary: change the sheets, dust the furniture, and organize closets if time allows. Gather all the washable items in the house, such as curtains, towels, and bed linens, and aim to have everything washed, dried, and put away by the end of the day. Finish with a walk-through, basket and cloth in hand, to catch missed spots, tidy remaining clutter, and give surfaces a final wipe. Outdoor Spaces and Entryways: Make the First Impression Count The entryway sets the tone for the whole home. Sweep patios, porches, and decks to remove debris and prevent slip hazards, wipe down outdoor furniture, and wash detachable cushions so the space is ready for entertaining. Inside, shake out or vacuum the welcome mat, polish the front door and hardware, and declutter the shoe and coat area so the transition into your home feels calm and ordered. In the evening, do a quick weeding and trimming session, and wash exterior windows so more natural light fills every room. When to Call in the Professionals A 2-day sprint is achievable, but some jobs are better left to a team. If the deep clean feels too big, a professional deep cleaning service can handle the heavy lifting in a single visit, and regular maid cleaning keeps the results going all year. Moving in or out? Move-in and move-out cleaning covers the transition, and Toronto Shine Cleaning serves homes across Toronto and the GTA. For a safer, smoother clean, follow the National Capital Poison Center’s spring cleaning safety tips, which cover product storage, ventilation, and keeping chemicals out of reach of children. Frequently Asked Questions What is the three-box method for decluttering? Sort every item into one of three boxes: keep, donate, or toss. The method forces quick decisions, prevents second-guessing, and keeps you moving through the home instead of getting stuck on any single item. Can I really finish a whole-house spring clean in two days? Yes, if you follow a plan: declutter and dust on day one, then floors, bedrooms, and laundry on day two. Focus on one room at a time and do not stop to deep-organize every drawer. Do I need to rent a carpet cleaner? Only if your carpets are heavily soiled or stained. Regular vacuuming plus spot cleaning handles most maintenance, while a rented machine is worth it once a year for a full refresh. How often should I do a spring cleaning sprint? Once a year is the classic rhythm, but a lighter version every season keeps dust, allergens, and clutter from building up between major cleans. With a clear two-day plan, spring cleaning stops being a chore and becomes a satisfying refresh. And when you need backup, the professionals at Toronto Shine Cleaning are one call away.

The 2-Day Spring Cleaning Sprint: How to Easy Get It Done Fast and Effectively Read More »

Pristine Home Exterior on Sunny Spring Day 2023

10 Essential Spring Cleaning Hacks to Refresh Your Home

10 Essential Spring Cleaning Hacks to Refresh Your Home Spring is here, and it is time to refresh your living space. Spring cleaning does not need to feel overwhelming. With the right approach and a few smart hacks, you can transform your home efficiently. Whether you live in Toronto, Mississauga, or anywhere across the GTA, these tips will help you clean smarter, not harder. A quick recap of the hacks covered below: Declutter before you clean to reduce obstacles Use natural cleaners like vinegar and baking soda Work from top to bottom in every room Reach hidden spots like air vents and window tracks Refresh bedding and organize as you go Declutter First for a Faster Clean Clearing out clutter before you start cleaning makes every step easier. Sort through your belongings and set aside items you no longer use. The one-year rule works well: if you have not used something in the past year and it does not spark joy or serve a purpose, consider donating or discarding it. A clutter-free home is not only easier to clean but also promotes a calmer mindset. Use Natural Cleaning Solutions Common pantry staples like vinegar, baking soda, and lemon are powerful natural cleaners. Vinegar cuts through grease and grime on glass and faucets. Baking soda acts as a gentle abrasive that lifts stains from sinks and bathtubs without scratching. Lemon brings natural acidity and antibacterial properties to countertops and cutting boards. These ingredients are economical, eco-friendly, and safer for households with pets and children. For more guidance on using household products safely, visit Health Canada’s chemical safety page. Work Top to Bottom Start with ceiling fans, light fixtures, and the tops of cabinets. Dust and debris that fall during cleaning will land on areas you have not yet cleaned, saving you from redoing work. Move to walls, windows, and furniture next. Finish with floors last. This methodical approach prevents resettling dust and makes your cleaning routine flow naturally. Use Microfiber Cloths Microfiber cloths attract and trap dust particles using static electricity rather than pushing them around. Use them dry for dusting electronics and delicate surfaces, or dampen them for grease splatters and soap scum. Unlike paper towels, microfiber cloths are reusable and reduce waste. They often require only water, cutting down on the need for chemical cleaners. Learn more about cleaning and disinfecting at CDC’s cleaning guidelines. Clean Air Vents Regularly Air vents collect dust and debris that can circulate allergens and reduce HVAC efficiency. Wrap a butter knife in a cloth to reach between slats, then vacuum the vent cover with a brush attachment. Clean vents improve indoor air quality, which is especially important for household members with allergies or asthma. Refresh Your Mattress Sprinkle baking soda over your mattress, add a few drops of lavender or citrus essential oil, and let it sit for one hour. The baking soda absorbs odors and moisture while the essential oil leaves a pleasant scent. Vacuum thoroughly afterward to remove dust mites and allergens. This simple hack keeps your bed fresh and hygienic between deep cleans. Hack Benefit Time Required Declutter first Faster cleaning, less stress 30-60 min Natural cleaners Safer, eco-friendly, cheaper Ongoing Top-to-bottom method No re-cleaning needed All-day clean Microfiber cloths Better dust removal Ongoing Mattress refresh Better sleep hygiene 1 hour Clean Window Tracks with Vinegar Window tracks collect dirt and grime that can interfere with operation. Dip a cotton swab or an old toothbrush in vinegar and scrub the crevices. The natural acidity breaks down buildup without harsh chemicals. This prevents mold growth and keeps windows sliding smoothly. Deodorize the Garbage Disposal with Lemon Cut lemon rinds into small pieces and run them through the garbage disposal with cold water. The natural acidity breaks down food residue while the citrus scent neutralizes odors. Run cold water afterward to flush loosened debris through the system. Do Not Forget Efficient Vacuuming Change your vacuum filter and empty the bag before a deep clean session. A well-maintained vacuum performs better and improves indoor air quality by capturing fine particles. Use attachments like the crevice tool for baseboards and upholstery for furniture. Proper vacuum care extends the life of your machine and saves time. Organize as You Go While cleaning, sort items into keep, donate, and discard piles. Use drawer dividers and storage boxes to assign a home for everything. This approach prevents clutter from returning and helps maintain the order you create. An organized home reduces daily stress and makes future cleaning sessions faster. Frequently Asked Questions How often should I do spring cleaning? Most homes benefit from a thorough spring cleaning once a year, though high-traffic homes may need a seasonal refresh. Can I use vinegar on all surfaces? Vinegar is safe for glass, tile, and stainless steel but should not be used on natural stone like granite or marble. What is the best order for cleaning a room? Always work top to bottom: ceiling fans and light fixtures first, then walls and windows, furniture, and floors last. Do I need professional help for spring cleaning? If your schedule is tight or the task feels overwhelming, consider hiring Toronto Shine Cleaning’s deep cleaning service. They handle every corner of your home so you can enjoy the season. Spring cleaning does not have to be a chore. With these hacks, you can refresh your home efficiently. For homes that need extra attention, Toronto Shine Cleaning offers regular cleaning services across the GTA. Check our pricing and see what our customers say. Call us at (647) 424-0355 to book your spring clean today.

10 Essential Spring Cleaning Hacks to Refresh Your Home Read More »

5 Surprising Ways How Bleach Can Transform Your Cleaning Routine

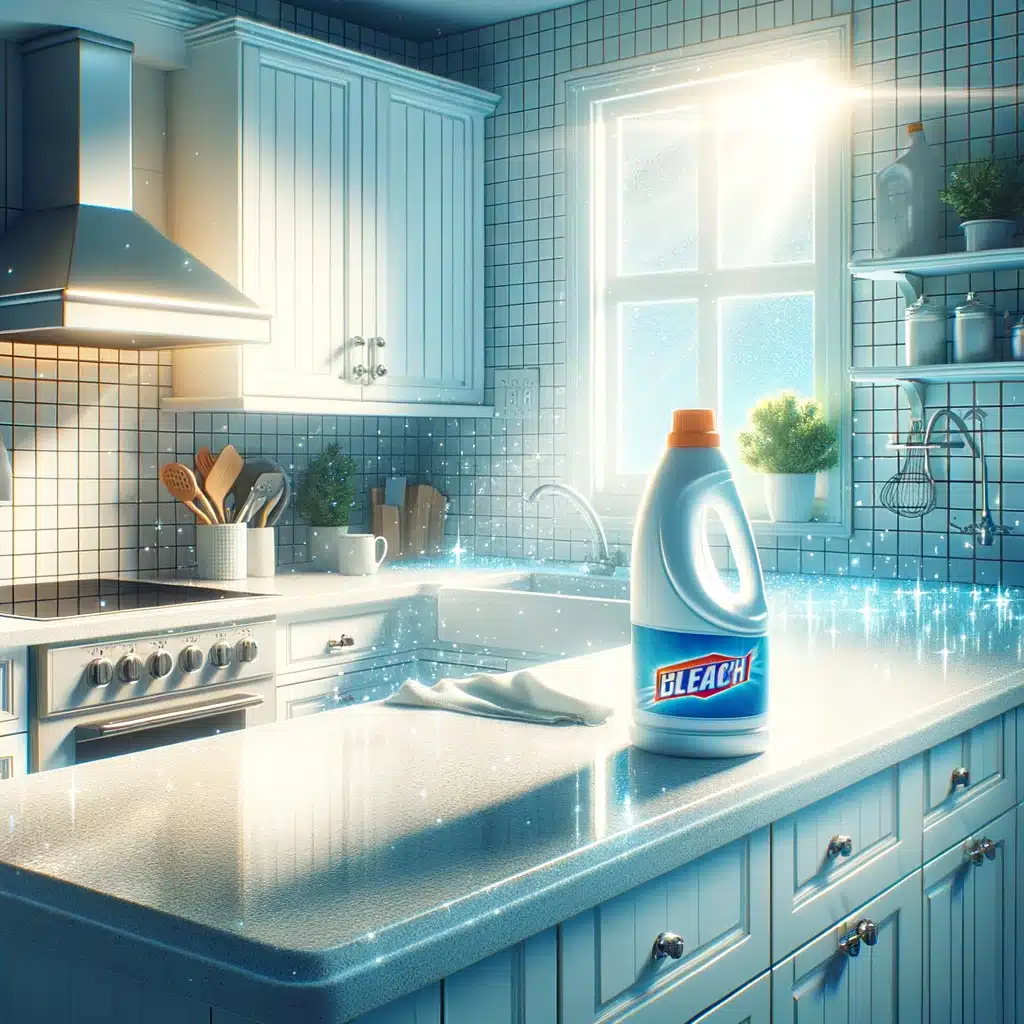
One Humble Bottle, Five Unexpected Jobs Bleach has sat in the cleaning cupboard for generations, zapping germs and brightening whites, and it quietly earns its place in far more routines than most households realize. Used at the right dilution, with gloves and an open window, it disinfects the surfaces raw meat touched, lifts decades from tired grout, neutralizes bin smell at the source, evicts mold spores, and pulls dinginess out of towels. The five methods below show how to get those results without the hazards people worry about, because every one of them starts and ends with the same safety habits. Use 1: Sanitize Cutting Boards and Countertops A simple solution of bleach diluted in water becomes a potent, cheap weapon against foodborne illness, and its reach extends well beyond the board: appliance handles, sink faucets, and even the interior of the fridge all collect spills and contaminants. The habit that matters is timing. After handling raw ingredients, wipe surfaces with the solution, let it sit for a few minutes to maximize germ-killing power, then rinse thoroughly with water so no bleach residue remains anywhere food will touch again. That rinse step is non-negotiable, and the payoff is a kitchen you can genuinely trust between meal preps. Use 2: Bring Old Grout Back From the Dead Grout is porous, so it drinks in dirt and grime until tiles look tired no matter how often you mop. The fix is a paste built on bleach’s whitening, disinfecting power plus the gentle abrasive action of baking soda. Apply it to the lines, let it work, then scrub with a brush so the physical action teams up with the chemistry to lift years of staining. In moisture-prone bathrooms and kitchens this also kills mold and mildew spores, helping prevent their return, and the rinsed-off result looks like a re-grouted room for the price of two pantry ingredients. Keep the exhaust fan running and your gloves on the whole time. Use 3: Disinfect and Deodorize Trash Cans A damp bin full of organic waste is a germ incubator, and the smell is bacterial decomposition announcing itself. Soap and water make the can look clean; a properly diluted bleach solution annihilates the bacteria, viruses, and fungi responsible, which is why the odor comes back gone rather than masked. Scrub inside and out with gloves on and ventilation open, then let the can air dry completely so leftover solution evaporates and the disinfectant finishes working. Sun drying adds a boost, since UV light contributes its own natural sanitizing effect. Do this whenever the bin starts to smell between takeouts. Use 4: Deep-Clean Mold and Mildew Mold and mildew are more than ugly: they aggravate allergies, asthma, and other respiratory problems, and they thrive wherever damp meets warmth, from bathrooms and kitchens to basements. Bleach’s strong oxidizing properties break mold down at a molecular level, killing the growth and making regrowth harder. Spray or sponge on the affected area, give it a real dwell time so it penetrates, scrub, then rinse well, because residual bleach fumes and skin contact are exactly what you are trying to avoid. Prevention decides whether this is a one-time job: run exhaust fans, fix leaks promptly, and dehumidify chronically damp rooms. Outdoors on siding or patios, a garden sprayer reaches big or high areas efficiently, but shield plants and grass first, since bleach runoff harms vegetation. The CDC’s mold and your health page explains who is most at risk, and Health Canada’s rules on household products cover reading labels for approved uses. Use 5: Rescue Dingy White Laundry Whites gray and yellow from body oils, sweat, and everyday stains that detergent alone leaves behind. Bleach’s active ingredients react with wash water to lift discoloration from deep inside fibers, whitening beyond what an ordinary cycle achieves, and the same antibacterial action makes towels, sheets, and underwear hygienically as well as visibly cleaner. Measure honestly: a general rule of thumb is about 1/4 cup per regular load, adjusted up or down for load size and soil level, because too much weakens fibers over time while too little leaves the dinginess. Check every care label first, since some fabrics cannot take bleach at all. If the environmental trade-off bothers you, oxygen-based brighteners are a gentler alternative that still tackles stains. Bleach Safety Rules Before You Open The Bottle Always dilute with water to the right proportion: strong enough to disinfect, weak enough to protect surfaces and lungs Wear gloves and keep the room ventilated every single time you use it Rinse food-contact surfaces thoroughly after the dwell time, with no residue left behind Never combine bleach with ammonia-based or acidic cleaners, and store it away from kids and pets Protect plants and grass from runoff when treating outdoor mold or mildew Check fabric care labels before adding bleach to any laundry load The Five Bleach Jobs Side by Side Job Method Key detail Cutting boards and counters Diluted solution, wipe and wait Sit a few minutes, then rinse food surfaces fully Grout lines Bleach and baking soda paste plus brush Ventilate; rinse away all loosened grime Trash cans Diluted scrub inside and out Air dry, sun helps via UV Mold and mildew Apply, dwell, scrub, rinse Exhaust fans and repairs prevent return Whites laundry About 1/4 cup per regular load Adjust to load size; check care labels Bleach Questions From Real Households Is bleach safe to use at all? Handled responsibly, yes, and Health Canada regulates it as a household chemical with label directions that are worth following. Dilution, gloves, ventilation, and thorough rinsing are what separate a safe routine from a risky one. Can I use the CDC bleach guidance for food-contact surfaces? Yes. The CDC page on cleaning and disinfecting with bleach walks through dilution and contact time, the same details that make the cutting-board method work. Will bleach kill mold forever? It kills surface growth and spores on non-porous materials and keeps regrowth away longer, but moisture is the root cause.

5 Surprising Ways How Bleach Can Transform Your Cleaning Routine Read More »

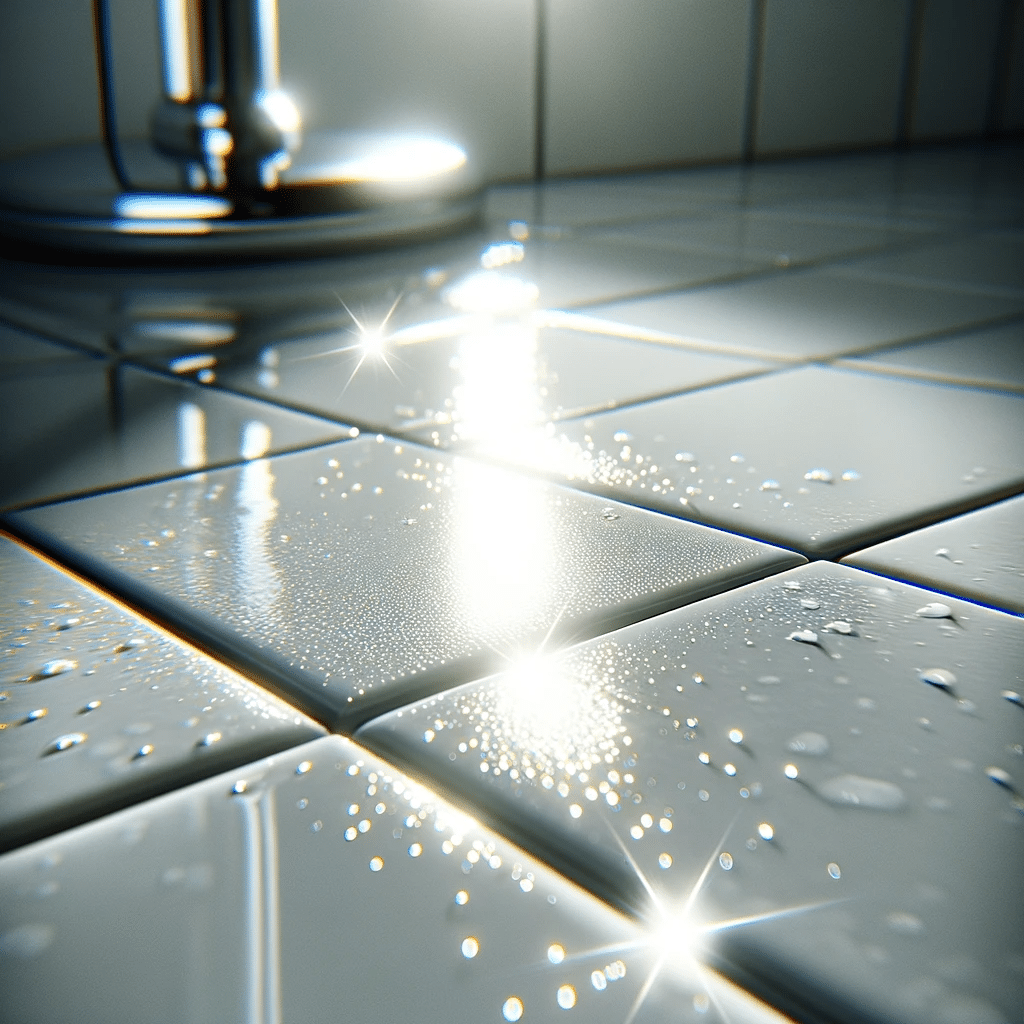
Wet shower tiles in bathroom

5 Quick and Easy Ways to Remove Soap Scum from Shower Tiles

How to Remove Soap Scum from Shower Tiles: 5 Quick and Easy Ways Soap scum is the cloudy, streaky film that builds up on shower tiles when soap mixes with hard water minerals and body oils. It is one of the most common bathroom frustrations in Toronto, where hard water makes the buildup worse. The good news: you do not need harsh chemicals to beat it. These five methods use things you probably already own, plus a few store-bought options, to leave your tiles sparkling. Whichever method you choose, test it on a small, hidden section of tile first. 1. White Vinegar and Water Mix equal parts white vinegar and water in a spray bottle. Spray the tiles generously and let the solution sit for about 10 minutes so the acid can break down the scum. Scrub lightly with a non-abrasive brush or sponge, then rinse with water. The difference is immediate, and the solution is gentle on tile finishes. For stubborn rings along the waterline, spray the vinegar solution onto a cloth, wrap it around the area, and let it sit for a few minutes before scrubbing. 2. Baking Soda Paste Mix baking soda with a little water until it forms a thick, frosting-like paste. Spread it over the tiles, scrub gently in circular motions with a soft brush or sponge, and rinse. Baking soda’s fine grit lifts the scum without scratching, and it is a great option if you want to avoid chemical smells entirely. 3. Commercial Shower Cleaners Store-bought bathroom cleaners are formulated to dissolve soap scum quickly. Spray, follow the label’s dwell time, and rinse. Two safety rules matter: Keep the bathroom ventilated: open a window or run the exhaust fan while you clean. Never mix cleaning products. The Canadian Centre for Occupational Health and Safety warns that mixing bleach with other cleaners can produce toxic gases, and Health Canada’s household chemical safety guide gives the same warning: never mix bleach with other products. 4. Lemon Oil for a Streak-Free Finish After cleaning with any method, put a few drops of lemon oil on a soft cloth and wipe the tiles down. The oil cuts through remaining water marks and streaks, leaves a light citrus scent, and adds a subtle sheen that makes the whole bathroom feel fresh. 5. Dish Soap and Warm Water Dish soap is designed to cut grease, and soap scum is exactly that: oily residue. Mix a few drops of dish soap with warm water in a spray bottle, spray the tiles, let it sit for a few minutes, scrub gently, and rinse. This method is mild, safe for all tile types, and leaves no harsh chemical smell. Warm water helps the soap dissolve evenly, and the same mix works on glass shower doors, not just tiles. Method Supplies Best For Vinegar and water Spray bottle, white vinegar Everyday buildup on glazed tiles Baking soda paste Baking soda, water Stubborn spots, chemical-free households Commercial cleaner Store-bought spray Quick results on heavy scum Lemon oil Soft cloth, lemon oil Streaks and finishing shine Dish soap and water Dish soap, spray bottle Gentle regular maintenance Stop Soap Scum Before It Starts Prevention beats scrubbing: Squeegee the tiles after every shower, it takes 20 seconds. Run the exhaust fan during and after showers to lower humidity. Use liquid soap instead of bar soap, which leaves more residue. Clean the shower weekly so buildup never gets a chance to set. Give the tiles a quick 30 second rinse after each shower to wash away fresh soap residue before it dries into film. Keeping moisture in check matters beyond looks: the CDC notes that mould grows wherever there is moisture, so a well-ventilated bathroom protects your health as well as your tiles. When to Bring in the Pros If scum has built up for months, or you are moving out of a Toronto rental and need the bathroom to pass inspection, professional help saves the day. Toronto Shine Cleaning offers deep cleaning services that tackle showers, grout, and tile, move-in and move-out cleaning for tenants and landlords, and regular residential cleaning to keep bathrooms fresh between deep cleans. Clients rate us 4.9 out of 5 on Google, as you can see on our reviews page. Call 647-424-0355 to book. Is vinegar safe on all shower tiles? Vinegar is safe on glazed ceramic and porcelain tile, but avoid it on natural stone like marble, limestone, and travertine, since acid can etch the surface. Use dish soap or a stone-safe cleaner on those materials. Why does soap scum keep coming back? Soap scum returns because soap residue combines with hard water minerals every time you shower. Daily squeegeeing, weekly cleaning, and running the exhaust fan all slow the buildup significantly. Can I mix vinegar and baking soda for soap scum? Mixing them creates foam but mostly neutralizes both, so the cleaning power is weaker than using either one alone. Use them separately: vinegar first, then a baking soda paste for stubborn spots. How often should I clean my shower tiles? A quick wipe or squeegee daily, plus one weekly clean with your preferred method, keeps scum from building up. Monthly deep cleaning of grout and corners prevents the toughest buildup.

5 Quick and Easy Ways to Remove Soap Scum from Shower Tiles Read More »

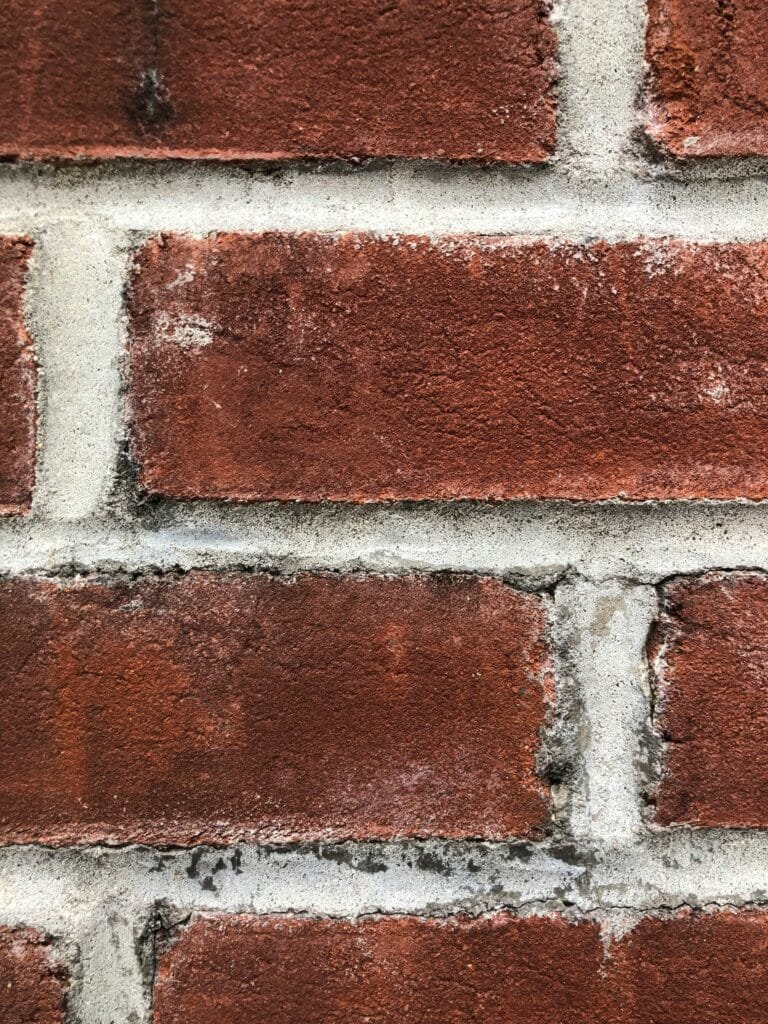
Brick grout, wall grout

5 Easy How-To Tips for Effectively Cleaning Grout

5 Easy How-To Tips for Effectively Cleaning Grout Grout has a way of aging a whole room. The tile may be spotless, but dark, grimy lines make a bathroom or kitchen floor look tired no matter how much you mop. Because grout is porous, it absorbs whatever touches it: soap scum, hard water minerals, grease, and moisture that feeds mildew. The five methods below move from gentle to heavy duty, and together they cover almost every grout problem a Toronto home can throw at you. Your Grout Cleaning Kit Everything on this list is inexpensive, and most of it is already in your home: An old toothbrush or small scrub brush with stiff bristles Baking soda and white vinegar A bottle of hydrogen peroxide A spray bottle and a few microfiber cloths Rubber gloves to protect your hands Tip 1: Start with a Baking Soda Paste Baking soda is slightly abrasive, so it scrubs away surface stains without scratching the tile, and it doubles as a natural deodorizer for musty smells. Mix a few tablespoons with just enough water to make a thick paste, then apply it along the grout lines with gloved fingers, a small spatula, or the toothbrush. Let it sit for at least 10 minutes, or up to an hour for stubborn grime, so it can penetrate the pores and draw the dirt out. Scrub in a circular motion, spritzing a little water if the paste dries out, then rinse. It is safe for homes with kids, pets, or anyone sensitive to strong products. Tip 2: Spray Vinegar on Soap Scum and Hard Water Vinegar’s natural acidity breaks down the set-in film that makes grout look aged, especially soap scum and hard water stains. Combine equal parts white vinegar and warm water in a spray bottle, coat the lines generously, and give it a few minutes of dwell time, up to 10 minutes on tough spots. Scrub back and forth with the brush, rinse with clean water, and the grout should look noticeably brighter. One caution: never combine vinegar with bleach or chlorine products, and keep bleach-based cleaners strictly separate. Mixing them produces toxic gas, which is exactly the kind of hazard Health Canada covers in its household chemical safety guidance. Tip 3: Bring In Hydrogen Peroxide for Stains and Mildew For discoloration that survives vinegar, hydrogen peroxide is the stain buster. Its bleaching and disinfecting action works directly on mold and mildew in damp areas. Pour or spray it straight onto the lines for general discoloration, or mix it with baking soda into a fizzy paste for the stubborn cases; the reaction helps lift the stain while the soda adds gentle abrasion. Let it work for several minutes, up to 30 for deep stains, then scrub and rinse thoroughly so no residue remains to attract fresh dirt. A second application usually finishes what the first one started. Tip 4: Steam the Grout Clean Steam cleaning is the chemical free option that also sanitizes. High temperature steam penetrates deep into the porous surface, loosening embedded grime, and it kills most bacteria, mold, and mildew on contact. Since water is the only ingredient, it is a smart choice for households worried about indoor air quality or chemical residues, which can actually attract more dirt over time. Most machines sell grout attachments that direct the steam along the lines; move slowly, then wipe the loosened dirt away as you go. Tip 5: Seal the Grout So It Stays Clean Sealer is the step most people skip, and it is the reason grout gets dirty again so fast. A quality sealer forms a protective barrier that repels spills, steam, and foot traffic instead of letting them soak in. Start with grout that is completely clean and dry, since anything trapped under the sealer causes problems later. Choose a water based or solvent based formula that suits your tile and the room’s moisture level, apply it along the lines with a small brush, roller, or applicator bottle, and keep it off the tile faces. Let it dry per the manufacturer’s instructions, and plan on a second coat for showers and other high moisture areas. Method Best For Dwell Time Baking soda paste Surface dirt and light stains 10 to 60 minutes Vinegar spray Soap scum and hard water marks 5 to 10 minutes Hydrogen peroxide Mold, mildew, deep stains Up to 30 minutes Steam Sanitizing without chemicals Pass by pass, then wipe Sealer Preventing the next round of stains Dry per label, cure before use Grout Cleaning FAQs Why does grout get so much dirtier than tile? Tile surface is dense and glassy, while grout is porous, so it absorbs spills, oils, and moisture instead of letting them wipe away. That is why the same spill beads on tile but stains the line beside it, and why sealing makes such a difference. How often should I clean my grout? Wipe the lines with your regular bathroom or kitchen routine weekly, and run a baking soda or vinegar treatment monthly in wet areas. Deep treatments and resealing are worth doing a couple of times a year, or whenever the lines start darkening again. If I use bleach on moldy grout, anything to know? Yes: ventilate the room, wear gloves, follow the label, and never let bleach meet vinegar, ammonia, or other cleaners. Health Canada’s guidance above and the CDC’s bleach safety page both stress that combination risks. Used carefully, bleach products can disinfect, but they are rarely necessary after peroxide. When is professional grout cleaning worth it? When stains survive all five methods, when mildew keeps returning despite real effort, or when the area is simply too large to tackle on your hands and knees. Professionals bring commercial steam equipment and the right sealers, which resets the surface completely. Fresh Lines Without the Weekend Lost These five tips will handle the majority of grout problems, but some jobs deserve professional gear and hands. Toronto Shine Cleaning’s deep cleaning service restores tiles

5 Easy How-To Tips for Effectively Cleaning Grout Read More »

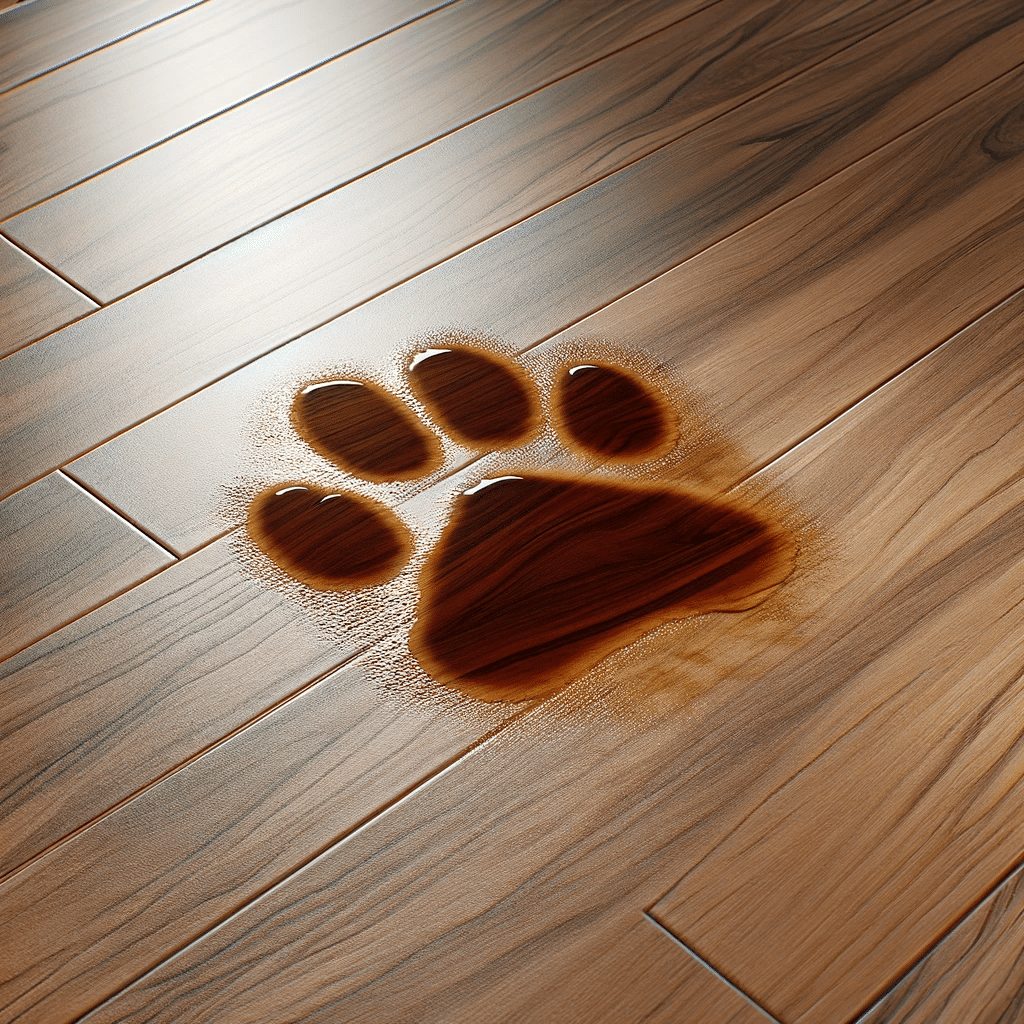
Remove Pet Stains Easily

7 Simple Steps to Eliminate Pet Stains from Your Hardwood Floors

Why Pet Stains on Hardwood Floors Need Fast Action Every pet owner knows the sinking feeling of spotting a wet patch on a beautiful hardwood floor. Wood is porous, so urine, vomit, and muddy paw prints sink in quickly and leave behind stains, odors, and dull discoloration. The good news is that a calm, methodical cleanup can save your floors. The seven steps below walk you through the full process, from catching the mess early to confirming the finish is intact, and they work on urine, drool, and food accidents alike. Step 1: Identify Pet Stains Early Timing decides everything. A fresh stain mostly sits on the surface, while an old one has already soaked deep into the grain. Catching accidents early brings three clear benefits: Less absorption: wipe within minutes and the liquid never reaches the seams where swelling begins. Color prevention: acids in urine dull and darken wood over time, so speed preserves the natural tone of your floors. Odor control: bacteria multiply in organic messes, and fast cleanup stops smells before they set in. Keep an emergency kit near the areas your pet favors: absorbent cloths for quick blotting, an enzyme based cleaner rated safe for sealed wood, and a flashlight or black light that reveals dried spots you would otherwise miss. Step 2: Blot, Do Not Rub Rubbing pushes liquid down into the grain and outward across the boards, the exact opposite of what you want. Take a clean, absorbent cloth or paper towels and press straight down, lifting repeatedly, until no more moisture transfers. Blotting stops the stain from spreading and protects the finish, because wood that drinks too much liquid can swell, warp, or discolor permanently. Nobody attacks a treasured wooden table with a scouring pad, and your floor deserves the same respect. Step 3: Apply a Pet Safe Cleaner Strong solvents and harsh chemicals can irritate paws, skin, and lungs, since pets live inches above the floor and groom residue right off their coats. The CDC healthy pets guidance reminds owners to choose and handle cleaning products carefully around animals and to follow label directions. Enzyme formulas are the workhorses for pet accidents because they digest the urine crystals that trigger repeat marking instead of merely masking them. Pet safe cleaners use non toxic ingredients that break down organic stains, and they are also gentler on wood finishes, cutting the risk of clouding or discoloration. Health Canada’s page on household products explains how to read labels and store these supplies safely. You can find pet safe options at most pet stores and online retailers. Step 4: Scrub Gently in Circular Motions Armed with a soft brush or soft cloth, work the cleaner into the spot using light pressure and small circles, almost like massaging lotion into skin. Aggressive scrubbing scratches the protective finish and leaves a dull patch that makes every future spill more visible. If the mark resists, do not press harder; reapply the cleaner and keep going gently. Patience removes stains that brute force would turn into floor damage. Step 5: Rinse With a Damp Cloth Cleaner left on the floor keeps working long after you have walked away. Residue attracts dirt, dulls the sheen, and can turn sticky or discolored over the following weeks. Wipe the area with a cloth moistened, never dripping, in fresh water, and rinse or swap the cloth often so you lift solution away rather than spread it around. When the surface no longer feels soapy or sticky, rinsing is done. Step 6: Dry the Floor Thoroughly Water is wood’s quiet enemy. Pat the cleaned zone with a dry cloth until the cloth picks up nothing more, swapping to a fresh one as needed, and let the area air out afterward. Trapped moisture can creep into seams and cracks, causing warping, swelling, and even rot that surfaces months later as a costly repair. Step 7: Check for Lasting Damage Inspect the spot in good light once everything is fully dry. Is the color even with the surrounding boards? Is the finish clear and intact rather than cloudy or peeling? Stubborn or long old stains can leave bleached patches or raised grain that no household method reverses. Persistent discoloration, warping, or swelling is your cue to call professional help, whether a flooring specialist or a deep cleaning service experienced with tired wood. The Seven Steps at a Glance Step Action Why It Matters 1. Identify Scan with a black light, keep a kit ready Fresh stains clean far easier than set ones 2. Blot Press down, lift, repeat Rubbing drives liquid deeper into the grain 3. Clean Apply an enzyme, pet safe formula Digests urine crystals and protects paws 4. Scrub Soft brush, light circular motions Lifts marks while preserving the finish 5. Rinse Damp cloth, fresh water often Removes residue that dulls and attracts dirt 6. Dry Dry cloths until no moisture remains Prevents swelling, warping, and rot 7. Inspect Check color and finish closely Catches damage that needs a professional Frequently Asked Questions Can vinegar and water remove pet stains from hardwood? Diluted vinegar can freshen a surface, but it does not digest urine crystals the way an enzyme cleaner does, and strong acid can dull a wood finish. Use gentle products and save enzyme formulas for accidents that have already soaked in. How fast should I clean a pet stain? Within minutes if at all possible. The first stretch of time decides whether the mess stays on the surface or reaches the seams between boards, which is why your cloths and enzyme cleaner should live within arm’s reach of the spots your pet uses most. Can an old pet stain be fixed without refinishing? Sometimes. Several gentle enzyme applications over a few days can lift older marks. However, if urine has reached the subfloor or blackened the wood, professional deep cleaning or localized refinishing is the honest answer. How do I keep floors stain free between accidents? Wipe paws at entryways, trim foot

7 Simple Steps to Eliminate Pet Stains from Your Hardwood Floors Read More »

Mopping floor with organized cleaning supplies.

Mississauga’s Move-Out Cleaning: Common Mistakes to Avoid

Mississauga’s Move-Out Cleaning: Common Mistakes to Avoid Move-out day in Mississauga mixes excitement about your next chapter with one very unglamorous task: leaving the old place spotless. Done well, a thorough move-out clean protects your security deposit and your peace of mind. Done in a panicked rush, it invites surprise deductions. Almost every move-out disaster traces back to one of seven predictable mistakes that Toronto Shine Cleaning crews see weekly across Mississauga and the GTA. Here is how to sidestep them. Procrastinating the clean-up until the final weekend Overlooking what your rental agreement actually requires Skimping on the right cleaning supplies Missing the details landlords check on inspection day Trying to do the entire deep clean alone Forgetting the balcony, patio, and entrance Skipping the final walk-through Start Early and Read the Fine Print Mistake 1: Procrastinating the Clean-Up Most tenants underestimate the sheer volume of work between sorting what to keep, packing years of memories, and making every surface shine. Start weeks early and break the job into chunks: dedicate one weekend to decluttering, another to the kitchen and living room. As moving day approaches, set aside 15 to 30 minutes a day for one task, like bathroom mirrors today and the kitchen backsplash tomorrow. Steady progress shrinks moving anxiety and leaves flexibility for jobs that never happen in a rush, like cleaning behind appliances or touching up wall scuffs. Mistake 2: Overlooking the Rental Agreement Your lease, not your memory, defines what “clean” means. Before you pack the first dish, revisit the agreement for clauses about the condition in which the property must be returned. Some landlords require professional carpet cleaning, steam cleaning, wall washing, or specific repairs, and a surface-level tidy will not satisfy them. If those requirements exist, book the services well ahead of your move-out date, because peak seasons fill professional calendars fast, and knowing the rules lets you budget for them. If anything seems unclear or unreasonable, talk to your landlord early: a quick conversation often reveals the real concern and ends in a compromise instead of a deduction. The Supplies and Details That Decide Your Deposit Mistake 3: Skimping on Cleaning Supplies One all-purpose spray and a single rag can double your work. Glass streaks, stainless dulls, and harsh chemicals can damage the very surfaces they were never meant for. A modest, targeted kit covers almost everything: glass cleaner for streak-free windows and mirrors, a tile scrub for bathroom grout, wood polish for floors, stainless cleaner for appliances, plus a squeegee, microfiber cloths, and a good mop. Some of the strongest tools are cheap, like vinegar and baking soda. A stocked kit also cuts store runs, speeds the process, and makes tasks easy to hand to helpers. Mistake 4: Missing the Details Floors, counters, and toilets get cleaned by reflex; the forgotten spots are what cost deposits. The inside of the oven, the tops of cabinets, light fixtures, and ceiling fans collect astonishing grime precisely because they sit below daily attention. Build a checklist that goes beyond the obvious: behind appliances, baseboards, window blinds, door handles, vents, and any built-in storage you are leaving empty, then work room by room. Damp corners deserve special attention: Health Canada’s advice on reducing humidity, moisture, and mould explains why lingering dampness under sinks breeds mould an inspection will catch. In kitchens and bathrooms, follow the CDC advice to clean surfaces first and disinfect where needed. A detail-first clean signals respect for the property that landlords remember. Area Commonly missed spots landlords check Kitchen Oven and fridge interiors, cabinet tops, behind appliances, backsplash grease Bathrooms Grout lines, limescale, vents, under-sink cabinets Bedrooms and living areas Baseboards, blinds, light fixtures, ceiling fans, wall scuffs Entrance and storage Door handles, closet rails, built-in shelving, threshold dirt Why You Should Not Do It Alone Move-out cleaning is a deep clean of every corner in a home you are simultaneously packing, and the time, energy, and expertise it takes are exactly what a move depletes. Enlisting friends and family makes the job faster and turns it into one last gathering in a home full of memories; assign tasks by strength. When the scope outruns your volunteers, professionals bring the tools and techniques for baked-on grease and the carpet steam cleaning leases so often demand. Booking an end-of-tenancy cleaning service frees you to handle the rest of the move while delivering a result built around landlord expectations. Toronto Shine Cleaning serves rentals across Mississauga and the GTA. Finish Outside, Then Walk Through Mistake 6: Forgetting the Exterior Balconies, patios, and yards collect a surprising layer of dirt, debris, and weather wear, and they are the first thing your landlord sees on the walk-through. Sweep decks and balconies, wash down built-up dust, clean glass railings, and wipe any outdoor furniture you are leaving behind. Then check the entrance: sweep the front steps, wipe down the door, make sure outdoor light fixtures are clean and working, and tend any garden covered by your agreement instead of leaving it overgrown. In Mississauga, where outdoor living spaces are prized, an unkempt exterior can undo a sparkling interior. Mistake 7: Overlooking the Final Walk-Through Skipping the joint inspection leaves room for disputes you will lose in writing. Arrange a final walk-through with your landlord to inspect each room, show the effort you put in, and discuss damage versus normal wear face to face, which beats decoding an unexpected deduction weeks later. Bring your checklist and photos of the property from move-in day so discrepancies get clarified, not argued. Schedule the inspection a few days before you leave: that buffer lets you fix anything flagged and closes the tenancy on good terms. Move-Out Cleaning FAQs How early should I start move-out cleaning? Weeks ahead if possible: declutter and pack first, then clean in room-sized chunks with 15 to 30 minutes a day. Save the final pass for when the home is empty, so every cabinet and appliance interior is reachable. Do I have to hire professionals to

Mississauga’s Move-Out Cleaning: Common Mistakes to Avoid Read More »