Floor Cleaning

Clean kitchen with a plant at the table

How to Organize and Clean Your Kitchen Efficiently

Start With a Clear Slate: Declutter First A kitchen cannot be cleaned efficiently while every surface is buried, so decluttering comes first. Begin with the countertops: remove everything, appliances, jars, and decor, and wipe the bare surface as you go. Warm water with mild dish soap handles most countertop materials, and a baking soda paste, gently applied and wiped away, lifts tougher stains. Then make each item earn its place back: do you use it daily, is it functional, does it even belong in the kitchen? Fewer objects mean faster wipe downs and more room to cook. The cabinet crusade Give your cabinets a proper block of time. Empty them, lay the contents out in view, and keep a box ready for donations and discards. Daily items move to easy reach; occasional items migrate to higher shelves or the back. Wipe the empty interiors with an all purpose cleaner or a vinegar and water mix, and condition wooden cabinets with a wood cleaner. Group like with like as things go back, baking supplies in one zone, pots and pans in another. Clean From the Top Down Dirt falls, so clean in the direction gravity is already working. Start at the highest points: cabinet tops, the refrigerator top, and upper shelves, where dust quietly accumulates. A microfiber cloth or an extendable duster picks dust up instead of scattering it. Near the stove, where grease glues grime to cabinet tops, switch to warm soapy water or a natural one part vinegar to one part water solution. Then descend level by level to shelves and counters, and any debris that dropped earlier still gets swept up in a later pass. Finish with the deep cleaning zones nobody enjoys: under the sink and behind small appliances. Give Every Appliance a Deep Clean Appliances collect grease, food particles, and residue that quietly hurt performance and lifespan. Each one rewards a specific approach: Refrigerator: remove food and shelves, wash the interior with one tablespoon of baking soda per quart of water to clear odors and stains, then clean the rubber door seals and exterior. Oven: apply an oven cleaner per the product instructions, or spread a baking soda and water paste and leave it overnight before wiping. Degrease the stovetop and control panels. Microwave: heat a bowl of water with lemon juice for a few minutes and let the steam loosen hardened grime so it wipes right off. Dishwasher: run it empty with a specialized cleaner or a cup of vinegar to clean and deodorize. Small appliances: unplug toasters, blenders, and coffee makers first, then run a vinegar water mix through the coffee maker and wipe toasters and blenders with a damp cloth. Because kitchens are where food is handled, the CDC food safety prevention tips are a smart companion to appliance cleaning, and Health Canada’s household products guidance covers safe use of the cleaners themselves. Store Smarter With Containers and Labels Containers turn a chaotic pantry into a system. Clear, airtight containers for pasta, rice, and cereal let you see contents without opening anything, keep food fresher, and stack neatly to use vertical space. Choose square or rectangular shapes, which fit together without dead gaps, and pick glass for health and durability or BPA free plastic when weight and breakage matter more. Labeling multiplies the benefit. Write the item name plus the date stored or the expiry date on every container, especially leftovers in the fridge and anything in the freezer, where forgotten food turns into freezer burn and waste. A label maker, a marker, or chalkboard labels all work. Labeled spice jars end the rummage through lookalike containers and add a professional touch. Fridge and Freezer Reset Sweep the fridge and freezer for expired items often, checking dairy, meat, leftovers, and frozen goods; clearing them protects food safety, sharpens meal planning, and cuts waste. Turn the sweep into a wipe down with a water and baking soda mix, and give the freezer a gentle defrost if needed. Then restock by category: a shelf for dairy, crispers for vegetables, the door for condiments, and bins in the freezer grouped by vegetables, meat, and ready meals so nothing gets buried. Stackable containers keep leftovers visible in both. Tame the Small Stuff Utensils and spices are minor objects with major clutter potential. Spread utensils out and sort honestly, keeping what you use, in good condition, and without duplicates, then corral winners in drawer organizers or a countertop holder. For spices, choose alphabetical order or frequency of use, with daily jars out front. Cabinet door racks, tiered shelves, and drawer inserts keep jars visible, and uniform jars beat mismatched packets. The Routine That Holds It Together Frequency Tasks Payoff Daily Dishes, wipe counters and stovetop after cooking, sweep floors Mess never accumulates into a weekend project Weekly Mop, clean microwave and dishwasher inside and out, wipe cabinet fronts, refresh counters and backsplash Grease and grime stay thin and easy Monthly Clean oven, defrost and wipe freezer, organize the pantry, deep clean the fridge, hit cabinet tops and under sink Long term maintenance without a crisis clean Four habits keep the routine alive: be consistent so tasks never balloon, involve the whole household so the load stays light, keep supplies organized and within reach, and stay flexible enough to adapt the schedule when life happens. Add Personal Touches Last A clean kitchen should also feel like yours. Herbs add greenery and snippable flavor, succulents suit anyone without a green thumb, and artwork, family photos, colorful towels, or a distinctive light fixture turn everyday items into decor that fits your theme. Frequently Asked Questions How do I clean laminate or stone countertops safely? Stick to warm water with mild dish soap for routine cleaning and a gentle baking soda paste for stubborn spots. Skip abrasive scrubs and harsh acids, which dull laminate and etch many natural stones. What is the fastest way to clean a smelly fridge? Empty it, wash shelves with one tablespoon of baking soda per quart

How to Organize and Clean Your Kitchen Efficiently Read More »
Vision from the ground of a corridor with carpet

How to Keep Your Carpets Looking New: Expert Advice on Carpet Care

How to Keep Your Carpets Looking New: Expert Advice on Carpet Care Carpets add warmth, comfort, and style to a home, but they also collect dust, dirt, and allergens with every step. Without regular care, fibers flatten, colours fade, and stains set in. The good news is that properly maintained carpets can last for years, even decades. This expert guide covers the routines that keep your carpets looking new, from daily habits to periodic deep cleaning. Why Carpet Care Matters Carpet fibers trap dust, pet dander, and other particles that settle into the pile. Left alone, that buildup dulls the look of the carpet and can affect the air you breathe indoors. Health Canada’s overview of indoor air contaminants explains why controlling dust and allergens in the home matters, and regular vacuuming is the single most effective way to keep them from building up in your flooring. Vacuum on a Schedule That Matches Your Household A good vacuum makes all the difference. Look for strong suction and rotating brushes that lift dirt from deep within the fibers. If you have pets, choose a model designed for pet hair and dander, and consider a HEPA filter, which traps fine particles and allergens instead of recirculating them. How often you vacuum depends on your household: Household type High-traffic areas Entire carpet Homes with pets or kids Every couple of days At least once a week Less busy homes As needed Weekly Empty the canister or change the bag regularly, because a full vacuum loses suction and picks up less dirt. Handle Spills by Blotting, Not Rubbing Spills happen, and how you react in the first minutes decides whether a stain sets. Keep a clean, absorbent cloth or paper towels handy, and blot gently. Rubbing pushes the stain deeper into the fibers, so resist the urge to scrub. For tougher stains, use a quality carpet cleaner or spot remover matched to your carpet type, whether that is a pet-stain formula, a heavy-traffic formula, or a gentle option for delicate carpets. Always test the cleaner on a small, inconspicuous area first to make sure it does not cause discolouration, and follow the product instructions. Deep Clean Carpets Periodically Even with diligent vacuuming, embedded dirt accumulates over time. A carpet cleaner machine injects a mix of water and cleaning solution into the fibers, loosens the dirt and grime that have settled deep down, then extracts the dirty water along with the loosened soil. It is an effective way to refresh your carpet at home, provided you choose a solution suitable for your carpet’s material and colour and spot-test first. Professional deep cleaning goes a step further. Powerful equipment and specialized solutions remove deeply embedded dirt and address specific problems like pet odours, tough stains, and delicate fibers. Toronto Shine Cleaning’s deep cleaning services give carpets the thorough treatment they need to stay fresh and last longer. Prevent Wear With Mats, Rugs, and Smart Habits Prevention is cheaper than repair. A few simple habits protect your carpet every day: Place mats and rugs at entrances, hallways, and in front of sofas, where foot traffic is heaviest. Choose durable mats with non-slip backing that are easy to clean. Vacuum the mats regularly, and deep clean them with a mild detergent or carpet cleaner when they get dirty. Spot-test any cleaner in an inconspicuous area before applying it to the full carpet. These first-line defenses absorb the brunt of daily wear so your main carpet stays vibrant underfoot. Build a Carpet Care Routine That Lasts Caring for your carpet is not complicated, but consistency matters. Vacuum on a schedule, blot spills the moment they happen, deep clean periodically, and protect high-traffic zones with mats. The payoff is a carpet that stays soft, colourful, and comfortable for years. If the job feels overwhelming, or you simply prefer to leave it to the professionals, Toronto Shine Cleaning can handle all your carpet care needs. A regular maid cleaning visit keeps daily dust in check, and our pricing page shows transparent base rates before HST. To keep your carpets looking new without lifting a finger, call (647) 424-0355 or browse our customer reviews to see why local homeowners trust us. Health Canada’s healthy living resources are a helpful reminder that a clean, comfortable home supports your family’s well-being, and well-cared-for carpets are part of that picture. Frequently Asked Questions About Carpet Care How often should I vacuum my carpets? In homes with pets or kids, vacuum high-traffic areas every couple of days and the entire carpet at least once a week. In less busy households, a weekly vacuum of the whole carpet usually keeps fibers clean and fresh. Should I rub a spill to clean it up? No. Rubbing pushes the stain deeper into the carpet fibers. Blot gently with a clean, absorbent cloth or paper towel, working from the outside in, and use a carpet cleaner matched to your carpet type for tougher stains. Can I deep clean my carpets myself with a machine? Yes. A carpet cleaner machine injects water and cleaning solution into the fibers, then extracts the dirty water along with loosened dirt. Choose a solution suited to your carpet’s material and colour, and spot-test in an inconspicuous area first. How long do carpets last with proper care? With regular vacuuming, prompt spill treatment, periodic deep cleaning, and protective mats in high-traffic zones, carpets can stay in great shape for years, even decades, instead of wearing out and needing early replacement.

How to Keep Your Carpets Looking New: Expert Advice on Carpet Care Read More »

How to Prevent Cold and Flu with Natural Cleaning Solutions

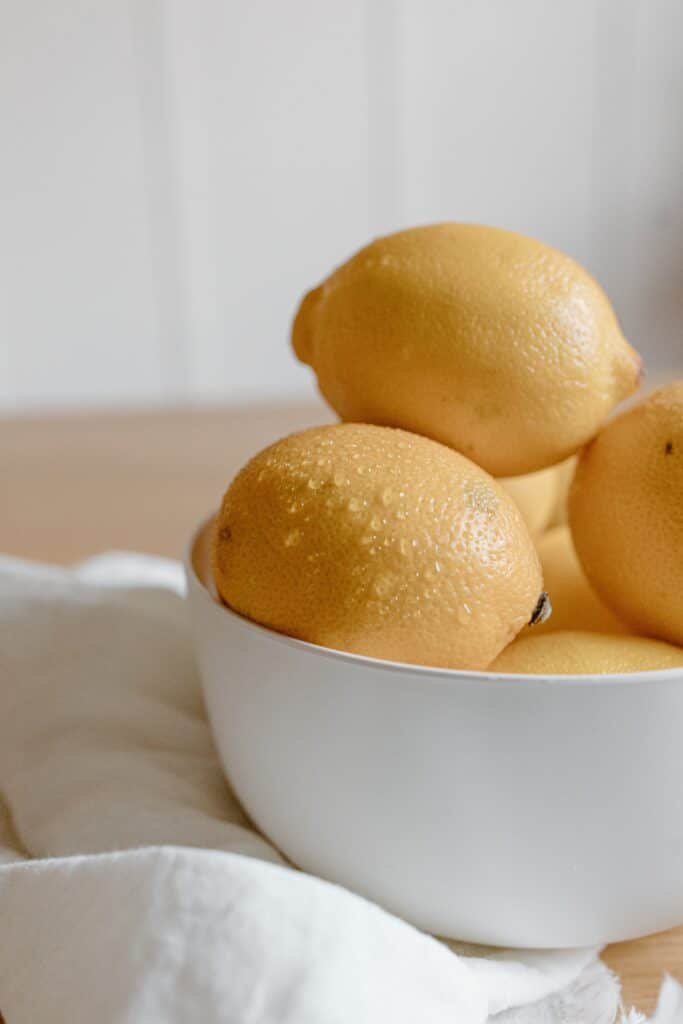
Hey there! To Prevent Cold and Flu with Natural Cleaning, it’s super important to keep our homes clean and germ-free. But, guess what? You don’t need to rely on harsh chemicals to do the trick. Natural cleaning solutions can be just as effective in keeping those pesky germs at bay. Let’s dive into how you can use natural solutions to prevent cold and flu in your cozy nest. Why Go Natural? First and foremost, natural cleaning solutions are kinder to your skin. We’ve all been there – using a strong cleaner only to end up with irritated hands. Natural options, on the other hand, are much gentler. This means you can clean away without worrying about harsh reactions, which is especially great if you have sensitive skin. But it’s not just about you! If you have little ones scampering around or furry friends lounging on your floors, you’ll love that natural cleaners are safer for them too. Kids and pets are often more sensitive to the harsh chemicals found in many standard cleaning products. By switching to natural alternatives, you’re creating a safer environment for the entire family. Imagine your kiddos playing on floors cleaned with gentle ingredients or your pets cozying up on freshly cleaned carpets that don’t have any harsh residues. It’s all about creating a safe and healthy space for everyone. Now, let’s talk about Mother Earth. We all want to do our part in keeping our planet happy and healthy, right? Well, natural cleaning solutions are a great step in that direction. They’re eco-friendly, which means they’re kinder to the environment. When you wash away these natural cleaners, you’re not sending harsh chemicals down the drain and into our water systems. It’s a win-win for your home and the environment. Another cool thing? You probably have most of these natural cleaning superheroes in your kitchen right now! That’s right – items like vinegar, lemon, and baking soda aren’t just for cooking; they’re also powerful cleaning agents. This means you can start your natural cleaning journey without a trip to the store. It’s convenient, effective, and kinder to your wallet too. The Magic of Vinegar So, what makes vinegar so special? It’s all about the acidity. Vinegar is known for its acidic nature, which is a nightmare for germs and viruses. This acidity isn’t just good for adding zing to your salad dressing; it’s also what gives vinegar its germ-killing superpowers. When you use vinegar as a cleaning agent, it works hard to break down grime, cut through grease, and yes, kill those pesky germs that can lead to colds and flu. Now, how do you transform vinegar into a cleaning superhero? It’s super simple. Take equal parts of water and white vinegar, mix them in a spray bottle, and there you have it – a natural disinfectant ready to tackle germs in your home. This mixture can be used on a variety of surfaces where germs love to lurk. Think kitchen counters, bathroom surfaces, doorknobs, and even your smartphone screen. But here’s the best part: it’s so easy to make and use. You don’t need to be a DIY guru to mix water and vinegar. Plus, it’s a cost-effective solution. Vinegar is way cheaper than most store-bought cleaners, and since you’re diluting it with water, a little goes a long way. You’re not only keeping your home clean; you’re also being kind to your wallet. Another bonus? You’re avoiding the strong, sometimes overwhelming scents that come with many commercial cleaners. While vinegar does have a distinct smell, it dissipates quickly, leaving you with a clean, fresh space without any lingering chemical odors.     Lemon: Not Just for Lemonade Why are lemons such a big deal in the cleaning world? It’s all about their high acidity. Just like vinegar, the acidic nature of lemons makes them a natural enemy for germs and viruses. When you’re trying to keep your home free from cold and flu bugs, lemons are your trusty allies. They can kill bacteria and leave your house not just clean, but also smelling fresh and citrusy. So, how do you turn lemons into a cleaning solution? It’s as easy as pie (or should I say, lemon pie?). Squeeze some lemon juice, mix it with a bit of water, and you’ve got yourself a natural disinfectant. This lemon-water mix is perfect for wiping down those areas where germs love to hang out. Think kitchen countertops, where you prepare all your meals, or doorknobs, which everyone touches multiple times a day. Even your bathroom surfaces can benefit from a lemony clean, leaving them not just germ-free but also with a refreshing scent. One of the coolest things about using lemon as a cleaner is the scent factor. Unlike some cleaners that can be harsh on your nose, lemons leave a light, refreshing citrus aroma. This makes cleaning a more pleasant experience and leaves your home smelling naturally fresh. Plus, there’s something incredibly satisfying about knowing you’re using a natural, biodegradable substance to keep your home clean. And let’s not forget, lemons are also great for tackling tough stains and bringing out natural shine. Got a stubborn stain on your countertop? Lemon juice to the rescue! Want to add some sparkle to your faucets or sink? Rub them with a lemon wedge and watch them shine. Essential Oils: Smells Good and Cleans Too! So, why are these particular oils so great for cleaning? Well, it turns out, nature has equipped them with properties that are tough on bacteria and viruses. For instance, tea tree oil is known for its powerful antiseptic properties. It’s like that tough-on-germs cleaner but without the harsh chemicals. Eucalyptus oil, on the other hand, isn’t just for helping you breathe easier when you have a cold; it’s also great for wiping out germs. And then there’s lavender, the all-rounder, known for its calming scent and its ability to fight off bacteria. Now, how do you use these oils in cleaning? It’s pretty

How to Prevent Cold and Flu with Natural Cleaning Solutions Read More »

How to Rejuvenate Your Home After the Holidays: Winter Maintenance Guide

Close the Holidays Out Properly Winter has settled in, the festivities are memories, and your home is quietly asking for a reset. Post holiday cleanup is about more than tidiness: it is how you start the new year with order instead of tinsel in every corner. The guide below moves through decoration storage, tree disposal, room by room deep cleaning, kitchen recovery, and the winter safety checks that keep the rest of the season calm. Un deck the Halls with Care Take the decorations down when you are ready, not when guilt says so. When you do begin, start with small items like ornaments and tinsel, and finish with the lights, which cause the most grief a year later. Wrap each strand around a piece of cardboard before storing it, the simplest trick known for preventing the tangled knot that ambushes you next December. As each item packs away, give it a quick inspection: dead bulbs, chipped ornaments, and tired ribbon are easier to replace now than in a panic on December 20th. Send the Tree Off Well Removing the tree closes the season’s chapter, and in Toronto and surrounding areas, municipal tree recycling programs give it a second life as mulch instead of landfill. Before your tree joins that program, strip it completely: every ornament, every strand of tinsel, every light. Adornments jam the chippers, so set the tree out as bare and natural as the forest made it. Deep Clean the Living Spaces The living room hosted the gift openings and movie marathons, so return its calm deliberately. Vacuum carpets and floors thoroughly, then chase the hiding places: under couch cushions where popcorn kernels and cookie crumbs have taken residence. Dust the shelves and entertainment centre, and wipe down every surface guests touched. The dining area earned the feast, so go past the table and chairs to the room’s corners, sideboards, and serving tables, treating wine and gravy splashes while they are still young, and finish with floors still marked by dropped food and scuffs. The kitchen, command centre of every baking marathon, needs a full scrub: countertops, stovetop, and oven crying out after weeks of use; a fridge cleared of leftovers that overstayed the season, with shelves wiped; and the sink, faucet, and a cleaning cycle on the faithful dishwasher. Freshen Every Floor Vacuuming is the first line of defence, and it deserves a thorough pass: move furniture, work the corners, and reach under the sofa and between cushions for the festive debris. The CDC cleaning guidance supports exactly this order of operations: clean visible messes first, then disinfect high touch zones. Then mop hardwood, tile, and laminate with a cleaner suited to that floor type, lifting sticky spills and restoring the shine celebrations dulled. Carpeted areas reward a deeper intervention: steam cleaning pulls grime and allergens deep from the fibres, lifting stubborn stains and odours, and leaving carpet softer and brighter than a routine vacuum achieves. Tackle the Kitchen Appliances The oven worked hardest, so start there. Built up grease and burnt food are not merely ugly; lingering residue is a fire hazard and a drag on efficiency, so run the self cleaning cycle or apply oven cleaner with elbow grease. Next, empty the refrigerator entirely, wipe the interior, check expiration dates while you handle each item, and reorganise as you restock, which cuts waste and keeps groceries visible. Give the smaller helpers their moments too: descale the coffee maker, wipe the microwave, and run the dishwasher’s cleaning cycle. Finally, clear the pantry, discard anything expired, wipe the shelves, and rearrange staples around how you actually cook. Refresh the Guest Rooms Guests left; their fingerprints on the peace of the room should not. Strip and wash the linens, sheets, pillowcases, and blankets, resetting the room hygienically for whoever sleeps there next. Dust thoroughly, because bedroom dust is an allergen question, and reach past the obvious to nightstands, dressers, window sills, and headboards. Finish with a full vacuum, pulling trapped dust from carpet fibres and leaving those satisfying lines that read as a clean room in one glance. Prepare for the Rest of Winter Post holiday maintenance looks forward as much as back. Icy walkways are a genuine hazard, so stock salt or ice melt now, ready for the next deep freeze, because ice underfoot is a safety issue, not a convenience; Health Canada’s household chemical safety tips also cover keeping these products away from children and pets. Inspect snow tools before you need them; a cracked shovel found mid snowfall is a bad morning. In heavy snow zones, watch the roof, clearing accumulation regularly with a roof rake to avoid damage, and keep gutters clear of ice and debris so water drains instead of forming ice dams that push moisture into the house. Three winter checks worth doing before the next storm: Restock salt and ice melt now, not during the storm Test shovels, roof rakes, and scrapers while it is mild Swap the furnace filter so heated air keeps moving The Post Holiday Checklist Task What It Involves Why Now Decorations down Ornaments, tinsel, cardboard wrapped lights, damage check Prevents tangles and December panic Tree recycling Strip all decorations, set tree out bare Keeps Toronto recycling programs working Floor refresh Vacuum deep, mop hard surfaces, steam clean carpets Remains of feasts and traffic are still fresh Kitchen reset Oven, fridge, dishwasher, descale, pantry Residue is a hazard and wastes food Winter proofing Salt stock, shovel check, roof snow, clear gutters Safety before the next storm, not after Frequently Asked Questions When should holiday lights come down? Anytime the season feels finished, but sooner rather than later if lights stayed up for weeks, since heat and time make bulbs brittle and wires stiff. Wrap each strand around cardboard as it comes down and storage is solved at the same moment. What do I do with a real Christmas tree in Toronto? Use your city’s tree recycling program, common across Toronto and surrounding areas, which turns

How to Rejuvenate Your Home After the Holidays: Winter Maintenance Guide Read More »

Family putting up a Christmas tree

How to Achieve a Sparkling Clean Home this Holiday Season

A Sparkling Clean Home This Holiday Season Holiday prep means lights, gifts, parties, and a home that suddenly looks like real life happened. Instead of scrubbing in a panic the night before guests arrive, a little planning turns the whole project into a series of small, easy wins. Here is how to get your home guest ready without losing your mind, and when it makes sense to hand the messy parts to a deep cleaning service. A clean home in December is not only about impressing company. It is about walking into a calm, uncluttered space after a long day of shopping and cooking. Break the work into manageable chunks, one room per day, and the season stays fun instead of frantic. The goal is not perfection; it is a warm space where memories get made. Countdown: A Week by Week Holiday Cleaning Plan Spreading the work out is the single biggest stress killer. Use this simple timeline. When Focus Time needed Three weeks out Declutter every room, wash windows, dust high and low 2 to 3 hours Two weeks out Deep clean kitchen appliances, bathrooms, and carpets 3 to 4 hours One week out Launder guest bedding, wipe cabinet fronts, polish fixtures 2 hours Day before guests Quick vacuum, fresh towels, scent the kitchen 45 minutes Morning after Clear plates, spot mop, reset the living room 1 hour Declutter Before You Scrub Decluttering sets the stage, like priming a canvas before you paint. Walk into each room with fresh eyes and pull out anything that does not belong in your holiday story: the pile of magazines, the summer clothes still in the closet, the mystery drawer contents. Every item you remove is one less surface for dust to settle on and one less obstacle when you vacuum. Then reorganize what stays. Summer gear moves under the bed or into storage bins, and that junk drawer finally gets a system. Less clutter means decorations shine brighter and cleaning goes faster. Deep Cleaning, Room by Room The kitchen Your kitchen becomes mission control for the season. Start with the appliances: scrub the oven, microwave, and stovetop so they are ready for heavy use. Clear and polish the countertops for food prep, then mop the floors, which will soon see constant traffic between the stove and the table. Because food safety matters most when everyone is cooking together, the CDC food safety guidance on keeping prep areas clean is a good reminder. The living room Dust every shelf, mantel, and corner so decorations take center stage instead of dust bunnies. Clean the windows to let in winter light and the glow of outdoor displays. If you have a fireplace, give it the attention it deserves so it becomes the warm heart of the room. Finish with a thorough vacuum or mop. Bedrooms and bathrooms For overnight guests, fresh linens are a must; they look inviting and smell clean. In the bathroom, aim for five star hotel level: sparkling mirrors, spotless countertops, and a gleaming tub or shower. A quick word on hand hygiene never hurts during party season either, and the CDC clean hands guidance explains why washing beats wiping when it comes to stopping germs. Don’t Skip the Little Details Scent: simmer a pot of water with cinnamon sticks, orange peels, and cloves for a natural holiday fragrance, or layer candles and essential oil diffusers so the aroma feels warm instead of one note. Decorations: ornaments have sat in storage for a year, so dust them gently with a soft cloth or feather duster and wipe down light strings so they shine brighter. Inspection: while unwrapping decor, check for damage and repair or replace anything that cannot be saved. Maintenance: Keeping It Clean Through the Chaos Once the deep clean is done, daily upkeep can stay small and smart. Sweep high traffic floors, wipe kitchen counters and the dining table, and handle spills before they set. After guests leave, do a quick reset: gather plates, glasses, and utensils, run the dishwasher, vacuum where people clustered, and touch up the bathroom. Ten minutes now saves a painful hour the next morning and keeps your home inviting for the next gathering. Get the Whole Family Involved Kids love to help when cleaning feels like a game. Try a toy scavenger hunt: whoever puts away the most toys in a set time gets to choose the evening holiday movie or the bedtime story. A sticker chart for finished tasks, leading to a small weekly reward like a treat or an extra half hour of playtime, keeps momentum going. Assign jobs by strength; the organizer handles closets while the vacuum fan takes the floors. Working side by side turns a chore into memory making. When to Call in the Pros Professional deep cleaning is your holiday rescue team, handling everything from bathrooms and kitchens to carpets, upholstery, and the places you cannot reach. Toronto Shine Cleaning deep cleans start at $270.38 for a studio or 1BR and run to $441 for a 3BR and $527.63 for a 4BR, all before HST; current rates are on our pricing page. If your calendar is packed, regular cleaning keeps the home guest ready all season, with studio and 1BR visits from $212.63 and 2BR at $273. Every visit is bonded and insured under a $1,000,000 policy, and neighbours can vouch for the results on our reviews page. Holiday Cleaning FAQ How many days before the holidays should I deep clean? Start the big work two to three weeks ahead so nothing is rushed. Focus on appliances, bathrooms, floors, and hidden dust early, then save simple touch ups like vacuuming and fresh towels for the final day. This spacing keeps the house sparkling through several gatherings without a second full scrub. What is the fastest way to make my home smell festive? Simmer water with cinnamon sticks, orange peels, and cloves on the stovetop for a natural, layered scent. Follow up with candles or an essential oil diffuser

How to Achieve a Sparkling Clean Home this Holiday Season Read More »

Office window cleaning by men surrounded by plants

Green Cleaning: How to Make an Easy Eco-Friendly Cleaning

Hey there, fellow Green Cleaning freaks! Are you tired of harsh chemicals that leave your home smelling like a science lab? Well, guess what? You can keep your space sparkling clean and be kind to Mother Earth at the same time. Welcome to the world of green cleaning! It’s not just a trend; it’s a lifestyle shift that’s good for you, your home, and the planet. Let’s dive into how to make eco-friendly cleaning a part of your everyday routine. Why Go Green in Your Cleaning Routine? Before we jump into the “how,” let’s talk about the “why.” Traditional cleaning products are often loaded with chemicals that can be harsh on your skin, respiratory system, and the environment. When you use them, they can release volatile organic compounds (VOCs), which contribute to indoor air pollution and can be tough on our lungs. Ever felt a bit dizzy or had a headache after a big clean? Those could be the chemicals talking! But that’s not all. These chemical-laden cleaners can have a lasting impact on our environment too. When they wash down the drain, they can end up in our waterways, affecting aquatic life and even coming back to us in our water supply. Not a pretty picture, right? Switching to green cleaning means you’re choosing products that are safer for you and the planet. These eco-friendly options are usually made with plant-based, biodegradable ingredients that break down harmlessly in the environment. Plus, they’re often free from artificial fragrances and colors, which is great news for those with allergies or sensitivities. And here’s a bonus: green cleaning can be kinder on your wallet in the long run. Many green cleaning products are concentrated, so a little goes a long way. Or, if you’re into DIY solutions, you can whip up effective cleaners with inexpensive, everyday items like vinegar and baking soda. Easy Eco-Friendly Cleaning Swaps When it comes to green cleaning, there are so many simple swaps you can make that have a big impact. Let’s start with DIY cleaners. You might be surprised by the cleaning power of items you already have in your pantry. White vinegar, for example, is a natural disinfectant and great at cutting through grease and grime. Baking soda is another hero in the DIY cleaning world. It’s fantastic for scrubbing and neutralizing odors. And let’s not forget lemon juice, which not only leaves a refreshing scent but also has natural antibacterial properties. You can use these ingredients separately or mix them to create a variety of cleaners for different purposes. Now, if you’re not the DIY type, no worries! The market for eco-friendly cleaning products has exploded in recent years. More and more brands are focusing on creating products that are both effective and kind to the planet. When shopping for these products, look for ones with biodegradable ingredients and packaging. This means they’ll break down naturally without harming the environment. Many of these products also avoid harsh chemicals, making them safer for use around kids and pets. Another swap is replacing your paper towels with microfiber cloths. Microfiber cloths are a game-changer in cleaning. They’re incredibly effective at trapping dirt and dust, and the best part is they’re reusable. Just toss them in the wash and they’re good as new, reducing waste and saving you money in the long run. Essential oils are a great addition to your green cleaning arsenal. They not only add a natural and pleasant scent to your homemade cleaners but also come with their own cleaning benefits. For instance, lavender and citrus oils have natural antibacterial and antiviral properties, making them great for homemade disinfectants. Plus, using essential oils allows you to customize the scent of your cleaners to suit your mood or preference. Lastly, consider your scrubbing tools. Instead of reaching for plastic scrubbers, choose brushes made from natural materials like bamboo or sisal. These materials are sustainable and biodegradable, and they work just as well, if not better, than their plastic counterparts. They’re also more durable, so you won’t have to replace them as often.     Tips for a Successful Green Cleaning Routine Embarking on a green cleaning journey can be both exciting and a bit overwhelming, but don’t worry, I’ve got some more tips to help you along the way. Start Small: You don’t need to do a complete 180 on your cleaning routine overnight. It’s okay to start small. Maybe swap out your all-purpose cleaner or dish soap with a greener alternative and see how it goes. As you get comfortable, you can gradually replace more products. This approach not only eases the transition but also allows you to test what works best for you and your home. Read Labels: When shopping for commercial green cleaning products, reading labels is key. Not all products marketed as “green” or “natural” are created equal. Look for certifications like EcoLogo or Green Seal, as these indicate that the product meets certain environmental standards. Also, be cautious of vague terms like “eco-friendly” or “green” without any specific information, as these can sometimes be misleading marketing tactics. Recycle and Reuse: Green cleaning isn’t just about the products you use; it’s also about reducing waste. Get creative with what you already have. Old t-shirts and towels can be cut into cleaning cloths, and old toothbrushes are perfect for scrubbing grout and other tight spaces. This not only saves you money but also keeps these items out of landfills. Stay Informed: The world of green cleaning is always evolving. New products and methods are constantly being developed. Stay informed about the latest trends and breakthroughs. This could be as simple as following a few eco-friendly blogs, joining online communities, or subscribing to newsletters that focus on sustainable living. Consider the Whole Product Lifecycle: Think about a product’s impact from production to disposal. For example, products with minimal packaging or those made from recycled materials have a lower environmental footprint. Also, consider the energy used in producing the product and whether

Green Cleaning: How to Make an Easy Eco-Friendly Cleaning Read More »

Tesla, Electricity, Future

Revolutionizing Cleanliness: How Technology is Shaping the Cleaning Industry

Revolutionizing Cleanliness: How Technology Is Reshaping Cleaning Cleaning is no longer just mops and buckets. Robot vacuums glide across floors while you sleep, apps schedule whole weeks of chores, and sensors monitor the air you breathe. The industry has shifted from task driven work to technology driven routines, and the payoff is homes that stay cleaner with less effort. Here is what is actually changing, what it does for your health, and how to decide which upgrades earn their place in your Toronto home. Smart Devices Are Already Here Modern robotic vacuums are past the era of bumping into furniture. They map your home, learn the layout over time, and figure out which rooms collect the most dirt. Sensors detect changes in floor type, so the robot adjusts its method on the fly, switching modes between carpet and hardwood. Smart mops follow the same logic with built in water tanks that dispense the right amount of moisture, so floors come out clean without being soaked. Beyond floors, smart air purifiers read air quality in real time and ramp up filtration automatically when dust or pollen spikes, with smartphone integration that lets you check and control the air from anywhere. Companion apps tie it together: they schedule cleaning sessions, remind you to rinse filters or restock supplies, and can act as a single control hub for your whole cleaning arsenal. Eco Friendly Solutions: Green Is the New Clean The green shift is every bit as real as the robot one. Biodegradable, plant based cleaning agents break down naturally instead of sending harsh chemicals down the drain after you cut kitchen grease or bathroom grime. Energy efficient appliances play a role too: vacuums with eco modes draw less power, and washers use less water and energy while still performing. Waste reducing tools like microfiber cloths replace disposable wipes and paper towels because they trap dust effectively and go straight in the wash for repeated use. Water conservation rounds it out, from steam cleaners that need surprisingly little water to smart irrigation that waters garden beds just enough. Before you mix any cleaner at home, Health Canada’s guidance on household chemical safety is worth a skim, even for gentler products. Green upgrades that earn their keep Biodegradable, plant based cleaners that break down without polluting waterways and marine life Reusable microfiber cloths in place of disposable wipes and paper towels Appliances with eco modes that draw less power and water, trimming both your footprint and utility bills Rechargeable, longer-lasting batteries that cut hazardous disposable battery waste AI and Robotics: Not Just Sci-Fi The real change is systems that learn and adapt instead of just following a timer. AI in cleaning devices analyzes patterns in your household, such as which zones dirty fastest or when you prefer quiet, then optimizes schedules around them. Picture a robot that does a quick kitchen sweep after the morning rush and stays out of the living room during your evening wind down. AI also powers personalized tips, maintenance reminders for your gadgets, and restock alerts, making the whole routine more effective and tailored. For anyone who finds traditional cleaning physically taxing, including people with mobility issues, this automation removes the heavy lifting of hefty vacuums and unwieldy mops. Why This Matters for Your Health High tech cleaning reaches microscopic particles that routine methods miss, which matters most for allergy and asthma households. Vacuums with HEPA filters trap the fine particles that trigger symptoms, actively improving the air rather than just moving dust around; the CDC asthma resources cover how allergen control eases symptoms. UV-C light sanitizers, once limited to medical settings, now bring chemical-free disinfection of surfaces, gadgets, and even air into ordinary homes. Smart sensors add a proactive layer, prompting purifiers to boost or flagging high-touch zones for regular sanitizing of doorknobs and countertops. Moisture control completes the picture: dehumidifiers and smart ventilation hold humidity in a range that discourages mold, and the CDC mold health page explains why damp air is a health issue, not a smell issue. Choosing Tech That Earns Its Keep Not every gadget fits every home. Match the tool to your actual friction points. Device What it does Best for Robot vacuum Maps rooms, adapts to floor types, cleans autonomously Pet hair and daily maintenance Smart mop Dispenses measured moisture for sticky messes Hard floors that show every spill Smart air purifier Monitors air quality and adjusts filtration live Allergy and asthma households HEPA vacuum Traps fine particles traditional bags recirculate Carpets, upholstery, deep cleans Steam cleaner Sanitizes with minimal water, no chemicals Eco conscious tile and grout care Where Professionals Fit in a Smart Home Gadgets handle maintenance; people still win at transformation. A pro crew brings commercial-grade tools plus judgement about which surface needs which product, something no app substitutes yet. Toronto Shine Cleaning pairs that expertise with modern equipment for both regular cleaning visits, from $212.63 for a studio or 1BR and $273 for a 2BR, and full deep cleaning projects from $270.38 for a studio or 1BR. See what fits your budget on the pricing page, all rates before HST, backed by a $1,000,000 insurance policy. Cleaning Technology FAQ Do robot vacuums replace a real vacuum? For daily upkeep, largely yes, since they hold floors to a consistent baseline. You will still want a capable upright or stick with a HEPA filter for carpets, edges, upholstery, and the deep passes robots miss. Think of the robot as preventing mess buildup rather than performing deep cleaning. Are HEPA filters worth the extra cost? If anyone in your home has allergies or asthma, usually yes. HEPA filtration traps the fine particles that trigger symptoms instead of exhausting them back into the room, which supports cleaner air between professional visits and daily dusting. Are eco-friendly cleaning products as effective? Modern plant-based formulas handle everyday grease, grime, and soap scum well, and microfiber cloths boost mechanical cleaning with less product. For disinfecting during illness, follow label directions on an approved disinfectant

Revolutionizing Cleanliness: How Technology is Shaping the Cleaning Industry Read More »

Warm and confortable winter, book, christmas

How to Master Winter Cleaning: Essential Tips for a Warm and Welcoming Home

How to Master Winter Cleaning: Tips for a Warm and Welcoming Home Winter brings muddy boots, extra layers, snow day chaos, and far more hours spent indoors. You do not have to put your cleaning routine into hibernation just because it is cold outside. With a few clever strategies, your home can stay as inviting as a warm hug all season. Why Winter Cleaning Matters More Than You Think Winter cleaning is not about tidiness for its own sake. It is about creating a sanctuary where you can escape the cold and actually relax. With windows sealed and everyone indoors, a routine also keeps germs and dust from quietly building up: fewer sick days and a space that feels warm instead of closed in. Start the Season with a Deep Clean The best way to get ahead of winter is one thorough deep clean before the cold fully settles in. Focus on the rooms that carry the season: kitchen, bathrooms, and living spaces. Then hit the spots a normal wipe down skips, because that is where winter grime hides. Under and behind furniture, where dust layers build unnoticed Tops of cabinets and high shelves and corners of rooms Behind appliances, which collect crumbs and pet hair all year Baseboards, doors, and window sills that trap tracked-in dirt If a whole-home scrub feels overwhelming, a professional deep cleaning service handles it fastest; ours start at $270.38 for a studio or 1BR and run to $527.63 for a 4BR, before HST, listed on our pricing page. Build a Regular Schedule You Can Keep Consistency beats heroics. A routine stops chores piling into an overwhelming weekend marathon by splitting work into bite-sized chunks: dusting on Monday, vacuuming on Wednesday, laundry on Sunday. Tailor it to your house; a busy kitchen may need a five minute daily tidy while quieter rooms only need a weekly pass. Day Winter task Minutes Monday Dust surfaces, frames, and reachable corners 20 Wednesday Vacuum entryway, halls, and high traffic rooms 25 Friday Mop kitchen and bathroom floors, wipe appliance handles 20 Sunday Laundry, mail sorting, and a clutter sweep 30 Focus on High Traffic Areas Winter dirt follows the footpaths, so spend effort where boots land. The entrance is your first line of defense: sweep, vacuum, or mop it often, and place a sturdy doormat both outside and inside the door. The living room collects crumbs, pet hair, and dust on coffee tables and media consoles, so a daily quick pass keeps it welcoming. In the kitchen, wipe counters daily, handle spills immediately, and never ignore appliance fronts and handles. Don’t Forget the Windows Clean windows do double duty in winter: they let in more of the season’s scarce natural light, which brightens mood and makes rooms feel warmer, and washing them gives you a chance to inspect. Look for drafts around frames, which signal insulation problems that push up heating bills, and for condensation trapped between panes, a sign of seal failure worth catching early. Use a squeegee or microfiber cloth with a gentle solution and clean both sides. If weather or upper floors make the exterior unsafe, leave that to professionals. Declutter Before the Cabin Fever Sets In More time indoors means mail, magazines, and toys multiply on every surface. Handle mail the moment it arrives, sorting into urgent, later, and recycling. Give reading materials one basket and clear it weekly. For toys, labeled bins and a designated play zone make pickup faster. Clear surfaces also mean dusting and vacuuming take half the time. Protect Your Floors and Your Air Snow, salt, and grit are hard on finishes. Use the dual mat system at every entrance, a scraping mat outside and an absorbent mat inside, and ask everyone to remove shoes at the door. Vacuum and mop regularly to lift the salt that sneaks past, use a cleaner suited to your flooring type so you do not strip finishes, and dry wood floors well after mopping. Sealed windows also trap airborne dust, so air care belongs on the winter list. Dust and vacuum often with a HEPA filter vacuum that captures dander and pollen, run an air purifier sized for your most used room, and change forced-air heating filters before they clog. Counter dry indoor air with a humidifier to ease scratchy throats and static; because damp problem zones invite growth, the CDC mold health guidance is a useful reference for keeping humidity sensible rather than excessive. Choose Products Wisely for Closed-Up Homes With less ventilation in winter, harsh chemical fumes hit harder. Eco-friendly, non-toxic products clean effectively while being gentler on skin, eyes, and airways, which matters in homes with kids, pets, or asthma. Pantry options like vinegar, baking soda, and lemon tackle many tasks for pennies. Match products to surfaces regardless; what suits tile can damage a hardwood finish, and Health Canada’s household chemical safety resources explain label precautions worth following. Handle the Post-Holiday Reset When the festivities end, clean decorations before storage: dust ornaments, wipe decor, and make sure everything is dry. Pack in clear, labeled bins, use wreath containers and ornament dividers for fragile pieces, and wind lights on a reel or cardboard so they never tangle again. Then book a regular cleaning visit to reset the house while you keep the cocoa. Plan for Cozy Finish by layering warmth. Soft, golden light from table lamps, string lights, or dimmers makes rooms feel snugger than overhead brightness. Candles in cinnamon, vanilla, or pine add calm and scent. Fleece, velvet, and chunky knit throws and cushions bring texture and literal warmth to the spaces you just cleaned. Winter Cleaning FAQ How often should I clean during winter? Aim for small daily touches in the kitchen and entryway, a short scheduled task a few times a week, and one fuller session on weekends. That rhythm stops salt, dust, and clutter from compounding and keeps occasional deep cleans short. Why do my windows get condensation in winter? Warm indoor air meets cold glass and

How to Master Winter Cleaning: Essential Tips for a Warm and Welcoming Home Read More »

Cleaning with blue cleaning gloves furnitures, deep cleaning

New Build, New Clean: How to Tackle Post-Construction Cleaning Like a Pro

New Build, New Clean: How to Tackle Post-Construction Cleaning Like a Pro Congratulations on your new build or renovation. The dust has settled and the last step before enjoying your space is post-construction cleaning. This is not your typical tidy-up. It requires thoroughness and the right approach to remove all traces of construction debris, dust, and residues. A proper post-construction clean transforms your space from a work zone into a healthy, move-in-ready home. What Is Post-Construction Cleaning? Post-construction cleaning is a deep clean that removes all remnants of building work. This includes sawdust, drywall dust, paint splatters, adhesive residue, and debris like nails and screws. Beyond aesthetics, this cleaning is essential for health and safety. Construction dust can linger in the air and irritate respiratory systems, while chemical residues from paints and sealants need proper removal. If moisture from construction is left unchecked, mold can develop in hidden areas. Fine particles can also damage HVAC systems if they circulate through the home. Phase 1: The Rough Clean Start by removing large debris such as wood scraps, drywall chunks, and packaging materials. Wear protective gear including gloves, a mask (N95 recommended), and safety glasses. Use a heavy-duty vacuum with a HEPA filter to capture fine dust from floors, walls, and surfaces. A regular household vacuum will not cut it for this stage because construction dust is finer and denser than everyday household dust. Empty the vacuum frequently to maintain suction power. Remove all protective plastic sheeting and tape from floors, windows, and fixtures. This phase prepares the space for detailed work. Phase 2: The Detailed Clean Wipe down every surface including walls, countertops, windowsills, and cabinets. Construction dust settles on vertical surfaces just as much as horizontal ones. Use a damp microfiber cloth to capture dust without spreading it. Pay special attention to baseboards, window tracks, and corners where dust accumulates. Each flooring type needs specific care: hardwood requires gentle dust removal with a soft mop, tile needs streak-free cleaning with a neutral pH cleaner, and carpets benefit from steam cleaning to extract deep particles. Clean inside cabinets, closets, and behind fixtures where construction dust settles. Remove sawdust from electrical outlets, switch plates, and light fixtures. Indoor air quality can improve significantly when construction residues are thoroughly removed. Phase 3: The Final Polish Do a room-by-room walkthrough to spot missed smudges, paint flecks, or dusty corners. Clean windows and mirrors until streak-free using a quality glass cleaner and lint-free cloth. Perform a final vacuum and mop to capture any residual particles that settled during the detailed clean. This finishing stage transforms a space from construction site to move-in ready home. Touch up baseboards and door frames where cleaning may have revealed hidden dust. Check all vents and registers one last time. Phase Tasks Tools Needed Rough Clean Remove debris, vacuum dust HEPA vacuum, gloves, mask Detailed Clean Wipe surfaces, scrub grout, clean tracks Microfiber cloths, scrub brushes Final Polish Windows, mirrors, floor finishing Glass cleaner, mop, lint-free cloths Why Hire Professionals for Post-Construction Cleaning? Professional cleaners bring industrial-grade vacuums, steam cleaners, and specialized solutions that most homeowners do not own. They are trained to handle hazardous materials safely and know exactly where construction dust hides. A pro team can complete in one day what might take you an entire weekend. They also handle proper disposal of construction waste and know which cleaning agents work on each surface type without causing damage. Professional deep cleaning services ensure every surface is safe and spotless. DIY Tips for Post-Construction Cleaning Invest in a HEPA-filter vacuum for fine particle removal Use microfiber mops and cloths to trap dust instead of pushing it Break the work into manageable stages one room at a time Wear N95 masks, gloves, and safety goggles throughout Be patient and plan to go over areas multiple times Change vacuum filters partway through the job Frequently Asked Questions How long does post-construction cleaning take? For a standard condo or home, expect 4-8 hours. Large homes may take a full day or more. Do I need to clean before the post-construction team arrives? No, professional post-construction cleaners are equipped to handle every stage from rough debris removal to final polish. Is post-construction cleaning included in standard move-in cleaning? No. Post-construction cleaning is more intensive and requires different equipment. Move-in/out cleaning covers general household soiling, while post-construction targets builder residue. Can I move in right after post-construction cleaning? Yes. Once the cleaning is complete and all residues are removed, the space is safe and ready for occupancy. Post-construction cleaning is the final step in making your new space feel like home. If the job feels too big to tackle alone, trust the team at Toronto Shine Cleaning. We provide move-in/out cleaning and deep cleaning tailored to your needs. Check our pricing and call (647) 424-0355 to schedule your post-construction clean today.

New Build, New Clean: How to Tackle Post-Construction Cleaning Like a Pro Read More »

Professional vacuuming in home office setup.

How to Transform Your Space with Turn-Over Cleaning: A Step-by-Step Guide for Spotless Results

How to Transform Your Space with Turn-Over Cleaning: A Step-by-Step Guide Turn-over cleaning is the reset that happens between guests: the full clean that takes a rental suite, guest room, or Airbnb unit from just-vacated to ready-to-welcome. Done well, it is invisible; every guest simply finds a space that feels fresh and cared for. Done poorly, it shows up in reviews. This guide walks through the professional sequence, room by room, so your next turn-over is fast, thorough, and stress free. What Turn-Over Cleaning Actually Means A turn-over is more than a tidy up. It is a complete reset of a lived-in space: linens changed, kitchen and bathroom sanitized, floors redone, and every surface a guest will touch brought back to day-one condition. The window is usually tight, sometimes just a few hours between check-out and check-in, which is exactly why a repeatable checklist matters. With a system, you never stand in the middle of the unit wondering what comes next. Why Bother with a Real Turn-Over First impressions set the tone for an entire stay, and cleanliness is the first thing guests notice, before the view or the coffee machine. It is also the detail guests mention most in reviews, so consistent turn-overs protect your ratings directly. There is a health angle too: shared spaces pass germs easily, and health authorities recommend cleaning surfaces first and then disinfecting, which is the sequence the CDC’s clean and disinfect guidance lays out for high touch areas. Step 1: Plan and Prep Before You Start Build a checklist for the specific unit and keep a copy in the property, on paper or on your phone. Gather your supplies in one caddy so nothing sends you hunting mid-clean: microfiber cloths, sponges, an all-purpose cleaner, glass cleaner, a duster, a toilet brush, and trash bags. Wear gloves, and if you plan to use bleach-based disinfectants, read the label first; the CDC’s bleach safety page covers ventilation and the combinations to avoid. Budget your time per room before you begin. Step 2: Declutter Everything First Walk the unit and collect anything guests left behind: chargers in drawers, snacks in cabinets, socks under the bed. Empty every trash can, including bathroom bins, and replace liners. Tidy drawers and closets so they close the way a guest expects to find them, and sweep under the bed, the classic lost-sock zone. Decluttering first means the cleaning that follows never has to stop and restart around someone’s abandoned suitcase. Step 3: Dust from the Top Down Gravity is your coworker: start with ceiling fans, light fixtures, and shelves so falling dust lands on surfaces you have not cleaned yet, then work down to counters, baseboards, window sills, and door frames. Get the corners, the tops of picture frames, and the space behind appliances where dust settles quietly. Finish with the doorknobs and handles, which will get a second pass during disinfecting anyway. Step 4: Deep Dive the Kitchen and Bathroom These two rooms decide most reviews, so give them the full treatment. In the kitchen, wipe the appliances inside and out: the fridge shelves, the microwave, the kettle, the coffee maker. Clean the sink until it shines and clear the drain area completely. In the bathroom, the toilet, sink, and shower are the three benchmarks every guest checks. Scrub each properly, polish the mirror and fixtures, and lay out fresh toilet paper within easy reach. Step 5: Floors and Linens Last With surfaces done, sweep or vacuum every floor, then mop hard surfaces and let them dry while you handle linens. Strip and replace all bedding, from sheets to duvet covers, and set out fresh bath towels, hand towels, and face cloths. Fresh linens are both a hygiene requirement and one of the strongest signals of a cared-for space, so never try to stretch a set to a second guest. Step 6: The Guest-Ready Walkthrough Final touches turn a clean unit into a welcome: fluff the pillows, fold the towel corners, set the welcome note where it cannot be missed. Before you leave, do one walkthrough starting at the front door and moving through the space exactly as a guest would. Everything you would notice in a hotel, they will notice too. Between guests, pay special attention to the touch points everyone shares: Doorknobs and handles, entry to bathroom Light switches and lamp bases TV remotes and game controllers Faucet handles and toilet flush buttons Kettle, coffee maker, and fridge handles Room Non-Negotiables Before Check-In Kitchen Appliances inside and out, sink shining, dishes put away, trash emptied Bathroom Toilet, sink, shower scrubbed, mirror polished, fresh towels and toilet paper Bedroom Fresh linens, under-bed swept, surfaces dusted, closets tidy Living area Floors redone, cushions straightened, remotes wiped, decor aligned Turn-Over Cleaning FAQs How long does a turn-over clean take? It depends on the size of the unit and how the last guests left it. A studio with a good system is often done in an hour or two; larger multi-bedroom units take proportionally longer. Professional teams with a fixed checklist move faster because nothing gets revisited. How is a turn-over different from regular cleaning? A regular clean maintains a home you live in on a schedule. A turn-over rebuilds a like-new condition for a stranger arriving within hours, which adds linen changes, full sanitizing, and a hotel-style presentation standard on a deadline. Should linens really be changed after every single guest? Yes. It is the hygiene baseline guests assume, and protecting that assumption is what earns five star mentions for cleanliness. A spare, sealed set per bed keeps the turn-over fast even on back-to-back bookings. When does it make sense to hire professionals? When you manage more than one property, host back-to-back bookings, or simply want the guarantee of a hotel standard every time. A team turns the turn-over from a scramble into a scheduled, reliable service. Book the Reset, Skip the Scramble Toronto Shine Cleaning handles turn-overs across the city with the same checklist discipline described above. For

How to Transform Your Space with Turn-Over Cleaning: A Step-by-Step Guide for Spotless Results Read More »