Spring Cleaning

August cleaning preparation

How To Prepare For August Cleaning: 7 Steps Fast and Easy

August cleaning is a specific kind of reset, the air in Toronto during August carries a distinct weight. This is the month where summer hits its peak just before beginning its slow retreat. Inside your home, the evidence of a season lived to its fullest is everywhere. Preparing for the August cleaning isn’t just about tidying; it’s about resetting the home after months of high activity and preparing it for the shift into autumn. The purpose of a dedicated August cleaning is to systematically remove the specific grime of summer and create a clean foundation for the indoor months to come. 1.HVAC A critical first step in any thorough August cleaning is addressing the air your family breathes. With windows open for weeks, allergens, city dust, and pollen have infiltrated every room. Your HVAC system has been in constant use, and its filter is the first line of defense. Changing it is a non-negotiable starting point for your August cleaning. A clogged, grey filter is not only inefficient but also circulates the very particles you want to remove. Once replaced, use a vacuum with a brush attachment to clean all intake and outtake vents. This foundational task sets the stage for the rest of your August cleaning, ensuring the air moving through your home is as clean as possible. 2.Windows and Doors Now, turn your attention to the windows and doors. The screens have been interceptors of bugs, leaves, and dirt all summer. A proper August cleaning demands they be removed and washed. A soft brush, mild soap, and a gentle spray from a garden hose will dislodge the grime. While they dry, focus on the window tracks and sills. These channels are graveyards for dust and insects. Vacuum the loose debris and use an old toothbrush to scrub the caked-on dirt. This level of detail is a hallmark of a successful August cleaning. Washing the glass, inside and out, on an overcast day will prevent streaking and let pristine light into your newly refreshed space. Completing this part of the August cleaning makes an immediate, visible difference to the brightness of your home. 3.The Floors The floors hold the story of summer. Sand from The Beaches, soil from the garden, and grass from the park have been ground into every surface. A deep floor treatment is non-negotiable for a proper August cleaning. For hard floors, a thorough mopping, perhaps even twice in high-traffic areas, is required to lift the settled-in dirt. For carpets and area rugs, this is the time for a deep extraction clean. Renting or owning a carpet cleaner is essential for this part of the August cleaning, as it pulls out the deep-set allergens and grit that a standard vacuum cannot reach. The murky water you dispose of is proof of the effectiveness of this task. Moving furniture to clean underneath is a vital step in a comprehensive August cleaning; the dust and lost items accumulated over three months need to be addressed. This aspect of the August cleaning removes the literal grit of the season from your home. 4.Fat in the Kitchen The kitchen August cleaning is a project in itself. The refrigerator has been a revolving door of summer treats and barbecue ingredients. Empty it completely. Wash all shelves and drawers in warm, soapy water. Wipe the interior with a food-safe cleaner, checking expiration dates as you go. The exterior and handles, covered in fingerprints, also need attention. Summer cooking often involves more frying and grilling, leaving a sticky film of grease on cabinets, the backsplash, and especially the range hood. A good degreaser is your best tool for this part of the August cleaning. Spray it on, let it work for a few minutes, then wipe clean. Don’t forget the hidden areas during your August cleaning; pull out the oven and stove to clean the sides and the floor underneath, which are magnets for crumbs and grease. This part of the August cleaning is about health as much as it is about aesthetics. 5.Sofa Cushion Your living room August cleaning should focus on soft surfaces where dust and dander settle. If your sofa cushion covers are machine-washable, now is the time to launder them. For all other upholstery, a meticulous vacuuming with the correct attachment is key. Go into every seam and crevice. For a deeper refresh, sprinkling baking soda over the fabric, letting it sit to absorb odors, and then vacuuming it up is a great technique to include in your August cleaning schedule. All throw blankets and pillows should be washed or cleaned according to their care tags. Dusting is another crucial element. Use a damp microfiber cloth to trap dust, not just move it. The goal of this August cleaning is to touch every surface, including the tops of picture frames, ceiling fan blades, and lamp shades. This comprehensive dusting is what makes an August cleaning so effective. Think of this as resetting the comfort zones of your home with your August cleaning. 6.Bathroom The bathroom August cleaning targets the buildup from summer humidity and increased traffic. Go beyond the basic wipe-down and scrub the grout lines on the floor and in the shower where soap scum and mineral deposits have accumulated. A paste of baking soda and vinegar is an effective, natural solution. Wash the shower curtain and its liner. The exhaust fan cover, likely caked with dust, should be removed and cleaned to ensure it can effectively pull moisture from the air. A successful August cleaning restores these high-use spaces to a state of hygienic freshness. Take the time to empty and wipe out medicine cabinets and vanities, organizing the contents as you go. 7.The Summer Gear A key part of the August cleaning process is managing the transition of seasonal items. The summer gear pool toys, beach chairs, inflatable rafts needs to be cleaned, deflated, and stored properly to protect it for next year. The barbecue grill deserves a deep clean after a season of heavy

How To Prepare For August Cleaning: 7 Steps Fast and Easy Read More »

housekeeper

What Is A Housekeeper – 3 Reasons Why You Should Hire

A housekeeper is far more than just someone who cleans your home. While the primary image that comes to mind might be someone with a vacuum or a dust cloth, the reality of a professional housekeeper’s role is much broader, encompassing a comprehensive approach to home management and the overall well-being of a living space. They are individuals entrusted with maintaining the order, cleanliness, and functionality of a household, often serving as a crucial backbone for busy individuals and families. It’s about creating and sustaining an environment where you can truly thrive, not just exist. Think of a housekeeper not as a visitor who performs a single task, but as a dedicated manager of your domestic environment. Their responsibilities extend well beyond surface-level tidiness. They delve into the intricate details of what makes a house feel like a home  a place of comfort, peace, and efficiency. This often includes a wide array of duties that can be customized to suit specific household needs, but generally covers everything from meticulous cleaning to organizational tasks and even light household management. They are experts in ensuring that every corner of your home is not just clean, but cared for, reflecting an understanding of proper maintenance and the nuances of different materials and surfaces. 1.Light and Heavy Cleaning For instance, their cleaning duties are exhaustive. This isn’t just a quick sweep or a superficial wipe-down. A professional housekeeper engages in deep cleaning protocols for kitchens and bathrooms, sanitizing surfaces, scrubbing grout, polishing fixtures, and ensuring these critical areas are hygienic and sparkling. They handle floor care with precision, knowing the right methods for hardwood, tile, carpet, or laminate, ensuring longevity and shine. Dusting isn’t limited to visible surfaces; it extends to baseboards, light fixtures, ceiling fans, blinds, and intricate decor, preventing the buildup of allergens and maintaining a fresh atmosphere. Vacuuming and mopping are performed thoroughly, reaching under furniture and into corners that are often overlooked in daily tidying. Laundry management is also a common duty, involving washing, drying, folding, ironing, and putting away clothes, linens, and towels, ensuring that your wardrobe and household textiles are always fresh and ready. They make beds with an eye for detail, turning a simple chore into an act of creating a welcoming sanctuary. Beyond the immediate act of cleaning, a housekeeper is also an organizational wizard. They help in reducing clutter, creating systems for storage, and maintaining order in common areas, closets, and pantries. This proactive approach to organization means less time spent searching for items and more time enjoying a harmonious living space. They might assist with tidying up children’s play areas, ensuring toys are stored properly, or organizing bookshelves and filing systems. It’s about creating a flow in the home that makes daily living smoother and less stressful. This often involves an intuitive understanding of how a household operates and anticipating what areas might become disorganized, intervening before chaos takes hold. Furthermore, a housekeeper often takes on light household management responsibilities. This can include managing household supplies, ensuring that cleaning products, toiletries, and even certain pantry staples are always stocked. They might run light errands, such as dropping off dry cleaning or picking up groceries. For homes with pets, they might assist with basic pet care, like feeding or tidying up pet areas. They can also oversee plant care, ensuring your indoor greenery thrives. In some cases, especially in larger homes, a housekeeper might coordinate with other service providers, such as plumbers, electricians, or gardeners, ensuring maintenance schedules are met and issues are addressed promptly. They act as a central point of contact, ensuring the home functions like a well-oiled machine, even when you are not present to manage every detail yourself. The distinction between a “cleaner” and a “housekeeper” is critical. A cleaner typically comes for a few hours, performs specific cleaning tasks, and then leaves. Their focus is solely on the immediate cleanliness of the space. A housekeeper, on the other hand, often has a more encompassing and ongoing relationship with the household. They are involved in the continuous upkeep, proactive organization, and management of the home’s daily rhythm. They build an intimate understanding of the home’s needs, its inhabitants’ preferences, and the specific routines that keep everything running smoothly. This level of dedication and involvement fosters a deeper sense of trust and partnership, where the housekeeper becomes an invaluable asset to the household’s operational efficiency and overall peace. 2.Making Up For Lost Time So, why should you consider hiring a housekeeper? The reasons are multifaceted and profoundly impactful on your daily life. Primarily, it’s about reclaiming your time. In today’s fast-paced world, time is arguably our most precious commodity. Juggling demanding careers, family responsibilities, social obligations, and personal pursuits leaves very little room for the arduous and often relentless demands of household chores. The hours spent on cleaning, organizing, and maintaining a home can quickly accumulate, eating into weekends, evenings, and any potential moments of relaxation. Hiring a housekeeper liberates these hours, allowing you to dedicate them to activities that genuinely enrich your life – spending quality time with loved ones, pursuing hobbies, engaging in personal development, exercising, or simply enjoying uninterrupted rest. Imagine coming home after a long day not to a list of chores, but to a clean, organized, and welcoming sanctuary, ready for you to unwind. This isn’t just about saving time; it’s about investing in your personal well-being and life satisfaction. Beyond time, hiring a housekeeper significantly reduces stress and mental load. The burden of an untidy or disorganized home can weigh heavily on one’s mind, creating a constant hum of anxiety and guilt. The mental energy expended on planning cleaning schedules, remembering what needs to be done, or feeling overwhelmed by accumulated mess is immense. A housekeeper takes this entire burden off your shoulders. The peace of mind that comes from knowing your home is being professionally cared for, consistently and thoroughly, is immeasurable. It eliminates potential arguments or frustrations over chore distribution in shared living spaces and

What Is A Housekeeper – 3 Reasons Why You Should Hire Read More »

summer deep cleaning

Why Summer Is The Best Season To Do a Deep Cleaning At Home

The arrival of summer, with its longer days and warmer temperatures, brings with it a unique opportunity for home maintenance that is often overlooked in the rush of vacations and outdoor activities. It might seem counterintuitive to suggest a deep cleaning during a season traditionally associated with leisure, but upon closer examination, summer truly presents the most optimal conditions for a comprehensive revitalization of your living space. There are myriad practical advantages that the summer months offer, making them the ideal time to delve into those cleaning tasks that seem daunting during the colder, darker parts of the year, ensuring your home is not just superficially clean, but deeply, thoroughly refreshed. 1.Better Ventilation One of the most immediate and impactful benefits of summer cleaning revolves around the unparalleled ventilation it provides. Unlike the winter months, when windows must remain shut to conserve heat, summer allows for wide-open windows and doors, creating a natural cross-breeze that is invaluable for cleaning. This constant flow of fresh air is critical when using cleaning solutions, as it rapidly dissipates fumes and chemical odors, making the process far more comfortable and safer for occupants. More significantly, proper ventilation during deep cleaning ensures that any moisture introduced, whether from mopping floors, steam cleaning carpets, or washing upholstery, dries quickly and completely. This rapid drying is essential to prevent the growth of mold and mildew, which thrive in damp, stagnant environments and can lead to musty odors and potential health issues. The ease with which air can circulate in the summer means that deep cleaning projects, particularly those involving water, can be undertaken without the lingering worry of dampness becoming a problem, allowing for a much more thorough and worry-free clean. Beyond simple air circulation, the abundant sunlight of summer plays a transformative role in the deep cleaning process. Sunlight is a natural disinfectant, its ultraviolet rays capable of killing bacteria and other microorganisms on surfaces. After a long winter of closed-up spaces, letting direct sunlight into areas that might have been damp or enclosed can significantly improve hygiene. Furthermore, the sheer brightness of summer light reveals dirt, dust, and grime that might go unnoticed in dimmer conditions. Streaks on windows, smudges on walls, and dust motes dancing in the air become glaringly obvious under the intense summer sun, allowing for a more meticulous and effective cleaning effort. It’s a natural spotlight, highlighting every corner and crevice that needs attention, ensuring no speck of dust or forgotten smudge escapes your notice. This natural illumination empowers a level of detail in cleaning that is simply not achievable during the shorter, darker days of other seasons. 2.Better at Cleaning The ambient warmth of summer also contributes significantly to the efficacy of cleaning tasks. Warm temperatures help cleaning solutions work more effectively, breaking down grease, grime, and stubborn stains with greater ease than in colder conditions. This means less scrubbing, less product, and ultimately, a more efficient cleaning process. For tasks like washing down exterior walls, cleaning patio furniture, or even tackling greasy kitchen range hoods, the warmth helps to loosen dirt and allow cleaning agents to penetrate more deeply. The summer warmth also means that you can move furniture and items outdoors for cleaning or airing out without concern for the cold or rain, allowing for a more thorough cleaning of those items that are difficult to manage indoors. Rugs can be beaten and aired out in the sun, cushions can be scrubbed and left to dry quickly, and even mattresses can benefit from a few hours of sun exposure to sanitize and refresh them. This ability to extend the cleaning zone beyond the immediate confines of the house is a distinct advantage of the summer season. From a practical scheduling perspective, summer often presents more flexible timelines for many households. School is out for children, and many adults take their vacations during these months, leading to a potential increase in available time for household projects. Rather than squeezing deep cleaning into weekends already packed with commitments, the relaxed pace of summer can afford the sustained blocks of time necessary for a truly comprehensive clean. The longer daylight hours also mean that you can start earlier and finish later, providing ample time to tackle even the most extensive cleaning projects without feeling rushed. This extended window of opportunity allows for a more relaxed, systematic approach to deep cleaning, ensuring that every area receives the attention it deserves without the pressure of dwindling daylight or impending commitments. It transforms the daunting task into a manageable project that can be spread out over several days if needed, fitting seamlessly into a more leisurely summer schedule. 3.Pleasant Tasks Specific cleaning tasks that are particularly suited to summer further underscore its status as the ideal deep cleaning season. Washing windows and screens, for instance, becomes a much more agreeable task when done in warm, breezy conditions. Screens can be easily removed, scrubbed, and left to dry quickly in the sun, while windows can be washed without the concern of streaks forming due to rapid evaporation in cold weather, or the discomfort of working in chilly temperatures. Similarly, deep cleaning carpets and upholstery is optimally performed in summer. Professional carpet and upholstery cleaning often involves water extraction, and the ability to open windows wide and use fans to accelerate drying is paramount to preventing musty odors and mold growth. Attempting these tasks in humid or cold conditions can lead to prolonged drying times and potential issues, making summer the clear winner for such significant cleaning endeavors. The outdoor living spaces, which see the most use during summer, naturally become an extension of the deep cleaning project. Patios, decks, outdoor furniture, and BBQ grills accumulate grime throughout the year and are best cleaned when they are actively being used and appreciated. Cleaning a grill in sub-zero temperatures is an unpleasant, often inefficient task, but in summer, with warm water and the ability to easily hose things down, it becomes much more manageable. The very

Why Summer Is The Best Season To Do a Deep Cleaning At Home Read More »

How Mental Health and House Cleaning are Completely Linked

Do you know why mental health and house cleaning are completely linked? It’s where we spend most of our time and where we give it the least value. The state of our living space is often a direct reflection of our internal world. When we feel overwhelmed, stressed, or lost, our homes can begin to mirror that chaos. Piles of mail accumulate on the counter, laundry remains unfolded in baskets, and a thin layer of dust settles on surfaces we no longer have the energy to notice. Conversely, when we feel in control and at peace, our surroundings tend to be more orderly and calm. This connection is not a coincidence; it is a profound and interactive relationship. The act of cleaning, often dismissed as a mundane chore, is one of the most accessible and powerful tools we have for managing our mental health. It is a physical activity that produces tangible results, creating a positive feedback loop that can quiet an anxious mind, restore a sense of agency, and pave the way for clearer thinking. 1.Sense of Control One of the most significant psychological benefits of cleaning is the restoration of a sense of control. Life is inherently unpredictable. We cannot control global events, the economy, the actions of others, or the unexpected challenges that arise in our careers and personal lives. This lack of control can be a major source of anxiety and feelings of helplessness. In the face of such large, unmanageable forces, the home becomes a sanctuary, a small, manageable universe where our actions have direct and immediate consequences. When you decide to scrub the kitchen floor, you are the sole agent of that change. You choose the cleaner, you apply the effort, and you witness the transformation from grimy to gleaming. This simple act reinforces a powerful truth: you are capable of creating order out of chaos. You can effect positive change. This feeling of efficacy, cultivated in the small sphere of your home, can then ripple outward, bolstering your confidence to tackle other, more complex challenges in your life. The methodical task of sorting a messy closet or organizing a chaotic pantry provides a contained problem with a clear solution, a satisfying and rare experience in a world full of complex, ambiguous issues. The physical process of cleaning itself is a form of active meditation. Repetitive motions, such as scrubbing, wiping, sweeping, or folding, can be incredibly grounding. When the mind is racing with anxious thoughts, looping over past regrets or future worries, it is difficult to break the cycle. The physical demands of cleaning force your attention into the present moment. You become focused on the task at hand: the feeling of the warm, soapy water on your hands, the rhythmic back-and-forth motion of a vacuum cleaner, the faint scent of lemon polish, the sound of a cloth wiping across a glass surface. This sensory engagement is a core principle of mindfulness. It anchors you in the “now,” providing a temporary respite from the mental chatter that fuels anxiety. For the duration of the task, you are not ruminating; you are simply doing. This period of focused activity allows the nervous system to calm down, lowering cortisol levels and reducing the physiological symptoms of stress, such as a rapid heart rate and shallow breathing. It is an accessible way to achieve a state of flow, where you are so immersed in an activity that time seems to fade away, leaving you feeling refreshed and centered afterward. 2.Dopamine Furthermore, completing a cleaning task triggers a genuine neurological reward. Our brains are wired to feel pleasure from accomplishment. When you look at a cluttered, dirty room and then see it transformed into a clean, orderly space through your own efforts, you receive a potent dose of dopamine. This neurotransmitter is associated with pleasure, motivation, and satisfaction. The “before and after” effect is not just visually pleasing; it is chemically rewarding. It provides tangible proof of your productivity and competence. This is why making your bed in the morning can have such a positive impact on the rest of your day. It is the first completed task, the first small victory that sets a precedent for further accomplishment. Each cleared counter, organized shelf, and polished surface becomes a small monument to your effort, reinforcing a sense of capability. This process helps to counteract feelings of depression, which are often characterized by lethargy, apathy, and a sense of futility. By engaging in a purposeful activity with a clear and positive outcome, you actively fight against the inertia of a low mood. Conversely, living in a cluttered and disorganized environment exacts a constant, low-level toll on our mental resources. Clutter is more than just an aesthetic issue; it is a source of excessive sensory input. Every object in our field of vision sends a signal to our brain. In a tidy space, these signals are manageable. In a cluttered space, the brain is bombarded with stimuli. Piles of paper signal unfinished tasks, overflowing laundry baskets are a reminder of pending chores, and disorganized surfaces create a sense of visual noise that is difficult to ignore, even on a subconscious level. This constant overstimulation makes it difficult to relax and focus. It can lead to a persistent state of low-grade stress, keeping cortisol levels slightly elevated. The mind is perpetually distracted, unable to fully rest because the environment is signaling that work is never done. This can drain cognitive resources, making it harder to concentrate on work, enjoy a hobby, or even engage in a meaningful conversation. The simple act of decluttering removes this visual noise, giving your mind the clear space it needs to function effectively and peacefully. 3.Better Focus A clean and organized environment also directly supports better focus and productivity. When your physical space is in order, your mental space tends to follow. Imagine trying to write an important report or study for an exam at a desk covered in old mugs, stray papers, and

How Mental Health and House Cleaning are Completely Linked Read More »

Barbecue Grills

6 Tips on How to Keep Your Barbecue Grills Looking Like New

The residue of past meals clings to your barbecue grates. It’s a combination of carbonized sugars from marinades, polymerized fats from meats, and the general ash and debris of open-flame cooking. This build-up is not a badge of honor or a layer of “seasoning.” It is a detriment to your cooking. It imparts a bitter, burnt flavor to fresh food, causes flare-ups that scorch your meal, and can harbor bacteria. A clean barbecue is not just an aesthetic choice; it is a functional necessity for better-tasting, safer food and for prolonging the life of your equipment. The grates are the most critical component, as they make direct contact with your food. 1.Grill Brush Before you begin any deep cleaning, you need the right tools. Your success is dictated by your preparation. You will need a high-quality grill brush. The debate between traditional wire bristle brushes and bristle-free alternatives is significant. Wire bristles are effective but carry a small risk of detaching and ending up in food. If you use one, inspect it before each use for loose bristles and replace it regularly. Bristle-free brushes, often made of coiled stainless steel or featuring nylon bristles for cool-grate cleaning, are a safer alternative. A long handle is non-negotiable for safety. You will also need a metal or plastic scraper for stubborn, flat deposits, gloves (heavy-duty rubber or nitrile) to protect your hands from grease and cleaning agents, and a bucket for hot, soapy water. For cleaning solutions, simple dish soap with degreasing properties is a workhorse. For more natural methods, distilled white vinegar and baking soda are essential. For extreme cases, a specialized barbecue degreaser or oven cleaner can be used, but with significant caution. Finally, have a collection of microfiber cloths, paper towels, and perhaps a non-abrasive scour pad on hand. 2.Warm Up The process always begins with heat. This is the single most effective step you can take after every cook and as the precursor to a deep clean. Turn your barbecue on to its highest setting, close the lid, and let it run for 15 to 20 minutes. The intense heat will incinerate most of the fresh food residue, turning it into a dry, white or gray ash. This process, known as pyrolysis, makes the subsequent scraping significantly easier. The goal is to carbonize the gunk, not to cook it further. After the burn-off period, turn off the gas or extinguish the charcoal. While the grates are still very hot, use your grill brush to scrape them clean. Work in the direction of the grate bars. Apply firm, steady pressure. The ash and carbon should flake off relatively easily. The scraper on your brush is useful here for any particularly thick, flat areas of carbon. This immediate post-cook or pre-deep-clean scrape is a fundamental habit that reduces the need for intensive deep cleans. For a true deep clean, the hot scrape is only the beginning. You must remove the grates from the grill. Ensure they have cooled enough to be handled safely with gloves. Your approach from here depends on the level of grime and the type of grates you have. Cast iron, stainless steel, and porcelain-coated grates have slightly different tolerances. 3.Submerge The most common and straightforward deep-cleaning method is the soap and water soak. Place the grates in a large utility sink, a bucket, or a plastic tub large enough to submerge them. If you don’t have a container large enough, a heavy-duty trash bag laid inside a tub or even on your driveway can work. Fill the container with the hottest water you can safely handle and a generous amount of degreasing dish soap. Let the grates soak for at least 30 minutes, but several hours or even overnight for severely neglected grates is better. The hot, soapy water will work to soften and dissolve the polymerized grease that the burn-off couldn’t completely eliminate. After soaking, use a stiff, non-abrasive brush or scour pad to scrub every surface of the grates. Pay attention to the corners and undersides. The gunk should come off with moderate effort. Once you are satisfied, rinse the grates thoroughly with clean water to remove all soap residue. Any leftover soap can impart an unpleasant taste to your food. Dry the grates immediately and completely with a cloth or paper towels, especially if they are cast iron, to prevent flash rust. 4.Mixtures For a more natural approach, or for those who prefer to avoid detergents, the vinegar and baking soda method is highly effective. Place the cool grates in a large, heavy-duty trash bag. Pour in a solution of two parts distilled white vinegar to one part water, enough to coat the grates. Seal the bag and let it sit for a few hours or overnight. The acetic acid in the vinegar is excellent at breaking down grease and rust. After the initial soak, open the bag and generously sprinkle baking soda over the grates. The chemical reaction between the acidic vinegar and the alkaline baking soda will create a fizzing foam. This gentle abrasive action helps to lift the loosened grime from the metal. Close the bag again and let it sit for another 20-30 minutes. Then, open the bag and use a scour pad or brush to scrub the grates. The combination of the two agents makes the caked-on residue surprisingly easy to remove. Rinse them thoroughly with water and dry them completely. This method is particularly good for grates with surface rust. 5.Protection In extreme situations, where layers of black carbon have fused to the grates over years of neglect, you may consider a commercial oven cleaner or a dedicated barbecue degreaser. This is the most aggressive option and requires caution. This method should be performed outdoors in a well-ventilated area, away from children and pets. Always wear gloves and eye protection. Place the grates on several layers of newspaper or cardboard to protect the surface underneath. Spray the cleaner evenly over all surfaces of the grates, following

6 Tips on How to Keep Your Barbecue Grills Looking Like New Read More »

preparing for the July cleaning

How to Prepare for July Cleaning: 4 Steps Fast and Easy

July Cleaning brings a unique set of circumstances to our living spaces. The longer days, increased outdoor activity, and potential for more guests mean our homes need a different kind of attention. Preparing for a thorough July Cleaning is not merely about having supplies on hand; it is a systematic approach to ensuring efficiency and effectiveness, laying the groundwork so the actual cleaning process becomes smoother and more impactful. Without proper preparation, cleaning can feel overwhelming and incomplete, like trying to build a house without first pouring a solid foundation. 1.Preparing The Mind Start by mentally preparing yourself for the task ahead. This involves more than just setting aside time; it means adopting a mindset focused on systematic action rather than sporadic effort. Acknowledge that a significant clean requires energy and focus. Break down the entire house into manageable zones or rooms. Avoid the trap of trying to tackle everything at once, which often leads to burnout and a sense of defeat. Instead, visualize the clean, organized space you aim to achieve, and let that vision guide your planning. Consider creating a simple, unwritten mental checklist or a rough written outline of areas you want to address. This helps in prioritizing tasks and ensures nothing important is overlooked. Think about who else might be able to contribute, even small tasks, as collaboration can significantly lighten the load. Hydrate well, ensure you have comfortable clothing, and think about playing some uplifting music to keep spirits high. The mental readiness is the first, often underestimated, step towards a successful July Cleaning. 2.One Room At a Time Once your mind is aligned, the next crucial step is comprehensive decluttering. This isn’t just tidying; it’s a strategic removal of anything that obstructs access or impedes effective cleaning. Clutter acts as a barrier, trapping dust, hiding spills, and making it impossible to properly wipe surfaces or vacuum floors during your July Cleaning efforts. Begin by focusing on one area at a time, perhaps starting with the most heavily used spaces like the kitchen or living room. In the kitchen, this means clearing every countertop. Move small appliances like toasters, coffee makers, and blenders. Don’t just push them aside; truly lift them, wipe the counter beneath them, and consider if they need a quick wipe-down themselves. Empty the sink of all dirty dishes and load them into the dishwasher, or wash them immediately. Go through any papers or mail that have accumulated on kitchen surfaces, sorting them into immediate action, filing, or recycling piles. Check the pantry and refrigerator for expired food items, disposing of anything that’s past its prime to prevent future messes and odors. This creates clear, unobstructed surfaces, allowing your cleaning tools to reach every corner and crevice effectively for your July Cleaning. 3.Supplies And Tools With decluttering underway, the next phase is gathering all your cleaning supplies and tools. There’s nothing more frustrating than starting a task only to realize you’re missing a crucial item or that a bottle is empty. Take an inventory of your cleaning arsenal for your July Cleaning. Do you have a sufficient supply of all-purpose cleaner, glass cleaner, bathroom cleaner, and floor cleaner suitable for your specific flooring types? Check the levels of your dish soap and hand soap. Ensure you have plenty of clean microfiber cloths for dusting and wiping, a separate set for glass, and another for bathrooms to prevent cross-contamination. Sponges, scrub brushes for tough grime, a toilet brush, and a squeegee for windows or shower doors are essential. Check the condition of your mop and bucket; do they need to be cleaned or replaced? Ensure your vacuum cleaner bags are empty or the canister is cleared, and that all attachments are readily available and free of blockages. A good dustpan and brush are also invaluable. Don’t forget protective gloves to safeguard your hands from harsh chemicals and dirty water. Have a designated cleaning caddy or bucket where you can neatly organize and transport these items from room to room, minimizing trips back and forth to the supply closet. This foresight saves valuable time and maintains momentum once the actual July Cleaning begins. Before the deep cleaning commences, there are a few immediate pre-cleaning actions that make a significant difference. First and foremost, empty all trash cans throughout the house. This prevents new odors from developing and clears the way for wiping down the bins themselves. Next, address any obvious large debris or major spills. If there’s a pile of dirt by the entryway, sweep it up. If there’s a visible spill on the kitchen floor, wipe it up immediately rather than waiting for the floor cleaning. These seemingly small actions prevent tracking dirt into other areas and save you from having to clean over existing messes during your July Cleaning. For bathrooms, consider pre-treating stubborn stains in the toilet bowl or shower with a specialized cleaner; allowing it to soak for some time will significantly reduce scrubbing effort later. In the kitchen, if your oven racks are greasy, remove them and soak them in a tub with hot, soapy water. Opening windows and doors, if the weather permits, is also an excellent preliminary step, especially in July, for an effective July Cleaning. This not only ventilates the house, dispelling stale air and potential cleaning fumes, but also helps to dry surfaces more quickly after they’ve been cleaned, which is particularly useful in humid summer conditions. Now, let’s refine the room-by-room preparation, ensuring every space is primed for optimal July Cleaning. 4.Remove Items In the kitchen, beyond clearing countertops and dealing with dishes, think about items typically stored inside cupboards or drawers that might benefit from a quick re-organization or wipe-down of their exterior. Pull out the toaster crumb tray and empty it. If your microwave is splattered, a quick pre-wipe with a damp cloth or a bowl of water steamed inside for a few minutes will loosen grime significantly, aiding your July Cleaning. Ensure the area around your sink is completely clear, moving soap dispensers, sponge holders, and dish racks. If you have a small

How to Prepare for July Cleaning: 4 Steps Fast and Easy Read More »

4 Easy Home Deep Cleaning Tips You Need to Try

Home deep cleaning represents a far more comprehensive and intensive approach to household cleanliness than routine or daily tidying. While regular cleaning maintains a surface level of order, deep cleaning delves into the accumulated dirt, stubborn grime, pervasive bacteria, and hidden allergens that build up over time in every part of a home. It is a methodical process designed to sanitize and refresh spaces from top to bottom, reaching beyond the immediately visible to address areas often overlooked. This type of cleaning aims not just for visual appeal but to restore a home to its optimal hygienic condition. It involves meticulous attention to detail, often requiring significantly more time, focused effort, and the use of specialized cleaning agents and equipment compared to standard upkeep. The goal is to systematically eliminate layers of dust, grease, soap scum, limescale, and other residues that can compromise both the appearance and the healthfulness of a living environment. 1.Home Deep Cleaning – Kitchen   A home environment stands to gain substantially from periodic, thorough home deep cleaning. Over months and seasons, dust particles, pet dander, pollen, mold spores, and various pathogens can settle and multiply in hard-to-reach places like behind furniture, within carpet fibers, on high ledges, and in air vents. These hidden accumulations can degrade indoor air quality, potentially triggering or exacerbating allergies, asthma, and other respiratory conditions. Home deep cleaning directly targets and removes these reservoirs of contaminants, contributing to a healthier atmosphere for all occupants. Beyond health implications, this intensive cleaning also plays a crucial role in home maintenance. By removing corrosive substances like grease build-up in kitchens or hard water stains in bathrooms, home deep cleaning helps preserve the integrity and extend the lifespan of fixtures, surfaces, and appliances. A deeply cleaned home offers an enhanced sense of comfort and well-being, transforming the living space into a more pleasant, sanitary, and genuinely revitalized sanctuary. This can also be a factor in preventing pest infestations by removing food sources and disturbing potential hiding spots.   Numerous situations and life events make a professional home deep cleaning service particularly beneficial. Seasonal transitions, notably spring and autumn, are common triggers as individuals look to refresh their homes after a long winter or prepare for increased indoor living as temperatures drop. Before hosting significant events, such as holiday gatherings, family celebrations, or important social functions, a deep clean ensures the home is impeccably presentable and welcoming. Conversely, after such events, a deep clean helps restore order and cleanliness. Moving is another prime occasion; cleaning an old residence thoroughly before vacating or ensuring a new home is sanitized and fresh before moving in is standard practice. Properties being prepared for sale or rental greatly benefit from home deep cleaning to enhance their appeal to potential buyers or tenants. Post-renovation or construction work, a specialized deep clean is essential to remove fine dust, debris, and construction residues that settle everywhere. Furthermore, many homeowners integrate home deep cleaning into their annual or semi-annual maintenance schedule as a proactive measure to maintain a consistently high standard of cleanliness and hygiene, even without a specific event prompting it. Observable signs like persistent musty odors, visible dust build-up in corners or on less-disturbed surfaces, or a general feeling that the home isn’t truly clean despite regular efforts also indicate it’s time for a deep clean. Home deep cleaning services are characterized by their meticulousness and comprehensive scope, designed to address areas that routine cleaning simply cannot cover effectively. While the exact checklist can vary between providers and can often be customized, a typical comprehensive service will dedicate focused attention to all rooms. In the kitchen, deep cleaning is particularly intensive due to grease, food particles, and potential bacteria. This usually involves cleaning the interior and exterior of major appliances. Ovens are degreased inside and out, including racks and doors. Microwaves are cleaned internally and externally. Refrigerators are cleaned on the outside, and often the inside if requested and emptied, including shelves and drawers. Dishwasher exteriors are wiped, and sometimes an internal cleaning cycle is run. Range hoods and their filters are thoroughly degreased. Cabinet exteriors are wiped down to remove fingerprints, food splatters, and grease accumulation; interior cabinet cleaning may also be included if they are empty. Sinks, faucets, and fixtures are descaled, cleaned, and polished to remove water spots and build-up. Countertops and backsplashes are cleaned and sanitized, with specific attention paid to grout lines to remove discoloration and grime. Floors, including edges, corners, and under movable appliances, are scrubbed or mopped meticulously. Even small appliances’ exteriors and accessible areas around them receive attention. 2. Mold, Hard Water And Dust? No! Bathrooms, being high-moisture areas prone to mold, mildew, and soap scum, undergo rigorous sanitization. Showers and bathtubs, including walls, doors, and tracks, are scrubbed intensively to eliminate soap scum, hard water deposits, and any signs of mildew. Toilets are disinfected thoroughly, both inside the bowl and all exterior surfaces, including the base and the floor area surrounding it. Sinks, vanities, and countertops are cleaned, sanitized, and polished. Mirrors are cleaned to achieve a streak-free finish. Tiles and grout on both floors and walls are scrubbed to remove build-up and restore brightness. Light fixtures, exhaust fans, and vents are dusted or wiped down to remove accumulated dust and improve air circulation. Faucets, showerheads, and other chrome fixtures are often descaled and polished. Living areas, dining rooms, and bedrooms are also given detailed treatment. All surfaces are thoroughly dusted, encompassing high areas such as ceiling fans (blades and fixtures), light fixtures, picture rails, and curtain rods, as well as often-neglected low areas like baseboards, skirting boards, and electrical outlet covers. Furniture is typically vacuumed, including under cushions, and if feasible, moved to allow cleaning underneath and behind. Upholstery may receive more detailed vacuuming, targeting crevices. Window sills, ledges, tracks, and frames are wiped clean of dust and grime. Cobwebs are carefully removed from ceilings, corners, and light fixtures. Interior windows (glass and frames) and mirrors throughout these rooms are cleaned.

4 Easy Home Deep Cleaning Tips You Need to Try Read More »

Very dirty gutter

Gutter Cleaning In 3 Steps – You Should To Know

Effective gutter cleaning starts with selecting the right tools. For a thorough cleaning, make sure you have a sturdy ladder. The ladder should be tall enough to safely reach the gutters without straining. Always prioritize safety. You’ll also need heavy-duty, waterproof gloves to protect your hands from the sharp debris and bacteria that are often encountered during cleaning. A gutter shovel or small, sturdy garden spade is essential for removing leaves, twigs, mud, and even snow. These tools make the physical act of cleaning much easier. Have a bucket ready to collect debris, or lay a tarp on the ground beneath your work area to catch any debris that falls. A garden hose fitted with a spray nozzle is crucial for removing fine particles and testing the flow after the main cleaning. Safety glasses are essential to protect your eyes from falling debris or splashing water during the process. For stubborn clogs, a plumber’s snake or flexible auger can be a very useful addition to your arsenal. Having all of these items ready before you begin will speed up the job. 1.Safety First Proper ladder safety is essential before performing any gutter cleaning. Position your ladder on firm, level ground. If the ground is uneven, use a ladder leveler or sturdy boards to create a stable base. Never place a ladder on wet or slippery surfaces. When extending the ladder for cleaning, make sure it reaches at least three rungs above the roof line or gutter lip for safe access. Always maintain three points of contact with the ladder when climbing or working—two feet and one hand, or two hands and one foot. Avoid reaching too far to the side while cleaning; it is much safer to climb down and replace the ladder frequently. This may seem time-consuming, but it significantly reduces the risk of falls, which are a serious hazard when cleaning gutters. Let someone know that you will be cleaning, especially if you are working alone. A properly positioned and safely used ladder is the foundation of any successful, injury-free gutter cleaning task. Start your gutter cleaning by removing the largest debris. It’s usually most effective to start near the outlet of a gutter. This allows you to clear a path for water if you decide to flush during the process, though removing large amounts usually comes first. Using your gutter shovel or trowel, begin removing leaves, twigs, pine needles, gravel, and any other accumulated solids. Work in manageable sections along the gutter. Deposit the removed debris directly into the bucket or onto the tarp spread below. This initial step of the cleaning can be messy, which is why gloves are so important. Pay close attention to areas where debris tends to accumulate, such as valleys or corners of your gutter system. Removing this bulk material consistently is the crux of the gutter cleaning process and will make subsequent steps easier. This part of the cleaning prevents larger items from being pushed into and clogging your gutters. 2.Cleaning Gutters With Water? Once the bulk of the debris has been removed, grab your garden hose, fitted with a spray nozzle, and start at the end of the gutter furthest from a downpipe. Direct a stream of water into the gutter, working toward the downpipe. This flushing action will remove any remaining smaller particles, mud, and grit that your shovel may have missed during the initial phase. Watch the flow of water carefully. If the water pools or backs up, this indicates a blockage further along the gutter or in the downpipe itself. This flushing step of gutter cleaning not only clears the channels, but also serves as an excellent diagnostic tool for identifying problem areas that require more focused attention. A strong, consistent flow toward and into the downpipe signifies a successful cleaning for that section. Checking and clearing your downpipes is an essential part of a thorough gutter cleaning. If, during the flushing step, you notice that water is not draining properly through a downpipe, it is almost certainly clogged. Start by trying to clear the downpipe from top to bottom with a concentrated spray of water from the hose. Sometimes the force of the water is enough to clear the clog. If this does not work, try inserting the hose into the bottom opening of the downpipe and spraying upward. This can sometimes clear the pipe from below. For more stubborn blockages found during gutter cleaning, a plumber’s snake or auger can be carefully inserted from top to bottom or bottom to top into the downpipe to break up or remove compacted debris. In severe cases, it may be necessary to disassemble sections of the downpipe, especially at elbow joints, where clogs often form. Ensuring that your downpipes are clear is vital, as a clogged downpipe renders all your efforts ineffective. 3.Benefits After the primary gutter cleaning and flushing are complete, conduct a thorough inspection of your gutters and downspouts. Look closely for any signs of damage. Check for cracks, holes, or areas of rust, particularly in older metal gutters. Ensure that all gutter sections are securely fastened to the fascia board and that there is no sagging, as sagging can cause water to pool and not drain correctly, defeating the purpose of gutter cleaning. Examine the seams between gutter sections and at the end caps for any leaks. Inspect the downspouts to ensure they are firmly attached to both the gutter outlet and the house, and that they extend far enough away from your home’s foundation to direct water appropriately. This post-gutter cleaning inspection can help you identify minor issues before they become major, costly repairs, extending the life of your gutter system and the benefits of your gutter cleaning. Finally, establish a schedule for regular gutter cleaning. The frequency of gutter cleaning depends largely on your home’s surroundings. As a general rule, gutter cleaning should be performed at least twice a year: once in the late spring after trees have shed their seeds and

Gutter Cleaning In 3 Steps – You Should To Know Read More »

Apartment cleaning mistake, cleaning purple paint spraying a cleaner

7 Common Apartment Cleaning Mistakes and How to Avoid Them

Keeping your apartment clean is essential for a healthy and comfortable living space. However, many people make simple apartment cleaning mistakes that can make the job harder, less effective, or even damaging to surfaces. Here are seven of the most common apartment cleaning mistakes and how to avoid them to keep your home fresh and spotless. 1. Using the Wrong Cleaning Products One of the biggest apartment cleaning mistakes people make is using the wrong products for specific surfaces. Not all cleaners are universal, and using a harsh chemical on delicate materials like wood or marble can cause permanent damage. For example, bleach-based cleaners can discolor granite countertops, while ammonia can strip the finish off wooden furniture. Always read the labels and ensure the cleaner is safe for the surface you are using it on. Another issue with the wrong cleaning products is that some cleaners may leave behind residue that attracts more dirt rather than removing it. Many multi-purpose sprays work well for quick cleans, but they might not be suitable for deep cleaning certain materials. Investing in high-quality, specialized cleaners can make a huge difference in the longevity and cleanliness of your apartment. For a more eco-friendly approach, look for non-toxic cleaners that are safe for both your home and the environment. Many commercial brands now offer plant-based options that effectively clean without harmful chemicals. Choosing the right product ensures your apartment remains fresh without unnecessary wear and tear on your belongings. 2. Skipping High-Touch Areas When cleaning, many people focus on visible areas like floors, countertops, and bathrooms but forget about high-touch surfaces. These areas include light switches, doorknobs, remote controls, and refrigerator handles. Since these spots are used frequently, they accumulate bacteria and germs quickly, making them a hotspot for potential illness. Ignoring these spots is a common apartment cleaning mistake that can compromise your home’s hygiene. To keep your apartment truly clean, make a habit of disinfecting these areas regularly. A simple wipe-down with a disinfectant cloth or spray can go a long way in maintaining a hygienic home. If you’re using reusable cloths, make sure to wash them frequently to prevent bacteria buildup. Especially during flu season or when guests come over, high-touch areas should be cleaned even more often. These small cleaning habits can significantly improve the overall cleanliness of your home and help prevent the spread of germs.     3. Forgetting to Dust Before Vacuuming Many people vacuum first and then dust, thinking they are being efficient. However, dusting after vacuuming can undo all your hard work by allowing dust particles to settle back onto freshly cleaned floors. Dust accumulates on surfaces like shelves, blinds, and furniture, and when disturbed, it becomes airborne, eventually settling on the floor again. This is a common apartment cleaning mistake that leads to more dust buildup. To clean effectively, always dust before you vacuum. Start with higher surfaces, like ceiling fans and shelves, then work your way down. Use a microfiber cloth or a duster that traps dust rather than just spreading it around. This method ensures that any dust that falls to the floor is picked up when you vacuum. In addition to dusting surfaces, don’t forget about vents and baseboards. These areas are often neglected but collect a surprising amount of dust over time. A regular dusting and vacuuming routine will keep your apartment looking fresh and help maintain good air quality. 4. Overloading the Dishwasher Cramming too many dishes into the dishwasher may seem like a time-saver, but it can actually prevent your dishes from getting properly cleaned. When dishes are packed too tightly, water and detergent can’t reach all surfaces, leaving behind food residue and soap buildup. This means you’ll have to rewash items, wasting both time and water. Overloading the dishwasher is another common apartment cleaning mistake that reduces efficiency. Instead, load your dishwasher efficiently by giving dishes enough space for water to circulate. Place larger items on the bottom rack and smaller, more delicate items on the top. If necessary, run two smaller loads instead of overloading one. Additionally, make sure to clean your dishwasher regularly. Food particles and grease can build up over time, reducing efficiency. Running a cleaning cycle with a dishwasher cleaner once a month will help keep it running smoothly and ensure your dishes come out sparkling clean.     5. Using Too Much Cleaning Product It’s common to think that using more cleaning product will make your apartment cleaner, but this is not the case. Overusing cleaning products can leave behind a sticky residue that attracts dirt and dust, making surfaces feel grimy faster than they should. This is one of the most overlooked apartment cleaning mistakes that can actually make your space dirtier. To avoid this mistake, always follow the recommended amount on the product label. Using too much can also make rinsing and wiping more difficult, leading to streaks and buildup. A little goes a long way when it comes to most cleaning solutions. If you notice streaks on glass, floors, or countertops, it may be a sign that you’re using too much product. Try using less and see if it makes a difference in the cleanliness of your space. 6. Ignoring Hidden Areas It’s easy to focus on visible areas like countertops and floors, but hidden spots often accumulate the most dirt. Under furniture, behind appliances, and inside cabinets are some of the most neglected areas in apartment cleaning mistakes. Dust, crumbs, and even mold can build up over time if these areas are ignored. Skipping these hidden areas is a major apartment cleaning mistake that can lead to long-term hygiene issues. Make it a habit to move furniture occasionally and vacuum or sweep underneath. Similarly, clean behind your stove and fridge at least once every few months to prevent grease and food debris from accumulating. Closets and storage areas should also be checked regularly. These spaces can collect dust and clutter, making them harder to clean later. A little

7 Common Apartment Cleaning Mistakes and How to Avoid Them Read More »

Clean glass on the city

6 Expert Tips for Cleaning Glass Without Streaks

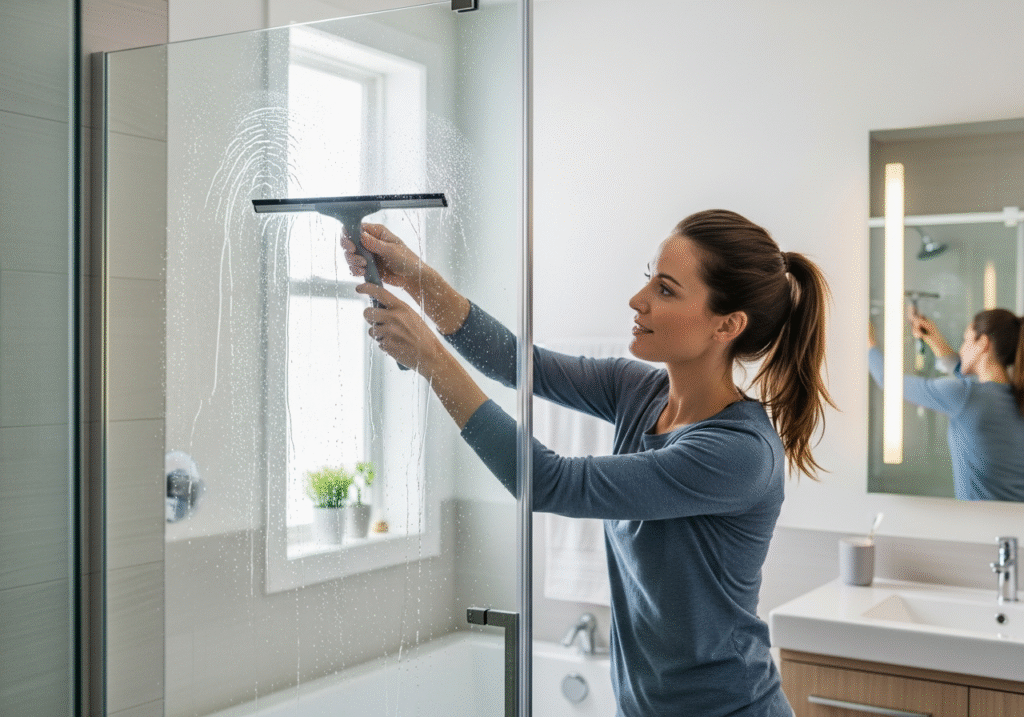
Keeping your glass surfaces clean and streak-free can be a challenge, especially when dealing with fingerprints, dust, and water spots. A perfectly clear window or mirror can instantly brighten a space, making it look fresher and more inviting. However, using the wrong techniques or products can leave annoying streaks that ruin the look. With the right methods, you can achieve a professional-quality finish every time. Here are six expert tips to help you with Cleaning glass surfaces without streaks. 1. Use a Microfiber Cloth or Squeegee When cleaning glass, the tool you use is just as important as the cleaning solution. Many people reach for paper towels, but these often leave lint behind and create more streaks. Instead, opt for a microfiber cloth, which is designed to trap dust and absorb moisture without leaving behind fibers. Microfiber cloths are also reusable, making them a more eco-friendly and cost-effective choice. Another great option is a squeegee, a tool used by professional window cleaners. A good-quality squeegee removes excess water and cleaner in a smooth motion, preventing streaks from forming. If you’re cleaning large windows, using a squeegee will make the process much faster and more effective. Just make sure to wipe the blade clean after each swipe to avoid smearing dirt back onto the glass. For best results, dedicate specific microfiber cloths or squeegees to Cleaning glass only. Using the same cloths for other household cleaning tasks can transfer grease and residue, which can cause streaks and make the glass look cloudy. 2. Choose the Right Glass Cleaner Not all glass cleaners are created equal, and choosing the wrong one can lead to streaks or even damage to certain types of glass. Many store-bought Cleaning Glass contain ammonia, which can be effective but also harsh, especially on tinted windows or delicate surfaces. If you’re sensitive to strong chemical smells or have children and pets, consider using an ammonia-free cleaner. A simple but effective alternative is mixing a few drops of dish soap with water. This solution gently cuts through grease and dirt without leaving behind a sticky residue. If your glass has stubborn spots, you can also use a small amount of rubbing alcohol on a cloth to dissolve them before wiping the entire surface. Always apply the cleaner directly to the cloth or squeegee instead of spraying it directly on the Cleaning glass. This prevents excess product from dripping down, which can cause streaks and require extra wiping. A little cleaner goes a long way—too much product can leave behind a filmy residue that attracts dust and makes the Cleaning glass look dull over time. 3. Clean on a Cloudy Day It may seem like a good idea to clean windows on a sunny day, but direct sunlight can actually make the process harder. When Cleaning glass  dries too quickly, it can leave behind streaks and water spots, making it difficult to achieve a flawless finish. Instead, choose an overcast day or clean in the early morning or evening when the sun isn’t as strong. If you must clean on a sunny day, work on smaller sections at a time. Spray the cleaner, wipe immediately, and move on to the next section to prevent the solution from drying too fast. Keeping a dry microfiber cloth handy can also help you quickly buff out any streaks that appear. For exterior windows that are exposed to the sun all day, consider using a hose to rinse off excess dust and dirt before applying the cleaner. This step prevents dirt from being smeared around and helps the cleaner work more effectively. 4. Wipe in One Direction How you wipe the glass makes a big difference in preventing streaks. Many people make the mistake of wiping in random motions, which can spread dirt around and make streaks harder to spot. Instead, use a systematic approach by wiping in one consistent direction. For windows, a great trick is to wipe the inside glass vertically and the outside horizontally (or vice versa). This way, if streaks appear, you’ll know which side needs extra attention. On mirrors and smaller glass surfaces, use long, even strokes rather than circular motions to prevent smudges. Additionally, avoid using old or dirty cloths, as they can leave behind lint and streaks. If you’re cleaning multiple glass surfaces, switch to a fresh microfiber cloth when you notice it getting damp or dirty. Keeping your tools clean is just as important as the cleaning method itself. 5. Don’t Use Too Much Cleaner It’s easy to think that more cleaner equals better results, but using too much product can actually cause streaks. When there’s excess cleaner on the Cleaning glass, it can leave a soapy film that’s difficult to remove completely. This residue attracts dust and dirt, making your glass look dirty again sooner than expected. The key is to use a light mist—just enough to loosen dirt and smudges without drenching the surface. If needed, you can always apply a second, small amount for stubborn spots. Spraying too much cleaner also increases the risk of drips running down onto window sills and frames, which can cause buildup over time. If you accidentally use too much cleaner, go over the Cleaning glass with a dry microfiber cloth or squeegee to remove the excess. This extra step will ensure a streak-free, polished finish. Remember, a little product goes a long way when cleaning glass. 6. Dry With a Lint-Free Cloth The final step in achieving streak-free glass is drying it properly. Even after wiping with a microfiber cloth or squeegee, some moisture can remain on the surface. If left to air-dry, these droplets can leave behind water spots and streaks. To avoid this, always follow up with a dry, lint-free cloth for a final buffing. Some people swear by using crumpled newspaper for this step. While it can be effective, not all newspapers are the same—some contain inks that can smudge or leave residue on the Cleaning glass. If you prefer a guaranteed streak-free

6 Expert Tips for Cleaning Glass Without Streaks Read More »