Spring Cleaning

barbecue grill cleaning

Get Your Grill Ready for Summer: A Professional Deep Cleaning Guide

How about making better use of your barbecue grill? The Victoria Day long weekend is the unofficial but undisputed start of summer in Canada. It is a time for opening the cottage, planting the garden, and, most importantly, firing up the barbecue for the first time. But after a long, cold winter spent in hibernation under a cover, your grill is not immediately ready for that first steak or burger. It is coated in the greasy remnants of last season’s final cookout, and potentially home to dust, insects, and other unwelcome guests. Before a single flame is lit, a thorough, deep cleaning is not just recommended; it is an essential ritual for performance, taste, and, above all, safety. This is not a quick wipe-down. It is a comprehensive overhaul, a process that strips the appliance back to its functional core and prepares it for a season of reliable service. The reward for this effort is a grill that heats more evenly, produces better-tasting food free from the carbonized ghosts of meals past, and operates without the significant fire risk posed by a heavy accumulation of grease. First Step The very first step in this process is preparation, and it begins with safety. Before you do anything else, you must disconnect the fuel source. For a propane grill, this means ensuring the valve on the tank is fully closed, then unscrewing the regulator from the tank. For a natural gas grill, you must shut off the gas supply at the valve where the grill’s hose connects to your home’s gas line. This step is non-negotiable. 1.Tools Next, gather your tools. This is a messy job, and having everything on hand will make the process smoother. You will need a high-quality grill brush, preferably one with stainless steel bristles that are securely fastened. You will also need a plastic scraper, a set of heavy-duty rubber gloves to protect your hands from the grease, a large bucket or utility tub, a strong degreasing dish soap, a scrub brush or non-abrasive scouring pads, and several old rags. Finally, you need a workspace. Move your grill off your finished deck or stone patio and onto a patch of lawn. The grime you will be removing can easily stain porous surfaces. With your area prepped, you can begin the cleaning process with a preliminary burn-off. Reconnect the propane tank temporarily, open the lid, and light all the burners, setting them to high. Close the lid and let the grill run for 15 to 20 minutes. This intense heat will not clean the grill, but it will incinerate any residual food particles, turning them into carbonized ash and making them much easier to scrape off. 2.Disassembly After the burn-off, turn off the burners and the gas supply, disconnect the tank again, and let the grill cool down completely. This may take at least an hour. Do not attempt to clean a hot grill. Once it is cool to the touch, put on your gloves and begin the disassembly. The first components to come out are the cooking grates. Lift them out and set them aside. Next are the heat tents, the metal plates that sit directly above the burners. These are often called “flavorizer bars” or heat shields. Their job is to protect the burners from direct drippings and to vaporize those drippings to create that classic barbecue flavor. Lift these out and set them aside with the grates. Now you can see the heart of the grill: the burner tubes. In many models, these can be easily removed by detaching a pin or a screw at one end. If they come out easily, remove them. If not, you can clean them in place. Finally, locate the grease management system. This is usually a shallow tray or pan that funnels grease into a smaller, disposable drip pan or a permanent catch cup. Remove this entire assembly. 3.Degreaser With the grill disassembled, the wet work begins. Fill your large bucket or utility tub with the hottest water your tap can produce and add a generous amount of your degreasing dish soap. Place the cooking grates and the heat tents into this hot, soapy bath and let them soak for at least 30 minutes, or longer for very heavy buildup. This soaking process is crucial; it does the hard work of softening and dissolving the baked-on, polymerized grease, which is incredibly difficult to remove when dry. While those components are soaking, turn your attention to the inside of the cook box. This is where the real grime lives. Take your plastic scraper and begin scraping down the interior walls and the inside of the lid. You will be removing a thick layer of carbonized grease and smoke residue. It is important to use a plastic scraper, not a metal one, to avoid scratching and chipping the porcelain-enamel or painted finish inside the grill. Scrape everything downwards, towards the bottom of the cook box. Continue scraping until you have removed all the flaky, built-up gunk. Once the walls are scraped, clean out the bottom of the cook box. Use your scraper and handfuls of paper towels or rags to push all the loose debris out through the opening for the grease tray and into a trash bag. This is a messy, unpleasant job, but it is critical for fire prevention. Now, inspect the burner tubes. The small ports where the gas comes out can become clogged with debris, leading to an uneven flame and poor heating. Use a stiff, narrow brush, like a venturi brush or a pipe cleaner, to clean the exterior of the tubes. Carefully poke a small wire or a paperclip into each port to ensure it is clear. Do not use a toothpick, as it can break off inside the port. If you removed the burner tubes, you can do this more easily. If they are still in place, clean them as best you can. 4.Rubbing After at least half an hour of soaking, the

Get Your Grill Ready for Summer: A Professional Deep Cleaning Guide Read More »

Yoga mat

Yoga Mat: A Complete Guide to Daily and Deep Cleaning Your Yoga Mat

A yoga mat is a deeply personal and essential piece of equipment. It is more than just a piece of rubber or foam; it is a sacred space, a portable sanctuary where we connect with our breath, challenge our bodies, and seek a sense of calm and focus. This intimate connection, however, comes with a hygienic responsibility. With every practice, our mats absorb a mixture of sweat, body oils, dust from the floor, and microscopic bacteria. Over time, this buildup can make the mat feel slippery, look grimy, and develop a persistent, unpleasant odor. Cleaning your yoga mat is not just an aesthetic chore; it is a vital act of self-care and maintenance that preserves the grip and integrity of the mat, extends its lifespan, and ensures your sacred space remains a clean, healthy, and inviting place to practice. Materials The first and most fundamental principle of yoga mat care is to understand the material you are working with. Yoga mats are made from a wide variety of materials, each with its own unique properties and cleaning requirements. The most common mats are made from PVC (polyvinyl chloride) or TPE (thermoplastic elastomer), which are durable, closed-cell materials that do not absorb moisture readily. Natural rubber mats are prized for their exceptional grip and eco-friendly properties, but they are open-cell, meaning they are more porous and can absorb liquids. Newer, high-performance mats may have a polyurethane top layer, which is specifically designed to absorb moisture for a non-slip grip. Using the wrong cleaning method or product can be disastrous; a harsh chemical can degrade a natural rubber mat, while an oily solution can permanently ruin the grip of a polyurethane surface. Always check the manufacturer’s website for specific cleaning recommendations for your particular mat Daily Cleaning For a simple, daily refresh after each practice, a quick wipe-down is essential. This preventative measure is the single most effective way to keep your mat from developing a deep-seated layer of grime. You can create your own simple, effective, and beautifully scented daily cleaning spray using a few basic, natural ingredients. In a small spray bottle, mix a solution of roughly three parts water to one part white vinegar. The vinegar’s mild acidity is excellent at breaking down light sweat and oils and also acts as a natural disinfectant and deodorizer. To counteract the vinegar smell and add your own aromatherapy element, add a few drops of a high-quality essential oil. Tea tree oil is a particularly good choice, as it possesses powerful natural antibacterial and antifungal properties. Lavender is another excellent option, known for its calming scent and antimicrobial benefits. After your practice, simply give your mat a light spritz with this solution and wipe it down with a clean, damp microfiber cloth. The most crucial step is to let the mat air dry completely before rolling it up. Rolling up a damp mat is the primary cause of mildew and musty odors. While a daily wipe-down is great for maintenance, a periodic deep clean is necessary to remove the more stubborn, ingrained buildup of oils and dirt that can make a mat feel slippery and look dull. This should be done at least once a month, or more often if you practice frequently or engage in hot yoga. The method for this deep clean will vary significantly based on your mat’s material. Deep Cleaning For standard, durable PVC or TPE mats, the deep cleaning process is relatively straightforward. You will need a bathtub or a large basin, lukewarm water, and a very small amount of a gentle, mild soap. A clear, non-moisturizing dish soap is a good choice. It is absolutely essential to avoid using too much soap, as any residue left behind will make the mat dangerously slippery. Fill the tub with a few inches of lukewarm water, just enough to submerge the mat, and add no more than a single teaspoon of soap for a full tub of water. Submerge the mat and let it soak for about ten to fifteen minutes. This will help to loosen the embedded grime. After the soak, use a soft cloth or a non-abrasive sponge to gently scrub both sides of the mat. Pay extra attention to the areas where your hands and feet are most often placed. Once you have scrubbed the mat, drain the soapy water and rinse the mat meticulously. This is the most critical part of the process. Use your shower head to spray down both sides of the mat, ensuring that every last trace of soap residue is washed away. You should continue to rinse until the water running off the mat is completely clear and free of any bubbles. With the mat thoroughly rinsed, you must remove as much excess water as possible. Lay the mat flat on a large, clean, dry towel. Place another dry towel on top of it, creating a mat sandwich. Then, carefully roll up the entire sandwich, pressing firmly as you go. The towels will absorb a significant amount of the water from the mat. After unrolling it, the mat will be damp rather than sopping wet. The final step is to hang the mat to air dry. Drape it over a shower curtain rod or a drying rack, ensuring that air can circulate around both sides. It is crucial to let it dry completely, which can take 24 to 48 hours, before using it or rolling it up. Open-cell Mats For open-cell mats, such as those made from natural rubber, the deep cleaning process requires a more cautious approach. These mats are like sponges and will absorb water readily. While you can submerge them in the same way as a PVC mat, it is often better to avoid a full soak. Instead, lay the mat on the floor of your shower and give it a good spray-down with lukewarm water. Use a very small amount of a highly diluted, gentle soap solution and a soft cloth to clean the surface. The

Yoga Mat: A Complete Guide to Daily and Deep Cleaning Your Yoga Mat Read More »

Airbnb professional cleaning

Airbnb Cleaning: How Hosts Can Prepare for World Cup Guests

How should hosts prepare? In the highly competitive world of short-term rental hosting, there is one factor that reigns supreme, an element that, by itself, can elevate a property from mediocre to magnificent or condemn it to a string of lackluster reviews. It is not the stylish decor, the high-end amenities, or even the prime location. It is cleanliness. For an Airbnb host, a pristine level of cleanliness is not a bonus feature; it is the absolute bedrock of the guest experience. A guest might forgive a lumpy pillow or a slow Wi-Fi connection, but they will never forgive a dirty bathroom or a greasy kitchen. The path to consistent five-star reviews is paved with a meticulous, unwavering commitment to a professional cleaning standard. Clean or Sanitized? This is where a checklist becomes more than just a list; it becomes a business tool. A professional cleaning checklist is not a casual reminder to “tidy up.” It is a systematic, top-to-bottom blueprint for a flawless turnover. It ensures consistency, whether you are cleaning the property yourself or entrusting it to a service. It provides accountability and eliminates the guesswork, transforming an overwhelming task into a manageable, repeatable process. It is the difference between a home that is simply “not dirty” and one that feels professionally prepared, sanitized, and truly welcoming. The philosophy behind such a checklist is to think less like a homeowner and more like a hotelier. It is about understanding the psychology of a guest. When a guest walks into your Airbnb, they are not just entering a room; they are entering a sanctuary for their trip. They are seeking comfort, safety, and a break from their own daily chores. Any sign of the previous occupant—a stray hair, a smudge on a glass, a crumb on the counter—instantly shatters this illusion and erodes trust. A professional checklist is designed to erase every trace of the past and present a perfectly clean, neutral, and inviting space for the new arrival. Golden Rule The universal golden rule of all professional cleaning applies here: start high and work your way down. This simple principle ensures that you are always working with gravity, not against it. Dust and debris dislodged from high surfaces like ceiling fans and shelves will fall to the floor, which is the very last surface you will clean. This prevents you from having to re-clean surfaces and is the foundation of an efficient workflow. 1.Appliances The kitchen is the first of two make-or-break rooms in any rental. Guests will scrutinize this space, and its level of cleanliness will heavily influence their overall impression. The process must be exhaustive. Begin with the appliances, the workhorses of the kitchen. The refrigerator must be completely emptied of any food or drink left by the previous guest. Every shelf and drawer should be wiped down with a food-safe disinfectant. The exterior should be cleaned of fingerprints and smudges, paying close attention to the handles. The microwave is next. It must be cleaned both inside and out, ensuring there are no splatters or food residue. The oven should be checked for crumbs and spills, and the stovetop must be degreased and polished until it shines. At the end, open the dishwasher. Ensure it is empty and clean the filter at the bottom, a small step that makes a huge difference in performance and odor prevention. 2.Surfaces Once the appliances are addressed, turn your attention to the surfaces. All countertops must be cleared, wiped down, and sanitized. The backsplash behind the stove and sink should be degreased and cleaned of any splatters. The sink itself must be scrubbed until it is spotless, and the faucet should be polished until it gleams. This is a detail that guests always notice. Cabinet fronts should be wiped down to remove any drips or fingerprints. 3.Restocking The final step in the kitchen is about hospitality as much as cleaning. This is the restocking phase. Ensure there is a fresh, clean sponge or dishcloth, a full bottle of dish soap, and a fresh roll of paper towels. Coffee and tea stations should be wiped down and restocked with supplies. The garbage can should be emptied, cleaned, and relined with a fresh bag. Only when the kitchen is completely cleaned and restocked should you address the floor. It must be thoroughly swept or vacuumed, paying close attention to the edges along the cabinets and appliances, and then meticulously mopped. 4.Bathroom The second critical area is the bathroom. There is no room for error here; it must be impeccably clean and sanitized. The toilet is the first priority. It must be cleaned thoroughly, not just in the bowl, but on every exterior surface, including the tank, the base where it meets the floor, and the often-overlooked hinges of the seat. The shower and bathtub require a detailed scrubbing to remove all traces of soap scum, hard water stains, and, most importantly, any stray hairs. The drain should be checked and cleared. The glass shower door must be squeegeed or wiped to a streak-free shine. 5.Sink and Vanity The sink and vanity area must be treated with the same level of detail. The sink should be scrubbed clean, and the faucet polished. The mirror must be perfectly clean and free of spots or streaks. The countertop should be wiped down and sanitized. Restocking in the bathroom is equally important. Ensure there is a fresh, full roll of toilet paper on the holder, with at least one extra visible for the guest. The hand soap dispenser should be full and wiped clean. If you provide toiletries like shampoo and conditioner, make sure they are full and neatly arranged. Fresh, clean, perfectly folded towels must be put out. The final touch is to sweep and meticulously mop the floor, paying special attention to the area around the base of the toilet. 6.Bedroom The bedroom is the guest’s personal sanctuary, and it must feel fresh, clean, and restful. The bed is the centerpiece and demands

Airbnb Cleaning: How Hosts Can Prepare for World Cup Guests Read More »

Tools and Gadgets Professionals Use for a Perfect Spring Clean

The Tools and Gadgets Professionals Use for a Perfect Spring Clean

Do you know what the main gadgets are for spring cleaning? Spring cleaning is a ritual of renewal, a deep, restorative process that goes far beyond the scope of a routine weekly tidy. It is a full-scale assault on the accumulated dust, grime, and clutter of a long winter. This ambitious undertaking, however, can quickly become overwhelming when approached with the standard tools of daily maintenance. Trying to scrub a winter’s worth of soap scum with a simple sponge or reaching the dusty tops of cabinets with a flimsy duster is an exercise in frustration and wasted effort. The secret to transforming this monumental task into a manageable and even satisfying project lies in equipping yourself with a small arsenal of specialized gadgets designed to amplify your effort and deliver a truly professional level of clean. The Best Gadgets 1.Vacuum Cleaner The most fundamental and non-negotiable tool in any spring cleaning toolkit is a high-quality vacuum cleaner with a full suite of attachments. This is not just a machine for cleaning floors; it is the primary weapon in the war against dust and allergens. After months of sealed windows, the air in a home is laden with dust, pet dander, and pollen that has settled on every conceivable surface. A vacuum equipped with a HEPA (High-Efficiency Particulate Air) filter is essential. This type of filter is designed to trap microscopic particles, removing them from your home’s environment rather than simply recirculating them back into the air as a standard vacuum might. The true versatility of this gadget, however, is revealed through its attachments. The long, narrow crevice tool is your key to the forgotten spaces. It is the perfect instrument for pulling the dense accumulation of dirt, dead insects, and dust from deep within your window tracks. It can reach between couch cushions, along baseboards, and into the narrow, grimy space between your stove and your countertops. The soft-bristled dusting brush attachment is a champion for delicate and irregular surfaces. Use it to gently remove the thick layer of winter dust from blinds, lampshades, and intricately carved furniture without causing damage. It is also the ideal tool for cleaning dusty air vents and registers, directly improving the quality of the air being circulated through your home. The upholstery attachment is crucial for the deep cleaning of all your home’s textiles, from sofas and armchairs to curtains and, most importantly, your mattress, where it can remove the dead skin cells that feed dust mites. A powerful vacuum with the right attachments is the foundational gadget that does the heavy lifting of dust and allergen removal before any wet cleaning begins. 2.Drill Brush While a vacuum handles the loose debris, the true “deep clean” often involves tackling stubborn, caked-on grime that requires serious scrubbing power. This is where a set of drill brush attachments can be a revolutionary addition to your cleaning arsenal. This simple but ingenious gadget consists of a set of durable, nylon-bristled brushes of various shapes and sizes that attach directly to a standard cordless drill. This instantly transforms a common household tool into a high-speed power scrubber, delivering hundreds of rotations per minute and obliterating grime with a fraction of the physical effort of manual scrubbing. The large, flat brush is perfect for scouring large surface areas like the floor of a fiberglass shower or a tile floor. The smaller, bullet-shaped brush is a miracle worker on tile grout. When combined with a paste of oxygen bleach, the high-speed agitation of the brush can lift years of discoloration from grout lines, restoring them to their original color in a fraction of the time it would take by hand. The round corner brush is perfectly designed to get into the curved, hard-to-reach areas of a bathtub or sink, effortlessly removing the stubborn ring of soap scum that builds up at the waterline. This gadget is the ultimate solution for “elbow grease,” saving your muscles and your time while delivering a level of clean that is difficult to achieve manually. 3.Microfiber Duster Spring cleaning is also about reaching the high and low zones of neglect, the areas that are out of sight and out of mind during routine cleaning. For this, an extendable microfiber duster is an indispensable gadget. This tool typically features a telescoping handle that can reach up to the highest ceilings and a flexible, bendable duster head covered in a removable, washable microfiber sleeve. The long reach allows you to safely clean the blades of a ceiling fan from the ground, preventing the dangerous balancing act on a wobbly chair. The flexible head can be bent to a ninety-degree angle, making it the perfect tool for cleaning the tops of tall kitchen cabinets, bookcases, and door frames, which are notorious for collecting a thick, furry layer of dust. The science of microfiber is key here; its statically charged fibers attract and trap dust particles, removing them completely rather than just flicking them into the air to resettle elsewhere. The same tool, with the handle shortened, is also a back-saver for cleaning the low zones. Instead of getting on your hands and knees with a rag, you can stand comfortably and run the duster along every baseboard in your home, lifting scuffs and dust with ease. 4.Steam Cleaner For a truly hygienic, chemical-free deep clean, a handheld steam cleaner is a sanitizing powerhouse. This gadget uses a small internal boiler to heat water past its boiling point, creating a jet of high-pressure, high-temperature steam that can be directed through various nozzle attachments. This superheated steam is a triple threat: it is a powerful solvent, a potent disinfectant, and a targeted cleaning tool. The heat is incredibly effective at melting and dissolving stubborn, greasy, and sticky messes without any chemicals whatsoever. It can liquefy the baked-on grease on a stovetop, dissolve the grimy buildup around sink faucets and drains, and even soften the burnt-on food inside a microwave. As a sanitizer, the steam is hot enough to kill

The Tools and Gadgets Professionals Use for a Perfect Spring Clean Read More »

post-winter

Transform Your Backyard: A Guide to Restoring Your Outdoor Space

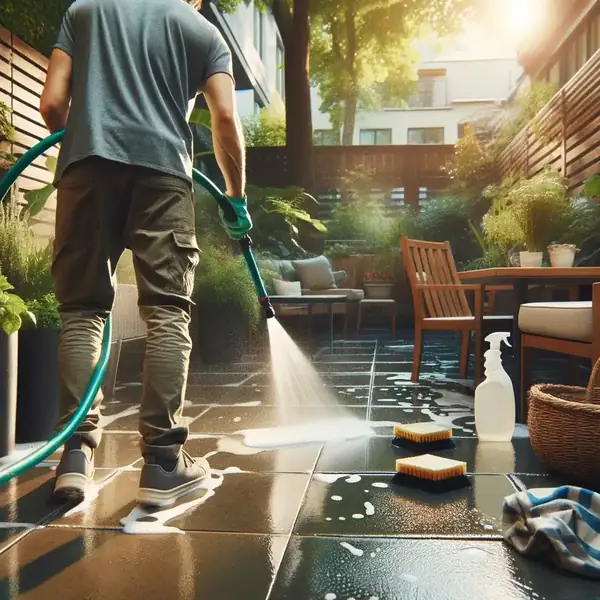
The arrival of May in Canada is a profound and welcome turning point. It is the month when the last vestiges of winter finally recede in your backyard, the ground thaws completely, and the long-dormant desire to live outdoors is reawakened. We look to our patios, decks, and balconies not as frozen, forgotten spaces, but as extensions of our homes, places for relaxation, dining, and gathering. However, the first look of the season is often a discouraging one. These outdoor living areas have endured months of harsh weather, and they bear the scars: a grimy film of dirt and pollution, a carpet of dead leaves and twigs, and the chalky, white residue of winter salt. The task of reclaiming this space can feel overwhelming, but it is a deeply rewarding ritual, a methodical process of cleaning and preparation that officially ushers in the warmer, brighter season ahead. Backyard floor The most effective approach to this seasonal reset begins with the foundation itself: the floor of your outdoor space. You cannot properly clean the furniture or set up for the season on a dirty surface. The first, non-negotiable step is to clear the deck or patio completely. Every chair, every table, every planter must be moved off to the lawn or driveway. This creates a blank canvas and allows you to address the entire surface without obstruction. Begin with a thorough dry sweep. Using a stiff-bristled push broom, systematically clear away all the loose leaves, pine needles, branches, and other debris that has accumulated over the winter. With the loose debris gone, you can now tackle the ingrained layer of winter grime, and the technique will depend on your surface. For a wooden deck, a deep scrub is required. Create a gentle but effective cleaning solution in a bucket by mixing a gallon of warm water with a quarter cup of an oxygen bleach powder, like sodium percarbonate, which is excellent at killing mildew and algae without being as harsh on the wood as chlorine bleach. Liberally apply this solution to a section of the deck with a mop or a deck sprayer. Let it sit for about fifteen minutes to allow the cleaner to penetrate and loosen the grime, but do not let it dry. Then, using a stiff-bristled deck brush with a long handle, begin to scrub vigorously, always working in the direction of the wood grain. This will prevent you from roughing up the wood fibers. You will see the dirty foam lift away, revealing the clean wood beneath. Work in manageable sections until the entire deck is scrubbed, then rinse it thoroughly with a garden hose. While a pressure washer can be a tempting shortcut, it must be used with extreme caution on wood. An incorrect nozzle or too much pressure can easily gouge the soft wood, splinter the surface, and cause permanent damage. For concrete or stone patios, the process is similar but you can be more aggressive. After sweeping, you can use the same oxygen bleach solution or a mixture of water and vinegar to scrub the surface. For stubborn algae or moss stains in shaded areas, a more direct scrubbing with a stiff brush will be needed. A pressure washer is generally safe and incredibly effective on concrete and most types of paving stones, quickly blasting away a winter’s worth of dirt to reveal the bright, clean surface underneath. Furniture Once the foundational surface is clean and left to dry, turn your attention to the patio furniture, which has likely been sitting in storage or under covers, accumulating dust and mustiness. The cleaning method for your furniture will be dictated by its material. For common plastic or resin chairs and tables, a simple solution of warm water and a few drops of dish soap is often enough to remove surface dirt. For the stubborn black spots of mildew or the chalky, oxidized film that can develop on older plastic, a solution of one part white vinegar to three parts water is an excellent cleaner. Use a non-abrasive scrub sponge to work the solution into the surface, which will restore the color and remove the mildew. Wood furniture, such as teak or cedar, requires a gentler touch. Use a soft-bristled brush and a mild, soapy water solution to scrub the wood, again, always working with the grain. Rinse it thoroughly with a clean, damp cloth. After cleaning, and once it is completely dry, it is a good idea to apply a new coat of a protective sealer or oil specifically designed for that type of wood. This will nourish the wood and protect it from the sun and rain in the months to come. For metal furniture, like aluminum or wrought iron, a simple wipe-down with soapy water is usually sufficient. For wrought iron, this is also a crucial time to inspect for any chips in the paint that have started to rust over the winter. These spots should be lightly sanded and touched up with a rust-resistant paint to prevent the rust from spreading. Cushions Outdoor fabric cushions are another major component of the revival. Even if they have been in storage, they can smell stale and musty. First, check the care tag for any specific washing instructions. For most, a surface clean is the best approach. Begin by vacuuming them thoroughly with an upholstery attachment to remove any loose dust and debris. Then, mix a solution of mild soap and lukewarm water. Using a soft sponge, work the suds into the fabric in a circular motion, paying extra attention to any stained areas. It is important not to saturate the cushion’s inner foam. Once scrubbed, “rinse” the cushion by wiping it down with a clean cloth dampened with plain water. The most critical step is drying. Squeeze out as much excess water as possible, then stand the cushions up on their edge in a sunny, breezy spot. Allowing air to circulate on all sides is the key to ensuring they dry completely,

Transform Your Backyard: A Guide to Restoring Your Outdoor Space Read More »

The 20 Spots You’re Forgetting on Your Spring Cleaning Checklist

The term “spring cleaning checklist” evokes a powerful and almost instinctual urge to refresh our living spaces after a long, stagnant winter. It is more than just a routine tidying; it is a full-scale, top-to-bottom reset, a chance to clear away the accumulated dust, clutter, and grime of the colder months. However, the sheer scale of this task can be overwhelming, often leading to a paralysis of inaction. Where do you even begin? The secret to transforming this monumental project into a manageable and even satisfying endeavor lies in a single, indispensable tool: the checklist. A well-structured checklist is not just a list of chores; it is a strategic roadmap, a system that breaks down an overwhelming goal into a series of clear, achievable steps, ensuring that no forgotten corner is left untouched. The most effective way to approach a spring cleaning checklist is to organize it by room, transforming the daunting task of cleaning an entire house into a series of smaller, more focused projects. This allows you to concentrate your energy on one space at a time, providing a clear sense of accomplishment as you physically check off each room and move on to the next. The Kitchen The kitchen is the most intensive room to deep clean and should be a top priority. It is where grease, food particles, and daily traffic converge. Tops of Cabinets and Refrigerator: Begin at the highest point. This out-of-sight area is a notorious trap for a sticky, greasy film of dust. Carefully wipe this surface with a powerful degreasing solution. Cabinet Fronts: Wipe down the exterior of all cabinets and drawers to remove fingerprints and splatters. Pay special attention to the areas around the handles. The Refrigerator Deep Clean: This is a major project in itself. Empty the entire fridge, discard expired food, and wash all removable shelves and drawers in warm, soapy water. Wipe down the entire interior shell. Pull the refrigerator away from the wall to vacuum the dusty condenser coils and clean the floor beneath. The Oven and Stovetop: A true deep clean involves more than just wiping the surface. For the oven, this means tackling the baked-on interior, either with the self-cleaning function or a non-toxic baking soda paste left to sit overnight. For the stovetop, remove the grates and burner caps and soak them in hot, soapy water before scrubbing. Clean every crevice of the cooktop itself. The Sink and Drain: Descale the faucet to remove mineral buildup. Thoroughly scrub and sanitize the sink basin. Crucially, clean and deodorize the garbage disposal and sink drain by flushing with boiling water and using a baking soda and vinegar solution. Small Appliances: Do not forget the microwave, coffee maker, and toaster. Clean the interior of the microwave, descale the coffee maker, and empty and wipe out the crumb tray of the toaster. Backsplash and Countertops: Clear everything off the countertops and give them a deep clean and polish, paying special attention to scrubbing the grout lines of the backsplash. Final Pass: Wipe down all baseboards, light switches, and finish with a thorough mopping of the floor. The Bathrooms Bathrooms require a deep focus on sanitation and the removal of soap scum and mineral deposits. Exhaust Fan: The cover of the bathroom fan is a magnet for dust. Remove it, wash it thoroughly, and vacuum the fan blades and housing. Shower and Tub: This is a multi-step process. First, descale the showerhead by soaking it in vinegar to restore water flow. Scrub the walls, tub, and shower doors with a cleaner designed to cut through soap scum. Meticulously scrub every grout line with a stiff brush to remove mildew and discoloration. The Toilet: A deep clean goes beyond the bowl. Clean the entire exterior, including the tank, the base, and the often-neglected area where the toilet meets the floor. The Vanity and Sink: Clear the countertop completely. Clean and polish the faucet and fixtures. Scrub the sink basin and clean out the overflow hole. Organize the medicine cabinet, discarding expired products, and wipe down all shelves. Washing Textiles: Launder the shower curtain and any bath mats. Final Pass: As with the kitchen, finish by wiping down baseboards, light switches, and mopping the floor. The Bedrooms Bedrooms are often less about grime and more about dust and allergens. The goal is to create a fresh, restful environment. The Mattress: This is a crucial spring cleaning task. Strip the bed completely and vacuum the entire mattress surface with an upholstery attachment. Spot-clean any stains and deodorize it by sprinkling it with baking soda, letting it sit, and then vacuuming it up. Laundering Bedding: While the mattress is airing out, wash all of your bedding, including the items that are often overlooked: the duvet or comforter, pillows, and the mattress protector. Closet Reorganization: This is the perfect time for a seasonal wardrobe switch. Empty the closet, wipe down the shelves, and sort through your clothes, storing heavy winter items and bringing spring and summer clothes to the forefront. Dusting from Top to Bottom: Dust all surfaces, starting with the highest points like ceiling fan blades, light fixtures, and the tops of dressers and bookcases, working your way down. Windows: Clean the interior of the windows, wash the curtains, and dust the blinds. Final Pass: Wipe down all baseboards and furniture legs, and finish with a thorough vacuuming of the entire floor, including deep under the bed. The Living and Common Areas These high-traffic areas require a focus on deep dusting and restoring order. Upholstered Furniture: A deep clean involves more than just fluffing pillows. Remove all cushions and use a vacuum’s crevice tool to get deep into the seams and under the frame to remove years of crumbs and dust. Carpets and Rugs: Move furniture to vacuum areas that are normally covered. For a true deep clean, consider a professional carpet cleaning to remove the embedded dirt and allergens of winter. Walls and Baseboards: Wipe down all baseboards. For walls, this is a good time to spot-clean any scuffs or marks. The High and Lows of Dusting: As in the bedroom, a systematic, top-to-bottom dusting

The 20 Spots You’re Forgetting on Your Spring Cleaning Checklist Read More »

drawer with kitchen organizers

7 Genius Kitchen Drawers Organization Ideas You Need to Try

Kitchen drawers are the unsung workhorses of the home, the primary storage for the essential tools we use every single day. They hold our cutlery, our cooking utensils, our knives, and all the miscellaneous gadgets that make a kitchen function. Yet, for all their importance, they often devolve into a state of chaotic, jumbled frustration. A search for a simple vegetable peeler can become an archaeological dig through a tangled mess of spatulas, whisks, and mystery items. This disorganization is more than just an aesthetic issue; it is a source of daily friction, a constant, low-grade stress that makes cooking less efficient and less enjoyable. Taking control of your kitchen drawers is a transformative act of creating a smooth, logical workflow, saving precious time and bringing a profound sense of calm to the heart of your home. Emptying The first and most critical step in this organizational journey is the total empty-out. This is a non-negotiable, foundational act. You cannot truly assess or organize what you cannot see. One by one, you must empty every single drawer in your kitchen, placing all of their contents onto your countertops or a large dining table. This may seem like a daunting and messy task, but it is the only way to begin with a truly clean slate. It forces you to confront the sheer volume of what you own and immediately reveals the redundancies and clutter that have been hiding in plain sight. As you empty each drawer, take a moment to give the now-vacant space a thorough cleaning. Use a vacuum with a crevice tool to suck up the inevitable collection of crumbs, dust, and debris that accumulates in the corners. Then, wipe down the entire interior of the drawer with a damp cloth and a gentle all-purpose cleaner. Starting with a pristine, empty container is a powerful psychological reset that prepares you for building a new, intentional system from the ground up. With your entire collection of drawer-bound items laid bare, the most difficult and most liberating phase begins: the edit. This is where you must be practical, honest, and sometimes ruthless. The goal is to create a curated arsenal of tools that you actually use and love, rather than a museum of impulse buys and inherited gadgets. Pick up each individual item and ask yourself a series of direct questions. Is this item broken, rusted, or melted? Do I have duplicates or even triplicates of this item? Have I used this in the last year? Does this “unitasker”—a gadget designed for only one, very specific purpose like an avocado slicer or a strawberry huller—truly earn its valuable real estate in my kitchen? Based on your answers, sort every item into one of three distinct piles: keep, donate, or discard. Discard anything that is broken. For the duplicates, keep the one that is in the best condition or that you prefer to use, and donate the rest. Be particularly critical of the unitaskers. If a simple knife can do the job just as well, it may be time to let the gadget go. This purging process is deeply satisfying, as you reclaim valuable space and edit your collection down to the functional essentials. Planning Now, with your edited collection of “keep” items and your clean, empty drawers, the strategic planning phase can begin. Do not simply start putting things back. The most effective organizational system is based on the principle of zoning. This means storing items as close as possible to where they will actually be used, creating a logical workflow that minimizes unnecessary steps and movement around the kitchen. Think of your kitchen as a series of work zones. 1.Prep Zone The primary “Prep Zone” is typically the largest stretch of open counter space, where you do most of your chopping and mixing. The drawers in this zone are prime real estate for the tools you need to prepare ingredients. This is where your knives should live, along with peelers, graters, measuring cups and spoons, mixing bowls, and cutting boards. 2.Cooking Zone The “Cooking Zone” is the area immediately surrounding your stovetop and oven. The drawers here should house all the tools you reach for when you are actively cooking with heat. This includes spatulas, tongs, wooden spoons, whisks, oven mitts, and trivets. By having these items within arm’s reach of the stove, you create a seamless and safe cooking experience, eliminating the need to rummage through a distant drawer while something is sizzling on the burner. 3.Eating and Serving Zone The “Eating and Serving Zone” is usually located near your dishwasher or your dining table. This is the logical home for your everyday cutlery—the forks, knives, and spoons you use for meals. This drawer should also contain serving utensils, cloth napkins, and any other items you need to set the table. Storing cutlery near the dishwasher makes the task of unloading it significantly faster and more efficient. 4.Baking Zone The “Baking Zone,” if you are a baker, might be a dedicated area where you store your stand mixer. The drawers here should contain all your baking-specific tools: spatulas, pastry brushes, cookie cutters, rolling pins, and piping bags. 5.Utility Drawer At the end, every kitchen needs a “Utility Drawer,” which is the tamed, organized version of the dreaded “junk drawer.” This drawer is not for kitchen tools, but for the essential household items you need to access regularly. This is the home for scissors, pens, a notepad, tape, rubber bands, batteries, and a small toolkit with a screwdriver and pliers. The key to keeping this drawer from descending into chaos is rigorous containment, which we will address next. Containment With your zones established, the next layer of organization is containment. This is the physical act of using dividers and inserts to create a designated home for every single item. Simply placing loose items into a zoned drawer is not enough; they will inevitably slide around and become a jumbled mess. Drawer organizers are the key to a sustainable

7 Genius Kitchen Drawers Organization Ideas You Need to Try Read More »

coffee spilled on natural stone

How to Remove Coffee Stains: A Step-by-Step Guide for Every Surface

Coffee stains are difficult to remove, aren’t they? the rich, aromatic pleasure of a morning cup of coffee is a daily ritual for millions, but it comes with an inherent risk: the spill. Coffee contains compounds called tannins, which are natural pigments found in many plants. These tannins are what give coffee its dark, rich color, and they are also what make it such a formidable and stubborn stain, capable of leaving its mark on everything from a favorite shirt to a pristine carpet. The key to successfully removing a coffee stain is to act with speed, precision, and an understanding of the surface you are treating. A panicked, incorrect response can often do more harm than the initial spill, setting the stain permanently and turning a minor accident into a lasting blemish. Be quick Before addressing any specific surface, there are three universal golden rules that apply to almost every fresh coffee spill. The first and most critical is to act immediately. A wet coffee stain is a suspension of pigments in liquid, making it far easier to lift and remove. As the liquid evaporates, the tannins begin to chemically bond with the fibers or pores of the surface, making the stain exponentially more difficult to treat. The second rule is to blot, never rub. Your first instinct may be to grab a cloth and scrub vigorously, but this is a catastrophic mistake. Rubbing a wet stain only serves to spread the pigments over a larger area while simultaneously pushing them deeper into the material’s fibers. The correct technique is to take a clean, dry, absorbent cloth or paper towel and gently blot the spill, working from the outside edges of the stain inward to prevent it from spreading. This will lift the excess liquid straight up and out of the material. The third rule is to always perform a spot test with any cleaning solution on a hidden, inconspicuous area first. The agents powerful enough to break down a coffee stain can also be powerful enough to break down dyes or damage delicate finishes. Let us begin with one of the most common scenarios: a coffee stain on washable fabric, such as a cotton shirt or a tablecloth. After blotting away the excess, the most effective immediate action is to flush the stain with cold water. Take the garment to a sink and run a stream of cold water through the back of the stained area. This is a crucial detail; flushing from the back pushes the coffee pigments back out the way they came in, rather than driving them deeper into the fabric’s weave. For a fresh, light stain, this cold-water flush may be enough. For a more significant spill, a pre-treatment is necessary. A simple and effective solution can be made by mixing equal parts of white vinegar and water with a few drops of a clear, non-bleach dish soap. Apply this solution to the stain, gently work it in with your fingers, and let it sit for at least fifteen minutes. The vinegar’s mild acidity helps to break down the tannins, while the soap helps to lift the stain. For older, more set-in stains, or for spills on durable white fabrics, a pre-soak in a solution of oxygen bleach powder (sodium percarbonate) and hot water is a true miracle worker. Dissolve the powder in the hottest water the fabric can safely tolerate, submerge the garment, and let it soak for several hours, or even overnight. After pre-treating or soaking, launder the garment as you normally would, using the warmest water recommended on the care label. Before you place the item in the dryer, inspect the stained area carefully. If any trace of the stain remains, do not apply heat. The heat of a dryer will permanently set the stain, making it nearly impossible to remove. Repeat the pre-treatment process and wash it again. Carpet and Upholstery Carpet and upholstery present a higher-stakes challenge, as they cannot simply be tossed in the wash. The principles of speed and blotting are even more critical here. After thoroughly blotting the fresh spill with a clean, dry cloth, you will need to create a cleaning solution. A highly effective and safe mixture for most carpets and upholstery is two cups of cool water, one tablespoon of white vinegar, and one tablespoon of a clear, non-bleach dish soap. It is essential that you never pour this solution directly onto the stain, as this will oversaturate the carpet and its padding, potentially leading to mildew. Instead, dampen a clean, white cloth with the solution and use it to blot the stain. Work from the outside in, dabbing gently. You will see the coffee begin to transfer from the carpet to your cloth. As it does, continuously move to a clean section of the cloth to avoid redepositing the stain. Repeat this process patiently until the stain is no longer visible. Once the stain has been lifted, the job is not yet finished. You must now “rinse” the area to remove the cleaning solution, as any soap residue left behind will attract new dirt over time. To do this, dampen a new, clean cloth with plain, cool water and blot the area again to lift out the soap and vinegar. The final step is crucial for preventing water marks and mildew. Place a thick stack of clean, dry paper towels or a thick, white towel over the damp spot and weigh it down with something heavy, like a stack of books. Leave it in place for several hours. This will wick the remaining moisture up and out of the carpet fibers and the padding underneath, ensuring the area dries completely and cleanly. Non-Porous Surfaces When it comes to hard, non-porous surfaces like ceramic tile, laminate countertops, or vinyl flooring, coffee spills are far less intimidating. For a fresh spill, a simple wipe with a damp cloth or a sponge with a little all-purpose cleaner is all that is needed. If a stain has

How to Remove Coffee Stains: A Step-by-Step Guide for Every Surface Read More »

The Solution to Your Mother’s Day Gift Dilemma: A Professional Clean

The annual search for the perfect Mother’s Day gift is a familiar ritual, a quest to find something that adequately expresses a lifetime of gratitude and love. We often gravitate towards the traditional tokens of appreciation: a beautiful bouquet of flowers, a decadent box of chocolates, a piece of jewelry, or a gift certificate for a spa day. These are wonderful gestures, thoughtful and well-intentioned, but they share a common trait: they are fleeting. The flowers wilt, the chocolates are consumed, and the spa day, while lovely, is a brief escape that ends with a return to the realities and responsibilities of daily life. For the woman who has given so much of her time and energy to creating a comfortable and orderly home, there is a gift that transcends the temporary, a gift that offers something she can never have enough of, something more precious than any object: the gift of time. Time Machine A professional house cleaning service is, at its core, a time machine. It is the tangible act of buying back the hours that would otherwise be spent on the physically demanding and often thankless tasks of deep cleaning. Consider the typical weekend. For many mothers, it is not a period of pure rest and recreation, but a race to catch up on the household chores that accumulate during a busy week. It is the Saturday morning spent scrubbing floors on hands and knees, the Sunday afternoon dedicated to deep cleaning bathrooms, the constant, low-level hum of a to-do list that never seems to get any shorter. A professional cleaning service intercepts this relentless cycle. It takes the five, six, or even more hours of intensive labor required for a true deep clean and removes them from her schedule completely, handing them back as a block of pure, unencumbered free time. This reclaimed time is the true substance and beauty of the gift. It is a Saturday morning she can spend reading a book in the garden with a cup of coffee, a Sunday afternoon she can use to visit with friends she has not seen in months, a weekend she can dedicate to a long-neglected hobby, or simply a day she can enjoy with her family without the nagging, ever-present feeling that she should be cleaning. It is a gift that says, “Your time is the most valuable thing you have, and you deserve to spend it on yourself, not on scrubbing grout.” In a world where so many mothers feel time-poor, constantly juggling the demands of family, work, and the endless logistics of household management, giving back a significant portion of that time is one of the most practical and profound expressions of love and appreciation imaginable. It acknowledges the sheer volume of her labor and provides a real, tangible respite from it. Beyond the quantifiable gift of hours, there is the invaluable and often overlooked gift of reduced mental load. The responsibility of maintaining a home is not just about the physical labor; it is about the constant, invisible work of management. It is the mental checklist of what needs to be cleaned, the planning of when it will get done, the worry about the state of the guest bathroom before visitors arrive, and the low-grade, persistent stress that comes from living in a space that feels perpetually in need of attention. A professional deep clean is a powerful circuit-breaker for this heavy mental burden. It is a full reset, a moment where the entire home is brought to a baseline of pristine cleanliness all at once. This single act can wipe the slate clean, quieting the constant internal monologue about chores and replacing it with a sense of peace, completion, and order. It allows her to simply exist in her home, to enjoy it as a sanctuary rather than viewing it as a project that is never quite finished. Luxury Service Furthermore, it is crucial to reframe this gift as what it truly is: a luxury service, not a critique. Presenting a cleaning service is not an insinuation that her home is not clean enough; it is an acknowledgment that she deserves a break from the hard work required to keep it that way. It should be positioned as a “spa day for the home,” an experience of being pampered and cared for within her own environment. A professional cleaning is fundamentally different from a routine weekly tidy-up. Professionals arrive with a systematic approach, specialized tools, and an expert understanding of how to tackle the most stubborn and neglected areas of a home. They have the knowledge and equipment to perform tasks that are often put off indefinitely due to their difficulty or unpleasantness. They are the ones who will pull the refrigerator out from the wall to clean the floor and vacuum the dusty condenser coils that impact its efficiency. They will meticulously wash the baseboards throughout the house, erasing the scuffs and dust of an entire season. They will clean the sticky, greasy film from the tops of the kitchen cabinets and wash the light fixtures and ceiling fan blades that are just out of reach. They will scrub the soap scum and hard water stains from the shower doors until they are crystal clear. The result is a level of deep, foundational cleanliness that is difficult for a single person to achieve on their own without dedicating an entire weekend to the exhaustive task. The feeling of walking into a home that has been professionally cleaned is a unique and wonderful experience. The air feels lighter, every surface gleams, and there is a sense of order and freshness that permeates every room. It is a gift of environment, a transformation of her daily space into a place of true rest and relaxation. In an age where many people are actively trying to reduce the amount of “stuff” in their lives, an experiential gift is often far more meaningful than a physical one. A professional cleaning does not add to the

The Solution to Your Mother’s Day Gift Dilemma: A Professional Clean Read More »

Refrigerator

Refrigerator Cleaning: The Professional Way to Clean a Refrigerator

The refrigerator is the undisputed workhorse of the modern kitchen. It runs silently and constantly, twenty-four hours a day, a cold, quiet sentinel preserving our food and serving as the central hub for daily meals. Yet, for all its importance, it is often one of the most profoundly neglected areas when it comes to deep cleaning. We dutifully wipe up the occasional spill and dispose of expired items, but a true refrigerator reset is a far more comprehensive and restorative process. Over time, the interior becomes a landscape of sticky but invisible drips from jar rings, a fine layer of crumbs in every crevice, and a crowded collection of forgotten condiments and containers. This is not just a matter of aesthetics; a dirty refrigerator can harbor odor-causing bacteria, facilitate the cross-contamination of fresh foods, and even run less efficiently, wasting energy and money. A thorough, methodical deep clean is a vital act of kitchen hygiene, a reset that ensures your food is being stored in a pristine, safe, and well-organized environment. Emptying The first and most critical phase of this operation is the complete and total empty-out. This is a non-negotiable step that sets the stage for everything to come. You cannot truly see the state of your refrigerator or clean it effectively with items still inside. Before you begin, prepare a temporary holding area for your food. A large cooler with a few ice packs is ideal for perishables like meat and dairy. As you remove every single item from the refrigerator and freezer, place it on your countertops and begin the essential process of sorting. This is your opportunity to perform a full food audit. Inspect every jar, container, and package. Discard anything that is past its expiration date, anything that shows signs of spoilage, or that forgotten container of leftovers that has become a science experiment. Be honest about the condiments you will never use again and the freezer-burned items that have lost their flavor and texture. This initial purge is deeply satisfying, clearing out the clutter and ensuring that only fresh, usable food will return to your clean refrigerator. With the refrigerator now completely empty, unplug it from the wall. This is a crucial safety step before introducing any water into an electrical appliance, but it also serves a practical purpose. It allows the appliance to come to room temperature, which is important for the next step. Now, begin to deconstruct the interior. Carefully remove all the removable components: the shelves, the crisper drawers, the door bins, and any other detachable organizers. These pieces are often made of plastic or tempered glass and can be very cold from the refrigerator’s operating temperature. It is essential that you let them sit on the counter and come to room temperature for at least thirty minutes before washing them. Plunging a frigid glass shelf into a sink of hot water will cause it to contract and expand at different rates, creating immense stress that can cause it to crack from thermal shock. Patience in this step will save you from a costly replacement. Vinegar  While the components are warming up, turn your attention to the now-empty interior shell of the refrigerator. This is where you will confront the sticky rings left by jars, the fine layer of crumbs that has accumulated in the corners, and any other spills that have gone unnoticed. The best cleaning solution for this area is a simple, food-safe one. A mixture of equal parts plain white vinegar and warm water in a spray bottle is perfect. The vinegar is a natural disinfectant and is excellent at cutting through sticky residues without leaving behind any harmful chemicals. Alternatively, a simple solution of warm water and a few drops of mild dish soap will also work well. Beginning from the top and working your way down, spray the entire interior surface with your cleaning solution. Let it sit for a few minutes to allow it to dissolve any hardened spills. Then, using a soft microfiber cloth, wipe down every single surface: the top, the bottom, the sides, and the back wall. Pay special attention to the small channels and grooves molded into the liner, which are designed to catch spills but also trap grime. An old toothbrush is the perfect tool for getting into these tight spots. Once clean, wipe the entire interior down again with a cloth dampened with plain water to rinse away any cleaning residue, and finally, dry it completely with a clean, dry cloth. Now, turn your attention to the shelves and drawers that have been warming on your counter. Take them to the sink and wash them thoroughly with warm, soapy water, just as you would wash your dishes. Use a non-abrasive sponge to scrub away any sticky spots or grime. For stubborn, caked-on messes, let the piece soak for a while before scrubbing. Rinse every component meticulously with warm water and, most importantly, allow them to air dry completely or dry them by hand with a clean towel. Reinstalling a shelf or drawer while it is still damp can trap moisture in unseen areas, leading to mildew or unpleasant odors. Exterior With the interior pristine, it is time to address the exterior. For a stainless steel refrigerator, the key to a streak-free finish is to use the right tools and technique. A microfiber cloth is essential. You can use your vinegar and water solution or a specialized stainless steel cleaner. Always spray the cleaner onto the cloth, not directly onto the appliance. The most critical tip is to wipe in the direction of the metal’s grain. Look closely at the surface and you will see fine, parallel lines; following these lines will prevent microscopic scratches and ensure a uniform, gleaming finish. Once clean, use a second, dry microfiber cloth to buff the surface. Pay special attention to the door handles and the water/ice dispenser area. These are the highest-touch surfaces and should be thoroughly disinfected. The next step is

Refrigerator Cleaning: The Professional Way to Clean a Refrigerator Read More »