Bathroom Cleaning

Bathroom Cleaning

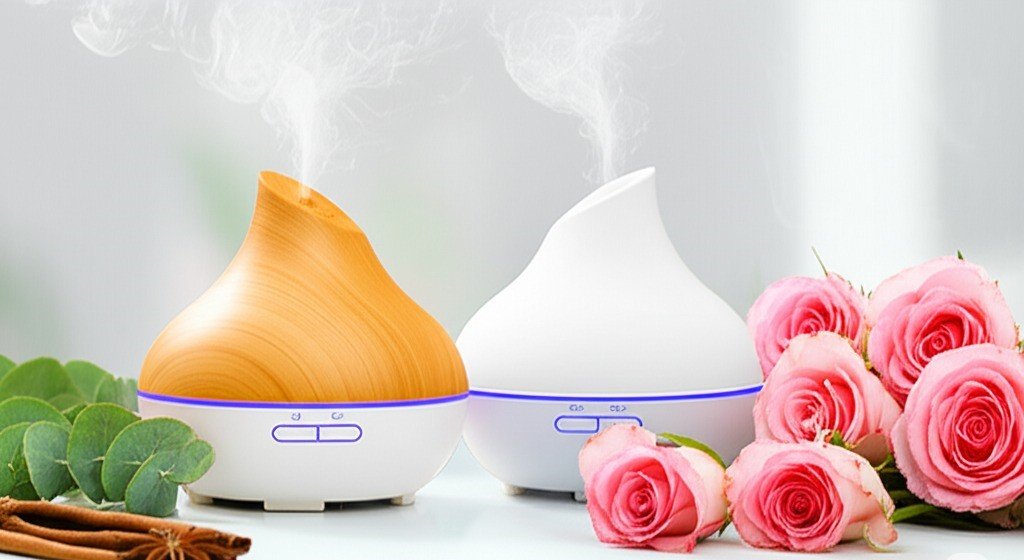
oil diffusers and flowers

6 Expert Tips For Getting Rid Of Odors In Your Home

6 Expert Tips For Getting Rid Of Odors In Your Home A fresh-smelling home is more than a pleasure: it signals cleanliness, comfort, and care to everyone who walks through the door. The secret is not masking smells with sprays but removing their causes and keeping the air moving. Most odors start with something simple, a bin of food scraps, a damp towel, a litter box, or a pile of laundry, and they build when those sources are neglected. These six expert tips give you a complete system for getting rid of odors at the source, refreshing the air, and keeping your home consistently welcoming. Tip 1: Eliminate Odor Sources Before Adding Fragrance Fragrance cannot fix a home that has not been cleaned, so start by removing whatever creates the smell. Empty kitchen waste bins daily, especially when they hold food scraps, and wash the bins periodically. Deal with spills on countertops, stovetops, and floors immediately, because decomposing food particles are prime odor culprits. Flush and clean kitchen and bathroom sink drains regularly so trapped debris does not ferment, and keep bathroom moisture in check by running the vent fan and letting towels dry completely between uses. Think of this as creating a clean slate before adding anything good; Health Canada’s information on indoor air contaminants explains what can build up in household air. Tip 2: Ventilate Daily to Swap Stale Air for Fresh Clean homes still smell stale if the air never changes, so make ventilation a daily habit. Open windows whenever the weather allows, even briefly, to exchange odor-laden indoor air for fresh outdoor air. Cooking smells, household stuffiness, and fine airborne particles all dissipate faster with a real air current, so open windows on facing sides of a room or across the house to create a steady flow. Bathrooms and kitchens benefit most, since they generate moisture and odors, but every room deserves regular airing. Tip 3: Refresh Fabrics That Trap Household Smells Carpets, upholstered furniture, curtains, bedding, and clothing act like sponges for cooking smells, pet odors, and everyday life. Vacuum carpets and upholstery regularly to lift odor-carrying particles along with visible dirt, and launder bed linens frequently. Do not let dirty laundry pile up, especially damp towels and sportswear, and dry everything fully before storage, since damp fabric breeds mildew. For deeper odors in carpets or large upholstered pieces, schedule a professional steam cleaning once or twice a year, or use a fabric refresher, preferably a natural or unscented formula, to neutralize trapped smells rather than cover them. Tip 4: Target the Hotspots That Breed Odors Some zones generate smells continuously and need dedicated attention. Pet areas top the list: groom animals regularly, wash their bedding often, scoop litter boxes daily, change the litter on schedule, and treat accidents immediately with an enzymatic cleaner that breaks down the odor-causing proteins. High-moisture areas are next: bathrooms, poorly ventilated laundry rooms, and basements stay musty without good airflow, so ventilate them, repair leaks promptly, and run a dehumidifier if needed; the CDC’s mould health and cleanup guidance explains why dry air is healthier air. The refrigerator belongs on the list too: clear out old food and wipe the interior so it never becomes a hidden odor source. Kitchen bin and recycling: empty daily, wash weekly Sink drains: flush with hot water weekly Pet bedding and litter box: wash and scoop on schedule Bathroom towels and mats: wash often, dry fully Refrigerator: clear expired food and wipe shelves weekly Tip 5: Add Subtle Natural Fragrances as a Finishing Layer Once the sources are gone and the air moves freely, a light natural fragrance makes a home feel finished: a delicate layer of scent that complements genuine cleanliness. Place fresh flowers or a bowl of citrus in living areas, or simmer a pot of water with cinnamon sticks, cloves, and citrus peels for a gentle perfume during cooler months. Essential oil diffusers with quality oils such as lavender, citrus, or eucalyptus let you customize each room’s scent, and candles made from natural waxes scented with essential oils work well when burned safely with adequate ventilation. Tip 6: Lock In Freshness With Maintenance Habits The final tip ties everything together: consistency beats occasional marathons. Small daily habits stop odors before they start: wipe kitchen counters after every meal, sweep or vacuum high-traffic kitchen floors, keep the sink free of dirty dishes overnight, and give the bathroom sink a quick clean each evening. Weekly, vacuum and dust every room, change bed linens, clean bathroom fixtures thoroughly, and mop floors. Breaking the work into manageable pieces prevents buildup and beats a draining once-a-month marathon. These habits become the backbone of a home that smells as fresh as it looks. Area Daily habit Weekly habit Kitchen Wipe counters, clear the sink, empty food scraps Wash the bin, flush drains, wipe the fridge shelves Bathroom Quick sink wipe, hang towels to dry fully Scrub fixtures, wash towels and bath mats Floors and carpets Sweep or vacuum high-traffic areas Vacuum all rooms, mop hard floors Bedding and laundry Never leave damp clothes piled up Change linens, launder and dry everything fully Pet zones Scoop litter, spot-clean accidents Wash bedding, refresh the litter box Frequently Asked Questions About Household Odors Why does my home smell musty even though I clean it? Musty smells usually come from moisture: check for damp towels, poor ventilation, leaky pipes, or humid basements, since reducing humidity is the real cure for mildew odors. Do air fresheners actually remove odors? Most only mask them; lasting freshness requires removing the odor source first, then using natural scents or ventilating to keep the air genuinely clean. How can I get pet odors out of my carpet? Treat fresh accidents with an enzymatic cleaner, vacuum regularly, sprinkle baking soda before vacuuming for ongoing freshness, and steam clean carpets once or twice a year. How often should I wash bedding to keep bedrooms fresh? Weekly washing of sheets and pillowcases removes the body oils, skin

6 Expert Tips For Getting Rid Of Odors In Your Home Read More »
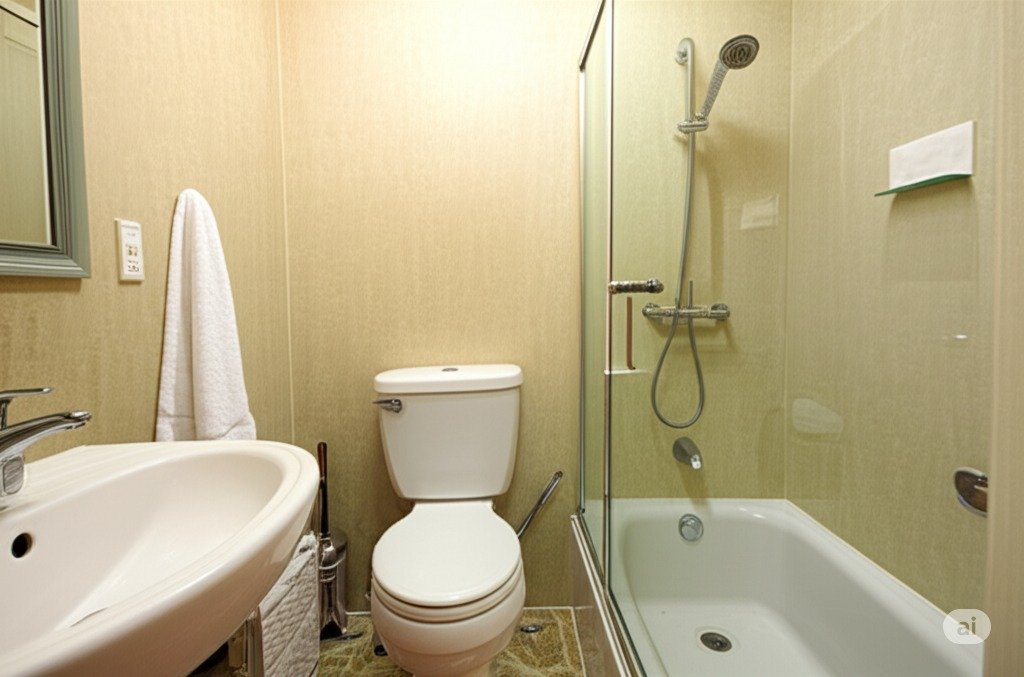
5 Bathroom Cleaning Tips Every Toronto Home Should Follow

5 Bathroom Cleaning Tips Every Toronto Home Should Follow A truly clean bathroom is more than surface shine. It is deep hygiene, fresh air, and the quiet confidence that the most hardworking room in the house is properly cared for. These five stages take a bathroom from wiped down to genuinely serene, and they work for every Toronto bathroom from a downtown condo ensuite to a family home’s main bath. Assemble the kit once and all five stages get faster: Toilet bowl cleaner and a dedicated toilet brush A soap-scum formula cleaner and non-abrasive sponges A grout brush or an old toothbrush Cream cleanser, glass cleaner, and lint-free microfiber cloths pH-neutral floor cleaner and a well-wrung mop Tip 1: Conquer the Commode with Diligence Start where hygiene matters most. Apply a quality toilet bowl cleaner so it reaches under the rim and coats the surfaces as it flows down, and give it a few minutes to dissolve the buildup you cannot see. Scrub the entire interior with a dedicated toilet brush, reaching every curve. Then do the part most cleanings skip: the exterior. Wipe the tank, the lid, both sides of the seat including the often-forgotten underside, the pedestal, and the floor around the base with a disinfectant cleaner. That full-fixture approach is the difference between a toilet that looks clean and one that is hygienically sound. Tip 2: Win the Battle Against Soap Scum in the Bath and Shower The shower fights a constant war against soap scum, hard water stains, and, in damp conditions, the early stages of mildew. Choose a bathroom cleaner formulated to dissolve exactly those three, apply it to every surface, whether the walls are tile, fiberglass, or acrylic, along with the shower door or curtain, and let it sit for a few minutes so it can actually loosen the grime. Scrub with a non-abrasive sponge, and give the grout lines a dedicated pass with a grout brush or an old toothbrush; grout is where mildew claims its first territory. Polish the showerhead, taps, and drain cover last to remove water spots and mineral buildup. For a bathtub, same principles with special attention to the waterline where residue collects. Tip 3: Make the Vanity and Mirror Sparkle The sink basin collects toothpaste splatter and water spots at remarkable speed. A gentle cream cleanser or a versatile spray cleaner handles it, including the drain area where debris accumulates. Wipe and polish the faucets and handles, touched dozens of times a day, until they shine without fingerprints. Clear the countertops of product residue, then finish with the mirror: quality glass cleaner and a lint-free microfiber cloth in overlapping strokes for the streak-free finish that instantly makes the whole room feel brighter and larger. Thirty seconds of countertop tidying completes the calm, orderly look. Tip 4: Treat the Floor as a System Floors collect stray hairs, splash dust, and debris, so remove the loose material before any wet cleaning: sweep with a soft broom or vacuum with an attachment along the baseboards and around the toilet and vanity. Then mop with a pH-neutral floor cleaner diluted per the manufacturer’s instructions, safe for ceramic tile, vinyl, or linoleum alike. Wring the mop well, since over-saturating the floor is hard on unsealed grout. Work the edges of the room, the lip under the vanity if accessible, and carefully around the toilet base, the spots that make the difference between mopped and actually clean. Tip 5: Finish with Freshness That Lasts The details after the cleaning determine how long it lasts. Run the extractor fan during and after every shower to pull humidity down, which starves mildew and musty odors before they start; Health Canada’s humidity and mould guidance treats ventilation as the front line of bathroom health. Empty the bin before it overflows, wipe the light switches and door handles that every family member touches, and skip the overpowering artificial fragrances in favor of simply fresh air. A bathroom that smells like nothing is the one that feels genuinely clean. Stage Focus Key Tool Toilet Bowl interior plus full exterior and floor Toilet brush and disinfectant Bath and shower Soap scum, hard water, grout lines Non-abrasive sponge, grout brush Vanity and mirror Basin, faucets, streak-free glass Cream cleanser, microfiber cloth Floor Dry removal first, then a damp mop pH-neutral cleaner, well-wrung mop Finishing Ventilation, touchpoints, fresh air Extractor fan and a damp cloth Bathroom Cleaning FAQs How often should a bathroom be deep cleaned? A light weekly routine covering toilet, sink, and mirror keeps a bathroom presentable, with a full five-stage session monthly. Large households, or bathrooms with poor ventilation, deserve the deep session every two weeks. What removes soap scum without scratching? A cleaner formulated for soap scum, given dwell time, plus a non-abrasive sponge. Never reach for abrasive powders or pads on acrylic, fiberglass, or glossy tile, because the scratches they leave then hold grime and scum returns faster. How do I stop mildew from coming back? Ventilation first: run the fan during showers and for a while after, and leave the door open when possible. Keep a small squeegee by the shower for a ten second glass wipe, and treat grout lines with a mildew remover at the first dark speck. Where bleach-based products are part of the plan, follow the label carefully; the CDC’s bleach safety guidance covers ventilation and the combinations to avoid. Is professional bathroom cleaning worth it? For the deep session, absolutely: pros bring grout brushes, proper disinfectants, and the routine to keep mildew permanently behind. Many Toronto homes pair a monthly deep clean with their own weekly touch-ups and get the best of both. Your Bathroom Sanctuary, Maintained Toronto Shine Cleaning’s deep cleaning service delivers all five stages in one visit, and recurring housekeeping keeps the sparkle between deep cleans. A regular studio or one bedroom clean starts at $212.63 before HST, with every option on the pricing page. Call (647) 424-0355 and let the bathroom become the easiest room to

5 Bathroom Cleaning Tips Every Toronto Home Should Follow Read More »

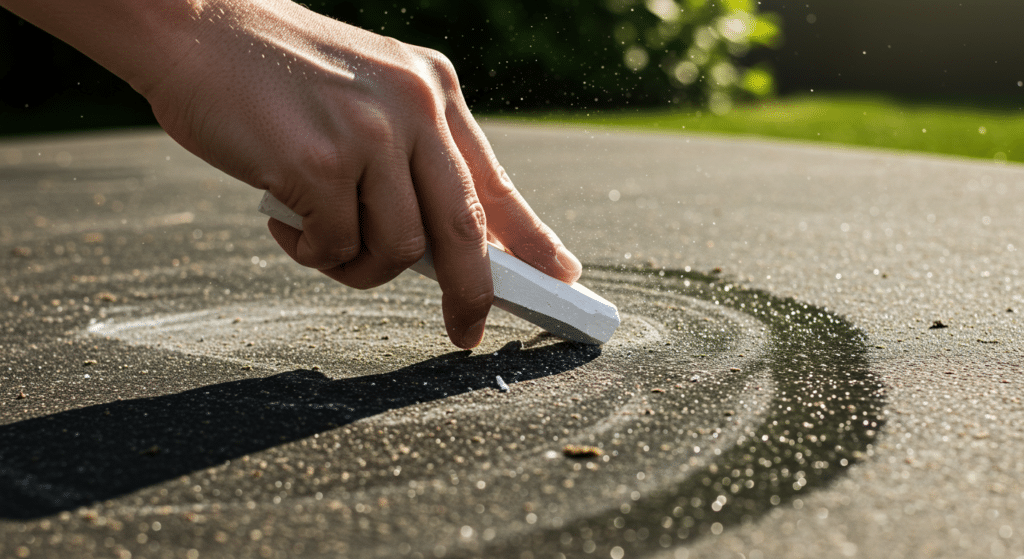
Cleaning while using chalk

Cleaning with Chalk: 6 Ways a Plain Stick Fights Grease, Odor and Rust

Cleaning with Chalk: Six Ways a Plain Stick Fights Grease, Odor and Rust Almost nobody lists chalk among their cleaning supplies, which is why its quiet usefulness gets overlooked. Chalk is dry and porous, so it draws oil and moisture out of fabric, air and metal instead of smearing them around. A box costs a couple of dollars, it carries no harsh solvent, and it needs no equipment at all. Below are six jobs worth handing to a stick of chalk, followed by the questions our readers raise most often. 1. Pull Grease Out of Clothing and Upholstery When salad dressing or cooking oil lands on a shirt, resist the urge to blot with a wet cloth and reach for plain white chalk instead. Rub the stick lightly across the mark, then leave the powder in place for a few minutes so it can draw the oil outward. Brush the dust away with a dry rag and launder the garment as usual. Keep water away until the chalk has finished working, because moisture drives grease deeper into the weave and turns a simple mark into a permanent shadow. The same trick suits napkins, canvas totes, cushion covers and table linens. 2. Dry Out a Damp, Smelly Closet A closet that smells musty usually has more humidity than airflow. Tie three or four chalk sticks inside an old sock or mesh produce bag, then hang the bundle from the rod. The chalk pulls moisture out of the surrounding air, which starves the mildew behind the odor. Expect a difference within a few days. Replace the bundle each month and add smaller ones to dresser drawers, bathroom cabinets and linen shelves. Nothing leaks, nothing drips and no perfume competes with the smell, so the space simply starts reading neutral again. 3. Slow Down Tarnish on Silver Silver darkens when airborne moisture and sulfur reach the metal. A few sticks tucked into a jewellery box or the silverware drawer soak up that moisture and stall the reaction. This is prevention rather than polishing, so no scrubbing is involved, and less upkeep is needed when the good cutlery comes out for a dinner. Broken pieces work perfectly well. Keep them in a shallow open dish with a little clearance so chalk dust does not settle directly on the jewellery. 4. Erase Fingerprints and Smudges from Painted Walls Handprints around light switches and stair rails are usually skin oil, not dirt. Rub white chalk over the mark and wipe the area with a soft dry cloth. The powder grips the oil and carries it off the paint instead of pushing it deeper. This approach shines on flat or matte finishes, the very surfaces that streak the moment a wet sponge touches them. Test an inconspicuous corner first, and remember that fresh smudges respond far better than old, ground-in ones. 5. Keep Tools Free of Rust Rust appears wherever humid air meets bare steel, so garages, basements and unheated sheds are prime candidates. Drop several chalk sticks into the corners of a toolbox or the drawer under a workbench. The chalk acts as a small moisture sponge and cuts the dampness that feeds corrosion. Swap the sticks monthly in a humid space and every two months in a dry one. Tools stay ready to use, and the orange film that ruins a good wrench never gets started. 6. Fade Ring Marks on Wood and Scuffs on Paint A glass left on a coffee table, a chair leg dragged across a wall or a coloured scuff on a baseboard often responds to the same treatment. Rubbing chalk over the mark lifts the surface oils or pigment that create the discolouration, and a dry wipe finishes the job. Rings that have soaked into unfinished wood need more than this, but as a first step it risks nothing. Keep a short stick in the living room for touch-ups before guests arrive. Quick Reference: Where Chalk Earns Its Place Fresh grease or oil marks on cotton, denim and canvas. Musty closets, drawers, cabinets and linen cupboards. Silverware and jewellery stored for long stretches. Fingerprints and light scuffs on flat or matte paint. Toolboxes and any steel kept in damp air. Water rings and furniture scuffs on finished wood. Stick to white chalk. Coloured sticks carry pigment that can transfer onto pale paint or light fabric, undoing the work you just did. If a mark survives, wash the surface properly and wash your hands afterwards, as the CDC hand hygiene guidance recommends after handling soiled cloths and greasy rags. When to Hand the Big Jobs to a Professional Team Chalk handles small, fresh marks well, but it cannot replace a proper clean. Kitchens, bathrooms, floors and appliances need real products and equipment, and the routine work adds up fast. Toronto Shine Cleaning serves homes, condos and offices across the GTA, and regular visits start at $212.63 for a studio or one bedroom, $273 for two bedrooms and $327 for three, all before HST, with current rates listed on the pricing page. A first deep cleaning runs $270.38 for a studio or one bedroom and $393.75 for two, and a move-in or move-out clean starts at $242.63. The crew is bonded and insured, holds $1,000,000 in liability coverage plus a $10,000 accidental breakage and surety bond, and books appointments at (647) 424-0355. Frequently Asked Questions Does chalk really lift grease stains? It does when the stain is fresh. Chalk is a dry absorbent, so pressing it onto oil pulls some of the grease free before it bonds with the fibers. Leave the powder a few minutes, brush it off, then wash the item normally. Old stains that have already set usually need a proper pre-treatment. Which chalk should I avoid? Use plain white chalk with no added colour or scent. Sidewalk chalk and coloured sticks contain pigments that can leave new marks on fabric or light paint. Blackboard chalk and cheap school chalk are both fine, and broken pieces work just

Cleaning with Chalk: 6 Ways a Plain Stick Fights Grease, Odor and Rust Read More »

Hand painted image about Leslieville

Deep Cleaning Services in Leslieville, We Do It Right!

Deep Cleaning Services in Leslieville for a Spotless Home Leslieville is one of Toronto’s most vibrant neighborhoods, with its trendy cafes, historic homes, and lively community spirit. But busy city life can make it hard to keep your home truly clean. That is where professional deep cleaning services in Leslieville come in. Toronto Shine Cleaning specializes in transforming your living space by tackling the embedded dirt, dust, and grime that accumulate over time. Whether you need a one-time refresh or ongoing care, our team delivers results that last. Our bonded and insured professionals bring over a million dollars in insurance coverage and a ten thousand dollar accidental breakage surety bond, so your home is in safe hands. Why Choose Professional Deep Cleaning in Leslieville? Standard cleaning keeps surfaces tidy, but deep cleaning reaches the hidden spots that collect grime. Our trained professionals go beyond surface-level dusting to scrub, sanitize, and restore every corner of your home. Here is why Leslieville residents trust us: Experienced Professionals — Our skilled cleaners know how to handle even the most stubborn messes safely and effectively. Eco-Friendly Products — We use non-toxic cleaning supplies that are safe for your family and the environment. For guidance on safe household cleaning, the Government of Canada offers tips on using household products safely. Customizable Service — Need extra attention on a specific area? We tailor every cleaning to your needs. Satisfaction Guaranteed — We do not leave until the job is done right and you are happy with the result. What Our Deep Cleaning Service Covers Our deep cleaning service covers every inch of your home, focusing on areas often missed in routine cleaning. Proper cleaning and disinfecting of high-touch surfaces is key to a healthy home, and the CDC recommends a clean-first approach followed by disinfection when needed. Area What We Clean Kitchen Countertops, backsplash, sinks, stovetops, oven, microwave, refrigerator shelves, cabinets, and drawers Bathroom Toilets, tubs, showers, tiles, grout, sinks, mirrors, and high-touch surfaces like light switches and doorknobs Living Areas & Bedrooms Furniture dusting, vacuuming under furniture, window washing, upholstery and mattress vacuuming, floor mopping Floors & Carpets Carpet vacuuming, stain treatment, hardwood and tile mopping, high-traffic area care Dust & Cobwebs Baseboards, vents, ceiling fans, door frames, window sills, and cobweb removal Benefits of Regular Deep Cleaning Investing in professional deep cleaning services in Leslieville pays off in several ways: Healthier Home — Deep cleaning removes allergens, bacteria, and dust mites, significantly improving indoor air quality for your family. This is especially valuable for households with children, seniors, or pets who are more sensitive to airborne irritants. The Health Canada offers guidance on indoor air contaminants to help families breathe easier at home. Extends Longevity — Regular deep care preserves floors, furniture, and appliances, saving money on repairs and replacements. When you protect your investment in your home, every cleaning session adds years to your furnishings and finishes. Stress-Free Living — A thoroughly clean home promotes relaxation and peace of mind without the hassle of doing it yourself. Coming home to a sparkling space after a long day makes a real difference in your quality of life. Ready for Any Occasion — Hosting guests or preparing to sell? A deep clean ensures your home looks its absolute best and makes a lasting impression on visitors or potential buyers. How Often Should You Book a Deep Clean? For most homes, scheduling a deep clean every three to six months keeps things fresh. Households with pets, allergy sufferers, or young children may benefit from more frequent service. We also offer regular maid cleaning to maintain your home between deep sessions, keeping surfaces tidy and clutter under control. If you are moving in or out, our move-in/out cleaning ensures a completely fresh start in your new space. Who Needs Deep Cleaning in Leslieville? Our deep cleaning services in Leslieville are perfect for busy professionals who lack time for thorough cleaning, families with kids and pets who need extra help managing fur and spills, homeowners preparing to sell who want a spotless impression, new homeowners and renters starting fresh, and anyone recovering from a renovation who needs construction dust removed. No matter your situation, we customize our approach to match your home and your schedule. Frequently Asked Questions How is deep cleaning different from regular cleaning? Deep cleaning reaches areas that standard cleaning skips, such as inside appliances, behind furniture, baseboards, and grout. It is a more thorough, detail-oriented service that restores rather than maintains. Do I need to be home during the cleaning? Not at all. Many clients provide access instructions and return to a spotless home. Our team is bonded and insured for your complete peace of mind. What products do you use? We use eco-friendly, non-toxic cleaning products that are safe for children, pets, and anyone with sensitivities. Let us know if you have specific requirements and we will accommodate them. Can I add extra services to my deep clean? Yes. Our services are fully customizable. Whether you need oven cleaning, window washing, or carpet treatment, we can tailor every visit to your needs. How do I get a quote for deep cleaning in Leslieville? Call us at (647) 424-0355 or visit our pricing page for transparent rates. We serve Leslieville and all of Toronto. Ready to give your home the deep clean it deserves? Contact Toronto Shine Cleaning at (647) 424-0355 to book your appointment today. You can also find your location to confirm we serve your area and read what our customers say on our reviews page.

Deep Cleaning Services in Leslieville, We Do It Right! Read More »

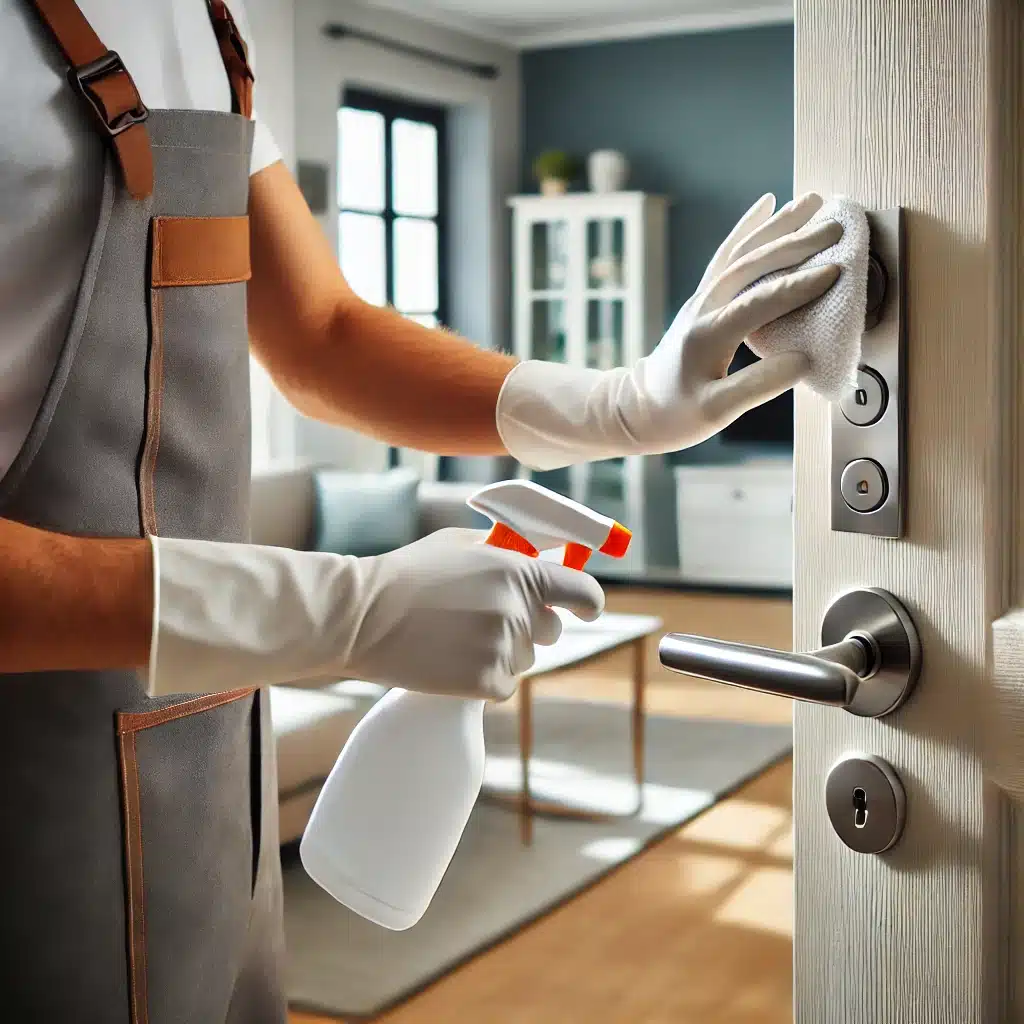
High-traffic area on doorknob being cleaned

Germ Hotspots in Your Home and How to Clean Them

Germ Hotspots in Your Home and How to Clean Them A house can look spotless and still be the reason everyone keeps catching colds. The surfaces that carry the most microbes are rarely the ones you notice, because they are touched dozens of times a day and almost never wiped. Below are the seven worst offenders, what tends to live on each one, and a cleaning routine that is realistic enough to actually keep up with. 1. Kitchen Sponge and Sink Drain A sponge stays damp, holds food residue and sits in the warmest room in the house, which is close to ideal conditions for bacteria. The sink is no better: the area around the drain and the tap handle collect whatever came off raw meat and vegetables. Replace sponges every one to two weeks, and sanitize the one you are using by microwaving it damp for one to two minutes or running it through the dishwasher. Wash the sink basin with hot soapy water or a disinfectant daily, and keep separate sponges for dishes, counters and the floor. 2. Doorknobs, Handles and Light Switches Every hand in the household touches the same door handles, cabinet pulls and switches, often within minutes of coughing or handling food. Viruses can survive on hard surfaces for hours and sometimes days. Wipe these points with a disinfectant wipe or spray daily, giving extra attention to bathroom and kitchen switches. Cleaning first with a microfiber cloth removes the film that stops disinfectant from working, so do that step before you spray. Anyone in the house who washes their hands more often, following the CDC hand hygiene guidance, reduces how much lands on these surfaces to begin with. 3. Remote Controls, Phones and Game Controllers Remotes and phones travel from the kitchen table to the couch to the bedroom, and they rarely get cleaned. Phones often carry more bacteria than a toilet seat. Wipe remotes and controllers with a disinfectant wipe daily, working into the seams where crumbs collect. For phones and tablets, use a microfiber cloth barely dampened with isopropyl alcohol, since too much liquid can damage screens and ports. 4. Toothbrush Holders and Faucet Handles Bathrooms stay humid, and that is all the encouragement bacteria need. Toothbrush holders pool water at the bottom, while faucet handles are touched before and after every handwash. Rinse the holder out and wash it in hot soapy water weekly, and store brushes upright so they dry between uses. Replace toothbrushes every few months. Disinfect faucet handles daily with a spray or wipe, especially in a shared bathroom where several people use the same tap. For dilution ratios on stronger products, see the CDC page on cleaning and disinfecting with bleach. 5. Pillows, Mattresses and Bedding Beds collect sweat, skin cells and dust mites, which is a problem for anyone with allergies or asthma. Wash sheets and pillowcases weekly in hot water, add a mattress protector that can be washed, and vacuum the mattress surface monthly before airing it out. Dust mites struggle in dry, cool air, so ventilate the bedroom. Pillows should be replaced every one to two years, or washed every few months if the care label allows it. 6. Fridge Handles and Drawer Pulls The refrigerator handle is touched constantly, usually on the way to or from raw ingredients. Cabinet pulls and drawer fronts in the kitchen and bathroom collect the same traffic. Wipe the fridge handle daily with disinfectant, and clean the outside of drawers and cabinets weekly. Empty and wash drawers once a month so crumbs and grease do not build up in the corners. 7. Pet Bowls and Toys Pet bowls, especially the water bowl, develop a slippery film of bacteria and yeast within a day. Wash food and water bowls daily in hot soapy water, and sanitize rubber or plastic toys weekly by soaking them in a diluted vinegar solution or washing them with mild soap. Throw out anything cracked, chewed through or mouldy, since scratches cannot be cleaned properly. Which Spots to Hit Daily, Weekly and Monthly Frequency Surfaces Daily Sponges, sink, fridge handle, doorknobs, switches, remotes, faucet handles, pet bowls Weekly Toothbrush holder, pet toys, drawer fronts, sheets and pillowcases, bath mats and towels Monthly Inside kitchen drawers, mattress vacuuming, airing pillows, deep clean of grout and shower seals A short daily pass over high-touch points is the single most effective habit here, and it takes about five minutes. Cleaning first and disinfecting second matters, since disinfectant cannot reach a surface that is still greasy or dusty, as the CDC explains in its guidance on when and how to clean and disinfect your home. Tools Worth Keeping Handy Disinfectant spray or wipes with a registered claim Microfiber cloths for removing soil before you disinfect Hydrogen peroxide in a spray bottle Hot soapy water and a sponge kept for sinks only Get Help With the Areas You Skip Kitchen and bathroom grime builds in exactly the places a weekly tidy-up misses. A deep cleaning targets appliances, grout, vents and the hidden edges where microbes gather, while a regular maid service keeps high-touch surfaces on a consistent schedule. Deep cleans start at $270.38 and regular cleaning at $212.63 for a studio or one bedroom before HST, with all rates listed on the pricing page. Toronto Shine Cleaning is bonded and insured with a $1,000,000 policy and a $10,000 accidental breakage and surety bond, and reviews from local clients are collected on the reviews page. Call (647) 424-0355 to book, or visit 140 Yonge St Suite 285, Toronto ON M5C 1X6. FAQ: Cleaning Germ Hotspots How often should I disinfect high-touch surfaces? Once a day is enough for most households, and more often when someone in the house is sick. Clean the surface first to remove grease and dust, then apply disinfectant and leave it wet for the contact time printed on the label. Can vinegar replace disinfectant? Vinegar is a useful cleaner for light mineral film and odours, but it

Germ Hotspots in Your Home and How to Clean Them Read More »

Blank paper and pen with apple at side

February Cleaning Checklist: Keep Your Home Fresh

February Cleaning Checklist: Keep Your Home Fresh This Winter Midwinter in Toronto means boots full of salt, windows that stay shut, and indoor air carrying more dust and germs than usual. A focused February cleaning checklist keeps your home cozy, healthy, and organized while you wait out the cold. The tasks below tackle the dirt winter drags in, refresh the soft surfaces that trap odors, and set you up for an easier spring clean. Deep Clean Entryways and High-Traffic Areas Entryways, hallways, and living rooms take the hardest hit in winter because snow, slush, and road salt get tracked straight onto them. Vacuum carpets thoroughly with a HEPA-filter vacuum to pull out trapped dirt, allergens, and pet dander without releasing fine particles back into the air. On hardwood or tile, mop with a gentle but effective cleaner to lift grime without dulling the finish. Baseboards and corners gather dust and debris quickly, so wipe baseboards with a damp microfiber cloth and use a melamine sponge on scuff marks. Move furniture and clean underneath it, where dust accumulates unnoticed. At the front door, lay down a heavy-duty mat, ask family members to remove their shoes on arrival, and keep a shoe rack or storage bench nearby so wet footwear never travels past the entry. Dust and Disinfect High-Touch Surfaces Germs thrive when a home stays closed up, so make disinfecting part of your February cleaning checklist. Wipe countertops, doorknobs, and light switches with a disinfectant spray or wipes, giving extra attention to kitchen surfaces where food is prepared. The CDC explains that cleaning with soap or detergent removes most germs from surfaces, so clean first and disinfect when it is truly needed: follow the CDC guidance on when and how to clean and disinfect your home. Dust weekly with a microfiber cloth or electrostatic duster so allergens never settle in. Cover ceiling fans, air vents, and window blinds, and check the surfaces that hide dust best, because Health Canada lists dust among the indoor air contaminants that affect health. Electronics such as remote controls, keyboards, and phones accumulate bacteria fast, so wipe them down with a disinfectant wipe on the same schedule. Refresh Bedding and Upholstery Couches, curtains, and mattresses hold dust and odors, and closed winter windows make mustiness worse. Vacuum upholstered furniture with an upholstery attachment, working into crevices and under cushions where crumbs collect. Pillowcases, sheets, and comforters deserve a weekly warm-water wash, which kills bacteria and dust mites, and dry bedding in sunlight when you can. Dust mites thrive in beds, carpets, and furniture, so regular washing keeps their numbers down, as explained on the Health Canada page about dust and dust mites. Rotate and flip your mattress every few months to spread wear evenly. Sprinkle baking soda over upholstery before vacuuming to neutralize odors, and switch to a pet-specific upholstery cleaner if dogs or cats share the furniture. Cut Kitchen Grease and Bathroom Grime Wipe cabinets and countertops with a grease-cutting cleaner, focusing on the area around the stove where splatters land. Warm water and mild dish soap handle everyday touch-ups without harsh residues. Clean the oven with a baking soda paste or commercial oven cleaner, let it sit for a few hours, then wipe it away with a damp cloth. Wash the stovetop, burner grates, and knobs so the whole kitchen looks spotless. Sort the pantry, discard expired items, and group similar products in bins or labeled jars to make meal prep faster and cut food waste. In the bathroom, run the exhaust fan or open a window after hot showers so mold cannot take hold. Scrub tile grout with a grout brush and baking soda paste, and switch to a hydrogen peroxide solution for stubborn discoloration. Clean mirrors with a streak-free glass cleaner, use a vinegar-free product on faucets and showerheads, and replace old sponges, shower liners, and towels. Declutter and Prepare for Spring Use the last weeks of winter to clear closets and plan the seasonal refresh: Sort items into keep, donate, and discard piles. Pack bulky winter coats and sweaters into vacuum-sealed storage bags to reclaim closet space. Organize the clothes you keep by type and color. List upcoming spring tasks such as washing windows and cleaning gutters. Tackling small decluttering jobs now means spring cleaning starts from a much lighter base, and the home stays organized year-round. February Cleaning at a Glance Task Frequency Best Tool Vacuum carpets and rugs Weekly, more often in high-traffic zones HEPA-filter vacuum Dust furniture, blinds, and vents Weekly Microfiber or electrostatic duster Wash bedding and pillowcases Weekly in warm water Warm-water laundry cycle Disinfect high-touch surfaces Several times a week Disinfectant spray or wipes Clean oven, stovetop, and grates Monthly Baking soda paste February Cleaning FAQ How often should bedding be washed during winter? In winter, wash sheets, pillowcases, and comforters every week in warm water so sweat, dust mites, and bacteria cannot build up while windows stay shut. Why do baseboards get so dirty in February? Winter air pushes dust and settled grime toward the floor, and baseboards sit right in that path, so they pick up a visible layer quickly; a damp microfiber wipe every week or two keeps them looking fresh. Is disinfecting necessary if everyone is healthy? Regular cleaning removes most germs from surfaces, but disinfecting high-touch points such as doorknobs and light switches several times a week lowers the odds of winter illnesses moving through the household. When should I book a professional deep clean? If grease, grime, or dust have built up faster than your weekly routine can manage, or before spring entertaining begins, a professional deep clean resets the entire home in one visit. Let Toronto Shine Cleaning Handle the Hard Part Following this February cleaning checklist keeps a home fresh through the cold, but thorough cleaning is time-consuming on a busy schedule. Toronto Shine Cleaning provides residential and commercial services, whether you need a one-time deep cleaning or ongoing regular maid service. Read our customer reviews

February Cleaning Checklist: Keep Your Home Fresh Read More »

Cold Weather Cleaning

Cold Weather Cleaning in 7 Days: A Toronto Winter Plan

Cold Weather Cleaning in 7 Days: A Toronto Winter Reset Salt stains, slush, and grit follow every pair of boots through a Toronto doorway between November and March. Because windows stay shut for months, dust and cooking odours keep recycling through the same indoor air. One planned week of cold weather cleaning solves both problems room by room without eating a whole weekend. Each day below stays short. If you would rather skip the work, call (647) 424-0355 and book a crew instead. Gather Your Supplies First Assemble everything before day one so you never stop mid-task to hunt for a cloth. A single caddy that travels with you from room to room saves more time than any one product. Microfibre cloths, plus a second set reserved for glass pH-neutral cleaner for sealed wood, stone, and laminate Vacuum with a crevice tool and an upholstery brush Bucket, mop, and a tray or rack for wet boots Labelled bins for donation, storage, and recycling The Week at a Glance Day Zone Main job 1 Entryway Salt control and boot storage 2 Living room Textiles, dusting, cable tidy 3 Kitchen Degrease, pantry, fridge audit 4 Bedroom Closet swap and under-bed dust 5 Bathroom Grout, fixtures, towel refresh 6 Home office Desk, cables, paper purge 7 Whole home Touch-ups and a new routine Day 1: Entryway and Mudroom The front hall absorbs the heaviest punishment, so begin there. Empty the closet, sort footwear into keep, donate, and store piles, then place a boot tray and a low rack near the threshold. Vacuum the corners, launder the mat, and mop tile with a solution that lifts dried salt film rather than dragging it around. A bench plus two hooks stops the pile from rebuilding itself by Saturday. Day 2: Living Room and Textiles Refresh every throw and cushion cover, then dust shelves from the top down so debris lands on a floor you have not vacuumed yet. Pull the sofa forward, run a crevice tool along its frame, and clip loose media cables together behind the television. Condensation on cold glass encourages mildew on sills, so wipe them dry with a barely damp cloth. Day 3: Kitchen Deep Pass Winter cooking throws far more grease onto cabinet fronts than a summer salad ever does. Degrease the doors, clear the counters, and lift every jar off the pantry shelf so expired items become obvious. Work through the refrigerator one shelf at a time, and wipe the door gasket, where crumbs break the seal and waste hydro. Cleaning the range hood filter delivers the most visible change for the least effort. Day 4: Bedroom Reset Trade light summer bedding for warmer layers and rotate the closet so knitwear sits at eye level. Dust beneath the bed and behind the headboard, since dry indoor air lets dust mites build up quickly. Rotate the mattress unless it is a pillow-top model, then wash everything that touches skin, including pillow protectors and the chair blanket. Day 5: Bathroom Scrub and Disinfect Cold and flu season turns this room into the priority rather than an afterthought. Work grout lines with a small brush, disinfect the toilet, taps, and light switches, and launder the bath mat and shower liner. A damp towel spreads odour, so hang fresh ones and wipe the exhaust fan grille. Hand hygiene after handling laundry matters here, and the CDC handwashing guidance covers the basics. Day 6: Home Office and Paper Trail A cluttered workspace quietly drains focus when daylight is short. Clear the desktop, wipe the keyboard and monitor with a dry microfibre cloth, and route cables through one channel so nothing tangles. Shred outdated paperwork, scan what you must keep, and file the rest into labelled folders before the stack returns in February. Day 7: Finishing Touches and Maintenance Carry a basket through the whole home and collect whatever drifted out of place during the week. Restock the caddy, schedule a five-minute daily reset for the kitchen and entry, and pencil in a monthly deeper pass for floors and appliances. Small consistent habits protect a winter home far better than one exhausting marathon. Keep the Air and Fabrics Fresh Indoors Sealed windows trap moisture along with dust, and a home that never airs out develops a stale smell that no spray can hide. Run the kitchen and bathroom fans longer than feels necessary, crack a window for ten minutes on a mild afternoon, and rotate area rugs so damp patches dry through instead of souring. Winter is also cold and flu season, so a habit of washing up at the kitchen and bathroom sinks pays off, and the CDC home cleaning and disinfecting guide explains which surfaces truly need disinfecting and which only need soap and water. When to Bring In a Professional Team Some winter jobs need more than a cloth and a free afternoon: salt-dulled hardwood, upholstery that swallowed months of grit, or a rental turning over mid-season. Toronto Shine Cleaning works across Toronto and the GTA, and a deep clean reaches baseboards, vents, grout, and appliance interiors that a weekly tidy misses. Rates begin at $212.63 before HST for a studio or one-bedroom, with two-bedroom homes from $273 and three-bedroom homes from $327 shown on the pricing page. Every cleaner is bonded and insured, backed by a $1,000,000 policy and a $10,000 accidental breakage and surety bond. Residents often pair that visit with regular cleaning through the rest of winter. Frequently Asked Questions How long should each day take? Allow 30 to 45 minutes for a one-bedroom condo and up to 90 minutes for a larger house. Set a timer so the task ends when the time does. Can I merge the seven days into one weekend? Yes, though four to six hours with real breaks is more realistic. Pairing days one and five in the same session works best because both involve wet floors. Which day matters most in a Toronto winter? Day one, because the entryway feeds dirt into

Cold Weather Cleaning in 7 Days: A Toronto Winter Plan Read More »

Wet shower tiles in bathroom

How to Keep Your Bathroom Mold-Free: Top 5 Tips

Five Habits That Keep a Bathroom Free of Mold No room in a house meets as much moisture as the bathroom, and mold always finds the wettest corner first. Spores settle into grout lines, lifted caulking, or the folds of a shower curtain, and by the time a patch is visible, lifting it takes real effort. Health Canada reports that households dealing with dampness and mold are more likely to experience health effects, which makes a short weekly routine worth far more than an occasional rescue scrub. The five habits below cover the whole job. One: Push the Moist Air Outdoors Humidity is what growth needs, so removing it is step one. Start the exhaust fan before the water runs and leave it going well after you towel off, so vapor travels outside rather than condensing on walls and tile. Where there is no fan, fitting one pays for itself in any bathroom that keeps regrowing patches. Leaving a window cracked or a door open a few inches does something similar on warmer days. Two: Put Tile, Grout, and Curtains on a Rotation Water clings to grout and tile, turning both into a nursery for spores. Scrub them on a fixed schedule with bleach thinned in water or a product made for mold, and slow down in corners and along the edges where growth hides. A curtain needs the same care: launder or swap it regularly, and if fabric is your preference, buy a machine-washable style and dry it thoroughly before hanging it back up. Four small jobs, done weekly, keep this manageable: Pull a squeegee down the walls and glass once a shower ends. Run a cloth over damp surfaces instead of leaving them to air dry. Scrub the tile and grout once each week. Wash or replace the curtain about once a month. Three: Deal With Leaks and Seals Quickly Any leak creates the damp environment spores need, and many leaks stay invisible for months. Watch for pooling around faucets, supply pipes, and the base of the toilet, and check the seals at the tub and sink. Caulking hardens, cracks, and lifts as it ages, opening a path for water to slip behind it, so replace it when a gap appears. Prompt repairs keep the room dry and stop small problems growing into expensive ones. Where daily upkeep does not fit your week, booking a regular maid cleaning keeps hard surfaces wiped and lets problems surface early. Four: Choose Materials That Resist Mold Products engineered to fight spores give a routine a head start. Bathroom paint contains antimicrobial additives that slow growth on walls and ceilings in moisture-exposed areas. Curtains sold as mold-resistant shed water and dry fast, and quick-drying bath mats stop water soaking into the floor. None of these buys replaces cleaning, but together they build a solid barrier. Five: Hold the Room Under 50 Percent Humidity Everything else rests on moisture control. Switch on a dehumidifier once a bath or shower is over, and read the room with a hygrometer rather than guessing, aiming to stay below 50 percent. Towels belong on a rack outside the bathroom, not bunched on a hook. Health Canada’s advice on mould and moisture lands in the same place: repair water problems without delay, then control humidity so growth never starts. The CDC material on mold and health makes a comparable point about damp indoor air. Mold Prevention Reference Job How often What it involves Squeegee and towel dry Each shower Clear standing water from walls, glass, and fittings Tile and grout scrub Weekly Bleach solution or mold cleaner worked into the joints Curtain wash Monthly Launder or replace, then dry completely Leak inspection Monthly Faucets, pipes, toilet base, and caulking checked for gaps Humidity reading After every bath Dehumidifier running, hygrometer kept below 50 percent When Professional Help Makes Sense Even careful households fall behind when work and family fill the calendar, and that is where a professional visit earns its place. Toronto Shine Cleaning’s deep cleaning service concentrates on the spots mold prefers, working through grout, corners, and fixtures so spores never gain a foothold. The same team covers routine visits and move-in and move-out cleaning, keeping the rest of the home at the same standard. Where growth has spread widely, Health Canada’s indoor air contaminants information points toward professional help instead of do-it-yourself scrubbing, and a thorough clean is the sensible first step. Handles, switches, and other high-touch points need a sequence when illness is in the house: clean the surface, then disinfect it, as set out in the CDC guide to cleaning and disinfecting a home. Questions About Bathroom Mold What schedule keeps a bathroom mold-free? Squeegee and dry wet surfaces after every shower, scrub tile and grout weekly, and launder or replace the curtain about once a month. Add a monthly look at caulking and pipes to catch the leaks that feed growth. Does bleach work on moldy grout? Thinned bleach is a widely used and effective option for tile and grout, and purpose-made mold cleaners perform well too. Try any product on a hidden patch first, and keep the room ventilated while you work. Which humidity level stops growth? Anything under 50 percent. A hygrometer shows live readings, and a dehumidifier run after every bath removes the moisture spores need before it can settle on surfaces. Can a cleaning service remove mold from my bathroom? Professional deep cleaning scrubs the areas growth prefers, including grout, corners, and fixtures, with the right products and technique. Where it has spread widely, Health Canada advises considering professional help beyond routine cleaning. Is an exhaust fan really necessary? It does more than any single item in the room. A fan pushes moist air outdoors, so humidity cannot rest on the surfaces where spores take hold, and running it during and after every shower costs almost nothing. Consistency does the work here: ventilate, clean on schedule, repair leaks fast, pick resistant materials, and watch the humidity. If you

How to Keep Your Bathroom Mold-Free: Top 5 Tips Read More »

Spotless modern bathroom with white tiles and clear mirror in Mississauga.

How to Easily Clean Your Bathroom in Mississauga: 6 Essential Tips

Why a Clean Bathroom in Mississauga Matters Cleaning your bathroom can feel like a chore, but with the right routine it is quick and manageable. Bathrooms face constant moisture, which leads to soap scum, hard water stains, and mildew if left unchecked. These six essential tips will help you keep your bathroom in Mississauga sparkling clean without spending hours scrubbing. For professional house cleaning in Mississauga, Toronto Shine Cleaning provides regular, deep, and move-in or move-out cleaning across Mississauga and the GTA. Six Essential Tips to Clean Your Bathroom in Mississauga Work in this order and the whole job becomes easier: supplies first, then the toilet, sink, mirror, shower, and floors. A clean bathroom also matters for health, since the CDC notes that regularly cleaning and disinfecting high-touch surfaces helps reduce the spread of germs. 1. Gather Your Cleaning Supplies Keep everything within arm’s reach before you begin: an all-purpose cleaner, a bathroom cleaner for tough buildup, glass cleaner for mirrors, microfiber cloths, a scrub brush, toilet cleaner and brush, and rubber gloves to protect your hands from harsh chemicals. 2. Start With the Toilet Apply toilet cleaner inside the bowl and let it soak while you clean the exterior. Wipe the tank, handle, seat, and base with a disinfectant wipe or a cloth dampened with cleaner, reaching into crevices and hinges that are often overlooked. Finish by scrubbing the bowl under the rim and at the water line, then flush to rinse everything away. 3. Tackle the Sink and Counter Spray an all-purpose or bathroom cleaner on the sink, faucet, and countertop. Scrub around the faucet and drain where buildup collects, and reach into the corners and edges. Then wipe everything with a microfiber cloth in a circular motion for a streak-free, spotless finish that leaves the whole vanity looking fresh. 4. Make the Mirror Sparkle Spray glass cleaner across the mirror and let it sit for a moment to break down fingerprints and grime. Wipe with a lint-free microfiber cloth in a circular motion, which prevents streaking. Pay extra attention to the edges and corners of the mirror, where dust and residue collect, for a truly immaculate finish. 5. Clean the Shower and Tub Spray bathroom cleaner on all shower and tub surfaces and let it sit for a few minutes to soften soap scum, mildew, and hard water stains. Scrub grout lines, corners, and the base of the tub with a brush, then rinse everything with warm water. For glass shower doors, use the same glass cleaner as your mirror and wipe with a microfiber cloth to remove water spots. 6. Finish With the Floors Sweep or vacuum the floor first to pick up hair, dust, and debris, then mop with a cleaner suited to your tile or vinyl flooring. Start at the farthest corner of the bathroom and work toward the door so you do not step on wet areas. Give extra attention to corners and the area around the toilet base, which collect the most dirt. Bathroom Cleaning Quick Reference Toilet: soak the bowl, wipe the exterior, scrub and flush. Sink and counter: spray, scrub the faucet area, wipe with microfiber. Mirror: glass cleaner, circular motion, clean the edges. Shower and tub: let the cleaner sit, scrub grout, rinse well. Glass doors: glass cleaner and a microfiber cloth. Floors: sweep first, then mop from the far corner to the door. Bathroom Area Key Step Pro Tip Toilet Soak, wipe, scrub, flush Clean hinges and crevices Sink and counter Spray and scrub Focus on the faucet and drain Mirror Glass cleaner and wipe Circular motion prevents streaks Shower and tub Let cleaner sit, then scrub Rinse with warm water Floors Sweep, then mop Finish near the toilet base Frequently Asked Questions About Bathroom Cleaning in Mississauga How often should I clean my bathroom in Mississauga? Wipe down high-touch surfaces weekly and do a deeper scrub every two to four weeks. Bathrooms that get heavy daily use, such as family bathrooms, may need attention more often to keep soap scum and mildew from building up between cleans. Why does my bathroom get mildew so fast? Bathrooms stay damp, and the CDC notes that mold grows wherever moisture collects, including around showers and on walls. Run the exhaust fan during and after showers, fix drips quickly, and dry surfaces after use to keep mildew from taking hold. What is the best way to clean glass shower doors? Spray the glass with a quality glass cleaner, let it sit briefly, and wipe with a microfiber cloth in a circular motion. Cleaning them regularly prevents hard water spots from etching the glass, and squeegeeing after every shower keeps them clearer for longer. Should I hire a professional bathroom cleaning service? If time is tight or the bathroom needs a deep refresh, professional help is a great option. Toronto Shine Cleaning offers regular, deep, and move-in or move-out cleaning in Mississauga, so you can choose the schedule that fits your home and your budget. Professional Bathroom Cleaning in Mississauga Even the best routine slips sometimes, and that is where Toronto Shine Cleaning comes in. Our regular maid service keeps bathrooms fresh on a schedule you choose, and our deep cleaning service handles soap scum, grime, and mildew buildup in one thorough visit. We clean across Mississauga and the GTA and we are bonded and insured for your peace of mind. See what our customers say on our reviews page, and call (647) 424-0355 to book your clean.

How to Easily Clean Your Bathroom in Mississauga: 6 Essential Tips Read More »

Homemade natural cleaning solutions displayed on a sunny kitchen countertop.

How to Refresh Your Home: 5 Essential Oil Recipes for Natural Cleaning

How to Refresh Your Home: 5 Essential Oil Recipes for Natural Cleaning Essential oils bring more than a pleasant scent to a cleaning routine. Several of them carry real antibacterial, antifungal or grease-cutting properties, and a few drops mixed into water, vinegar or dish soap turn ordinary household staples into effective cleaners. Here are five simple recipes you can mix in minutes, plus notes on where each one works best. 1. Lemon and Lavender All-Purpose Cleaner This is the bottle most households reach for first, and it suits hard, non-porous surfaces such as countertops, kitchen tables, appliances and bathroom fixtures. 1 cup of water, the base that spreads the solution evenly 1 cup of white vinegar, an acidic disinfectant that cuts grease and grime 15 drops of lemon essential oil, refreshing and strongly antibacterial 15 drops of lavender essential oil, calming in scent and mildly antiseptic A spray bottle for mixing, storing and applying Pour the water, vinegar and oils straight into the bottle. Because oils separate from the water and vinegar, shake well before every use so the blend is evenly dispersed. Spray the surface and wipe with a cloth or sponge. Lemon and vinegar together take on common household germs, lavender settles the mood, and the mix is non-toxic, which helps in homes with children or pets. 2. Peppermint Window and Mirror Cleaner Glass needs a mix that dries without streaks, and this one leaves a fresh minty note behind. 1 1/2 cups of water to dilute the vinegar gently 1/2 cup of white vinegar to dissolve film and leave glass clear 10 drops of peppermint essential oil, a natural deterrent for spiders and ants A spray bottle that lays down a fine, even mist Combine the water and vinegar in the bottle, add the peppermint oil, then shake hard before spraying. A light coat is enough: spray the glass and wipe with a cloth or sponge. Use it on windows, mirrors and glass doors for a smudge-free finish that also discourages insects, and it is safe around children and pets. 3. Tea Tree Mould and Mildew Spray Damp bathrooms and basement corners are where tea tree oil earns its reputation. Its natural fungicidal action attacks mould and mildew and its scent helps deodorise the area. 1 cup of water as the base, diluting the oil to a safe working strength 1 teaspoon of tea tree oil, the antifungal ingredient A spray bottle for precise, even coverage Fill the bottle with water, add the tea tree oil and shake thoroughly so the oil is dispersed. Spray directly onto the affected spots and let the solution sit; rinsing is not required. Unlike synthetic fungicides, tea tree oil is far less likely to irritate skin or airways, and its lingering antifungal action discourages new growth. For more on why damp surfaces invite mould, see the CDC pages on mould and health. 4. Citrus-Boosted Dish Soap You do not need a new bottle for this one, just 10 drops of orange, lemon or grapefruit essential oil added to your regular liquid dish soap. Seal the bottle and shake so the oil blends through the soap. Citrus oils contain d-limonene, which dissolves the fats and oils that make greasy dishes stubborn, so the soap cuts through residue faster while releasing a bright scent. Citrus also brings mild antibacterial action to the sink, and the change moves your routine a step away from heavier chemical products. 5. Eucalyptus Toilet Bowl Cleaner Fill a spray bottle with water, add 10 drops of eucalyptus essential oil and you have a bathroom spray with genuine antimicrobial reach. Spritz generously inside the bowl, especially under the rim, and let it sit briefly so the oil can work. Follow with a toilet brush; the scrubbing action plus the eucalyptus leaves the bowl cleaned, deodorised and freshened with a crisp scent. The same blend works as a quick freshener for the rest of the bathroom, and the scent lingers far less aggressively than a chemical product. Using Natural Cleaners Safely Label every bottle, store them out of reach of children and pets, and spot test on an inconspicuous area before treating a whole surface. Never combine vinegar or essential oils with bleach, since the reaction can release harmful fumes; the CDC guidance on bleach safety explains why. Keep a routine of wiping high-touch points, which the CDC home cleaning guide sets out, so natural sprays are working on light soil rather than heavy build-up. When DIY Cleaning Is Not Enough These recipes handle everyday dirt beautifully, but grout, vents, oven interiors and the backs of appliances need more than a spray bottle. Toronto Shine Cleaning covers both sides of the job with a regular cleaning service for upkeep and deep cleaning for the areas that have gone a long time without attention. Current rates are on the pricing page, and client feedback is collected on the reviews page. For a booking, call (647) 424-0355. Frequently Asked Questions Do essential oils actually clean, or just add scent? Both. Lemon, tea tree, eucalyptus and citrus oils have documented antibacterial or antifungal properties, and vinegar or soap does the heavy lifting on grease and soil. The oils add cleaning power and make the work pleasanter. Why do my homemade sprays separate? Oil and water do not stay mixed, so the essential oil rises between uses. Shake the bottle before every spray. If you want a blend that holds, add a small amount of solubiliser, though shaking works fine for most homes. Are these recipes safe around pets? The diluted mixes described here are generally gentle, but cats and dogs react differently to some oils, and tea tree is one to watch. Keep bottles closed and stored away, ventilate while you clean, and ask your vet if you are unsure. Can I use these sprays on every surface? No. Vinegar can dull natural stone such as marble or travertine, so use a dedicated stone cleaner there. Test any new mix on a

How to Refresh Your Home: 5 Essential Oil Recipes for Natural Cleaning Read More »