Bathroom Cleaning

Bathroom Cleaning

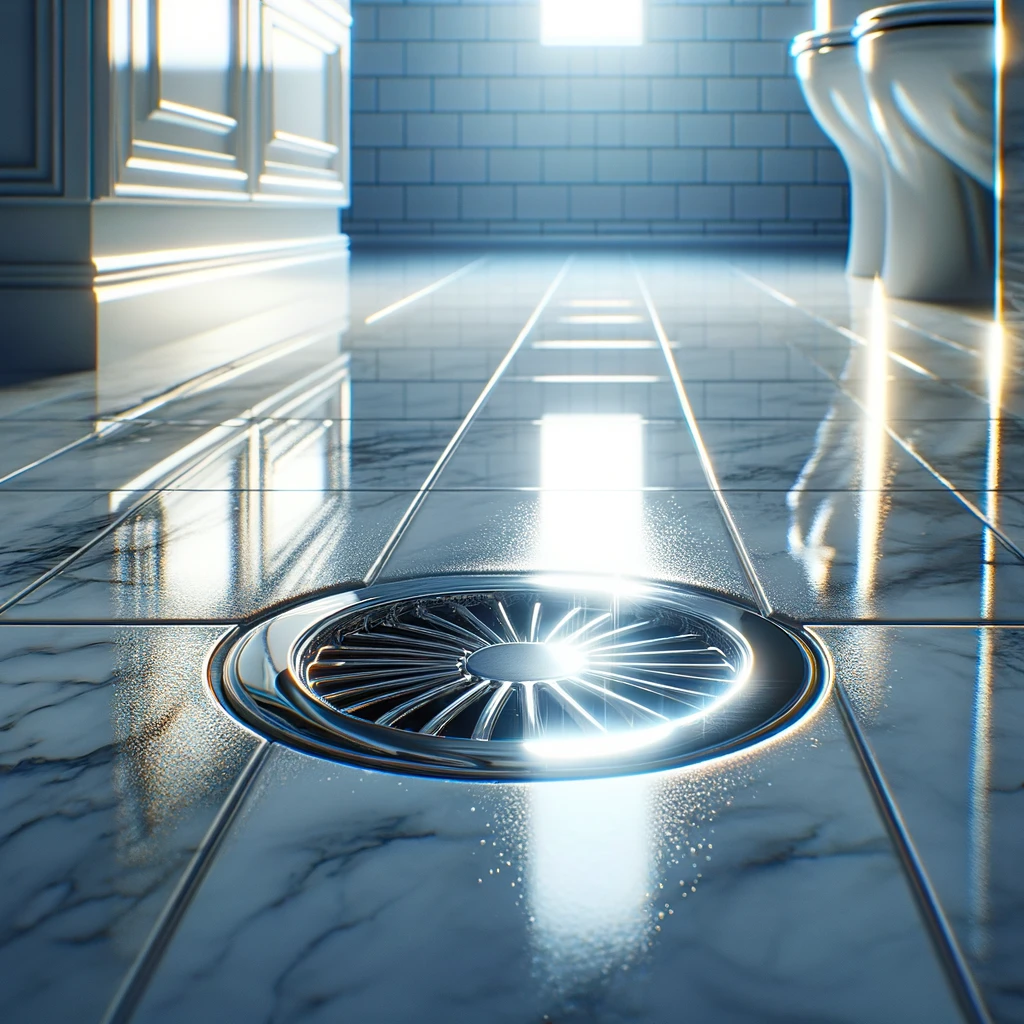
Sparkling clean bathroom drain amid glossy tiles.

7 Easy Tips for Keeping Your Bathroom Drain Sparkling Clean | Toronto Shine Cleaning

7 Easy Tips for Keeping Your Bathroom Drain Sparkling Clean The bathroom drain does quiet work right up until the day it does not, and then you are standing in an inch of shower water wondering what went wrong. Slow flow and lingering smells build up gradually from hair, soap scum, and body products, and a few simple habits keep the whole system clear. Here are seven tips, from weekly rituals to the moment to call in help. 1. Boil the Troubles Away Once a Week Boiling water is the simplest drain treatment there is: no special equipment, no harsh chemicals, nothing lingering in the water system. Make it a weekly ritual, a set day when a kettle goes down each drain. One caution: porcelain and delicate fixtures can crack from sudden temperature swings, so pour straight into the drain rather than letting water wash over the surrounding surface, or use very hot tap water if your fixtures are sensitive. When buildup is stubborn, follow the hot water with a plunger or a plumber’s snake to clear what the heat has loosened. 2. Flush With Cold Water Daily Cold water sounds like the opponent of step one, but the two cooperate. Conditioners, body oils, and shaving creams cling to pipe walls while they are warm and viscous; a minute of cold water after the sink or shower helps them harden and travel on instead of settling. It is especially useful after shaving or washing hair in the sink, when loose strands are looking for a place to snag. Over time, the daily flush lowers the odds of a clog forming at all. 3. Keep an Old Toothbrush Handy A retired toothbrush is the perfect drain tool: small enough for the drain cover, stiff enough for grime, and free. Dip it in cleaning solution so the liquid softens the buildup while the bristles scrub it away, and use the varied bristle lengths to reach the uneven spots around the cover and visible pipe. Every reuse also keeps one more plastic handle out of the landfill, which fits a greener cleaning routine. 4. Fit a Hair Catcher A hair catcher is the cheapest insurance a drain can have. The mesh fits over or inside the drain and stops hair, soap scum, and debris before they enter the pipes, so clogs never get the chance to form. Installation takes no tools. Maintenance is a weekly minute: lift the catcher, bin what it caught, rinse it clean, and soak it in vinegar solution when soap residue builds up. With that routine, water keeps flowing and chemical cleaners stay on the shelf. 5. Try Enzymes Before Chemicals Chemical drain cleaners are potent, and that is exactly the problem. Repeated use degrades pipe materials, especially in older homes with metal plumbing, and whatever goes down the drain eventually reaches the wider water system, where it can harm aquatic life. Keep chemical cleaners for genuine emergencies, and choose an enzyme-based product when you can: these cleaners use natural enzymes and bacteria to consume the organic matter, hair and food scraps included, that blocks the pipe. They work more slowly, but they spare the plumbing and the environment. Whichever product you reach for, follow the label as advised in Health Canada’s guidance on household products, and never mix it with another cleaner, because CDC guidance on bleach warns that the vapors can be dangerous. 6. Check Monthly for Early Warnings Your drain gives warnings, and slow drainage is the loudest. Watch how water leaves the sink, tub, and shower, and when the flow drops even slightly, act early: a plunger handles minor clogs by suction and pressure, while a plumber’s snake twists down into the pipe to break up or retrieve stubborn blockages. Add a monthly inspection to your bathroom cleaning: test each drain, pull visible hair and soap scum off the cover, and note anything unusual. It is worth the two minutes, because slow drainage keeps the fixture and the cabinet around it damp, and mold grows wherever moisture lingers. 7. Bring In a Professional When Needed Some clogs are beyond do-it-yourself reach, and that is when experience and equipment earn their keep. Plumbers arrive with high-pressure water jetting systems, powerful drain augers, and cameras that show exactly where and why the line is blocked. That kit, plus trained judgment, fixes the root cause rather than patching symptoms, which is usually cheaper than a string of temporary fixes. Professionals also spot developing problems early, before a slow drain becomes an emergency. Your Drain Maintenance Schedule Habit What it does How often Boiling water rinse Loosens grease and residue in the pipes Weekly Cold water flush Hardens oils and products so they move along Daily Toothbrush scrub Clears the drain cover and visible parts Weekly Hair catcher clean Keeps trapped debris from slowing flow Weekly Drain check Catches slow flow before it becomes a blockage Monthly A Simple Drain Routine Run cold water for a minute after every sink or shower use. Pour boiling water down each drain weekly, straight into the opening. Empty and rinse the hair catcher weekly; soak it in vinegar when needed. Scrub the drain cover with an old toothbrush. Test all drains monthly, and plunge early at the first sign of slow flow. Frequently Asked Questions Can boiling water damage my plumbing? The usual concern is the fixture, not the pipe. Sudden temperature changes can crack delicate porcelain, so pour boiling water directly into the drain and keep it off surrounding surfaces, or switch to very hot tap water if your sink or tub is sensitive. Follow the rinse with a plunger or snake when buildup is stubborn. Are chemical drain cleaners safe to use? They work, but they are hard on pipes, especially older metal plumbing, and they can harm aquatic life once they reach the water system. Treat them as a last resort, never mix them with other cleaners, and consider enzyme-based products, which use natural bacteria and enzymes to

7 Easy Tips for Keeping Your Bathroom Drain Sparkling Clean | Toronto Shine Cleaning Read More »

Person cleaning a sparkling white bathtub in a bright, airy bathroom.

7 Natural and Effective Ways to Clean Your Bathtub

7 Natural and Effective Ways to Clean Your Bathtub Soap scum, hard water film and dull porcelain build up quietly, and harsh cleaners are not the only answer. Kitchen staples and a few essential oils remove most tub grime safely, with no lingering chemical smell and nothing harsh going down the drain. Here are seven methods worth keeping in your routine, each with rough timing so you know what to expect. 1. Baking Soda Paste Baking soda, or sodium bicarbonate, works as a gentle abrasive. Mix it with a little water to form a paste, then spread it over the tub surface. It lifts everyday grime and light stains, and soap scum in particular, without scratching the finish. Leave the paste for 15 to 20 minutes so it can soften the deposits, scrub with a sponge or a soft brush, then rinse the tub thoroughly. The whole treatment relies on a non-toxic ingredient that is safe for a septic system. 2. Vinegar and Dish Soap Solution Combine equal parts white vinegar and liquid dish soap in a spray bottle. Vinegar is acidic, so it acts as a descaler and disinfectant that dissolves the bond between grime and the tub, while the soap breaks down the oils left by body wash, shampoo and conditioner. Coat the surface evenly and let the solution sit for about an hour. That dwell time does the hard work, and the scrubbing that follows goes much faster. A stiff-bristled brush reaches stubborn build-up, and a rinse leaves a clean, revived surface. 3. Lemon and Salt Scrub Cut a lemon in half and sprinkle salt on the cut face, then scrub the stained areas directly. The citric acid in the fruit binds to the minerals in hard water stains and loosens them, while the salt adds a coarse grit that helps physically lift the residue. The method leaves a fresh citrus scent rather than a chemical one, and both ingredients are biodegradable and safe for most surfaces, which makes it a sensible choice in homes with children or pets. It is also quick to assemble when a stain appears. 4. Hydrogen Peroxide for Tough Stains Pour hydrogen peroxide onto the stain and watch it bubble. That reaction lifts the mark from the surface, which makes scrubbing easier, and it works on mould, mildew and soap scum. For stubborn areas, mix the peroxide with baking soda into a paste. Baking soda supplies the abrasive action while its alkalinity complements the oxidizing power of the peroxide, and a longer dwell time, roughly 30 minutes, lets the mixture work deeper. Scrub, then rinse the residue away. Hydrogen peroxide breaks down into water and oxygen, so it leaves no harmful traces, and its antimicrobial action disinfects as it cleans. 5. Borax and Lemon Juice Paste Borax is a naturally occurring mineral long used as a multi-purpose cleaner: it softens water, boosts soap and lifts tough stains. Mixed with lemon juice into a paste, it becomes a strong option for restoring shine. The citric acid in the juice brightens the surface and breaks down mineral build-up, while the paste clings to vertical sides so it stays where the problem is. Leave it for 15 to 20 minutes, then scrub with a sponge or brush and rinse. Both ingredients are a safer alternative to harsh chemicals for households with pets or anyone sensitive to strong products. 6. Essential Oils for Fragrance and Disinfection A few drops of oil added to any of the mixes above sharpen both the scent and the germ-killing effect. Lavender oil, calming in aroma with mild antimicrobial action, for a spa-like bathroom Tea tree oil, a strong antiseptic against bacteria, viruses and fungi, for the hardest-working mix Eucalyptus oil, crisp and invigorating, with antimicrobial properties that freshen the room Beyond cleaning, the scents change how the room feels. Lavender soothes, tea tree smells clean, and eucalyptus revives a stuffy space. 7. Denture Cleaning Tablets Fill the tub with hot water; the heat also softens build-up on the surface. Drop in a few denture cleaning tablets and let them fizz. As they dissolve, the effervescent solution circulates through the tub and reaches nooks that are awkward to clean by hand, which makes this the easiest general refresh for surface dirt and light staining. A gentle scrub after the soak lifts anything loosened but not removed. The tablets are non-toxic and simple to use, so they suit households with children, pets or anyone sensitive to strong cleaners. Keeping the Tub Cleaner Between Deep Cleans Rinse and squeegee after every bath, run the exhaust fan to cut humidity, and treat fresh stains before they set. Damp bathrooms are where mould gets its start, and the CDC guidance on mould and health explains the health side of that. Regular surface cleaning also matters more than most people expect, as the CDC home cleaning and disinfecting guide sets out, and clean hands in a shared bathroom reduce the spread of germs further. When to Call a Professional Natural methods handle routine upkeep, but heavy mineral scale, discoloured grout and bathroom surfaces that have gone years without attention need professional products and time. Toronto Shine Cleaning offers a deep cleaning service that covers bathrooms top to bottom and a regular cleaning plan that keeps them that way. Rates are published on the pricing page, and reviews from past clients are on the reviews page. Call (647) 424-0355 to schedule a visit. Frequently Asked Questions What removes hard water stains from a bathtub? Acidic treatments work best. A lemon and salt scrub, a vinegar and dish soap solution or a borax and lemon juice paste all break down the minerals that bond to the tub. Give the mix time to sit before you scrub. Can baking soda scratch an acrylic tub? Baking soda is a mild abrasive, so it is far gentler than scouring powder, but acrylic scratches easily. Use a soft sponge rather than a stiff brush, keep pressure light, and test a hidden

7 Natural and Effective Ways to Clean Your Bathtub Read More »

Dish soap and its lots of uses, how dish soap is useful

How Dish Soap Can Transform Your Cleaning Routine: Top 8 Tips

The Unsung Hero Under Your Kitchen Sink Most households own one bottle of dish soap and use it for exactly one job. It is engineered to break down grease, and grease sits behind most household messes. The eight techniques below turn that bottle into an all-purpose cleaner, a jewelry soak, a stain pre-treater, and a window solution, cheap enough to shrink your cleaning cabinet. Tip 1: Brew Your Own All-Purpose Cleaner Fill a spray bottle most of the way with water, then add dish soap aiming for about a teaspoon per cup. That ratio gives real cleaning power without leaving surfaces filmied. Cap it tightly, shake gently, then mist countertops, appliances, cabinets, or walls and wipe with a clean cloth or sponge; the mild formula will not damage or discolor. For tougher grime, let it dwell a minute or two before wiping. Tip 2: Revive Dull Jewelry in a Bowl Mix a few drops of mild dish soap into warm, not hot, water; the warmth loosens the oils and dirt clinging to metal and stones. Soak pieces for 15 to 30 minutes, then scrub crevices and intricate settings with a soft-bristle toothbrush or jewelry brush. Rinse under gentle, lukewarm water over a strainer so nothing travels down the drain, then buff dry with a soft, lint-free cloth. Finish with a hairdryer on its lowest setting, held at a safe distance, to chase moisture from tight spots. Tip 3: Pre-Treat Greasy Fabric Stains Dab a coin-sized amount of dish soap straight onto the stain and work it in with your fingertips or an old soft toothbrush so it penetrates the fibers, gently on delicates. Let it sit anywhere from five to thirty minutes; the wait breaks the oils loose. Spot test a hidden area first, since some dyes and fabrics react badly. Wash per the care label, then inspect the spot before machine drying, because heat sets leftover stains. Repeat the treatment if any mark lingers. Tip 4: Scrub Garden Tools and Outdoor Furniture Fill a bucket with warm water and a generous squirt of soap, visibly soapy without being overly sudsy. Scrub tool heads with a firm brush to clear soil, sap, and rust, including sweaty handles. On furniture, hit the crevices and joints where damp hides and mold and mildew start; many cushions take mild soap, but check care labels. Rinse with clean water, dry tools fully with a cloth or sun to keep rust away, and wipe furniture dry so no water spots remain. Tip 5: Unclog a Kitchen Drain With Soap and Heat Set a kettle or pot of water boiling. Meanwhile, squirt roughly a quarter to half a cup of dish soap into the drain, enough to coat the pipe and reach the blockage, then pour the boiling water carefully down after it. The heat softens grease while the soap emulsifies it and lubricates the pipes, letting the dislodged clog flush away. Tough blockages may need two or three rounds; letting the soap sit a few minutes before the water strengthens it. Tip 6: Refresh the Inside of Your Fridge Empty the fridge and wash removable shelves, drawers, and bins in the sink or tub. Mix a squirt or two of dish soap into a gallon of warm water, dip a clean sponge, wring it damp rather than dripping, and wipe the walls, ceiling, and floor; soap cuts food grease without residue. Dried-on messes soften if the solution sits a few minutes, with a soft brush finishing gently. Wipe again with a cloth rinsed in plain water, then towel dry or air dry with the door open. Clean storage is food safety: the CDC’s foodborne illness prevention guidance starts with clean surfaces where food lives. Tip 7: Squeegee Streak-Free Windows Stir just a few drops of dish soap into a warm water bucket; a little breaks down grime without leaving film. Wash the glass from the top down in a zigzag with a sponge or soft cloth wrung mostly dry, then set a squeegee at the top edge and pull straight down with steady pressure, wiping the blade on a clean dry cloth after every stroke and overlapping each pass slightly. Finish corners and edges, where streaks breed, with dry microfiber or a small squeegee. Tip 8: Rescue a Bath Time With Gentle Soap In a pinch, a few drops of the gentlest, most natural dish soap you own will wash a dog. Wet the coat with lukewarm water first, lather the soap in your hands, and work it through the fur while avoiding eyes, ears, and mouth rather than scrubbing. For fleas, the soap acts as a mild insecticide against the ones currently on your pet, though it will not prevent the next wave, so leave it on a few minutes before rinsing. Rinse until the water runs clear, because residue attracts dirt and dries skin, then towel dry and blow dry on a cool setting, focusing on dense undercoats. Regular use strips natural oils, so routine baths belong to pH-balanced pet shampoos. Plain soap and water anchor hygiene for people too, per the CDC’s clean hands guidance. What One Bottle Replaces The whole kit fits on one shelf: Spray bottle and bucket for the all-purpose mix, tools, furniture, and windows Soft cloths, microfiber towels, and an old toothbrush for jewelry and seams Squeegee and drain strainer for streak-free glass and safe jewelry rinses Dish Soap Recipes At a Glance Job Mix Dwell time All-purpose spray 1 tsp soap per cup of water 1 to 2 minutes on grime Jewelry soak Few drops in warm water 15 to 30 minutes Grease stain pre-treat Undiluted dab on the spot 5 to 30 minutes Fridge wash A squirt or two per gallon Minutes on dried spills Drain flush Quarter to half cup plus boiling water Optional pause before pouring Dish Soap Questions, Answered Will a soap-and-water spray disinfect my counters? No. It lifts grease, crumbs, and most surface soil, but it is a cleaner rather than

How Dish Soap Can Transform Your Cleaning Routine: Top 8 Tips Read More »

Clear vinegar cleaning spray bottle with simple design.

5 Vinegar Cleaning Easy Hacks for a Sparkling Home

5 Vinegar Cleaning Easy Hacks for a Sparkling Home A bottle of white vinegar costs less than a sandwich and replaces half the sprays under your sink. Its acetic acid dissolves the mineral film that dulls glass and fixtures, and it breaks down grease without leaving a chemical residue behind. These five hacks cover the windows, the microwave, the shower head, the coffee maker and the driveway: Glass and mirror cleaner for streaks and fingerprints Microwave steam clean for baked on splatter Shower head soak for hard water scale Coffee maker descaling run for better tasting coffee Weed killer for cracks in the driveway and patio 1. Glass and Mirror Cleaner Mix equal parts water and white vinegar in a spray bottle. Spray the glass evenly rather than soaking it, then wipe with a clean microfiber cloth. Microfiber grabs and holds the dirt instead of pushing it around, which is why it beats a paper towel for a streak free finish. If you are out of cloths, newspaper works surprisingly well: the ink acts as a mild abrasive and the paper does not shed lint. Use it on windows, mirrors, glass tables and shower doors as often as you like. The mix is gentle on glass, has no lingering perfume, and costs a fraction of a dedicated glass cleaner. 2. Microwave Steam Cleaner Splatter that has been reheated a dozen times sets like glue. Fill a microwave safe bowl with equal parts water and vinegar and run it on high until the liquid boils, usually about three minutes. The steam saturates the walls, ceiling and door, softening food residue that a cloth could not shift on its own. Let the bowl sit with the door closed for a few minutes after the timer stops, then wipe everything down with a damp cloth. Vinegar also neutralizes the mixed smells of leftover takeout, reheated coffee and popcorn that build up in a machine nobody thinks to wash. 3. Shower Head Detox Mineral deposits turn a strong shower into a weak drizzle. Pour white vinegar into a plastic bag, slip it over the shower head and tie it around the neck so the nozzles are submerged, then leave it overnight. No scrubbing and no disassembly: the acid works while you sleep. In the morning, remove the bag and run the shower for a minute. Scale and residue rinse away with the vinegar, and the flow should come back evenly through every nozzle. As a bonus, removing that mineral layer takes away the damp surface that mould and bacteria like to settle on. 4. Coffee Maker Cleanse Scale inside a coffee maker forces the heating element to work harder and leaves a flat taste in the cup. Fill the reservoir with equal parts white vinegar and water and run a normal brew cycle without coffee in the basket. Then run two or three full cycles of plain water to flush the machine, which is the step that keeps vinegar out of your next coffee. Once every month or two, more often if your water is hard, keeps brew temperature steady and extends the life of the appliance. The same routine works on a kettle, minus the brew cycle. 5. Weed Killer for the Driveway Full strength white vinegar poured or sprayed straight onto weeds dries out the leaves and reaches down toward the root. Results show up fast, often within a day, which makes it useful for the cracks between patio stones and along a driveway edge. Two cautions matter here. Vinegar is non-selective, so it damages any plant it touches, which is why careful aim, a targeted spray bottle or even a paintbrush on individual weeds is worth the extra minute. It also works best on young annual weeds; established perennials with deep roots may need repeated applications. Because it breaks down quickly, it leaves no lasting residue in the soil. Ratios at a Glance Job Vinegar to water Method Glass and mirrors 1 to 1 Spray on, buff with microfiber Microwave 1 to 1 Boil three minutes, steam five, wipe Shower head Full strength Bag over the head, soak overnight Coffee maker 1 to 1 One brew cycle, then plain water flushes Weeds Full strength Spray the leaves of individual plants Safety Notes Before You Start Never mix vinegar with bleach or with any other cleaner, because the combination can release vapors that are dangerous to breathe; the CDC page on cleaning with bleach spells out the risks. Keep acid off natural stone such as marble and travertine, where it etches the surface, and off aluminium and cast iron. Test an inconspicuous spot first on any new finish, and remember that vinegar is a cleaner rather than a disinfectant: for germ removal, soap and water comes first, as the CDC home cleaning guide explains. When You Want the Whole House Done Vinegar handles the everyday jobs, but it will not lift years of scale from a shower, cut grease behind a stove, or deep clean carpet. Toronto Shine Cleaning is bonded and insured, carries a $1,000,000 insurance policy and a $10,000 accidental breakage and surety bond, and serves Toronto and the GTA from 140 Yonge St Suite 285, Toronto ON M5C 1X6. Book an in depth deep clean when the backlog has built up, add a regular maid service to keep it that way, and see the pricing page for rates starting at $212.63 before HST. Call (647) 424-0355 to arrange a visit. Frequently Asked Questions Can I use vinegar on everything? No. It is excellent on glass, chrome, ceramic, plastic and stainless steel, but the acid etches marble, travertine and limestone and can corrode aluminium and cast iron. Test any new surface in a hidden corner first, and rinse after cleaning. Does the glass mix need a rinse? Not on glass, as the residue flashes off as you buff. On counters and fixtures, a rinse with clean water prevents an acid film from sitting on the finish, and drying with

5 Vinegar Cleaning Easy Hacks for a Sparkling Home Read More »

Wet shower tiles in bathroom

5 Quick and Easy Ways to Remove Soap Scum From Shower Tiles

5 Quick and Easy Ways to Remove Soap Scum From Shower Tiles That cloudy, streaky layer on shower tile has a simple origin: soap meets the minerals in hard water and the oils your skin sheds, and the residue dries into film. Toronto’s water supply makes the problem worse, which is why so many bathrooms here end up fighting it. Beating it does not require harsh chemistry, though. The five approaches below rely on supplies you probably already have at home, plus a couple of store-bought options for heavier buildup. Whichever you choose, try it on an inconspicuous patch of tile first. 1. Vinegar and Water Fill a spray bottle with equal amounts of white vinegar and water. Coat the tile and give the acid about ten minutes to soften the film, then go over it lightly with a sponge or a non-abrasive brush and rinse. Results show up right away, and the mix will not harm glazed finishes. Where the waterline has left a hard ring, soak a cloth in the solution, wrap the cloth around the area, wait a few minutes, and then scrub. 2. A Baking Soda Paste Add just enough water to baking soda to make a thick paste. Smear it across the tile, work it in with small circles using a soft brush, and rinse. The powder’s fine texture lifts residue without scratching the surface, and there is no chemical smell to ventilate away. 3. Store-Bought Shower Cleaner Commercial bathroom products are designed to dissolve scum fast. Spray, wait as long as the label directs, and rinse. Two rules protect you while you work: Open a window or switch on the exhaust fan so the room stays ventilated. Do not combine products, because bleach mixed with other cleaners can release toxic gases. Rinsing well and drying the tile afterwards also cuts the humidity that damp surfaces hold, which is why the CDC material on mould and health treats moisture control as a health issue rather than a cosmetic one. 4. Lemon Oil for the Finishing Pass Whichever method you used, finish by putting several drops of lemon oil on a soft cloth and wiping the tile. It lifts the last of the water spots and streaks, leaves a faint citrus scent behind, and adds a light sheen that makes the room feel clean. 5. Dish Soap and Warm Water Cutting grease is exactly what dish soap is made for, and soap scum is largely oily residue. Add a few drops to warm water in a spray bottle, mist the tile, give it a few minutes, scrub gently, and rinse. Nothing here is harsh, the mix suits every tile type, and it leaves no strong odour behind. Warm water helps the soap spread evenly, and the same bottle works on glass shower doors too. Approach What you need Where it shines Vinegar and water White vinegar, spray bottle Routine film on glazed tile Baking soda paste Baking soda, water Stubborn patches, no-chemical homes Commercial cleaner Spray from the store Fast work on heavy buildup Lemon oil Lemon oil, soft cloth Streaks and final shine Dish soap and water Dish soap, spray bottle Light weekly upkeep Prevention Beats Scrubbing Stopping the film from forming is easier than removing it afterward: Pull a squeegee across the tile after each shower, which takes only seconds. Leave the exhaust fan running during and after a shower to pull humidity out of the room. Choose liquid soap rather than a bar, which leaves more residue behind. Wipe the shower down once a week so nothing has time to harden. Rinse the tile for about 30 seconds after a shower to carry fresh residue away before it dries. Moisture control matters for more than appearance. A bathroom that dries out properly protects your health along with the tile, and the CDC household cleaning pages explain how to clean, then disinfect, surfaces once soil takes hold. When Professional Help Makes Sense Once scum has had months to build, or when a Toronto rental has to pass an inspection, a professional visit saves the day. Toronto Shine Cleaning handles shower, grout, and tile deep cleaning, end-of-tenancy cleaning for tenants and landlords, and recurring home cleaning that keeps bathrooms fresh in between. Our Google rating sits at 4.9 out of 5, and the reviews page has the details. Phone (647) 424-0355 to book a visit. Frequently Asked Questions About Soap Scum Does vinegar damage any tile? Glazed ceramic and porcelain handle it fine, but natural stone such as marble, limestone, or travertine can be etched by acid. Use dish soap or a cleaner formulated for stone on those surfaces instead. What makes soap scum return so quickly? Every shower adds fresh soap residue to the minerals already present in hard water. Squeegeeing daily, cleaning weekly, and running the exhaust fan all slow the film down considerably. Should I combine vinegar and baking soda? The two fizz when mixed but largely cancel each other out, so the result cleans less effectively than either one on its own. Use vinegar first, then bring out a baking soda paste for the stubborn spots. How frequently should shower tile be cleaned? A daily squeegee or wipe plus one weekly clean with your preferred method stops scum from settling in, and a monthly pass over the grout lines and corners prevents the worst of the buildup. Do I need the fan running while I clean? Yes, whenever a commercial product is involved, and never mix bleach with another cleaner. Airflow keeps the room safe to breathe and helps the tile dry without streaks.

5 Quick and Easy Ways to Remove Soap Scum From Shower Tiles Read More »

Family putting up a Christmas tree

How to Achieve a Sparkling Clean Home this Holiday Season

A Sparkling Clean Home This Holiday Season Holiday prep means lights, gifts, parties, and a home that suddenly looks like real life happened. Instead of scrubbing in a panic the night before guests arrive, a little planning turns the whole project into a series of small, easy wins. Here is how to get your home guest ready without losing your mind, and when it makes sense to hand the messy parts to a deep cleaning service. A clean home in December is not only about impressing company. It is about walking into a calm, uncluttered space after a long day of shopping and cooking. Break the work into manageable chunks, one room per day, and the season stays fun instead of frantic. The goal is not perfection; it is a warm space where memories get made. Countdown: A Week by Week Holiday Cleaning Plan Spreading the work out is the single biggest stress killer. Use this simple timeline. When Focus Time needed Three weeks out Declutter every room, wash windows, dust high and low 2 to 3 hours Two weeks out Deep clean kitchen appliances, bathrooms, and carpets 3 to 4 hours One week out Launder guest bedding, wipe cabinet fronts, polish fixtures 2 hours Day before guests Quick vacuum, fresh towels, scent the kitchen 45 minutes Morning after Clear plates, spot mop, reset the living room 1 hour Declutter Before You Scrub Decluttering sets the stage, like priming a canvas before you paint. Walk into each room with fresh eyes and pull out anything that does not belong in your holiday story: the pile of magazines, the summer clothes still in the closet, the mystery drawer contents. Every item you remove is one less surface for dust to settle on and one less obstacle when you vacuum. Then reorganize what stays. Summer gear moves under the bed or into storage bins, and that junk drawer finally gets a system. Less clutter means decorations shine brighter and cleaning goes faster. Deep Cleaning, Room by Room The kitchen Your kitchen becomes mission control for the season. Start with the appliances: scrub the oven, microwave, and stovetop so they are ready for heavy use. Clear and polish the countertops for food prep, then mop the floors, which will soon see constant traffic between the stove and the table. Because food safety matters most when everyone is cooking together, the CDC food safety guidance on keeping prep areas clean is a good reminder. The living room Dust every shelf, mantel, and corner so decorations take center stage instead of dust bunnies. Clean the windows to let in winter light and the glow of outdoor displays. If you have a fireplace, give it the attention it deserves so it becomes the warm heart of the room. Finish with a thorough vacuum or mop. Bedrooms and bathrooms For overnight guests, fresh linens are a must; they look inviting and smell clean. In the bathroom, aim for five star hotel level: sparkling mirrors, spotless countertops, and a gleaming tub or shower. A quick word on hand hygiene never hurts during party season either, and the CDC clean hands guidance explains why washing beats wiping when it comes to stopping germs. Don’t Skip the Little Details Scent: simmer a pot of water with cinnamon sticks, orange peels, and cloves for a natural holiday fragrance, or layer candles and essential oil diffusers so the aroma feels warm instead of one note. Decorations: ornaments have sat in storage for a year, so dust them gently with a soft cloth or feather duster and wipe down light strings so they shine brighter. Inspection: while unwrapping decor, check for damage and repair or replace anything that cannot be saved. Maintenance: Keeping It Clean Through the Chaos Once the deep clean is done, daily upkeep can stay small and smart. Sweep high traffic floors, wipe kitchen counters and the dining table, and handle spills before they set. After guests leave, do a quick reset: gather plates, glasses, and utensils, run the dishwasher, vacuum where people clustered, and touch up the bathroom. Ten minutes now saves a painful hour the next morning and keeps your home inviting for the next gathering. Get the Whole Family Involved Kids love to help when cleaning feels like a game. Try a toy scavenger hunt: whoever puts away the most toys in a set time gets to choose the evening holiday movie or the bedtime story. A sticker chart for finished tasks, leading to a small weekly reward like a treat or an extra half hour of playtime, keeps momentum going. Assign jobs by strength; the organizer handles closets while the vacuum fan takes the floors. Working side by side turns a chore into memory making. When to Call in the Pros Professional deep cleaning is your holiday rescue team, handling everything from bathrooms and kitchens to carpets, upholstery, and the places you cannot reach. Toronto Shine Cleaning deep cleans start at $270.38 for a studio or 1BR and run to $441 for a 3BR and $527.63 for a 4BR, all before HST; current rates are on our pricing page. If your calendar is packed, regular cleaning keeps the home guest ready all season, with studio and 1BR visits from $212.63 and 2BR at $273. Every visit is bonded and insured under a $1,000,000 policy, and neighbours can vouch for the results on our reviews page. Holiday Cleaning FAQ How many days before the holidays should I deep clean? Start the big work two to three weeks ahead so nothing is rushed. Focus on appliances, bathrooms, floors, and hidden dust early, then save simple touch ups like vacuuming and fresh towels for the final day. This spacing keeps the house sparkling through several gatherings without a second full scrub. What is the fastest way to make my home smell festive? Simmer water with cinnamon sticks, orange peels, and cloves on the stovetop for a natural, layered scent. Follow up with candles or an essential oil diffuser

How to Achieve a Sparkling Clean Home this Holiday Season Read More »

Tesla, Electricity, Future

Revolutionizing Cleanliness: How Technology is Shaping the Cleaning Industry

Revolutionizing Cleanliness: How Technology Is Reshaping Cleaning Cleaning is no longer just mops and buckets. Robot vacuums glide across floors while you sleep, apps schedule whole weeks of chores, and sensors monitor the air you breathe. The industry has shifted from task driven work to technology driven routines, and the payoff is homes that stay cleaner with less effort. Here is what is actually changing, what it does for your health, and how to decide which upgrades earn their place in your Toronto home. Smart Devices Are Already Here Modern robotic vacuums are past the era of bumping into furniture. They map your home, learn the layout over time, and figure out which rooms collect the most dirt. Sensors detect changes in floor type, so the robot adjusts its method on the fly, switching modes between carpet and hardwood. Smart mops follow the same logic with built in water tanks that dispense the right amount of moisture, so floors come out clean without being soaked. Beyond floors, smart air purifiers read air quality in real time and ramp up filtration automatically when dust or pollen spikes, with smartphone integration that lets you check and control the air from anywhere. Companion apps tie it together: they schedule cleaning sessions, remind you to rinse filters or restock supplies, and can act as a single control hub for your whole cleaning arsenal. Eco Friendly Solutions: Green Is the New Clean The green shift is every bit as real as the robot one. Biodegradable, plant based cleaning agents break down naturally instead of sending harsh chemicals down the drain after you cut kitchen grease or bathroom grime. Energy efficient appliances play a role too: vacuums with eco modes draw less power, and washers use less water and energy while still performing. Waste reducing tools like microfiber cloths replace disposable wipes and paper towels because they trap dust effectively and go straight in the wash for repeated use. Water conservation rounds it out, from steam cleaners that need surprisingly little water to smart irrigation that waters garden beds just enough. Before you mix any cleaner at home, Health Canada’s guidance on household chemical safety is worth a skim, even for gentler products. Green upgrades that earn their keep Biodegradable, plant based cleaners that break down without polluting waterways and marine life Reusable microfiber cloths in place of disposable wipes and paper towels Appliances with eco modes that draw less power and water, trimming both your footprint and utility bills Rechargeable, longer-lasting batteries that cut hazardous disposable battery waste AI and Robotics: Not Just Sci-Fi The real change is systems that learn and adapt instead of just following a timer. AI in cleaning devices analyzes patterns in your household, such as which zones dirty fastest or when you prefer quiet, then optimizes schedules around them. Picture a robot that does a quick kitchen sweep after the morning rush and stays out of the living room during your evening wind down. AI also powers personalized tips, maintenance reminders for your gadgets, and restock alerts, making the whole routine more effective and tailored. For anyone who finds traditional cleaning physically taxing, including people with mobility issues, this automation removes the heavy lifting of hefty vacuums and unwieldy mops. Why This Matters for Your Health High tech cleaning reaches microscopic particles that routine methods miss, which matters most for allergy and asthma households. Vacuums with HEPA filters trap the fine particles that trigger symptoms, actively improving the air rather than just moving dust around; the CDC asthma resources cover how allergen control eases symptoms. UV-C light sanitizers, once limited to medical settings, now bring chemical-free disinfection of surfaces, gadgets, and even air into ordinary homes. Smart sensors add a proactive layer, prompting purifiers to boost or flagging high-touch zones for regular sanitizing of doorknobs and countertops. Moisture control completes the picture: dehumidifiers and smart ventilation hold humidity in a range that discourages mold, and the CDC mold health page explains why damp air is a health issue, not a smell issue. Choosing Tech That Earns Its Keep Not every gadget fits every home. Match the tool to your actual friction points. Device What it does Best for Robot vacuum Maps rooms, adapts to floor types, cleans autonomously Pet hair and daily maintenance Smart mop Dispenses measured moisture for sticky messes Hard floors that show every spill Smart air purifier Monitors air quality and adjusts filtration live Allergy and asthma households HEPA vacuum Traps fine particles traditional bags recirculate Carpets, upholstery, deep cleans Steam cleaner Sanitizes with minimal water, no chemicals Eco conscious tile and grout care Where Professionals Fit in a Smart Home Gadgets handle maintenance; people still win at transformation. A pro crew brings commercial-grade tools plus judgement about which surface needs which product, something no app substitutes yet. Toronto Shine Cleaning pairs that expertise with modern equipment for both regular cleaning visits, from $212.63 for a studio or 1BR and $273 for a 2BR, and full deep cleaning projects from $270.38 for a studio or 1BR. See what fits your budget on the pricing page, all rates before HST, backed by a $1,000,000 insurance policy. Cleaning Technology FAQ Do robot vacuums replace a real vacuum? For daily upkeep, largely yes, since they hold floors to a consistent baseline. You will still want a capable upright or stick with a HEPA filter for carpets, edges, upholstery, and the deep passes robots miss. Think of the robot as preventing mess buildup rather than performing deep cleaning. Are HEPA filters worth the extra cost? If anyone in your home has allergies or asthma, usually yes. HEPA filtration traps the fine particles that trigger symptoms instead of exhausting them back into the room, which supports cleaner air between professional visits and daily dusting. Are eco-friendly cleaning products as effective? Modern plant-based formulas handle everyday grease, grime, and soap scum well, and microfiber cloths boost mechanical cleaning with less product. For disinfecting during illness, follow label directions on an approved disinfectant

Revolutionizing Cleanliness: How Technology is Shaping the Cleaning Industry Read More »

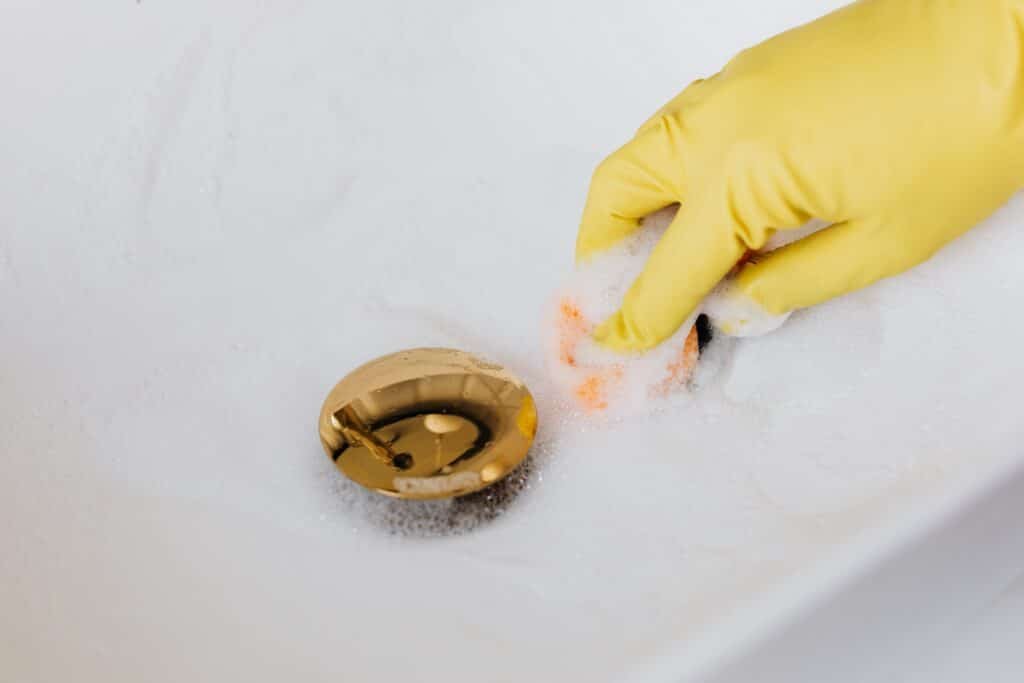
Drain being cleaned, yellow cleaning gloves, foam

Easy Drain Change: DIY Cleaning and Maintenance for Your Sink

Easy Drain Change: DIY Cleaning and Maintenance for Your Sink A sink that drains slowly or smells faintly of the last few meals is usually a maintenance problem, not a plumbing emergency. Changing a drain and cleaning around it are jobs a homeowner can finish in an afternoon with a few basic tools, and the work pays off in fewer clogs, less odour and plumbing that lasts longer. Why Bother with DIY Drain Maintenance Tackling the drain yourself is not only about fixing a blockage that already exists. Staying ahead of it is the point. Regular maintenance prevents the clogs that appear at the worst possible moment, so you are not staring at standing water while dishes pile up behind you. Wear and tear matters as much as the blockage. Debris that sits in the pipe forces fittings and seals to work harder, so gentle upkeep keeps the assembly in better shape for longer and saves money on repairs. It also keeps the kitchen and bathroom smelling fresh, and there is real satisfaction in looking after your own home: you stop being only the owner and start being the caretaker. Tools You Will Need A plunger, always handy for minor clogs A pipe wrench or pliers for tighter fittings A drain snake or a straightened wire hanger to fish out debris A bucket to catch water and gunk Rubber gloves to keep your hands clean Baking soda and vinegar, the natural cleaning pair Step by Step: Changing Your Sink Drain Turn off the water. Locate the valves under the sink and close them with a simple twist so nothing unexpected flows while the drain is open. Remove the old drain. Loosen the fittings that hold the drain in place with the wrench or pliers, working gently to avoid cracking the sink, then lift the drain out. A stubborn one gives way with a little patience and elbow grease. Clean the area. Expect gunk and residue around the opening. A cloth with a baking soda and vinegar mix clears it away and leaves a clean surface for the new drain to seal against. Install the new drain. Apply plumber putty around the rim to create a watertight seal, set the drain into the opening, then tighten it from below. It takes some contorting under the cabinet, but nothing more than patience. Reconnect and test. Refit any pipes that were disconnected and check that every joint is snug. Turn the water back on and run the tap, watching for a smooth drain and no leaks. Cleaning and Unclogging a Slow Drain You do not need harsh chemicals for this. Start with the simplest tool. A plunger is often the fastest answer to a blocked sink: keep enough water in the bowl to cover the cup, press down firmly, then pull up sharply and repeat several times. If that fails, stir half a cup of baking soda into the same amount of salt, tip it down the drain, then rinse with about two litres of warm water. The mixture is abrasive enough to break down gunk, and the warm water helps dissolve what is left behind. For stubborn blockages, use a drain snake or a straightened wire hanger with a small hook bent into one end. Ease it into the drain, work it around until you feel resistance, then pull the clog out. This is the best option for hair and soap scum, which rarely respond to water alone. Regular Maintenance Tips Flush with hot water once a week, near boiling but not boiling, to melt greasy residue Pour baking soda and vinegar down the drain once a month, wait 15 to 20 minutes, then rinse Fit a strainer and empty it regularly so hair and food never reach the pipe Skip chemical drain cleaners, which can corrode pipes and cause leaks over time Maintenance at a Glance Task How often Method Hot water flush Weekly Pour near boiling water slowly down the drain Natural cleaner Monthly Baking soda and vinegar, wait 15 to 20 minutes, rinse Strainer check Every few days Empty hair and food particles into the bin Fitting inspection Seasonally Look under the sink for damp joints or slow drips Safety Before You Start Chemical drain cleaners are tempting when water will not move, but regular use damages pipes and the fumes irritate eyes, throat and lungs. If you do reach for one, ventilate the room, wear gloves and follow the label exactly. The CDC guidance on cleaning with bleach makes the same point for bleach based products: never combine them with another cleaner, because the vapours can be dangerous to breathe. Wash your hands with soap and water once the gloves come off, one of the simplest ways to stop germs spreading, as the CDC handwashing page explains. A kitchen sink is also a food preparation area, so clean the basin and counter before disinfecting, and disinfect mainly when someone in the home has been unwell, following the order in the CDC home cleaning guide. When to Call a Professional A drain that keeps backing up after snaking, water pooling under the cabinet, or a cracked fitting all point to work beyond a homeowner toolkit. For the rest of the house, Toronto Shine Cleaning is bonded and insured, carries a $1,000,000 insurance policy plus a $10,000 accidental breakage and surety bond, and works from 140 Yonge St Suite 285, Toronto ON M5C 1X6. Book a deep cleaning visit for the kitchen and bathrooms, keep it up with a regular cleaning plan, and check the pricing page for rates that start at $270.38 before HST. Call (647) 424-0355 to arrange a visit. Frequently Asked Questions How do I know the new drain is sealed? Fill the sink, let it stand a few minutes, then release the water while you watch the fittings below with a torch. A dry joint after a full bowl has drained means the seal is sound. Can I use boiling water on my pipes? Near

Easy Drain Change: DIY Cleaning and Maintenance for Your Sink Read More »

Warm and confortable winter, book, christmas

How to Master Winter Cleaning: Essential Tips for a Warm and Welcoming Home

How to Master Winter Cleaning: Tips for a Warm and Welcoming Home Winter brings muddy boots, extra layers, snow day chaos, and far more hours spent indoors. You do not have to put your cleaning routine into hibernation just because it is cold outside. With a few clever strategies, your home can stay as inviting as a warm hug all season. Why Winter Cleaning Matters More Than You Think Winter cleaning is not about tidiness for its own sake. It is about creating a sanctuary where you can escape the cold and actually relax. With windows sealed and everyone indoors, a routine also keeps germs and dust from quietly building up: fewer sick days and a space that feels warm instead of closed in. Start the Season with a Deep Clean The best way to get ahead of winter is one thorough deep clean before the cold fully settles in. Focus on the rooms that carry the season: kitchen, bathrooms, and living spaces. Then hit the spots a normal wipe down skips, because that is where winter grime hides. Under and behind furniture, where dust layers build unnoticed Tops of cabinets and high shelves and corners of rooms Behind appliances, which collect crumbs and pet hair all year Baseboards, doors, and window sills that trap tracked-in dirt If a whole-home scrub feels overwhelming, a professional deep cleaning service handles it fastest; ours start at $270.38 for a studio or 1BR and run to $527.63 for a 4BR, before HST, listed on our pricing page. Build a Regular Schedule You Can Keep Consistency beats heroics. A routine stops chores piling into an overwhelming weekend marathon by splitting work into bite-sized chunks: dusting on Monday, vacuuming on Wednesday, laundry on Sunday. Tailor it to your house; a busy kitchen may need a five minute daily tidy while quieter rooms only need a weekly pass. Day Winter task Minutes Monday Dust surfaces, frames, and reachable corners 20 Wednesday Vacuum entryway, halls, and high traffic rooms 25 Friday Mop kitchen and bathroom floors, wipe appliance handles 20 Sunday Laundry, mail sorting, and a clutter sweep 30 Focus on High Traffic Areas Winter dirt follows the footpaths, so spend effort where boots land. The entrance is your first line of defense: sweep, vacuum, or mop it often, and place a sturdy doormat both outside and inside the door. The living room collects crumbs, pet hair, and dust on coffee tables and media consoles, so a daily quick pass keeps it welcoming. In the kitchen, wipe counters daily, handle spills immediately, and never ignore appliance fronts and handles. Don’t Forget the Windows Clean windows do double duty in winter: they let in more of the season’s scarce natural light, which brightens mood and makes rooms feel warmer, and washing them gives you a chance to inspect. Look for drafts around frames, which signal insulation problems that push up heating bills, and for condensation trapped between panes, a sign of seal failure worth catching early. Use a squeegee or microfiber cloth with a gentle solution and clean both sides. If weather or upper floors make the exterior unsafe, leave that to professionals. Declutter Before the Cabin Fever Sets In More time indoors means mail, magazines, and toys multiply on every surface. Handle mail the moment it arrives, sorting into urgent, later, and recycling. Give reading materials one basket and clear it weekly. For toys, labeled bins and a designated play zone make pickup faster. Clear surfaces also mean dusting and vacuuming take half the time. Protect Your Floors and Your Air Snow, salt, and grit are hard on finishes. Use the dual mat system at every entrance, a scraping mat outside and an absorbent mat inside, and ask everyone to remove shoes at the door. Vacuum and mop regularly to lift the salt that sneaks past, use a cleaner suited to your flooring type so you do not strip finishes, and dry wood floors well after mopping. Sealed windows also trap airborne dust, so air care belongs on the winter list. Dust and vacuum often with a HEPA filter vacuum that captures dander and pollen, run an air purifier sized for your most used room, and change forced-air heating filters before they clog. Counter dry indoor air with a humidifier to ease scratchy throats and static; because damp problem zones invite growth, the CDC mold health guidance is a useful reference for keeping humidity sensible rather than excessive. Choose Products Wisely for Closed-Up Homes With less ventilation in winter, harsh chemical fumes hit harder. Eco-friendly, non-toxic products clean effectively while being gentler on skin, eyes, and airways, which matters in homes with kids, pets, or asthma. Pantry options like vinegar, baking soda, and lemon tackle many tasks for pennies. Match products to surfaces regardless; what suits tile can damage a hardwood finish, and Health Canada’s household chemical safety resources explain label precautions worth following. Handle the Post-Holiday Reset When the festivities end, clean decorations before storage: dust ornaments, wipe decor, and make sure everything is dry. Pack in clear, labeled bins, use wreath containers and ornament dividers for fragile pieces, and wind lights on a reel or cardboard so they never tangle again. Then book a regular cleaning visit to reset the house while you keep the cocoa. Plan for Cozy Finish by layering warmth. Soft, golden light from table lamps, string lights, or dimmers makes rooms feel snugger than overhead brightness. Candles in cinnamon, vanilla, or pine add calm and scent. Fleece, velvet, and chunky knit throws and cushions bring texture and literal warmth to the spaces you just cleaned. Winter Cleaning FAQ How often should I clean during winter? Aim for small daily touches in the kitchen and entryway, a short scheduled task a few times a week, and one fuller session on weekends. That rhythm stops salt, dust, and clutter from compounding and keeps occasional deep cleans short. Why do my windows get condensation in winter? Warm indoor air meets cold glass and

How to Master Winter Cleaning: Essential Tips for a Warm and Welcoming Home Read More »

Cleaning with blue cleaning gloves furnitures, deep cleaning

New Build, New Clean: How to Tackle Post-Construction Cleaning Like a Pro

New Build, New Clean: How to Tackle Post-Construction Cleaning Like a Pro Congratulations on your new build or renovation. The dust has settled and the last step before enjoying your space is post-construction cleaning. This is not your typical tidy-up. It requires thoroughness and the right approach to remove all traces of construction debris, dust, and residues. A proper post-construction clean transforms your space from a work zone into a healthy, move-in-ready home. What Is Post-Construction Cleaning? Post-construction cleaning is a deep clean that removes all remnants of building work. This includes sawdust, drywall dust, paint splatters, adhesive residue, and debris like nails and screws. Beyond aesthetics, this cleaning is essential for health and safety. Construction dust can linger in the air and irritate respiratory systems, while chemical residues from paints and sealants need proper removal. If moisture from construction is left unchecked, mold can develop in hidden areas. Fine particles can also damage HVAC systems if they circulate through the home. Phase 1: The Rough Clean Start by removing large debris such as wood scraps, drywall chunks, and packaging materials. Wear protective gear including gloves, a mask (N95 recommended), and safety glasses. Use a heavy-duty vacuum with a HEPA filter to capture fine dust from floors, walls, and surfaces. A regular household vacuum will not cut it for this stage because construction dust is finer and denser than everyday household dust. Empty the vacuum frequently to maintain suction power. Remove all protective plastic sheeting and tape from floors, windows, and fixtures. This phase prepares the space for detailed work. Phase 2: The Detailed Clean Wipe down every surface including walls, countertops, windowsills, and cabinets. Construction dust settles on vertical surfaces just as much as horizontal ones. Use a damp microfiber cloth to capture dust without spreading it. Pay special attention to baseboards, window tracks, and corners where dust accumulates. Each flooring type needs specific care: hardwood requires gentle dust removal with a soft mop, tile needs streak-free cleaning with a neutral pH cleaner, and carpets benefit from steam cleaning to extract deep particles. Clean inside cabinets, closets, and behind fixtures where construction dust settles. Remove sawdust from electrical outlets, switch plates, and light fixtures. Indoor air quality can improve significantly when construction residues are thoroughly removed. Phase 3: The Final Polish Do a room-by-room walkthrough to spot missed smudges, paint flecks, or dusty corners. Clean windows and mirrors until streak-free using a quality glass cleaner and lint-free cloth. Perform a final vacuum and mop to capture any residual particles that settled during the detailed clean. This finishing stage transforms a space from construction site to move-in ready home. Touch up baseboards and door frames where cleaning may have revealed hidden dust. Check all vents and registers one last time. Phase Tasks Tools Needed Rough Clean Remove debris, vacuum dust HEPA vacuum, gloves, mask Detailed Clean Wipe surfaces, scrub grout, clean tracks Microfiber cloths, scrub brushes Final Polish Windows, mirrors, floor finishing Glass cleaner, mop, lint-free cloths Why Hire Professionals for Post-Construction Cleaning? Professional cleaners bring industrial-grade vacuums, steam cleaners, and specialized solutions that most homeowners do not own. They are trained to handle hazardous materials safely and know exactly where construction dust hides. A pro team can complete in one day what might take you an entire weekend. They also handle proper disposal of construction waste and know which cleaning agents work on each surface type without causing damage. Professional deep cleaning services ensure every surface is safe and spotless. DIY Tips for Post-Construction Cleaning Invest in a HEPA-filter vacuum for fine particle removal Use microfiber mops and cloths to trap dust instead of pushing it Break the work into manageable stages one room at a time Wear N95 masks, gloves, and safety goggles throughout Be patient and plan to go over areas multiple times Change vacuum filters partway through the job Frequently Asked Questions How long does post-construction cleaning take? For a standard condo or home, expect 4-8 hours. Large homes may take a full day or more. Do I need to clean before the post-construction team arrives? No, professional post-construction cleaners are equipped to handle every stage from rough debris removal to final polish. Is post-construction cleaning included in standard move-in cleaning? No. Post-construction cleaning is more intensive and requires different equipment. Move-in/out cleaning covers general household soiling, while post-construction targets builder residue. Can I move in right after post-construction cleaning? Yes. Once the cleaning is complete and all residues are removed, the space is safe and ready for occupancy. Post-construction cleaning is the final step in making your new space feel like home. If the job feels too big to tackle alone, trust the team at Toronto Shine Cleaning. We provide move-in/out cleaning and deep cleaning tailored to your needs. Check our pricing and call (647) 424-0355 to schedule your post-construction clean today.

New Build, New Clean: How to Tackle Post-Construction Cleaning Like a Pro Read More »