Cleaning Guide

closed concrete garage with a bicycle

7 Tips for Easy Maintaining a Clean and Organized Concrete Garage

Oh, the clean and organized concrete garage! It’s often the unsung hero of home storage and a sanctuary for DIY enthusiasts and car lovers alike. But, let’s be honest, it can quickly turn into a chaotic catch-all if not kept in check. Whether you’re a seasoned pro at keeping your space tidy or looking to revamp your cluttered garage, these 7 tips will help maintain a clean and organized concrete haven. 1. Declutter Regularly Decluttering regularly can be a family affair. Involve everyone in the household to sort through their belongings stored in the garage. This can be an excellent opportunity for teaching children about the value of organization and letting go of things they no longer need or use. As you declutter, you might discover items that have been long forgotten, some of which could be valuable or have sentimental worth. This process not only frees up space but can also be a trip down memory lane, giving you a chance to reminisce and maybe even repurpose or display items that bring joy. In addition to the physical benefits of decluttering, such as a more functional and inviting garage, this process can have a positive impact on your mental well-being. A clean and organized space can reduce stress and make your garage a more pleasant part of your home to work on projects or store important items. 2. Invest in Shelving and Storage Solutions Pegboards offer another layer of versatility to your garage organization. With a variety of hooks and bins that can be rearranged as needed, pegboards make it easy to store tools of all sizes, from hammers and screwdrivers to garden tools and paintbrushes. This adaptability is perfect for those who frequently use their garage for projects and need to access their tools quickly. Clear storage bins are another game-changer in the realm of garage organization. By allowing you to see their contents without opening them, these bins save time and reduce frustration when searching for specific items. This visibility is especially useful for seasonal items, such as holiday decorations or summer sports equipment, which are used infrequently but still need to be accessible. Beyond the practicality of keeping items off the ground, investing in storage solutions can also protect your belongings from damage. Elevated storage prevents water damage from flooding, keeps items free from dust and pests, and reduces the likelihood of items being damaged by vehicles or foot traffic. Tailored storage solutions can add aesthetic value to your garage. A cohesive look, with matching shelving units, cabinets, and bins, can make your garage feel like an extension of your home rather than an afterthought. This approach not only enhances the functionality of your space but also its appeal, making it a more enjoyable place to spend time in.     3. Seal and Protect Your Concrete Floor Sealing and protecting your concrete floor is a fundamental step in maintaining the longevity and appearance of your garage. Concrete, by its nature, is porous, which means it can absorb spills and stains, leading to unsightly marks and potential damage over time. Applying a concrete sealer not only safeguards the floor against these everyday mishaps but also enhances its durability against the wear and tear of garage activities. This protective layer acts as a barrier, repelling water, oil, chemicals, and other substances, making your garage floor easier to clean and maintain. Adding floor mats under vehicles and work areas introduces an additional layer of protection. These mats catch drips and spills, preventing them from ever reaching your sealed floor. They’re particularly useful in work areas where spills are more likely, such as under a workbench where you might change oil or paint. Not only do these mats protect your floor, but they also provide a safer, non-slip surface to stand on, reducing the risk of slips and falls. Protecting your concrete floor extends beyond just practicality; it’s also about preserving the aesthetic appeal of your garage. A well-maintained floor can significantly enhance the overall look of the space, making it more inviting and usable. Whether you’re using your garage as a workshop, storage area, or even a place to hang out, a clean and undamaged floor sets the foundation for a pleasant environment. For those looking to go the extra mile, there are additional options for floor protection and aesthetics. Epoxy coatings offer a more durable and visually appealing alternative to standard sealers. Available in various colors and finishes, epoxy can transform your garage floor into a high-gloss or matte surface that’s resistant to impacts, chemicals, and stains. This type of coating not only provides superior protection but also adds a professional touch to your garage’s appearance. 4. Implement a Zone System Implementing a zone system in your garage is a strategic approach that brings a new level of organization and efficiency to the space. By dividing the garage into designated areas for specific activities or item types, you create a structured environment where every tool, piece of equipment, and storage bin has a defined place. This method streamlines the process of finding and storing items, saving you time and reducing the frustration of searching through clutter. Tailoring each zone to its specific use can significantly enhance its functionality. For automotive care, consider installing a workbench with rolling tool chests and oil-resistant floor mats. For the lawn and garden zone, wall-mounted hooks and racks can keep long-handled tools organized and off the floor, while shelves can hold smaller gardening supplies. Sports equipment, often bulky and awkwardly shaped, can be accommodated with specialized racks for bikes, balls, and other gear. The workshop area can be equipped with a sturdy workbench, good lighting, and pegboards or magnetic strips for tools. Labeling is another critical aspect of the zone system that shouldn’t be overlooked. Clear, durable labels on shelves, bins, and cabinets not only guide you and other household members to the right location but also encourage the return of items to their proper place. This simple step can significantly

7 Tips for Easy Maintaining a Clean and Organized Concrete Garage Read More »

Woman in blue rubber cleaning glove holds up white sequin bag with a lambswool duster.

Dust Be Gone: Dust-Free Easy Essential Steps

Hey there, homeowners! Tired of sneezing and seeing those pesky dust bunnies roll like tumbleweeds across your floor? You’re in the right place! Today, let’s chat about something we all battle with: dust. It’s like that uninvited guest at your party who just won’t leave. But fear not! I’ve got some essential steps to help you keep your home dust-free and your sneezes at bay. So, grab a cup of coffee, and let’s dive in! Why Dusting is a Must Firstly, think about the air you breathe in every day. Dust accumulation can significantly degrade your indoor air quality. It’s like having an invisible enemy that silently affects your health and well-being. By regularly wiping away dust, you’re essentially purifying the air in your home, making it safer to breathe, especially for those with respiratory issues. Now, let’s talk about what’s actually in the dust. It’s not just harmless tiny particles. Dust can be a cocktail of various allergens such as pet dander, pollen, and even fibers from textiles. These allergens can trigger reactions like sneezing, coughing, and itchy eyes, particularly for those with allergies or asthma. It’s almost as if these particles are lying in wait to set off a sneeze fest. But wait, there’s more! Dust mites, those microscopic critters that thrive in household dust, feed on dead skin cells and flourish in warm, humid environments. They are a common cause of allergy and asthma symptoms. Regular dusting and vacuuming can significantly reduce their numbers, giving you a more comfortable and healthier living space. Dust can also affect the longevity and efficiency of your electronic appliances and heating or cooling systems. When dust accumulates inside gadgets and vents, it can cause them to overheat or work less efficiently. So, when you’re dusting, you’re not just cleaning; you’re also helping to maintain and prolong the life of your appliances. Daily Dust-Free Habits Microfiber Magic Switching to microfiber cloths is a game-changer in your daily dusting routine. Unlike traditional rags or feather dusters that often just move dust around, microfiber cloths are designed to attract and hold onto dust particles. The science behind it is pretty neat – the tiny fibers in these cloths create a static charge that literally pulls in and traps dust, hair, and other small particles, locking them away until you wash the cloth. This means you’re not just rearranging the dust in your home; you’re actually removing it. Plus, microfiber is super gentle and won’t scratch your surfaces. Whether it’s wiping down your electronics, dusting furniture, or cleaning those hard-to-reach corners, microfiber cloths are your best ally. Vacuum Vroom Investing in a good vacuum cleaner, particularly one with a HEPA (High-Efficiency Particulate Air) filter, is a cornerstone of your dust management strategy. HEPA filters are capable of trapping extremely small particles, including most of the allergens and fine dust that other vacuums might recirculate back into the air. This means you’re not just cleaning your floors; you’re improving the air quality of your home. Use your vacuum’s various attachments to gently clean sofas, curtains, and even upholstery. These areas are often overlooked but can harbor a significant amount of dust. Regular vacuuming, not just of your carpets but also of these other areas, can dramatically reduce the amount of dust circulating in your home. Clutter-Free Zone Now, let’s talk clutter. It’s not just an eyesore; it’s a dust magnet. Every extra item in your home is one more surface for dust to settle on. By keeping your home clutter-free, you’re significantly reducing the number of places dust can accumulate. This doesn’t mean you need to adopt a minimalist lifestyle (unless you want to, of course!). Start with small, manageable steps like clearing off countertops, organizing bookshelves, and keeping decorative items to a minimum. Regularly decluttering not only makes it easier to clean but also creates a more peaceful and inviting living space. Plus, with fewer items to dust around, your cleaning routine becomes faster and more efficient. Weekly Wonders     Under and Over Tackling those often-neglected areas can be a game-changer in your weekly cleaning routine. Let’s break it down a bit more. When we talk about the tops of doors, under furniture, and ceiling fan blades, we’re referring to spots that are easy to overlook during a quick clean but can accumulate a surprising amount of dust over time. Tops of Doors and Windows: These horizontal surfaces are perfect landing spots for dust. Giving them a quick swipe with a microfiber cloth or a duster with an extendable handle can prevent a significant amount of dust from floating down into your living spaces. Under Furniture: Dust bunnies love to hide under sofas, beds, and other furniture. Using a vacuum with a low-profile attachment can help you reach these spots without having to move heavy furniture around every week. Ceiling Fan Blades: Dust on fan blades can quickly spread throughout the room when the fan is turned on. Use a damp cloth or a special duster designed for ceiling fans to gently remove dust. This not only keeps your room cleaner but also ensures your fan operates more efficiently. Bedding Bonanza Your bed, believe it or not, is a major dust reservoir, especially considering we spend about a third of our lives in it! Sheets, pillows, and mattresses can gather skin flakes, hair, and dust mites. Washing Sheets: Doing this weekly in hot water is crucial. Hot water helps kill dust mites and removes allergens more effectively than cold or warm water. Don’t forget about pillowcases and mattress covers! Mattress and Pillows: While you can’t toss them in the wash as easily, vacuuming your mattress and pillows during your bedding wash day can help remove dust and allergens. Also, consider using allergen-proof covers for an extra layer of protection. Pet Patrol Our furry friends, as much as we love them, are big contributors to the dust in our homes. Pet dander, hair, and even the tiny particles of dirt and pollen they carry

Dust Be Gone: Dust-Free Easy Essential Steps Read More »

couple with a white pet dog indoors

Pet Hair, Don’t Care: 7 Effective Cleaning Strategies for Pet Owners

Hey there, fellow pet lovers! If you’re like me, your furry friends are part of the family. But let’s face it: as much as we adore them, dealing with pet hair can be a bit of a hassle. Worry not, though! I’ve got some paw-some tips to help you tackle the fur fury and keep your home sparkling. 🐾✨ 1. Regular Grooming: Cleaning Strategies The frequency of grooming can depend a lot on what kind of pet you have. For example, if you have a long-haired cat or dog, they might need a good brush every other day. Breeds with shorter hair can get by with less frequent grooming, but don’t let that fool you – they can still shed quite a bit. The key is consistency. Making grooming a regular part of your pet care routine not only helps with shedding but also gives you a great opportunity to check for any skin issues or bumps that might need attention. And hey, grooming time can be bonding time! Many pets love the attention and affection that come with a gentle brush. It’s a win-win: your pet gets some love and you get less hair to deal with around the house. Investing in the right tools is also crucial. Different types of fur might require different types of brushes or combs. For instance, a de-shedding tool can be a lifesaver for those heavy-shedding breeds. These tools are designed to reach deep into the undercoat, capturing the loose hair before it has a chance to end up all over your home. 2. Vacuuming The key here is to make vacuuming a regular part of your cleaning routine. Pet owners might find that they need to vacuum more frequently than those without pets. It’s all about staying ahead of the fur. You might need to vacuum a couple of times a week, or even daily if your pet is a heavy shedder or it’s shedding season. Consistency is crucial – it’s easier to manage the pet hair situation if you’re regularly sucking up those stray hairs before they have a chance to embed themselves in every fabric surface in your house. Now, let’s talk about the vacuum itself. Not all vacuums are created equal, especially when it comes to dealing with pet hair. Investing in a vacuum that’s specifically designed to handle pet hair can be a game-changer. These vacuums usually come with special attachments and features that make them more effective at picking up hair. For example, they might have a brush roll that’s designed to not get tangled with hair, or more powerful suction to pick up hair from carpets and upholstery. Some vacuums even come with HEPA filters, which are great for capturing pet dander and other allergens. This is particularly important for those with allergies or asthma. These filters ensure that the air in your home stays clean and healthy, not just the floors. 3. Specialized Pet Hair Removal Tools First up, we’ve got rubber gloves and squeegees. Now, you might think these are just for cleaning your dishes or wiping down your windows, but they have a hidden talent: they’re fantastic for getting pet hair off fabric surfaces. The trick here is a little bit of water. Just dampen the rubber glove or squeegee and then gently run it over your upholstery, like your couch or armchair. You’ll be amazed at how the hair just clings to the rubber. It’s a simple yet surprisingly effective way to rid your fabrics of pet hair. Plus, it’s a great arm workout! Another superhero in the pet hair battle is the lint roller. This is the tool you want to keep in every room, your car, and even your handbag. Lint rollers are perfect for a quick touch-up on your clothes or furniture. Got a last-minute meeting and found some pet hair on your blazer? Lint roller to the rescue. Noticed some fur on the sofa just as your guests are about to arrive? Lint roller saves the day. They’re quick, convenient, and don’t require any special skills to use – just roll and go. What’s great about these tools is that they’re not only effective but also super accessible and easy to use. You don’t need any fancy equipment or special skills. Whether it’s a rubber glove from under your sink or a lint roller from the local store, these tools are readily available and incredibly handy. 4. Washable Covers Having washable covers on your furniture means you’re always just a laundry cycle away from a clean, fresh-looking sofa or armchair. These covers are designed to be easily removable and durable enough to withstand frequent washing. That means no more panicking when your furry friend decides to nap on the couch or has a little mishap. Just remove the cover, toss it in the wash, and voila – your furniture is as good as new! But it’s not just about functionality. Washable covers come in a variety of styles and colors, allowing you to change the look of your room without investing in new furniture. Want to refresh your living room for the spring? Swap out the covers. Looking for a cozy, winter vibe? Choose a different texture or color. It’s an affordable and stylish way to keep your home looking great, no matter what your pets throw at it (or on it). Moreover, using washable covers can actually extend the life of your furniture. They protect your sofas and chairs from the wear and tear of everyday pet use, keeping the underlying material in better condition for longer. This means you won’t have to replace or reupholster your furniture as often, saving you money in the long run.     5. Deep-Cleaning Deep-cleaning takes your regular cleaning routine to the next level, especially in a home with pets. It’s about reaching those spots that regular cleaning might miss and giving your home a thorough refresh. This is particularly important for pet owners because, let’s be honest, pets

Pet Hair, Don’t Care: 7 Effective Cleaning Strategies for Pet Owners Read More »

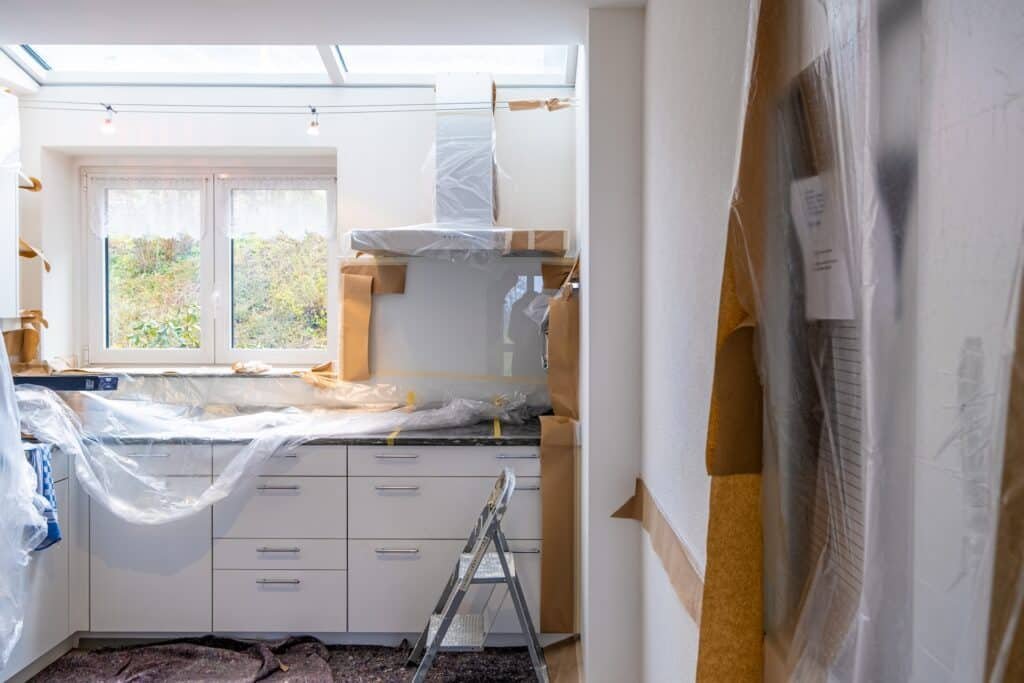
white wooden cabinet near window

Post Renovation Cleaning in Scarborough

Post Renovation Cleaning in Scarborough After months of planning and construction, your Scarborough home renovation is finally complete. But before you can enjoy your new space, a thorough post-renovation cleaning is essential. Construction dust, debris, and hazardous materials can linger on every surface. Professional post-renovation cleaning ensures your home is safe, spotless, and ready for move-in. Toronto Shine Cleaning specializes in post-renovation cleaning across Scarborough, removing every trace of construction residue so you can enjoy the full beauty of your newly renovated space. Why Post-Renovation Cleaning Matters Renovations leave behind fine dust particles that settle on floors, walls, cabinets, and inside HVAC vents. Drywall dust, sawdust, and paint splatters can spread throughout the home and affect indoor air quality. These fine particles are small enough to remain airborne for hours after work ends, settling on every horizontal surface. Beyond dust, sharp objects such as nails, staples, and broken tiles pose safety risks, especially in households with children or pets. Leftover adhesive, caulk residue, and paint drips can also mar new surfaces if not cleaned promptly and properly. A thorough cleaning removes these hazards and reveals the true beauty of your renovated space. Indoor air quality is a primary concern after any renovation. Construction dust contains silica, gypsum, and other particles that can irritate the respiratory system. According to the Canada.ca guide on reducing humidity and mould, poor ventilation combined with construction dust can contribute to indoor air contaminants. Professional cleaning with HEPA-filtered vacuums captures these fine particles and prevents them from recirculating. Key Benefits of Professional Post-Renovation Cleaning Thorough dust removal: HEPA-filtered vacuums capture fine drywall dust, silica particles, and sawdust that household vacuums simply recirculate into the air. Surface protection: Professional cleaners use the right techniques for new paint, fresh grout, and sealed hardwood to avoid damage or discolouration during the cleaning process. Time savings: A full post-renovation clean can take four to eight hours. Hiring professionals frees you to focus on unpacking, decorating, and settling into your renovated home. Health and safety: Removal of sharp debris, chemical residues, and airborne dust protects your family from injury and respiratory irritation after construction ends. Common Post-Reno Contaminants Where They Accumulate Why They Need Removal Drywall dust Floors, shelves, inside cabinets, window sills Irritates respiratory system, causes scratching on finished surfaces Paint splatters and adhesive Window frames, baseboards, door hardware Affects finish appearance, can harden and become permanent stains Sharp debris (nails, staples) Carpets, corners, under appliances Safety hazard for bare feet and pets; can damage vacuum cleaners Construction dust in vents HVAC registers, ductwork, ceiling fans Recirculates fine dust every time the system runs Step-by-Step Cleaning Process A complete post-renovation clean follows a logical progression. Start by clearing all large debris and construction waste from every room. Next, dust from the top down: ceilings, ceiling fans, light fixtures, and window frames. Use a damp microfiber cloth or HEPA vacuum attachment so dust is captured rather than scattered. Wipe walls gently with a barely damp cloth to collect fine drywall dust without damaging fresh paint. Clean all doors, handles, and frames, as these high-touch areas collect the most residue. Once vertical surfaces are clean, move to floors. Vacuum carpets and hard floors thoroughly, then mop hard surfaces with appropriate cleaners for tile, hardwood, or laminate. Pay special attention to corners and edges where debris accumulates. In kitchens and bathrooms, sanitize all surfaces including countertops, sinks, and cabinets inside and out. Clean inside appliances such as the oven, refrigerator, and microwave, which may have collected dust during construction. Wipe down all switch plates, outlet covers, and door handles. Finally, wipe down HVAC vents and replace filters to prevent construction dust from circulating through your home. A final walk-through ensures every room is inspected for missed spots. Why Hire Professionals for Post-Renovation Cleaning Professional cleaners bring industrial-grade vacuums with HEPA filtration, specialized cleaning solutions, and the expertise to tackle stubborn post-renovation residue. They can reach high corners, clean inside ductwork, and safely dispose of construction debris. DIY attempts often miss the fine dust that settles on horizontal surfaces and inside cabinets, which may resurface days later and undo the sense of freshness you expect from a new renovation. Professional teams also know which cleaning agents work safely on new paint, fresh grout, and sealed hardwood without causing damage or discolouration. For Scarborough homeowners, booking a professional post-renovation clean saves time and guarantees a truly spotless result. Frequently Asked Questions How long does a post-renovation cleaning take? For an average Scarborough home, expect four to eight hours depending on the scope of the renovation and the amount of debris left behind. Should I clean before or after the renovation crew leaves? After. The renovation crew should handle their own debris removal, and then a deep clean addresses the fine dust and hidden grime they leave behind. Is post-renovation cleaning safe for pets? Yes. Professional cleaners use eco-friendly, non-toxic products that are safe for pets and children once all surfaces are dry. Do you clean windows after renovation? Yes. Post-renovation cleaning includes interior window cleaning to remove dust, paint splatters, and adhesive residue from glass surfaces and frames. Ready for a fresh start in your newly renovated Scarborough home? Call (647) 424-0355 to schedule your post-renovation cleaning. We offer deep cleaning, regular maintenance, and move-in/out cleaning across Scarborough. Check our pricing for transparent rates. Serving all GTA locations. For indoor air quality information, read the CDC guidelines on cleaning and disinfecting your home.

Post Renovation Cleaning in Scarborough Read More »

white bed linen on bed. Apartment interior design

Tips in Finding a Budget-Friendly Airbnb Cleaning Services Toronto

Budget-Friendly Airbnb Cleaning Services in Toronto: How to Find the Right Fit Running an Airbnb in Toronto means every guest should walk into a spotless space, but the cost of cleaning can eat into your returns. The good news is that affordable Airbnb cleaning services Toronto hosts rely on are within reach if you shop smartly. The balance comes from knowing what your property needs, comparing transparent pricing, and building a relationship with a cleaner who understands your rental. Know Exactly What Your Airbnb Needs Every Airbnb is different. A quick turnaround clean after each guest may be enough for a lightly used unit, while a frequently booked property needs deeper attention between stays. Think about the high-use areas too: a kitchen used for heavy cooking collects grease faster, and a living room with lots of foot traffic needs more vacuuming and surface care. Turnaround cleaning after every checkout A deep clean every few months or after long guest stays Extra attention for kitchens used for heavy cooking Fast scheduling windows for back-to-back bookings Frequency matters just as much as scope. Back-to-back bookings call for fast, efficient turnovers, while spaced-out stays let you schedule a more thorough clean each time. Matching the service to your actual needs is the simplest way to avoid paying for work you do not require. Compare Transparent Pricing Without Sacrificing Quality Start by comparing rates across companies. Many cleaning businesses, including Toronto Shine Cleaning, list their prices openly on their websites, which makes comparison easy. But price is only half the equation: a spotless space earns rave reviews, repeat bookings, and recommendations, while a missed corner can cost you a star. Read reviews from other Airbnb hosts to gauge reliability, thoroughness, and punctuality, and ask hosts in your network about services they have used. First impressions matter, so choose a cleaner whose quality record matches your standards. The CDC’s guidance on cleaning and disinfecting your home is a useful benchmark for what a proper turnover should include, especially between different guest groups. Ask for a Custom Quote Airbnb properties often have quirks that standard packages miss: antique furniture, delicate artwork, or a large bay window that collects dust. A custom quote lets you highlight these items so the cleaner budgets the right time for them. You also avoid paying for services your space does not need. Be specific about expectations, such as deep carpet cleaning, polishing hardwood floors, or streak-free windows, and the quote will match the real scope of work. Look for Package Deals, Loyalty Discounts, and Off-Peak Slots Cleaning companies reward regular business. If your calendar fills up with bookings, ask about package deals or loyalty discounts for recurring cleans. Running several properties? Some services offer bulk rates for multiple units. Flexibility with timing also pays off: off-peak slots, such as early mornings or late evenings, may come with lower rates because the crew is less busy. The table below summarizes the most common savings: Strategy How It Works Best For Package deals Book several cleans in advance at a reduced rate Hosts with steady booking volume Loyalty discounts Reduced pricing for ongoing regular customers Hosts who use the same service weekly Off-peak scheduling Lower rates for early morning or evening slots Flexible hosts with turnaround windows Referral rates Special pricing for clients who arrive via a host referral Hosts with a network of fellow hosts Watch for Extra Fees An affordable quote can grow quickly with hidden extras. Some companies add parking fees, which matter in a city like Toronto, or surcharges for rooms that need extra attention after heavy use. Before you agree, ask for a detailed, all-inclusive quote that breaks down every cost. A reputable company will explain its fees happily and confirm that no surprise charges will appear on the final bill. Health Canada’s household products safety page is also worth a read so you know what goes into the products used in your rental. Go Local and Lean on Other Hosts Local cleaners save on travel time, which often translates into lower rates, and they know the rhythms of Toronto hosting. Supporting a local business also builds a community around your rental. Fellow hosts are your best source of honest recommendations: they can tell you which service handled a last-minute turnover gracefully and which one cut corners. Word-of-mouth referrals often uncover smaller companies with competitive rates and personal service. Airbnb Cleaning Services Toronto FAQ How much does Airbnb cleaning cost in Toronto? It depends on the size of the unit, the level of cleaning, and how often you book. Check the pricing page for published base rates, then request a custom quote for your property. Can I book a one-time Airbnb clean? Yes. One-time turnovers and deep cleans are both available, and you can move to a recurring schedule later if the volume of bookings grows. How fast can cleaners turn around a unit between guests? Most standard turnovers are completed within a few hours, depending on the size of the property. Same-day service is often possible when you book ahead. Are the cleaners insured? Toronto Shine Cleaning is bonded and insured, with a $1,000,000 insurance policy and a $10,000 accidental breakage and surety bond, so your property and belongings are covered. Toronto Shine Cleaning provides regular, deep, and move-in or move-out cleaning for Airbnb hosts across Toronto and the GTA. Check our customer reviews, book a regular cleaning service for ongoing turnovers, or call (647) 424-0355 for a quote tailored to your Airbnb.

Tips in Finding a Budget-Friendly Airbnb Cleaning Services Toronto Read More »

two kids standing side by side wearing masks

An Easy Fresh Start: Top Tips for Back-to-School Cleaning in North York

An Easy Fresh Start: Top Tips for Back-to-School Cleaning in North York The first school morning of September is the most chaotic of the year unless the house is ready for it. North York families know the drill: missing shoes, desks buried under summer crafts, closets full of clothes that no longer fit. A focused weekend of back-to-school cleaning resets all of it, and the payoff runs all year, because an organized home makes every school morning shorter. Here is the plan, room by room. Declutter the Desks and Study Areas Study spaces absorb a summer of art supplies, magazines, and unread paperbacks. Go through everything on the desk and sort it honestly: paper that is done goes to recycling, books that will not be revisited go to the library donation bin or a charity, and supplies get sorted into drawers, holders, or repurposed containers. The goal is a workspace that signals focus the moment your kid sits down. There is real psychology behind it: a tidy desk reduces distractions, and an organized pencil cup beats a ten minute hunt for a working pen every single homework night. Refresh the Kids’ Bedrooms Treat the bedroom reset as a one-day deep clean. Dust everywhere the eye does not naturally go: behind the bed, under the desk, on top of shelves, and in the nooks where clutter nests. Then vacuum thoroughly, especially under the bed and along baseboards, because carpets hold the dust and allergens that aggravate kids with allergies or asthma. Finish with the bedding: wash sheets, pillowcases, and blankets so the school year starts on fresh sleep. Clean bedding is not just a nice feeling; good sleep is what school performance is built on. Tackle the Closets Pull everything out, pile by pile, and sort into keep, donate, and maybe. Clothes the kids have outgrown should head to donation while someone else can still use them. Check school uniforms and staples for fit and condition, then list what actually needs buying so you shop with precision instead of panic. Organize what remains by type, or even by school day, so the first weeks of mornings run on autopilot instead of wrestling matches. Build a Real Homework Station Pick a spot with minimal distractions and strong light, whether that is a corner of the bedroom, a living room nook, or a dedicated section of the dining table. Comfortable chair, right height desk, and a stocked supply drawer: pencils, erasers, paper, a ruler, and a few highlighters. Let your kids personalize the space with artwork or a couple of decorations; ownership turns homework resistance into routine. A dedicated station also protects the dining table from becoming a permanent paper battlefield. Sanitize the Common Areas Back to school means back to the germs that ride home in backpacks. Sanitizing the shared surfaces is a stealth health check for the whole family. Start with the hotspots everyone touches: Kitchen counters and dining tables, wiped with disinfectant daily during cold season Doorknobs, light switches, and cabinet handles, the highest traffic points in any home Bathroom surfaces, from faucets to counters Electronics: phones, keyboards, remotes, and game controllers, cleaned with electronics-safe wipes Health authorities are consistent on the order of operations: clean surfaces first to remove grime, then disinfect to kill what remains, the sequence the CDC’s cleaning and disinfecting guidance lays out. And since school mornings run on routine, handwashing before snacks and after school is the cheapest illness insurance there is; the CDC’s handwashing basics are a two minute read worth sharing with the kids. Plan the Cleaning Schedule That Survives the Semester Assess what needs doing and how often, then assign tasks to fixed days so nothing relies on memory. A simple rotation keeps a family home steady even in the busiest weeks: Day Task Why It Fits Monday Vacuum high traffic rooms Clears the weekend’s mess early Midweek Laundry cycle Clean clothes ready for the second half Friday Dusting and touch-ups Sets up a clean, free weekend Weekend Kitchen and bathroom deep touch Resets the two germ hubs Assign age-appropriate tasks to the kids. Wiping tables and sorting laundry are real contributions, and kids who help clean treat the space differently afterward. Consistency turns the schedule into background noise instead of a weekly negotiation. Back-to-School Cleaning FAQs When should we start the back-to-school reset? The last two weeks of August are ideal: early enough to fix what you find, like missing uniform pieces, and close enough that the new systems hold through September. One weekend of work covers it if you follow the room order above. How do I get kids to keep their desks tidy? Give every item a labeled home and keep the surface to essentials only. A two minute reset as part of the after-school routine, backpack unpacked, desk cleared, works better than any weekend lecture. How often should touchpoints be disinfected during the school year? Wipe the highest traffic points, doorknobs, switches, and remotes, twice a week in normal times and daily during flu season or after someone has been sick. It takes minutes and measurably cuts the germ relay between family members. Can a cleaning service handle the seasonal resets? Absolutely. Deep cleans before the school year, and regular visits during it, keep the family home running without it consuming your evenings. Professional crews bring the products and the checklist; you keep the weekends. A Cleaner Start for North York Families Start the year with a home that works as hard as the students in it. Toronto Shine Cleaning serves North York and the wider GTA, with our coverage listed on the locations page, and regular plans through our housekeeping service or a full deep clean before the first bell. Call (647) 424-0355 and make this the organized school year.

An Easy Fresh Start: Top Tips for Back-to-School Cleaning in North York Read More »

woman in white long sleeve shirt and blue denim jeans standing beside white wooden framed glas

Deep Cleaning Services for Etobicoke Homes

Deep Cleaning Services for Etobicoke Homes Keeping an Etobicoke home truly clean means going beyond the weekly sweep and mop. Deep cleaning tackles the hidden dirt, grease, and allergens that regular cleaning misses. Toronto Shine Cleaning offers thorough deep cleaning services designed to refresh every corner of your Etobicoke home, from the kitchen backsplash to the bedroom baseboards. Our professional team uses eco-friendly products and commercial-grade equipment to deliver results that standard household cleaning cannot match. Whether your home is a century-old house in The Kingsway or a modern condo near Humber Bay Shores, our deep cleaning service adapts to the specific cleaning needs of your property and lifestyle. What Deep Cleaning Covers A deep cleaning service addresses areas that accumulate grime over time and are often neglected during routine cleaning. In the kitchen, we clean inside and outside all appliances including ovens, microwaves, and refrigerators. We scrub cabinet fronts and interiors to remove cooking grease and food residue, degrease backsplashes thoroughly, and sanitize countertops, sinks, and faucets. In bathrooms, we scrub tile and grout lines with specialized brushes to remove soap scum and mildew, clean shower doors and tracks, sanitize toilets including the base and behind, clean vanity cabinets inside and out, and polish mirrors to a streak-free shine. For living areas and bedrooms, we dust ceiling fans, window sills, blinds, light fixtures, picture frames, and baseboards. We vacuum under and behind furniture, clean door frames and switch plates, and detail every high-touch surface. We also pay special attention to staircases, handrails, and entryways that see heavy daily traffic and accumulate dirt faster than other areas. Benefits of Deep Cleaning Your Etobicoke Home Healthier indoor air: Deep cleaning removes dust mites, pollen, pet dander, and mould spores trapped in carpets, upholstery, and HVAC vents. This significantly reduces allergy and asthma triggers for your family and creates a fresher, more breathable environment. Extended lifespan of surfaces: Regular deep cleaning prevents dirt and grime from wearing down carpets, hardwood floors, tile grout, and appliance seals. This protects your home investment and delays the need for expensive replacements or refinishing. Reduced stress: A deeply cleaned home feels calmer, more organized, and more inviting. The psychological benefit of a clean environment directly improves your daily well-being and productivity, making your home a true sanctuary. Long-term savings: Removing dust build-up from appliance coils, filters, and seals helps appliances run efficiently and last longer. Well-maintained appliances consume less energy and require fewer repairs, saving you money month after month. Area Deep Cleaning Tasks Recommended Frequency Kitchen Inside oven, fridge, microwave; cabinet fronts and interiors; backsplash degreasing; counter sanitizing Every 3 to 4 months Bathroom Grout scrubbing; shower head descaling; toilet base and tank cleaning; mirror polishing Quarterly Living areas Under furniture dusting; ceiling fans; window tracks; baseboards; light fixtures Every 6 months HVAC vents Register cleaning; filter inspection; duct surface wipe-down Seasonally Why Etobicoke Homeowners Trust Professional Deep Cleaning Etobicoke homes have their own character. Older homes feature original hardwood floors, ornate woodwork, and classic tile that require gentle, specialized handling. Newer condos and townhouses feature stainless steel appliances, glass shower enclosures, and quartz countertops that need streak-free, non-abrasive care. Professional cleaners bring the right tools and expertise for every surface type. They use food-safe disinfectants in the kitchen, non-abrasive cleaners for tile and stone, and HEPA-filtered vacuums to capture fine particles that household vacuums recirculate. A professional deep cleaning also saves hours of physical effort and delivers results that are difficult to achieve with off-the-shelf cleaning supplies alone. How Deep Cleaning Differs from Regular Cleaning Understanding the difference between deep cleaning and standard housekeeping helps you choose the right service. A standard cleaning focuses on visible surfaces: countertops, floors, sink fixtures, and high-traffic areas. Deep cleaning goes further, targeting the grime that accumulates in hidden spaces. For example, while a regular cleaning wipes down the exterior of kitchen cabinets, a deep clean addresses the interior shelves and door tracks. Where standard service dusts visible shelves, deep cleaning reaches ceiling fan blades, window tracks, and under heavy furniture. Both services are valuable, but deep cleaning provides the comprehensive refresh that homes need periodically to stay truly clean and healthy. Frequently Asked Questions How is deep cleaning different from a standard clean? A standard clean addresses visible surfaces like counters, floors, and sinks. Deep cleaning includes detailed work on grout, inside and behind appliances, under furniture, baseboards, light fixtures, and window tracks for a comprehensive refresh. Do I need to be home during the cleaning? No. Many Etobicoke clients provide access instructions, and our bonded, insured team cleans while you are at work or running errands. What cleaning products do you use? We use eco-friendly, non-toxic cleaning products that are safe for children, pets, and all common home surfaces. We can also accommodate specific product requests or sensitivities. How long does a deep cleaning take? For a typical two-bedroom Etobicoke home, expect approximately three to five hours. Larger homes or homes with significant build-up may require more time. Transform your Etobicoke home with a professional deep cleaning today. Call (647) 424-0355 or visit our deep cleaning page to book. Our team also offers regular cleaning services for ongoing maintenance. View pricing and packages and read customer reviews on our reviews page. Serving all GTA locations including Etobicoke. For safe cleaning guidance, refer to the CDC guide on home cleaning and disinfection and the Canada.ca tips on household chemical safety.

Deep Cleaning Services for Etobicoke Homes Read More »

Cleaning Services East York

A Complete Guide to Cleaning After Moving Out

Why a Thorough Move-Out Clean Matters Cleaning after moving out is about more than appearances. A spotless unit helps you protect your security deposit, leaves a good impression with the landlord or next tenant, and makes the final walkthrough far less stressful. Moving is exhausting, so the cleaning often gets pushed to the last minute. That is exactly why a clear plan matters: break the job into room-by-room tasks, gather your supplies first, and tackle the dirtiest areas while you still have energy. Start With a Move-Out Cleaning Plan Before you touch a sponge, walk through the unit and note every area that needs attention. Build a checklist so nothing gets missed: kitchen, bathrooms, living room, bedrooms, hallways, closets, and windows. Landlords notice details like dusty baseboards, greasy range hoods, and dirty window tracks, so give those extras a place on your list. Confirm what your lease or property manager expects, since requirements vary from building to building. Ontario’s home and housing pages are a helpful starting point for tenant rights and responsibilities. Gather your supplies before you start: an all-purpose cleaner, microfiber cloths, glass cleaner, a scrub brush, a mop and bucket, and a vacuum with attachments. Having everything in one caddy means you can move from room to room without losing momentum. Kitchen: The Room Landlords Inspect First Empty the fridge and freezer, discard expired food, and wipe down every shelf and drawer. Clean the oven, stovetop, and range hood, including the filters, and degrease the backsplash. Wipe cabinet fronts and handles, take out all trash, and leave the sink clean and shiny. The kitchen shows the most wear, so it deserves the most time. Bathroom: Grime and Mildew Have to Go Scrub the toilet inside and out, remove soap scum from the tub and shower, clean the grout, and polish mirrors and fixtures. Wipe down the exhaust fan and vents, and check corners for mildew. If you spot mould, small areas can be cleaned with warm water and unscented dishwashing detergent, following CMHC’s mould guidance, but larger areas should be handled by trained professionals. Living Room and Bedrooms: Dust, Vacuum, Repeat Dust all surfaces from top to bottom, vacuum under furniture and along baseboards, and spot clean walls and doors. Wash or wipe closet shelves and drawers so the next tenant starts fresh. Wipe light switches, door handles, and window sills: the small touches that signal a truly clean home. For high-touch surfaces, the CDC recommends cleaning first, then disinfecting when needed, which is enough for most move-outs. Other Areas: Hallways, Entryways, and Storage Sweep and mop entryways, wipe doors and frames, and clean staircases and railings. Vacuum closets and storage areas, and remove every item you left behind. A quick pass over vents and light fixtures finishes the job and shows the unit was cared for end to end. Move-Out Cleaning Checklist Empty and wipe the fridge and freezer Clean the oven, stovetop, and range hood Scrub toilets, tubs, showers, and sinks Dust all surfaces and wipe baseboards Vacuum and mop every floor Clean windows, sills, and tracks Wipe light switches, door handles, and vents Take out all trash and recycling Room Must-Do Tasks Commonly Missed Spots Kitchen Fridge, oven, stovetop, counters, cabinets Range hood, backsplash, cabinet tops Bathroom Toilet, tub, shower, sink, mirror Grout, exhaust fan, behind the toilet Bedrooms and living room Dust, vacuum, mop, spot clean walls Baseboards, window tracks, closet shelves Entryway and halls Sweep, mop, wipe doors and frames Stair railings, light switches DIY or Professional Move-Out Cleaning? If you are short on time or the unit needs a deep reset, professional move-out cleaning often pays for itself in deposit protection and peace of mind. Toronto Shine Cleaning’s move-in/out cleaning service is designed for end-of-tenancy turnover, with move-out cleaning starting at $242.63 for a studio or 1 bedroom home before HST. Get an exact price for your home size, call us at (647) 424-0355, see the areas we serve, or read our customer reviews. Move-Out Cleaning FAQ Do I have to clean when I move out? Most leases ask tenants to return the unit in a reasonably clean condition, and a thorough clean is usually needed to get your full deposit back. Check your lease and local rules, and photograph the unit after cleaning. How long does a move-out clean take? A one-bedroom apartment can take most of a day when done alone, and larger homes take longer. Splitting the work across two days or booking professionals is a common approach. What do landlords check at a final walkthrough? They commonly check the fridge and oven, bathrooms for soap scum and mildew, floors, walls, windows, and any signs of damage or leftover items. Is professional move-out cleaning worth it? For most movers, yes: professionals cover the details landlords notice, save you hours during an already busy move, and the cost is often small compared with a partial deposit deduction.

A Complete Guide to Cleaning After Moving Out Read More »

Cleaner dusting mirror

Dust And Your Health: Why Dusting is a Good Idea

What Is Household Dust, and Why Does It Matter? Dust looks harmless on a coffee table, but it is actually a mix of dead skin cells, strands of hair, pet dander, pollen, and microscopic fibers from clothing, carpets, and household items. Tiny dust mites feed on this material and thrive in warm, humid places like beds, upholstered furniture, and carpets. It is not the mites themselves but their droppings and body fragments that act as powerful allergens for many people. Asthma Canada notes that Canadians spend about 90 percent of their time indoors, and the U.S. EPA reports that indoor air can be more polluted than outdoor air even in large cities. The EPA’s guide to indoor air quality explains why controlling dust is one of the simplest ways to improve the air you breathe. Allergies and Asthma: How Dust Affects Breathing For people with allergies or asthma, inhaling dust can trigger sneezing, a runny or stuffy nose, red or itchy eyes, and in more severe cases, wheezing, chest tightness, or full asthma attacks. Dust mite allergens are among the most common indoor triggers. Asthma Canada’s indoor triggers guide explains that dust mites live in carpet fibres, plush furniture, curtains, mattresses, pillows, and bedding, and their excretions and body parts can powerfully trigger asthma symptoms. Skin Irritation and Long-Term Concerns Dust does not only affect the lungs. For people with sensitive skin or eczema, dust particles can stick to the skin and cause rashes, itching, or flare-ups. Researchers are also studying the long-term effects of chronic dust exposure, including possible links to respiratory conditions and other lung issues, and the National Institute of Environmental Health Sciences lists house-dust mites among the most common allergens. Keeping dust under control is a low-effort way to protect everyone in the household, especially children, seniors, and people with respiratory conditions. Why Regular Dusting Helps Your Home and Your Health Dusting is much more than a chore for appearances. Regular dusting delivers real benefits: Reduces allergens and irritants in the air you breathe Improves indoor air quality, especially during allergy season Protects electronics, furniture, and fabrics from dust buildup Reduces the need for harsh chemical cleaners Creates a calmer, more inviting living space There is a psychological side too. A clean, dust-free room feels calmer and more peaceful, and a tidy space is easier to relax in after a long day. Even the act of dusting can be therapeutic: a simple, repetitive task that lets your mind settle while you work. Dust also damages belongings over time. It settles into electronics, scratches fine surfaces, and dulls fabrics and finishes, so regular dusting protects your furniture and appliances as much as your lungs. Dusting Tips That Actually Work Dust from the top down, using a damp microfiber cloth so particles stick to the cloth instead of floating into the air. Vacuum regularly with a HEPA-filter vacuum, and do not forget under furniture and along baseboards. In the bedroom, wash bedding in hot water and consider allergen-proof encasings for the mattress and pillows. Keep indoor humidity below 50 percent, since dust mites cannot survive in dry environments. Dust Source Where It Hides How to Control It Dust mites Mattresses, pillows, bedding, carpets, upholstered furniture Wash bedding in hot water, use allergen-proof encasings, keep humidity below 50 percent Pet dander Carpets, furniture, fabrics Vacuum with a HEPA filter, dust with damp cloths Pollen and outdoor particles Window sills, entryways, shelves Wipe surfaces weekly, remove shoes at the door When Professional Cleaning Makes a Difference If allergies are flaring up or dust has built up in hard-to-reach places, a professional clean can reset your home. Toronto Shine Cleaning’s regular cleaning service keeps dust under control on a schedule, and our deep cleaning service reaches the spots that are easy to miss, like vents, baseboards, and behind furniture. Every cleaner is background-checked and insured, and we can use eco-friendly products on request. Call us at (647) 424-0355, read our customer reviews, or see the areas we serve to get started. Dust and Health FAQ Is household dust bad for your health? For most people dust is a nuisance, but for those with allergies, asthma, or sensitive skin it can trigger sneezing, itchy eyes, wheezing, rashes, and flare-ups. Reducing dust through regular cleaning lowers exposure for everyone. How often should I dust my home? Dust high-traffic surfaces weekly and do a deeper dusting of shelves, baseboards, and vents once a month. Homes with pets or allergy sufferers benefit from more frequent dusting. Does dusting make allergies worse? Dusting with a dry cloth can stir particles into the air. Use a damp microfiber cloth and vacuum with a HEPA filter to trap dust instead of spreading it. Can dust mites be eliminated completely? No, but you can control them: wash bedding in hot water weekly, use allergen-proof encasings, remove carpet where possible, and keep humidity below 50 percent.

Dust And Your Health: Why Dusting is a Good Idea Read More »

yellow sponges

The Ultimate Spring Cleaning Guide 101

Why Spring Cleaning Matters for Your Toronto Home Spring is the season of renewal, and after a long winter of closed windows and indoor heating, your home needs a refresh. Spring cleaning is more than a tradition: it is a chance to remove the dust, allergens, and clutter that settled in over the colder months before allergy season arrives. A clean home reduces common triggers like dust and mold, which is especially helpful as the weather warms up. The U.S. EPA notes that indoor air can be more polluted than outdoor air even in large cities, and most people spend about 90 percent of their time indoors, so the air in your home deserves attention. Learn more about indoor air quality from the EPA before you start. Think of spring cleaning as clearing your space and your mind at the same time. Sorting through stacks of magazines, reorganizing closets, and scrubbing the kitchen are physical activities that also make room for new experiences. Approach the project room by room, and you will see real progress with every finished space instead of feeling overwhelmed. Where to Start: Declutter Before You Deep Clean Decluttering is the opening act of any good spring clean. Work through the home one room at a time and sort items into keep, donate, recycle, and toss piles. That sweater you have not worn in a year? Let it find a new home. Those old magazines gathering dust? Recycle them. Clearing the stage first makes every later step faster and gives you an immediate sense of accomplishment. Gather the Right Cleaning Tools Before you start, assemble everything you need so you are not hunting for supplies mid-task. Here is the starter kit: An all-purpose cleaner for most surfaces Microfiber cloths that trap dust instead of pushing it around A duster with an extension handle for high shelves and corners A vacuum with attachments for edges, upholstery, and under furniture A mop and bucket for hard floors Rubber gloves and a scrub brush for stubborn spots When using any cleaning product, read the label, never mix products, and keep children and pets away from the work area. The National Capital Poison Center publishes safe spring cleaning tips that are worth a quick read before you begin. Room-by-Room Spring Cleaning Checklist Working room by room keeps the project manageable and gives you a visible win with each finished space. Start wherever you feel most motivated, then move through the rest of the home. Kitchen: empty the fridge shelf by shelf, wipe every surface, and tackle the oven and stovetop. Bathroom: disinfect the toilet, scrub away soap scum in the tub and shower, and polish the mirrors for a streak-free shine. Living room: dust bookshelves and coffee tables, then vacuum the floors, including under furniture. Bedroom: strip the bed, wash the linens, and flip or rotate the mattress to extend its life and help you sleep better. Room Priority Tasks Tools to Have Ready Kitchen Empty and wipe the fridge, clean the oven, degrease the stovetop All-purpose cleaner, microfiber cloths, sponge Bathroom Disinfect the toilet, scrub tub and shower, polish mirrors Disinfectant, scrub brush, glass cleaner Living room Dust surfaces, vacuum floors and under furniture, rearrange if needed Duster, vacuum, microfiber cloths Bedroom Wash linens, flip or rotate the mattress, tidy closets Fresh bedding, vacuum, storage bins Don’t Forget the Small Stuff Light switches, door handles, window sills, baseboards, and vents are touched or ignored daily and collect surprising amounts of grime. Wipe them down during your spring clean, and you will notice how much fresher each room feels. For high-touch surfaces like handles and switches, the CDC recommends cleaning first, then sanitizing or disinfecting when someone is sick or at higher risk of illness. See the CDC guidance on cleaning and disinfecting your home. Outdoor Spaces and Maintaining the Clean If you have a balcony, patio, or entryway, sweep away the leaves and debris that gathered over the fall and winter, and declutter anything that does not belong there. To make the results last, build small habits: a few minutes of daily tidying, a weekly schedule that assigns one task per day, and cleaning supplies stored where you actually use them. When to Call in Professional Cleaners Sometimes the job is bigger than your weekend allows. Toronto Shine Cleaning offers a regular cleaning service to maintain your home and a deep cleaning service for the top-to-bottom reset your home needs once a season. Our insured, background-checked team follows a detailed checklist and can use eco-friendly products on request. Call us at (647) 424-0355, check our house cleaning prices, or see the areas we serve to get started. Spring Cleaning FAQ How long does a full spring cleaning take? A thorough spring clean of a typical Toronto apartment usually takes a full day when done alone, and longer for larger homes. Splitting the work across rooms and weekends makes it easier to finish without burnout. What should I clean first during spring cleaning? Start with decluttering, then clean from the top down: dust high shelves and ceiling corners before vacuuming and mopping floors, so loosened dust does not land on finished surfaces. How often should I do a deep spring cleaning? Once a year is the traditional pace, but homes with pets, allergies, or young children benefit from a deep clean every season or every few months. Is spring cleaning worth hiring professionals for? If your schedule is tight or the home needs a full reset, professional cleaners save hours and reach the spots that are easy to miss. Many families book a deep cleaning once a year and keep up with regular cleanings in between.

The Ultimate Spring Cleaning Guide 101 Read More »