Decoration

Labeling Kitchen Items – 4 Easy and Fast Tips

Kitchen product labeling is not merely a formality; it is a critical pillar of safety, health, and efficiency in any space where food is prepared, stored, or cleaned. The seemingly small details printed on a package or affixed to a container carry immense weight, guiding decisions that impact well-being, prevent waste, and ensure smooth operations. Without clear, accurate labeling, a kitchen, whether professional or domestic, quickly descends into a realm of uncertainty and potential hazards. 1.Food Allergies Consider the immediate and profound impact on safety. Allergens, for instance, represent a constant, invisible threat without proper labeling. For individuals with severe food allergies to peanuts, tree nuts, dairy, gluten, soy, eggs, fish, or shellfish, the absence of explicit allergen warnings on food packaging can mean the difference between a safe meal and a life-threatening anaphylactic shock. This isn’t just about avoiding discomfort; it’s about preventing medical emergencies. Labels clearly state “contains” or “may contain” information, allowing consumers to make informed choices that protect their health. This responsibility extends beyond the original packaging. Once a product is opened and transferred to another container, or if ingredients are portioned out, the new container must be meticulously labeled with its contents and, crucially, any allergen information relevant to those ingredients. Imagine a kitchen where flour is stored next to gluten-free flour without distinction, or where sugar is confused with salt; such errors are not just inconvenient but can render food inedible or, worse, dangerous. 2.Validity Data Expiry dates and best-before dates are another fundamental safety component. These dates are not arbitrary; they are meticulously determined by manufacturers based on product stability and safety. Consuming food past its expiry date significantly increases the risk of foodborne illnesses, ranging from mild digestive upset to severe bacterial infections like salmonella or E. coli. Labels on perishable items like dairy, meats, and prepared foods dictate the window within which they are safest to consume. For shelf-stable goods, a best-before date indicates optimal quality rather than immediate danger, but ignoring it can still lead to diminished taste, texture, and nutritional value. The absence of these dates, or their illegibility, creates a guessing game, leading to either unnecessary waste due to premature disposal or dangerous consumption of spoiled goods. Effective labeling ensures that a rotation system, like “First-In, First-Out” (FIFO), can be accurately implemented, minimizing spoilage and optimizing inventory. 3.Cleaning Products Beyond food, the kitchen is also home to various cleaning products, each with its own set of risks and specific usage instructions. A cleaning product label is a comprehensive safety manual. It details active ingredients, potential hazards (corrosive, irritant, flammable), and crucial first aid measures in case of accidental contact or ingestion. It specifies appropriate personal protective equipment (gloves, eye protection), ventilation requirements, and compatible surfaces. Using the wrong cleaner on a surface, applying an undiluted concentrate, or mixing incompatible chemicals can lead to damage to kitchen surfaces, toxic fumes, or even explosive reactions. Imagine mistaking a strong oven cleaner for a dish soap; the consequences could be severe for both the user and the kitchen environment. Clear, persistent labeling on these products is not merely a recommendation; it is an absolute necessity for safe handling and preventing chemical burns, respiratory issues, or other serious injuries. Nutritional information on food labels serves a vital health function. For many, dietary choices are not just about taste but about managing chronic health conditions like diabetes, heart disease, or hypertension. The nutrition facts panel provides detailed breakdowns of calories, fats, carbohydrates, sugars, sodium, and protein, empowering individuals to make informed decisions that align with their specific health needs or dietary goals. Labels also list vitamins and minerals, helping to identify nutrient-dense options or potential deficiencies. Without this information, individuals are left guessing, making it incredibly difficult to maintain a balanced diet or adhere to medically advised restrictions. Furthermore, ingredient lists are crucial for those avoiding specific components for ethical reasons, such as animal products for vegans, or for those with sensitivities to certain additives, preservatives, or artificial colors. The transparency provided by comprehensive labeling fosters trust and enables consumers to exercise genuine autonomy over what they consume. 4.Storage Proper storage instructions, frequently found on labels, are essential for maintaining food quality and preventing spoilage. Labels dictate whether a product requires refrigeration, freezing, or pantry storage, and often specify conditions like “store in a cool, dry place away from direct sunlight” or “refrigerate after opening.” These instructions are not arbitrary suggestions but are based on scientific understanding of how different ingredients react to temperature, light, and air exposure. Ignoring these guidelines can lead to rapid degradation of food quality, nutrient loss, and bacterial growth. An opened jar of sauce, for instance, might have a short “use within X days of opening” recommendation due to increased exposure to air and potential contaminants. Labeling ensures that these critical details are not overlooked, extending the useful life of food and preventing unnecessary waste. Efficiency in a kitchen, particularly in a professional setting, relies heavily on organized processes, and labeling is central to this. Knowing exactly what is in every container, when it was prepared, and when it expires streamlines inventory management, reduces preparation time, and minimizes cross-contamination risks. For dry goods like spices, flours, or grains, labeling prevents mix-ups that could ruin a dish or, again, pose an allergen risk. Imagine a busy kitchen without labels on containers of baking soda and baking powder; the subtle difference could lead to a collapsed cake or an inedible one. Even for homemade items like sauces, stocks, or prepped vegetables, clear labels indicating content and date of preparation are indispensable for maintaining freshness and ensuring proper rotation. This not only saves money by preventing spoilage but also saves time by eliminating guesswork. The legal and regulatory framework underpinning product labeling underscores its importance. Governments worldwide mandate specific labeling requirements for food and cleaning products to protect consumers. These regulations cover everything from ingredient disclosure and nutritional information to allergen warnings and handling instructions. Manufacturers are legally obligated to
Labeling Kitchen Items – 4 Easy and Fast Tips Read More »

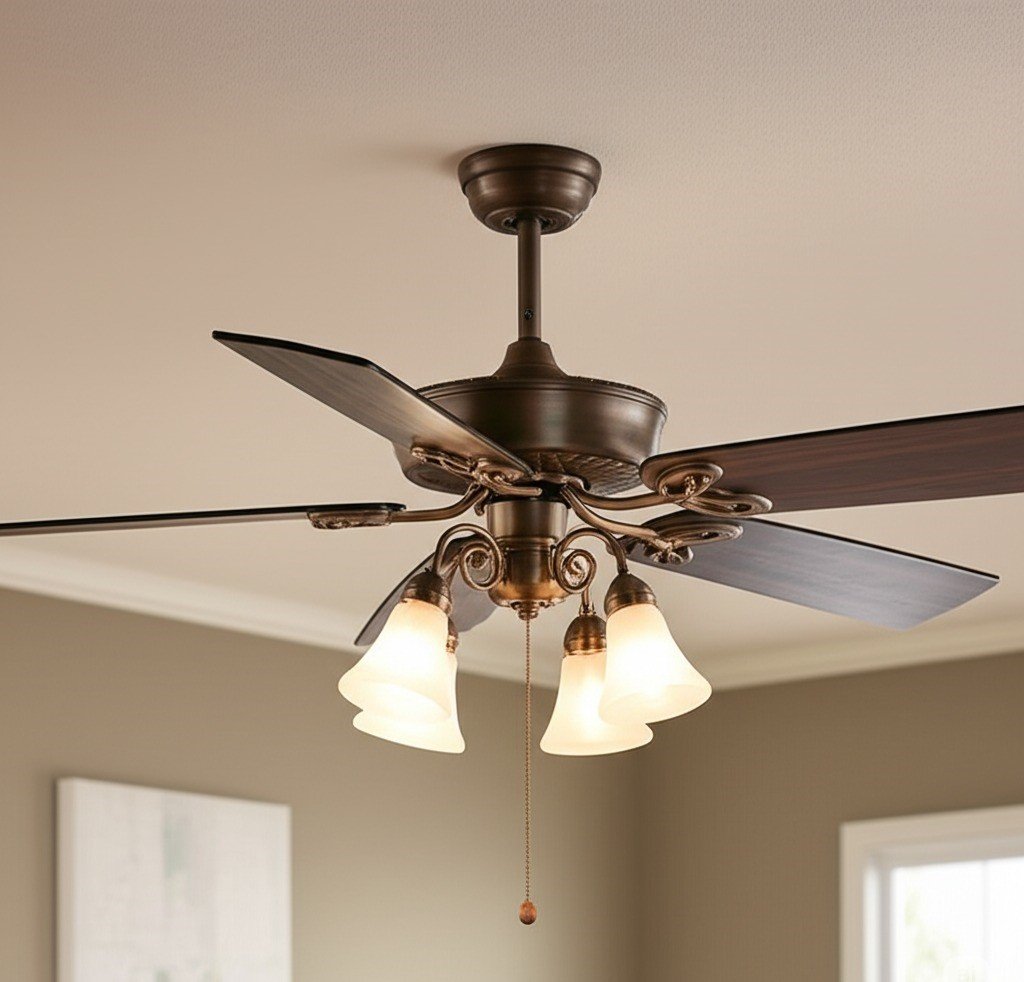
ceiling fan

4 Ceiling Fan Cleaning Tricks You Need to Try

Cleaning a ceiling fan is an essential household chore that significantly improves the air quality in your home and maintains its operational efficiency. Dust and dirt that accumulate on fan blades are not only unsightly; they can be dispersed into the air with each rotation, potentially aggravating allergies and respiratory problems. Additionally, a substantial buildup of debris can cause the blades to become unbalanced, which can cause wobbling, noise, and excessive strain on the fan motor, reducing its lifespan. This guide provides a comprehensive and straightforward approach to cleaning your ceiling fan safely and effectively. 1.Protection Before you begin the cleaning process, meticulous preparation is essential. Make sure you have all the necessary supplies readily available. A sturdy, stable ladder is essential; choose one that allows you to reach the fan comfortably without overreaching or standing on the top rungs. An A-frame ladder or platform ladder usually offers the best stability. You’ll need an old sheet, a painter’s tarp (canvas or plastic), or even large, flat cardboard boxes to cover the furniture and floor directly below the fan. This protective layer will catch any dust and debris that falls from the fan, making the cleanup process much easier. Personal protective equipment (PPE) is also crucial. Wear safety glasses, preferably the wraparound type, to protect your eyes from falling particles, and a dust mask (an N95 respirator offers superior protection) to avoid inhaling dust. For the cleaning itself, gather an old pillowcase (cotton works well due to its light texture), a vacuum cleaner equipped with a soft brush attachment and possibly a crevice tool, several clean microfiber cloths (their electrostatic properties make them excellent at trapping dust), and a cleaning solution appropriate for cleaning your ceiling fan. For most fan blades made of metal, plastic, or finished wood, a mild all-purpose cleaner diluted with water will usually suffice. A common homemade solution is a mixture of equal parts white vinegar and water in a spray bottle. If your fan blades are made of delicate, unfinished or specialty wood, a wood-specific cleaner or simply a cloth lightly dampened with plain water is recommended to prevent damage. Always have a dry cloth on hand to wipe away excess moisture. 2.Circuit Breaker The first and most critical step before making any physical contact with your ceiling fan is to ensure that it is completely de-energized. Turn off the fan using the designated wall switch or pull chain. For an added layer of safety and to eliminate any risk of accidental activation, go to your home’s electrical panel and turn off the circuit breaker that controls the power supply to the ceiling fan. It’s a good practice to test the fan’s switch again after turning off the circuit breaker to confirm that the power has indeed been cut off. You may even consider placing a piece of tape over the switch or circuit breaker as a reminder not to turn it back on prematurely. Ladder safety cannot be overemphasized: make sure the ladder is fully extended, your feet are firmly planted on level ground, and that you can comfortably access the fan blades. Maintain three points of contact with the ladder whenever possible (two feet and one hand, or two hands and one foot). Avoid overreaching; it’s safer to climb down and reposition the ladder. Having another person present to act as a spotter can provide additional safety so that you can clean your ceiling fan without any problems. With all safety precautions in place and your supplies organized, carefully lay down your chosen tarp or old sheet over the floor and any furniture directly beneath the fan. This will be your main defense against a shower of dust that will spread throughout the room. Put on your safety glasses and dust mask before beginning any cleaning action. One of the most efficient and least messy methods for cleaning dusty fan blades involves using an old pillowcase. Carefully climb up on a ladder. Grab the open end of the pillowcase and carefully slide it over an entire fan blade, as if you were putting on a sock, making sure the blade is completely enclosed in the fabric. Once the blade is inside, gently press the top and bottom surfaces of the pillowcase against the blade. Then, in a smooth, controlled motion, slide the pillowcase off the blade. The dust, dirt, and cobwebs will be contained in the pillowcase, rather than being blown into the air or onto the surfaces below. Repeat this procedure for each blade. Once all the blades have been treated, carefully take the dust-filled pillowcase outside and shake it out well, away from open windows or doors. If there is still some lingering residue on the blades, you can proceed with cleaning your ceiling fan. 3.Dust Alternatively, you can use a vacuum cleaner fitted with a soft brush attachment. This method is particularly suitable for light dust accumulations or for more regular, quick touch-ups between deeper cleanings. Before you begin, make sure the brush attachment is clean to avoid transferring dirt. Carefully and methodically vacuum the top, bottom, and all edges of each fan blade. Move the attachment slowly to maximize dust capture, and be careful not to scratch the blade surface or unbalance it inadvertently. The crevice cleaning attachment can be useful for cleaning the areas where the blades attach to the motor housing (the blade mounts or brackets) of your ceiling fan. For more intensive cleaning, or if the blades are coated with an oily film or stubborn, caked-on dirt (often found on ceiling fans in or near kitchens), you will need to clean them directly. Dampen a clean microfiber cloth with your chosen cleaning solution. Wring the cloth out thoroughly; it should be damp, not soaking wet. Excess moisture can cause irreparable damage to the internal components of the fan motor and can also cause the wooden blades to warp, swell, or stain. Gently wipe down all surfaces of each blade—top, bottom, and the leading and trailing edges.

4 Ceiling Fan Cleaning Tricks You Need to Try Read More »

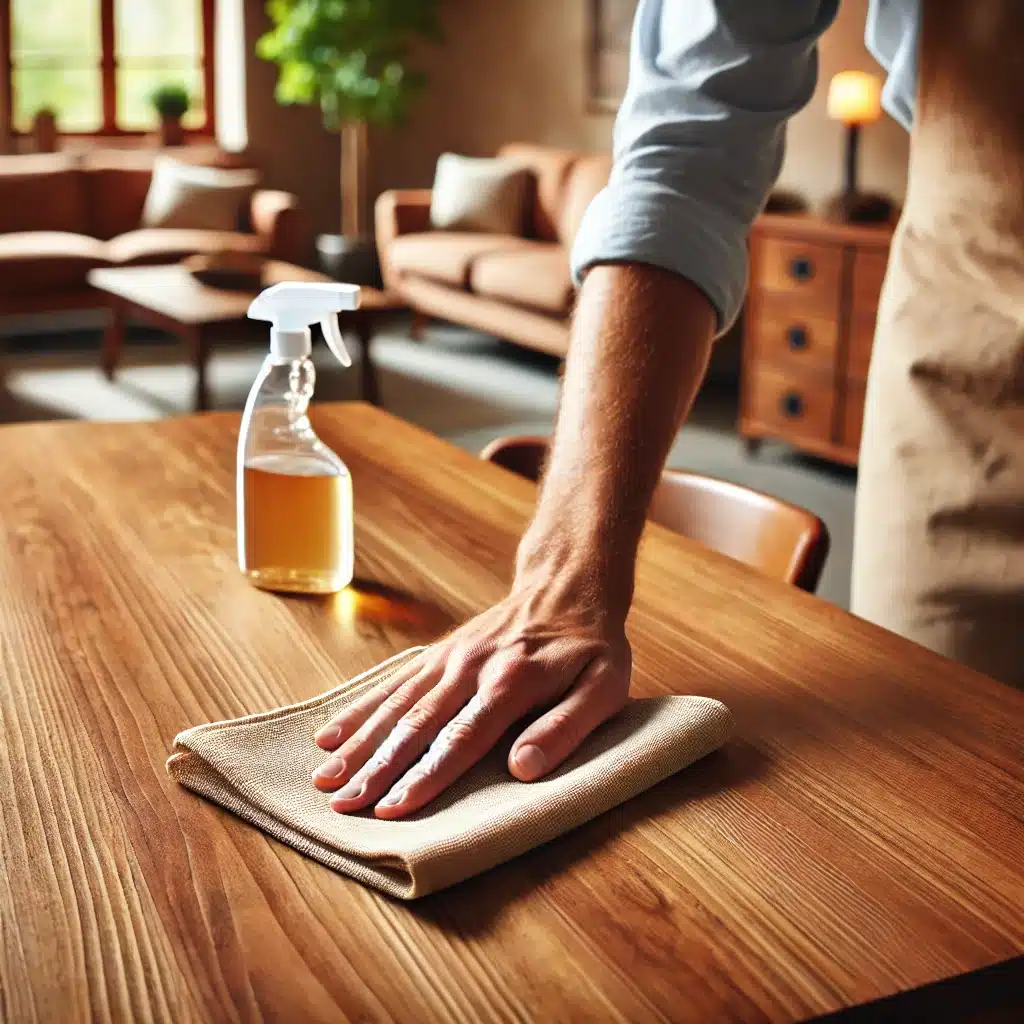
Cleaning wooden furniture with microfiber cloth

5 Best Ways to Clean Wooden Furniture and Keep It Looking New

Wooden furniture adds warmth and elegance to any home, but it requires proper care to maintain its beauty. Using the wrong cleaning methods can cause damage, dull the finish, or lead to buildup. If you want to clean wooden furniture effectively and keep it looking like new, follow these five best methods. With the right cleaning techniques, your wooden furniture can maintain its natural shine and durability for years. 1. Dust Regularly with a Microfiber Cloth One of the easiest ways to clean wooden furniture is by dusting it regularly. Dust buildup can make your furniture look dull and neglected, affecting its natural beauty. If dust accumulates for too long, it can mix with moisture in the air and create a sticky residue that is difficult to remove. Using a soft microfiber cloth helps trap dust without scratching the wood’s surface, making it the best option for maintaining your furniture’s finish. For best results, dust your wooden furniture at least once a week. When dusting, move the cloth in the direction of the wood grain to prevent tiny scratches. Avoid using dry paper towels or rough fabrics, as they can leave micro-abrasions on the wood. If your wooden furniture has detailed carvings or hard-to-reach corners, use a soft brush or an old toothbrush to remove dust from small crevices without damaging the finish. In addition to regular dusting, consider using a static duster or a vacuum with a brush attachment for larger pieces of furniture. These tools help remove dust from underneath tables, along chair legs, and inside cabinets. Keeping wooden furniture dust-free not only enhances its appearance but also prevents dirt buildup that could require deeper cleaning in the future.     2. Use a Gentle Wood Cleaner When it comes to cleaning wooden furniture, using a gentle and safe wood cleaner is essential. Harsh chemical-based cleaners can strip away the protective finish, leaving the wood vulnerable to stains and damage. A simple yet effective way to clean wooden furniture is by using mild dish soap mixed with warm water. This solution is strong enough to remove grime but gentle enough to preserve the wood’s natural texture and sheen. To clean wooden furniture properly, dampen a soft cloth with the soapy water solution and wipe the surface in circular motions. Never soak the wood or allow water to sit on the surface, as excessive moisture can cause warping, discoloration, or even mold growth. Always follow up by drying the furniture immediately with a clean, dry cloth to remove any leftover moisture. This prevents water damage and keeps the wood looking polished. If you prefer a store-bought wood cleaner, choose a product specifically designed for natural wood furniture. Avoid cleaners with ammonia, bleach, or silicone, as these ingredients can cause long-term damage. A high-quality wood cleaner will help remove dirt and fingerprints while preserving the protective finish of your wooden furniture, ensuring that it remains in top condition for years to come. 3. Polish with Natural Oils for Shine To keep wooden furniture looking vibrant and polished, regular oiling is essential. Natural oils like mineral oil or lemon oil work wonders in restoring the wood’s shine while preventing it from drying out. Unlike wax-based polishes that leave behind residue, natural oils penetrate the wood, keeping it nourished and protected from cracks or discoloration. To properly clean wooden furniture and enhance its shine, apply a small amount of oil to a soft cloth and rub it gently onto the surface using circular motions. Let the oil sit for a few minutes before buffing it with a clean, dry cloth. This method helps seal in moisture, making wooden furniture more resistant to dust, dirt, and environmental factors like humidity. Polishing once every few months can significantly extend the life of your furniture and keep it looking brand new. It’s important to use the right type of oil for your wooden furniture. Avoid vegetable oils or olive oil, as they can turn rancid and attract dust. Instead, opt for high-quality wood oils or specialized furniture polishes designed for wooden surfaces. By incorporating regular polishing into your furniture care routine, you can keep your wooden furniture glowing with a natural, healthy finish.     4. Protect Against Scratches and Spills Scratches, spills, and stains are some of the biggest threats to wooden furniture. Without proper protection, wooden surfaces can easily develop unsightly marks that are difficult to remove. To prevent scratches, always use coasters under glasses, placemats under plates, and felt pads under decorative objects. These small precautions can help minimize the risk of surface damage and keep your wooden furniture in top shape. If your wooden furniture does get scratched, there are easy ways to fix minor imperfections. A simple trick is to rub a walnut over light scratches—the natural oils in the nut help darken the scratch, making it less visible. For deeper scratches, furniture wax or wood repair markers can help restore the original finish. Keeping a wood touch-up kit on hand is a great way to maintain your furniture’s appearance in case of accidental damage. Spills are another common problem that can ruin wooden furniture. Always clean up spills immediately using a dry cloth to prevent liquid from seeping into the wood. If water rings or stains appear, applying a small amount of wood polish can help restore the finish. By taking preventative measures, you can clean wooden furniture more effectively and prevent long-term damage. 5. Keep Wooden Furniture Away from Direct Sunlight and Humidity Environmental factors like sunlight and humidity can significantly impact the condition of wooden furniture. Prolonged exposure to direct sunlight can cause wood to fade, dry out, or develop cracks over time. To protect wooden furniture, place it away from windows or use curtains and blinds to block intense sunlight. If rearranging furniture isn’t an option, consider using UV-protective furniture sprays to reduce sun damage. Humidity is another major factor that affects wooden furniture. Excess moisture in the air can cause wood to swell and

5 Best Ways to Clean Wooden Furniture and Keep It Looking New Read More »

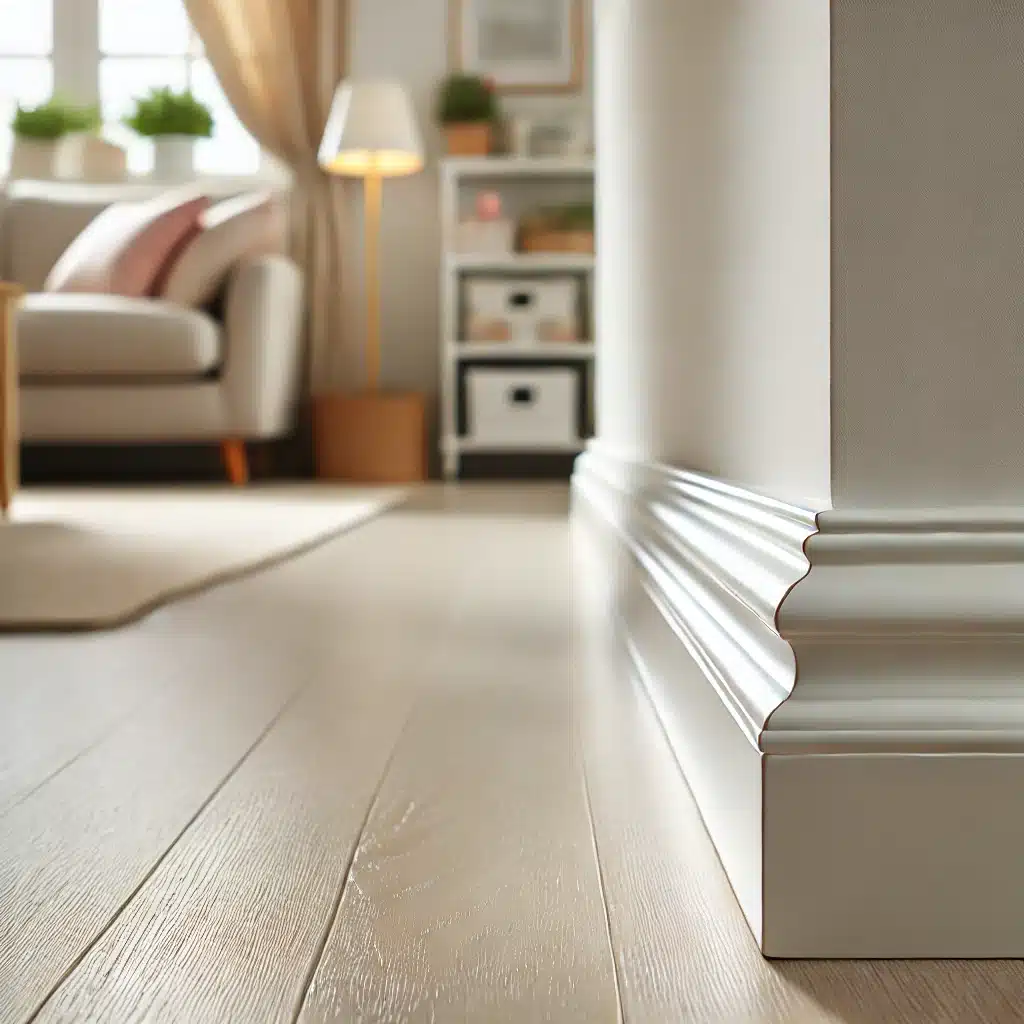
Spotless white baseboard and clean floor in a well-lit room.

How to Clean Baseboards: 5 Easy Hacks

How to Clean Baseboards: 5 Easy Hacks That Work Baseboards line every room in your home, which means they collect dust, scuffs, and grime from the constant floor traffic that passes them. Because they sit low and out of the line of sight, they often go months between cleanings, until the buildup demands serious scrubbing. These five easy hacks keep baseboards clean with tools you likely already own, and each one takes minutes rather than hours. 1. Dust Weekly With a Microfiber Cloth Regular dusting prevents the gritty film that makes baseboards look dull. Run a dry microfiber cloth along the full length of each board, front face and top edge, once a week; microfiber traps dust instead of pushing it into the air. For stubborn dust, dampen the cloth and wring it out well, because a dripping cloth leaves streaks and can seep behind the trim. Do not forget the top edges and corner joints: dust settles there first and shows at eye level the moment you sit down. A weekly pass takes about ten minutes for a whole house and dramatically cuts the need for deep scrubbing. 2. Vacuum With a Brush Attachment The vacuum brush attachment makes quick work of the dust, pet hair, and debris that cling to baseboards. Fit the brush head and run it slowly along the trim so the suction has time to lift what the bristles loosen. This step is especially valuable in pet homes, where hair collects along the bottom of walls even when the floors look clean. Use the attachment on top edges and in corners too, since those spots catch the most dust. A vacuum pass before any damp cleaning removes loose dirt, which means your cloth picks up grime instead of smearing it around. 3. Erase Scuffs and Stains With a Magic Eraser Scuffs from shoes, vacuum bumpers, and toys show up fast on painted baseboards. A damp magic eraser lifts these marks without heavy scrubbing: wet it, squeeze out the excess so it is just moist, and rub the mark in gentle circles. The eraser’s fine abrasive action breaks down the scuff while staying safe on painted and wood trim. Wipe the area with a clean cloth when you finish so no residue is left behind. Keeping one eraser near your cleaning supplies means scuffs no longer give you a reason to postpone baseboard care. 4. Use a DIY Cleaning Solution for Grime For the greasy, gray film that builds up near kitchens and entryways, a homemade cleaner cuts through better than plain water. Whisk a 50/50 vinegar and water blend in a spray bottle with a few drops of dish soap, then shake gently to combine. Spray the solution onto a cloth rather than the wall, wipe the baseboard, and follow with a damp cloth to rinse away any soapy residue. This gentle mix suits painted and wood trim alike, and for most homes regular cleaning is all baseboards need; the CDC’s home cleaning guidance explains when disinfecting is actually necessary. When you make your own products, treat them with the same care as store-bought ones: never combine the mixture with bleach or other chemicals, and follow Health Canada’s household chemical safety guidance for storing and labelling it safely. 5. Repel Dust With Dryer Sheets Dryer sheets do more than soften laundry: rubbed along a baseboard, they pick up dust and leave an antistatic layer that makes future dust slide off instead of sticking. Run a sheet along each board after cleaning, replace it as soon as it looks dirty, and enjoy baseboards that stay cleaner between dustings. This finishing step takes seconds per room and noticeably extends the time between deep cleans, which makes it the easiest hack on this list to keep up. If fragrance bothers anyone in your home, unscented dryer sheets give the same antistatic effect. Baseboard Cleaning Supplies to Keep Handy Microfiber cloths for dusting and rinsing Vacuum with a brush attachment Magic erasers for scuffs and marks Spray bottle with vinegar, water, and dish soap Dryer sheets for a dust-repelling finish Baseboard Cleaning Quick Reference Task Tool Frequency Dusting Dry microfiber cloth, dampened if needed Weekly Loose dust and pet hair Vacuum brush attachment Weekly Scuffs and marks Damp magic eraser As needed Greasy grime Vinegar, water, and dish soap spray Monthly Dust repellent finish Dryer sheet wipe-down After each cleaning Frequently Asked Questions About Cleaning Baseboards How often should baseboards be cleaned? Dust them weekly and do a deeper clean monthly; entryways and kitchens may need the damp routine more often because they collect more grime. Can vinegar damage painted baseboards? Diluted one part to one part with water it is safe for painted and wood trim, but rinse with a damp cloth afterwards and avoid using it on unsealed or raw wood. What is the fastest way to clean baseboards? A vacuum brush attachment removes loose dust quickly, and a dryer sheet wipe afterwards leaves an antistatic layer that slows future dust buildup. Why do my baseboards get dusty so quickly? Static charge attracts dust to painted trim and heating vents push particles along the floor, which is why antistatic dryer sheets help them stay clean longer. Do magic erasers damage paint? They can dull paint if scrubbed hard, so use light pressure with a damp eraser and test an inconspicuous spot first, especially on older or matte finishes. Spotless baseboards are one of those details that make a whole home feel freshly cleaned, and the right habits keep them that way without much effort. When you would rather leave the trim, floors, and everything else to the professionals, Toronto Shine Cleaning brings regular cleaning and deep cleaning to homes across the GTA, with straightforward rates on our pricing page. Call (647) 424-0355 to book your clean.

How to Clean Baseboards: 5 Easy Hacks Read More »

House cleaner inside a home

7 Innovative Tools Every Home Should Have to Prevent Falls | Toronto Shine Cleaning

Falls Are Predictable. Your Home Can Be Too. A fall at home can change a life in a second, and the people most at risk are the ones we love most: older adults and anyone managing a mobility challenge. The encouraging part is that most household falls are preventable with the right gear in the right places. From invisible floor treatments to alert systems that watch quietly in the background, these seven tools turn an ordinary house into one that actively protects the people inside it. 1. Non-Slip Floor Treatments Slick floors are fall machinery, and non-slip treatments disarm them. Applied to tile, hardwood, or laminate, the treatment adds a microscopic texture you cannot see but your feet absolutely feel, which sharply reduces the chance of a slip, especially when surfaces get wet. Bathrooms and kitchens gain the most because water and spills make those floors chronically treacherous: even after a splash, grip stays reliable. And because the treatment is effectively invisible, your floors keep their look while quietly becoming far safer underfoot. 2. Motion-Sensor Lighting Most people who fall in a hallway simply could not see the problem. Motion-sensor lighting ends that instantly: pathways, staircases, and rooms flood with light the moment someone enters, with no switch-hunting in the dark. That matters most at night, when a quick trip to the bathroom becomes the highest-risk journey in the house. The fixtures are energy efficient, switching themselves off once motion stops, and wiring them into your home security setup adds a bonus: the same lights that steady your steps also discourage intruders around the exterior. 3. Grab Bars and Handrails Some risks need something solid to hold, and modern hardware finally makes that stylish. In bathrooms, sturdy bars beside the tub, shower, and toilet give anyone with balance or mobility challenges a dependable anchor on wet ground. Along stairs and in hallways, handrails support everyone from toddlers mastering steps to grandparents who want extra assurance. Today’s bars and rails come in many finishes and styles, so safety hardware can match your decor instead of making your home look clinical. 4. Smart Floor Mats Smart mats are the newest guardrail for the rooms where falls cluster. Placed beside the bed, in front of favourite seating, or across high-traffic zones, they monitor movement instead of just padding it. If someone falls and stays down, the mat registers the abnormal stillness and can automatically alert a designated phone number or connected medical alert system, so help comes fast and injuries do not compound while nobody knows. They can also flag risky movement patterns, like repeated unsteady steps near the bathroom, giving caregivers a warning before the fall actually happens. 5. Cordless Vacuum Cleaners Cleaning itself causes falls when cords snake across walkways, which makes a cordless vacuum a safety device disguised as a chore tool. With no cable to trip over, keeping floors clean becomes quick and hazard-free, a real win in homes with children, pets, or anyone unsteady on their feet. Being lightweight and easy to steer also cuts the physical strain of vacuuming, helping older adults or people with limited strength cover more floor with less effort, and skipping the constant re-plugging shrinks the window when an accident could happen. 6. Shoe Organizers The humble shoe pile by the door is a genuine trip trap, and an organizer clears it for good. A hanging rack, a slim cabinet, or a simple tray pulls footwear off the floor and out of walkways, keeping busy entryways passable even in tight homes. Clear floors mean safer movement for every resident and every guest, and your shoes stop getting crushed at the bottom of a pile, so the little investment protects both people and footwear. 7. Smart Home Devices Voice control removes the walk you were about to take in the dark. Smart assistants can raise the lights, lock doors, switch the television, and adjust the thermostat on command, which means fewer unsteady crossings of a dim room late at night or first thing in the morning. Asking a device to light the hallway from bed, or to confirm the doors are locked without getting up, cuts exactly the low-light, half-awake moments when trips happen most. Where Each Tool Earns Its Keep Zone Best Tools Primary Hazard Covered Bathroom Non-slip treatment, grab bars, smart mat Wet surfaces and tub transfers Stairs and hallways Handrails, motion-sensor lights Missed steps and dim paths Entryway Shoe organizer, smart mat Clutter trips at the door Living areas Cordless vacuum, smart devices Cords, clutter, dark crossings None of this replaces steady habits: keeping spill-free floors and moving your body regularly both matter. A ten-minute weekly safety sweep catches most new hazards before they claim an ankle: Wipe any wet spot in the bathroom, kitchen, or entryway the moment it appears Re-route or retract cords crossing walkways, including charging cables Straighten rugs and confirm non-slip backing is still gripping the floor Put shoes away in the organizer instead of leaving them by the door Confirm night lights and sensor bulbs are still working along the bedroom-to-bathroom path Beyond habits, moving your body regularly matters too. The CDC’s page on physical activity benefits notes that regular activity keeps muscles and bones strong and supports balance, which is fall prevention from the inside out. A simple tidy-up routine, like the basics in the CDC cleaning and disinfecting guide, keeps wet spots and clutter from ever reaching tripping size. Book recurring floor-and-tidy upkeep through a regular cleaning service so the hazard pile never rebuilds. Frequently Asked Questions Which room should I protect first? Start with the bathroom, where wet surfaces and the tub or toilet concentrate the risk, then do the stairway. Non-slip treatment, a grab bar or two, and a light that turns on by itself cover the biggest dangers fastest. Do smart floor mats need wifi or a subscription? Models vary. Many connect to a phone by bluetooth or wifi and alert a preset contact when they detect a fall or

7 Innovative Tools Every Home Should Have to Prevent Falls | Toronto Shine Cleaning Read More »

toronto residential cleaning

5 Smart Storage Solutions for an Easy Clutter-Free Home

5 Smart Storage Solutions for an Easy, Clutter-Free Home A clutter-free home is not about owning less for its own sake. It is about giving what you own a place to live, so the rooms you use every day stay enjoyable and functional. The hard part is rarely the decision to keep something; it is working out where the thing should go. These five storage strategies suit a compact Toronto apartment and a larger house in the Greater Toronto Area alike. 1. Use the Vertical Space Walls are the most underused real estate in any home. Tall shelving units make dead height useful, holding books, decor, and baskets that keep less attractive items out of sight but still within reach. A few wall-mounted options cover the rest of the house: Racks over a kitchen counter for spices and utensils, or in a bathroom for toiletries and towels Over-the-door organizers for shoes, accessories, cleaning supplies, or pantry goods Hanging racks for pots and pans, which free cabinet space and turn cookware into decor Pegboards, a customizable grid of hooks for utensils and small appliances Over-the-door organizers install in minutes and move without fuss. Book lovers can run floor-to-ceiling shelves along a wall; placed well, those units also divide an open-concept space, add a little privacy, and hold photographs and memorabilia as easily as paperbacks. 2. Put the Space Under the Bed to Work The gap beneath a bed is often wasted, and it converts into storage very easily. Out-of-season clothing, spare bedding, shoes, accessories, books, and children’s toys all fit, as long as the contents stay accessible and dust-free. Bins on wheels roll out without a struggle, which makes rotating seasonal items far simpler than reaching under the frame. A bed frame with built-in drawers is the integrated version of the same idea, since the storage becomes part of the furniture and the look of the bedroom does not change. In a small bedroom this one move can roughly double the storage on offer. It helps with cleaning too, because a clear floor is quick to vacuum or wash and nothing has to be shifted out of the way. 3. Choose Multipurpose Furniture Furniture that stores things while doing its normal job earns its floor space twice. A coffee table with drawers keeps remotes, magazines, and coasters out of sight while holding drinks, books, and decor on top. An ottoman with storage can serve as a footrest, extra seating, or a table when you set a tray on it, and the space inside swallows blankets, pillows, and toys when visitors arrive. Benches with compartments suit an entryway, where you can sit to take off shoes and stash footwear, umbrellas, and outdoor gear underneath; the same piece works at the foot of a bed for extra bedding or seasonal clothing. Look for pieces with lids or drawers, so clutter disappears instead of simply moving to another surface, and remember that styles, materials, and finishes are wide ranging, so storage does not have to look like storage. 4. Declutter on a Schedule Storage buys room, but only a regular review stops clutter from returning. Going through your belongings asks one simple question about each item: has it been used recently, does it bring you joy, or is it merely taking up space? That habit makes you deliberate about what you buy and keep. A box kept near the door for donations helps: fill it whenever something loses its use, then drop it off during a regular errand. Decluttering also lowers stress, because a crowded room is hard to relax in, and clearing what you do not need creates a calmer, more orderly space. Passing items on, whether by donation, a sale, or a gift, gives them a second life and keeps useful goods out of landfill. Treat the process as ongoing rather than a one-time purge, since needs and preferences change and the home has to change with them. 5. Invest in Customizable Shelving Adjustable shelving adapts as your life does. Units can be added to, expanded, or trimmed back to fit a new collection or a new hobby, which keeps an organized home from sliding into clutter again. Flexibility also means style: sleek metal for a modern living room, warm wood for a study. In a kitchen, adjustable shelves accommodate appliances of different heights and packages of different sizes, which makes full use of pantry space. Heavy-duty versions in a garage hold tools, sports equipment, and seasonal decorations off the floor. Start with one wall or one alcove and expand once the system proves itself in daily use. Reconfiguring beats replacing, so the system saves money over the years and keeps old furniture out of the waste stream. Keep the Space Clean, Not Just Tidy Organization and cleanliness reinforce each other: a tidy room is quick to clean, and a clean room stays tidy longer. Toronto Shine Cleaning offers regular housekeeping from $212.63 before HST, deep cleaning, and specialty work such as post-construction clean-up, so the space you have organized also looks its best. Full rates are listed on the pricing page, and you can reach the team at (647) 424-0355. For the cleaning itself, the CDC guidance on cleaning and disinfecting your home explains how to handle high-touch surfaces, the CDC hygiene basics cover everyday habits, and the hand washing page is a good reminder after a session with dusty boxes. Frequently Asked Questions What is the quickest storage upgrade for a small home? Look up before you buy anything new. Wall-mounted racks, tall shelves, and over-the-door organizers add capacity without taking up a single square foot of floor space. Is under-bed storage a good idea? Yes, especially in a small bedroom, where it can roughly double your storage. Choose bins with wheels or a bed frame with drawers, and keep the contents sealed so dust does not settle on them. How often should I declutter? Treat it as a habit rather than a yearly event. A short review each

5 Smart Storage Solutions for an Easy Clutter-Free Home Read More »

Vibrant cityscape at sunset by Ceyda Ciftci.

Macrame Wall Hanging Clean: 5 Steps to Perfectly Take Care | Toronto Shine Cleaning

Macrame Wall Hanging Care: Five Steps to Keep It Perfectly Clean Macrame wall hangings have claimed a permanent spot in modern homes, layering boho texture and knotted pattern over bare walls. Like anything built from kilometres of cord, they also catch dust faster than a flat shelf ever could. The five steps below take you from routine dusting to a full bath and a refresh ritual, without fraying a single fringe in the process. Step 1: Dust It Off, Gently Dust is the first battle, and the easiest to win. Take the piece outside and give it a good shake: the motion frees settled dust and wakes up the knots at the same time. When a shake is not enough, run a soft-bristle brush along the contours of the weaving, letting each stroke comb grit out of the deepest crevices. The modern shortcut is a hand vacuum on its lowest power setting, glided slowly through the weaves with a soft nozzle so suction lifts dust without grabbing fibres. The guiding principle through all three options is gentleness. Knotted cord is durable and delicate at once, and heavy pressure or harsh tools will distort the shape and fray the strands. Step 2: Spot Clean Stains Calmly A stain on macrame is an inconvenience, not a disaster. Mix a small squirt of mild detergent into a bowl of water and treat it as your first-aid kit for the piece. Dip a soft cloth, wring it well, and dab at the mark with a light hand, coaxing it out rather than demanding its departure. Skip harsh chemicals entirely: they promise speed and deliver frayed, discoloured fibres. For a mark that fights back, sprinkle baking soda on a damp cloth and work it in softly, letting the gentle abrasive break the stain down where chemicals should not go. Buying tips for safer cleaners, including how to read labels, are on the Health Canada household products pages. Step 3: Wash Gently When It Is Time A full wash is a slow ritual, and that is the point. Fill a basin or tub with lukewarm water and a whisper of mild detergent, then submerge the hanging and let it soak so the water can travel into every twist and loosen accumulated grime. Swish the piece softly through the bath, a near-meditative motion that releases dirt while the structure holds its shape. Rinse under a gentle but thorough stream of clean water until no soap remains, because detergent residue dulls the fibres and attracts fresh dust. Nothing here should be hurried or aggressive. Step 4: Dry It Properly Drying decides whether the piece comes back to life or comes back misshapen. Start by squeezing gently, cradling the wet macrame and pressing out water without twisting the form. Lay the piece flat on a clean towel, which acts as a sponge while supporting the whole hanging so nothing stretches out of shape. Large pieces can hang outside to dry for the fresh-air bonus, but keep them out of direct sun, whose rays fade colour as surely as they brighten a room. Before anything goes back on the wall, confirm the piece is dry through and through: trapped moisture breeds mildew, and the CDC’s overview of mold and health explains why damp textiles are worth taking seriously indoors. Step 5: Maintain and Refresh Between Washes Long life comes from small, repeated gestures. Give the hanging an occasional shake to dislodge new dust before it settles. When fibres start to droop and lose their crispness, a gentle spritz of water acts like morning dew: the cords tighten and regain elasticity as they dry. Follow the mist with a pass of your fingers through the fringe to untangle knots and re-fluff the pattern. This routine is less about cleaning and more about conversation with the piece, reading its needs before problems appear. A Simple Care Schedule Task How often What you need Outdoor shake Weekly or fortnightly Just your hands Brush or low-power vacuum Monthly Soft-bristle brush or hand vacuum Spot treatment As soon as a mark appears Mild detergent, soft cloth, baking soda Full gentle wash Yearly, or when visibly dull Lukewarm water, mild detergent, clean towels Refresh spritz and finger-comb Whenever fibres droop Water spray bottle Keep the routine light by doing only what the piece asks for: Shake and brush before any wet step, since dry dust turns to mud when it meets water. Test every cleaning mixture on a hidden knot before it touches the front of the work. Never wring, scrub hard, or use a high-suction nozzle on loose fringe. Dry flat and fully, away from direct sun, before rehanging. Frequently Asked Questions Can a macrame hanging go in the washing machine? Hand washing is the safer habit for knotted, textured work. A machine agitates exactly what makes the piece: the loops and twists that hold the pattern. A basin soak with mild detergent gets the same refresh with none of the distortion risk. Is baking soda really enough for stubborn spots? On most household marks, yes. Its mild abrasiveness lifts grime without stripping colour the way solvent cleaners can. Work it on a damp cloth in soft circles, let the area dry, and brush the residue away before evaluating once more. How long does a washed piece need to dry? Flat drying on towels commonly takes a day or more depending on thickness and room humidity. Thicker cords hide dampness long after the surface feels dry, so press a towel into the densest knots and wait for a fully dry result before rehanging. Can I skip washing and only dust? Regular shaking and brushing carries a lightly used piece for years. When the whole hanging looks grey or feels gritty despite dusting, the fibres have collected more than surface dust and the gentle bath is due. Handing the Busy Households a Break Caring for handmade art deserves time, and life often does not hand out extra hours. That is where a helping routine earns

Macrame Wall Hanging Clean: 5 Steps to Perfectly Take Care | Toronto Shine Cleaning Read More »

Elegant metal geometric candle holder with intricate design.

Cheap and Chic Home Decor Finds for DIYers

5 Cheap and Chic Home Decor Finds Decorating a home does not have to drain a wallet. Small, well-chosen pieces can shift the mood of a room far more than one expensive statement item, and the five finds below all land under $20. Mix and match them, move them between rooms when the season changes, and your space starts to look considered rather than merely furnished. The shortlist, with the price you can expect to pay: Geometric candle holders, around $15 Decorative throw pillow covers, $10 to $20 Floating shelves, around $20 Boho-chic macrame wall hangings, $15 to $20 Vibrant plant pots, $5 to $20 1. Geometric Candle Holders These are candle holders and sculpture in one. Shapes run from spheres and hexagons to intricate polyhedrons, and each one plays with light differently, throwing patterns and shadows across the wall as the evening settles in. Cluster two or three at different heights on a mantel or a sideboard and the effect gets stronger. Material changes the mood again: a rose gold or silver finish feels sleek and sophisticated, perfect for a reading nook or a dinner table, while matte black brings a bold, understated edge that suits a minimalist room. During the day they simply sit there looking good and starting conversations. They can even hold a succulent or an air plant, which makes the same piece work twice. 2. Decorative Throw Pillow Covers Swapping covers costs a fraction of buying new cushions and reinvents a living room in minutes. The range is enormous, from intricate bohemian patterns and vibrant hues to the clean lines and muted tones of Scandinavian minimalism. A sunny yellow set lifts a room on a drab, rainy day, while deep blues and greens feel right through the colder months. Buy a cover slightly larger than the insert for a full look, and rotate the sets as the seasons turn. Texture and pattern add depth too, and mixing smooth silk with coarse linen gives a sofa more interest. Practicality seals it: covers slip off for washing, which is ideal in a home with pets or children, and reusing the inserts you already own is easier on both the wallet and the environment. 3. Floating Shelves A floating shelf saves floor space and cuts clutter, then goes further than a plain storage board. With no visible brackets, it seems to hover, lending a light, airy feel that helps smaller rooms. In a bathroom, shelves hold towels, toiletries, and a few decorative pieces for a spa-like atmosphere. In a living room, they turn family photos and collectibles into a gallery wall, or keep books and magazines tidy and visible; grouping two or three on a bare wall reads as a single arrangement. In a kitchen, they store spices, jars, and small appliances off the counter, and they can display vintage cookware or colourful plates. Warm wood adds a natural touch; industrial metal suits a contemporary edge. 4. Boho-Chic Macrame Wall Hangings Macrame is more than a passing trend. Each piece carries the signature of the person who tied it, so no two hangings are quite alike, and the handcrafted quality is exactly why it feels personal. A simple design with clean lines or an elaborate version with beads and feathers can suit the same room. Above a bed, a hanging turns a bedroom into a calmer retreat. In an entryway, it greets guests with earthy charm, and on a gallery wall it adds a tactile layer that contrasts with smooth framed art. Hang them away from direct sunlight so the fibres hold their colour. Cotton, jute, and wool read as sustainable and natural, drawing a little of the outdoors inside. 5. Vibrant Plant Pots The right pot magnifies everything a plant brings to a room. Options run from sleek monochrome designs to playful patterns, so an indoor garden can match the decor instead of fighting it. A bright colour against green foliage makes both pop, and bold textures turn a houseplant into a focal point. Plain pots also invite DIY: paint, decoupage, or a fabric wrap makes a one-of-a-kind piece. Function matters as much as form, so choose pots with drainage holes to prevent overwatering and pick a size that lets the roots develop, and set a saucer underneath to protect the surface below. Small succulents cluster happily in mini pots on a windowsill, herbs look good on a kitchen counter, and a large houseplant in a statement pot can anchor a whole corner. Styled and Spotless New decor looks its best in a clean room, and upkeep is what keeps the shine on your finds. A shelf that worked above a bathroom vanity can move above a desk after a rearrange, but no arrangement looks sharp under a layer of dust. Toronto Shine Cleaning handles routine tidy-ups and in-depth deep cleans, with rates from $212.63 before HST listed on the pricing page. Book by calling (647) 424-0355. When you clean around delicate decor, the CDC advice on cleaning and disinfecting your home is a useful reference for surfaces, the CDC hygiene basics cover the everyday habits, and the hand washing guidance is worth a glance after a session with dusty shelves and picture frames. Frequently Asked Questions Can I really refresh a room for under $20? Yes. Candle holders, pillow covers, a floating shelf, a macrame hanging, or a set of plant pots all land in that range, and rearranging what you already own costs nothing at all. Pick one update and see how much it changes the space. How do I choose decor that works with my existing style? Pick one or two pieces that echo a colour already in the room. A matte black holder, a linen cover, or a wood shelf settles into almost any scheme without calling for a full redesign. Do cheap decor pieces look cheap? Price is not the giveaway; finish and shape are. Simple forms, natural materials, and a consistent palette make inexpensive pieces read as deliberate choices rather

Cheap and Chic Home Decor Finds for DIYers Read More »