Floor Cleaning

Hot Water and Cold Water

Hot Water vs Cold Water – Which is More Efficient at Cleaning?

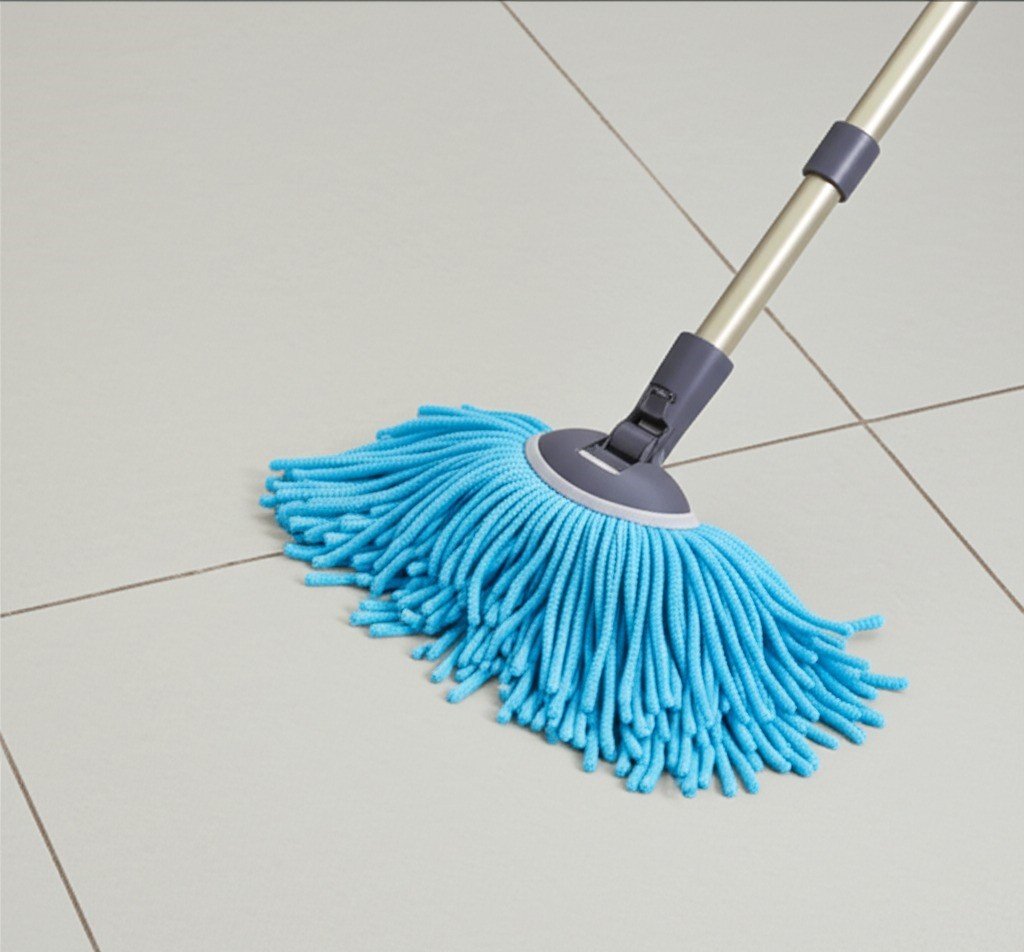
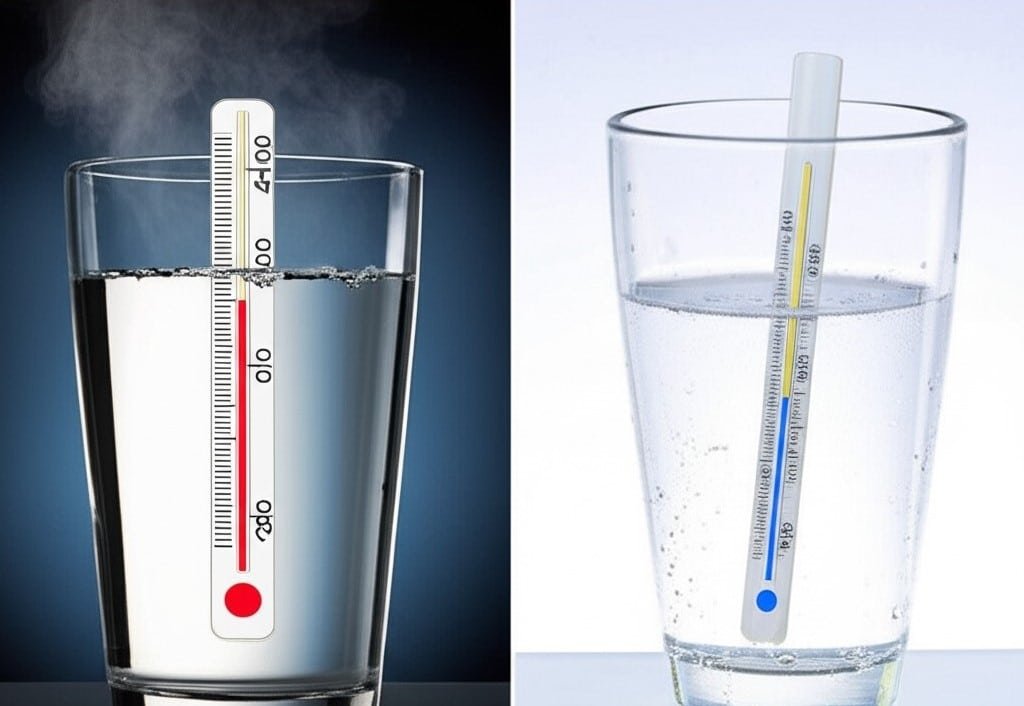
The temperature of hot or cold water used for cleaning is not a matter of preference; it is a fundamental variable that determines the effectiveness, safety and efficiency of the task at hand. The choice between hot and cold water can mean the difference between a stain being removed permanently and being set forever, or between a surface being sanitized and simply being wiped. Understanding the distinct properties and applications of each is essential for proper cleaning. 1.Greasy Hot water’s primary advantage lies in its thermal energy. Molecules in hot water move faster and with more kinetic energy than those in cold water. This increased energy translates directly into enhanced cleaning power in several ways. First, it lowers the surface tension of water, allowing it to spread more easily and penetrate soils and fabrics more effectively. Second, and most critically, heat excels at dealing with fats, oils, and grease. When heated, these substances become less viscous they soften, liquefy, and break down. This makes them significantly easier for detergents and mechanical action (scrubbing) to lift and wash away. Think of washing a greasy frying pan. Using cold water, the grease remains a stubborn, solid film. With hot water, the grease melts into a liquid that can be readily emulsified by soap and rinsed away. This principle applies to kitchen backsplashes coated in cooking oil, range hoods accumulating greasy vapor, and dining tables with oily residues from food. Beyond its effect on grease, heat acts as a powerful sanitizer. While boiling water (100°C or 212°F) is required for true sterilization, the hot water from a typical tap (usually between 49°C and 60°C or 120°F and 140°F) is sufficient to kill a significant number of common household bacteria, germs, and viruses. This makes hot water the superior choice for cleaning areas where hygiene is paramount. Kitchen countertops where raw meat has been prepared, cutting boards, sinks, and garbage disposals all benefit from the sanitizing action of hot water. In the bathroom, hot water is effective for cleaning toilets, sinks, and shower surfaces, helping to reduce the microbial load and control the spread of germs. It also works exceptionally well on soap scum, which is composed of mineral deposits and body oils. The heat helps to soften this tough buildup, making it much easier to scrub away. 2.Fabrics In laundry, hot water is a powerful tool for specific applications. It is most effective for washing heavily soiled items, such as work clothes, sports uniforms, and reusable cleaning cloths. It is the best choice for white cottons, bedding, and towels, as it not only removes dirt and body oils more effectively but also helps to sanitize the items, killing dust mites and allergens. The heat helps to brighten whites and can handle robust fabrics that are not at risk of shrinking or color loss. Furthermore, many powdered detergents are formulated with ingredients that activate and dissolve more completely in hot water, unleashing their full cleaning potential. Without sufficient heat, these detergents can clump and leave a residue on clothes. However, the power of hot water is also its primary source of risk and limitation. The same heat that melts grease can also damage a wide range of materials. It can cause synthetic fabrics like polyester and rayon to warp or melt, and natural fibers like wool and silk to shrink and lose their shape. Hot water is notorious for causing colors to bleed and fade, which is why it is generally unsuitable for washing dark or brightly colored garments. It can also damage certain surfaces around the home. Prolonged exposure to hot water can warp unsealed wood, damage the finish on some types of flooring, and cause certain plastics to become brittle or misshapen. A critical mistake in stain removal is applying hot water to protein-based stains. Stains from blood, egg, dairy, or mud contain proteins that coagulate when heated essentially, they cook. Applying hot water will permanently set these stains into the fabric fibers, making them nearly impossible to remove. 3.Cold Water Cold water, on the other hand, operates on a different set of principles and offers its own distinct advantages. Its primary benefit is its gentle nature. Lacking the intense thermal energy of hot water, it is significantly safer for a vast majority of materials and fabrics. This makes it the default and recommended choice for washing delicate items, such as lace, silk, and woolens, as it prevents shrinkage, stretching, and damage to the fibers. It is also the best option for washing dark and vibrant colors, as it minimizes the risk of dye bleeding and fading, preserving the life and look of the garments. The most crucial application for cold water is in stain removal for protein-based soils. Unlike hot water, which sets these stains, cold water helps to break them down and flush them out of the fabric without cooking the proteins. Any time you are dealing with a bloodstain on a shirt, a spilled glass of milk on the carpet, or an egg yolk on a tablecloth, the first and most important step is to use cold water. Soaking or rinsing the affected area in cold water before applying any cleaning agent is the correct protocol. Modern advancements in detergent technology have greatly expanded the utility of cold water for general cleaning and laundry. While older detergents required heat to be effective, most liquid detergents and specialized cold-water powders today are formulated with enzymes. These enzymes are biological catalysts designed to target and break down specific types of stains proteases for proteins, amylases for starches, and lipases for fats and they function optimally in cool or cold temperatures. Using a high-quality, enzyme-based detergent allows cold water to achieve cleaning results that are comparable to hot water for many types of lightly to moderately soiled loads, effectively removing everyday dirt and grime without the risks associated with heat. Beyond its material safety and stain-specific effectiveness, the use of cold water has significant economic and environmental benefits. Heating water is

Hot Water vs Cold Water – Which is More Efficient at Cleaning? Read More »

cleaning professional

4 Reasons Why You Should Hire a Cleaning Service

The decision to hire a professional cleaning service is often viewed through a simple lens of cost versus convenience. Yet, the true value extends far beyond that straightforward calculation. It’s an investment in your time, your health, your peace of mind, and the longevity of your home itself. It is about reclaiming a fundamental part of your life that is quietly consumed by the endless cycle of upkeep. 1.Your Time is Precious A home is more than just a structure; it’s a sanctuary, a place of rest and reprieve from the demands of the outside world. However, the responsibility of maintaining that sanctuary can become a significant source of stress and a relentless chore. The hours spent each week scrubbing, dusting, vacuuming, and mopping are hours that are permanently lost. This is time that could be dedicated to family, personal passions, professional development, or simply the vital act of resting and recharging. When you delegate the task of cleaning, you aren’t just paying for clean floors; you are purchasing time, the single most finite and precious commodity we possess. Think of the weekend not as two days to catch up on household labor, but as two full days to live. Beyond the reclamation of time, there is the undeniable element of quality. A professional cleaner brings a level of expertise and efficiency that is difficult for the average homeowner to replicate. They operate with a systematic approach, honed over hundreds of hours in countless homes. They understand the science of cleaning which products work on which surfaces, the most effective way to remove stubborn soap scum without damaging tile, and the precise technique for leaving windows streak-free. They see the details that are often overlooked in a hurried weekly wipe-down: the dust accumulating on baseboards, the grime building up on cabinet doors, the fingerprints on light switch plates, and the forgotten corners behind furniture. 2.Trust the Cleaning Professional This professional standard is supported by professional-grade tools and supplies. While a homeowner might have a domestic vacuum and a handful of all-purpose sprays, a cleaning service arrives with a specialized arsenal. They utilize high-filtration vacuums that capture fine dust particles and allergens rather than redistributing them into the air. They use a system of color-coded microfiber cloths to prevent cross-contamination between the bathroom and the kitchen. Their cleaning solutions are often more effective and formulated for specific tasks, allowing them to work more efficiently and produce a superior result. This eliminates the need for you to research, purchase, and store a dozen different bottles of chemicals, many of which may be used infrequently or prove ineffective. This leads directly to one of the most compelling reasons to hire a service: the impact on your health. A home that looks clean and a home that is hygienically clean are two different things. Dust is not just an unsightly layer on your furniture; it’s a complex matrix of skin cells, fabric fibers, pollen, pet dander, and microscopic dust mites, all of which are common triggers for allergies and asthma. A thorough, professional dusting and vacuuming routine significantly reduces the level of these airborne irritants, contributing to better indoor air quality and easier breathing. The kitchen and bathroom are particular areas of concern. These spaces can be breeding grounds for bacteria, mold, and mildew. A professional service doesn’t just wipe down counters; they sanitize them. They have the knowledge and products to effectively disinfect toilets, sinks, and showers, tackling the invisible germs that can contribute to illness. They can identify and address areas of potential mold growth before they become a more significant problem. A consistently clean home is a healthier environment, reducing the occupants’ exposure to allergens and pathogens on a daily basis. 3.Take Care of Your Mental Health The mental health benefits are just as profound. Living in a cluttered or dirty environment has been shown to increase levels of the stress hormone cortisol. The persistent, low-grade anxiety of knowing there are chores waiting to be done can weigh heavily on the mind. Walking into a home that is consistently clean and orderly provides an immediate sense of calm and control. It removes a major source of friction and mental clutter, allowing your home to function as a true space for relaxation. The burden of the task is lifted, not just for the few hours of the cleaning itself, but permanently. You no longer have to spend your evenings thinking about when you’ll find the time to scrub the floors or clean the bathrooms. That mental energy is freed up for more important or enjoyable pursuits. For many households, cleaning is also a source of domestic conflict. Disagreements over whose turn it is to do a particular chore or differing standards of what “clean” means can create unnecessary tension between partners or family members. Outsourcing this labor removes it as a point of contention entirely. It becomes a neutral, scheduled service that maintains a consistent standard for everyone, fostering a more harmonious living environment. 4.Avoid Conflicts Furthermore, a professional service provides a level of consistency that is difficult to maintain on your own. Life gets busy. Work projects, family obligations, or simple fatigue can lead to cleaning being postponed. A week of neglect can quickly turn into two, allowing dirt and grime to become more deeply embedded and harder to remove. With a scheduled service, your home is brought back to a baseline level of clean on a regular basis—whether it’s weekly, bi-weekly, or monthly. This regular maintenance prevents the deep buildup of dirt, making the home easier to manage between professional visits and preserving the condition of your floors, fixtures, and surfaces over the long term. This proactive care can save you money on costly restoration or replacement projects down the road. There are also specific life stages and events where a cleaning service transitions from a luxury to a near-necessity. When moving into a new home, a deep clean ensures you are starting with a completely fresh, sanitized slate.

4 Reasons Why You Should Hire a Cleaning Service Read More »

preparing for the July cleaning

How to Prepare for July Cleaning: 4 Steps Fast and Easy

July Cleaning brings a unique set of circumstances to our living spaces. The longer days, increased outdoor activity, and potential for more guests mean our homes need a different kind of attention. Preparing for a thorough July Cleaning is not merely about having supplies on hand; it is a systematic approach to ensuring efficiency and effectiveness, laying the groundwork so the actual cleaning process becomes smoother and more impactful. Without proper preparation, cleaning can feel overwhelming and incomplete, like trying to build a house without first pouring a solid foundation. 1.Preparing The Mind Start by mentally preparing yourself for the task ahead. This involves more than just setting aside time; it means adopting a mindset focused on systematic action rather than sporadic effort. Acknowledge that a significant clean requires energy and focus. Break down the entire house into manageable zones or rooms. Avoid the trap of trying to tackle everything at once, which often leads to burnout and a sense of defeat. Instead, visualize the clean, organized space you aim to achieve, and let that vision guide your planning. Consider creating a simple, unwritten mental checklist or a rough written outline of areas you want to address. This helps in prioritizing tasks and ensures nothing important is overlooked. Think about who else might be able to contribute, even small tasks, as collaboration can significantly lighten the load. Hydrate well, ensure you have comfortable clothing, and think about playing some uplifting music to keep spirits high. The mental readiness is the first, often underestimated, step towards a successful July Cleaning. 2.One Room At a Time Once your mind is aligned, the next crucial step is comprehensive decluttering. This isn’t just tidying; it’s a strategic removal of anything that obstructs access or impedes effective cleaning. Clutter acts as a barrier, trapping dust, hiding spills, and making it impossible to properly wipe surfaces or vacuum floors during your July Cleaning efforts. Begin by focusing on one area at a time, perhaps starting with the most heavily used spaces like the kitchen or living room. In the kitchen, this means clearing every countertop. Move small appliances like toasters, coffee makers, and blenders. Don’t just push them aside; truly lift them, wipe the counter beneath them, and consider if they need a quick wipe-down themselves. Empty the sink of all dirty dishes and load them into the dishwasher, or wash them immediately. Go through any papers or mail that have accumulated on kitchen surfaces, sorting them into immediate action, filing, or recycling piles. Check the pantry and refrigerator for expired food items, disposing of anything that’s past its prime to prevent future messes and odors. This creates clear, unobstructed surfaces, allowing your cleaning tools to reach every corner and crevice effectively for your July Cleaning. 3.Supplies And Tools With decluttering underway, the next phase is gathering all your cleaning supplies and tools. There’s nothing more frustrating than starting a task only to realize you’re missing a crucial item or that a bottle is empty. Take an inventory of your cleaning arsenal for your July Cleaning. Do you have a sufficient supply of all-purpose cleaner, glass cleaner, bathroom cleaner, and floor cleaner suitable for your specific flooring types? Check the levels of your dish soap and hand soap. Ensure you have plenty of clean microfiber cloths for dusting and wiping, a separate set for glass, and another for bathrooms to prevent cross-contamination. Sponges, scrub brushes for tough grime, a toilet brush, and a squeegee for windows or shower doors are essential. Check the condition of your mop and bucket; do they need to be cleaned or replaced? Ensure your vacuum cleaner bags are empty or the canister is cleared, and that all attachments are readily available and free of blockages. A good dustpan and brush are also invaluable. Don’t forget protective gloves to safeguard your hands from harsh chemicals and dirty water. Have a designated cleaning caddy or bucket where you can neatly organize and transport these items from room to room, minimizing trips back and forth to the supply closet. This foresight saves valuable time and maintains momentum once the actual July Cleaning begins. Before the deep cleaning commences, there are a few immediate pre-cleaning actions that make a significant difference. First and foremost, empty all trash cans throughout the house. This prevents new odors from developing and clears the way for wiping down the bins themselves. Next, address any obvious large debris or major spills. If there’s a pile of dirt by the entryway, sweep it up. If there’s a visible spill on the kitchen floor, wipe it up immediately rather than waiting for the floor cleaning. These seemingly small actions prevent tracking dirt into other areas and save you from having to clean over existing messes during your July Cleaning. For bathrooms, consider pre-treating stubborn stains in the toilet bowl or shower with a specialized cleaner; allowing it to soak for some time will significantly reduce scrubbing effort later. In the kitchen, if your oven racks are greasy, remove them and soak them in a tub with hot, soapy water. Opening windows and doors, if the weather permits, is also an excellent preliminary step, especially in July, for an effective July Cleaning. This not only ventilates the house, dispelling stale air and potential cleaning fumes, but also helps to dry surfaces more quickly after they’ve been cleaned, which is particularly useful in humid summer conditions. Now, let’s refine the room-by-room preparation, ensuring every space is primed for optimal July Cleaning. 4.Remove Items In the kitchen, beyond clearing countertops and dealing with dishes, think about items typically stored inside cupboards or drawers that might benefit from a quick re-organization or wipe-down of their exterior. Pull out the toaster crumb tray and empty it. If your microwave is splattered, a quick pre-wipe with a damp cloth or a bowl of water steamed inside for a few minutes will loosen grime significantly, aiding your July Cleaning. Ensure the area around your sink is completely clear, moving soap dispensers, sponge holders, and dish racks. If you have a small

How to Prepare for July Cleaning: 4 Steps Fast and Easy Read More »

protective items for cleaning the house

Why do You Need Protection To Clean Your House? – 6 Essential Items

Cleaning your home without protection can be dangerous. It’s a battle against dust, dirt, germs, and clutter. In this battle, we arm ourselves with an arsenal of tools: powerful chemical sprays, abrasive sponges, powerful vacuum cleaners, and microfiber cloths. However, amidst the focus on eliminating dirt from our surroundings, one critical element is often overlooked: protecting the combatant. The cleaning process exposes individuals to a variety of occupational hazards, ranging from the seemingly minor, such as dry skin, to the extremely serious, such as chemical burns, respiratory distress, and lasting physical injuries. Wearing a full complement of protective gear is not a sign of over-meticulousness; it’s the hallmark of a smart, safe, and professional approach to a task that involves direct contact with chemicals, biological contaminants, and significant physical exertion. 1.Gloves The most immediate and constant point of contact in any cleaning endeavor is the hands. They are the primary instruments, manipulating cloths, holding spray bottles, and scrubbing surfaces. The skin, our body’s largest organ, provides a remarkable natural barrier, but it is a barrier with limits. Continuous exposure to water, a universal solvent, systematically strips away the skin’s protective layer of sebum, leading to dehydration, redness, painful cracking, and a compromised ability to defend against infection. Introduce cleaning chemicals into this equation, and the risks escalate dramatically. Detergents, degreasers, disinfectants, and acidic or alkaline solutions can induce contact dermatitis, trigger severe allergic reactions, and, in the case of concentrated agents like oven cleaners or drain unblockers, inflict serious chemical burns. Therefore, gloves are not an optional accessory; they are an indispensable piece of personal protective equipment. A truly prepared cleaning kit contains multiple types of gloves for different applications. For light-duty tasks requiring high dexterity, such as wiping down countertops, polishing fixtures, or handling soiled laundry, disposable gloves are the superior choice. Nitrile gloves are often preferred over latex due to their superior chemical resistance and the prevalence of latex allergies. They provide a reliable shield against germs and chemicals for short-term use and can be discarded immediately, which is a crucial step in preventing cross-contamination between different areas of the home, like the kitchen and the bathroom. For more demanding jobs, a pair of heavy-duty, reusable gloves is required. Tasks like washing dishes in very hot water, scrubbing floors with strong detergents, or cleaning a mold-affected area call for the robust protection of thick rubber or PVC gloves. These are more durable, less prone to tearing, and often feature longer cuffs that extend up the forearm, providing a crucial defense against splashes. Opting for a pair with a flock lining can significantly increase comfort by absorbing perspiration, allowing them to be worn for longer periods without discomfort. Proper care extends the life and safety of these gloves. After each use, they must be rinsed thoroughly while still on the hands, washed with soap and water, then removed and allowed to air dry completely, both inside and out, to inhibit the growth of bacteria and mold within them. 2.Ventilation As we move from contact hazards to airborne ones, the protection of the respiratory system becomes paramount. Many of the most effective cleaning products achieve their results through chemical reactions that release fumes and volatile organic compounds (VOCs) into the air. When a cleaner is sprayed, it is aerosolized, creating a fine mist of chemical droplets that are easily inhaled. The acrid scent of bleach, the sharp, pungent odor of ammonia-based glass cleaners, or the powerful fumes from a self-cleaning oven cycle are all indicators of airborne chemicals that can irritate the delicate mucous membranes of the nose, throat, and lungs. For individuals with asthma, allergies, or other respiratory sensitivities, this exposure can trigger wheezing, coughing, and shortness of breath. Even for those without pre-existing conditions, chronic, long-term inhalation of these fumes can contribute to a range of health problems. The first line of defense is always ventilation. Opening windows and doors to create a cross-breeze and using an exhaust fan can significantly dilute the concentration of airborne chemicals. However, ventilation alone is not always sufficient, especially in enclosed spaces like small bathrooms or when dealing with particularly potent substances or large amounts of particulates. In these cases, respiratory protection is essential. For tasks that kick up a lot of dust, pet dander, or debris, such as sweeping a dusty garage, deep-cleaning carpets, or clearing out a long-neglected storage area a well-fitting N95 respirator is the appropriate choice. Unlike a simple dust mask, an N95 is certified to filter out at least 95 percent of fine airborne particles, providing meaningful protection against allergens and irritants that can penetrate deep into the lungs. When working with aggressive chemicals known to produce harmful vapors, such as certain solvents, paint strippers, or heavy-duty oven cleaners, a more advanced respirator is warranted. An elastomeric half-mask respirator with interchangeable cartridges designed to filter organic vapors offers a much higher level of protection. It is also a vital piece of safety knowledge that mixing certain household cleaners can create lethal gases. The most infamous combination, bleach and ammonia, produces toxic chloramine gas, while mixing bleach with acidic cleaners can release chlorine gas. Proper respiratory protection, coupled with unwavering adherence to the rule of never mixing cleaning products, is a foundational principle of household safety. 3.Safety Glasses The eyes, with their delicate and irreplaceable tissues, are uniquely vulnerable to cleaning-related injuries. A single misdirected splash of a chemical cleaner can cause immediate, intense pain and has the potential to inflict permanent corneal damage and vision loss. These incidents can happen with surprising ease: a toilet brush flicking contaminated water upwards, an aerosol spray nozzle sputtering unexpectedly, or gravity pulling droplets down as you clean a surface overhead, like a showerhead or a ceiling fan. Standard eyeglasses or sunglasses offer minimal protection, as splashes can easily enter from the sides, top, or bottom. The gold standard for eye protection during cleaning is a pair of safety goggles. Goggles are designed to form a seal around the eye

Why do You Need Protection To Clean Your House? – 6 Essential Items Read More »

disorganized home

Why Hiring A Professional Organizer Is Important – 5 Key Factors

Thinking about hiring a professional organizer? Then we will help you. The sheer weight of accumulated belongings can become a quiet, pervasive burden in any home. It starts subtly, an item here, a stack there, until spaces that once felt open and functional begin to feel constricted, heavy. This isn’t just about untidiness; it’s about the way clutter can insidiously affect daily life, breeding a sense of low-grade stress, making simple tasks feel more complicated, and, critically, turning the act of cleaning into a monumental, often futile, effort. When surfaces are obscured and floors are pathways through obstacles, true cleanliness remains elusive. Dust settles not just on shelves, but within an environment of disorder, making it harder to breathe easy, both literally and figuratively. Many find that no matter how much they wipe, scrub, or vacuum, the underlying disarray prevents a feeling of genuine, lasting cleanliness. This is often the point where the realization dawns that something more fundamental than cleaning is required; a strategic approach to the items themselves. This is where the expertise of a professional organizer becomes invaluable. These individuals are more than just people who like to tidy; they are specialists in creating order from chaos, developing sustainable systems, and transforming living spaces into environments that support, rather than hinder, daily life. Their work is a methodical process, beginning with an in-depth consultation. This initial step involves understanding your specific challenges, how you use your space, what your frustrations are, and what your vision is for a more functional home. They assess the scope of the clutter, the types of items involved, and the underlying habits or circumstances that may have contributed to the situation. It’s a non-judgmental exploration designed to tailor a plan that aligns with your lifestyle and goals. 1.Do You Need All The Objects? The heart of the organizing process, and often the most daunting phase for homeowners, is decluttering. A professional organizer acts as a calm, objective guide through this potentially emotional journey. They help you confront your possessions, item by item or category by category, and make decisions about what stays and what goes. This isn’t about indiscriminately throwing things away; it’s about thoughtful evaluation. Questions like “Do I use this?”, “Do I love this?”, “Do I need this?” become central. For sentimental items, which often carry the heaviest emotional weight, organizers provide strategies for honoring memories without being overwhelmed by physical objects. They might suggest digitizing photos or letters, or creating a dedicated, contained memory box. For general household clutter, from overflowing kitchen cabinets to jumbled linen closets, they bring a systematic approach, helping you to see your belongings with fresh eyes and make choices that serve your current life, not a past or imagined future one. They also assist with the responsible disposal of unwanted items, coordinating donations to charities, identifying items for sale, or ensuring proper recycling and waste removal.   2.Sorting And Categorizing Once the excess is cleared, the next stage involves sorting and categorizing what remains. Items are grouped logically, all baking supplies together, all office stationery in one area, all cleaning products consolidated. This “like with like” principle is fundamental to creating intuitive systems. It might sound simple, but in a home where items have migrated and been stashed haphazardly over years, this step alone can be revealing, showing you exactly what you own and highlighting redundancies. With items sorted, the professional organizer then moves into space planning and system implementation. This is where their strategic thinking truly shines. They analyze the available space, closets, cabinets, shelves, drawers, even vertical space and design solutions to store items efficiently and accessibly. In a kitchen, this might involve reconfiguring pantry shelves, introducing clear, stackable containers for dry goods, implementing a first-in-first-out system to reduce food waste, using drawer dividers for utensils and gadgets, or finding clever solutions for awkward items like pot lids or baking sheets. The goal is to create a workflow that makes cooking and cleaning smoother. 3.Closets In closets, organizers might introduce uniform hangers to save space and create visual calm, demonstrate effective folding techniques that maximize drawer capacity, suggest shoe storage solutions that keep pairs together and visible, and implement systems for accessories like scarves, belts, and jewelry. They often help with seasonal wardrobe rotation, ensuring that out-of-season clothes are stored properly and easily retrieved when needed. For home offices, the focus is on creating an environment conducive to productivity. This can involve setting up effective paper management systems (e.g., action files, reference files, archives), advising on digital organization strategies, optimizing desk layout for ergonomic comfort, and ensuring essential supplies are within easy reach. Children’s playrooms and bedrooms benefit immensely from an organizer’s touch. Systems are designed to make it easier for children to find their toys and, crucially, to put them away. This often involves clear bins, picture labels for younger children, and strategies for toy rotation to prevent overwhelm and keep engagement high. Even daunting spaces like garages, basements, or attics are tackled methodically. Organizers can help install heavy-duty shelving, utilize clear, durable storage bins, and create designated zones for tools, sporting equipment, holiday decorations, and long-term storage, transforming these areas from dumping grounds into functional extensions of the home. 4.Labeling A critical component of any organizing system is labeling. Clear, consistent, and easy-to-read labels are the signposts that help everyone in the household understand where things belong. This simple step is vital for the long-term maintenance of order, preventing items from slowly migrating back into disorganized piles. The professional organizer doesn’t just set up these systems and leave; a key part of their service often involves coaching on how to maintain them. They understand that lasting organization requires a shift in habits. They might provide tips for quick daily or weekly resets, help establish routines for managing incoming mail or putting away groceries, and sometimes offer follow-up sessions to tweak systems as needs evolve or to provide a refresher. The benefits of engaging a professional organizer extend far beyond

Why Hiring A Professional Organizer Is Important – 5 Key Factors Read More »

7 Best Tips To Make Your Basement Spotless

Begin by ensuring your safety. Basements often have poor ventilation. Open any available windows and doors. Utilize fans to circulate air. Adequate lighting is crucial; if built-in lighting is insufficient, bring in portable work lights. Equip yourself with heavy-duty gloves, an N95 respirator mask to protect against dust, mold spores, and other airborne particles, and safety glasses. Wear sturdy, closed-toe shoes to protect your feet. Be mindful of potential pests like spiders, insects, or signs of rodents. Exercise caution around electrical outlets and wiring, especially in damp conditions. 1.Cleaning Tools Gather your cleaning supplies. You will need heavy-duty trash bags, sorting boxes or bins, labels, and markers. For cleaning, assemble an all-purpose cleaner, a disinfectant, a specific mold and mildew remover, a degreaser if you have oily stains, and a concrete cleaner for unsealed floors. If you have basement windows, glass cleaner will be necessary. For any wooden elements, have wood polish on hand. Tools should include a vacuum cleaner with crevice and brush attachments, a shop vac for larger debris or potential water, a mop and bucket, a selection of scrub brushes (various sizes and stiffness levels), plenty of rags or microfiber cloths, sponges, and a squeegee. A step ladder will be essential for reaching high areas. A utility knife can be useful for breaking down boxes. A broom and dustpan are standard. Consider having a dehumidifier ready to run after cleaning and an air purifier to improve air quality. Before diving in, clear a workspace. Move items to create a pathway and an area to sort. Walk through the basement to identify problem areas  visible mold, signs of pests, water stains, or areas of extreme clutter. Define what you want to achieve with this cleaning: is it primarily decluttering, a deep sanitizing clean, or preparing the space for organization? To make the task less daunting, divide the basement into manageable zones, such as a storage section, laundry area, and any recreational or workshop spaces. 2.Boxes Method The first major phase is decluttering. Employ a systematic approach, such as the four-container method. Designate areas or use large boxes for: “Keep” (items that will remain in the basement or be stored properly), “Donate/Sell” (items in good, usable condition that you no longer need), “Trash/Recycle” (items that are broken, expired, damaged beyond repair, or no longer serve a purpose), and “Relocate” (items that belong in other parts of your home). Address categories of items methodically. Go through old furniture. Assess its condition and usefulness. If it’s structurally sound but unwanted, consider donation or selling. If damaged, arrange for disposal. Tackle boxes of stored items one by one. This is often the most time-consuming part. Be honest with yourself about whether you truly need each item. For clothing, sort through anything stored in the basement. Remove items that are outgrown, no longer in style, damaged, or haven’t been worn in years. Donate usable clothing and discard the rest. The same applies to children’s toys; broken or unused toys can be discarded or donated. Sift through any paperwork. Old bills, manuals for discarded appliances, and outdated documents can often be recycled. Ensure you shred any documents containing sensitive personal information. Hobby supplies and sports equipment should be evaluated. If hobbies are no longer pursued or equipment is broken or outdated, decide whether to keep, sell, donate, or discard. Holiday decorations are a common basement inhabitant. Inspect them for damage. Discard broken ornaments or lights. Consolidate decorations into well-sealed containers. Go through tools and hardware. Organize what you keep and dispose of broken or rusted tools. Be cautious with old paints, solvents, and chemicals. Check your local municipality’s guidelines for hazardous waste disposal; never pour these items down the drain or put them in regular trash. Dealing with sentimental items requires a gentle but firm approach. Acknowledge the emotional attachment, but also recognize that keeping everything can lead to overwhelming clutter. Set a limit, perhaps one or two clearly labeled boxes for true keepsakes. For items you feel nostalgic about but don’t have space for, consider taking photographs as a memento before letting them go. Once sorting is complete, focus on removing the unwanted items. Schedule a bulk trash pickup with your municipality for large items if necessary. Make trips to local donation centers with items designated for donation. For very large decluttering projects, renting a small dumpster for a weekend might be a practical solution. 3.Accessories With the clutter removed, you can begin the deep cleaning of all surfaces. Start from the top down.Use a long-handled duster or a vacuum cleaner with a brush attachment to remove cobwebs and dust from the ceiling, corners, and along the tops of walls. Pay attention to light fixtures and any exposed ductwork or pipes. For general wall dusting, a microfiber mop with a clean, dry pad works well, or use a large microfiber cloth. If walls are visibly grimy or stained (and are painted with washable paint), you may need to wash them. Mix a mild solution of all-purpose cleaner or a few drops of dish soap in a bucket of warm water. Always spot-test in an inconspicuous area first to ensure the paint or surface isn’t damaged. Use one sponge or cloth to wash and another rinsed in clean water to wipe away any detergent residue. Work in sections.If you encounter mold or mildew on ceilings or walls, address this carefully. For small, contained areas, use a dedicated mold and mildew remover. Ensure the area is well-ventilated, and you are wearing your PPE (gloves, mask, eye protection). Spray the cleaner onto the affected area, let it sit according to the product instructions, and then wipe or scrub clean. For extensive mold growth (larger than a few square feet), it is advisable to consult a professional mold remediation service. The type of flooring will dictate your cleaning method.For concrete floors, which are common in basements, begin with a thorough sweeping to remove loose dirt and debris. Follow up with a shop vac, using the crevice

7 Best Tips To Make Your Basement Spotless Read More »

microfiber mop

Microfiber Mop Cleaning – 4 Tips You Should Know

The microfiber mop itself is a marvel of household science, composed of synthetic fibers, typically a blend of polyester and polyamide (nylon), that are split into strands much finer than a human hair. This extreme fineness dramatically increases the surface area of ​​the material. A single microfiber mop can contain hundreds of thousands of these tiny fibers, creating an intricate network that can interact with dirt, dust, and liquids on a microscopic level. Unlike traditional cotton fibers, which tend to push dirt around or require significant amounts of water and cleaning chemicals to break it down and absorb it, microfiber works through a combination of mechanical action and electrostatic attraction. The split fibers have a positive charge that naturally attracts negatively charged dust particles, effectively lifting and trapping them inside the mop rather than simply displacing them. 1.Microfiber Mop When a microfiber mop glides over a surface, these numerous fine fibers act like tiny hooks and paddles. They reach into the microscopic pores and crevices of your floor, areas that thicker cotton loops or sponge surfaces often can’t reach. This allows them to physically dislodge and trap dust, dirt, allergens, pet dander, and even bacteria. The density of the fibers means that significantly more particles can be picked up and trapped by a microfiber pad compared to its conventional counterparts before it needs to be rinsed or replaced. This superior particle collection is one of the main reasons why microfiber mops are so effective at cleaning. For dry cleaning or dusting, a microfiber mop is exceptionally effective. When used dry, the electrostatic properties of the fibers are maximized. As the mop head passes over the floor, it creates gentle friction that increases its ability to attract and trap fine dust and allergens. This makes it an ideal tool for daily maintenance of hard floors, quickly removing the layer of dust that can build up and tarnish the appearance of the floor or trigger allergies. It is far more efficient than a traditional broom, which often sends fine particles suspended in the air, only to have them settle back down later. When it comes to wet cleaning, the microfiber mop continues to outperform. The material is highly absorbent, capable of holding many times its weight in water, but releases the liquid more evenly and requires less water overall to get a clean floor. For most cleaning tasks, a microfiber mop needs to be just damp, not soaking wet. This controlled application of moisture is crucial for water-sensitive floors such as hardwood and laminate, as it cleans effectively without the risk of water damage, warping or staining. The capillary action of the fibres helps to draw liquids and airborne dirt into the mat. Because less water is used, floors also dry significantly faster, reducing slipping hazards and the time until the room can be used again. 2.Hot Water The implications for hygiene are substantial. Studies have shown that microfiber mops can remove a significantly higher percentage of bacteria from surfaces compared to cotton mops, even when used with water alone. The fine fibers are more effective at physically removing and capturing microbes. When used with a disinfectant, microfiber provides better contact with the surface and a more even distribution of the cleaning agent, further improving sanitation. This makes microfiber mops an excellent choice for homes with children, pets, allergy sufferers, or anyone concerned about maintaining a truly clean environment. In addition to their cleaning power, using microfiber mops has a number of practical benefits. Reducing the reliance on harsh chemicals is a significant benefit for both indoor air quality and the environment. Hot water is often sufficient for effective cleaning with a microfiber mop, or a very dilute solution of a mild, pH-neutral cleaner can be used for tougher stains. This minimizes chemical residue on floors, which is safer for occupants and pets, and reduces the amount of chemicals that enter waterways. Water conservation is another key environmental and economic consideration. Traditional cleaning methods with microfiber mops can consume large amounts of water, both for the cleaning solution and for rinsing the mop. Microfiber’s ability to clean effectively with minimal moisture dramatically reduces water usage. Not only does this conserve a precious resource, it can also lead to lower utility bills. 3.Cleaning Mop Head Durability and reusability are hallmarks of quality microfiber mop pads. Unlike disposable mop sheets that contribute to landfill waste, or cotton mop heads that can degrade relatively quickly and harbor bacteria if not properly laundered and dried, microfiber pads are designed to withstand hundreds of washing cycles without losing their cleaning effectiveness. This longevity makes them a more economical choice in the long run, despite a potentially higher initial investment for a good quality system. Proper care, involving regular machine washing (without fabric softener or bleach) and air drying or low-heat tumble drying, will extend their lifespan considerably. Ergonomically, microfiber mops are generally lighter and easier to maneuver than their bulkier, water-laden traditional counterparts. Flat microfiber mops, the most common type for floors, often feature swivel heads that allow for easy cleaning under furniture and around obstacles. The reduced effort required to push the mop and the lesser need to frequently change heavy buckets of water can significantly reduce physical strain for the user, making the cleaning process less arduous and more efficient. The versatility of microfiber extends to the variety of pads available. Different weaves and textures are designed for specific tasks. For instance, pads with a looped construction are excellent for general-purpose cleaning and dust mopping. Pads with denser, more aggressive scrubbing strips woven in are ideal for tackling sticky spills or more stubborn dirt on resilient flooring like tile or vinyl. Some pads have fringed edges that are particularly good at capturing larger debris and reaching into corners. This ability to switch out pads tailored to the cleaning challenge at hand, or for different floor types within a home, adds another layer of efficiency. When selecting a microfiber mopping system, consider the mop head’s

Microfiber Mop Cleaning – 4 Tips You Should Know Read More »

wooden items on top of a wooden table

Keep Your Wood Items Shining – 4 Best Tips

Wood items bring warmth and timeless elegance to any space, but their longevity and beauty depend heavily on consistent and proper care. Understanding wood as a natural, somewhat porous material is the first step. It breathes, responding to its environment, particularly changes in humidity and temperature. The type of finish on the wood—whether it’s oil, wax, varnish, lacquer, polyurethane, or paint—also dictates specific care routines for wood items, as the finish acts as the primary barrier against damage. 1.The Right Fabric Regular dusting is a cornerstone of wood care, and it’s more important than many realize. It’s not just about maintaining a clean appearance; dust particles can be surprisingly abrasive. When cleaned carelessly or allowed to accumulate, they can create microscopic scratches in the surface of the wood. Over time, these tiny abrasions dull the finish and can even wear it away, making the wood more susceptible to future damage. For effective dusting, choose your tools carefully. A soft, lint-free cloth, such as microfiber or a piece of an old, well-washed cotton T-shirt, is ideal. Feather dusters can be useful for intricately carved items or delicate surfaces where a cloth might snag, but make sure they’re made from real ostrich feathers, which trap dust rather than just scatter it around. A soft-bristled brush, such as a new paintbrush, can also be used to gently remove dust from crevices and corners. When dusting, always try to wipe in the direction of the grain of the wood. This helps to lift dust from the subtle textures of the wood, rather than pushing it deeper. Avoid using dusting sprays with silicone, as they can create an oily film that attracts more dust and can interfere with future finishing work. How often should you dust? For most wood furniture, once or twice a week is sufficient, although items in high-traffic areas or dust-prone homes may benefit from more frequent attention. In addition to routine cleaning, wood items will occasionally require a more thorough cleaning to remove fingerprints, sticky stains, or general grime that cleaning alone cannot remove. The key here is caution, especially when it comes to moisture. Wood and water are not natural companions. For most sealed finishes, such as varnish, polyurethane, or lacquer, a cloth lightly dampened with water is usually sufficient. Wring the cloth out until it is nearly dry; it should feel slightly cool to the touch, but should not leave any visible traces of moisture on your wood items. If water alone is not enough to remove the dirt, you can add a small drop of mild dish soap to a small bowl of water. Dip the cloth in, wring it out well, and gently wipe the affected area, again moving in the direction of the wood grain if possible. Important: Always wipe immediately with a clean, dry, soft cloth to remove any residual moisture. Never leave water on a wood surface, even for a short period of time, as it can seep into an imperfect finish and cause swelling, discoloration, or white spots on any wood item. For oil-finished or waxed woods, which are less sealed, extra caution is required with water. These finishes are designed to let the wood breathe and are more vulnerable to moisture. A dry cloth or a cloth lightly moistened with a cleaner specifically for oil-finished or waxed woods is often preferable. Always test any cleaning solution, even plain water, on an inconspicuous area first to ensure it will not negatively affect the finish of your wood items. 2.Wood Items Protecting wood items from environmental factors is just as important as cleaning them. Sunlight, for example, can be a formidable enemy. Prolonged exposure to direct ultraviolet (UV) rays can fade the color of wood, leading to discoloration and a dry, brittle appearance. Heat from direct sunlight can also cause wood to dry out excessively, potentially causing it to shrink, crack, or warp. To mitigate this, consider the positioning of your wood furniture. Avoid placing valuable pieces directly in the path of strong sunlight throughout the day, if possible. Use UV-blocking blinds, curtains, or window film to diffuse or block the strongest rays, especially during peak sun hours. Rotating furniture periodically can also help ensure that light exposure is more evenly distributed, preventing one side from fading more noticeably than the other. Humidity levels play a critical role in the health of wood items. Wood, being hygroscopic, absorbs and releases moisture from the air around it. The ideal relative humidity range for most wood furniture and flooring is generally between 40% and 60%. When humidity levels drop too low, as they often do in winter when indoor heating is on, wood releases its internal moisture, causing it to shrink. This shrinkage can lead to gaps in floorboards, loosening of joints in furniture, and even the development of small cracks in surfaces. On the other hand, if humidity levels are too high, wood absorbs excess moisture and swells. This can cause drawers and doors to stick, veneer to lift or bubble, joints to become tight or even warp, and can create an environment conducive to mold and mildew growth. Maintaining a stable humidity level is critical. You can monitor indoor humidity with a simple hygrometer. If your home is very dry, consider using a humidifier. If it’s very humid, a dehumidifier or improved ventilation may help. Avoid placing wood items directly near radiators, heating vents or fireplaces, as direct heat and very dry air can quickly cause localized damage. Similarly, avoid frequent and drastic temperature fluctuations, as these also contribute to the expansion and contraction cycle of wood, wearing the material down over time and thus maintaining the quality of your wood items. Preventing physical damage through careful daily use is another essential aspect of wood care. Water marks, heat marks, and scratches are common and can mar the beauty of wood surfaces. The simplest preventative measures are often the most effective. Always use coasters under glasses, mugs, and cups to protect against condensation

Keep Your Wood Items Shining – 4 Best Tips Read More »

3 Best Tips How To Keep Your Living Area Clean

Living areas, essential to daily life, accumulate use and require constant attention to maintain their comfort and cleanliness. A systematic approach ensures that all aspects of the space are considered, resulting in a truly refreshed environment. 1.Living Area Start by decluttering all surfaces. This initial step is essential to achieving the desired living area, as it paves the way for effective cleaning and reveals the true scope of upcoming tasks. Start with one surface, such as the coffee table, and work methodically through the room, addressing side tables, entertainment cabinets, shelves, and any other flat areas. As you handle each item, decide where it will go: items to be discarded, items to be donated, items that belong in other rooms, or items that need to be stored neatly within the living area itself. Common culprits of clutter include accumulated mail, old magazines or newspapers, lost remote controls, and items brought in from other parts of the house. Have designated spots for frequently used items, such as remote controls or current reading material. This practice greatly simplifies future organization and always keeps the living area tidy. Removing unnecessary objects not only makes cleaning easier, but also contributes to a visually calmer and more organized space. Once the surfaces are free of extraneous items, the cleaning itself can begin without obstructions. Dusting the living area is the next critical step and should always be done from the top down. This principle ensures that any dust or particles dislodged from higher surfaces fall to lower surfaces or the floor, which will be cleaned later. Equip yourself with the right tools; microfiber cloths are highly effective as their fibers trap dust rather than simply move it around. For hard-to-reach areas such as high shelves, ceiling corners or light fixtures, an extendable duster is invaluable. Many vacuum cleaners also come with brush attachments suitable for dusting a variety of surfaces. Start with the highest points in the room, such as ceiling fan blades (ensure the fan is off and cool), the tops of tall bookshelves or cabinets, and light fixtures. Carefully wipe these areas. Move downwards to shelves, picture frames, and artwork. When dusting shelves, especially those holding many objects, it’s often best to remove the items, dust the shelf thoroughly, dust the items themselves, and then replace them. Pay attention to the details of decorative items; intricate pieces may require a soft brush or careful wiping. Electronic devices, such as televisions, sound systems, and game consoles, attract a significant amount of dust. Before cleaning electronics, ensure they are turned off and ideally unplugged. Use a dry, soft microfiber cloth to gently wipe screens and surfaces. Compressed air can be useful for cleaning dust from vents, keyboards, and other tight spaces. Avoid spraying liquids directly onto any electronic component. 2.Lampshades And Sofas Lampshades also collect dust and should be treated. Fabric lampshades can usually be gently vacuumed with a brush attachment or wiped with a dry cloth. Plastic or paper lampshades can be wiped clean. Window coverings, such as blinds or shutters, are notorious dust magnets. Each slat may need to be cleaned individually, a task that can be done with a microfiber cloth or a specialized blind cleaning tool in your living area. Don’t neglect window sills and frames. Wood furniture requires care; dust regularly and, if appropriate for the finish, use a suitable furniture polish sparingly to protect and enhance the wood. Apply the polish to a cloth, not directly to the furniture. Glass surfaces, such as tabletops or cabinet doors, should be cleaned with a glass cleaner and a lint-free cloth for a streak-free shine. Once all elevated surfaces and items have been dusted, the dislodged particles will have settled, ready to be treated during upholstery and floor cleaning in your living area. Let’s not forget about the sofas in your living area. For dusty surfaces, focus on upholstered furniture. Sofas and armchairs get a lot of use and can accumulate dust, crumbs, pet hair, and other debris. Regular vacuuming is essential to keeping them clean and extending their lifespan. Use the upholstery attachment on your vacuum cleaner, which is designed to be gentler on fabric, and the crevice tool to get into seams, under cushions, and along edges where debris loves to hide. Remove all cushions and vacuum the base of the furniture thoroughly. Then, vacuum all sides of each cushion before replacing them. If you have pets, a specialized hair removal tool or attachment can be especially effective. In addition to regular vacuuming, spot cleaning may be necessary for spills or stains. The key to successful spot cleaning in living areas is to act quickly. Blot any fresh spills immediately with a clean, absorbent cloth, working from the outside in to prevent spreading. Avoid rubbing, as this can push the stain deeper into the fibers and potentially damage the fabric. Before applying any cleaning solution in large quantities, test it on a small, inconspicuous area of ​​the upholstery to ensure it does not cause discoloration or damage. Different upholstery materials require different cleaning methods and solutions, so consult the manufacturer’s care label if available. For general stains, a mild solution of detergent and water can sometimes be effective, or you may need a commercial upholstery cleaner formulated for your type of fabric. After treating a stain, gently blot the area with a clean, damp cloth to remove any residue of the cleaning solution, then dry. For general freshening, some fabric fresheners can be used, but always test them first and use sparingly. Alternatively, lightly sprinkling baking soda, leaving it to sit for about 15 to 30 minutes, and then vacuuming can help neutralize odors and give you a fresh-smelling living area. After you’ve taken care of your upholstery, the last important step in your living area is cleaning the floor. The method you use will depend on whether your space has hard floors, carpets, or a combination of the two. 3.High-Traffic For hard floors, such as wood, laminate, tile,

3 Best Tips How To Keep Your Living Area Clean Read More »

different types of carpets

How to Clean Different Types of Carpets – 4 Best Ways

Cleaning carpet effectively depends heavily on the material they are made from. Different fibers react uniquely to cleaning methods and solutions. 1.Synthetic Carpets (Nylon, Polyester, Olefin/Polypropylene) Synthetic carpets are popular due to their durability and stain resistance. Nylon is very resilient, polyester is known for its softness and inherent stain/fade resistance, and olefin (polypropylene) is moisture and mildew resistant, often used in basements or outdoors. Regular maintenance for all synthetic carpets begins with frequent vacuuming. Use a vacuum cleaner with a beater bar or rotating brush to agitate the fibers and lift embedded dirt. Aim to vacuum high-traffic areas daily or every other day, and the entire carpeted area at least twice a week. This prevents dirt particles from grinding down the fibers over time. For spills on synthetic carpets, prompt action is crucial. First, carefully scoop up any solids with a dull knife or spoon. Next, blot liquids immediately with a clean, white absorbent cloth or plain white paper towels. Start blotting from the outside of the spill and work inward to prevent it from spreading. Avoid rubbing, as this can damage the fibers and push the stain deeper. Continue blotting until no more moisture is transferred to the cloth. After initial blotting, prepare a cleaning solution. A simple mixture of a quarter teaspoon of mild, non-bleach dishwashing liquid with one cup of lukewarm water is often effective for general spills. Before applying any solution to the stain, always test it on an inconspicuous area of the carpet, like inside a closet or under a large piece of furniture, to ensure it doesn’t cause discoloration or damage. Apply a small amount of the tested solution to a clean cloth, not directly onto the carpet. Gently dab the stained area with the cloth, working from the outside in. Allow the solution to sit for a few minutes to break down the stain. Then, blot the area again with a clean, dry cloth to absorb the solution and the loosened stain. Repeat this process if necessary. Once the stain is removed, rinsing the area is important to remove any detergent residue, which can attract more dirt if left behind. Lightly mist the cleaned area with plain cool water using a spray bottle. Be careful not to overwet the carpet. Blot thoroughly with a clean, dry cloth to remove the rinse water. Finally, cover the damp area with a thick layer of clean white paper towels or a dry cloth, weighted down with a heavy, non-staining object. Leave this overnight to absorb any remaining moisture. Once dry, vacuum the area to restore the pile’s texture. For tougher stains like grease, ink, or wine, specific stain removers designed for synthetic carpets may be needed. Always follow the product instructions carefully and test first. For deep cleaning synthetic carpets, hot water extraction, also known as steam cleaning, is generally the most effective method. You can rent a machine or hire a professional service. If doing it yourself, first vacuum the carpet thoroughly. Pre-treat any heavily soiled areas or stubborn stains according to the machine and cleaning solution manufacturer’s instructions. Prepare the machine with hot water and the appropriate cleaning solution formulated for synthetic carpets. Work in sections, slowly pulling the machine over the carpet to release the solution and then extract it along with the dirt. Avoid overwetting the carpet by making multiple dry passes to extract as much water as possible. After cleaning, ensure good ventilation by opening windows or using fans and a dehumidifier to speed up drying, which usually takes 6 to 12 hours, or sometimes longer. 2.Wool Carpets Wool carpets are a natural fiber known for their luxurious feel, durability, and natural soil resistance. However, they require more delicate care than synthetic carpets as they are sensitive to harsh chemicals, high pH levels, excessive moisture, and aggressive agitation. Regular vacuuming is essential for wool carpets. Use a vacuum cleaner with strong suction. If your vacuum has a beater bar, set it to the highest pile setting or use a suction-only attachment, as aggressive beater bars can damage wool fibers, causing them to fuzz or pill. Vacuum at least once or twice a week, more often in high-traffic areas. When spills occur on wool carpets, immediate attention is vital. Wool is absorbent, so quick action can prevent a spill from becoming a permanent stain. Gently scrape up any solids. Blot liquids immediately with a clean, white absorbent cloth or paper towels. Press down firmly but avoid rubbing. Work from the edges of the spill toward the center. For cleaning solutions, only use products specifically designated as “WoolSafe” or pH-neutral cleaners. Alkaline detergents (high pH) or those containing bleach can damage wool fibers, causing yellowing or weakening. Test any cleaning solution in an inconspicuous spot first. Apply a small amount of the wool-safe cleaner to a clean cloth, not directly to the carpet. Gently blot the stained area. Do not scrub. Allow the cleaner to work for a few minutes. Then, blot with a clean, damp cloth to “rinse” the area, using minimal water. Follow this by blotting with a dry, absorbent cloth to remove as much moisture as possible. Overwetting wool can lead to browning, mildew, or shrinkage. Drying a cleaned wool carpet area thoroughly and quickly is very important. Use fans or a dehumidifier to circulate air and speed up the drying process. You can also place a thick towel over the damp spot and weigh it down to absorb residual moisture. Avoid applying direct heat, like from a hairdryer on a hot setting, as this can damage the fibers. For deep cleaning wool carpets, professional cleaning is often the safest and most effective option. Professionals experienced with wool will use appropriate low-moisture methods and wool-safe cleaning solutions. If you choose to deep clean yourself, ensure the equipment and cleaning solutions are specifically designed and safe for wool. Methods like dry foam cleaning or low-moisture hot water extraction with minimal water and rapid drying are preferred over traditional steam

How to Clean Different Types of Carpets – 4 Best Ways Read More »