Furniture Cleaning

Corridor, cleaning, maid, vacuum machine

How Much Does a Cleaning Maid Cost in Toronto

How Much Does a Cleaning Maid Cost in Toronto It is the search everyone does eventually: staring at a weekend’s worth of chores and wondering what it would cost to hand them to a professional. In Toronto the honest answer is a range, not a number, because maid service pricing responds to the size of your space, the level of cleaning required, and how often someone comes. Here is the full breakdown, from market rate ranges to what actually changes the quote, so you can price your own home in minutes. What Regular Cleaning Costs Regular cleaning is the maintenance tier: the recurring visit that keeps a home consistently fresh. A standard visit covers: Dusting surfaces, frames, and the corners where bunnies breed Vacuuming carpets and rugs thoroughly Mopping hard floors back to a shine Cleaning and sanitizing kitchen and bathroom sinks, counters, and appliances General tidying, from making beds to organizing the magazine pile Toronto market rates for regular cleaning typically run from $100 to $250 per visit. Smaller apartments sit at the lower end, larger houses reach the top, and extras like laundry or dishwashing add to the total. Frequency matters too: weekly or bi-weekly schedules often qualify for a lower per-visit rate, because a maintained home takes less work than a catch-up one. For comparison, Toronto Shine Cleaning’s current regular base for a studio or one bedroom starts at $212.63 before HST, with every size listed on the pricing page. What Deep Cleaning Costs Deep cleaning is the reset button: everything in a regular clean plus the detail work that standard visits never reach. That includes grout and tile scrubbing, the insides of the microwave, oven, and fridge, under and behind furniture, baseboards and window sills, and ceiling fans and light fixtures. Market rates for a professional deep clean commonly start around $200 and climb with size and condition. At Toronto Shine Cleaning the deep clean base for a studio or one bedroom is $270.38 before HST, rising with bedrooms and bathrooms as listed on the pricing page, and larger homes with months of buildup take proportionally more time, which is exactly what the price reflects. Custom requests, such as eco-friendly or allergy-sensitive products, can also adjust the total. Specialized Services and Their Pricing Beyond the two standard tiers, specialized cleans are quoted individually because their scope varies so much: Move-in and move-out cleaning is the comprehensive empty-home reset: inside cabinets and drawers, behind appliances, everything the next occupant or landlord will inspect. Post-construction cleaning removes the dust, debris, and paint splatter renos leave behind, with the equipment and techniques to do it safely. Short-term rental cleaning keeps an Airbnb guest-ready between stays, and office cleaning tailors the same rigor to commercial spaces. Personalized quotes are the norm here since the price depends on property size, condition, and any specific challenges the space presents. The Four Factors That Move Every Quote Factor Effect on Price Size of the space More rooms and bathrooms mean more time at every tier Level of cleaning Regular, then deep, then specialized in ascending cost Frequency Recurring schedules reduce the per-visit rate Condition and extras Buildup, pets, and add-ons like laundry add time One-Time Visit or Ongoing Service? A one-time clean makes sense for specific moments: a spring reset, prepping for guests or an event, or catching up after a chaotic stretch. Ongoing service is the better long-term value, because each visit maintains the last one instead of fighting buildup, the crew learns your home and preferences, and per-visit pricing usually improves with commitment. If your schedule allows only the occasional clean, book the deep version, then let regular visits take over; the combined cost beats repeated catch-up cleans. What the Bonded and Insured Question Means for Price Comparing quotes is not only about the number; it is about what sits behind it. A service that is bonded and insured carries real overhead that cheap operators skip, and it protects you if anything breaks or goes missing. Toronto Shine Cleaning holds a $1,000,000 insurance policy plus a $10,000 accidental breakage and surety bond, so the safety net is explicit. Whatever provider you choose, the answer to the insurance question should be instant and specific. Maid Cost FAQs Why is there such a wide price range in Toronto? The $100 to $250 market range for regular visits reflects real differences: home size, number of bathrooms, condition, frequency, and whether supplies and insurance are included. Quoting on details is how accurate pricing works. Does the first clean cost more? Usually the first visit takes longer because the team is establishing the baseline a regular schedule then maintains. After that, each visit gets faster and the per-visit rate often drops with recurrence. Are supplies included in the price? Professional services typically bring their own pro-grade products, including eco-friendly options on request, which is part of what the rate covers. Confirm at booking if you have specific product preferences; Health Canada’s household products guidance is a good reference for what to ask about, and its chemical safety page covers what the labels of stronger agents require. Is hiring a maid cheaper than doing it myself? In hours, yes: the average deep clean can eat most of a weekend, and your time has value. The professional rate buys back those hours with a more thorough result, which is the trade most busy Toronto households are happy to make. Get Your Home Priced Properly Toronto Shine Cleaning’s rates are published, not hidden: regular housekeeping, deep cleaning, and specialized services all map to the bases on the pricing page. Call (647) 424-0355, describe your space, and get a quote that matches your home and your schedule, not a guess.

How Much Does a Cleaning Maid Cost in Toronto Read More »

Cobwebs

How to Remove Cobwebs From Your Home

How to Remove Cobwebs From Your Home Cobwebs show up in the corners nobody checks until a guest does: above door frames, behind bookcases, along ceiling lines, and around light fixtures. Removing them takes only a few minutes once you own the right tools and work in the right order. This guide explains what cobwebs are, which tools reach them, how to clean each area without spreading dust, and how to stop them from coming back. What Cobwebs Are and Why They Form A cobweb is not the same thing as a spider web. Cobwebs are the irregular, tangled webs built by house spiders, usually species from the Theridiidae family, in corners and other undisturbed spots. The spider often abandons the structure after a while, and the empty web then collects dust, pollen, and airborne debris, which gives it that grey and fluffy look. Two useful things follow from that. First, cobwebs mark low traffic zones, so they gather in basements, attics, stairwells, closets, and spare rooms. Second, because they trap dust and other particles, they add to the allergen load in a home. Clearing them is part of indoor air care, and it fits neatly with the routine cleaning and disinfection guidance published by the CDC. Tools That Make Cobweb Removal Easy You do not need a cupboard full of gadgets. Four items cover almost every situation. Extendable duster: a telescoping handle with a bendable head reaches high corners and ceiling fan blades without a ladder. Vacuum with attachments: a crevice tool handles tight corners, while a soft brush attachment is safer on textured ceilings and baseboards. Microfiber cloth: dampened slightly, it lifts the fine residue a duster leaves behind, and it can be washed and reused. Soft bristled brush: the right pick for indoor plants, artwork, and delicate light fittings. A Step by Step Cobweb Removal Routine Always work from the top of the room downwards. Dust and web strands you loosen above will settle on anything you have already wiped, so the order matters as much as the tool. Step 1, start at the ceiling. Sweep the corners where ceilings meet walls, then move across ceiling fan blades, light fixtures, and the tops of tall furniture. Shake the duster out outdoors afterwards. Step 2, work down the walls. Follow the wall and window frame line with the vacuum and soft brush attachment, paying attention to picture rails and curtain rods. Step 3, clear the hidden spots. Pull furniture slightly away from the wall, then use the crevice tool behind large appliances, under beds, and inside closets. Step 4, finish with a damp wipe. Run a lightly dampened microfiber cloth over skirting boards, shelves, and window sills to remove the dust the web was holding. Which Method Suits Which Area Area Best method How often Ceiling corners and cornices Extendable duster Weekly in living areas Ceiling fans and light fixtures Extendable duster, then microfiber Every two weeks Baseboards and window frames Vacuum with soft brush and crevice tool Weekly Behind appliances and under beds Vacuum crevice tool and soft bristled brush Monthly Basements, attics, and garages Duster plus a moisture check Monthly How to Stop Cobwebs From Coming Back Prevention is mostly about removing the conditions spiders like: undisturbed corners, moisture, and easy entry points. Reduce clutter. Boxes, bags, and stacked storage create the quiet corners spiders prefer, so keep storage areas tidy and inspect them as you organize. Seal the gaps. Caulk cracks around window frames, doors, and utility pipe entries, and repair worn weather stripping and torn window screens. Control moisture. A dehumidifier in a damp basement or crawl space makes those rooms far less attractive, and it helps keep mould in check as well. Use natural deterrents. A spray of peppermint oil diluted in water, reapplied weekly around sills and doorways, is a popular home remedy, and vinegar mixed with water works in a similar way. Trim the outside. Keep shrubs and tree branches clear of exterior walls, and choose outdoor lighting that attracts fewer insects. When a Professional Clean Is Worth It Most cobwebs come down with a duster and ten minutes of your time. A few situations are better handed over: vaulted ceilings, unfinished basements, homes that have sat empty for months, and seasonal resets before or after a move. A professional team arrives with extendable poles, HEPA vacuums, and products chosen for the surfaces in your home, and it can take the same top to bottom pass through the areas you would rather not reach. Toronto Shine Cleaning is bonded and insured and carries a $1,000,000 insurance policy plus a $10,000 accidental breakage and surety bond. If you want the high ceilings and hidden corners handled properly, the team can fold the work into a deep cleaning visit, or you can add a cobweb pass to a regular cleaning plan. Rates are listed on the pricing page, and service areas cover Toronto and the wider GTA. To book, call (647) 424-0355 or visit 140 Yonge St Suite 285, Toronto ON M5C 1X6. Frequently Asked Questions About Cobwebs Are cobwebs a sign of a spider infestation? Usually not. Most cobwebs are abandoned webs built by common house spiders, and finding one or two in a high corner or a basement does not mean you have an infestation. Repeated webs in the same spot simply mean that corner stays undisturbed and possibly damp. Removing the web, reducing clutter, and sealing entry points is normally enough. If you see spiders regularly in living areas or find egg sacs, a pest control professional is the right call. How often should I remove cobwebs? Add a quick sweep of ceiling corners to your weekly clean in busy rooms, then inspect basements, closets, and behind furniture once a month. Homes that sit empty or have high ceilings may need a seasonal deep pass instead. Consistency matters more than effort: a fast weekly pass keeps webs from collecting the dust that makes them so obvious. Can cobwebs affect

How to Remove Cobwebs From Your Home Read More »

Sink, clean

Sink Cleaning Simplified: Easy Tips to Make Your Sink Gleam

How to Clean a Kitchen Sink So It Gleams A bright, hygienic sink changes how the whole kitchen feels, and it is one of the quickest wins in your cleaning routine once you know the right order: rinse, wash, lift stains, disinfect, then dry and polish. The steps below work on stainless steel, porcelain, and composite basins, and they protect the finish while they clean. Why the Right Supplies Matter Harsh chemicals can dull or damage a sink finish, so the best kit leans on mild, natural products. Dish soap cuts everyday grease and food residue while staying gentle on the surface. Baking soda is a mild abrasive that lifts stubborn marks without scratching, and it also neutralizes odors. White vinegar brings disinfecting power plus the acidity that dissolves water spots and mineral deposits. A soft sponge or cloth handles washing, a dry cloth prevents streaks, and an old toothbrush reaches faucet bases and sink edges where grime hides. Rubber gloves keep hot water and cleaning agents off your skin, and a few drops of olive oil finish stainless steel with a polished, water-resistant sheen. Step 1: Rinse the Whole Basin Open the tap and let warm water run over the whole basin. Splash water up into the corners and around the faucet by hand or with a small cup, since a straight stream may skip those spots. This first rinse loosens debris and softens dried-on residue before soap touches anything. Step 2: Wash With Dish Soap Add a small amount of mild dish soap to your sponge or cloth; a little goes a long way. Scrub from the top of the sink downward, using circular motions, so everything you loosen falls toward the drain. Give extra attention to the drain area and the sink edges where grime collects. If your sink is stainless steel, scrub along the grain of the metal to prevent scratches. Step 3: Lift Stains With a Baking Soda Paste In a small bowl, stir baking soda with water at roughly a three to one ratio until you get a thick, spreadable paste that is neither watery nor dry. Lift some paste with a sponge, cloth, or your fingers, then press it onto the stains until they are fully covered. For stubborn spots, apply a thicker layer and let the paste work before you scrub. Step 4: Disinfect and Shine With White Vinegar Rinse the sink thoroughly with warm water first. This matters: vinegar and baking soda neutralize each other, so any paste left behind weakens both. Then soak a soft cloth in undiluted white vinegar and wipe the entire sink, including the faucet and drain area. Let it sit for a few minutes to disinfect the surface and build shine. If the smell bothers you, dilute the vinegar slightly. Step 5: Detail the Faucet With a Toothbrush Faucet bases trap grime and hard water minerals, and the buildup is worst in areas where tap water leaves spots. Dip an old toothbrush in soapy water for light jobs or in a vinegar solution for hard water stains, then scrub the base of the faucet, under the handles, and any tight corners with small circular motions. The bristles dislodge buildup that cloths and sponges cannot reach. Step 6: Final Rinse, Then Dry and Polish Give the sink one last rinse with warm water to wash away every trace of soap, vinegar, and baking soda. Leftover residue causes streaks and helps grime cling over time. Dry the basin with a soft cloth, because water droplets left to air dry leave spots, especially on stainless steel. For the finishing touch, pour a few drops of olive oil onto a cloth and buff the sink in circular motions, focusing on the most visible areas. The thin oil layer adds a mirror-like shine and repels future water marks and fingerprints. Sink Care at a Glance Task What to use Why it works Daily rinse and wipe Warm water and a soft cloth Stops food residue and soap film from building up Weekly wash Mild dish soap and a sponge Removes grease, dust, and unseen bacteria Stubborn stains Baking soda paste, roughly three to one with water Mild abrasion lifts marks without scratches Water spots and germs White vinegar on a soft cloth Dissolves minerals and disinfects the surface Stainless steel shine A few drops of olive oil Repels water spots and fingerprints Everyday Habits That Keep the Shine Clean the sink regularly so grime and bacteria never get a foothold. Keep to natural cleaners such as baking soda and vinegar so the finish stays protected. After preparing raw meat, disinfect the basin as part of your kitchen cleanup. The CDC explains when and how to clean and disinfect your home, and its food safety guidance covers kitchen surfaces that touch food. Never combine cleaning products casually, because some mixtures release dangerous fumes. Health Canada publishes household chemical safety advice worth checking before you experiment. Sink Cleaning Questions How often should I clean my kitchen sink? Rinse and wipe it daily, give it a full soap and vinegar clean weekly, and disinfect after raw meat, illness in the home, or any job that left visible grime. Regular attention keeps buildup from hardening into stains. Can I use the same method on a porcelain sink? Yes. The mild dish soap, baking soda paste, and vinegar routine is gentle enough for porcelain and other finishes, and skipping harsh chemicals is exactly what preserves the glaze. Test any stronger product in a hidden spot first. Why does my stainless steel sink still look dull after cleaning? Water droplets left to dry are usually the cause. Dry the basin immediately with a soft cloth and finish with a thin buff of olive oil; that final polish is what turns clean into gleaming. What should I do about hard water marks around the drain? Soak a cloth in white vinegar, wrap it over the spot for a few minutes, then wipe and rinse. The acidity breaks

Sink Cleaning Simplified: Easy Tips to Make Your Sink Gleam Read More »

cleaning kitchen rust and aplliances rusted

Battling Kitchen Rust: 7 Tips and Tricks for Keeping Your Cookware and Appliances Rust Free

Keep Your Kitchen Cookware and Appliances Rust Free Pulling a skillet from the cupboard and finding orange spots is a familiar kitchen letdown. Rust happens when iron meets oxygen and moisture, and once it starts, it spreads. The good news is that rust is manageable: a few simple habits prevent it, and three common pantry items remove it when prevention slips. What Rust Is and Why Your Kitchen Gear Gets It Rust is iron oxide. It forms through oxidation: the iron found in plenty of pots and appliances reacts with oxygen whenever water or moisture is present. In chemical shorthand, Fe plus O2 plus H2O produces Fe2O3. The reaction speeds up in wet environments, and even high humidity can start trouble. Repeated contact with water from washing and cooking raises the odds, and any scratch or chip in a protective coating leaves bare metal open to air and moisture. Prevention First: Dry, Store, and Control Humidity Dry thoroughly after every wash. Even a little lingering moisture starts the process, so wipe items down, and use a hair dryer on the cool setting for the parts a towel cannot reach. Store with paper towels. A sheet placed inside stacked cookware absorbs moisture, which matters most for cast iron. Run a dehumidifier in humid months or damp kitchens. Lower moisture in the air means rust has far less opportunity to form. Three DIY Ways to Remove Rust White Vinegar Soak The acetic acid in vinegar breaks down rust so it can be scrubbed away. Submerge the rusty item completely in white vinegar and leave it for a few hours, or overnight for heavier rust. Scrub with a non-metallic brush such as an old toothbrush, then rinse and dry immediately so fresh rust cannot form. Baking Soda Paste Baking soda is mildly abrasive, which makes it effective against rust without damaging the metal beneath. Mix it with water to form a thick paste, apply it generously over the rusted area, and let it sit for about an hour. Scrub with a brush or sponge, rinse the paste away, and dry the piece at once. The Potato Trick Potatoes contain oxalic acid, which helps dissolve rust, and pairing a raw potato with a mild abrasive works well on small spots. Slice a potato into two halves, dip the exposed flesh in dish soap or dust it with baking soda, and rub it over the rust until the marks fade. Repeat as needed, then rinse and dry. Method Cheat Sheet Method Best for Time needed White vinegar soak Heavily rusted items and thick patches A few hours, or overnight for tough rust Baking soda paste General surface rust on metal About an hour before scrubbing Potato and mild abrasive Small spots and light surface rust A few minutes of rubbing Caring for Rust-Prone Favorites Cast Iron Pans Clean the pan immediately after use and avoid soaking it in water. Dry it thoroughly, either with a towel or by resting it on the stovetop briefly so leftover damp evaporates. Then coat the surface with a thin layer of cooking oil to seal out air and damp, and store it in a dry spot. When pans get stacked, slip a paper towel in between each layer so trapped moisture is soaked up. Steel Utensils Hand wash these rather than running them through the dishwasher, dry them right away or stand them in a drying rack, and store them apart from items that could scratch them. A dry cabinet away from humid spots keeps them in good shape. Restore or Replace? The Decision Points Assess the damage: light surface rust usually cleans up, but rust that has pitted the metal and compromised it means replacement time. Weigh the value: a sentimental or costly piece may justify the restoration effort, while a cheap item is often easier to replace. Put safety first: deep rust can shelter bacteria, so such pieces may be unsuitable for preparing food. Count the effort: if removal means hours of scrubbing with an uncertain result, replacing the item may be the smarter call. Store-Bought Rust Removers: What to Look For When DIY methods are not enough, shop with four checks in mind: a kitchen-safe formula, non-toxic and environmentally friendly ingredients for anything that touches food, a track record of effectiveness without damaging the metal, and an application style you will actually use. Popular options include Bar Keepers Friend for stainless steel and other metals, CLR Calcium, Lime and Rust Remover for a range of surfaces, Evapo-Rust for a non-toxic soak that is safe for kitchen use, and WD-40 Specialist Rust Remover Soak for heavily rusted items. Follow label directions and store products carefully using Health Canada’s household chemical safety tips, and keep food safety in mind with guidance from the CDC’s food safety pages whenever an item touches food. Expert Habits for Rust-Free Kitchen Gear Professional kitchens stay ahead of rust with three habits. First, inspect regularly and act at the first sign of a spot, because early rust comes off easily while late rust does damage. Second, store smart: keep the area ventilated, tuck silica gel packs into drawers and cabinets to absorb extra moisture, and hang cookware where possible instead of stacking, which traps damp and invites scratches. Third, clean gently and dry thoroughly, using mild detergents rather than harsh chemicals, and season cast iron regularly so the baked-in oil layer keeps working as both a rust barrier and a non-stick surface. To keep a maintenance habit running across the whole house, professional regular cleaning keeps the kitchen on track. Kitchen Rust Questions Is rusted cookware safe to use? Surface rust can usually be scrubbed away and the piece returned to service, especially cast iron, which you can season again. Pitted or deeply rusted metal is a different story: it can harbor bacteria, so replacing the item is the safer choice. How long should rusty items soak in vinegar? A few hours handles light rust, and an overnight soak softens tougher patches.

Battling Kitchen Rust: 7 Tips and Tricks for Keeping Your Cookware and Appliances Rust Free Read More »

House cleaner inside a home

How to Choose the Right Professional House Cleaning Service in Yorkville: 5 Essential Tips

Choosing a House Cleaning Service in Yorkville Yorkville homes range from compact condos on Bay to century houses near Avenue Road, and the cleaning company that suits a suburban five-bedroom may not suit a glass-walled suite where every streak shows. Choosing well comes down to five checks: what you need cleaned, what reviews say, what happens if something breaks, who is actually doing the work, and what the quote really includes. Work through them in order and you will avoid the two classic mistakes, paying for scope you do not need and hiring on price alone. 1. Define Your Cleaning Needs First Before you request a single quote, write down what you want cleaned and how often. Most households land in one of three buckets: recurring maintenance for the weekly basics, a seasonal deep clean that reaches inside appliances and behind furniture, or a move-in or move-out clean tied to a lease or sale. Be specific about the extras that quote forms hide: inside the oven, inside the fridge, interior windows, balconies, and laundry. A clear scope in writing is what makes three quotes comparable, and it protects you from a surprise line item on invoice day. 2. Research Reviews and References Look beyond the star rating. Read recent reviews with photos, note whether complaints repeat, and check how the company responded, because a calm, specific reply says more than a wall of five stars. Google, Yelp, and local neighbourhood groups each catch different customers, so scan all three. Then ask for two references from homes similar to yours, ideally in the same part of the city, and call them. A company that hesitates to share references is telling you something. For local proof, you can also scan reviews of Toronto Shine Cleaning while you compare options. 3. Ask for Proof of Insurance and Bonding This is the check homeowners skip and later regret. Ask for a certificate of insurance showing liability coverage and confirm the company carries bonding for its cleaners, because a spilled bottle of bleach on an oak floor should never become your repair bill. At minimum, request: A current certificate of insurance with the policy number and coverage limits. Proof of a surety bond or a written guarantee covering theft and breakage. A clear statement of who pays if something is damaged, and by when. Confirmation that cleaners are employees or insured contractors, not an unvetted marketplace. As a benchmark, Toronto Shine Cleaning is bonded and insured with a one million dollar insurance policy and a ten thousand dollar accidental breakage and surety bond, and shares those details before the first visit rather than after an accident. 4. Check Experience and Expertise Years in business matter less than fit. Ask what training new cleaners receive, how the company handles special surfaces like marble, hardwood, and stainless steel, and whether the same cleaner returns each visit. Consistency is worth a premium: a team that learns your home cleans faster and needs less supervision. Also ask how they screen staff and whether they use their own supplies and equipment. A company that brings professional-grade products and a commercial vacuum tends to finish faster, while one that asks you to supply everything may cost less upfront and more in the long run. It also helps to know whether the team cleans first and disinfects only where needed, the sequence the CDC describes for cleaning and disinfecting your home. 5. Compare Prices and What Is Included Rates mean nothing without scope. Compare quotes on three axes: the base price, the tasks included, and any fees for pets, heavy clutter, or larger square footage. Flat rates are predictable but only fair if the task list is complete; hourly rates flex with the job but can punish a slow visit. Ask specifically whether oven interiors, fridge interiors, and interior windows are included or add-ons. For a concrete reference, the Toronto Shine Cleaning pricing page lists base rates before HST as follows. Service Studio or 1 bedroom 2 bedroom 3 bedroom 4 bedroom Regular cleaning from $212.63 $273 $327 Deep cleaning $270.38 $393.75 $441 $527.63 Move-in or move-out from $242.63 Request every quote in writing with the scope attached, then compare totals rather than the headline number. When you are ready to book a regular plan, you can see the recurring cleaning service and confirm whether your address falls inside the service areas. Choosing a Yorkville Cleaner FAQ How much should house cleaning cost in Yorkville? Downtown Toronto rates sit above the national average because of labour and parking costs. Expect roughly $210 to $330 for a regular clean of a smaller home before tax, with deep cleans higher; compare at least three written quotes with identical task lists. Should I tip my house cleaner? Tipping is optional but appreciated. If you are happy with the work, ten to fifteen percent per visit or a year-end bonus are common in Toronto. Regular clients often build it into their budget rather than deciding each visit. Do I need to be home during the cleaning? No. Many clients provide a key, lockbox code, or door code, and companies document arrival and departure. If you prefer to be present, say so when booking; it will not change the price for a standard visit. What cleaning products will they use in my home? Ask before booking, especially if anyone in the home has allergies or asthma, and confirm whether you can request fragrance-free products. Safe storage, dilution, and handling of cleaning chemicals matter too, and Health Canada’s household chemical safety tips are a good standard to hold any provider to. Book With Confidence Toronto Shine Cleaning serves Yorkville and the surrounding downtown core with bonded and insured cleaners, a one million dollar insurance policy, and a ten thousand dollar accidental breakage and surety bond. Whether you need a weekly maintenance plan or a seasonal refresh, review current rates on the pricing page or call (647) 424-0355 to get a quote for your address.

How to Choose the Right Professional House Cleaning Service in Yorkville: 5 Essential Tips Read More »

couple with a white pet dog indoors

Pet Hair, Don’t Care: 7 Effective Cleaning Strategies for Pet Owners

Pet Hair, Don’t Care: 7 Cleaning Strategies That Actually Work Pets are family, and their fur is a permanent part of your decor. You can accept that reality and still win the battle against shedding. These seven strategies cover grooming, vacuuming, tools, washable covers, deep cleaning, air quality, and prevention. 1. Groom Your Pets on Schedule Brushing is the cheapest pet hair removal you will ever do, because fur that stays in the brush never reaches your sofa. Long-haired cats and dogs often need a session every other day, while short-haired pets can go longer, though do not assume they shed less: many short coats drop a surprising amount of fine hair. Consistency matters more than intensity. As a bonus, grooming time doubles as a health check where you can spot lumps, bald patches, or skin irritation early, and most pets learn to enjoy the attention. Use the right tool for the coat: De-shedding rake: reaches the undercoat before loose hair spreads through the house. Slicker brush: best for finer fur. Rubber curry comb: suits short coats and bath time. 2. Build a Vacuuming Rhythm Homes with pets need more frequent vacuuming than homes without, plain and simple. Two to three passes a week is the baseline, and daily vacuuming earns its keep during heavy shedding seasons or if you live with a double-coated breed. The machine matters too. Pet-specific vacuums offer brush rolls engineered not to tangle with hair and stronger suction for pulling fur out of carpets and upholstery. Some models include HEPA filtration, which matters for anyone sensitive to dander; the CDC notes that dust and dander are common asthma triggers, so trapping the fine particles instead of recirculating them protects the air, not just the floors. Empty the canister before it overfills, since a full vacuum loses suction exactly when you need it. 3. Keep Specialized Pet Hair Removal Tools Handy Two inexpensive tools handle the surfaces vacuums cannot easily reach. The first is a damp rubber glove or squeegee: moisten it slightly, then drag it across upholstery in short strokes and watch loose hair cling to the rubber in clumps. It works on sofas, armchairs, and even carpeted stairs, and it costs almost nothing. The second is the humble lint roller. Keep one in every room, in the car, and in your bag for last-minute rescues, whether that is a blazer before a meeting or the couch five minutes before guests arrive. Neither tool needs training or batteries, which is exactly why they get used. 4. Choose Washable Covers and Easy-Clean Fabrics Removable, machine-washable covers turn a hairy sofa into a laundry problem instead of a crisis. When your pet claims the best cushion, you strip the cover, run a cycle, and the furniture looks new again. Covers also refresh the room’s look seasonally without new furniture and shield the upholstery from daily wear. When shopping for new pieces, lean toward leather or tightly woven fabrics, because hair wipes off or vacuums away rather than weaving itself in. Washable rugs and mats in the areas your pets favor make cleanup even simpler. 5. Schedule Deep Cleans for the Hidden Zones Regular cleaning misses the places pet hair loves: under beds and sofas, along baseboards, and behind furniture, where dander and fur build up out of sight, along with the odors they bring. A DIY deep clean works with the right equipment: a vacuum with crevice and upholstery attachments, a damp cloth for baseboards and sills, and ideally a carpet cleaner, which you can rent. When the job is larger than a free afternoon allows, professional help pays off. Our deep cleaning service targets pet hair, dander, and lingering odors with commercial equipment, and regular cleaning plans keep shedding under control between deep visits. 6. Manage Air Filters and Purifiers Airborne fur and dander keep circulating until something captures them. Change your HVAC filters on schedule, because a clogged filter cannot trap particles and forces the system to strain, raising energy costs over time. Pair that with a standalone air purifier in the rooms where your pets spend their days; models rated for pet dander and the size of the room work best, and some include odor neutralizers. Together, filters and purifiers reduce the fine particles that settle back onto every surface you just cleaned. The CDC’s guidance on cleaning your home makes the same point: remove dirt and germs from surfaces first, then treat them further only if needed. 7. Prevent Hair Where You Can Prevention beats remediation. Pet-friendly zones with comfy beds and toys in the areas they are welcome, plus closed doors or consistent training elsewhere, contain shedding to part of the house. Guests with allergies appreciate at least one reliably fur-free room, and making allowed spaces more appealing than forbidden ones teaches most pets to respect the boundaries. Where you can choose surfaces, choose forgiving ones. A quick comparison: Surface Pet hair friendliness Care tip Leather or faux leather High, hair wipes off fast Wipe weekly with a damp cloth Tightly woven fabric Moderate, vacuums clean Vacuum with an upholstery attachment Loose-weave or shag textiles Low, hair embeds deeply Use washable throw covers over them Hard floors with washable rugs High, fur collects on top Swiffer or vacuum daily, launder rugs monthly When Shedding Season Wins Twice a year, most pets blow their coats and even diligent routines feel like a treadmill. That is the moment to bring reinforcements. Toronto Shine Cleaning handles pet hair, dander, and odors across homes in Toronto and surrounding areas, with current rates on our pricing page and bookings by phone at (647) 424-0355. Frequently Asked Questions How do I get pet hair out of a couch without a vacuum? Dampen a rubber glove or squeegee and drag it across the fabric in one direction; the hair clumps and lifts. Follow with a lint roller for the stragglers. For deep-set fur, sprinkle a little baking soda, let it sit, then sweep it up with the hair.

Pet Hair, Don’t Care: 7 Effective Cleaning Strategies for Pet Owners Read More »

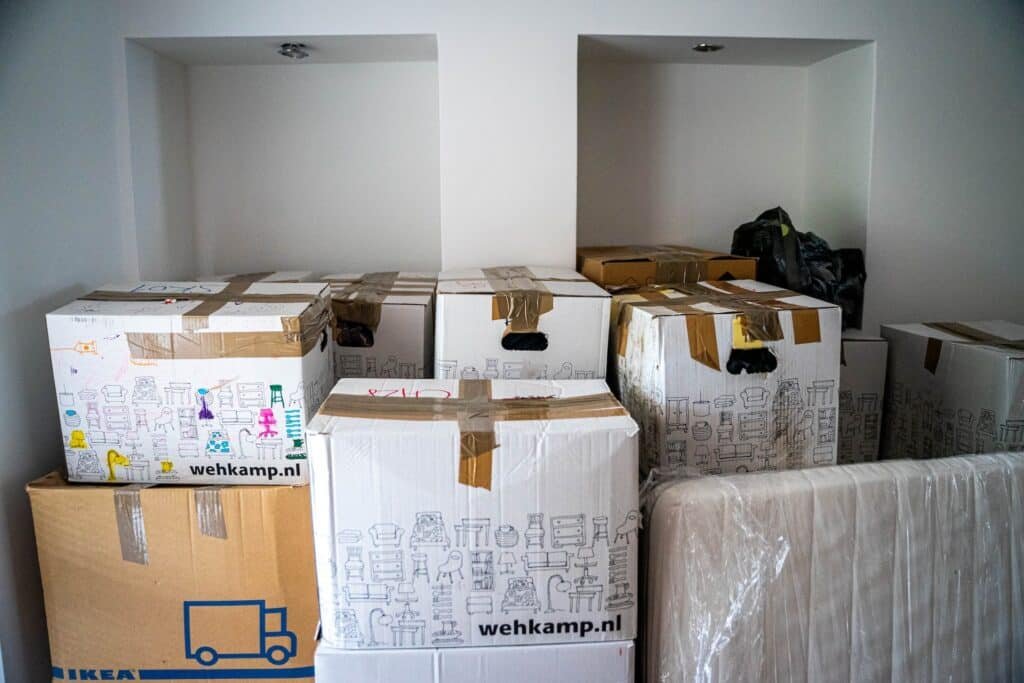
Packed boxes inside the home for moving out

Benefits of Hiring Professional Move In and Move Out Cleaners in Toronto

Benefits of Hiring Professional Move In and Move Out Cleaners in Toronto Moving in the 6ix is a maze of boxes, utility calls, and last-minute logistics, and one enormous task sits at the end of every checklist: the big clean-up. Whether you are leaving a rental that has to pass a landlord’s final inspection or settling into a place where you want a true fresh start, professional move-in and move-out cleaners turn that chore into a single booked appointment. Here is why hiring them is one of the smartest moving decisions you can make. Professional Cleaners Save You Serious Time Imagine moving week: boxes everywhere, utilities on hold, a pet adding confusion to the chaos, and a deep clean still ahead. Professionals change the equation. They arrive with every tool and product the job needs and follow a systematic approach that covers the corners a hurried DIY clean overlooks, such as the insides of cabinets and the gaps behind appliances. Their speed comes from specialization: hardwood floors, tiled bathrooms, stubborn stains, and accumulated grime are handled without relearning the process on your clock. The deeper value is mental relief. With the cleaning in capable hands, you can focus on packing, organizing, or stealing a quiet moment to say goodbye to your old home. Scrubbing a whole unit is real physical work, and while the CDC notes genuine mood benefits of staying physically active, moving week is a poor time to get that exercise. Our end-of-tenancy cleaning service is built for exactly this week. Professional Cleaning Helps You Get Your Deposit Back For many tenants, the security deposit is a significant amount of money that comes down to a walkthrough. Cleaners who do this work regularly know what landlords and property managers check during the final inspection, and they catch the details a standard clean misses: cabinet tops, oven interiors, the undersides of sinks, and tile grout where dirt collects. They bring the right tools and agents for each task, whether that means removing limescale from bathroom fixtures, degreasing kitchen appliances, or leaving windows streak-free. Meticulous coverage significantly increases the odds of a full deposit return and spares you the stress of second-guessing your own elbow grease. Here is where the typical DIY effort falls short: Cabinet tops and interiors: grease and dust build up for years, unseen. Ovens and refrigerators: baked-on carbon and forgotten spills. Under sinks: limescale, grime, and missed corners. Grout and drains: discoloration and hair that inspectors spot instantly. Windows and tracks: smudges and streaks under daylight. Toronto landlords and property managers see the difference constantly, and you can read what clients say about our results on our reviews page. A Healthy, Fresh Start in Your New Home Moving somewhere new is the start of a chapter, and you want it to begin in a genuinely clean space. Move-in cleaners go past the surface to remove the dust, dirt, and allergens previous occupants left behind. They sanitize high-touch points like countertops, doorknobs, and light switches, deep-clean carpets that harbor dust mites, and address neglected areas such as air vents and bathroom grout, where mold and mildew can grow unnoticed. The CDC’s overview of cleaning and disinfecting your home explains why thorough sanitization matters. That peace of mind is especially valuable if anyone in your family lives with allergies or asthma, because a professionally cleaned home significantly reduces common triggers. Professional Grade Equipment, Customized to Your Home Tools and products you do not own Experts work with industrial-grade equipment rarely found in a household closet: powerful vacuums that suction more dust and allergens than standard models, steam cleaners that sanitize without harsh chemicals, and surface-specific solutions for hardwood, marble, and delicate upholstery. Their expertise covers tough stains and high, hard-to-reach areas, and their methodical approach leaves nothing out, from baseboards to ceiling fans. The result is a home that does not just look clean but shines. A cleaning plan built around your needs A good service starts with a consultation to understand your priorities, whether that means concentrating on kitchens and bathrooms or tackling pet odors and allergen reduction. Techniques match the problem: degreasers and steam for a greasy kitchen, deep shampooing or hot water extraction for carpets. Homes with large glass surfaces are handled differently than homes full of wooden furniture, and special pieces like antique furniture, high-end appliances, and delicate fabrics get careful treatment, so you get value instead of a generic pass that overlooks your concerns. Compare Your Options Before Moving Day Aspect DIY with a weekend to spare Hired professional crew Time cost Many exhausting hours after a day of lifting boxes A scheduled visit while you handle the rest of the move Equipment Store-bought products and a household vacuum Industrial tools, steam cleaners, surface-specific agents Deposit risk Missed spots can mean deductions and disputes A checklist built around landlord inspections The Peace of Mind Factor When you entrust your space to a professional team, you lean on their skills, experience, and specialized knowledge. They follow a systematic process that reaches high shelves, ceiling corners, and behind appliances, and they treat every material appropriately, from hardwood floors to delicate light fixtures. Moving is inherently stressful, so delegating the cleaning removes a major burden and gives you confidence the job is done right as you prepare a space for its next chapter. As for numbers, move-in and move-out cleaning starts at $242.63 before HST for a studio or one-bedroom, as listed on our pricing page. Move In and Move Out Cleaning FAQs What is the difference between move-in and move-out cleaning? The checklist is largely the same because both require a vacant, spotless home: inside cabinets and appliances, walls, baseboards, fixtures, floors, and bathrooms. Move-out work adds deposit-pressure items like limescale and grease removal, while move-in work focuses on sanitizing what the previous occupants left behind. Do landlords in Toronto require professional cleaning? Many leases expect the property returned in rental-ready condition, and landlords run detailed final inspections. Even where a professional service is

Benefits of Hiring Professional Move In and Move Out Cleaners in Toronto Read More »

white bed linen on bed. Apartment interior design

Tips in Finding a Budget-Friendly Airbnb Cleaning Services Toronto

Budget-Friendly Airbnb Cleaning Services in Toronto: How to Find the Right Fit Running an Airbnb in Toronto means every guest should walk into a spotless space, but the cost of cleaning can eat into your returns. The good news is that affordable Airbnb cleaning services Toronto hosts rely on are within reach if you shop smartly. The balance comes from knowing what your property needs, comparing transparent pricing, and building a relationship with a cleaner who understands your rental. Know Exactly What Your Airbnb Needs Every Airbnb is different. A quick turnaround clean after each guest may be enough for a lightly used unit, while a frequently booked property needs deeper attention between stays. Think about the high-use areas too: a kitchen used for heavy cooking collects grease faster, and a living room with lots of foot traffic needs more vacuuming and surface care. Turnaround cleaning after every checkout A deep clean every few months or after long guest stays Extra attention for kitchens used for heavy cooking Fast scheduling windows for back-to-back bookings Frequency matters just as much as scope. Back-to-back bookings call for fast, efficient turnovers, while spaced-out stays let you schedule a more thorough clean each time. Matching the service to your actual needs is the simplest way to avoid paying for work you do not require. Compare Transparent Pricing Without Sacrificing Quality Start by comparing rates across companies. Many cleaning businesses, including Toronto Shine Cleaning, list their prices openly on their websites, which makes comparison easy. But price is only half the equation: a spotless space earns rave reviews, repeat bookings, and recommendations, while a missed corner can cost you a star. Read reviews from other Airbnb hosts to gauge reliability, thoroughness, and punctuality, and ask hosts in your network about services they have used. First impressions matter, so choose a cleaner whose quality record matches your standards. The CDC’s guidance on cleaning and disinfecting your home is a useful benchmark for what a proper turnover should include, especially between different guest groups. Ask for a Custom Quote Airbnb properties often have quirks that standard packages miss: antique furniture, delicate artwork, or a large bay window that collects dust. A custom quote lets you highlight these items so the cleaner budgets the right time for them. You also avoid paying for services your space does not need. Be specific about expectations, such as deep carpet cleaning, polishing hardwood floors, or streak-free windows, and the quote will match the real scope of work. Look for Package Deals, Loyalty Discounts, and Off-Peak Slots Cleaning companies reward regular business. If your calendar fills up with bookings, ask about package deals or loyalty discounts for recurring cleans. Running several properties? Some services offer bulk rates for multiple units. Flexibility with timing also pays off: off-peak slots, such as early mornings or late evenings, may come with lower rates because the crew is less busy. The table below summarizes the most common savings: Strategy How It Works Best For Package deals Book several cleans in advance at a reduced rate Hosts with steady booking volume Loyalty discounts Reduced pricing for ongoing regular customers Hosts who use the same service weekly Off-peak scheduling Lower rates for early morning or evening slots Flexible hosts with turnaround windows Referral rates Special pricing for clients who arrive via a host referral Hosts with a network of fellow hosts Watch for Extra Fees An affordable quote can grow quickly with hidden extras. Some companies add parking fees, which matter in a city like Toronto, or surcharges for rooms that need extra attention after heavy use. Before you agree, ask for a detailed, all-inclusive quote that breaks down every cost. A reputable company will explain its fees happily and confirm that no surprise charges will appear on the final bill. Health Canada’s household products safety page is also worth a read so you know what goes into the products used in your rental. Go Local and Lean on Other Hosts Local cleaners save on travel time, which often translates into lower rates, and they know the rhythms of Toronto hosting. Supporting a local business also builds a community around your rental. Fellow hosts are your best source of honest recommendations: they can tell you which service handled a last-minute turnover gracefully and which one cut corners. Word-of-mouth referrals often uncover smaller companies with competitive rates and personal service. Airbnb Cleaning Services Toronto FAQ How much does Airbnb cleaning cost in Toronto? It depends on the size of the unit, the level of cleaning, and how often you book. Check the pricing page for published base rates, then request a custom quote for your property. Can I book a one-time Airbnb clean? Yes. One-time turnovers and deep cleans are both available, and you can move to a recurring schedule later if the volume of bookings grows. How fast can cleaners turn around a unit between guests? Most standard turnovers are completed within a few hours, depending on the size of the property. Same-day service is often possible when you book ahead. Are the cleaners insured? Toronto Shine Cleaning is bonded and insured, with a $1,000,000 insurance policy and a $10,000 accidental breakage and surety bond, so your property and belongings are covered. Toronto Shine Cleaning provides regular, deep, and move-in or move-out cleaning for Airbnb hosts across Toronto and the GTA. Check our customer reviews, book a regular cleaning service for ongoing turnovers, or call (647) 424-0355 for a quote tailored to your Airbnb.

Tips in Finding a Budget-Friendly Airbnb Cleaning Services Toronto Read More »

two kids standing side by side wearing masks

An Easy Fresh Start: Top Tips for Back-to-School Cleaning in North York

An Easy Fresh Start: Top Tips for Back-to-School Cleaning in North York The first school morning of September is the most chaotic of the year unless the house is ready for it. North York families know the drill: missing shoes, desks buried under summer crafts, closets full of clothes that no longer fit. A focused weekend of back-to-school cleaning resets all of it, and the payoff runs all year, because an organized home makes every school morning shorter. Here is the plan, room by room. Declutter the Desks and Study Areas Study spaces absorb a summer of art supplies, magazines, and unread paperbacks. Go through everything on the desk and sort it honestly: paper that is done goes to recycling, books that will not be revisited go to the library donation bin or a charity, and supplies get sorted into drawers, holders, or repurposed containers. The goal is a workspace that signals focus the moment your kid sits down. There is real psychology behind it: a tidy desk reduces distractions, and an organized pencil cup beats a ten minute hunt for a working pen every single homework night. Refresh the Kids’ Bedrooms Treat the bedroom reset as a one-day deep clean. Dust everywhere the eye does not naturally go: behind the bed, under the desk, on top of shelves, and in the nooks where clutter nests. Then vacuum thoroughly, especially under the bed and along baseboards, because carpets hold the dust and allergens that aggravate kids with allergies or asthma. Finish with the bedding: wash sheets, pillowcases, and blankets so the school year starts on fresh sleep. Clean bedding is not just a nice feeling; good sleep is what school performance is built on. Tackle the Closets Pull everything out, pile by pile, and sort into keep, donate, and maybe. Clothes the kids have outgrown should head to donation while someone else can still use them. Check school uniforms and staples for fit and condition, then list what actually needs buying so you shop with precision instead of panic. Organize what remains by type, or even by school day, so the first weeks of mornings run on autopilot instead of wrestling matches. Build a Real Homework Station Pick a spot with minimal distractions and strong light, whether that is a corner of the bedroom, a living room nook, or a dedicated section of the dining table. Comfortable chair, right height desk, and a stocked supply drawer: pencils, erasers, paper, a ruler, and a few highlighters. Let your kids personalize the space with artwork or a couple of decorations; ownership turns homework resistance into routine. A dedicated station also protects the dining table from becoming a permanent paper battlefield. Sanitize the Common Areas Back to school means back to the germs that ride home in backpacks. Sanitizing the shared surfaces is a stealth health check for the whole family. Start with the hotspots everyone touches: Kitchen counters and dining tables, wiped with disinfectant daily during cold season Doorknobs, light switches, and cabinet handles, the highest traffic points in any home Bathroom surfaces, from faucets to counters Electronics: phones, keyboards, remotes, and game controllers, cleaned with electronics-safe wipes Health authorities are consistent on the order of operations: clean surfaces first to remove grime, then disinfect to kill what remains, the sequence the CDC’s cleaning and disinfecting guidance lays out. And since school mornings run on routine, handwashing before snacks and after school is the cheapest illness insurance there is; the CDC’s handwashing basics are a two minute read worth sharing with the kids. Plan the Cleaning Schedule That Survives the Semester Assess what needs doing and how often, then assign tasks to fixed days so nothing relies on memory. A simple rotation keeps a family home steady even in the busiest weeks: Day Task Why It Fits Monday Vacuum high traffic rooms Clears the weekend’s mess early Midweek Laundry cycle Clean clothes ready for the second half Friday Dusting and touch-ups Sets up a clean, free weekend Weekend Kitchen and bathroom deep touch Resets the two germ hubs Assign age-appropriate tasks to the kids. Wiping tables and sorting laundry are real contributions, and kids who help clean treat the space differently afterward. Consistency turns the schedule into background noise instead of a weekly negotiation. Back-to-School Cleaning FAQs When should we start the back-to-school reset? The last two weeks of August are ideal: early enough to fix what you find, like missing uniform pieces, and close enough that the new systems hold through September. One weekend of work covers it if you follow the room order above. How do I get kids to keep their desks tidy? Give every item a labeled home and keep the surface to essentials only. A two minute reset as part of the after-school routine, backpack unpacked, desk cleared, works better than any weekend lecture. How often should touchpoints be disinfected during the school year? Wipe the highest traffic points, doorknobs, switches, and remotes, twice a week in normal times and daily during flu season or after someone has been sick. It takes minutes and measurably cuts the germ relay between family members. Can a cleaning service handle the seasonal resets? Absolutely. Deep cleans before the school year, and regular visits during it, keep the family home running without it consuming your evenings. Professional crews bring the products and the checklist; you keep the weekends. A Cleaner Start for North York Families Start the year with a home that works as hard as the students in it. Toronto Shine Cleaning serves North York and the wider GTA, with our coverage listed on the locations page, and regular plans through our housekeeping service or a full deep clean before the first bell. Call (647) 424-0355 and make this the organized school year.

An Easy Fresh Start: Top Tips for Back-to-School Cleaning in North York Read More »

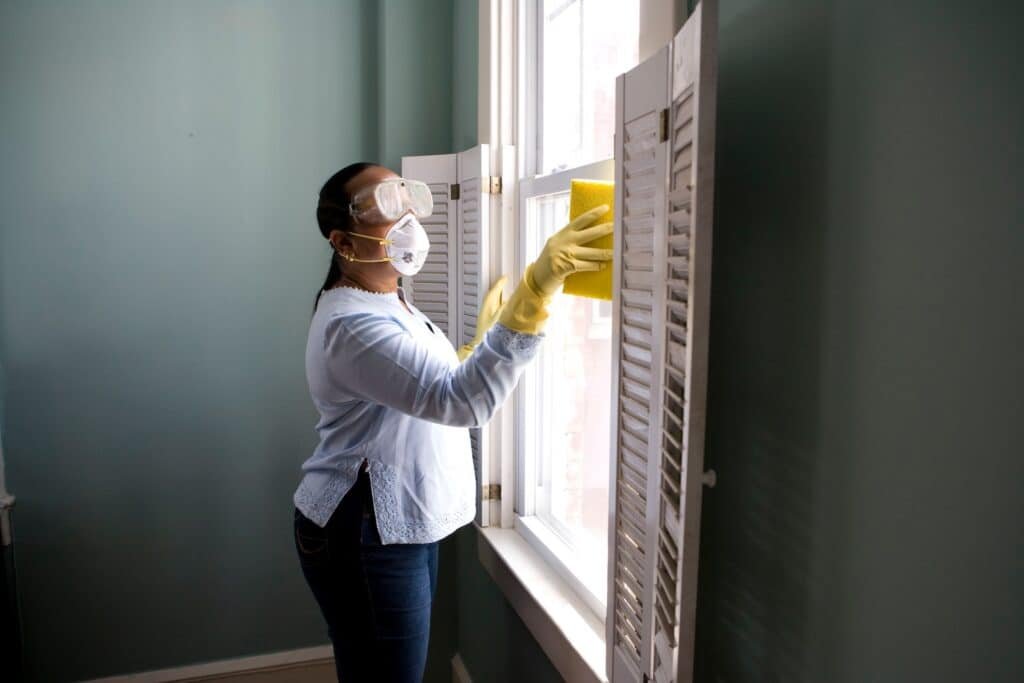
woman in white long sleeve shirt and blue denim jeans standing beside white wooden framed glas

Deep Cleaning Services for Etobicoke Homes

Deep Cleaning Services for Etobicoke Homes Keeping an Etobicoke home truly clean means going beyond the weekly sweep and mop. Deep cleaning tackles the hidden dirt, grease, and allergens that regular cleaning misses. Toronto Shine Cleaning offers thorough deep cleaning services designed to refresh every corner of your Etobicoke home, from the kitchen backsplash to the bedroom baseboards. Our professional team uses eco-friendly products and commercial-grade equipment to deliver results that standard household cleaning cannot match. Whether your home is a century-old house in The Kingsway or a modern condo near Humber Bay Shores, our deep cleaning service adapts to the specific cleaning needs of your property and lifestyle. What Deep Cleaning Covers A deep cleaning service addresses areas that accumulate grime over time and are often neglected during routine cleaning. In the kitchen, we clean inside and outside all appliances including ovens, microwaves, and refrigerators. We scrub cabinet fronts and interiors to remove cooking grease and food residue, degrease backsplashes thoroughly, and sanitize countertops, sinks, and faucets. In bathrooms, we scrub tile and grout lines with specialized brushes to remove soap scum and mildew, clean shower doors and tracks, sanitize toilets including the base and behind, clean vanity cabinets inside and out, and polish mirrors to a streak-free shine. For living areas and bedrooms, we dust ceiling fans, window sills, blinds, light fixtures, picture frames, and baseboards. We vacuum under and behind furniture, clean door frames and switch plates, and detail every high-touch surface. We also pay special attention to staircases, handrails, and entryways that see heavy daily traffic and accumulate dirt faster than other areas. Benefits of Deep Cleaning Your Etobicoke Home Healthier indoor air: Deep cleaning removes dust mites, pollen, pet dander, and mould spores trapped in carpets, upholstery, and HVAC vents. This significantly reduces allergy and asthma triggers for your family and creates a fresher, more breathable environment. Extended lifespan of surfaces: Regular deep cleaning prevents dirt and grime from wearing down carpets, hardwood floors, tile grout, and appliance seals. This protects your home investment and delays the need for expensive replacements or refinishing. Reduced stress: A deeply cleaned home feels calmer, more organized, and more inviting. The psychological benefit of a clean environment directly improves your daily well-being and productivity, making your home a true sanctuary. Long-term savings: Removing dust build-up from appliance coils, filters, and seals helps appliances run efficiently and last longer. Well-maintained appliances consume less energy and require fewer repairs, saving you money month after month. Area Deep Cleaning Tasks Recommended Frequency Kitchen Inside oven, fridge, microwave; cabinet fronts and interiors; backsplash degreasing; counter sanitizing Every 3 to 4 months Bathroom Grout scrubbing; shower head descaling; toilet base and tank cleaning; mirror polishing Quarterly Living areas Under furniture dusting; ceiling fans; window tracks; baseboards; light fixtures Every 6 months HVAC vents Register cleaning; filter inspection; duct surface wipe-down Seasonally Why Etobicoke Homeowners Trust Professional Deep Cleaning Etobicoke homes have their own character. Older homes feature original hardwood floors, ornate woodwork, and classic tile that require gentle, specialized handling. Newer condos and townhouses feature stainless steel appliances, glass shower enclosures, and quartz countertops that need streak-free, non-abrasive care. Professional cleaners bring the right tools and expertise for every surface type. They use food-safe disinfectants in the kitchen, non-abrasive cleaners for tile and stone, and HEPA-filtered vacuums to capture fine particles that household vacuums recirculate. A professional deep cleaning also saves hours of physical effort and delivers results that are difficult to achieve with off-the-shelf cleaning supplies alone. How Deep Cleaning Differs from Regular Cleaning Understanding the difference between deep cleaning and standard housekeeping helps you choose the right service. A standard cleaning focuses on visible surfaces: countertops, floors, sink fixtures, and high-traffic areas. Deep cleaning goes further, targeting the grime that accumulates in hidden spaces. For example, while a regular cleaning wipes down the exterior of kitchen cabinets, a deep clean addresses the interior shelves and door tracks. Where standard service dusts visible shelves, deep cleaning reaches ceiling fan blades, window tracks, and under heavy furniture. Both services are valuable, but deep cleaning provides the comprehensive refresh that homes need periodically to stay truly clean and healthy. Frequently Asked Questions How is deep cleaning different from a standard clean? A standard clean addresses visible surfaces like counters, floors, and sinks. Deep cleaning includes detailed work on grout, inside and behind appliances, under furniture, baseboards, light fixtures, and window tracks for a comprehensive refresh. Do I need to be home during the cleaning? No. Many Etobicoke clients provide access instructions, and our bonded, insured team cleans while you are at work or running errands. What cleaning products do you use? We use eco-friendly, non-toxic cleaning products that are safe for children, pets, and all common home surfaces. We can also accommodate specific product requests or sensitivities. How long does a deep cleaning take? For a typical two-bedroom Etobicoke home, expect approximately three to five hours. Larger homes or homes with significant build-up may require more time. Transform your Etobicoke home with a professional deep cleaning today. Call (647) 424-0355 or visit our deep cleaning page to book. Our team also offers regular cleaning services for ongoing maintenance. View pricing and packages and read customer reviews on our reviews page. Serving all GTA locations including Etobicoke. For safe cleaning guidance, refer to the CDC guide on home cleaning and disinfection and the Canada.ca tips on household chemical safety.

Deep Cleaning Services for Etobicoke Homes Read More »