Home Disinfecting

drains

7 Tricks To Keep Your Drains Clean And Odor-Free

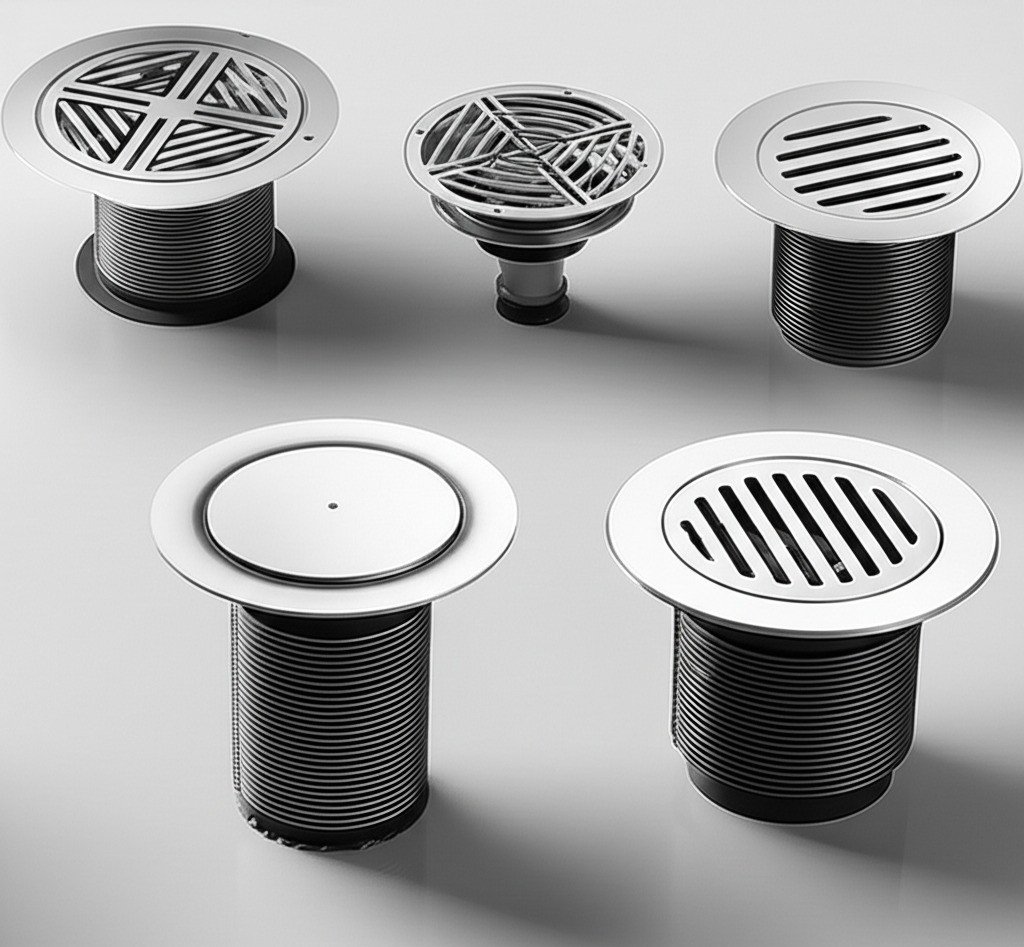
7 Tricks To Keep Your Drains Clean And Odor-Free Working drains are invisible, but a slow sink, a strange gurgle, or a sour smell from the pipes quickly reminds you how much your home depends on them. Every sink, tub, shower, toilet, and washing machine shares one drainage system, and each feeds it different debris: kitchen drains carry dishwater, food bits, and grease; bathroom drains collect soap, hair, and toothpaste; laundry drains deliver detergent and lint. Most drain problems are preventable with simple, consistent habits. These seven tricks cover prevention, daily routines, gentle fixes, and when to stop DIY and call a plumber. Tricks 1-2: Stop Clogs Before They Start Trick 1: Keep Grease and Food Scraps Out of Kitchen Drains Cooking fats, oils, and grease are the leading cause of kitchen clogs. They pour down the drain as liquids, then cool and solidify inside the pipes into sticky buildup that traps everything else that passes. Wipe greasy pans with a paper towel before washing, dispose of cooled cooking oil in a container, and keep coffee grounds, tea leaves, and fibrous scraps like vegetable peels out of the sink. A mesh strainer catches what rinses off plates, and emptying it into the compost or trash instead of the sink keeps the pipe clear. Trick 2: Never Flush Bathroom Offenders In the bathroom, hair is the main culprit: strands tangle into dense webs that trap soap scum and slow the water. Brush hair before showering and clear the drain cover regularly. The toilet deserves equal caution. Flushable wet wipes do not break down like toilet paper, and dental floss, cotton swabs, and feminine hygiene products should never be flushed; they snag on pipe joints and build into blockages. Cooking grease, oils, and fats Coffee grounds and tea leaves Fibrous food scraps and vegetable peels Wet wipes, dental floss, and cotton swabs Feminine hygiene products Tricks 3-4: Build Daily Habits That Keep Drains Clear Trick 3: Use Strainers and Empty Them Often Drain strainers or screens are the cheapest plumbing insurance you can buy. Fitted over every sink and shower drain, they catch hair and food debris before it enters the pipes. The secret is emptying them regularly, after every shower and several times a day in a busy kitchen: a full strainer protects nothing. Trick 4: Flush With Hot Water on a Schedule Heat keeps pipe buildup soft. After washing greasy dishes, run hot water for a minute or two so liquefied fats rinse through before they cool and cling. Once a week, pour comfortably hot tap water down every drain, but never boiling water, which can damage PVC pipes and some older metal joints. Once a month, fill sinks and tubs with very hot water and release the plugs at once so a strong surge sweeps the pipes clean. This monthly flush acts like spring cleaning for your drain lines, dissolving early soap scum and grease before they harden. Tricks 5-6: Read the Signs and Use Gentle DIY Fixes Trick 5: Learn the Warning Signs of a Growing Clog Watch for water that drains slower than usual, gurgling sounds as air pushes past a partial blockage, and odors rising from the drain, which signal trapped food or grease breaking down in the pipe. A more serious warning is water backing up into other fixtures, such as a bathtub that fills when you flush the toilet, which points to a blockage deep in the line. Act on the first sign and you avoid the emergency. Trick 6: Clear Minor Buildup With Baking Soda and Vinegar For a slow drain, gentle homemade methods usually do the job without harsh chemicals. Pour about half a cup of baking soda into the drain, follow with an equal amount of white vinegar, and let the fizz work for 30-60 minutes on soft buildup. Finish with a generous flush of hot water. For blockages near the opening, a plunger often works: cover the cup with water, seal it over the drain, and pump with steady strokes. If the sink’s P-trap is accessible, place a bucket underneath, unscrew it carefully, and remove the debris by hand. Avoid commercial chemical drain cleaners, which are corrosive to pipes, hard on the environment, and risky to handle; for more on the hazards of household chemicals, see Health Canada’s household chemical safety information. Warning sign What it usually means Smart response Slow draining water Buildup narrowing the pipe Baking soda and vinegar flush, then hot water Gurgling noises Air trapped behind a partial blockage Plunger first; snaking if it persists Bad smells from the drain Decaying food or organic matter in the trap Clean the trap area and flush with hot water Water backing up elsewhere Deep blockage, possibly the main line Stop using the fixtures and call a plumber Trick 7: Know When to Call a Professional Plumber Some problems are beyond DIY, and recognizing them saves you from expensive damage. Call a plumber when clogs keep returning despite your best efforts, when several drains back up at the same time, or when sewage rises into any fixture, a serious health hazard that needs immediate professional attention. Suspected tree root intrusion, a collapsed pipe, or other structural damage also demands expert hands, since amateur attempts usually make it worse. Plumbers bring the right tools, including drain cameras to see the problem, and augers and hydro-jetters to clear it safely. For everyday prevention, choose the right products for the job, as outlined in Health Canada’s guide to household products. Frequently Asked Questions About Drain Care How often should I use the baking soda and vinegar treatment? Monthly is a good maintenance rhythm for most households, but weekly hot water flushes matter more, since they prevent buildup from forming in the first place. Is it safe to pour boiling water down the drain? No: boiling water can damage PVC pipes and some metal joints, so use comfortably hot tap water instead for regular flushes. Why does my drain smell even though

7 Tricks To Keep Your Drains Clean And Odor-Free Read More »
baking soda

Benefits Of Baking Soda That You Need To Know For Deep Cleaning

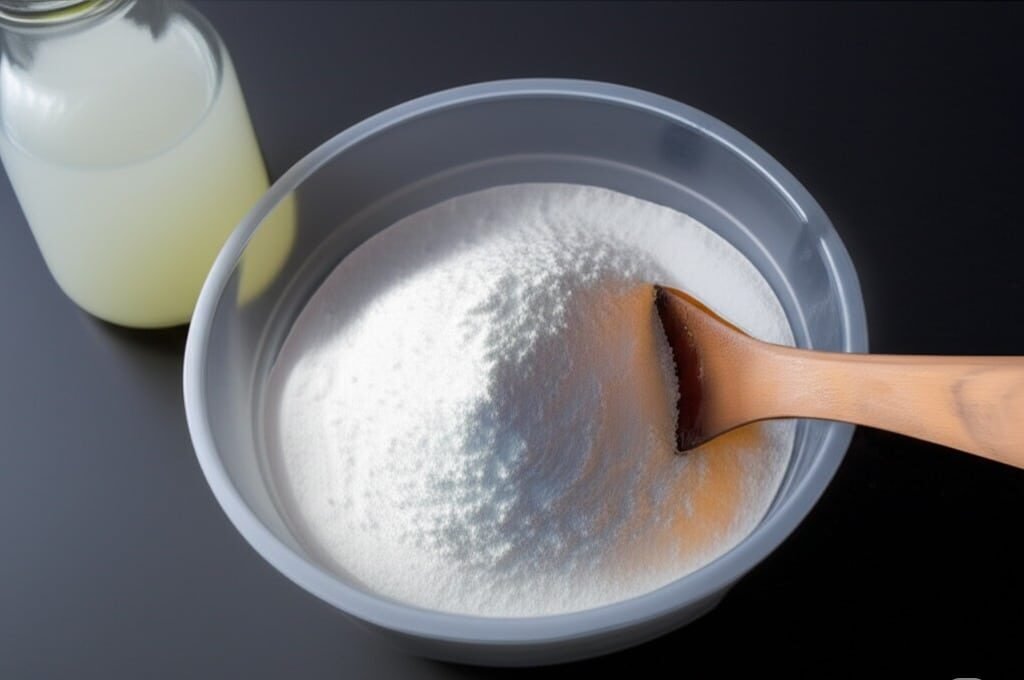
Why Baking Soda Belongs in Your Deep Cleaning Kit Sodium bicarbonate, better known as baking soda, is one of the most versatile cleaning tools in any home. Unlike many commercial cleaners packed with harsh chemicals, baking soda is a mild alkali and gentle abrasive that can scrub, deodorize, and break down grease without damaging surfaces. From tackling baked-on oven grime to neutralizing stubborn odors, its simple chemistry makes it a powerhouse for deep cleaning. Here is everything you need to know about using baking soda effectively around your home. How Baking Soda Works as a Cleaner Baking soda’s fine crystalline structure allows it to dislodge dirt and food deposits without scratching stainless steel, ceramic, porcelain, or fiberglass. When mixed with water into a paste, it becomes even more effective at tackling tough spots like baked-on food in ovens or burnt residue on cookware. Its mild alkalinity works on kitchen grease much the way traditional soap making works: the reaction converts fatty residues into compounds that loosen and rinse away with plain water. That is why it shines on greasy stovetops, backsplashes, and range hoods. Baking Soda for Kitchen Deep Cleaning Oven cleaning: Apply a baking soda paste to oven surfaces, let it sit overnight, then wipe and rinse to remove stubborn grease without harsh fumes. Drain maintenance: Pour half a cup of baking soda down the drain, add equal white vinegar, let it fizz for several minutes, then flush with boiling water to clear minor clogs and neutralize odors. Cookware: Sprinkle baking soda into burnt pots and pans, add hot water, and let soak to lift residue before scrubbing. Produce wash: Dissolve a few tablespoons in a sink of water to remove surface dirt, wax, and pesticide residues from fruits and vegetables. Deodorizing with Baking Soda Baking soda neutralizes odor molecules chemically rather than masking them with fragrance. An open box in the refrigerator absorbs food smells effectively and should be replaced every one to three months. For carpets, sprinkle baking soda generously, let it sit for 15 minutes or overnight for stronger odors, then vacuum thoroughly. This method works equally well on upholstered furniture, mattresses, pet bedding, and car interiors. Running baking soda through a garbage disposal with cold water neutralizes food waste smells instantly. Laundry Boosting and Brightening Adding half a cup of baking soda to your wash cycle enhances detergent effectiveness, especially in areas with hard water. It softens water by reacting with calcium and magnesium ions, allowing detergent to work more efficiently. Baking soda also deodorizes gym clothes, towels, and baby clothes while providing gentle brightening without the harshness of chlorine bleach. For perspiration or grease stains, apply a baking soda paste directly to the fabric before washing. Surface Baking Soda Method Key Benefit Oven interior Paste, sit overnight, wipe Removes grease without fumes Kitchen drains Baking soda + vinegar + boiling water Clears minor clogs, freshens Carpets and rugs Sprinkle, sit, vacuum Neutralizes pet and smoke odors Laundry Add half cup to wash Boosts detergent, softens water Produce Soak in baking soda water Removes wax and residues What to Watch Out For While baking soda is generally safe, its abrasiveness can damage delicate surfaces like polished silver or soft plastics if scrubbed too vigorously. When used as a toothpaste substitute, its grit can erode tooth enamel over time, and it lacks fluoride essential for dental health. Ingesting baking soda as an antacid should only be done after consulting a healthcare professional, as it is high in sodium and can cause gas or affect medication absorption. For personal care uses like deodorant or exfoliation, the high pH often irritates sensitive skin. Frequently Asked Questions Can baking soda remove tough stains from countertops? Yes, a paste of baking soda and water can lift stains from stainless steel, granite, and ceramic countertops, but test a small hidden area first to avoid scratching polished finishes. How often should I replace baking soda in my fridge? Replace the open box every one to three months for optimal odor absorption. Is baking soda safe for cleaning around pets and children? Yes, baking soda is non-toxic and safe for households with pets and children, though ingestion in large quantities should be avoided. Can baking soda unclog a completely blocked drain? Baking soda is effective for minor clogs and maintenance, but a fully blocked drain typically requires a plumber or professional drain cleaning service. Does baking soda expire for cleaning use? Baking soda does not spoil, but it loses potency over time. To test, drop a spoonful into vinegar: if it fizzes vigorously, it is still active and effective. For a thorough deep clean beyond what pantry staples can handle, consider professional deep cleaning services in Toronto. Combined with regular cleaning and baking soda touch-ups, your home stays spotless and fresh. View our pricing to find the plan that works for you. Read more about safe disinfecting practices from the CDC or explore Canada’s guide to household product safety. Call (647) 424-0355 to schedule your next cleaning appointment.

Benefits Of Baking Soda That You Need To Know For Deep Cleaning Read More »

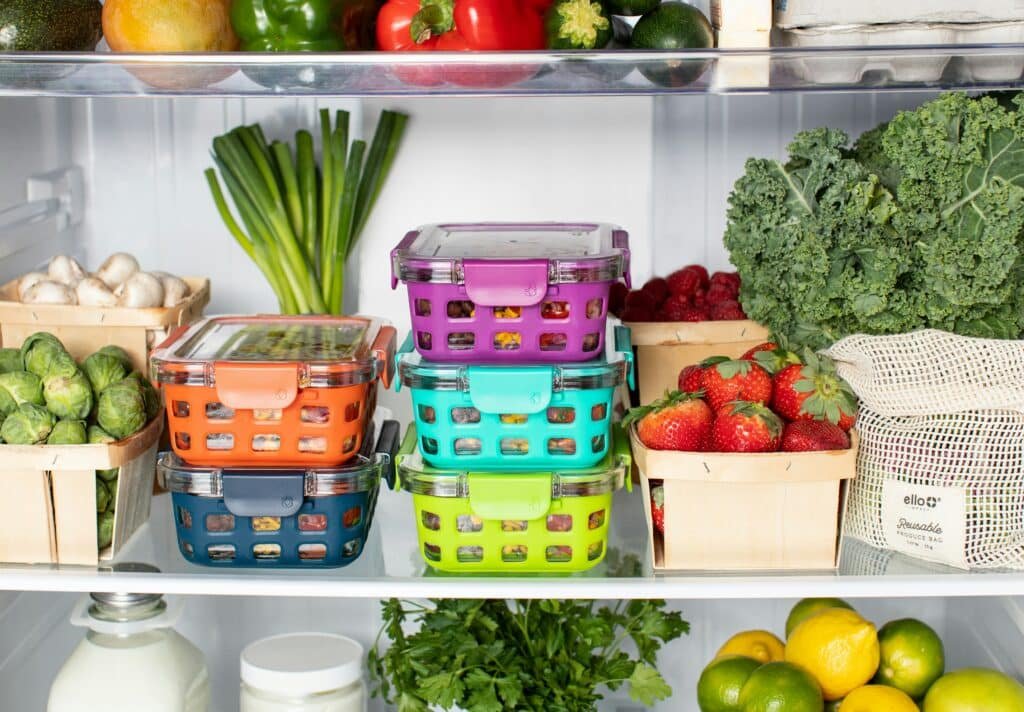
Kitchen refrigerator brimming with fresh veggies and meals.

How to Ensure Your Groceries are Virus-Free: A 7-Step Guide

How to Ensure Your Groceries are Virus-Free: A 7-Step Guide for Toronto Homes The weekly grocery run is one of the most routine errands in a Toronto household, and also one of the most contact-heavy: shared carts, busy checkout lanes, and shelves touched by dozens of shoppers every day. While the likelihood of catching a virus from food packaging is generally low, a few simple habits add real peace of mind, especially when your home includes young children, seniors, or anyone with a weakened immune system. This seven-step guide covers everything from planning your trip to putting the last package away, so you can keep your groceries virus-free from store to pantry. Step 1: Prepare Before You Shop Write your shopping list before you leave the house. Knowing exactly what you need lets you get in and out faster, which means less time in crowded aisles and fewer chances to touch shared surfaces. Pack hand sanitizer and disinfectant wipes for your hands, the cart, and payment screens. Keep a mask handy for busy periods when keeping distance is difficult. Shop during off-peak hours, such as weekday mornings, when stores are quietest. Step 2: Choose Touch-Free Options When Possible Delivery and curbside pickup remove most of the guesswork. Your order is packed by store staff and loaded straight into your car or left at your door, which limits your exposure to public spaces. If you do shop in person, touch only the items you plan to buy, and keep your hands away from your face while you browse. Step 3: Sanitize Your Hands and Cart Wipe the cart handle, basket edges, and child seat with a disinfectant wipe before you start, then apply hand sanitizer after touching door handles and payment terminals. These small steps stop germs from hitching a ride from the cart to your groceries, and then from your groceries to your kitchen. Step 4: Practice Safe Handling in the Aisles Use the produce bags as a barrier when picking loose fruits and vegetables instead of grabbing them with bare hands. Skip items with torn or damaged packaging, and avoid touching your eyes, nose, or mouth while shopping, since those are the easiest entry points for viruses. Step 5: Clean Your Groceries When You Get Home Designate a landing zone near the door or in the kitchen for incoming bags, then treat each item by type. Grocery Type Recommended Cleaning Method Cans, jars, and plastic bottles Wipe each container with a disinfectant wipe and let it air dry before storing. Fresh fruits and vegetables Rinse under running water and rub gently with your hands. Avoid soap or household detergents, which can leave residues that are not safe to eat. Cardboard boxes and bags Wipe the outside, or set them aside for a few hours before putting them away. Frozen items Wipe the packaging, since it has been handled in the store and during delivery. A produce wash is optional: running water and light friction remove most dirt and microbes from the surface. Cleaning physically removes germs while disinfecting kills them, so match the method to the item. The CDC explains both approaches in its food safety and home cleaning and disinfection guidance. Step 6: Designate a Cleaning Area and Tidy It After Keep one zone for groceries that still need attention so clean items and unwashed items never mix. Once everything is stored, wipe down the countertops, the sink area, and any bins or bags that touched the groceries. Wash reusable shopping bags regularly, either in the machine or by hand with warm soapy water. Health Canada’s safe food handling tips are a useful refresher for the whole family. Step 7: Wash Your Hands Thoroughly Finish every grocery session by washing your hands with soap and water for at least 20 seconds, including between your fingers, under your nails, and on the backs of your hands. This one habit is the most effective way to keep viruses from moving from your hands to your face or your food. Keep the Whole Kitchen Virus-Free Groceries are only one link in the chain. Fridge handles, faucets, counters, and cabinet fronts collect germs from everyday use, so wipe them down regularly and give the kitchen a deep clean every few weeks. If you would rather spend Saturday at the farmers market than scrubbing the fridge, Toronto Shine Cleaning provides deep cleaning services in Toronto and regular residential cleaning across the GTA, so your kitchen stays hygienic without eating your weekend. We serve Toronto and surrounding areas, and clients rate us 4.9 out of 5 on Google, as shown on our reviews page. Call 647-424-0355 to book a visit. Seven steps sound like a lot, but most of them take seconds once they become routine. Plan your list, protect your hands, clean by type, and wash up at the end, and your kitchen stays a safe place for everyone in your household. Do I need to disinfect every single package? No, focus on items you will touch frequently, such as cans, jars, bottles, and frozen packages. Fresh produce only needs a rinse under running water, and cardboard can be wiped or set aside briefly before storing. Can I wash fruits and vegetables with dish soap? No, avoid soap, detergent, and bleach on produce. These products can leave residues that are not safe to eat. Running water and gentle rubbing with your hands are enough, and a produce wash is optional. Is grocery delivery safer than shopping in store? Delivery and curbside pickup limit your exposure to shared surfaces like carts and checkout screens, which reduces contact with germs. If you do shop in person, keep your hands away from your face and sanitize after touching shared surfaces. How long should I wash my hands after handling groceries? At least 20 seconds with soap and water, covering between your fingers, under your nails, and the backs of your hands. Do this after unpacking and again before you eat or prepare food.

How to Ensure Your Groceries are Virus-Free: A 7-Step Guide Read More »

Elegant room interior with gleaming, sparkling plywood floors.

How to Keep Your Home Comfortable: Controlling Humidity from Basement to Attic 101

Keep Your Home Comfortable isn’t just about adjusting the thermostat; it involves maintaining the right balance of humidity throughout your home, from the basement to the attic. Too much moisture can make your home feel stuffy and can lead to mold and mildew issues, while too little can cause dry skin and respiratory problems. Let’s dive into how you can control humidity levels across different areas of your home, ensuring a comfortable living environment year-round. In the Basement: Combat Moisture at Its Source Basements often bear the brunt of humidity issues in a home due to their below-ground location, making them inherently prone to dampness and mustiness. Addressing humidity in the basement is crucial not only for the comfort and usability of the space itself but also for the overall air quality and structural integrity of your entire home. Here are some effective strategies to keep your basement dry and comfortable: Deploying a Dehumidifier is among the most direct and effective methods to manage moisture levels in your basement. A high-quality dehumidifier can significantly reduce humidity, making the air feel cooler and more comfortable while also preventing the growth of mold and mildew, which thrive in moist environments. It’s important to choose a dehumidifier that is appropriately sized for your basement area and to empty the collected water regularly to ensure it continues to operate efficiently. Sealing Leaks plays a pivotal role in moisture control. Basements are particularly vulnerable to water seepage due to their proximity to the ground. This moisture can enter through cracks in the foundation walls or floor, contributing to the overall humidity level of the space. Regular inspections can help identify any new cracks or leaks early on. Once found, these should be sealed with appropriate waterproofing materials. Not only does this prevent moisture from entering, but it also contributes to the structural health of your home. Improving Drainage around your property is essential to divert water away from your foundation, preventing it from collecting around your home and eventually finding its way into your basement. This might involve regrading the soil around your home’s foundation to slope away from the house, ensuring that downspouts extend several feet from the house, and keeping gutters clean and free of debris. These measures help to ensure that rainwater and melting snow are directed away from your home, reducing the likelihood of it seeping into the basement. Additionally, Ventilating the Space effectively can aid in reducing moisture levels. If your basement has windows, opening them during dry, sunny days can help lower humidity by allowing fresh air to circulate. For basements without windows, installing a ventilation system or using fans can help move air through the space, preventing it from becoming stagnant and moist. Finally, consider the Use of Waterproofing Paints and Sealants on interior basement walls and floors. These products can provide an additional layer of protection against moisture, preventing it from seeping through the porous concrete and into your basement. While not a solution for major leaks or flooding, they can be effective for controlling dampness and condensation.     On the Main Floors: Maintain a Balanced Environment Maintaining a balanced environment in the living areas of your home, where humidity levels are kept between 30% and 50%, is vital for both comfort and health. Achieving this balance involves a combination of techniques that manage moisture and ensure a pleasant living space. Ventilating your space effectively is key. Kitchens and bathrooms are hotspots for humidity, thanks to activities like cooking, dishwashing, and showering. Utilizing exhaust fans in these areas can significantly help in mitigating moisture accumulation. These fans work by pulling the humid air out of your home, preventing it from circulating and settling in your living spaces. Ensuring that these fans vent outside and not just into your attic or another room is crucial for this strategy to be effective. Incorporating houseplants into your decor can also play a role in humidity control. Certain plants have the natural ability to absorb moisture from the air through a process known as transpiration. By placing these plants around your home, you can harness this natural process to help regulate indoor humidity levels. Not only do these plants help in controlling moisture, but they also add to the aesthetic appeal of your space and improve air quality by removing toxins. Leveraging your air conditioning system is another effective way to manage humidity. Air conditioners don’t just cool the air; they also remove moisture as part of the cooling process. Running your air conditioning system during hot, humid days can help maintain a comfortable indoor climate, reducing humidity levels. It’s important to keep your air conditioning unit well-maintained, ensuring that filters are clean and the system is functioning efficiently for optimal moisture removal. Furthermore, strategic use of fans can assist in maintaining a balanced environment. Ceiling fans or standing fans improve air circulation, helping to distribute and mix the air evenly throughout your living spaces. This doesn’t directly reduce humidity but can make the environment feel cooler and more comfortable by facilitating the evaporation of moisture on the skin. Regular maintenance of indoor fabrics also contributes to a balanced humidity level. Upholstery, drapes, and carpets can absorb moisture, affecting the overall humidity level of your home. Cleaning and vacuuming these materials regularly can help minimize their moisture retention, contributing to a more balanced indoor environment. Managing activities that produce moisture is crucial. Simple changes like covering pots while cooking to reduce steam, taking shorter showers, and drying clothes outdoors or in a well-ventilated area can significantly reduce indoor humidity levels. In the Attic: Prevent Excess Moisture Build-Up The attic is a critical area in your home when it comes to controlling temperature and humidity. Due to its location, the attic is subject to wide fluctuations in both, which can significantly impact the overall comfort and air quality of your living spaces below. Managing humidity in the attic is essential for preventing structural damage, mold growth, and inefficient energy use

How to Keep Your Home Comfortable: Controlling Humidity from Basement to Attic 101 Read More »

Clean and Serene Indoor Space - Health Benefits Visual

7 Surprising Benefits of Regular Cleaning Services for Your Health and Home | Toronto Shine Cleaning

7 Surprising Benefits of Regular Cleaning Services for Your Health and Home Cleaning sits in the same mental drawer as laundry: a chore that never ends and gets postponed until someone is coming over. But a regular professional cleaning service delivers far more than a last-minute rescue before guests. From your lungs to your furniture, a consistently clean home pays you back in ways that are easy to overlook. Here are seven benefits that go well beyond a tidy living room. 1. Fewer Allergy and Asthma Symptoms Professionals do not stop at the visible dust. Their attention goes to where allergens collect quietly: under beds, behind furniture, and along baseboards, the spots where dust, pollen, and pet dander settle out of sight. What they leave behind matters too, because eco-friendly and hypoallergenic products clean thoroughly without adding new irritants to the air. On a steady schedule, dust never gets months to accumulate, which means fewer flare-ups through the seasons. 2. Lower Stress and Less Fatigue A clean home changes how a room feels. When someone else handles the upkeep, the mental list of undone chores finally closes, and clutter stops acting as a low-grade distraction. That shift frees time and energy for whatever restores you, whether that is family, hobbies, or plain rest, and it tends to pull healthier choices along with it. 3. Better Indoor Air Quality Dust particles are small enough to stay airborne, and ordinary tools can throw them back into the room. Professionals use microfiber cloths that trap dust rather than scatter it, along with vacuums whose HEPA filters capture particles down to 0.3 microns, pollen, pet dander, and dust mites included. They also watch what they spray: many conventional products release volatile organic compounds that evaporate into the air, so low- and no-VOC formulas do the cleaning without the chemical drift. Between visits, they can suggest air purifiers, air-purifying plants, and humidity control so that mold never gets a foothold. 4. More Productivity An organized space quiets the background noise of stray items and half-finished tasks, which is why the principle works at home as well as at the office. Professional services take over the deep tasks, dusting, vacuuming, organizing, that busy weeks postpone, so the space ends up genuinely clean rather than temporarily tidy. The mental space that opens up goes toward work, projects, and hobbies, and order itself saves time: less hunting for lost items, more focus on what you sat down to do. 5. Prevention of Pest Infestations Pests read a kitchen like a map, and crumbs, spills, and food residue are the landmarks. Regular professional cleaning targets exactly those attractants: surfaces wiped down, appliances cleaned around and under, food traces removed. Bathrooms and basements get the same attention, because the water and shelter they offer keep pests comfortable. Cleaners also spot entry points homeowners tend to miss, cracks and crevices in walls, floors, and foundations, and flag them for repair before an infestation takes hold. Non-toxic products handle the cleaning without leaving residues that put pets or children at risk. 6. Longer Lifespan for Furniture and Fixtures Dust is not just unsightly; it is abrasive. Ground into carpet fibres by daily foot traffic, it dulls colour and causes wear that cannot be reversed, and on wood it acts like fine sandpaper against the finish. Professional crews match equipment and technique to each material: steam cleaning refreshes upholstery and carpet without harming the fabric, and wood furniture gets suitable products plus conditioners and protectants that extend its life. Spills and stains, inevitable in any home, get handled correctly and quickly, which is often the difference between a mark that lifts and one that sets. The result is furniture, flooring, and fixtures that stay attractive and functional for far longer. 7. A Happier, Healthier Home Step into a professionally maintained home and you can feel the difference: it smells clean, looks inviting, and is genuinely hygienic, with germs and bacteria knocked down where they gather most, in the kitchen and bathroom. Cleaning is the first line of defense there, since it removes most germs from surfaces before any disinfecting is even considered. That level of clean lowers the odds of illness moving through the household and gives everyone, residents and guests alike, room to relax. What Regular Service Delivers Benefit What drives it What you notice Fewer allergies Deep cleaning under beds and behind furniture; vents kept clear Less sneezing, easier breathing Less stress Chore load lifted; clutter cleared Calmer rooms, reclaimed time Cleaner air Microfiber dusting, HEPA vacuums, low-VOC products Less dust and chemical smell indoors Better focus Consistent order and truly clean surfaces Fewer distractions, smoother days Fewer pests Food residue and standing water removed No crumbs, no uninvited guests Longer-lasting furnishings Correct care for fabrics, wood, and spills Furniture keeps its looks Signs the Routine Is Working Air vents and filters stay free of dust. Under-bed and behind-furniture zones stay clear. Kitchen surfaces and appliance edges show no food traces. Bathrooms and basements stay dry and aired out. Spills get treated when they happen, not discovered later. Clutter is kept low enough that cleaning reaches every surface. Frequently Asked Questions How often should I book cleaning services? Consistency does more than any single deep clean. A recurring plan, weekly, biweekly, or monthly depending on your household, keeps dust and dander from ever accumulating, keeps vents and filters clear, and holds the home’s baseline level of clean high. Are professional cleaning products safe for allergies and pets? Many services choose eco-friendly and hypoallergenic products for exactly that reason, along with low- or no-VOC formulas that do not degrade indoor air quality. That approach cleans effectively while going easy on sensitive lungs and household pets. Can a cleaning service really reduce stress? Yes, in two ways. The physical clutter that acts as a constant reminder of undone tasks clears, and the mental load of tracking the chores lifts with it. What do professional cleaners catch that I might miss? The out-of-sight

7 Surprising Benefits of Regular Cleaning Services for Your Health and Home | Toronto Shine Cleaning Read More »

apartment cleaning oakville

Does Indoor Air Quality Affect Your Health? How to Improve Your Home’s Indoor Air Quality

The Air Inside May Be Dirtier Than You Think Air pollution conjures images of smog and smokestacks, yet the air inside your home can be as polluted as outdoor air, sometimes worse. Carpets, pets, candles, cleaners, and even fresh paint all feed pollutants into the rooms where you sleep and eat. Understanding what floats through your indoor air, and what quietly does damage, is the first honest step toward breathing better at home. Why Indoor Air Quality Matters for Your Health Hidden pollutants in plain sight Your cozy living room hosts a quiet cast of airborne troublemakers. Dust mites flourish in bedding, upholstered furniture, and carpets. Pet dander from beloved animals circulates freely and provokes allergy symptoms. Mold colonizes bathrooms and kitchens wherever moisture lingers, releasing spores that irritate the respiratory system. And volatile organic compounds, or VOCs, given off by paints, finishes, and scented products, evaporate at room temperature and have been linked to headaches, dizziness, and other problems. A round the clock exposure Toronto winters and summers keep us indoors for most of the year, so every waking and sleeping hour is an hour of breathing whatever your indoor air contains. For allergy and asthma sufferers, that constant exposure can mean symptoms that never fully let up, while everyone else may absorb a slow, unnoticed toll. The CDC asthma resources explain how indoor triggers such as dust mites, pet dander, and mold factor into asthma attacks and how reducing them eases daily life. The long term account Poor indoor air rarely announces itself immediately. Years of consistent exposure can worsen respiratory conditions, contribute to chronic respiratory disease, and, as research suggests, even affect cardiovascular health. The air in your home is quietly booking charges against your lungs and heart. Let Fresh Air In Opening windows remains the simplest upgrade available: fresh outdoor air dilutes and displaces pollen, dust, and chemical residues trapped indoors. Pair it with exhaust fans in kitchens and bathrooms, the two humidity and odor hotspots of any house. Cooking releases particles and gases worth ejecting quickly, and steamy bathrooms invite mold and mildew, so running the fan during meals and hot showers cuts moisture and removes harmful cooking byproducts before they settle. The combination costs almost nothing and changes how your rooms feel within an afternoon. Clean in a Way That Helps the Air Cleaning is not only cosmetic; it is air management. Dust carries pet dander, pollen, and dust mite debris, all classic allergy triggers, so regular dusting and vacuuming pull them out before they resuspend. A quality vacuum, preferably fitted with a HEPA filter, matters because fine particles pass straight through weaker machines and blast back into the room. Vacuum carpets, rugs, and upholstery consistently to keep the allergen load low. Your product choice shapes air quality too. Many conventional cleaners release VOCs with every spray, so switching to natural, non toxic options protects the very air you are trying to clean. A vinegar, baking soda, and lemon juice rotation handles most household jobs safely. Health Canada’s page on household chemical safety offers practical guidance on reading labels, ventilating while you clean, and storing products properly. Green It Up, Mind Your Moisture Plants such as spider plants and peace lilies absorb common indoor pollutants, including formaldehyde, benzene, and trichloroethylene, through their leaves and roots, and they photosynthesize away carbon dioxide while releasing oxygen along the way. Both species shrug at neglect, making them realistic companions for busy households rather than guilt trips in pots. Moisture control does the heavier lifting. Dehumidifiers extract excess water from the air, denying mold the damp it needs and making life uncomfortable for dust mites as a bonus, especially in basements, laundry rooms, and bathrooms. Equally critical is fixing leaks the day you find them, whether from pipes, roofs, or window seals, because a small unchecked drip matures into a full mold problem and structural damage. Filter, Purify, and Renovate Wisely Your HVAC system circulates all your indoor air through its filters, where dust, pollen, and dander collect until the filter clogs and effectiveness collapses. Swapping filters on schedule keeps captured pollution out of your lungs. Air purifiers add a second line of defense: units with HEPA filters scrub microscopic particles from the air they cycle, and they earn their keep in bedrooms, where sleep hours add up, and in high traffic living areas. Renovations deserve forethought as well. Traditional paints, adhesives, and finishes off gas VOCs for a long time after the work ends. Choosing low VOC products preserves your indoor environment, and ventilating during the project, with doors and windows open and fans pushing air outward, plus continued airflow afterward, minimizes your exposure while materials cure. Your Indoor Air Action Plan Pollutant or Trigger Where It Hides What To Do Dust mites Bedding, upholstery, carpets Weekly HEPA vacuuming and dusting Pet dander Furniture, soft furnishings, airborne Regular vacuuming plus purifiers in bedrooms Mold spores Bathrooms, kitchens, leak sites, basements Exhaust fans, dehumidifiers, prompt leak repair VOCs Paints, finishes, conventional cleaners Low VOC products, natural cleaners, ventilation Cooking fumes Kitchen air and surfaces Run the exhaust fan whenever you cook Small habits keep the air honest between deep cleans: Open windows on opposite sides for ten minutes a day Run exhaust fans while cooking and showering Vacuum carpets and upholstery weekly with a HEPA filter Dust with a damp cloth so particles do not resuspend Check HVAC filters monthly during heating season Frequently Asked Questions How often should HVAC filters be changed? Check monthly and change at least every few months, more often with pets or during heavy heating and cooling seasons. A clogged filter both stops trapping particles and strains your system. Do houseplants really purify air? Plants such as spider plants and peace lilies absorb pollutants like formaldehyde, benzene, and trichloroethylene through leaves and roots, and they add oxygen through photosynthesis. They help, though they work slowly, so treat them as a pleasant supplement to ventilation and filtration rather than a replacement. What humidity

Does Indoor Air Quality Affect Your Health? How to Improve Your Home’s Indoor Air Quality Read More »

Office window cleaning by men surrounded by plants

Green Cleaning: How to Make an Easy Eco-Friendly Cleaning

Hey there, fellow Green Cleaning freaks! Are you tired of harsh chemicals that leave your home smelling like a science lab? Well, guess what? You can keep your space sparkling clean and be kind to Mother Earth at the same time. Welcome to the world of green cleaning! It’s not just a trend; it’s a lifestyle shift that’s good for you, your home, and the planet. Let’s dive into how to make eco-friendly cleaning a part of your everyday routine. Why Go Green in Your Cleaning Routine? Before we jump into the “how,” let’s talk about the “why.” Traditional cleaning products are often loaded with chemicals that can be harsh on your skin, respiratory system, and the environment. When you use them, they can release volatile organic compounds (VOCs), which contribute to indoor air pollution and can be tough on our lungs. Ever felt a bit dizzy or had a headache after a big clean? Those could be the chemicals talking! But that’s not all. These chemical-laden cleaners can have a lasting impact on our environment too. When they wash down the drain, they can end up in our waterways, affecting aquatic life and even coming back to us in our water supply. Not a pretty picture, right? Switching to green cleaning means you’re choosing products that are safer for you and the planet. These eco-friendly options are usually made with plant-based, biodegradable ingredients that break down harmlessly in the environment. Plus, they’re often free from artificial fragrances and colors, which is great news for those with allergies or sensitivities. And here’s a bonus: green cleaning can be kinder on your wallet in the long run. Many green cleaning products are concentrated, so a little goes a long way. Or, if you’re into DIY solutions, you can whip up effective cleaners with inexpensive, everyday items like vinegar and baking soda. Easy Eco-Friendly Cleaning Swaps When it comes to green cleaning, there are so many simple swaps you can make that have a big impact. Let’s start with DIY cleaners. You might be surprised by the cleaning power of items you already have in your pantry. White vinegar, for example, is a natural disinfectant and great at cutting through grease and grime. Baking soda is another hero in the DIY cleaning world. It’s fantastic for scrubbing and neutralizing odors. And let’s not forget lemon juice, which not only leaves a refreshing scent but also has natural antibacterial properties. You can use these ingredients separately or mix them to create a variety of cleaners for different purposes. Now, if you’re not the DIY type, no worries! The market for eco-friendly cleaning products has exploded in recent years. More and more brands are focusing on creating products that are both effective and kind to the planet. When shopping for these products, look for ones with biodegradable ingredients and packaging. This means they’ll break down naturally without harming the environment. Many of these products also avoid harsh chemicals, making them safer for use around kids and pets. Another swap is replacing your paper towels with microfiber cloths. Microfiber cloths are a game-changer in cleaning. They’re incredibly effective at trapping dirt and dust, and the best part is they’re reusable. Just toss them in the wash and they’re good as new, reducing waste and saving you money in the long run. Essential oils are a great addition to your green cleaning arsenal. They not only add a natural and pleasant scent to your homemade cleaners but also come with their own cleaning benefits. For instance, lavender and citrus oils have natural antibacterial and antiviral properties, making them great for homemade disinfectants. Plus, using essential oils allows you to customize the scent of your cleaners to suit your mood or preference. Lastly, consider your scrubbing tools. Instead of reaching for plastic scrubbers, choose brushes made from natural materials like bamboo or sisal. These materials are sustainable and biodegradable, and they work just as well, if not better, than their plastic counterparts. They’re also more durable, so you won’t have to replace them as often.     Tips for a Successful Green Cleaning Routine Embarking on a green cleaning journey can be both exciting and a bit overwhelming, but don’t worry, I’ve got some more tips to help you along the way. Start Small: You don’t need to do a complete 180 on your cleaning routine overnight. It’s okay to start small. Maybe swap out your all-purpose cleaner or dish soap with a greener alternative and see how it goes. As you get comfortable, you can gradually replace more products. This approach not only eases the transition but also allows you to test what works best for you and your home. Read Labels: When shopping for commercial green cleaning products, reading labels is key. Not all products marketed as “green” or “natural” are created equal. Look for certifications like EcoLogo or Green Seal, as these indicate that the product meets certain environmental standards. Also, be cautious of vague terms like “eco-friendly” or “green” without any specific information, as these can sometimes be misleading marketing tactics. Recycle and Reuse: Green cleaning isn’t just about the products you use; it’s also about reducing waste. Get creative with what you already have. Old t-shirts and towels can be cut into cleaning cloths, and old toothbrushes are perfect for scrubbing grout and other tight spaces. This not only saves you money but also keeps these items out of landfills. Stay Informed: The world of green cleaning is always evolving. New products and methods are constantly being developed. Stay informed about the latest trends and breakthroughs. This could be as simple as following a few eco-friendly blogs, joining online communities, or subscribing to newsletters that focus on sustainable living. Consider the Whole Product Lifecycle: Think about a product’s impact from production to disposal. For example, products with minimal packaging or those made from recycled materials have a lower environmental footprint. Also, consider the energy used in producing the product and whether

Green Cleaning: How to Make an Easy Eco-Friendly Cleaning Read More »

Professional vacuuming in home office setup.

How to Transform Your Space with Turn-Over Cleaning: A Step-by-Step Guide for Spotless Results

How to Transform Your Space with Turn-Over Cleaning: A Step-by-Step Guide Turn-over cleaning is the reset that happens between guests: the full clean that takes a rental suite, guest room, or Airbnb unit from just-vacated to ready-to-welcome. Done well, it is invisible; every guest simply finds a space that feels fresh and cared for. Done poorly, it shows up in reviews. This guide walks through the professional sequence, room by room, so your next turn-over is fast, thorough, and stress free. What Turn-Over Cleaning Actually Means A turn-over is more than a tidy up. It is a complete reset of a lived-in space: linens changed, kitchen and bathroom sanitized, floors redone, and every surface a guest will touch brought back to day-one condition. The window is usually tight, sometimes just a few hours between check-out and check-in, which is exactly why a repeatable checklist matters. With a system, you never stand in the middle of the unit wondering what comes next. Why Bother with a Real Turn-Over First impressions set the tone for an entire stay, and cleanliness is the first thing guests notice, before the view or the coffee machine. It is also the detail guests mention most in reviews, so consistent turn-overs protect your ratings directly. There is a health angle too: shared spaces pass germs easily, and health authorities recommend cleaning surfaces first and then disinfecting, which is the sequence the CDC’s clean and disinfect guidance lays out for high touch areas. Step 1: Plan and Prep Before You Start Build a checklist for the specific unit and keep a copy in the property, on paper or on your phone. Gather your supplies in one caddy so nothing sends you hunting mid-clean: microfiber cloths, sponges, an all-purpose cleaner, glass cleaner, a duster, a toilet brush, and trash bags. Wear gloves, and if you plan to use bleach-based disinfectants, read the label first; the CDC’s bleach safety page covers ventilation and the combinations to avoid. Budget your time per room before you begin. Step 2: Declutter Everything First Walk the unit and collect anything guests left behind: chargers in drawers, snacks in cabinets, socks under the bed. Empty every trash can, including bathroom bins, and replace liners. Tidy drawers and closets so they close the way a guest expects to find them, and sweep under the bed, the classic lost-sock zone. Decluttering first means the cleaning that follows never has to stop and restart around someone’s abandoned suitcase. Step 3: Dust from the Top Down Gravity is your coworker: start with ceiling fans, light fixtures, and shelves so falling dust lands on surfaces you have not cleaned yet, then work down to counters, baseboards, window sills, and door frames. Get the corners, the tops of picture frames, and the space behind appliances where dust settles quietly. Finish with the doorknobs and handles, which will get a second pass during disinfecting anyway. Step 4: Deep Dive the Kitchen and Bathroom These two rooms decide most reviews, so give them the full treatment. In the kitchen, wipe the appliances inside and out: the fridge shelves, the microwave, the kettle, the coffee maker. Clean the sink until it shines and clear the drain area completely. In the bathroom, the toilet, sink, and shower are the three benchmarks every guest checks. Scrub each properly, polish the mirror and fixtures, and lay out fresh toilet paper within easy reach. Step 5: Floors and Linens Last With surfaces done, sweep or vacuum every floor, then mop hard surfaces and let them dry while you handle linens. Strip and replace all bedding, from sheets to duvet covers, and set out fresh bath towels, hand towels, and face cloths. Fresh linens are both a hygiene requirement and one of the strongest signals of a cared-for space, so never try to stretch a set to a second guest. Step 6: The Guest-Ready Walkthrough Final touches turn a clean unit into a welcome: fluff the pillows, fold the towel corners, set the welcome note where it cannot be missed. Before you leave, do one walkthrough starting at the front door and moving through the space exactly as a guest would. Everything you would notice in a hotel, they will notice too. Between guests, pay special attention to the touch points everyone shares: Doorknobs and handles, entry to bathroom Light switches and lamp bases TV remotes and game controllers Faucet handles and toilet flush buttons Kettle, coffee maker, and fridge handles Room Non-Negotiables Before Check-In Kitchen Appliances inside and out, sink shining, dishes put away, trash emptied Bathroom Toilet, sink, shower scrubbed, mirror polished, fresh towels and toilet paper Bedroom Fresh linens, under-bed swept, surfaces dusted, closets tidy Living area Floors redone, cushions straightened, remotes wiped, decor aligned Turn-Over Cleaning FAQs How long does a turn-over clean take? It depends on the size of the unit and how the last guests left it. A studio with a good system is often done in an hour or two; larger multi-bedroom units take proportionally longer. Professional teams with a fixed checklist move faster because nothing gets revisited. How is a turn-over different from regular cleaning? A regular clean maintains a home you live in on a schedule. A turn-over rebuilds a like-new condition for a stranger arriving within hours, which adds linen changes, full sanitizing, and a hotel-style presentation standard on a deadline. Should linens really be changed after every single guest? Yes. It is the hygiene baseline guests assume, and protecting that assumption is what earns five star mentions for cleanliness. A spare, sealed set per bed keeps the turn-over fast even on back-to-back bookings. When does it make sense to hire professionals? When you manage more than one property, host back-to-back bookings, or simply want the guarantee of a hotel standard every time. A team turns the turn-over from a scramble into a scheduled, reliable service. Book the Reset, Skip the Scramble Toronto Shine Cleaning handles turn-overs across the city with the same checklist discipline described above. For

How to Transform Your Space with Turn-Over Cleaning: A Step-by-Step Guide for Spotless Results Read More »

Cleaning something with spray, wearing blue cleaning gloves

How to Easy Mitigate Health Risks by Cleaning Your House

How to Mitigate Health Risks by Cleaning Your House A spotless-looking home can still be quietly unhealthy. The risks that matter most, dust mites, bacteria on your sponge, mold creeping behind furniture, are exactly the ones you cannot see. Cleaning is not just curb appeal; it is one of the most practical things you do for your family’s health. This guide breaks down what is really living in your home, where to focus, and how to clean safely while doing it. The Lowdown on Germs and Dust Dust is not simple dirt. It is a mixture of dead skin cells, hair, pet dander, and even tiny plastic particles, and within it live dust mites: microscopic critters that settle into bedding, carpets, and upholstery and drive allergies and breathing problems for many people. Meanwhile, germs hide in plain sight on the things you touch daily. In the kitchen, sponges, cutting boards, and faucet handles serve as prime real estate for E. coli and salmonella, so the very places where you prepare meals and wash your hands can quietly spread illness if ignored. Why Regular Cleaning Matters Busting dust and allergens Treat dust mites and pet dander like uninvited performers causing a respiratory ruckus. Frequent dusting and vacuuming, especially where dust settles: bedding, carpets, upholstered furniture, shows those allergens the exit and helps everyone breathe easier. Households managing asthma benefit the most; the CDC asthma page outlines how controlling indoor triggers reduces symptoms. Keeping germs at bay Kitchens and bathrooms are the dense cities of the germ world. Raw meat, fresh produce, shared utensils, and personal hygiene routines all leave microbes behind, and without a routine, those rooms become breeding grounds. Scrubbing countertops, sanitizing sinks, and disinfecting toilets is not vanity; it is an illness-prevention measure. Tackling high-touch areas Every touch on a doorknob, light switch, or remote can deposit or pick up germs, making these surfaces highways for transmission between household members. Regular wipes with a proper disinfectant put up a barrier. Phones and tablets belong on the list too: they travel from bathroom to kitchen to public spaces and back, yet almost nobody cleans them. The CDC guidance on when and how to clean and disinfect your home is a good frequency benchmark, and hand washing after touching shared surfaces remains the simplest defense of all. Your Home’s Germ Hotspots Hotspot What lurks there Clean it Kitchen sponge and cutting boards E. coli, salmonella from raw food Daily disinfect, replace sponges often Doorknobs, switches, remotes Germs passed hand to hand Wipe several times weekly Phones and tablets Everything from pockets and public spaces Gentle disinfect wipe daily Bedding and upholstered furniture Dust mites, pet dander Vacuum weekly, wash linens hot and often Bathroom faucet handles and toilet Hygiene-related bacteria Scrub and sanitize weekly at minimum The Deep Clean Difference Routine tidying handles surfaces; deep cleaning handles the long game. It reaches the overlooked zones, under furniture, high shelves, behind appliances, where time builds up mold, mildew, and deep-seated grime. Mold is not merely ugly: it is notorious for triggering respiratory issues and allergic reactions, and left unchecked can contribute to more severe problems, which is why the CDC mold health guidance treats moisture and cleanup as health matters. Deep cleaning also clears the mental static: dirt and clutter quietly raise stress, and a thorough reset leaves your home feeling like a sanctuary, not a source of pressure. Clean Safely: Protect Yourself While You Scrub Cleaning should not harm you. Many conventional products contain harsh chemicals, so follow the basics every time: Wear gloves to prevent skin irritation and allergic reactions Ventilate well: open windows or run fans when using strong products, since fumes concentrate indoors Keep children and pets away from wet surfaces and stored chemicals, as pets are often more sensitive Consider natural alternatives like vinegar for grease and soap scum, baking soda as a gentle abrasive that will not scratch, and lemon for its fresh cleaning power and scent, all effective, inexpensive, and already in your pantry Read labels before mixing anything: Health Canada’s household chemical safety information covers the risks of combining products When to Call the Pros Some jobs deserve a team: whole-home deep cleans, large spaces, or simply a calendar with no room. Professional cleaners bring real advantages over DIY. Expertise and efficiency: trained methods for different soils and surfaces, with a full day of your work done in a fraction of the time using advanced equipment. Deep clean guarantee: sanitizing and disinfecting into crevices regular cleaning misses, lifting home air quality with it. Customized plans: one-time resets, ongoing maintenance, or focused kitchen and bathroom work. Peace of mind: no worrying about technique, hard areas, or effort. Toronto Shine Cleaning brings all four, fully bonded and insured with a $1,000,000 policy plus a $10,000 accidental breakage and surety bond. Deep cleans start at $270.38 for a studio or 1BR and run to $527.63 for a 4BR before HST, and ongoing regular cleaning keeps results from slipping between visits; see the full pricing page or book a deep clean directly. Health-Focused Cleaning FAQ How often should I disinfect high-touch surfaces? Several times a week as a baseline, daily during cold and flu season in your household, and immediately after someone is ill. Focus on doorknobs, switches, remotes, appliance handles, faucets, and phones, and clean visibly dirty surfaces with soap or detergent before disinfecting. Can dust really affect my health? Yes. Beyond irritation, dust carries mite allergens, dander, and fine particles that worsen allergies and asthma. Regular damp dusting, vacuuming with a HEPA filter, and washing bedding on a schedule measurably reduce the indoor allergen load. Are homemade cleaners safe for disinfecting? Vinegar, baking soda, and lemon are excellent cleaners and deodorizers, but they do not reliably disinfect. For illness prevention, disinfect high-touch areas with an approved product used exactly as the label directs, and ventilate while you work. Do professional cleanings improve indoor air? Meaningfully, yes, because they remove the reservoirs that keep recycling dust

How to Easy Mitigate Health Risks by Cleaning Your House Read More »

Timer

How Long Does it Take To Deep Clean A House?

How Long Does it Take To Deep Clean A House? If you are planning a deep clean, the first question is usually how long it will take. The answer depends on your home size, its current condition, and the level of detail you want. Understanding the time commitment helps you plan effectively or decide whether to call the professionals. A deep clean is a significant investment of time, but the results are transformative. Your home will look, smell, and feel like a fresh new space after a thorough deep cleaning session. Knowing what to expect helps you schedule your day and avoid frustration. What Is Deep Cleaning? Deep cleaning goes far beyond everyday tidying. It targets the areas that regular cleaning skips: baseboards, ceiling fans, window tracks, inside cabinets and appliances, behind furniture, and tile grout. Deep cleaning improves indoor air quality by removing allergens and deeply embedded dust. The CDC explains that cleaning removes most germs and dirt from surfaces, and deep cleaning takes this principle to every corner of your home. Unlike regular cleaning, deep cleaning addresses the accumulation of weeks or months in one thorough session. It reaches hidden areas like behind the refrigerator, under the sofa, and inside oven cavities that routine cleaning never touches. Average Time Estimates by Home Size Home Size Estimated Time Key Factors Small apartment (1-2 BR) 3-4 hours Less square footage, fewer rooms Medium house (3-4 BR) 4-8 hours Multiple bathrooms, more surfaces Large house (5+ BR) 8-12+ hours Extra rooms, stairs, basement Factors That Affect Deep Cleaning Time Current condition. A home that receives regular cleaning will deep clean faster than one that has not been thoroughly cleaned in months. Built-up grime and stains require extra scrubbing time. If you maintain a regular cleaning schedule, the deep clean takes significantly less time because dirt has not had months to accumulate. A weekly routine of surface cleaning keeps the deep clean focused on hard-to-reach areas rather than removing layers of built-up grime. Homes maintained with weekly cleaning can often complete a deep clean in half the time of neglected homes. Level of detail. Deep cleaning tasks like scrubbing grout, washing windows inside and out, and cleaning behind appliances all add time. The more detail you want, the longer each room takes. Some homeowners prefer a basic deep clean that hits the major areas, while others want every baseboard, blind, and light fixture done. A detailed deep clean that includes washing curtains, scrubbing grout lines, and polishing all hardware will take substantially longer than a standard deep clean. The choice is yours based on your standards and goals. Number of occupants. More people mean more belongings to work around and potentially more mess. Homes with children or pets typically need extra time because of higher traffic and more frequent staining. A family of four will naturally generate more deep cleaning work than a single occupant. Pet hair, muddy footprints, and sticky fingerprints all add to the cleaning burden and require additional attention. Help available. Cleaning alone takes longer. With two or three people working together, you can cut the time by half. Professional teams typically work in pairs and complete the job much faster because each person specializes in different tasks. Washing hands regularly during cleaning also helps prevent spreading dirt between surfaces and keeps the process hygienic. Hiring professionals is often the fastest and most reliable route to a thoroughly deep cleaned home. Tips to Speed Up Deep Cleaning Declutter each room before you start cleaning to reduce obstacles Work top to bottom and left to right for maximum efficiency Use a caddy to carry all supplies between rooms Set a timer for each task or room to stay on track Listen to music or a podcast to maintain momentum Keep up with regular cleaning to reduce deep cleaning time Open windows for ventilation while you work Frequently Asked Questions How often should I deep clean my house? Most homes benefit from a deep clean every 3-6 months. Homes with allergies, pets, or smokers may need it more frequently. Can I deep clean a whole house in one day? A small to medium home can be deep cleaned in one full day. Large homes may need two days or a professional crew. What happens if I skip deep cleaning? Dust, allergens, and grime accumulate over time, which can worsen indoor air quality and cause wear on surfaces and appliances. Is it worth hiring a deep cleaning service? Professional teams complete the job in a fraction of the time with industrial equipment. Toronto Shine Cleaning’s deep cleaning service handles everything from ceiling to floor. Deep cleaning is a significant time commitment, but the result is a healthier, fresher home. Check our pricing and read customer reviews. Call (647) 424-0355 to book your deep clean today.

How Long Does it Take To Deep Clean A House? Read More »