Home Improvement

4 Easy Home Deep Cleaning Tips You Need to Try

4 Easy Home Deep Cleaning Tips You Need to Try Home deep cleaning goes far beyond routine tidying. Where regular cleaning maintains surface-level order, deep cleaning removes accumulated dirt, stubborn grime, bacteria, and hidden allergens that build up over time in every part of a home. It is a methodical, top-to-bottom process that restores a home to its best hygienic condition, and these four tips make it manageable. 1. Deep Clean the Kitchen From Top to Bottom The kitchen needs the most intensive work because grease, food particles, and bacteria collect there. Clean the interior and exterior of major appliances: degrease ovens inside and out, including racks and doors, clean microwaves internally and externally, wipe refrigerator and dishwasher exteriors, and degrease range hoods and their filters. Wipe cabinet exteriors to remove fingerprints and splatters, descale and polish sinks, faucets, and fixtures, sanitize countertops and backsplashes with attention to grout lines, and scrub floors including edges, corners, and under movable appliances. 2. Say No to Mold, Hard Water, and Dust in Bathrooms Bathrooms are high-moisture areas prone to mold, mildew, and soap scum. Scrub showers and bathtubs, including walls, doors, and tracks, to remove soap scum, hard water deposits, and signs of mildew. Disinfect toilets thoroughly, both inside the bowl and on all exterior surfaces, including the base and surrounding floor. Clean and polish sinks, vanities, countertops, and mirrors, and scrub tiles and grout on floors and walls to restore brightness. Dust light fixtures, exhaust fans, and vents, and descale chrome faucets and showerheads. 3. Dust High, Clean Low, and Don’t Skip the Details Work from top to bottom so dust falls onto surfaces you have not cleaned yet. Dust ceiling fans, light fixtures, picture rails, and curtain rods, then move to baseboards, skirting boards, and electrical outlet covers. Vacuum furniture, including under cushions, and move pieces where possible to clean underneath and behind. Wipe window sills, ledges, tracks, and frames, remove cobwebs from ceilings and corners, and clean interior windows and mirrors. Finish with floors: vacuum carpets thoroughly, including edges and high-traffic areas with spot treatment for stains, and mop hard floors with a suitable cleaning solution, paying attention to corners. 4. Call a Professional Home Deep Cleaning Service Professional cleaners bring training, industrial-grade equipment, and specialized solutions that most homes do not have. They work from a detailed checklist so every agreed area is covered consistently, and a full house deep clean can take many hours or even days of strenuous work when done alone. Reputable companies are insured and bonded: Toronto Shine Cleaning carries a $1,000,000 insurance policy plus a $10,000 accidental breakage and surety bond. The process starts with a consultation to define the scope and finishes with a walk-through so you can confirm the results. The CDC’s cleaning and disinfecting guidance explains why removing dirt before disinfecting matters, and Health Canada’s indoor air quality information covers the allergens a deep clean removes. For mold-prone areas, the CDC’s mold resources explain why moisture control is essential. Signs it is time for a home deep cleaning: Persistent musty odors despite regular cleaning Visible dust build-up in corners or on less-disturbed surfaces Grease build-up in the kitchen or hard water stains in the bathroom Allergy symptoms that worsen indoors A big event, move, sale, or renovation on the calendar Room Deep Cleaning Focus Tools That Help Kitchen Appliances, range hood, cabinets, grout, floors Degreaser, microfiber cloths, scrub brush Bathroom Shower, toilet, tiles, grout, fixtures Disinfectant, descaler, grout brush Living areas and bedrooms Ceiling fans, baseboards, furniture, windows Vacuum attachments, extendable duster Whole home Vents, door frames, switches, floors Vacuum, mop, step ladder Make Deep Cleaning a Seasonal Habit Spring and autumn are natural triggers, and many homeowners book an annual or semi-annual deep clean to maintain a consistently high standard, especially before hosting events or after renovations. Once the professionals finish, ongoing regular maid service keeps the baseline high, while a professional home deep cleaning resets the whole house. Review pricing or find your GTA location, then call (647) 424-0355 to book. How often should I deep clean my home? Many homes benefit from a deep clean once or twice a year, typically in spring and autumn. You may want one more often before or after events, when moving in or out, before selling or renting a property, or after renovations. How long does a professional deep clean take? It depends on the size of the home, its initial condition, and the tasks involved. A full house deep clean can take many hours or even days of work, which is why professional teams working from a checklist are faster and more consistent. Is a professional deep cleaning service insured? Reputable companies are insured and bonded. Toronto Shine Cleaning carries a $1,000,000 insurance policy and a $10,000 accidental breakage and surety bond, so you are protected against accidental damage or liability. What is the difference between regular and deep cleaning? Regular cleaning maintains surface-level order: dusting, wiping counters, and tidying. Deep cleaning removes accumulated grease, soap scum, limescale, dust, and allergens from hard-to-reach places such as behind appliances, inside ovens, and along baseboards, and it sanitizes areas that routine cleaning misses.
4 Easy Home Deep Cleaning Tips You Need to Try Read More »

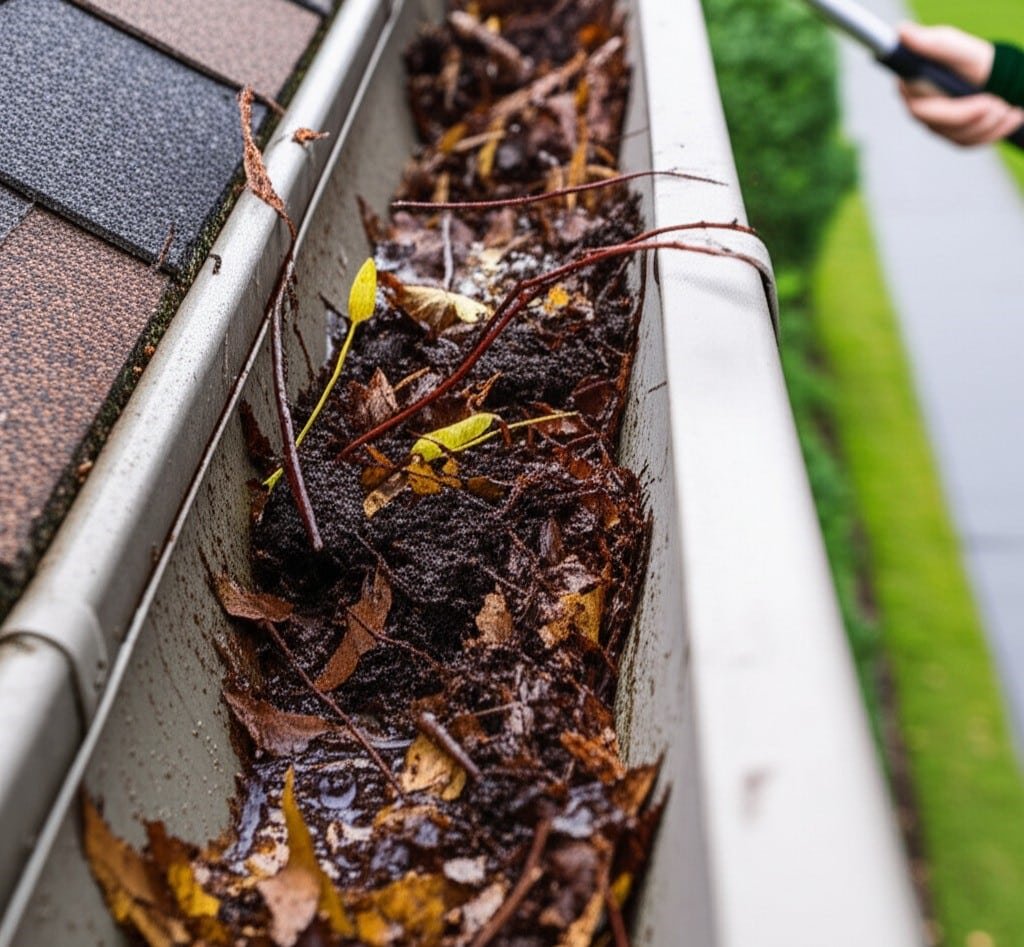
Very dirty gutter

Gutters Cleaning In 3 Steps – You Should To Know

Effective gutters cleaning starts with selecting the right tools. For a thorough cleaning, make sure you have a sturdy ladder. The ladder should be tall enough to safely reach the gutters without straining. Always prioritize safety. You’ll also need heavy-duty, waterproof gloves to protect your hands from the sharp debris and bacteria that are often encountered during cleaning. A gutter shovel or small, sturdy garden spade is essential for removing leaves, twigs, mud, and even snow. These tools make the physical act of cleaning much easier. Have a bucket ready to collect debris, or lay a tarp on the ground beneath your work area to catch any debris that falls. A garden hose fitted with a spray nozzle is crucial for removing fine particles and testing the flow after the main cleaning. Safety glasses are essential to protect your eyes from falling debris or splashing water during the process. For stubborn clogs, a plumber’s snake or flexible auger can be a very useful addition to your arsenal. Having all of these items ready before you begin will speed up the job. 1.Safety First Proper ladder safety is essential before performing any gutter cleaning. Position your ladder on firm, level ground. If the ground is uneven, use a ladder leveler or sturdy boards to create a stable base. Never place a ladder on wet or slippery surfaces. When extending the ladder for cleaning, make sure it reaches at least three rungs above the roof line or gutter lip for safe access. Always maintain three points of contact with the ladder when climbing or working-two feet and one hand, or two hands and one foot. Avoid reaching too far to the side while cleaning; it is much safer to climb down and replace the ladder frequently. This may seem time-consuming, but it significantly reduces the risk of falls, which are a serious hazard when cleaning gutters. Let someone know that you will be cleaning, especially if you are working alone. A properly positioned and safely used ladder is the foundation of any successful, injury-free gutter cleaning task. Start your gutter cleaning by removing the largest debris. It’s usually most effective to start near the outlet of a gutter. This allows you to clear a path for water if you decide to flush during the process, though removing large amounts usually comes first. Using your gutter shovel or trowel, begin removing leaves, twigs, pine needles, gravel, and any other accumulated solids. Work in manageable sections along the gutter. Deposit the removed debris directly into the bucket or onto the tarp spread below. This initial step of the cleaning can be messy, which is why gloves are so important. Pay close attention to areas where debris tends to accumulate, such as valleys or corners of your gutter system. Removing this bulk material consistently is the crux of the gutter cleaning process and will make subsequent steps easier. This part of the cleaning prevents larger items from being pushed into and clogging your gutters. 2.Cleaning Gutters With Water? Once the bulk of the debris has been removed, grab your garden hose, fitted with a spray nozzle, and start at the end of the gutter furthest from a downpipe. Direct a stream of water into the gutter, working toward the downpipe. This flushing action will remove any remaining smaller particles, mud, and grit that your shovel may have missed during the initial phase. Watch the flow of water carefully. If the water pools or backs up, this indicates a blockage further along the gutter or in the downpipe itself. This flushing step of gutter cleaning not only clears the channels, but also serves as an excellent diagnostic tool for identifying problem areas that require more focused attention. A strong, consistent flow toward and into the downpipe signifies a successful cleaning for that section. Checking and clearing your downpipes is an essential part of a thorough gutter cleaning. If, during the flushing step, you notice that water is not draining properly through a downpipe, it is almost certainly clogged. Start by trying to clear the downpipe from top to bottom with a concentrated spray of water from the hose. Sometimes the force of the water is enough to clear the clog. If this does not work, try inserting the hose into the bottom opening of the downpipe and spraying upward. This can sometimes clear the pipe from below. For more stubborn blockages found during gutter cleaning, a plumber’s snake or auger can be carefully inserted from top to bottom or bottom to top into the downpipe to break up or remove compacted debris. In severe cases, it may be necessary to disassemble sections of the downpipe, especially at elbow joints, where clogs often form. Ensuring that your downpipes are clear is vital, as a clogged downpipe renders all your efforts ineffective. 3.Benefits After the primary gutter cleaning and flushing are complete, conduct a thorough inspection of your gutters and downspouts. Look closely for any signs of damage. Check for cracks, holes, or areas of rust, particularly in older metal gutters. Ensure that all gutter sections are securely fastened to the fascia board and that there is no sagging, as sagging can cause water to pool and not drain correctly, defeating the purpose of gutter cleaning. Examine the seams between gutter sections and at the end caps for any leaks. Inspect the downspouts to ensure they are firmly attached to both the gutter outlet and the house, and that they extend far enough away from your home’s foundation to direct water appropriately. This post-gutter cleaning inspection can help you identify minor issues before they become major, costly repairs, extending the life of your gutter system and the benefits of your gutter cleaning. Finally, establish a schedule for regular gutter cleaning. The frequency of gutter cleaning depends largely on your home’s surroundings. As a general rule, gutter cleaning should be performed at least twice a year: once in the late spring after trees have shed their seeds and

Gutters Cleaning In 3 Steps – You Should To Know Read More »

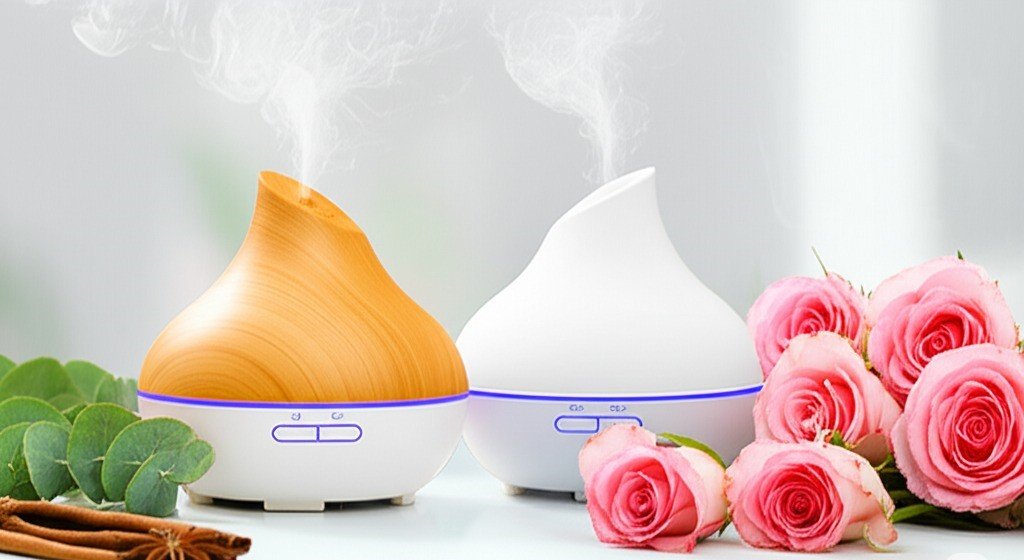
oil diffusers and flowers

6 Expert Tips For Getting Rid Of Odors In Your Home

How to prevent odors and have a home that smells good, either conjuring comfort and cleanliness or, if neglected, a sense of discomfort. Creating a space that always welcomes you with a breath of fresh air is less about masking odors and more about a deliberate, multifaceted approach. Today, we’ll walk you through five essential steps to transform your home into a fragrant sanctuary, where freshness is a constant and comforting presence. 1. Eliminating Sources of Odors Our first and most crucial step on the path to a sweet-smelling home lies in the uncompromising elimination of existing and potential odor sources through thorough, regular cleaning. Before any thought is given to introducing pleasant fragrances, the priority must be to neutralize the very things that cause unwelcome smells. This involves a commitment to consistent cleanliness across all areas. Kitchen waste bins, especially those holding food scraps, require daily emptying and periodic washing to prevent lingering odors. Similarly, bathroom bins and other refuse containers must be managed with diligence. Spills in the kitchen, whether on countertops, the stovetop, or the floor, need immediate attention, as decomposing food particles are a primary odor culprit. Sink drains in both the kitchen and bathroom should be regularly flushed and cleaned to prevent build-up. In the bathroom, combating moisture through ventilation and ensuring towels dry completely is key to preventing musty smells. Essentially, this initial stage is about removing the “bad” before we even consider adding the “good,” creating a truly clean slate. 2. Consistent Ventilation With a foundation of cleanliness established, our second vital step involves actively inviting fresh air into our homes. Consistent and effective ventilation is a remarkably simple yet profoundly effective tool in maintaining a pleasant indoor atmosphere. The daily practice of opening windows, even for a short duration when weather conditions permit, allows for the crucial exchange of stale, odor-laden indoor air with clean, fresh outdoor air. This natural circulation works wonders to dissipate lingering cooking smells, general household stuffiness, and a myriad of airborne particles that can otherwise contribute to a less-than-fresh environment. To maximize this effect, aim for cross-ventilation whenever possible by opening windows on opposite sides of a room or the home, creating a gentle but powerful current that sweeps away impurities and revitalizes the air within your living spaces. This regular “breathing” of your home is fundamental to its olfactory well-being. 3. Fabric Odors Our third significant step focuses on managing items within our homes that are particularly prone to trapping and holding onto odors: fabrics. Carpets, upholstered furniture, curtains, bedding, and clothing can all act like sponges, absorbing smells from cooking, pets, smoke, or general daily life. Regular vacuuming of carpets and upholstery is essential, not just for removing visible dirt but also for lifting odor-carrying particles. Bed linens should be laundered frequently, and dirty laundry, especially damp items or sportswear, should not be allowed to accumulate, as it can quickly become a source of unpleasant smells. Ensure all laundered items are completely dry before being stored to prevent mildew. For deeper-seated odors in carpets or large upholstered pieces, periodic professional steam cleaning or the use of appropriate fabric refreshers (preferably natural or unscented initially) can make a substantial difference, effectively neutralizing trapped smells and restoring freshness to these often-overlooked odor reservoirs. 4. Pet Areas The fourth step requires targeted attention to specific zones within the home that are inherently more susceptible to developing persistent odors. For households with pets, this means diligent management of pet-related smells. Regular grooming of animals, frequent cleaning of their bedding, and meticulous daily scooping and regular changing of litter boxes are non-negotiable. Any pet accidents must be addressed immediately with enzymatic cleaners designed to break down odor-causing proteins. High-moisture areas, primarily bathrooms but also potentially poorly ventilated laundry rooms or basements, need consistent strategies to combat mustiness. This includes ensuring good airflow, promptly repairing any leaks, and using dehumidifiers if necessary. The refrigerator also falls into this category; regular clearing out of old food and wiping down interior surfaces prevents it from becoming an odor source. By proactively managing these specific “hotspots,” we prevent localized odors from permeating the entire home. 5. Natural Fragrances Having diligently addressed cleanliness, ventilation, fabric care, and specific odor zones, our fifth and final step involves the artful and thoughtful introduction of subtle, natural fragrances to enhance the home’s ambiance. The aim here is not to overpower the senses with artificial chemicals but to add a delicate layer of pleasing scent that complements the underlying freshness. Consider placing fresh flowers or a bowl of citrus fruits in living areas for a light, natural aroma. Simmering a pot of water on the stove with ingredients like cinnamon sticks, cloves, and citrus peels can gently perfume the air, especially during cooler months. Essential oil diffusers, used responsibly with high-quality oils like lavender, citrus, or eucalyptus, can customize the scent profile of a room. Good quality candles made from natural waxes and scented with essential oils can also contribute, provided they are used safely and with adequate ventilation. The key is subtlety and a preference for natural sources, ensuring these added scents enhance, rather than compete with, the genuine cleanliness you’ve worked to achieve. 6. Maintenance Habits The sixth pillar emphasizes the critical importance of establishing and sticking to regular cleaning routines and habits. While the initial deep cleaning (Pillar One) is essential for a reset, it’s consistent and ongoing maintenance that truly keeps your home smelling great. This involves integrating small cleaning tasks into your daily and weekly routines. Daily habits might include wiping down kitchen counters after every meal, quickly sweeping or vacuuming high-traffic kitchen floors, making sure the sink is free of dirty dishes before bed, and quickly cleaning the bathroom sink. Weekly habits might include vacuuming and dusting all rooms more thoroughly, changing bed linens, cleaning bathroom fixtures more thoroughly, and mopping floors. By breaking down larger cleaning tasks into regular, manageable activities, you can prevent the buildup of dirt, grime, and odor-causing

6 Expert Tips For Getting Rid Of Odors In Your Home Read More »

baking soda

Benefits Of Baking Soda That You Need To Know For Deep Cleaning

Why Baking Soda Belongs in Your Deep Cleaning Kit Sodium bicarbonate, better known as baking soda, is one of the most versatile cleaning tools in any home. Unlike many commercial cleaners packed with harsh chemicals, baking soda is a mild alkali and gentle abrasive that can scrub, deodorize, and break down grease without damaging surfaces. From tackling baked-on oven grime to neutralizing stubborn odors, its simple chemistry makes it a powerhouse for deep cleaning. Here is everything you need to know about using baking soda effectively around your home. How Baking Soda Works as a Cleaner Baking soda’s fine crystalline structure allows it to dislodge dirt and food deposits without scratching stainless steel, ceramic, porcelain, or fiberglass. When mixed with water into a paste, it becomes even more effective at tackling tough spots like baked-on food in ovens or burnt residue on cookware. Its mild alkalinity works on kitchen grease much the way traditional soap making works: the reaction converts fatty residues into compounds that loosen and rinse away with plain water. That is why it shines on greasy stovetops, backsplashes, and range hoods. Baking Soda for Kitchen Deep Cleaning Oven cleaning: Apply a baking soda paste to oven surfaces, let it sit overnight, then wipe and rinse to remove stubborn grease without harsh fumes. Drain maintenance: Pour half a cup of baking soda down the drain, add equal white vinegar, let it fizz for several minutes, then flush with boiling water to clear minor clogs and neutralize odors. Cookware: Sprinkle baking soda into burnt pots and pans, add hot water, and let soak to lift residue before scrubbing. Produce wash: Dissolve a few tablespoons in a sink of water to remove surface dirt, wax, and pesticide residues from fruits and vegetables. Deodorizing with Baking Soda Baking soda neutralizes odor molecules chemically rather than masking them with fragrance. An open box in the refrigerator absorbs food smells effectively and should be replaced every one to three months. For carpets, sprinkle baking soda generously, let it sit for 15 minutes or overnight for stronger odors, then vacuum thoroughly. This method works equally well on upholstered furniture, mattresses, pet bedding, and car interiors. Running baking soda through a garbage disposal with cold water neutralizes food waste smells instantly. Laundry Boosting and Brightening Adding half a cup of baking soda to your wash cycle enhances detergent effectiveness, especially in areas with hard water. It softens water by reacting with calcium and magnesium ions, allowing detergent to work more efficiently. Baking soda also deodorizes gym clothes, towels, and baby clothes while providing gentle brightening without the harshness of chlorine bleach. For perspiration or grease stains, apply a baking soda paste directly to the fabric before washing. Surface Baking Soda Method Key Benefit Oven interior Paste, sit overnight, wipe Removes grease without fumes Kitchen drains Baking soda + vinegar + boiling water Clears minor clogs, freshens Carpets and rugs Sprinkle, sit, vacuum Neutralizes pet and smoke odors Laundry Add half cup to wash Boosts detergent, softens water Produce Soak in baking soda water Removes wax and residues What to Watch Out For While baking soda is generally safe, its abrasiveness can damage delicate surfaces like polished silver or soft plastics if scrubbed too vigorously. When used as a toothpaste substitute, its grit can erode tooth enamel over time, and it lacks fluoride essential for dental health. Ingesting baking soda as an antacid should only be done after consulting a healthcare professional, as it is high in sodium and can cause gas or affect medication absorption. For personal care uses like deodorant or exfoliation, the high pH often irritates sensitive skin. Frequently Asked Questions Can baking soda remove tough stains from countertops? Yes, a paste of baking soda and water can lift stains from stainless steel, granite, and ceramic countertops, but test a small hidden area first to avoid scratching polished finishes. How often should I replace baking soda in my fridge? Replace the open box every one to three months for optimal odor absorption. Is baking soda safe for cleaning around pets and children? Yes, baking soda is non-toxic and safe for households with pets and children, though ingestion in large quantities should be avoided. Can baking soda unclog a completely blocked drain? Baking soda is effective for minor clogs and maintenance, but a fully blocked drain typically requires a plumber or professional drain cleaning service. Does baking soda expire for cleaning use? Baking soda does not spoil, but it loses potency over time. To test, drop a spoonful into vinegar: if it fizzes vigorously, it is still active and effective. For a thorough deep clean beyond what pantry staples can handle, consider professional deep cleaning services in Toronto. Combined with regular cleaning and baking soda touch-ups, your home stays spotless and fresh. View our pricing to find the plan that works for you. Read more about safe disinfecting practices from the CDC or explore Canada’s guide to household product safety. Call (647) 424-0355 to schedule your next cleaning appointment.

Benefits Of Baking Soda That You Need To Know For Deep Cleaning Read More »

Cleaning with proper ventilation

Why Ventilation Matters More Than You Think When Cleaning

Better Ventilation Makes a Big Difference in Your Cleaning Routine When you think about a clean home, fresh air might not be the first thing that comes to mind-but it should be. Better ventilation is key to removing airborne particles, odours, and moisture that get stirred up while cleaning. If you skip this step, you could end up with a house that looks clean but doesn’t actually smell or feel fresh. Ventilation supports every cleaning task, making it more effective and longer lasting. In many Toronto homes, especially during colder months, windows stay shut and the air inside becomes stale. Without ventilation, that trapped air holds on to dust, cleaning chemical residues, and humidity. Over time, this can make your space feel stuffy-even if you’ve just deep cleaned. By opening a few windows or turning on fans while you clean, you let that stale air escape and make room for fresh air to circulate throughout your home. Adding airflow also helps speed up drying times for things like freshly mopped floors, steam-cleaned furniture, or bathroom tiles. This prevents moisture buildup, which can lead to mold or mildew-especially in closed-off areas. Whether you’re cleaning your kitchen or your whole house, better ventilation creates a safer, healthier environment. It’s one of those cleaning tips that’s easy to overlook, but makes a big difference in results. Say Goodbye to Lingering Smells with Proper Ventilation Strong cleaning product smells can hang in the air long after the job is done. Whether it’s bleach in the bathroom or disinfectants in the kitchen, those fumes can cause headaches or irritate sensitive lungs. Better ventilation helps flush out those harsh odours fast, so your home smells fresh instead of “chemical clean.” It’s a quick way to improve the comfort and air quality of your space, especially if you’re cleaning regularly. In tightly sealed Toronto apartments or condos, smells tend to get trapped indoors. Without a proper exit path, those odours settle into your furniture, curtains, and carpets. Even eco-friendly products can leave behind a scent that lingers too long without airflow. Keeping a fan running or cracking open a few windows while cleaning will help refresh the entire room and stop smells from sticking around. If you’re cleaning multiple rooms, open up interior doors as well to create a cross breeze. This helps air move freely through the space and cuts down on stuffiness. Better ventilation during cleaning doesn’t just help with odours-it also improves your mood and energy levels. You’ll notice the difference right away. A home that feels clean starts with air that’s fresh and breathable. Ventilation Helps Cut Down on Dust and Allergens When you clean, you stir up dust, pollen, pet dander, and other allergens that have settled on surfaces. Without proper ventilation, all those particles just float around and resettle elsewhere. Better ventilation helps clear the air so allergens don’t have a chance to stick around. This is especially helpful if you or your family members suffer from allergies or asthma. In many older Toronto homes, poor airflow can make dust problems worse. Even after a good vacuum or wipe-down, allergens can stay trapped in the air unless you’ve got some ventilation going. Opening windows while dusting or sweeping helps move those particles out of your home completely. It turns regular cleaning into a real health boost, not just a cosmetic fix. Air purifiers can also help, but they work best when combined with natural ventilation. Don’t underestimate the power of a cracked window and a breeze. It’s a low-tech solution with high-impact results. Better ventilation helps every part of your cleaning routine work better-from vacuuming to scrubbing-so your space stays fresher, longer. Cleaning Small Spaces? Ventilation Is Even More Important Small areas like bathrooms, laundry rooms, and closets can easily become hot spots for poor ventilation. These spaces often collect moisture during cleaning, especially when you’re using hot water or steam. Without airflow, that moisture sticks around and creates the perfect environment for mold and mildew. Proper ventilation helps prevent these issues before they even start. In many Toronto homes, these small rooms don’t always have windows, making ventilation a bit trickier. But there are still ways to boost airflow. Use a portable fan, turn on an exhaust fan, or keep the door open while you clean. Even just a few minutes of fresh air can help remove the steam and dry out damp surfaces faster. If you’re doing a deep clean, leave the door open afterward to let air circulate for a while. This helps reduce any chemical build-up from cleaning products and keeps humidity in check. Small spaces may be compact, but they’re just as important when it comes to better ventilation. A little fresh air goes a long way in keeping them fresh and safe. Ventilation and Cleaning: A Habit Worth Building Making better ventilation a habit doesn’t require fancy equipment or big changes. It just takes a little bit of planning before you start cleaning. Open windows, set up a fan, and let the air flow freely as you work. Over time, you’ll notice that your home not only looks cleaner-it smells and feels fresher, too. In Toronto, where homes face every type of weather, it’s easy to forget about airflow during the winter months. But even cracking a window for a few minutes makes a difference. Ventilation helps every step of your cleaning process work better, whether you’re wiping down surfaces, vacuuming rugs, or scrubbing the shower. It’s one of the simplest and most effective cleaning tips you can add to your routine. Fresh air improves indoor air quality, prevents build-up of moisture and chemicals, and helps your home stay clean longer. It’s a win across the board. If you want your space to feel truly clean-not just look the part-don’t skip this step. Better ventilation is your secret weapon for healthier, more effective cleaning. Want a Truly Fresh and Clean Home? Call Toronto Shine Cleaning Keeping up with deep cleaning and proper ventilation can

Why Ventilation Matters More Than You Think When Cleaning Read More »

Person cleaning kitchen table with vinegar spray in casual attire.

How to Clean High-Traffic Areas in 5 Easy Steps

Why High-Traffic Areas Need Extra Care Entryways, hallways, and living rooms see the most foot traffic in any home, so they collect dirt, dust, and grime faster than anywhere else. Mud, shoe scuffs, pet hair, and everyday spills build up quickly, and these are also the first spaces guests see. A simple five-step routine keeps them fresh without turning cleaning into a full-day project. Step 1: Gather Your Cleaning Supplies Having everything ready before you start saves time and keeps the flow smooth. For cleaning high-traffic areas, you will need: A vacuum with strong suction and a brush roll A mop, bucket, and floor cleaner matched to your flooring Microfiber cloths and an all-purpose cleaner A scrub brush for stubborn spots Rubber gloves Read product labels and never mix cleaning products: the National Capital Poison Center warns that mixing household cleaners can create poisonous fumes, and its safe spring cleaning tips apply all year round. Step 2: Declutter the Area Shoes, bags, coats, and mail pile up fast in high-traffic zones. Start by removing any objects that do not belong in the area, and give each item a home. A clutter-free entryway is easier to clean and looks more inviting, and clearing the space first means every corner is reachable. Regular decluttering also prevents dust and dirt from hiding under scattered items. Step 3: Vacuum Thoroughly Move slowly and make multiple passes over carpet and rugs so the brush roll can lift embedded dirt. Vacuum under furniture and along baseboards, where dust settles out of sight. Regular vacuuming protects carpets from the wear caused by grinding dirt and keeps dust and allergens from building up in the busiest rooms. The EPA’s guide to indoor air quality covers practical ways to control dust and allergens at home. For homes with pets, vacuuming twice a week in busy areas makes a visible difference, and using the crevice tool along baseboards and corners catches the hair and grit that settles at the edges. This habit also keeps dirt from being tracked into quieter rooms. Step 4: Mop the Floors For tile, laminate, and hardwood, mopping removes the fine dust and grime the vacuum misses. Use a cleaner suited to your floor type, wring the mop well so you do not oversaturate hardwood or laminate, and use a scrub brush for stuck-on marks. A clean mop is essential, otherwise you are spreading dirt rather than removing it. Step 5: Wipe Down High-Touch Surfaces Light switches, door handles, railings, and baseboards collect fingerprints and germs in busy areas. Wipe them with a microfiber cloth and all-purpose cleaner, spraying the cloth rather than the surface to avoid over-wetting. Microfiber traps dust and dirt instead of spreading it. For illness season, the CDC recommends cleaning surfaces first, then sanitizing or disinfecting when needed. Surface Best Tool Technique Carpet and rugs Vacuum with brush roll Multiple slow passes, including edges Hardwood and laminate Damp mop, floor-appropriate cleaner Wring well, avoid standing water Tile Mop and scrub brush Scrub grout lines for embedded grime Light switches and handles Microfiber cloth, all-purpose cleaner Spray the cloth, then wipe Keep Busy Areas Fresh Between Cleans Place doormats inside and outside every entrance, consider a no-shoes rule, and sweep or spot-clean entryways a couple of times a week. A short weekly routine beats a monthly marathon, and it keeps dirt from travelling into the rest of the home. A simple weekly rhythm works well: vacuum twice, mop once, and do a five-minute wipe-down of handles and switches. Set a reminder on your phone for the same day each week, and the routine becomes automatic. Twice a year, pair this routine with a deeper reset: move the furniture, clean behind it, and wash the doormats. That way buildup never gets a chance to settle in for long. When to Call in the Professionals If high-traffic areas need a deeper reset, Toronto Shine Cleaning can help. Our regular cleaning service keeps busy homes on schedule, and our deep cleaning service tackles floors, baseboards, and high-touch surfaces top to bottom. We are insured and background-checked, and we serve Toronto and surrounding areas. Call (647) 424-0355 or check our customer reviews to get started. High-Traffic Area Cleaning FAQ How often should I clean high-traffic areas? Vacuum entryways and living rooms once or twice a week, mop hard floors weekly, and wipe high-touch surfaces every few days. Adjust the pace for pets and kids. What counts as a high-traffic area? Entryways, hallways, staircases, living rooms, and kitchens are the usual culprits: any space people pass through or gather in daily. How do I remove scuff marks from hardwood? Use a microfiber cloth with a floor-appropriate cleaner, or a soft scrub brush for stubborn marks, working gently to avoid damaging the finish. Should I disinfect high-touch surfaces every day? Daily disinfecting is not usually needed. The CDC recommends cleaning regularly, and disinfecting when someone is sick or at higher risk of illness.

How to Clean High-Traffic Areas in 5 Easy Steps Read More »

Color-coordinated closet with tidy clothes and organized shoe shelves.

How to Organize and Clean Closet in 5 Easy Steps

A clean closet is more than just an organized space-it’s a breath of fresh air every time you get dressed. If your closet has turned into a chaotic mess, don’t worry! With these five easy steps, you’ll transform your cluttered space into a neat and tidy haven. Step 1: Clear Out and Categorize First things first, empty your closet completely. Yes, everything needs to come out! This allows you to see exactly what you have and start fresh with a clean slate. Once everything is out, begin categorizing your items into distinct groups. These groups might include clothes, shoes, accessories, and seasonal items. By categorizing, you create a clear inventory of what you own, which not only helps in organizing but also makes it easier to decide what to keep and what to let go of. As you sort through each item, think about its purpose and place in your wardrobe. Do you have clothes that you wear regularly, or are there pieces that have been pushed to the back for years? Assess your shoes and determine which pairs you actually use versus those that are simply taking up space. For accessories, consider if they still complement your current style or if they could be better utilized by someone else. Seasonal items, such as winter coats or summer swimwear, should be grouped together so they can be stored more efficiently when not in use. This process might feel overwhelming at first, but taking the time to categorize and clear out your closet is an essential step towards achieving a truly clean closet. It provides a moment of reflection on your current wardrobe and helps you make more intentional choices about what you keep. Plus, with everything laid out in front of you, you’ll have a better understanding of what you have and what you might need, making future shopping trips more purposeful and less impulsive.     Step 2: Purge What You Don’t Need Now that you’ve categorized your items, it’s time to dive into the decluttering process to ensure you achieve a truly clean closet. This step involves some tough decision-making, but it’s essential for creating an organized space. Start by examining each item and asking yourself critical questions: Have I worn this in the last year? Does it still fit and flatter me? Is it in good condition? These questions help you assess the true value and utility of each piece in your wardrobe. As you go through your belongings, create three distinct piles. The first pile is for items you want to keep. These are pieces that you love, wear often, and that still look good on you. The second pile is for donations. These items might not work for you anymore, but they are still in good condition and could be useful to someone else. The third pile is for items that need to be tossed. These are the clothes, shoes, or accessories that are too worn out, damaged, or outdated to be worn again. Be honest with yourself during this process. It can be tempting to hold onto items for sentimental reasons or with the hope that they might come back into fashion or fit again someday. However, if you haven’t worn something in a year, it’s likely time to let it go. Holding onto unnecessary items only adds to the clutter and makes it harder to maintain a clean closet. This purging step is crucial because it dramatically reduces the amount of stuff in your closet, making it easier to organize what remains. A clean closet isn’t just about neatness-it’s about efficiency and functionality. By removing what you don’t need, you create space for the items you truly value and wear, making your daily routine smoother and more enjoyable. Step 3: Clean the Closet Space With your closet completely empty, now is the perfect time to give it a thorough cleaning. This step is essential to achieving a truly clean closet. Begin by dusting the shelves to remove any accumulated grime or cobwebs. Wipe down the walls to ensure that no dust or dirt remains, creating a fresh and clean surface for your belongings. Don’t forget to vacuum or sweep the floor, getting into all the nooks and crannies where dust might have settled. Once the major cleaning is done, consider adding a fresh scent to your closet to keep your clothes smelling wonderful. Cedar blocks are a fantastic option, as they not only impart a pleasant aroma but also help repel moths and other pests. You could also use sachets filled with lavender or other natural fragrances to maintain a fresh scent. A clean closet truly begins with a clean space. This deep cleaning step ensures that the environment where you store your clothes and accessories is hygienic and pleasant. It also sets the stage for maintaining a tidy and organized closet in the long term. With everything spotless and fresh, you’ll be motivated to keep your closet neat and orderly, making it a joy to use every day. So, take the time to clean every corner and surface of your closet space. This effort will pay off when you start placing your categorized items back into a pristine, clean closet, ready to be arranged in a way that maximizes both space and functionality.     Step 4: Organize Smartly Now that your closet is clean and your items are categorized, it’s time to put everything back in an organized manner to maintain a clean closet. Start by using uniform hangers for your clothes. This not only gives a tidy and cohesive look but also helps maximize the available space. Uniform hangers allow your clothes to hang at the same level, making it easier to browse through your wardrobe and find what you need quickly. Next, sort your clothes by category and color. Grouping similar items together, such as all shirts in one section and pants in another, makes it much easier to locate specific pieces. Within each category, arrange the items

How to Organize and Clean Closet in 5 Easy Steps Read More »

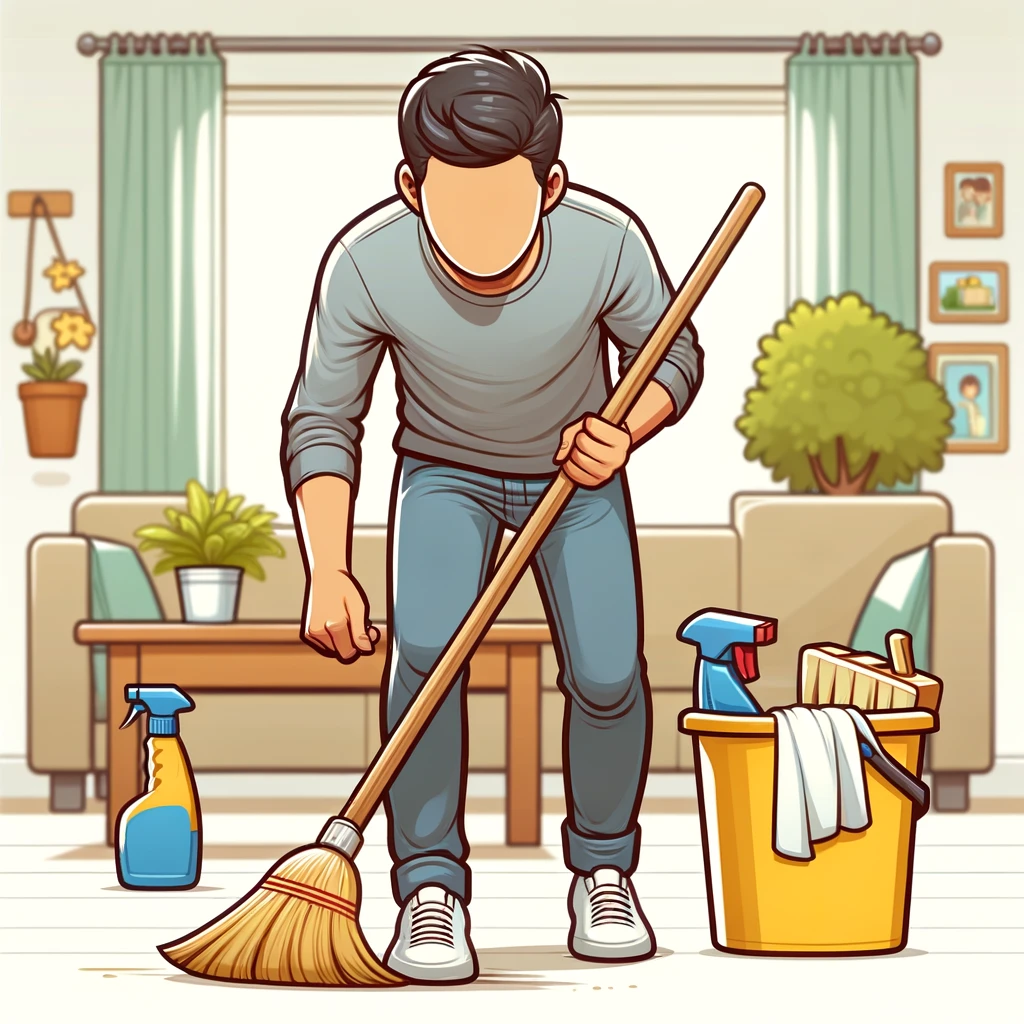
Cartoon man sweeping floor with focus on hands and broom.

How to Create a Weekly Cleaning Schedule: 5 Tips for Success

Keeping a tidy home can be a daunting task, especially when you have a busy schedule. But fear not! A well-organized cleaning schedule can help you manage your chores without feeling overwhelmed. Here are five tips to create a weekly cleaning schedule that will keep your home sparkling clean and your mind at ease. 1. Assess Your Cleaning Needs Before diving into creating a cleaning schedule, take a moment to assess what needs to be cleaned in your home. This crucial first step sets the foundation for an effective and manageable routine. Start by walking through each room of your house and noting the areas that require regular attention. Your kitchen, for example, is likely a high-traffic area that needs daily upkeep due to frequent cooking and eating activities. Similarly, bathrooms often demand more frequent cleaning because they are used multiple times a day by everyone in the household. Next, consider spaces like the living room and bedrooms. While these areas might not need daily deep cleaning, they still benefit from regular tidying and occasional thorough cleaning to maintain a comfortable and welcoming environment. Hallways and entryways, often overlooked, are also essential to include in your cleaning schedule as they are the first places guests see when they enter your home. Keeping these areas clean sets a positive tone for the rest of the house. Identifying high-traffic areas that need more frequent cleaning and less-used spaces that can be tackled less often is a key aspect of this assessment. For instance, while your kitchen and bathrooms might need daily or every-other-day attention, rooms like the guest bedroom or storage areas can be scheduled for a more infrequent, monthly cleaning. This initial assessment helps you allocate your time and resources more efficiently, ensuring that no area of your home is neglected while also preventing you from feeling overwhelmed by your cleaning tasks. 2. Divide Tasks by Frequency Not all cleaning tasks need to be done every day, and understanding this can save you a lot of time and stress. Dividing tasks by frequency ensures that you cover all necessary cleaning duties without spending your entire day cleaning. This approach helps in creating a balanced cleaning schedule that keeps your home clean and orderly, while also allowing you time for other important activities and relaxation. Daily tasks typically include those essential chores that keep your home looking and feeling tidy on a day-to-day basis. This might involve doing the dishes, wiping down countertops, and tidying up common areas like the living room and kitchen. These daily activities help maintain a basic level of cleanliness and prevent dirt and clutter from building up, making your weekly cleaning tasks much easier to manage. Weekly tasks are those that need to be done regularly but not necessarily every day. This could include vacuuming, mopping floors, cleaning bathrooms, and dusting surfaces. These chores ensure that deeper levels of cleanliness are maintained throughout your home. By tackling these tasks once a week, you can prevent grime and dust from accumulating, which keeps your living environment healthier and more pleasant. Finally, some tasks can be scheduled on a monthly basis. These might include cleaning windows, washing bedding, and organizing closets. By handling these less frequent chores monthly, you ensure that every part of your home gets the attention it needs without overwhelming your weekly cleaning schedule.     3. Set Realistic Goals One of the biggest pitfalls of creating a cleaning schedule is setting unrealistic goals. It’s easy to get overly ambitious when you’re motivated to start fresh, but this often leads to frustration and burnout. To create a sustainable and effective cleaning schedule, you must be honest about how much time you can realistically dedicate to cleaning each day. If your mornings are usually hectic, and you only have about 15 minutes before heading out the door, don’t overburden yourself with tasks that require more time. Similarly, if your evenings are the only time you can clean, allocate your tasks accordingly. Setting small, achievable goals for each day is essential for maintaining momentum and avoiding feelings of being overwhelmed. For example, you might designate Monday as the day for tackling the kitchen, focusing on tasks such as cleaning the countertops, wiping down appliances, and mopping the floor. By concentrating on one room or a specific set of tasks each day, you can manage your time more effectively and make the process less daunting. Tuesday could then be reserved for cleaning the bathrooms, including scrubbing the shower, wiping down mirrors, and sanitizing the toilet. This way, you break down your cleaning schedule into manageable chunks, making it more approachable and less intimidating. Moreover, setting realistic goals ensures that you don’t overcommit yourself and can maintain consistency in your cleaning routine. It’s better to achieve small goals regularly than to set large, unattainable goals that you can’t keep up with. This approach not only keeps your home cleaner on a regular basis but also helps you build a habit of consistent cleaning. Over time, these small daily efforts add up, leading to a more organized and spotless home without overwhelming yourself. 4. Create a Flexible Schedule Life is unpredictable, and sometimes your planned cleaning tasks might not get done. That’s okay! It’s essential to create a cleaning schedule that is flexible and can accommodate the unexpected changes that inevitably arise. If you miss a day due to a busy work schedule or an unforeseen event, don’t stress about it. The key is to be adaptable and understand that it’s perfectly fine to adjust your schedule as needed. Flexibility in your cleaning schedule allows you to maintain consistency without the added pressure of sticking to a rigid plan. A flexible cleaning schedule also means having the ability to shift tasks around without feeling guilty or overwhelmed. For instance, if you planned to vacuum on Wednesday but couldn’t get to it, simply move that task to Thursday or another day that works better for you. This approach helps to alleviate

How to Create a Weekly Cleaning Schedule: 5 Tips for Success Read More »

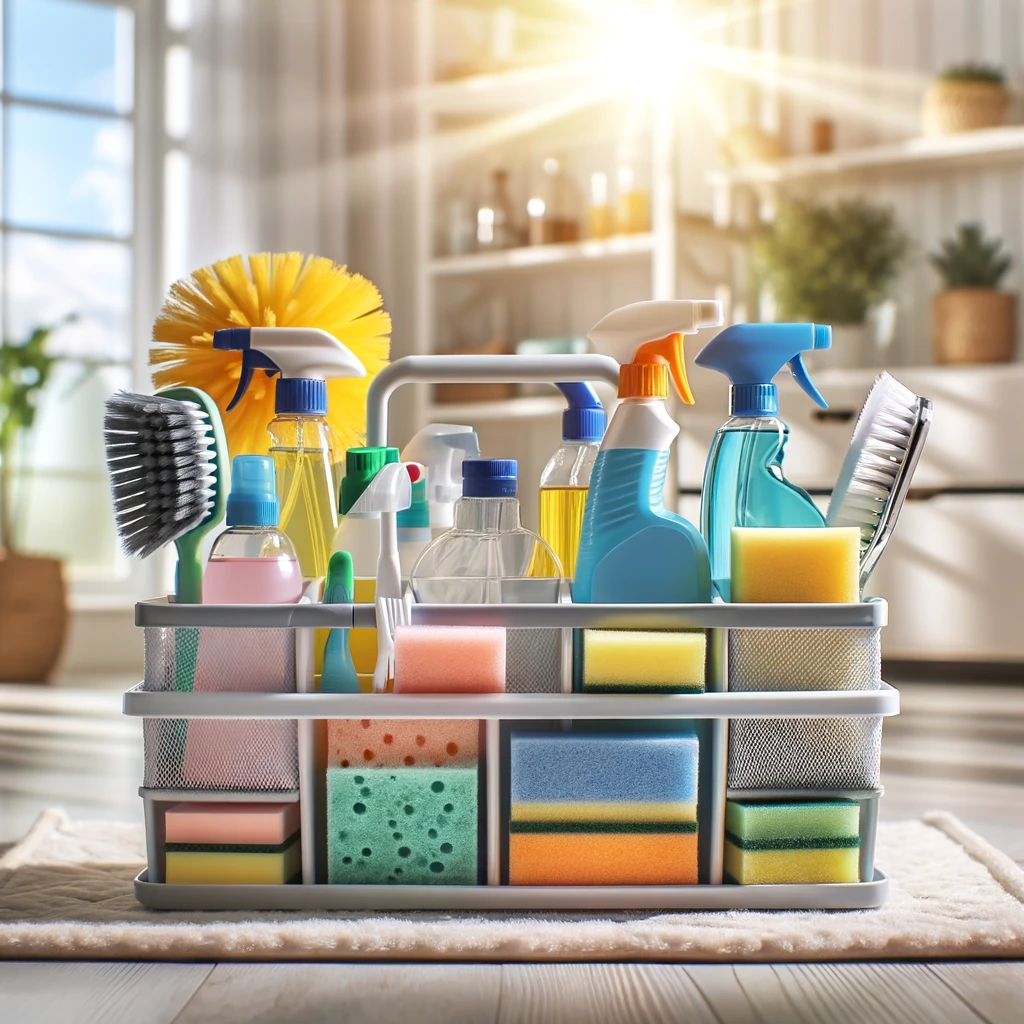
Organized cleaning caddy with supplies, sprays, and brushes.

How to Organize Cleaning Supplies: 6 Simple Tips

Keeping your home clean and tidy can be a breeze when you have your cleaning supplies well-organized. By taking a few simple steps to organize cleaning supplies, you’ll save time, reduce clutter, and make your cleaning routine more efficient. Here are six simple tips to help you get started. 1. Use a Cleaning Caddy Using a cleaning caddy is a game-changer when it comes to figuring out how to organize cleaning supplies effectively. Imagine having all your essential cleaning products in one portable container that you can easily carry from room to room. This simple tool can save you so much time and effort, as you won’t have to make multiple trips back and forth to grab different supplies. Plus, a caddy with compartments keeps everything in place, so you don’t have to worry about spills or items getting lost in the shuffle. A well-organized cleaning caddy means you can clean more efficiently. When all your supplies are within reach, you can tackle your cleaning tasks with greater speed and precision. No more wasting time hunting down the glass cleaner or scrubbing pads – everything is right there at your fingertips. This also makes it easier to move from one task to the next without losing momentum. Whether you’re dusting the living room, scrubbing the bathroom, or wiping down kitchen counters, your caddy ensures you have everything you need in one convenient spot. Moreover, investing in a cleaning caddy with compartments allows you to organize cleaning supplies in a way that maximizes space and accessibility. Different compartments can hold various items such as sprays, brushes, cloths, and sponges. This not only keeps your supplies neat and orderly but also extends the life of your cleaning products by preventing damage and spills.     2. Label Everything Labeling everything is an excellent strategy when you need to organize cleaning supplies effectively. By using labels to identify your spray bottles, containers, and storage bins, you can streamline your cleaning process and eliminate the frustration of searching for specific items. With clearly marked labels, you can instantly see what each container holds, which saves time and enhances efficiency during your cleaning routine. Whether you’re a seasoned cleaning pro or just getting started, labeling helps maintain order and accessibility. Incorporating labels into your organization system also promotes household harmony. When everyone knows exactly where to find and return cleaning supplies, it reduces clutter and confusion. Family members or roommates will appreciate the clarity, as it takes the guesswork out of locating and storing items. This simple step can significantly enhance the overall cleanliness and organization of your home. Even children can get involved in the cleaning process more easily when they can quickly identify and put away supplies. Using a label maker or even simple adhesive labels and a marker can make a big difference in how smoothly your household operates. Additionally, labeling your cleaning supplies can extend the lifespan of your products. When each item has a designated spot, it’s less likely to be misplaced, damaged, or wasted. For instance, knowing where to find specific cleaners or tools means they are used properly and stored correctly, maintaining their effectiveness over time. This systematic approach to organizing cleaning supplies not only keeps your home neat but also ensures you get the most out of your cleaning products. 3. Create a Dedicated Cleaning Closet Creating a dedicated cleaning closet is a transformative way to organize cleaning supplies, turning chaos into order. If you have the space, even a small closet or a section of a larger one can become a highly efficient storage area for all your cleaning essentials. By dedicating a specific area for these supplies, you can ensure that everything has its place, making it easier to find what you need when you need it. This approach not only saves time but also reduces the stress of having to search through various locations to gather your cleaning tools and products. Utilizing shelves, hooks, and bins in your cleaning closet allows you to maximize the available space while keeping everything neatly organized. Shelves can be used to store items like cleaning sprays, disinfectants, and cloths, making them easily accessible. Hooks are perfect for hanging brushes, dusters, and smaller tools, keeping them off surfaces and within reach. Bins are excellent for grouping similar items together, such as sponges, scrubbers, and microfiber cloths, ensuring that nothing gets lost or misplaced. Each item having a designated spot helps in maintaining a clutter-free environment, which is essential for an efficient cleaning process. To further enhance the functionality of your cleaning closet, consider adding a tension rod to hang spray bottles. This clever use of vertical space keeps bottles upright and easily accessible while freeing up valuable floor space for larger items like a vacuum cleaner or mop. This not only keeps the closet organized but also makes it easier to pull out and put away larger cleaning tools without causing a mess.     4. Utilize Clear Containers Utilizing clear containers is an effective strategy to organize cleaning supplies, particularly the smaller items that can easily get lost in the shuffle. Clear containers provide a visual advantage, allowing you to see exactly what’s inside without having to open every box or bin. This transparency saves time and reduces frustration, as you can quickly identify the contents and retrieve what you need. Whether it’s sponges, brushes, or cleaning cloths, these clear containers help maintain an orderly and efficient storage system. The beauty of clear containers lies in their versatility and the ability to maximize space. Stackable clear bins are especially useful for making the most of vertical storage areas, whether in a closet, under the sink, or in a pantry. By stacking bins, you can efficiently use every inch of available space, keeping your cleaning supplies organized and within easy reach. This approach prevents the clutter that often comes with storing items in opaque boxes or leaving them scattered around. Everything has its designated place, contributing to a

How to Organize Cleaning Supplies: 6 Simple Tips Read More »

Family Enjoying Spring Cleaning in Sunny Home Illustration, Easy Spring Cleaning Tasks

How to Tackle House Cleaning: 6 Essential Tips

How to Tackle House Cleaning: 6 Essential Tips House cleaning can seem like a daunting task, especially when you are looking at a week’s worth of dishes, dust, and disorder. But with the right approach and a few expert tips, the process can be efficient and even enjoyable. Whether you are gearing up for a spring clean or just trying to keep things tidy, these six tips will help you sweep through your house cleaning chores and leave your living space spotless and inviting. 1. Set Clear Cleaning Goals Before you pick up a sponge, make a detailed plan. Decide exactly what you need to accomplish: is this a quick tidy-up to freshen the space, or a thorough deep clean? Knowing your objectives up front helps you prioritize the most important tasks and allocate your time wisely. If you are expecting guests, focus on the living areas and bathrooms they will see and use. A clear plan reduces the feeling of being overwhelmed and delivers better results in less time. 2. Declutter First Clutter is one of the biggest roadblocks to efficient house cleaning. Before you dive into the actual cleaning, walk through each room and return items to the places they belong. Cleaning around clutter is inefficient, and removing it right away makes the space look tidier instantly. An organized home is also a safer one, since the Canadian Centre for Occupational Health and Safety identifies clutter and spills among the leading causes of slips, trips, and falls in the home. 3. Tackle One Room at a Time Trying to handle every room at once can feel overwhelming and actually slow you down. Work through one space at a time, starting with the kitchen or bathroom, and complete it fully before moving on. This focused approach produces visible results quickly, which keeps you motivated, and it ensures no room is left half-cleaned. You can fit the work into your schedule easily, whether you clean one room a day or dedicate a full day to going through the house systematically. 4. Keep Your Tools Handy Nothing disrupts a cleaning flow like stopping every few minutes to hunt for supplies. Gather everything you need before you start and carry it in a portable caddy: gloves, scrub brushes, rags, and cleaning solutions matched to the surfaces you will clean. A well-stocked caddy keeps the right tool within arm’s reach at the right moment, which significantly speeds up the process. When you shop for products, labels such as EPA Safer Choice can help you identify cleaners with safer ingredients, and always follow the directions on the label. 5. Use High-Efficiency Methods High-efficiency methods maximize results with the least wasted effort. When dusting, start at the top of the room and work your way down, so particles that fall are collected by the later steps. When vacuuming, do the whole house in one continuous session, moving quickly and seamlessly from room to room to avoid repeated setup and breakdown of equipment. Keeping a steady rhythm means no area gets overlooked and the total time spent shrinks. 6. Regular Maintenance Goes a Long Way Small daily habits dramatically reduce the workload on big cleaning days. Wipe surfaces down immediately after use, address spills the moment they happen to prevent stains and slip hazards, and keep floors clear by sweeping or vacuuming regularly, which also protects flooring from grit and hard particles. In damp areas such as bathrooms and kitchens, control moisture to discourage mould, because the EPA recommends fixing moisture problems as the first step in mould control. When DIY Isn’t Enough Even with the best routine, busy weeks happen, and some projects are simply too big for an afternoon. Toronto Shine Cleaning offers regular maid cleaning to keep your home maintained between deep cleans, and a deep cleaning service for the top-to-bottom reset your home needs a few times a year. Transparent house cleaning prices make it easy to plan ahead, and service is available across Toronto and the GTA. Frequently Asked Questions What order should I clean rooms in? Start with the kitchen or bathroom, the two rooms that take the most effort, then move through bedrooms and living spaces. Finish with floors so the final pass collects all the dust and debris from the earlier steps. How do I clean a whole house without getting overwhelmed? Break the work into individual rooms, set a timer for each one, and complete a space before moving to the next. A clear plan and a stocked caddy keep you moving from start to finish. How often should I deep clean my home? Most homes benefit from a deep clean every three to six months, with light maintenance in between. High-traffic homes with pets or young children may need it more often. What cleaning supplies do I actually need? A good all-purpose cleaner, glass cleaner, microfiber cloths, scrub brushes, gloves, and a vacuum cover most jobs. Add surface-specific products for stone, wood, and stainless steel as needed. House cleaning does not have to be a dreaded chore. Apply these six tips, and your home will stay fresher and more inviting with less effort all year round.

How to Tackle House Cleaning: 6 Essential Tips Read More »