Kitchen Cleaning

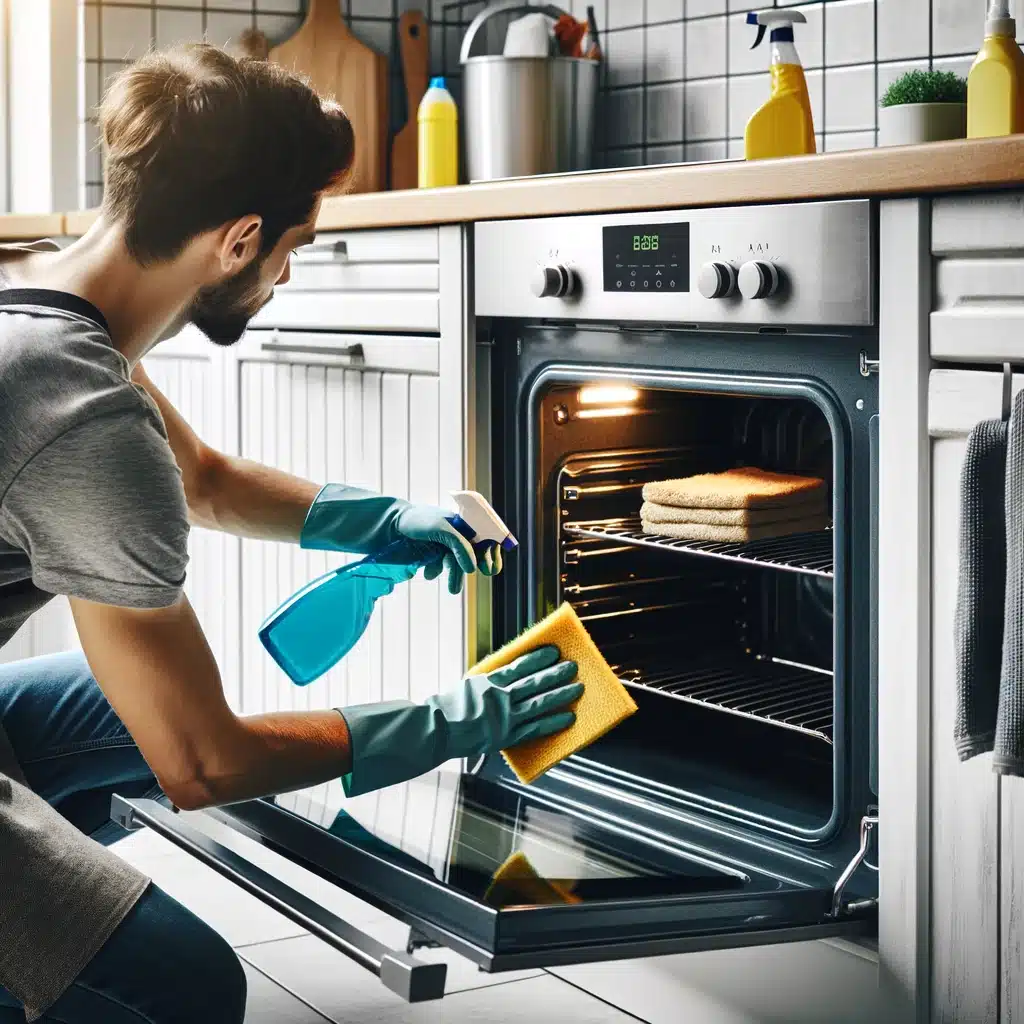
Person scrubbing modern oven interior with gloves and cleaning spray.

How to Deep Clean Your Kitchen: 7 Expert Tips

Why Your Kitchen Needs a Deep Clean Your kitchen is the hardest-working room in the house, and grime builds up fast: grease around the stove, crumbs in drawers, sticky countertops, and a sink that sees more traffic than any other surface. A deep clean does more than make your space sparkle. It removes hidden bacteria and grease that everyday wiping misses, reduces the risk of foodborne illness, and helps your appliances last longer. Here is how to deep clean your kitchen with seven expert steps. Seven Expert Steps to Deep Clean Your Kitchen Set aside a few hours, gather your supplies, and work through the kitchen one zone at a time. Start with the highest points and finish with the floors so you never clean the same surface twice. 1. Gather Your Cleaning Supplies Stock up before you start: an all-purpose cleaner for most surfaces, a degreaser for the stove and backsplash, microfiber cloths, sponges, glass cleaner for windows and cabinet fronts, dish soap, and a mop and bucket for the floors. Having everything ready keeps the job moving and saves you time. 2. Declutter and Organize Clear everything off the countertops, cabinets, and pantry shelves. Throw away expired products and donate anything you no longer use. With clear surfaces you can reach every corner, and an organized kitchen is easier to keep clean day to day. 3. Tackle the Appliances Remove everything from the refrigerator and wipe the shelves, drawers, and handles with an all-purpose cleaner. Clean the oven with a commercial oven cleaner, letting it sit to loosen baked-on residue, and scrub the racks separately. For the microwave, wipe the interior with dish soap and water, then the buttons and handle. Run an empty dishwasher cycle with a dishwasher cleaner to remove odors and buildup. 4. Clean the Cabinets and Drawers Empty each cabinet and drawer, then wipe the interiors with a mild cleaner and a damp cloth. Use a degreaser on sticky buildup, and do not forget the cabinet doors and handles, which collect grime from constant touching. 5. Scrub the Surfaces Clean countertops with a product matched to the material: a stone cleaner for granite, for example, protects the finish and keeps its shine. Degreaser works best on the backsplash around the stove. Wipe the walls near cooking and food preparation areas, where splatters and grease settle. 6. Shine the Sink Scrub the basin and faucet with dish soap, then polish with glass cleaner for a streak-free shine. For stubborn stains, use a commercial sink cleaner, let it sit for a few minutes, and scrub again. A gleaming sink makes the whole kitchen feel clean. 7. Sweep and Mop the Floors Sweep or vacuum the entire floor, reaching corners and under appliances where dust collects. Mop with a solution suited to your flooring, working from the farthest corner toward the exit so you do not step on wet areas. Pay extra attention to high-traffic zones near the stove and sink. Kitchen Deep Cleaning Quick Reference Refrigerator: empty, wipe shelves and drawers, clean handles. Oven: commercial cleaner, let it sit, scrub the racks. Microwave: damp cloth with dish soap, then wipe the keypad. Dishwasher: run an empty cycle with a dishwasher cleaner. Cabinets and drawers: empty, wipe interiors, degrease handles. Countertops and backsplash: surface-matched cleaner plus degreaser. Sink: dish soap scrub, glass cleaner polish, spot treatment for stains. Floors: sweep first, then mop with a floor-appropriate solution. Kitchen Zone Main Task Best Tool Refrigerator Empty and wipe all surfaces All-purpose cleaner Oven and racks Loosen baked-on residue Commercial oven cleaner Microwave Remove food splatters Dish soap and damp cloth Countertops Deep clean the work surface Material-matched cleaner Backsplash Cut through grease Degreaser Sink Scrub and polish Dish soap plus glass cleaner Floors Remove ground-in dirt Mop and floor cleaner Frequently Asked Questions About Deep Cleaning a Kitchen How often should I deep clean my kitchen? A full deep clean every three to six months keeps grease and grime under control, while a lighter weekly clean handles counters, sink, and floors. High-use kitchens may need a deep clean every season, especially if you cook often or entertain regularly. What is the difference between daily cleaning and deep cleaning? Daily cleaning wipes surfaces and does the dishes. Deep cleaning moves everything out, cleans inside appliances, degreases the backsplash, scrubs drawers and cabinets, and washes the floors properly. It reaches the buildup that daily wiping misses and keeps the kitchen hygienic and fresh. Is a deep-cleaned kitchen really safer for food preparation? Yes. The CDC explains that following safe food handling and cleaning practices reduces the risk of food poisoning, and Health Canada publishes the same guidance for Canadian kitchens. Removing grease, crumbs, and bacteria from counters, sinks, and appliances keeps the surfaces where you prepare food much safer. Can professional cleaners deep clean my kitchen? Yes. Toronto Shine Cleaning provides a thorough deep cleaning service that covers appliances, cabinets, surfaces, and floors using professional products and techniques. It is a convenient option when you are short on time or the kitchen needs more than a weekend DIY session. Deep Clean Your Kitchen With Toronto Shine Cleaning A clean kitchen is healthier, more efficient, and more pleasant to cook in. If the job feels overwhelming, or you simply want it done right, the deep cleaning service from Toronto Shine Cleaning takes your kitchen from grimy to gleaming. Pair it with a regular maid service to keep it that way between visits. Find transparent pricing online and check if we clean in your area on our locations page. Call (647) 424-0355 today.


How to Deep Clean Your Kitchen: 7 Expert Tips Read More »

Housekeeper in gloves sanitizes kitchen counter with spray and cloth.

How to Clean Your Kitchen in Richmond Hill: 6 Expert Tips

Why a Clean Kitchen in Richmond Hill Matters Cleaning your kitchen in Richmond Hill can feel like a big job, especially after a busy week of cooking. A sparkling kitchen not only looks good, it also supports a healthy home. These six expert tips will help you clean your kitchen in Richmond Hill efficiently, whether you are tackling a quick refresh or a full reset. For professional house cleaning in Richmond Hill, Toronto Shine Cleaning provides regular, deep, and move-in or move-out cleaning across Richmond Hill and the GTA. Six Expert Tips to Clean Your Kitchen in Richmond Hill Follow the order below and you will never clean the same surface twice: declutter, do the dishes, work from top to bottom, refresh the appliances, disinfect the countertops, and finish with the floors. 1. Declutter First Clear the countertops, empty the sink, and put away anything that does not belong in the kitchen. Remove small appliances, utensils, and decorations, and store them in cabinets or drawers. Storage solutions such as baskets, shelves, and drawer dividers keep everything in its place, so the cleaning that follows is faster and every surface is reachable. 2. Tackle the Dishes Nothing makes a kitchen feel cleaner than an empty sink. Wash the dishes or load the dishwasher efficiently, letting stubborn items soak in warm, soapy water first. Then clean the sink itself with a scrub brush and baking soda to lift grime, rinse with hot water, and wipe down the faucets and handles. Try to keep up with dishes daily so they never pile up. 3. Clean From Top to Bottom Work downward so dust and crumbs fall onto surfaces you have not cleaned yet. Dust the upper cabinets, shelves, light fixtures, and ceiling fans first, then wipe the walls and cabinet doors with a gentle cleaner, paying attention to the areas around the stove and sink. Finish with the countertops, appliances, and floors. 4. Pay Attention to Appliances The stove, microwave, and refrigerator are the most used items in the kitchen. Soak the stove grates and burners in warm, soapy water and wipe the stovetop, using a baking soda paste for tough grease. Steam the microwave with a bowl of water and lemon slices or a little vinegar to loosen splatters, then wipe the interior and keypad. Empty the fridge and clean the shelves and drawers regularly. 5. Disinfect Countertops and Surfaces Countertops are the workhorse of the kitchen, so disinfect them with a product suited to your material: a mild, non-abrasive cleaner protects granite, quartz, and marble from etching. Wipe the backsplash and grout lines too. Finish with high-touch spots such as cabinet handles, drawer pulls, and light switches, which harbour germs from frequent use. 6. Mop the Floors Sweep or vacuum the floor, reaching corners, under cabinets, and along baseboards where dirt hides. Choose a floor cleaner designed for tile, hardwood, laminate, or vinyl, wring out excess water, and mop in sections from the far end of the room. Let the floor dry completely before walking on it to avoid streaks and keep that just-cleaned shine. Kitchen Cleaning Quick Reference Declutter: clear countertops, empty the sink, store items properly. Dishes: wash or load the dishwasher, then clean the sink. Top to bottom: dust upper areas before wiping lower surfaces. Appliances: soak grates, steam the microwave, clean the fridge. Surfaces: disinfect countertops with a material-matched cleaner. High-touch spots: handles, pulls, and light switches. Floors: sweep, then mop with the right floor cleaner. Kitchen Task Main Step Pro Tip Decluttering Clear all countertops Use baskets and drawer dividers Dishes Wash or load the dishwasher Soak stubborn items first Appliances Clean stove, microwave, fridge Steam the microwave with lemon Countertops Disinfect the work surface Match cleaner to the material Floors Sweep, then mop Dry fully before walking on them Frequently Asked Questions About Kitchen Cleaning in Richmond Hill How often should I deep clean my kitchen in Richmond Hill? A full deep clean every three to six months keeps grease and grime in check, with lighter weekly cleaning for counters, sinks, and floors. Kitchens that get heavy use may need a seasonal deep clean, especially before holidays or family gatherings. What is the fastest way to clean a messy kitchen? Work in order: clear the clutter, do the dishes, wipe from top to bottom, disinfect the countertops, and mop the floors last. Following the same order every time builds speed, and daily habits such as washing dishes by the end of the day prevent messes from stacking up. Are kitchen cleaning products safe for all surfaces? Not always. Harsh or abrasive cleaners can etch natural stone and dull laminate. Check the label, and for granite, quartz, or marble use a mild, non-abrasive product. When in doubt, test any cleaner on a small, hidden area first, just as you would with walls or flooring. Why is kitchen hygiene important for food safety? Kitchens handle raw ingredients, and germs can spread from counters to food. The CDC recommends cleaning and disinfecting food-contact surfaces as part of safe food handling, and Health Canada offers the same guidance for Canadian homes. A clean kitchen is your first line of defence against foodborne illness. Clean Your Kitchen in Richmond Hill With Toronto Shine Cleaning If you would rather spend your weekend doing anything but scrubbing, Toronto Shine Cleaning can help. Our regular maid service keeps your kitchen and home maintained week to week, while our deep cleaning service handles the tough buildup. We serve Richmond Hill and the surrounding GTA, with transparent pricing available online. Call (647) 424-0355 to book your kitchen cleaning today.

How to Clean Your Kitchen in Richmond Hill: 6 Expert Tips Read More »

Kitchen rust, rust, oven rust

How to Remove Rust and Corrosion from Metal: 5 Best Methods

Dealing with rust and corrosion on metal surfaces can be a real headache, especially when it starts affecting the functionality or aesthetics of your items. Whether it’s tools, outdoor furniture, or any metal object, knowing how to effectively remove rust can prolong the life of your belongings and keep them looking great. Here, we’ll walk through five effective methods to get rid of rust and corrosion from metal. Grab your gloves, and let’s get started! 1. White Vinegar Bath: The Natural Soak White vinegar isn’t just a staple for your salad dressing-it’s also a highly effective natural rust remover for metal objects. The key ingredient here is acetic acid, which actively reacts with rust to help dissolve it, clearing the way for a cleaner, shinier metal surface beneath. This method is especially suitable for those who prefer eco-friendly cleaning solutions over harsh chemicals. To start, if you’re dealing with smaller metal items, simply find a container large enough to fully submerge them in white vinegar. Allow these items to sit in the vinegar bath overnight. This extended soak gives the acetic acid ample time to penetrate and break down the rust. For larger metal pieces that can’t be easily submerged, you don’t need to worry about finding an oversized container. Instead, grab some rags or even old towels, soak them in vinegar, and wrap them around the rusted areas of the metal. The goal is to keep the rusty spots thoroughly moistened with vinegar, so sometimes it might be helpful to re-soak the rags periodically to keep them wet throughout the soaking period. Once the soaking time has elapsed, it’s time to tackle the loosened rust. Using a metal brush or a piece of crumpled aluminum foil, scrub the treated areas vigorously. The abrasive action of the brush or foil helps to lift and remove the rust particles from the metal surface. After you’ve scrubbed the metal clean, the final step is to rinse the items with water. This not only removes any remaining vinegar and rust residue but also stops the acetic acid from further acting on the metal. Be sure to dry the metal thoroughly after rinsing. Leaving the metal wet could potentially lead to new rust formation, undoing all your hard work. Dry it off with a clean cloth or towel to ensure that every nook and cranny is moisture-free.     2. Baking Soda Paste: The Gentle Scrub When faced with less aggressive rust or when you need to treat delicate metal surfaces, baking soda emerges as an excellent, mild alternative to harsher chemical rust removers. This common household item is not only accessible but also gentle on metal while being tough on rust. To utilize baking soda for rust removal, start by preparing a thick paste. This is done by mixing baking soda with a small amount of water until you achieve a consistency that’s substantial enough to cling to vertical surfaces without dripping. This paste formation is crucial as it ensures that the baking soda stays in contact with the rusted areas long enough to facilitate the cleaning process. Once your paste is ready, apply it generously over the rusted portions of the metal. Spread the paste evenly, covering all rusty spots thoroughly. After applying, let the paste sit on the rust for a couple of hours. This dwelling time is vital as it allows the baking soda to chemically interact with the rust, breaking it down and making it easier to scrub away. Following the resting period, take a brush and gently scrub the treated areas. The texture of the baking soda paste helps to exfoliate the rust from the metal surface without scratching or damaging it. Scrubbing should be done with enough pressure to remove rust but gentle enough to preserve the integrity of the metal underneath. The final step in this rust removal process is to rinse and dry the metal. Washing off the baking soda paste with water not only cleans away the loosened rust particles but also any residual baking soda. It’s important to thoroughly dry the metal after rinsing. Any lingering moisture could potentially lead to new rust formation, which would counteract your cleaning efforts. Use a clean, dry cloth to wipe down the metal, ensuring that it is completely dry and free of moisture.     3. Potato and Dish Soap: The Surprising Trick It might sound unconventional at first, but using a potato combined with dish soap is a surprisingly effective method for removing rust from metal surfaces. This technique leverages the natural oxalic acid found in potatoes, an organic compound that interacts with rust to dissolve and loosen it, making removal a breeze. To start this rust-removal process, simply take a regular potato and slice it in half. The fresh cut surface of the potato will be used as your ‘applicator’. Apply a liberal amount of dish soap to this cut end of the potato. The dish soap not only helps in lubricating the surface but also enhances the rust removal process due to its degreasing properties. Next, use the soapy potato half just as you would a brush. Rub the cut end with the dish soap directly onto the rusted areas of the metal. As you do this, the oxalic acid from the potato interacts with the rust, breaking it down, while the dish soap aids in gently scrubbing the rust away without damaging the metal underneath. This method is especially useful for dealing with small patches of rust or for treating areas that are typically hard to reach with conventional tools. After thoroughly scrubbing the rusted areas, the next step is to rinse the metal. This step is crucial as it washes away the residual potato juices and soap, along with the loosened rust particles. Make sure to rinse the metal thoroughly to ensure that no soapy or acidic residues remain, as these could cause further corrosion if left on the metal. Finally, drying the metal effectively is key to prevent any

How to Remove Rust and Corrosion from Metal: 5 Best Methods Read More »

deep cleaning toronto

How Cleaning Your Home Can Fuel Your Weight Loss Journey: 6 Surprising Benefits

How Cleaning Your Home Can Fuel Your Weight Loss Journey: 5 Surprising Benefits Weight loss plans usually start at the gym, but your home is a surprisingly effective training partner. Cleaning is real physical activity, and a tidy environment supports the habits that make weight loss stick: better food choices, lower stress, consistent routines, and deeper sleep. Here are five ways your cleaning routine can fuel your weight loss journey. 1. Household Chores Burn Real Calories Vacuuming, scrubbing the bathroom, and mopping are genuine movement. Thirty minutes of active cleaning can burn up to 130 calories, depending on your body weight and how vigorously you work. Heavier tasks like washing windows and deep cleaning the kitchen push your energy use even higher. It is not a replacement for your workout, but it is far better than sitting. You can stack the effort too: squat while loading the dishwasher, lunge while vacuuming, or do calf raises while waiting for the kettle. Small intensity boosts turn routine chores into light training sessions. 2. Cleaning Lowers Stress and Stress Eating High stress triggers comfort eating and can slow your progress, but physical activity, even light activity like tidying, helps regulate stress. A cleaning session gives your mind a single, simple focus, which is calming after a demanding day. Lower stress means fewer stress-driven trips to the pantry. 3. More Movement Throughout the Day For anyone with a desk job, the problem is not the workout you miss, it is the hours of sitting. Bending, stretching, carrying, and walking between rooms all add up. The Public Health Agency of Canada notes that every movement counts toward your physical activity, so breaking up sedentary time with 10 minute cleaning bursts keeps your body engaged all day. Think of these as movement snacks: five minutes here and ten minutes there, spread across the day, without a gym bag in sight. Chore Movement Why It Helps Vacuuming Pushing, lunging, walking Sustained low-intensity cardio Scrubbing floors and tubs Squatting, reaching, pushing Leg and core engagement Laundry and tidying Lifting, bending, climbing stairs Frequent light activity Window washing Reaching, stretching Upper body and balance work 4. A Clean Kitchen Supports Better Food Choices Your environment shapes your decisions. A cluttered kitchen makes it easy to grab processed snacks and hard to find the ingredients for a real meal. When counters are clean and the pantry is organized, cooking at home becomes the path of least resistance, and home-cooked meals tend to be lower in calories and higher in nutrients than takeout. 5. Routine, Discipline, and Better Sleep Regular cleaning builds the same discipline that diet and exercise require. A set cleaning schedule trains you to show up for small commitments, and that muscle carries over to meal prep and workouts. A clean bedroom also improves sleep, and sleep regulates the hormones that control appetite. The NHLBI explains how sleep supports metabolism and overall health, while reducing allergens like dust mites in the bedroom helps you rest more deeply, a topic the National Institute of Environmental Health Sciences covers in its allergens overview. Consistency matters more than intensity: a tidy home kept up daily removes the weekend marathon clean, which is often when motivation runs out. Turn Cleaning into a Mini Workout Play upbeat music and keep moving between tasks. Add squats when you pick up toys or laundry baskets. Set a 20 minute timer and race yourself to finish a room. Use cleaning as your screen break between work calls. Free Up Time for Your Real Workouts Cleaning burns calories, but it cannot replace strength training or a long walk. If deep cleaning eats the hours you would rather spend at the gym or preparing healthy meals, outsource it. Toronto Shine Cleaning provides regular residential cleaning and deep cleaning services across the GTA, with prices starting at $212.63 for a studio or 1 bedroom home and a 15 percent discount on weekly and bi-weekly schedules. We cover Toronto and surrounding areas. Call 647-424-0355 to book, and put your energy into the workouts that move the needle. How many calories does cleaning actually burn? A 30 minute session of active cleaning can burn up to 130 calories, and heavier tasks like scrubbing or window washing burn more. The exact number depends on your weight and intensity, so treat it as a bonus, not your main workout. Does cleaning count as exercise? Cleaning counts as physical activity, and every bit of movement adds up, especially if you sit most of the day. For weight loss, pair it with dedicated cardio and strength training, since cleaning alone is not enough to build fitness. Can a clean kitchen really change what I eat? Yes. When counters are clear and healthy ingredients are visible, cooking at home becomes easier than ordering out. A tidy kitchen removes the friction that pushes you toward processed snacks. How does sleep fit into weight loss? Poor sleep disrupts the hormones that regulate hunger and appetite, which can increase cravings. A clean, calm bedroom supports deeper sleep, and consistent sleep makes consistent healthy eating easier.

How Cleaning Your Home Can Fuel Your Weight Loss Journey: 6 Surprising Benefits Read More »

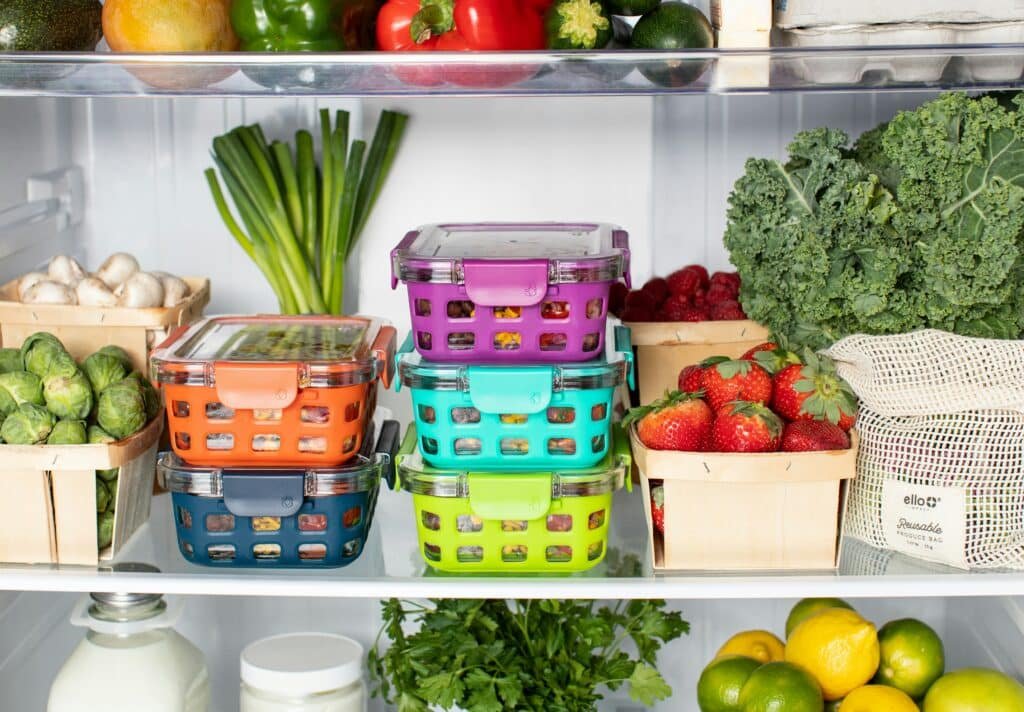
Kitchen refrigerator brimming with fresh veggies and meals.

How to Ensure Your Groceries are Virus-Free: A 7-Step Guide

How to Ensure Your Groceries are Virus-Free: A 7-Step Guide for Toronto Homes The weekly grocery run is one of the most routine errands in a Toronto household, and also one of the most contact-heavy: shared carts, busy checkout lanes, and shelves touched by dozens of shoppers every day. While the likelihood of catching a virus from food packaging is generally low, a few simple habits add real peace of mind, especially when your home includes young children, seniors, or anyone with a weakened immune system. This seven-step guide covers everything from planning your trip to putting the last package away, so you can keep your groceries virus-free from store to pantry. Step 1: Prepare Before You Shop Write your shopping list before you leave the house. Knowing exactly what you need lets you get in and out faster, which means less time in crowded aisles and fewer chances to touch shared surfaces. Pack hand sanitizer and disinfectant wipes for your hands, the cart, and payment screens. Keep a mask handy for busy periods when keeping distance is difficult. Shop during off-peak hours, such as weekday mornings, when stores are quietest. Step 2: Choose Touch-Free Options When Possible Delivery and curbside pickup remove most of the guesswork. Your order is packed by store staff and loaded straight into your car or left at your door, which limits your exposure to public spaces. If you do shop in person, touch only the items you plan to buy, and keep your hands away from your face while you browse. Step 3: Sanitize Your Hands and Cart Wipe the cart handle, basket edges, and child seat with a disinfectant wipe before you start, then apply hand sanitizer after touching door handles and payment terminals. These small steps stop germs from hitching a ride from the cart to your groceries, and then from your groceries to your kitchen. Step 4: Practice Safe Handling in the Aisles Use the produce bags as a barrier when picking loose fruits and vegetables instead of grabbing them with bare hands. Skip items with torn or damaged packaging, and avoid touching your eyes, nose, or mouth while shopping, since those are the easiest entry points for viruses. Step 5: Clean Your Groceries When You Get Home Designate a landing zone near the door or in the kitchen for incoming bags, then treat each item by type. Grocery Type Recommended Cleaning Method Cans, jars, and plastic bottles Wipe each container with a disinfectant wipe and let it air dry before storing. Fresh fruits and vegetables Rinse under running water and rub gently with your hands. Avoid soap or household detergents, which can leave residues that are not safe to eat. Cardboard boxes and bags Wipe the outside, or set them aside for a few hours before putting them away. Frozen items Wipe the packaging, since it has been handled in the store and during delivery. A produce wash is optional: running water and light friction remove most dirt and microbes from the surface. Cleaning physically removes germs while disinfecting kills them, so match the method to the item. The CDC explains both approaches in its food safety and home cleaning and disinfection guidance. Step 6: Designate a Cleaning Area and Tidy It After Keep one zone for groceries that still need attention so clean items and unwashed items never mix. Once everything is stored, wipe down the countertops, the sink area, and any bins or bags that touched the groceries. Wash reusable shopping bags regularly, either in the machine or by hand with warm soapy water. Health Canada’s safe food handling tips are a useful refresher for the whole family. Step 7: Wash Your Hands Thoroughly Finish every grocery session by washing your hands with soap and water for at least 20 seconds, including between your fingers, under your nails, and on the backs of your hands. This one habit is the most effective way to keep viruses from moving from your hands to your face or your food. Keep the Whole Kitchen Virus-Free Groceries are only one link in the chain. Fridge handles, faucets, counters, and cabinet fronts collect germs from everyday use, so wipe them down regularly and give the kitchen a deep clean every few weeks. If you would rather spend Saturday at the farmers market than scrubbing the fridge, Toronto Shine Cleaning provides deep cleaning services in Toronto and regular residential cleaning across the GTA, so your kitchen stays hygienic without eating your weekend. We serve Toronto and surrounding areas, and clients rate us 4.9 out of 5 on Google, as shown on our reviews page. Call 647-424-0355 to book a visit. Seven steps sound like a lot, but most of them take seconds once they become routine. Plan your list, protect your hands, clean by type, and wash up at the end, and your kitchen stays a safe place for everyone in your household. Do I need to disinfect every single package? No, focus on items you will touch frequently, such as cans, jars, bottles, and frozen packages. Fresh produce only needs a rinse under running water, and cardboard can be wiped or set aside briefly before storing. Can I wash fruits and vegetables with dish soap? No, avoid soap, detergent, and bleach on produce. These products can leave residues that are not safe to eat. Running water and gentle rubbing with your hands are enough, and a produce wash is optional. Is grocery delivery safer than shopping in store? Delivery and curbside pickup limit your exposure to shared surfaces like carts and checkout screens, which reduces contact with germs. If you do shop in person, keep your hands away from your face and sanitize after touching shared surfaces. How long should I wash my hands after handling groceries? At least 20 seconds with soap and water, covering between your fingers, under your nails, and the backs of your hands. Do this after unpacking and again before you eat or prepare food.

How to Ensure Your Groceries are Virus-Free: A 7-Step Guide Read More »

Person joyfully dancing and sweeping with headphones on.

How to Combine Home Cleaning and Exercise: 5 Ways to Stay Fit While You Tidy

How to Combine Home Cleaning and Exercise: 5 Ways to Stay Fit While You Tidy Finding time for both a clean home and a workout feels impossible on a busy schedule. The solution is to combine them. Housework is real movement, and it counts toward your activity goals. Canada’s physical activity guidance recommends that adults get at least 150 minutes of moderate-to-vigorous activity per week, and everyday activities at home count. These five ways to combine home cleaning and exercise will help you stay fit while you tidy, no gym required. 1. Turn Vacuuming Into a Power Walk Transform your vacuuming into a brisk power walk. Push and pull the vacuum at a steady pace, and you work your arms and shoulders just like a gym row. Keep your posture straight and engage your core as you move. To raise the intensity, add a lunge every few steps: step forward with one leg, bend both knees to lower your hips, and push back up. Keep your back straight and your knees in line with your toes to protect them, and your glutes and quads will feel the difference. 2. Dance While You Do the Dishes Dishwashing is a perfect stage for a dance party. Put on an upbeat playlist and let the music guide your movements: sway side to side, twist your hips, or add a few shimmy shakes. Dancing while you scrub raises your heart rate, improves circulation, and burns more calories than standing still at the sink. The mental bonus is real too, because the endorphins from dancing lift your mood and make the chore feel like fun instead of work. 3. Build Staircase Circuits If you have stairs, you have a free fitness machine. Set a timer for 15 to 20 minutes and use trips up and down as structured workout intervals, whether you are carrying laundry or moving items between floors. Change your movement every few trips to keep it interesting: run up the stairs for a cardiovascular boost, add a hop on each step to challenge balance and power, or take two steps at a time to engage your glutes and thighs more forcefully. Use the railing for balance whenever you need it. 4. Do Counter-Top Push-Ups While You Wait Kitchens are full of waiting time, and every minute counts. While the kettle boils, the microwave beeps, or the oven preheats, stand a few feet from the counter, plant your feet, and keep your body in a straight line. Place your hands on the counter edge and perform push-ups: easier than floor versions, but still effective for your chest, arms, and core. A quick set of 10 to 15 reps per waiting period adds up across the day, and it turns idle time into progress. 5. Squat While You Wash Windows and Mirrors Window washing and surface wiping become a leg workout when you add squats. Every time you dip your cloth in the bucket or rinse your sponge, lower into a squat: feet shoulder-width apart, back straight, hips lowered as if you are sitting back into a chair. Rise as you swipe the glass. For extra intensity, hold the squat position for a few seconds before standing. Proper form maximizes the strength-building effect and protects your back and knees from strain. Make a Cleaning Workout Routine That Sticks Consistency beats intensity. Fifteen to twenty minutes of movement a few times a week adds up quickly, and because the cleaning still gets done, you never lose time. Pair each chore with its exercise and rotate through them so no muscle group is neglected: Chore Exercise move Muscles targeted Vacuuming Brisk power walk with lunges Arms, shoulders, core, glutes, quads Dishwashing Dancing and swaying Full body, heart rate, flexibility Stair trips Staircase circuits, two steps at a time Legs, glutes, thighs, cardiovascular system Kitchen waits Counter-top push-ups Chest, arms, core Window washing Squats with a hold Legs, glutes, core A few safety reminders keep your cleaning workout injury-free: Keep your back straight during lunges, squats, and push-ups. Align your knees with your toes on every lunge and squat. Use the railing on stairs whenever you feel off balance. Start slowly and build up reps and speed over several weeks. Let the Professionals Handle the Deep Clean Your daily cleaning workout keeps your home tidy, but a professional deep clean takes it to the next level. Toronto Shine Cleaning offers everything from regular house cleaning to specialized deep cleaning services, so you can focus your energy on fitness while the experts handle the heavy lifting. Transparent base rates are published on our pricing page, and our reviews show why Toronto homeowners keep coming back. Health Canada’s healthy living resources are a great place to start if you want more ideas for building activity into daily life. Combining home cleaning and exercise turns two obligations into one habit. Vacuum with purpose, dance at the sink, work the stairs, push off the counter, and squat as you shine, and you will stay fit while you tidy. For a deeper clean, call Toronto Shine Cleaning at (647) 424-0355 and let the pros take it from there. Frequently Asked Questions About Cleaning and Exercise Can housework really count as exercise? Yes. Canada’s physical activity guidance recommends at least 150 minutes of moderate-to-vigorous activity per week for adults, and everyday activities such as brisk vacuuming, stair climbing, and dancing count toward that goal. How long should a cleaning workout session last? Fifteen to twenty minutes is a solid session, and the staircase circuit method works especially well with a timer. Even several shorter bursts of movement spread across the day deliver real benefits. Is it safe to exercise while cleaning? Yes, if you use proper form. Keep your back straight, align your knees with your toes on lunges and squats, use the railing on stairs, and start slowly before building up reps and intensity. How many push-ups should I do while waiting? Ten to fifteen reps per waiting period, such as

How to Combine Home Cleaning and Exercise: 5 Ways to Stay Fit While You Tidy Read More »

Pristine marble or granite kitchen countertop with reflective surface.

How to Easy Tackle Stubborn Stains on Countertops in 4 Steps

Tackling Stubborn Stains on Countertops doesn’t have to feel like a daunting task. Whether you’re dealing with a splash of coffee or a splash of sauce, there’s a simple, three-step approach that can help you get your counters shining again in no time. So, grab your cleaning supplies, and let’s dive into how you can make those stubborn stains a thing of the past! Identify Your Countertop Material Jumping into cleaning without knowing what your countertop is made of is like using soap before knowing if it’s for your hands, dishes, or clothes. Each one has its own needs, and countertops are no different. You see, materials like granite, marble, quartz, or laminate don’t just differ in looks but in their resilience and reaction to cleaners. Take marble, for instance; it’s as porous as a sponge in a way, soaking up liquids and potentially getting stained or damaged if you use something as common as vinegar or lemon juice for cleaning. And then there’s granite, tough and sturdy, yet it can still suffer if you treat it with harsh chemicals. Quartz, on the other hand, is like the superhero of countertops, resistant to most stains and damages, but even superheroes have their kryptonite – in quartz’s case, high pH cleaners can be its downfall. Laminate is like the easy-going friend, less fussy and able to handle a variety of cleaners, but still not a fan of abrasive scrubs that can leave it looking dull and scratched. So, knowing what your countertop calls home is the first step in making sure you’re not accidentally turning your cleaning spree into a renovation project. By identifying the material of your countertop, you equip yourself with the knowledge to select the right cleaning agents – ones that will treat your surfaces with the care they deserve, ensuring they stay looking as good as new. Prepare Your Cleaning Solution The mix you need depends on the type of countertop you’re dealing with. It’s not just about grabbing the nearest spray bottle; it’s about crafting a solution that speaks directly to the stains without offending the delicate balance of your countertop’s material. For those sporting granite or marble countertops, think of creating a gentle, yet effective, potion. A simple concoction of mild dish soap mixed with warm water can work wonders, creating a sudsy solution that lifts stains without causing drama. But when the going gets tough, and you’re staring down a stubborn stain refusing to leave, turning to a paste of baking soda mixed with water can be your gentle warrior. Apply it with care, and watch as it works its magic, coaxing the stain out without any harsh words. Quartz countertops, with their robust nature, still appreciate a soft touch. A spray of glass cleaner or a dab of dish soap mixed into water can be the perfect remedy for everyday spills. Yet, when faced with a stain that laughs in the face of regular cleaners, a gentle degreaser can step in. Used sparingly, it’s like having a secret weapon that targets the grime without undermining the quartz’s integrity. Laminate counters, with their versatile and forgiving nature, still require a thoughtful approach. A mix of vinegar and water, or for those more persistent stains, baking soda dissolved in water, can act as a mild, effective cleaner. This solution respects the laminate’s boundaries, cleaning without causing harm. When applying your chosen potion, imagine you’re painting with the softest brush, not scrubbing with a scouring pad. Using a soft cloth or sponge, embrace a gentle, circular motion, allowing the cleaner to do its job without introducing scratches to the scene.     Rinse, Dry, and Repeat if Necessary After you’ve put your cleaning solution to work and given that stubborn stain a gentle, yet firm talking to, it’s time to wash away any remnants of your cleaning campaign. Rinsing the area thoroughly with clean water is like the cool down after a workout, ensuring no sticky, soapy, or abrasive residues are left behind to tarnish your victory. This step is about respect for the surface you’ve just painstakingly cleaned, ensuring it’s left in pristine condition, ready to face the world-or at least your kitchen’s daily adventures-once more. Drying off your countertop with a soft towel isn’t just about avoiding water marks; it’s a gesture of care, protecting your surface from the potential harm of lingering moisture. Think of it as tucking your countertop in after a long day, ensuring it rests spotless, dry, and ready to shine brightly under your kitchen lights. However, much like life’s more persistent lessons, some stains don’t get the message the first time around. If after your initial efforts the stain stubbornly clings on, refusing to be forgotten, it’s time for a repeat performance. Retrace your steps with the cleaning solution, applying it with the same care and attention as before. This isn’t defeat; it’s determination. Some stains are simply more tenacious, requiring patience and persistence to fully erase their presence. This repeated process isn’t about brute force; it’s about understanding that some things take time. With each application, rinse, and dry cycle, you’re not just working to remove a stain; you’re caring for your home, ensuring that every inch of it reflects the care and attention you pour into it. Sometimes, it’s these repeated efforts, this willingness to try and try again, that make all the difference, leaving you with a countertop that’s not only clean but truly gleams with the pride of well-fought victory. Leverage the Power of Natural Light and Inspection Once you’ve navigated through identifying your countertop’s material, concocted the perfect cleaning solution, and meticulously rinsed and dried the surface, there’s an additional step that can elevate your cleaning game to new heights. It’s time to harness the illuminating power of natural light and a keen eye for inspection. This step is all about ensuring not a single spot or streak has been left behind, turning your countertop not just into a clean surface, but a

How to Easy Tackle Stubborn Stains on Countertops in 4 Steps Read More »

Fresh lemon used as a natural kitchen cleaner.

How to Use Lemon in 5 Surprising Ways for a Sparkling Clean Home

Lemons: they’re not just for lemonade anymore! Use lemons with this citrus wonder is a powerhouse, offering a refreshing scent and natural acidity that can tackle grime in ways that might just surprise you. Whether you’re a tidy enthusiast or someone just looking to spruce up your space with eco-friendly options, lemons are your go-to. Here’s how to use lemon in 5 surprising ways to get your home sparkling clean: 1. Freshen Up the Garbage Disposal Here’s a deeper dive into how to use lemons to freshen up your garbage disposal. The process is as simple as it is effective. Start by taking a lemon-any size will do, though a larger lemon means more citrusy goodness to combat odors and grime. Cut the lemon into small, manageable pieces. This increases the surface area that will come in contact with the disposal’s blades and interior surfaces, ensuring a thorough clean. Once your lemon is prepped, toss the pieces into the disposal. Go ahead and run the disposal, adding a moderate stream of water to facilitate the process. The water helps to move the lemon pieces around, ensuring they touch all parts of the disposal. As the disposal works its magic, the lemon is pulverized, releasing its natural acids and oils. These natural cleaners do double duty: the acid helps to break down any lingering food particles or grease, while the oils release a clean, refreshing scent that neutralizes bad odors.     2. Revitalize Cutting Boards Over time, cutting boards, whether they’re made of wood, plastic, or bamboo, can become a breeding ground for bacteria and a canvas for stains from various foods. This is where the humble lemon steps in, offering a natural and effective solution for cleaning and deodorizing these essential kitchen tools. When you cut a lemon in half and rub it across the surface of your cutting board, you’re harnessing the power of citric acid. This natural disinfectant goes to work on the bacteria lurking in the nooks and crannies, especially those left behind after cutting raw meat or slicing brightly colored vegetables and fruits. The acid’s antibacterial properties are effective yet gentle, ensuring that your cutting board is sanitized without the need for harsh, potentially harmful chemicals. But lemons don’t stop at just sanitizing. They’re also fantastic at tackling those stubborn stains that seem to permanently mark your board. The natural acidity of the lemon juice acts as a mild bleach, lightening stains without damaging the surface of your cutting board. It’s a simple yet effective way to keep your boards looking newer for longer. For those particularly tough stains or grooves that have seen better days, introducing coarse salt into the mix can elevate the cleaning power of the lemon. By sprinkling a generous amount of salt over the board before you start rubbing with the lemon half, you create a natural abrasive cleaner. This combination works wonders on the deeper stains and can help smooth out rough patches, leaving your cutting board not only cleaner but also smoother to the touch. This method of cleaning and revitalizing your cutting boards with lemon and salt is not just effective; it’s also eco-friendly and safe. You’re avoiding the use of synthetic chemicals, reducing the risk of contaminating your food with substances you’d rather not ingest. Plus, it leaves behind a fresh, citrus scent that makes your kitchen smell clean and inviting. 3. Shine Your Faucets The problem of water spots and lime buildup is all too common, resulting from hard water that leaves behind minerals on your fixtures. These deposits can be stubborn, making your faucets look dull and neglected, even in the cleanest of homes. However, the solution is as close as your fruit basket. Lemons, with their high citric acid content, are natural warriors against the grime that accumulates on faucets. When you cut a lemon in half and rub it directly onto the metal, the acid immediately begins to interact with the buildup, breaking it down and making it easier to wipe away. This method is gentle on your fixtures, avoiding the abrasiveness or chemical reaction that some cleaners might cause. But the benefits of using lemon don’t stop at just cleaning. The natural oils found in the lemon peel play a crucial role in polishing the metal surfaces. These oils coat the faucet, providing a protective barrier that not only brings out the shine but also repels water to a degree, helping to prevent future spots and buildup. It’s a dual-action approach that cleans and polishes in one go. After you’ve given your faucets a good rub-down with the lemon, the next steps are simple. Rinse the area with water to wash away any lemon residue and dissolved grime. Then, take a soft cloth and dry the faucets thoroughly. This step is vital as it removes any lingering water that could leave new spots, and it buffs the metal to a bright shine. The result is faucets that look as though they’ve just been installed, gleaming and free of any grimy buildup or water spots.     4. Natural Microwave Cleaner Traditional cleaning methods can be cumbersome, involving scrubbing and the use of chemical cleaners that might not be desirable for an appliance used to heat your food. This is where the humble lemon, paired with a bit of water, offers a brilliantly simple and natural cleaning solution. By combining the juice of one lemon with half a cup of water in a microwave-safe bowl, you create a natural cleaning agent that’s ready to tackle even the toughest microwave messes. The citric acid in the lemon works to break down the grime, while the boiling water helps the lemon’s essence to disperse evenly throughout the microwave as steam. This steam condensation is the key to loosening the particles and stains that have hardened onto the microwave’s interior surfaces. When you microwave this mixture on high for three minutes, you’re not just creating steam; you’re essentially giving your microwave a lemon-scented sauna.

How to Use Lemon in 5 Surprising Ways for a Sparkling Clean Home Read More »

Dish soap and its lots of uses, how dish soap is useful

How Dish Soap Can Transform Your Cleaning Routine: Top 8 Tips

Hey there! Ever thought dish soap could be the unsung hero of your cleaning arsenal? Well, buckle up because I’m about to show you how this kitchen staple can totally transform your cleaning routine. Dish soap, with its grease-fighting power, isn’t just for dishes anymore. Here are the top 10 tips to make the most out of dish soap and keep your home sparkling clean. 1. Make an All-Purpose Cleaner To create this cleaner, start with filling a spray bottle most of the way with water, then add a few drops of dish soap. The precise amount of dish soap doesn’t need to be exact, but aiming for about a teaspoon per cup of water is a good starting point. This ratio ensures that the solution has enough cleaning power to tackle dirt and grime without leaving surfaces covered in soap residue. After adding the dish soap to the water, tightly close the spray bottle and give it a gentle shake. This mixing action disperses the soap throughout the water, creating a uniform cleaning solution. Now, your all-purpose cleaner is ready to tackle a multitude of cleaning tasks. When using your homemade all-purpose cleaner, simply spray a light mist onto the surface you’re cleaning. Then, with a clean cloth or sponge, gently wipe the surface clean. The beauty of this cleaner lies in its versatility. It’s safe and effective on most surfaces, including countertops, appliances, cabinets, and even walls. Its gentle formula ensures that it won’t damage or discolor the surfaces it’s used on, making it ideal for daily use. For tougher stains or grime, let the solution sit on the surface for a minute or two before wiping it away. This brief dwell time allows the dish soap to penetrate and break down the grime, making it easier to wipe clean. 2. Revive Your Jewelry When using dish soap to clean your jewelry, the key is to create a solution that’s strong enough to tackle the grime but gentle enough not to damage the jewelry. Start by mixing a few drops of mild dish soap into a bowl of warm (not hot) water. The warmth of the water helps to loosen any dirt or oils clinging to the surface of your jewelry, making it easier to clean. Submerge your jewelry in the solution and let it sit for 15 to 30 minutes. This soaking time allows the soapy mixture to penetrate and break down the buildup of everyday pollutants, skin oils, and any products you’ve used that might have dulled the jewelry’s surface. After the soak, take a soft-bristle toothbrush, like a baby toothbrush or a soft jewelry cleaning brush, and gently scrub the jewelry. Pay special attention to crevices and intricate designs where dirt can easily accumulate. The bristles should be soft enough not to scratch the metal or stones but firm enough to remove the dirt. Rinse your jewelry thoroughly under running lukewarm water to wash away any remaining soap residue. It’s important to ensure the water flow isn’t too strong to avoid washing your jewelry down the drain. A strainer can be used during this process for extra safety. Finally, dry your jewelry with a soft, lint-free cloth. This step not only removes any water spots but also helps to buff the metal and stones back to their original shine. If necessary, you can use a hairdryer on the lowest setting to ensure no moisture is left in hard-to-reach areas, but keep the dryer at a safe distance to avoid heat damage.     3. Spot Treat Stains on Fabric To begin the treatment, identify the stained area on your garment. Applying a small amount of dish soap directly onto the stain is your first step. There’s no need for a large quantity; a dab roughly the size of a coin should suffice, depending on the size and severity of the stain. The concentrated power of the dish soap is typically strong enough to tackle the grease without the need for excessive amounts. Once you’ve applied the soap, the next step involves gently rubbing it into the fabric. This can be done using your fingertips or a soft-bristled brush, such as an old toothbrush, to work the soap into the fibers of the fabric. The goal here is to allow the soap to penetrate the stain thoroughly. However, it’s essential to perform this action gently to avoid damaging the fabric, especially if it’s delicate. After the dish soap has been adequately massaged into the stain, it’s crucial to let it sit for a few minutes. This waiting period allows the soap to break down the oils and grease, making the stain easier to remove during the washing process. Depending on the stain’s stubbornness, you may let the soap sit on the fabric for anywhere from five to thirty minutes. Before proceeding with this method, it’s wise to conduct a spot test on an inconspicuous area of the fabric. This precautionary step ensures that the dish soap won’t cause any discoloration or damage to the material. Some fabrics may react differently to dish soap, especially those with delicate dyes or compositions, so this step is crucial for avoiding unintended damage. Finally, wash the garment as you normally would, following the care instructions on the label. After the wash, inspect the stain area before drying. If the stain persists, you may repeat the treatment process before drying, as drying can set the stain further into the fabric. 4. Clean Your Tools and Outdoor Furniture Start by filling a bucket with warm water. The warmth of the water aids in dissolving the soap and loosening grime. Add a generous squirt of dish soap to the water, aiming for a ratio that creates a visibly soapy solution without being overly sudsy. This mixture strikes the perfect balance for effective cleaning without leaving a sticky residue. Submerge a scrub brush in this soapy water and begin to scrub your garden tools and outdoor furniture. The scrub brush’s bristles are firm

How Dish Soap Can Transform Your Cleaning Routine: Top 8 Tips Read More »

Clear vinegar cleaning spray bottle with simple design.

5 Vinegar Cleaning Easy Hacks for a Sparkling Home

Oh, vinegar cleaning! It’s not just for salads anymore. This humble kitchen staple is a cleaning powerhouse, perfect for those of us looking to keep our homes sparkling without breaking the bank or resorting to harsh chemicals. So, grab your vinegar bottle, and let’s dive into 5 amazing cleaning hacks that will make your home shine brighter than ever. 1. Glass and Mirror Cleaner The beauty of this method isn’t just in its simplicity but also in its effectiveness and environmental friendliness. When you mix equal parts water and vinegar, you’re creating a powerful solution that tackles dirt, grime, and those mysterious fingerprints that seem to appear out of nowhere. Using a spray bottle for your vinegar solution isn’t just about convenience; it’s about precision. It allows you to evenly distribute the mixture over the surface, ensuring that every inch of your glass or mirror gets covered without soaking it. This is key to avoiding drips and ensuring a streak-free finish. Now, when it comes to the wiping part, there’s a bit of an art to it. Using a clean cloth is a great choice, especially if it’s made of microfiber. These cloths are designed to pick up and trap dirt, which means they’ll hold onto the grime you’re trying to get rid of instead of just smearing it around. If you’re in a pinch, though, newspaper is a surprisingly effective alternative. The ink acts as a mild abrasive, helping to polish the glass as you wipe. Plus, it’s a great way to recycle. The magic moment comes when you step back and see the result. That streak-free shine isn’t just satisfying; it’s a clear sign that you’ve cleaned effectively without the need for harsh chemicals. This method is gentle enough to use as often as you need, making it perfect for keeping your home looking its best. And let’s not overlook the cost-saving aspect. Vinegar is incredibly affordable, especially compared to specialized glass cleaners. By opting for this natural solution, you’re not just making a choice that’s better for the environment; you’re also being kind to your wallet.     2. Microwave Cleaner Microwaves, being the workhorses of the kitchen, often end up splattered with all sorts of food residues. These residues can become as stubborn as a stain on a favorite shirt, especially after being zapped, reheated, and forgotten over time. The vinegar and water solution is like a spa treatment for your microwave, penetrating and softening the splatters and spills that seemed permanent. When you heat this mixture until it’s boiling, the steam generated plays a crucial role in the cleaning process. It’s not just about the heat; it’s about the moisture saturating every corner of your microwave, reaching places that a cleaning cloth or sponge might miss. This steam envelops the hardened food particles, breaking down their defenses and making them vulnerable to a simple wipe. But why stop at just cleaning? This method also helps to deodorize your microwave. Let’s face it, the mix of aromas from reheated leftovers, popcorn, and who-knows-what-else can create a not-so-pleasant bouquet. Vinegar, with its natural deodorizing properties, tackles these odors head-on, leaving your microwave smelling fresher. There’s also an element of safety to consider with this cleaning hack. The simplicity of using just vinegar and water eliminates the need for chemical cleaners, which can leave behind residues that might not be something you want to mix with your next microwave meal. Plus, this method avoids the potential hazards of scrubbing around the microwave’s electronic components with a wet cloth. After the vinegar and water solution has done its job, and you’ve carefully removed the hot bowl, all it takes is a damp cloth or sponge to wipe away the now-loosened grime. The difference can be astonishing, transforming a splatter-covered microwave into a clean, welcoming appliance ready for its next task. This approach to microwave cleaning is not just about achieving cleanliness; it’s about maintaining the longevity and performance of one of the most used appliances in your kitchen. Regularly cleaning your microwave with this vinegar steam method can help ensure it operates efficiently, without the burden of built-up residues that can interfere with its function. 3. Shower Head Detox Hard water deposits, which are essentially mineral buildups, can transform a once powerful shower into a disappointing drizzle. This not only affects your shower experience but can also contribute to the wear and tear of your shower head over time. The beauty of using vinegar to tackle this problem lies in its simplicity and effectiveness, providing a straightforward solution to a common household annoyance. When you secure a bag filled with white vinegar around the shower head, you’re essentially giving it a deep soak in a natural descaling solution. Vinegar, with its acetic acid content, is naturally adept at breaking down the lime scale and mineral deposits that hard water leaves behind. This process doesn’t require harsh chemicals or expensive cleaners; it’s an eco-friendly and cost-effective method that utilizes something many of us already have in our kitchens. Leaving the vinegar to work its magic overnight is crucial for the detox process. This extended contact time allows the vinegar to penetrate and dissolve the mineral buildup thoroughly. It’s a no-scrub solution that requires minimal effort but delivers maximum results. The convenience of this method is undeniable; it works while you sleep, transforming a neglected shower head into a fully functioning fixture by morning. In the morning, when you remove the bag and give the shower head a quick rinse, you’re not just washing away vinegar. You’re rinsing off the remnants of what was clogging your shower head, revealing the full potential of your shower’s water flow. The difference can be immediately noticeable, with water pressure restored and water flow evenly distributed through the nozzles. It’s as if your shower head has been given a new lease on life, ready to provide you with the invigorating showers you deserve. Moreover, this detox method extends beyond just improving water flow. It

5 Vinegar Cleaning Easy Hacks for a Sparkling Home Read More »