Kitchen Cleaning

clean oven

The Best Way To Clean Your Oven And Make It Shine In 5 Steps

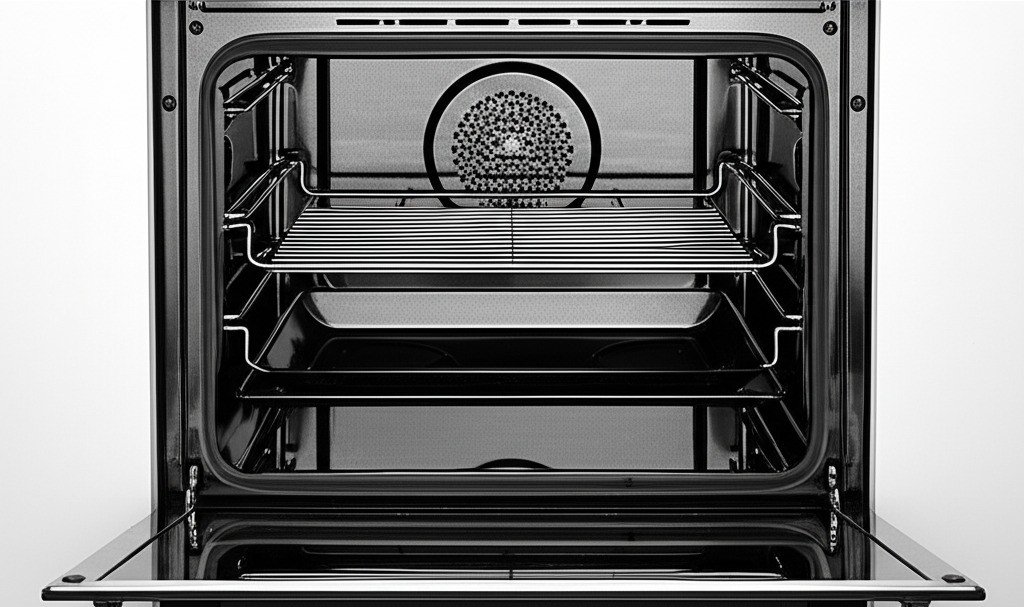
The Best Way To Clean Your Oven: Five Steps To a Spotless Interior Facing a filthy oven can feel like gearing up for a battle. The baked-on grime and mystery splatters look invincible, but with a clear plan you can conquer them and get your oven genuinely sparkling again. This is not only about appearance: a clean oven heats more evenly, cooks better, and keeps your whole kitchen smelling fresh. Roll up your sleeves and work through these five steps in order. Done methodically, the chore that takes most people an exhausting weekend becomes a manageable hour or two, with the waiting time doing the heavy lifting for you. Step 1: Prep Work, Safety, and Protection Safety and setup decide whether this job goes smoothly. Make absolutely sure the oven is completely cold before you begin, no exceptions: cleaning a warm or hot oven risks burns and makes cleaning fumes noticeably more intense. Then do the following preparation: Pull out the oven racks, which usually carry the worst grime, and set them in the sink or a bathtub lined with an old towel to prevent scratches. Clear everything else out: pizza stones, oven thermometers, and that forgotten baking tray. Remove loose debris with a small brush and dustpan, or the crevice tool on your vacuum, sweeping crumbs, ash, and charred food particles from the oven floor. Getting this out now prevents turning it into a muddy paste later. Lay newspaper or old towels on the kitchen floor in front of and beneath the oven door to catch drips, and set up ventilation by cracking a window or switching on the extractor fan. Step 2: Apply Your Chosen Cleaner Evenly With the oven prepped, bring in your cleaning solution, whether a heavy-duty commercial oven spray formulated for tough grease or a homemade paste of baking soda and water. Before you start, put on sturdy rubber gloves to protect your skin, and consider safety glasses if you are using a strong chemical spray, because these products are potent; Health Canada’s guidance on household chemical safety is worth following for any caustic cleaner. Coat every interior surface evenly and thoroughly: the sides, the back panel, the bottom, and the inside of the door. Avoid spraying cleaner directly onto visible heating elements or internal fans, which are sensitive components. Do not be shy with product on the really stubborn baked-on spots. A generous, even coat now means dramatically less elbow grease later. Step 3: The Waiting Game, Where the Real Cleaning Happens Now let patience do the work. This is not wasted time: the solution is busy penetrating and breaking down the caked-on grease and food residue. Check your product’s label for the manufacturer’s recommended dwell time, and see the table below for typical ranges. Whatever the recommendation, do not rush this stage, because the full, uninterrupted dwell is what makes the next step dramatically easier. Think of it as your secret weapon against excessive scrubbing, and use the downtime productively on the racks. Cleaner option Best for Typical dwell time Commercial oven spray Regular cleaning and moderate grease From around 30 minutes, always per the label Heavy-duty chemical cleaner Long-neglected, baked-on grime Several hours to overnight, per the label Baking soda and water paste A gentler homemade approach Several hours or overnight for tough messes Hot soapy water soak The removed racks While the cleaner dwells inside the oven Step 4: Scrub, Wipe, and Watch the Transformation The wait is over, and the cleaner has done the heavy lifting, so the grime should be significantly looser. Gather a non-scratch abrasive pad, a heavy-duty sponge, and a few clean rags. For spots that refuse to budge, a plastic scraper helps; an old credit card works in a pinch if used carefully. Wipe and scrub the interior systematically, starting at the top and working down, or finish one section before moving on, and do not forget the glass panes in the door. The deposits come away far more easily now than they would have with cold water and muscle alone. Rinse your sponge or rag frequently in a bucket of clean water so you are not simply spreading loosened dirt around the cavity, and pay special attention to corners, crevices, and recesses where grease loves to hide. Step 5: Rinse, Dry, and Reassemble On the home stretch. Now remove every last trace of cleaning product, because residue can produce nasty fumes or alter the taste of your food the next time you bake. Wipe all interior surfaces multiple times with clean, damp cloths, rinsing one often if that is what it takes, until no soapy or slippery feel remains. For an effective final rinse, many people wipe the surfaces with a cloth dampened in water mixed with a little white vinegar, which helps neutralize remaining cleaner residue and adds a nice sparkle. Then air-dry the oven with the door open for a few hours, or dry it thoroughly with a clean towel or microfiber cloth. Give the soaked racks a final rinse, dry them completely, and slide them back into position. Remove your floor protection and take a moment to admire the work. Oven Cleaning FAQ Can I use the self-cleaning cycle instead? A self-clean burns off soil with extreme heat, but it still cannot handle thick grease piles or loose debris, and many manufacturers advise against additional chemical cleaners with the cycle. The five manual steps above work on any oven and give you control over stubborn spots. What about the oven door glass? Clean it as part of Step 4 rather than skipping it. With the interior surfaces degreased during the dwell time, the panes wipe far more easily, and a dry microfiber buff at the end keeps the view into the oven streak-free. How often should an oven be cleaned? A light wipe after big spills keeps grime from carbonizing, and pairing it with a scheduled regular cleaning visit prevents the multi-hour buildup described in this post. Kitchens that roast or

The Best Way To Clean Your Oven And Make It Shine In 5 Steps Read More »
2 people using a kitchen degreaser to clean

5 Best Ways to Use a Kitchen Degreaser for Kitchen and Home Cleaning

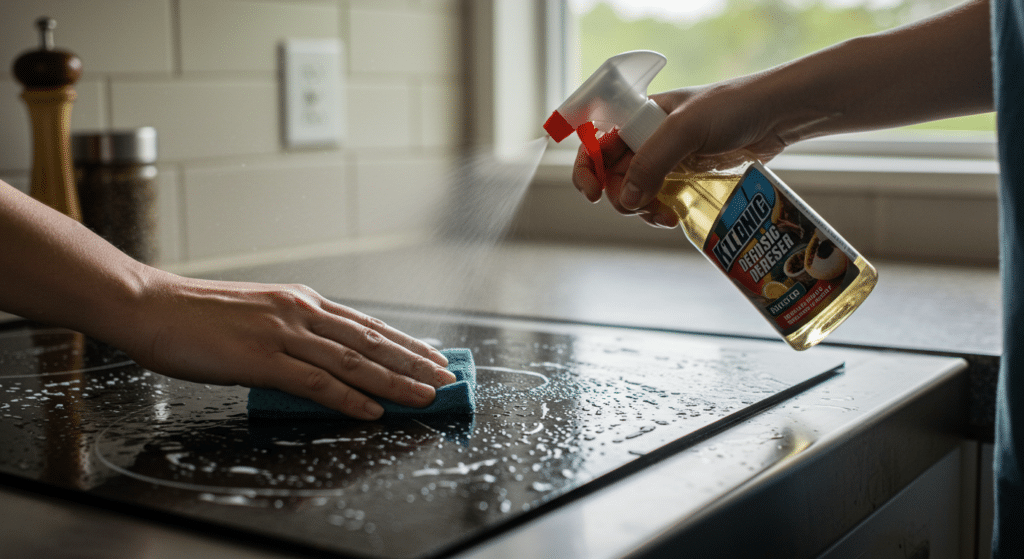
Using a degreaser can seriously upgrade how you clean around the house-especially in the kitchen. Regular cleaners don’t always cut through layers of grease, but a degreaser is built to break it down fast. Whether you’re dealing with stovetop splatter, sticky cabinets, or greasy garage floors, knowing how to clean with a degreaser makes your job a whole lot easier. Here are five ways to use it right and get better results every time you clean. 1. Stovetops and Cooktops Need a Degreaser for Deep Cleaning Stovetops collect everything from bubbling sauces to frying oil, and it doesn’t take long before they start looking grimy. Cleaning with a degreaser makes it easy to cut through thick grease. Spray the surface when it’s cool, let the product sit for a few minutes, and wipe it clean with a damp cloth. You’ll see a big difference right away. To keep your stovetop looking fresh, you can make this part of your weekly kitchen cleaning routine. The key is to let the degreaser work before scrubbing. That “wait time” allows it to break down buildup so you don’t have to scrub hard or risk scratching the surface. For gas stovetops, don’t forget to remove the burner grates and soak them in degreaser too. They often get overlooked but can build up the most grease. After everything is rinsed and dry, you’ll have a clean, smooth cooking surface ready for your next meal. 2. Use a Degreaser on Range Hoods and Filters Range hoods are grease magnets-especially if you cook with oil often. Over time, steam and grease combine into a sticky mess that clings to the hood and clogs the filter. Cleaning with a degreaser helps remove that grime quickly and keeps your kitchen air cleaner. Spray the surface and use a cloth to wipe it down after 5 minutes. If your hood has a metal filter, take it out and soak it in hot water mixed with a degreaser. Leave it in the sink for 10–15 minutes. Once the grease lifts, scrub it gently and rinse thoroughly before putting it back. You’ll be surprised how much better the fan works. Not only does a clean range hood work more efficiently, but it also helps prevent lingering kitchen smells. Regular degreaser cleaning keeps the fan blades, motor cover, and light covers in better shape too. It’s one of those areas most people forget-until they can’t unsee the buildup! 3. Degrease Kitchen Cabinets Without Damaging the Finish Kitchen cabinets may look clean, but they often hold onto invisible grease from cooking and handling. Over time, cabinet doors can feel sticky or look dull. Cleaning with a degreaser is a simple fix. Spray a cloth-not the cabinet itself-and gently wipe along the surface. Rinse with a clean damp cloth afterward. Always test the degreaser on a hidden spot first to avoid any damage. Some cabinet finishes are delicate, but most quality degreasers won’t harm the surface if you use the right amount and rinse it off. This quick step helps keep your kitchen looking well-kept and inviting. Use this method especially around cabinet handles and above the stove where grease tends to collect. Even white cabinets, which show grime easily, can be cleaned this way without discoloring the surface. It’s one of the most satisfying degreaser cleaning jobs you can do in the kitchen. 4. Degreaser Works Great for Cleaning Trash Cans Trash cans in the kitchen take a beating. Between spills, leaky bags, and everyday use, grease and grime can build up fast. Cleaning with a degreaser helps sanitize and remove stubborn stains. Spray the interior and exterior and let it sit for 10 minutes before scrubbing with a sponge or brush. If your trash can has a lid or foot pedal, don’t forget those areas too. They get touched constantly and are easy to forget during quick cleanups. A good degreaser dissolves the gunk in no time, making the can smell better and look new again. Rinse the trash can thoroughly and let it dry before using it again. Doing this once a week can prevent bacteria, odors, and that annoying sticky feeling around the rim. It’s a small task that makes your kitchen feel cleaner overall, and a degreaser really does most of the heavy lifting. 5. Garage Floors and Utility Areas Benefit From a Strong Degreaser If you’ve got a garage, laundry area, or utility space with oil stains or greasy footprints, this is the perfect place to use a degreaser. These spots get dirty quickly, and regular floor cleaners won’t always do the trick. Spray the degreaser over the affected area, wait at least 10 minutes, then scrub and rinse. For tougher stains, you might need to repeat the process, but the degreaser will loosen up the grime way better than soap alone. It works great on concrete, tile, or sealed floors. Just make sure to ventilate the area if you’re working inside. After rinsing, you’ll notice the surface not only looks cleaner but also feels safer-less slippery and sticky. Keeping these utility spaces clean with a degreaser cuts down on tracking grease back into your home. It’s a quick task with big results, especially if you have kids or pets running in and out. Let Toronto Shine Cleaning Handle the Dirty Work Using a degreaser is a smart way to keep your kitchen and home clean, but let’s be real-sometimes there just isn’t enough time in the day. That’s where Toronto Shine Cleaning comes in. We know the best degreaser cleaning methods and bring all the right products to get your home spotless without the stress. Whether it’s greasy kitchen cabinets, a grimy garage floor, or a range hood that hasn’t been touched in months, our team knows how to clean it right. Don’t waste hours scrubbing-book Toronto Shine Cleaning today and enjoy a fresher, cleaner home without lifting a finger.

5 Best Ways to Use a Kitchen Degreaser for Kitchen and Home Cleaning Read More »

Desorganized kitchen smelling bad

6 Tricks to Get Rid of Kitchen Smells After Cooking

Cooking at home is awesome-until the smell of last night’s dinner hangs around like an uninvited guest. If you’re wondering how to get rid of kitchen smells after cooking, you’re not alone. Whether it’s fish, garlic, or fried food, certain kitchen smells love to linger. But don’t worry-we’ve got six easy tricks to freshen up your kitchen fast. 1. Ventilate Right Away to Stop Kitchen Smells from Settling Proper ventilation is the first step to keep kitchen smells under control. Always turn on your range hood or fan before you even start cooking. This helps direct steam, grease, and food particles out of your home before they can settle onto cabinets, curtains, and other surfaces. The sooner you start ventilating, the better. If you don’t have a range hood or a powerful fan, crack open a few windows to get air circulating. You can even place a box fan near a window to push the cooking air outside. Cross-ventilation is a simple way to flush out unwanted kitchen smells while you’re still cooking. After you’re done, leave the fan or windows open for a bit longer. This helps clear out any lingering kitchen smells that didn’t escape during the cooking process. It may seem like a small step, but it makes a big difference in how your kitchen smells later. 2. Boil Lemon Peels and Cinnamon Sticks After Cooking Want to replace bad kitchen smells with something fresh? Boiling lemon peels and cinnamon sticks is a quick and natural way to do it. Just fill a pot with water, add the peels and cinnamon, and let it simmer on low heat for 10–20 minutes. It works like a natural air freshener without any synthetic fragrances. This method doesn’t just mask kitchen smells-it helps neutralize them. The natural oils from lemon and cinnamon break down lingering odors in the air, making your space smell clean and cozy. It’s a great little trick to have up your sleeve, especially after cooking fish, onions, or anything fried that causes strong kitchen smells. You can even try adding cloves or orange peels for a different scent. This trick is easy, budget-friendly, and chemical-free, which makes it perfect for everyday use. Plus, your kitchen ends up smelling like a cozy bakery instead of last night’s stir-fry.     3. Take Out the Garbage and Food Scraps Right Away The trash can is one of the biggest reasons kitchen smells hang around. After you cook, especially if you’ve used meat or dairy, make sure to toss all scraps and food packaging right away. Don’t leave them sitting overnight-they’ll stink up the place fast. Even if your trash doesn’t look full, it might be holding onto a lot of hidden kitchen smells. It’s always a good idea to tie the bag up and take it outside after a big cooking session. You’ll notice the difference almost immediately, especially if you cook with strong spices or oils. Also, don’t forget about compost bins or food waste containers. These can build up kitchen smells just as quickly. Rinse them out regularly and use liners when possible to prevent odors from soaking into the plastic. Clean bins mean a fresher kitchen. 4. Wipe Down Counters and Stovetops Immediately Grease and food splatter love to cling to your counters and stove. After you’re done cooking, take a couple of minutes to wipe everything down with a good all-purpose cleaner. This stops kitchen smells from settling into sticky surfaces and keeps things looking fresh too. Make sure to get into corners, behind knobs, and under burners. These areas tend to trap tiny bits of food and oil, which can start to smell if not cleaned up right away. A quick wipe now saves you from dealing with lingering kitchen smells later. Don’t forget your backsplash, microwave exterior, and even cupboard handles. Kitchen smells don’t just come from what’s in the air-they stick to every surface. The more you clean up immediately, the less your kitchen will smell hours later.     5. Use Coffee Grounds or Baking Soda to Absorb Kitchen Smells Both coffee grounds and baking soda are excellent at absorbing kitchen smells. Just place a bowl of either one on the counter overnight after cooking a strong-smelling meal. By morning, most of the lingering odor will be gone or drastically reduced. Coffee grounds work well because they contain nitrogen, which helps neutralize kitchen smells in the air. Baking soda is also highly effective because it traps odor molecules. You can even sprinkle some in your garbage can or near your sink for extra freshness. Make sure not to mix baking soda with vinegar, though. That combo might look foamy, but it stops working once the fizz is over. Stick to dry methods like coffee or plain baking soda for best results, especially when you’re dealing with strong kitchen smells. 6. Clean Out Your Sink and Garbage Disposal Your sink might look clean, but food particles can hide in the drain and garbage disposal, causing stubborn kitchen smells. After cooking, give your sink a quick rinse and scrub it down with dish soap. Pay attention to the edges and the drain opening. For your garbage disposal, toss in a few ice cubes and lemon peels, then run it for 30 seconds. The ice helps knock off stuck-on bits inside the disposal, and the lemon peels leave a fresh scent behind. It’s simple, but super effective at fighting kitchen smells. Do this at least a few times a week, especially if you cook often. A clean drain and disposal can go a long way in keeping your entire kitchen smelling fresh. Kitchen smells can build up in places you can’t see, so regular maintenance is key.     Conclusion: Let Toronto Shine Cleaning Handle the Tough Kitchen Smells Keeping your kitchen smelling fresh can feel like a full-time job, especially if you’re cooking every day. While these tips definitely help, sometimes you need a deeper clean to get rid of stubborn

6 Tricks to Get Rid of Kitchen Smells After Cooking Read More »

Hand painted image about Leslieville

Deep Cleaning Services in Leslieville, We Do It Right!

Deep Cleaning Services in Leslieville for a Spotless Home Leslieville is one of Toronto’s most vibrant neighborhoods, with its trendy cafes, historic homes, and lively community spirit. But busy city life can make it hard to keep your home truly clean. That is where professional deep cleaning services in Leslieville come in. Toronto Shine Cleaning specializes in transforming your living space by tackling the embedded dirt, dust, and grime that accumulate over time. Whether you need a one-time refresh or ongoing care, our team delivers results that last. Our bonded and insured professionals bring over a million dollars in insurance coverage and a ten thousand dollar accidental breakage surety bond, so your home is in safe hands. Why Choose Professional Deep Cleaning in Leslieville? Standard cleaning keeps surfaces tidy, but deep cleaning reaches the hidden spots that collect grime. Our trained professionals go beyond surface-level dusting to scrub, sanitize, and restore every corner of your home. Here is why Leslieville residents trust us: Experienced Professionals — Our skilled cleaners know how to handle even the most stubborn messes safely and effectively. Eco-Friendly Products — We use non-toxic cleaning supplies that are safe for your family and the environment. For guidance on safe household cleaning, the Government of Canada offers tips on using household products safely. Customizable Service — Need extra attention on a specific area? We tailor every cleaning to your needs. Satisfaction Guaranteed — We do not leave until the job is done right and you are happy with the result. What Our Deep Cleaning Service Covers Our deep cleaning service covers every inch of your home, focusing on areas often missed in routine cleaning. Proper cleaning and disinfecting of high-touch surfaces is key to a healthy home, and the CDC recommends a clean-first approach followed by disinfection when needed. Area What We Clean Kitchen Countertops, backsplash, sinks, stovetops, oven, microwave, refrigerator shelves, cabinets, and drawers Bathroom Toilets, tubs, showers, tiles, grout, sinks, mirrors, and high-touch surfaces like light switches and doorknobs Living Areas & Bedrooms Furniture dusting, vacuuming under furniture, window washing, upholstery and mattress vacuuming, floor mopping Floors & Carpets Carpet vacuuming, stain treatment, hardwood and tile mopping, high-traffic area care Dust & Cobwebs Baseboards, vents, ceiling fans, door frames, window sills, and cobweb removal Benefits of Regular Deep Cleaning Investing in professional deep cleaning services in Leslieville pays off in several ways: Healthier Home — Deep cleaning removes allergens, bacteria, and dust mites, significantly improving indoor air quality for your family. This is especially valuable for households with children, seniors, or pets who are more sensitive to airborne irritants. The Health Canada offers guidance on indoor air contaminants to help families breathe easier at home. Extends Longevity — Regular deep care preserves floors, furniture, and appliances, saving money on repairs and replacements. When you protect your investment in your home, every cleaning session adds years to your furnishings and finishes. Stress-Free Living — A thoroughly clean home promotes relaxation and peace of mind without the hassle of doing it yourself. Coming home to a sparkling space after a long day makes a real difference in your quality of life. Ready for Any Occasion — Hosting guests or preparing to sell? A deep clean ensures your home looks its absolute best and makes a lasting impression on visitors or potential buyers. How Often Should You Book a Deep Clean? For most homes, scheduling a deep clean every three to six months keeps things fresh. Households with pets, allergy sufferers, or young children may benefit from more frequent service. We also offer regular maid cleaning to maintain your home between deep sessions, keeping surfaces tidy and clutter under control. If you are moving in or out, our move-in/out cleaning ensures a completely fresh start in your new space. Who Needs Deep Cleaning in Leslieville? Our deep cleaning services in Leslieville are perfect for busy professionals who lack time for thorough cleaning, families with kids and pets who need extra help managing fur and spills, homeowners preparing to sell who want a spotless impression, new homeowners and renters starting fresh, and anyone recovering from a renovation who needs construction dust removed. No matter your situation, we customize our approach to match your home and your schedule. Frequently Asked Questions How is deep cleaning different from regular cleaning? Deep cleaning reaches areas that standard cleaning skips, such as inside appliances, behind furniture, baseboards, and grout. It is a more thorough, detail-oriented service that restores rather than maintains. Do I need to be home during the cleaning? Not at all. Many clients provide access instructions and return to a spotless home. Our team is bonded and insured for your complete peace of mind. What products do you use? We use eco-friendly, non-toxic cleaning products that are safe for children, pets, and anyone with sensitivities. Let us know if you have specific requirements and we will accommodate them. Can I add extra services to my deep clean? Yes. Our services are fully customizable. Whether you need oven cleaning, window washing, or carpet treatment, we can tailor every visit to your needs. How do I get a quote for deep cleaning in Leslieville? Call us at (647) 424-0355 or visit our pricing page for transparent rates. We serve Leslieville and all of Toronto. Ready to give your home the deep clean it deserves? Contact Toronto Shine Cleaning at (647) 424-0355 to book your appointment today. You can also find your location to confirm we serve your area and read what our customers say on our reviews page.

Deep Cleaning Services in Leslieville, We Do It Right! Read More »

A cleaning setup featuring a blue bucket with a microfiber cloth

Spring Is Coming! Top Things to Clean in March

March is the perfect time to shake off the winter blues and get your home ready for spring. The changing season means more sunlight, warmer temperatures, and a fresh start. A deep clean in March will help you clear out winter dust, refresh your space, and prepare for the months ahead. Here are seven essential areas to focus on during your March cleaning routine. 1. Wash Your Windows Inside and Out Winter weather leaves behind streaks, dirt, and dust on windows, making them look dull and blocking natural light. That’s why one of the first things to clean in March should be your windows. Grab a microfiber cloth and a streak-free glass cleaner to give them a thorough clean. For extra shine, use a squeegee to remove any remaining residue. Don’t forget about the window tracks and sills! These areas collect dust, grime, and even dead bugs over time. Use a vacuum attachment or an old toothbrush to scrub away dirt before wiping everything down. If you have screens, take them out and rinse them with soapy water to remove built-up dust. A proper clean in March will ensure your windows let in more natural light, instantly brightening your home. With longer days ahead, you’ll want to enjoy all the sunshine you can get! 2. Deep Clean Carpets and Rugs Your carpets and rugs have taken a beating over the winter months, collecting dirt, pet hair, and dust from heavy foot traffic. Even if you vacuum regularly, a deep clean in March is essential to remove embedded dirt and allergens. A steam cleaner or professional carpet cleaning service can make a huge difference. Before deep cleaning, move furniture to vacuum underneath and along baseboards where dust collects. If you notice any stains, treat them with a carpet stain remover and let it sit before scrubbing gently. Baking soda is also great for freshening up carpets-just sprinkle it on, let it sit for 15 minutes, and vacuum thoroughly. A thorough clean in March will not only make your carpets look better but also improve indoor air quality. With allergy season approaching, getting rid of dust and allergens now will help you breathe easier in the coming months. 3. Declutter and Organize Closets Spring is the perfect time to go through your closets and get rid of clothing you no longer wear. One key step to clean in March is decluttering your wardrobe. Start by taking everything out and sorting items into keep, donate, and discard piles. If you haven’t worn something in over a year, it’s probably time to let it go. Once you’ve sorted your clothes, organize them by category or season to make finding outfits easier. Store away heavy winter coats, boots, and scarves to free up space for lighter clothing. Investing in storage bins or vacuum-sealed bags can help keep everything tidy and protected. A well-organized closet saves time and makes getting dressed in the morning much less stressful. Plus, donating clothes you no longer need helps others in need and gives your wardrobe a fresh start for spring. A proper clean in March will leave your space looking neat and refreshed. 4. Clean Out Your Fridge and Pantry March is a great time to go through your kitchen and clear out expired or unused food. A kitchen clean in March should start by emptying your fridge and wiping down shelves and drawers with warm, soapy water. Toss anything past its expiration date and reorganize what’s left to make it easier to access. The pantry needs attention too! Go through dry goods like pasta, rice, and canned foods, checking for anything expired. Wipe down shelves and organize items so you can easily see what you have. This is also a good time to plan meals using ingredients you already own, reducing food waste. A clean and organized kitchen makes meal prep easier and ensures that your food stays fresh. With warmer weather coming, you’ll want a refreshed space to start making lighter, healthier meals. Prioritizing a kitchen clean in March will set you up for a fresh and organized spring. 5. Wash Bedding and Rotate Your Mattress Your bed is where you spend a lot of time, and it collects dust, sweat, and bacteria over time. One of the most important things to clean in March is your bedding. Strip all your pillowcases, sheets, and comforters, and wash them in hot water. If you have a mattress cover, wash that too for an extra layer of cleanliness. While your bedding is in the wash, take time to rotate or flip your mattress. This helps prevent uneven wear and extends its lifespan. If you notice any stains, spot clean them with a mild detergent or upholstery cleaner. Sprinkling baking soda over the mattress and vacuuming it up after 30 minutes can also help eliminate odors. Fresh bedding and a clean mattress improve sleep quality and make your bedroom feel more inviting. After all, there’s nothing better than climbing into a crisp, clean bed at the end of the day. A proper clean in March will ensure your sleep space is fresh and hygienic. 6. Scrub Baseboards and Walls Baseboards and walls often get overlooked, but they collect dust, dirt, and scuff marks over time. To properly clean in March, use a damp microfiber cloth or a mild soap solution to wipe down baseboards, removing built-up grime. Pay special attention to corners and edges where dust accumulates. Walls also need a refresh, especially in high-traffic areas like hallways and kitchens. A gentle wipe with a damp cloth can remove fingerprints, stains, and dust. If you have stubborn marks, try using a magic eraser for a deeper clean. A good clean in March will instantly brighten up your home, making it feel fresh and well-maintained. It’s a simple but effective way to prepare for the new season while eliminating winter grime. 7. Refresh Outdoor Spaces As the weather warms up, you’ll want to spend more time outside, so now is

Spring Is Coming! Top Things to Clean in March Read More »

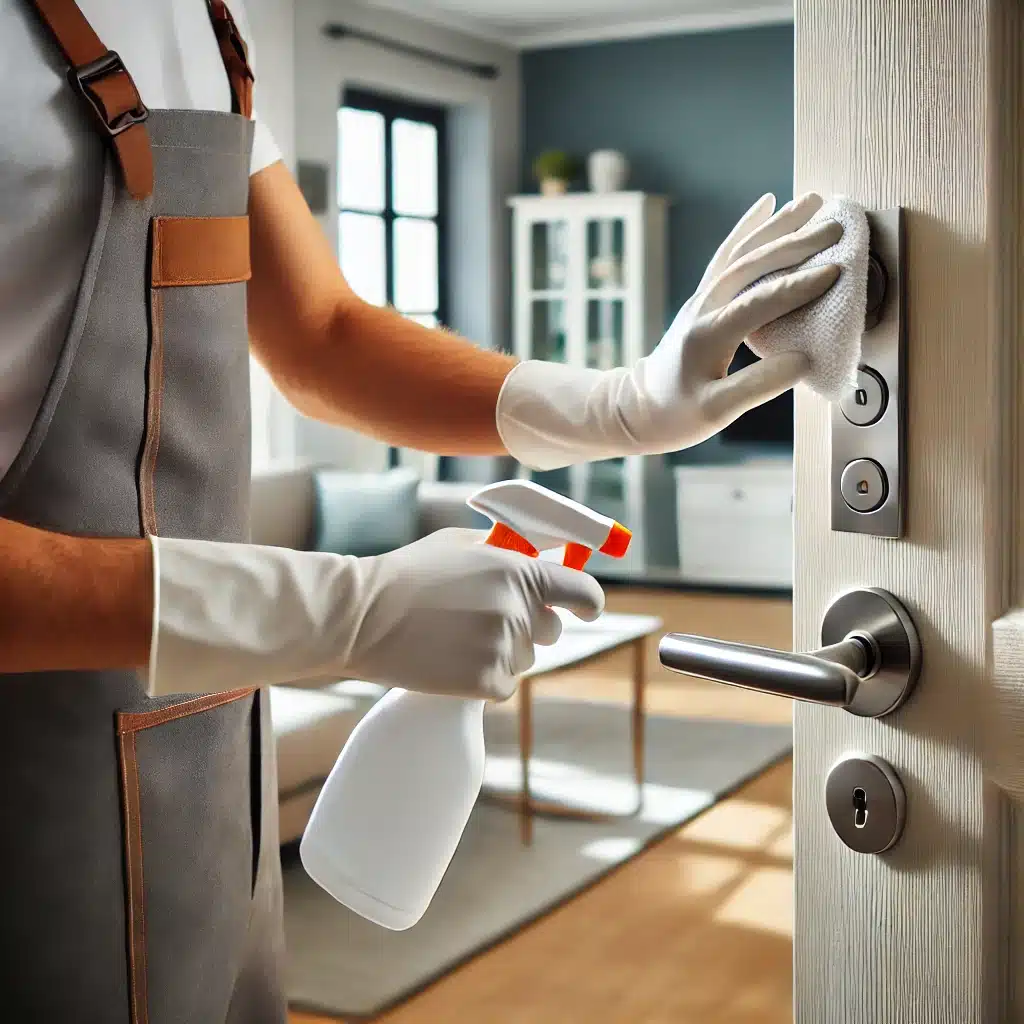
High-traffic area on doorknob being cleaned

Hidden Germ Hotspots in Your Home & How to Clean Them

Keeping a clean home isn’t just about appearance-it’s also about maintaining a healthy environment. Many areas in your home are breeding grounds for bacteria and viruses. Regular cleaning and disinfecting of these hidden germ hotspots can prevent illness and keep your space truly clean. Here are the top places germ hotspots thrive and how to clean them effectively. 1. Kitchen Sponge & Sink The kitchen sponge is one of the dirtiest items in your home. It absorbs moisture, food particles, and bacteria, making it a perfect breeding ground for germ hotspots . The sink, especially around the drain, also harbors harmful bacteria like E. coli and salmonella. Without regular sanitization, these germ hotspots can transfer bacteria to your dishes, utensils, and food preparation surfaces, increasing the risk of contamination. To keep your kitchen hygienic, sponges should be replaced every one to two weeks to prevent excessive bacterial buildup. You can sanitize sponges daily by microwaving a damp sponge for one to two minutes, which effectively kills germs. Additionally, washing the sink with a disinfectant or hot, soapy water every day will help eliminate bacteria and maintain a germ-free environment in one of the most frequently used areas of the home. Neglecting to clean these areas properly can lead to the spread of harmful bacteria across kitchen surfaces. Using disposable or antibacterial sponges can further reduce contamination risks. Consider also using separate sponges for different cleaning tasks to prevent cross-contamination between surfaces like countertops, dishes, and cutting boards.     2. Doorknobs & Light Switches High-touch surfaces like doorknobs, light switches, and cabinet handles collect bacteria and germs from multiple hands throughout the day. These germ hotspots are often overlooked during regular cleaning routines, yet they play a major role in the spread of illnesses such as the flu and the common cold. With frequent contact, bacteria and viruses can survive on these surfaces for hours or even days. To keep these surfaces clean, it’s essential to disinfect them daily using antibacterial wipes or a disinfectant spray. Focus on areas that receive the most traffic, such as bathroom and kitchen switches, as well as frequently used doorknobs. A quick wipe may remove visible grime, but a deeper disinfecting routine ensures harmful germs are completely eliminated. In addition to disinfecting, using a microfiber cloth to first remove dust and dirt can improve the effectiveness of cleaning products. Encouraging household members to wash their hands frequently can also reduce the transfer of germs onto these high-contact surfaces. Regular maintenance can make a significant difference in maintaining a hygienic living space. 3. Remote Controls & Electronics TV remotes, game controllers, and smartphones are handled by multiple people, making them germ hotspots for bacteria and viruses. These electronic devices often harbor more germs than toilet seats due to frequent use and limited cleaning. Without regular disinfecting, germs from unwashed hands, food residue, and even sneezing can accumulate on their surfaces. To clean these devices effectively, use a disinfectant wipe to sanitize remotes and controllers daily. Pay close attention to crevices where dirt and bacteria can hide. For smartphones and tablets, use a microfiber cloth with a small amount of isopropyl alcohol to safely disinfect without damaging sensitive screens or components. Excessive moisture can damage electronics, so avoid using too much liquid when cleaning. If possible, consider using a protective case that can be easily wiped down. Establishing a habit of cleaning electronics frequently will help prevent the spread of germs and maintain a healthier home environment. 4. Toothbrush Holders & Bathroom Faucets Moist environments like the bathroom encourage bacterial growth. The toothbrush holder and faucet handles are among the most overlooked germ hotspots. Toothbrushes sit in holders that collect water residue and bacteria, while faucet handles accumulate germs from dirty hands before and after washing. To maintain hygiene, the toothbrush holder should be washed in hot, soapy water at least once a week to remove buildup. In addition, toothbrushes should be stored in an upright position to allow proper drying and to prevent bacterial growth. Replacing toothbrushes every few months is also essential for oral hygiene and reducing bacterial exposure. Bathroom faucets require regular disinfecting since they are touched before and after handwashing. Using a cleaning spray or antibacterial wipes to sanitize faucet handles daily can help minimize germ accumulation. Proper cleaning in the bathroom is crucial for preventing the spread of bacteria, especially in shared living spaces.     5. Pillows & Bedding Your bed can accumulate dust mites, sweat, and dead skin cells, which can trigger allergies and skin issues. Many people focus on washing sheets but forget that pillows and mattresses also harbor allergens and bacteria. Without regular cleaning, these hidden germ hotspots can impact respiratory health and sleep quality. To maintain cleanliness, pillowcases and sheets should be washed weekly in hot water to eliminate dust mites and bacteria. Using a mattress protector can help prevent dirt buildup, but vacuuming and airing out the mattress monthly is also recommended. Dust mites thrive in warm, humid environments, so keeping the bedroom well-ventilated can help reduce their presence. Pillows should be replaced every one to two years, as they can become a breeding ground for bacteria over time. If possible, washing pillows in hot water every few months can help maintain a fresh and hygienic sleeping environment. A clean bed contributes to better overall health and well-being. 6. Refrigerator Handles & Drawer Pulls The fridge handle is touched multiple times daily, often before or after handling raw food. Drawer pulls in the kitchen and bathroom also accumulate bacteria over time. These germ hotspots are frequently used but often neglected when it comes to cleaning, allowing germs to spread easily. To prevent contamination, refrigerator handles should be wiped down daily with a disinfectant spray or wipe. Kitchen drawers and cabinets also require regular attention, as food particles and grease can create an environment for bacteria to thrive. Cleaning the inside of drawers at least once a month can help prevent mold and bacteria buildup.

Hidden Germ Hotspots in Your Home & How to Clean Them Read More »

Blank paper and pen with apple at side

February Cleaning Checklist: Keep Your Home Fresh

As February rolls in, keeping your home clean and fresh is essential to combat winter dust and germs. A well-planned cleaning checklist will ensure your home stays cozy, healthy, and organized. Follow these steps to refresh your space and prepare for the upcoming spring season. 1. Deep Clean High-Traffic Areas Winter months bring in dirt and moisture from outside, making entryways, hallways, and living rooms prone to buildup. Vacuum carpets thoroughly to remove trapped dirt and allergens. Using a high-quality vacuum with a HEPA filter can help improve air quality while ensuring dust and pet dander are minimized. For hardwood or tile floors, mopping with a gentle but effective cleaner will remove grime without damaging surfaces. Baseboards and corners often collect dust and debris, making them important areas to clean regularly. Wipe down baseboards with a damp microfiber cloth to remove accumulated dirt. If scuff marks are visible, a magic eraser can work wonders in restoring the look of your baseboards. Don’t forget to clean under furniture, where dust can accumulate unnoticed. Entryways tend to get especially messy in winter, with salt, snow, and mud being tracked in from outside. Consider placing a heavy-duty doormat by the front door and asking family members to remove their shoes upon entering. A shoe rack or storage bench near the entry can help keep things organized and prevent unnecessary messes from spreading throughout the home. 2. Dust and Disinfect Frequently Used Surfaces Germs thrive during the colder months, making it crucial to disinfect countertops, doorknobs, and light switches regularly. Using a disinfectant spray or wipes ensures bacteria and viruses are eliminated, reducing the risk of illness spreading throughout the household. Pay special attention to kitchen surfaces where food is prepared, as these areas can harbor germs and contaminants. Dusting should be a part of your weekly cleaning checklist to prevent allergens from accumulating. Use a microfiber cloth or an electrostatic duster to trap dust rather than simply spreading it around. Ceiling fans, air vents, and window blinds often collect dust that can trigger allergies if left unattended. Regularly wiping down these surfaces will contribute to a healthier indoor environment. Electronics are another common source of dust and germs. Wipe down remote controls, computer keyboards, and smartphones with a disinfectant wipe. These high-touch items can accumulate bacteria quickly, so making this a habit will help maintain a cleaner and healthier home.     3. Refresh Upholstery and Bedding Soft surfaces like couches, curtains, and mattresses trap dust and odors. Over time, these fabrics can develop musty smells, especially during winter when windows remain closed. To combat this, vacuum upholstered furniture thoroughly using an upholstery attachment. Be sure to get into crevices and under cushions, where dirt and crumbs often collect. Bedding should be washed regularly to maintain freshness and hygiene. Pillowcases, sheets, and comforters should be laundered at least once a week using warm water to kill bacteria and dust mites. If possible, hang bedding outside on a dry, sunny day to naturally freshen and eliminate odors. Rotating and flipping your mattress every few months also helps maintain even wear and prolongs its lifespan. For an added freshness boost, consider using fabric sprays or placing baking soda on upholstery before vacuuming. This can help neutralize odors and leave your home smelling clean and inviting. If you have pets, using a pet-specific upholstery cleaner will help remove fur and dander while keeping fabrics in great condition. 4. Clean and Organize Kitchen Spaces Kitchens require regular maintenance to avoid grease and bacteria buildup. Begin by wiping down cabinets and countertops with a grease-cutting cleaner to remove any residue from cooking. Pay special attention to areas around the stove, where grease splatters are most common. A mixture of warm water and mild dish soap works well for general cleaning checklist without leaving harsh chemical residues. Your oven is another area that needs to be in the deep cleaning checklist. Use a baking soda paste or a commercial oven cleaner to remove baked-on grime and spills. Let the cleaner sit for a few hours before wiping it away with a damp cloth. Don’t forget to clean the stovetop, including burner grates and knobs, to keep your kitchen looking spotless. Pantry organization is key to maintaining an efficient kitchen. Go through your pantry and discard expired items. Group similar items together and use storage bins or labeled jars to keep everything neat. This will not only make meal prep easier but also prevent food waste by ensuring you use ingredients before they go bad.     5. Tackle Bathroom Grime and Mold The humidity from hot showers can lead to mold growth in bathrooms. To prevent this, always use an exhaust fan or open a window to improve ventilation. Mold and mildew thrive in damp environments, so keeping air circulation strong will help prevent buildup. Scrubbing tile grout is an essential part of any cleaning checklist. Use a grout brush and a baking soda paste to lift dirt and discoloration. For tougher stains, a hydrogen peroxide solution can work wonders in restoring grout to its original brightness. Regularly cleaning grout helps maintain a fresh and hygienic bathroom space. Mirrors and fixtures should also be cleaned frequently to prevent water spots and soap scum buildup. A streak-free glass cleaner works best for mirrors, while a vinegar-free cleaning solution is ideal for faucets and showerheads. Replacing old sponges, shower liners, and towels ensures a fresh and inviting bathroom environment. 6. Declutter and Prepare for Spring Take advantage of the last winter month to declutter closets, donate unused items, and prepare for a seasonal refresh. Start by sorting items into categories: keep, donate, and discard. This method makes decluttering more manageable and ensures that only essential items remain. Closets can easily become overstuffed during winter. Rotate seasonal clothing by storing bulky winter coats and sweaters in vacuum-sealed bags to free up space. Organizing clothes by type and color can also make it easier to find outfits and maintain order in your

February Cleaning Checklist: Keep Your Home Fresh Read More »

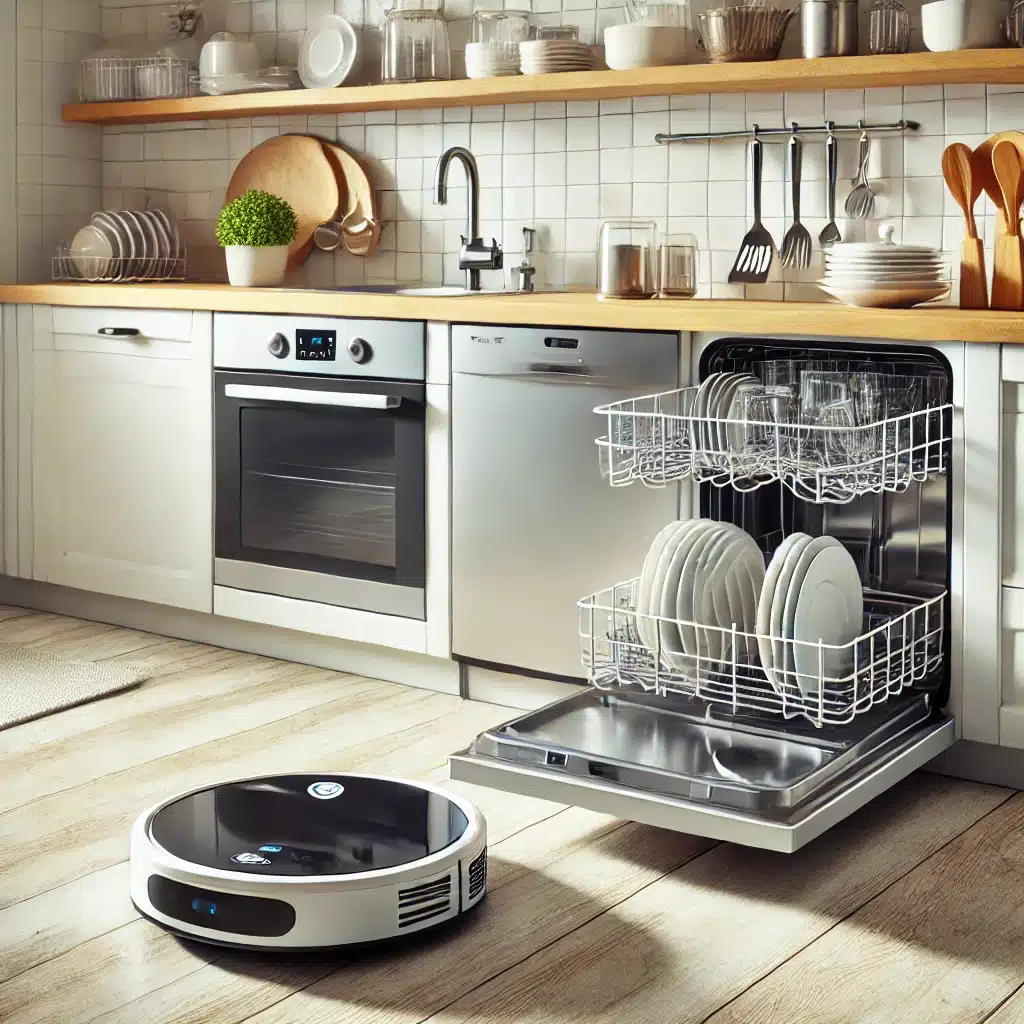
Automatic cleaning utencils for time saving cleaning

6 Easy Time Saving Cleaning Hacks You Need to Try

Keeping your home clean doesn’t have to be a time-consuming task. With these smart time saving cleaning hacks, you can maintain a spotless home while reducing effort. These quick and effective tricks will make time saving cleaning easier, allowing you to enjoy a tidy space without dedicating hours to chores. Try them today and experience the benefits of a well-maintained home with minimal effort. 1. Clean as You Go Avoid spending hours cleaning by tidying up throughout the day. Wipe down counters after cooking, put things away immediately, and do small time saving cleaning tasks instead of letting messes build up. Taking a few seconds to wipe up spills and crumbs prevents dirt from accumulating, making deep cleaning less frequent and much easier. Another great way to clean as you go is to use multitasking techniques. While waiting for food to cook or water to boil, quickly wipe down kitchen surfaces, organize utensils, or take care of small time saving cleaning tasks. Using these idle moments effectively helps maintain a cleaner space effortlessly. Developing a habit of putting things away immediately after use also contributes to a more organized and clutter-free environment. Whether it’s hanging up coats, putting dishes directly into the dishwasher, or folding laundry right away, these simple steps prevent messes from piling up.     2. Set a Timer for Speed Cleaning Set a 10–15 minute timer and challenge yourself to clean as much as possible. Focusing on one room at a time prevents overwhelm and helps maintain a consistently tidy home. By setting a short time limit, time saving cleaning feels more manageable, making it easier to stay motivated. Breaking down cleaning tasks into small, timed sessions prevents procrastination and ensures no single task feels too daunting. You can even make it a fun challenge by racing against the clock or involving family members to see who can tidy up the fastest. This method is especially helpful for daily maintenance. Instead of waiting for clutter to accumulate, dedicate a few minutes each day to targeted time saving cleaning. Over time, this habit keeps your home looking fresh without requiring hours of deep cleaning. 3. Keep Cleaning Supplies in Every Room Store essential time saving cleaning products where you use them most. Having a small set of supplies in the kitchen, bathroom, and living room saves time and encourages quick cleanups. Instead of searching for cleaning sprays or cloths, having them within reach ensures you can tackle messes immediately. For example, keeping disinfectant wipes under the bathroom sink allows you to quickly wipe down counters and sinks every day, preventing grime buildup. Similarly, storing dusting tools in the living room makes it easy to freshen up furniture and shelves in seconds. Consider using caddies or organizers for easy access. A well-organized time saving cleaning station in each area of your home eliminates wasted time and encourages consistent upkeep. 4. Steam Clean Your Microwave in Minutes Place a bowl of water with lemon slices in the microwave and heat for three minutes. The steam loosens stuck-on food, making it easy to wipe clean with a cloth. This method eliminates the need for scrubbing, saving you time and effort. Using natural ingredients like lemon not only breaks down grease and stains but also leaves a fresh scent. If you don’t have lemons, white vinegar works just as effectively. Once the microwave’s interior is steamed, simply wipe down the walls, removing all residues effortlessly. To maintain a clean microwave, make it a habit to cover food before heating to prevent splatters. Regularly using this steam-cleaning method keeps your microwave fresh and ready to use without any buildup.     5. Keep a Shoe-Free Home Encourage family members and guests to remove their shoes at the door. This reduces dirt and dust buildup, keeping your floors cleaner for longer and cutting down on mopping time. Shoes track in dirt, bacteria, and allergens, making your home harder to maintain. Placing a designated shoe rack or mat near the entrance makes it convenient for everyone to leave their shoes at the door. Offering indoor slippers can also encourage compliance while keeping feet comfortable. By enforcing this simple rule, you’ll notice a significant reduction in dust and debris on your floors. This small change results in cleaner carpets, less frequent vacuuming, and a healthier indoor environment. 6. Use a Dishwasher for More Than Just Dishes Your dishwasher isn’t just for plates and utensils-it can clean a variety of household items. Throw in sponges, plastic toys, oven knobs, and even certain types of shoes for a deep clean without extra effort. It saves time and ensures a thorough time saving cleaning, making household chores easier and more efficient. Many small household items, like toothbrush holders, soap dishes, and even pet bowls, can benefit from a cycle in the dishwasher. Cleaning these objects regularly helps eliminate germs and bacteria that accumulate over time. The heat and steam provide a deep time saving cleaning effect that hand washing might not achieve. Before placing any item in the dishwasher, always check the manufacturer’s recommendations to ensure it is dishwasher-safe. Avoid putting delicate or electronic components in the dishwasher, as high temperatures and water pressure may cause damage. By incorporating this hack into your time saving cleaning routine, you can maintain a cleaner home with less effort.     Time Saving Cleaning With Toronto Shine Cleaning! These time saving cleaning hacks will help you maintain a tidy home without spending hours scrubbing. By incorporating these practical strategies, you can enjoy a cleaner, more organized space with minimal effort! If you’re looking for a hassle-free way to keep your home spotless, consider hiring Toronto Shine Cleaning. Their professional time saving cleaning services ensure every corner of your home is deeply cleaned and maintained, saving you even more time and effort. With expert cleaners and customized service plans, Toronto Shine Cleaning makes it easy to enjoy a pristine home without lifting a finger. Contact Toronto Shine Cleaning today to schedule

6 Easy Time Saving Cleaning Hacks You Need to Try Read More »

Fridge organization with clean shelves and bins.

How to Clean Refrigerator in 5 Easy Steps

Why a Clean Refrigerator Matters for Food Safety A clean refrigerator is essential for a healthy kitchen. Spills, crumbs, and expired food can harbor bacteria, spread odors, and even affect how well your appliance keeps food cold. Health Canada reports that more than 4 million Canadians get food poisoning every year, and safe food handling starts with a clean fridge. The good news: a thorough clean does not have to be a big project. Follow this simple five-step routine. Step 1: Empty and Sort Take everything out of the fridge so you can see what you have and reach every corner. Discard any expired or unwanted items, ensuring your refrigerator will only contain fresh, safe-to-eat products. Place perishable foods like dairy, meat, and fresh produce in a cooler so they stay at a safe temperature while you work. Sorting as you go also reveals what needs restocking and prevents unpleasant odors. Step 2: Remove and Wash Shelves and Drawers Take out all removable shelves and drawers, which collect spills, crumbs, and bacteria over time. Wash them thoroughly with warm soapy water or a vinegar solution to cut through stuck-on grime, rinse well to remove any residue, and dry them completely before putting them back. Moisture left behind can encourage mold growth, so let everything air dry fully. Step 3: Wipe Down the Interior Mix warm water with a mild detergent or vinegar, and use a soft sponge or cloth to wipe the walls, ceiling, shelves, and door. Pay special attention to corners and crevices where food particles get trapped. Give sticky spots a little extra scrubbing, then go over every surface with a damp cloth to remove any cleaning residue. A hygienic interior directly supports the freshness and safety of your stored food. Step 4: Clean the Door Seals The rubber seals, or gaskets, keep the refrigerator airtight, but they also trap moisture and food particles. Dip a cloth in a vinegar solution and wipe along the entire length of the seals, getting into the folds and crevices. Clean seals help the fridge hold its temperature efficiently, which keeps food safer and can reduce energy use, and they prevent the buildup of mold and mildew that causes odors. Step 5: Replace and Organize Put the dry shelves and drawers back in their original spots, then return the food in an organized layout: group similar items together, place frequently used foods at the front and center, and move older items to the front so nothing gets forgotten. Good airflow around items helps the fridge maintain a consistent temperature. The CDC’s food safety guidance covers the four steps to safer food: clean, separate, cook, and chill, and Health Canada’s general food safety tips add safe storage, defrosting, and leftover habits that pair well with a clean fridge. Refrigerator Cleaning Schedule Task How Often Why It Matters Wipe spills and check expiry dates Weekly Stops bacteria and odors from building up Wash shelves and drawers Every 3 to 4 months Removes hidden grime and residue Clean door seals and vents Every 3 to 4 months Keeps the seal airtight and the fridge efficient Full empty-and-clean reset Twice a year Refreshes the whole appliance Weekly Habits for a Cleaner Refrigerator Check expiry dates when you put groceries away Wipe spills as soon as they happen Store raw meat sealed on a lower shelf, away from ready-to-eat foods Leave space between items so air can circulate When to Call in the Professionals Some homes benefit from a professional reset: after a long rental vacancy, before selling, or when the fridge is part of a whole-home deep clean. Toronto Shine Cleaning’s deep cleaning service covers the interior of the fridge as an add-on, along with the oven and cabinets, and our transparent pricing shows your exact total before you book. Call (647) 424-0355, read our customer reviews, or check the areas we serve to get started. Refrigerator Cleaning FAQ How often should I clean my refrigerator? Wipe spills and check expiry dates weekly, wash shelves and drawers every few months, and do a full empty-and-clean reset at least twice a year or after an illness in the household. What is the best cleaner for inside a fridge? Warm water with mild dish soap or a vinegar solution works well and is gentle on surfaces. Avoid harsh chemical cleaners and bleach sprays near food storage areas. How do I get rid of refrigerator odors? Remove expired food, wipe all surfaces, and clean the door seals and drip pan. Keep an open box of baking soda on a shelf to absorb lingering smells. Is a vinegar solution safe for fridge gaskets? Yes, a diluted vinegar solution is safe for door seals. Wipe along the full length of the gasket and dry it after cleaning so moisture does not collect in the folds.

How to Clean Refrigerator in 5 Easy Steps Read More »

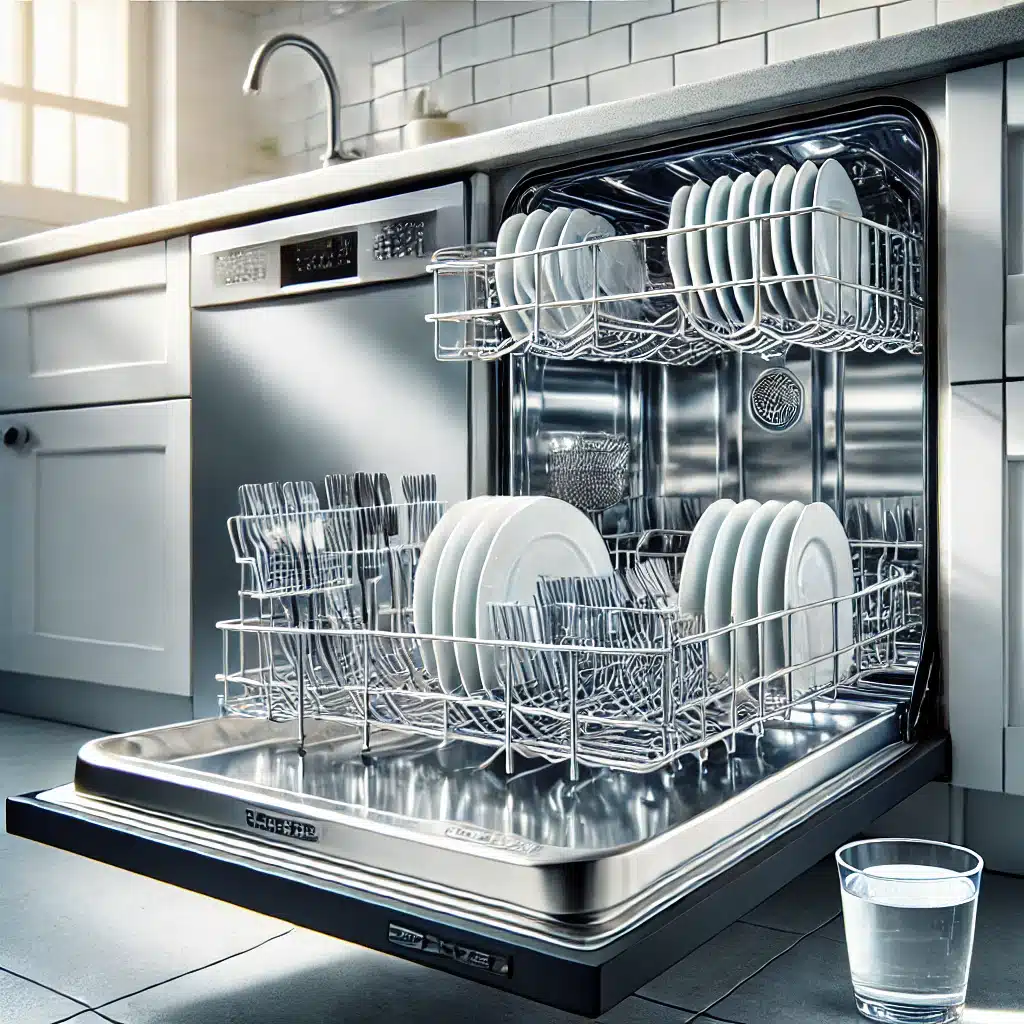
Immaculate open dishwasher with shining stainless steel and clean racks.

How to Clean Dishwasher: 6 Steps for a Sparkling Finish

Keeping a clean dishwasher is essential for ensuring your dishes come out sparkling and your appliance lasts longer. In this guide, we’ll walk you through the simple steps to clean your dishwasher effectively. Let’s dive into how to clean your dishwasher and keep it running smoothly! 1. Gather Your Cleaning Supplies Before you embark on your mission to clean your dishwasher, it’s essential to gather all the necessary supplies: White vinegar Baking soda A soft brush or toothbrush Dish soap Microfiber cloth A bowl or cup These everyday household items are powerful allies in your cleaning arsenal, making the process smooth and efficient. White vinegar is a natural cleaner known for its ability to break down grease and eliminate odors, making it perfect for tackling the inside of your dishwasher. Baking soda, on the other hand, is great for scrubbing away stains and providing a fresh finish. A soft brush or toothbrush will help you get into those nooks and crannies, especially around the filter and spray arms, where food particles often get stuck. Dish soap and a microfiber cloth will ensure you can wipe down surfaces effectively without scratching them. Lastly, a bowl or cup will be used to hold the vinegar during one of the cleaning cycles. Having these items ready and within reach is crucial as it allows you to clean your dishwasher in one go, without interruptions. By preparing your cleaning supplies beforehand, you ensure that the cleaning process is quick and efficient, saving you time and effort. Plus, using these common household items means you don’t need to spend extra money on specialized cleaning products, making it a cost-effective solution for maintaining a clean dishwasher. Having these items on hand will make the cleaning process quick and efficient.     2. Empty and Inspect the Dishwasher To begin the process to clean your dishwasher effectively, start by removing all dishes, utensils, and racks from the interior. This step ensures that you have unobstructed access to every part of the dishwasher, allowing you to clean it thoroughly. As you empty the appliance, take a moment to notice any obvious signs of debris or buildup that might be affecting its performance. Once the dishwasher is empty, carefully inspect the interior for any food debris or grime. It’s common for particles to accumulate in hidden corners, around the door seals, and especially near the drain. The drain area is a critical spot to check because clogs here can impede the dishwasher’s ability to drain water properly, leading to potential issues with cleanliness and functionality. Similarly, the spray arms should be examined closely, as blockages in the small holes can reduce the effectiveness of the water jets, resulting in dishes that aren’t thoroughly cleaned. Pay special attention to these areas and make a mental note of any spots that need extra care. Sometimes, simply wiping away visible debris can make a significant difference. However, for a deep clean, it’s essential to address any hidden grime that might not be immediately visible. By thoroughly inspecting and identifying problem areas, you set the stage for a more effective cleaning process. This careful inspection ensures that when you proceed with the cleaning steps, you’ll be able to target and eliminate all the dirt and buildup, resulting in a truly clean dishwasher that performs at its best. 3. Clean the Filter A crucial step in ensuring you maintain a clean dishwasher is addressing the filter, which can often become clogged with food particles and grease over time. The filter is usually located at the bottom of the dishwasher, and its primary function is to trap food debris, preventing it from recirculating onto your dishes during the wash cycle. When the filter is clogged, it can hinder your dishwasher’s performance, leading to poor cleaning results and unpleasant odors. To begin, locate the filter at the base of your dishwasher. Carefully remove it, paying attention to how it is installed so you can easily replace it later. Once removed, rinse the filter thoroughly under hot running water to loosen and wash away the accumulated debris. For stubborn particles or greasy buildup, use a soft brush, such as an old toothbrush, to gently scrub the filter. This will help ensure that all the tiny holes and mesh are free of obstructions, allowing water to flow through it properly. After cleaning, make sure to inspect the filter to ensure it’s completely free of any residue. A clean filter is essential for the efficient operation of your dishwasher, as it allows the appliance to drain water correctly and prevents food particles from sticking to your dishes. Once you’re satisfied with its cleanliness, reinstall the filter securely in its original position. 4. Clean the Spray Arms To maintain a clean dishwasher, paying attention to the spray arms is essential. These components are responsible for distributing water during the wash cycle, ensuring that every dish and utensil gets thoroughly cleaned. Over time, the tiny holes in the spray arms can become clogged with mineral deposits, food particles, and other debris, which can significantly reduce their effectiveness. Begin by removing the spray arms from the dishwasher. This process usually involves unscrewing or unclipping them, depending on your dishwasher model. Once removed, rinse the spray arms under warm water. This initial rinse helps to dislodge any loose debris and prepares them for a more thorough cleaning. Next, use a toothpick or a small brush to carefully clear any clogged holes in the spray arms. This step is crucial because even small blockages can disrupt the water flow, leading to subpar cleaning results. Ensure you check each hole meticulously, as the effectiveness of your dishwasher depends on these spray arms being fully operational. After you have cleaned each hole and are satisfied that water can flow freely through all of them, reattach the spray arms securely. Properly maintained spray arms will ensure that your dishwasher can clean your dishes effectively, contributing to a consistently clean dishwasher and spotless dishware. 5. Run a

How to Clean Dishwasher: 6 Steps for a Sparkling Finish Read More »