Kitchen Cleaning

lemon

Lemon For Cleaning – 4 Best Tips On How To Use It

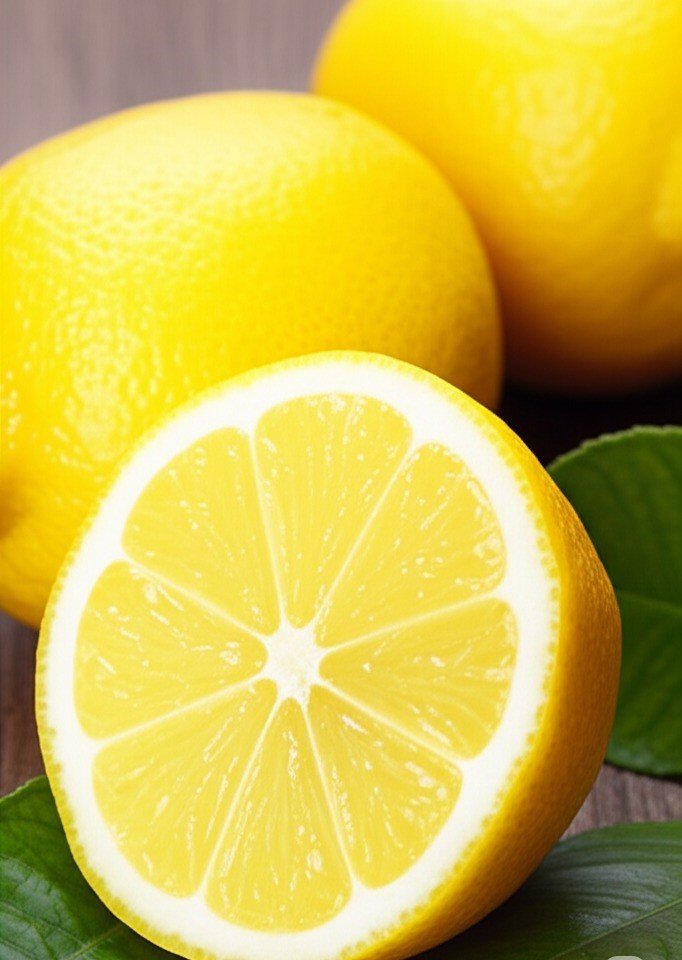
Lemons are a testament to nature’s ingenuity in providing effective cleaning solutions, offering a powerful yet fundamentally gentle alternative to many commercial synthetic products. Their remarkable cleaning ability is no accident; it comes from a sophisticated combination of natural compounds, most notably their high concentration of citric acid. This organic acid is the star of the show, with its characteristic acidity and, crucial to cleaning, its formidable ability to chemically break down and dissolve common household enemies such as grease, stubborn dirt, hard water mineral deposits and alkaline substances such as soap scum. The inherently low pH environment created by the juice, typically ranging from 2 to 3, proves inhospitable to the growth of many common household bacteria and various types of mold, and gives it significant natural disinfectant qualities. Scientific understanding suggests that this acidic environment can disrupt the cellular integrity of certain microbes, inhibiting their growth and activity. 1.The Benefits Of Lemon In addition to its strong acidity, it is also rich in other beneficial compounds. Lemon oil, predominantly found in the peel, contains d-limonene, a powerful natural solvent. Limonene contributes significantly to the degreasing capacity, helping to remove oily residues that water alone cannot remove. Furthermore, the universally appealing fresh, clean scent of lemon is not just a pleasant masking agent. The volatile organic compounds present in lemon actively interact with many malodorous molecules, particularly those of an alkaline nature, neutralizing them, leading to genuine odor elimination rather than just a temporary masking. This synergistic combination of potent acidity to dissolve and disinfect, solvent action to degrease, and inherent aromatic compounds to deodorize makes lemon an exceptionally versatile, effective, and sensorially pleasing cleaning agent for a multitude of household tasks. The kitchen, the heart of the home where food preparation demands the highest standards of hygiene and cleanliness, is one of the main areas where this citrus fruit demonstrates its multiple cleaning capabilities. Consider the humble cutting board, whether made of traditional wood or modern plastic. These surfaces are continually exposed to raw meats, spicy vegetables like onions and garlic, and a variety of other foods, making them potential breeding grounds for bacteria and lingering odors. When a cut lemon half is methodically rubbed across the surface of the board, the citric acid goes to work. It penetrates the microscopic grooves and knife cuts, where its low pH helps neutralize bacteria and break down residual organic matter. Visually, a subtle lightening of food stains can be observed, and aromatically, the strong, clean aroma of lemon gradually overwhelms and replaces any lingering food odors, leaving the board feeling refreshed and more hygienic. Greasy stovetops, oven doors and kitchen panels, often coated with a stubborn film of polymerized cooking oils, present another challenge perfectly suited to the degreasing nature of this critical fruit. Limonene in lemon peel, combined with citric acid, works to emulsify these fats. Whether applied directly by rubbing with a lemon wedge, or sprayed as a diluted solution, the juice begins to loosen the stubborn grip of grease. After a short contact time, the greasy layer becomes noticeably easier to clean, revealing the clean surface beneath without the need for harsh chemical solvents. Even the inside of a microwave, often plagued by dried-on, caked-on food splatters that seem to resist all but the most vigorous scrubbing, yields to the gentle power of lemon-infused steam. By heating a bowl of water and generous amounts of slices (or a few tablespoons of juice) to a rolling boil and filling the microwave cavity with steam, dried-on food particles are effectively softened and rehydrated. The acidic, aromatic steam not only loosens the grime, but also helps deodorize the interior. The subsequent cleaning process becomes remarkably easy, turning a frustrating task into a breeze, leaving behind a fresh citrus scent instead of the smell of stale food. 2.Lemon Juice Sinks and faucets, especially those made of stainless steel or chrome, often have unsightly marks from hard water deposits and soap scum build-up. Lemon juice, with its ability to dissolve these mineral build-ups, acts as a natural polish. Applying a slice directly to these surfaces, followed by gentle rubbing and thorough rinsing, can visibly restore their original shine, making them shine like new, free of cloudy films and water spots. The notorious garbage disposal, a common source of unpleasant kitchen odors, can be effectively cleaned and deodorized by grinding a few lemon peels (or a whole, cut lemon) into it. As the blades pulverize the peel, the abrasive action of the peel itself, along with the released oils and juice, cleans the grinding chamber, while the potent citrus fragrance powerfully neutralizes unpleasant odors emanating from trapped food particles. Similarly, the often-stained surfaces of stainless steel appliances, from refrigerators to dishwashers, can be restored to their sleek, pristine appearance. Wiping them down with a cloth dampened with lemon juice, followed by buffing with a clean, dry cloth, can remove fingerprints and smudges, leaving a polished, streak-free shine. Even stubborn food stains and lingering odors that have built up on plastic food storage containers can be significantly reduced. Soaking the container in a solution of lemon juice and water, or rubbing the inside of the container with a sliced lemon and letting it sit for a while before washing as usual, can lighten the discoloration and neutralize accumulated odors, extending the life of these containers. The bathroom environment, with its constant humidity and specific types of soiling, presents a distinct set of cleaning challenges, most notably persistent soap scum, dulling hard water stains, and the potential for mildew growth. Lemon, with its characteristic acidity and fresh scent, is remarkably well-equipped to address these issues effectively. Glass shower doors, ceramic tiles, and porcelain bathtubs frequently develop a tenacious, cloudy film of soap scum, which is an alkaline residue formed from the reaction of soap with hard water minerals. The citric acid in lemon directly counteracts and dissolves this alkaline buildup. Applying lemon juice liberally to these surfaces, either by spraying a solution or rubbing

Lemon For Cleaning – 4 Best Tips On How To Use It Read More »
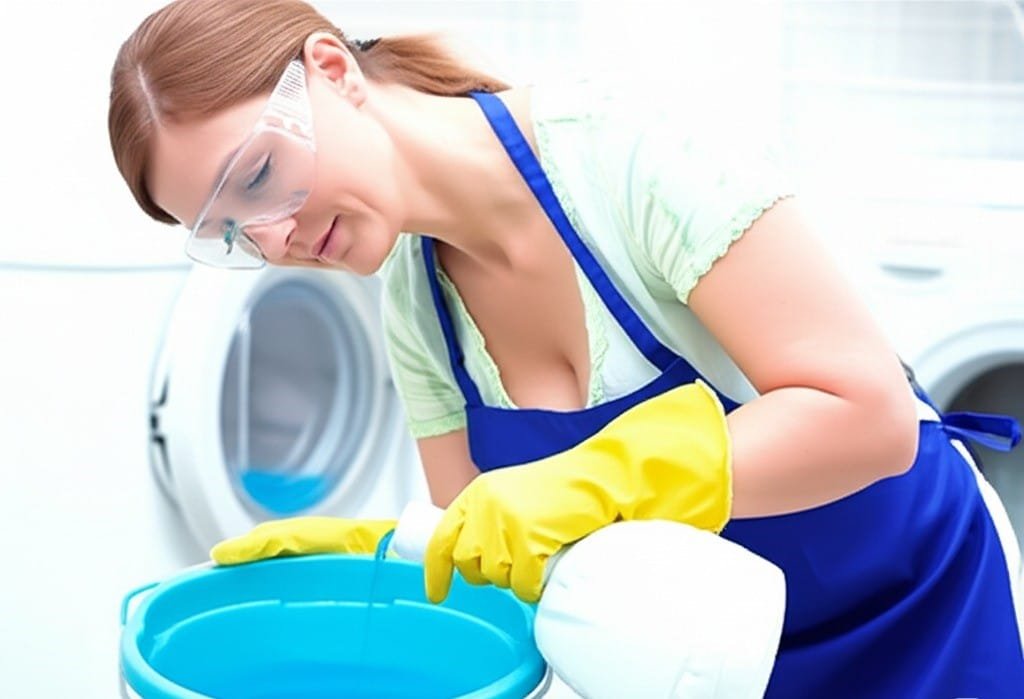
woman cleaning with bleach

6 Best Ways to Clean With Bleach – Diluted or Not?

Chlorine bleach, scientifically known as sodium hypochlorite, is a powerful chemical compound widely used for cleaning and disinfection. Its main function is to kill germs, including bacteria, viruses and fungi, making it an effective agent for sanitizing surfaces. In addition to disinfection, bleach is also recognized for its powerful whitening power, commonly used to brighten white fabrics and remove stubborn stains. Understanding its effectiveness is the first step to using it correctly. 1.Good Ventilation When working with bleach, safety is non-negotiable. Always make sure the area you’re cleaning is well-ventilated; open windows and doors to promote airflow and prevent fumes from building up. Personal protective equipment is essential. Wear impervious gloves to protect your skin from irritation and chemical burns, and consider eye protection, such as goggles, to protect your eyes from accidental splashes. It’s also a good idea to wear old clothes that you don’t mind getting damaged, as the chemical can discolor fabrics. One of the most critical safety rules is to never mix bleach with other cleaning products, especially those that contain ammonia or acids. Combining it with ammonia produces toxic chloramine gas, which can cause serious respiratory problems and can be fatal. Likewise, mixing it with acidic cleaning products like vinegar or toilet bowl cleaners can release chlorine gas, another dangerous irritant. Always use this disinfectant alone after rinsing off any other cleaning agents. Dilution is another key aspect of safe use. Concentrated disinfectants are often too strong for most applications and can damage surfaces or be overly corrosive. Always dilute the product with water based on the task at hand. Before applying the diluted solution to a large area or a new type of surface, perform a spot test. Apply a small amount of the diluted disinfectant to an inconspicuous area and wait to see if any discoloration or damage occurs. Keep undiluted sodium hypochlorite and prepared solutions out of the reach of children and pets. 2.Care Labels Creating the correct solution is vital for both safety and effectiveness. The appropriate dilution ratio depends on the cleaning task. For general disinfection of hard, non-porous surfaces, a common and effective dilution is approximately one-quarter cup of standard household disinfectant (typically 5-6% sodium hypochlorite) per gallon of cool water. This translates to roughly one tablespoon of the concentrated cleaner per quart of water. Always add the active ingredient to water, not water to the concentrate, to prevent splashing of the strong chemical. If you are dealing with more resilient issues like mold or mildew, a slightly stronger solution may be required. For such tasks, you might use up to one cup of the concentrated cleaner per gallon of water. However, stronger solutions increase the risk of surface damage and produce more potent fumes, so enhanced ventilation and caution are necessary. For laundry purposes, specifically for whitening white fabrics, the amount of whitener will depend on your washing machine and the load size. Typically, one-half to one cup of the product is added to the designated dispenser or diluted in water before being added to the wash, once the machine has filled with water and detergent. Always check garment care labels to ensure they are safe for this type of cleaner. Use cool or cold water for dilution, as hot water can decompose the active ingredient in the disinfecting liquid, reducing its effectiveness and potentially releasing more chlorine gas. 3.Bleach Bleach can be used to clean and disinfect a variety of hard, nonporous surfaces throughout the home. In the kitchen, diluted solutions are effective for sanitizing countertops, as long as they are made of materials such as laminate, sealed granite (after spot testing), or Corian. Sinks, both stainless steel and porcelain, can also be cleaned and disinfected with it. After cleaning food preparation surfaces with the solution, it is crucial to rinse them thoroughly with clean water and allow them to air dry or wipe them dry with a clean cloth. In the bathroom, it is an ideal option for toilets, bathtubs, showers, and tile surfaces. To clean the toilet, pour about a cup of the diluted solution into the bowl, scrub with a toilet brush, let it sit for at least 10 minutes to disinfect, and then flush. For bathtubs, showers, and tiled walls or floors, apply the diluted sanitizing solution using a sponge, cloth, or spray bottle. Allow the solution to sit on the surface for the recommended contact time, typically 5 to 10 minutes, to ensure proper disinfection. Then, rinse these surfaces thoroughly with water. Certain flooring types, such as vinyl and ceramic or porcelain tiles, can also be cleaned with a diluted solution. Avoid using the cleaner on hardwood floors, unsealed natural stone, or porous tiles, as it may cause damage or discoloration. When cleaning with the disinfectant liquid, ensure the area is well ventilated and keep pets and children away from the wet area until it is completely dry. Contact time is important; allow the solution to sit on the surface for several minutes before rinsing if necessary or allowing it to air dry, depending on the surface and concentration used. Bleach is a powerful tool for whitening white clothes and linens. Before using it in your laundry, always check the care labels on your clothes to confirm that they are safe for this type of cleaning. It is generally suitable for cotton, linen, and some synthetic fabrics that are white. Avoid using chlorine bleach on wool, silk, spandex, leather, or any colored fabric unless the product is specifically labeled as a “color safe” product or oxygen bleach, which is a different chemical. When adding the liquid to your laundry, most washing machines have a designated dispenser. If your machine has one, add the recommended amount of the substance (usually ½ to 1 cup, depending on the load size and concentration) to the dispenser before starting the wash. The dispenser will release the cleaning agent at the appropriate time in the wash cycle, usually after the machine is filled with water and

6 Best Ways to Clean With Bleach – Diluted or Not? Read More »

cleaning hard water

How to Clean Hard Water – 2 Easy Steps for a Sparkling Home

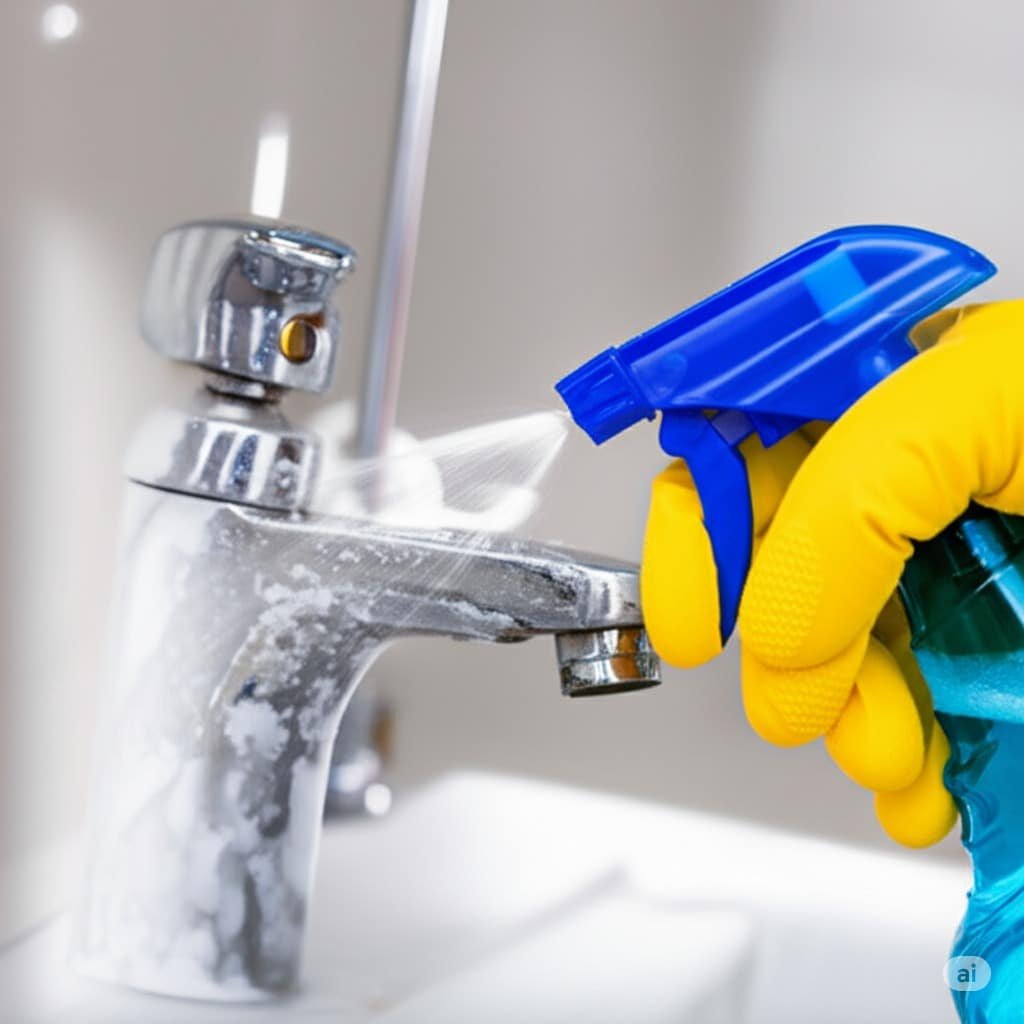
Hard water deposits, those chalky white or sometimes rusty stains, are a common nuisance in many homes. These marks are primarily composed of minerals like calcium and magnesium left behind as water evaporates. They can accumulate on various surfaces, diminishing their appearance and sometimes affecting their functionality. Addressing these buildups requires understanding how to dissolve these mineral deposits effectively. 1.Bathrooms In bathrooms, faucets and showerheads are frequent victims of hard water. The buildup can clog nozzles, reducing water flow and creating an unsightly crust. To clean these fixtures, undiluted white vinegar is a powerful ally. For faucets, you can soak a cloth or paper towel in vinegar and wrap it around the affected area. Let it sit for at least an hour, or longer for stubborn deposits. Afterward, scrub gently with an old toothbrush or a non-scratch sponge and rinse thoroughly. For showerheads, if removable, submerge them in a bowl or bag filled with white vinegar. Ensure the spray holes are completely covered. Let it soak for several hours, or even overnight for severe cases. After soaking, use a small brush or pin to clear any remaining debris from the nozzles and rinse with water before reattaching. Glass shower doors and enclosures often develop a cloudy film or streaks from hard water. A spray bottle filled with a solution of equal parts white vinegar and water can be used here. Spray the solution generously onto the glass and let it sit for 15 to 30 minutes. This allows the acetic acid in the vinegar to begin breaking down the mineral deposits. Then, scrub the surface with a non-scratch pad or a microfiber cloth. For more resistant stains, a paste made from baking soda and a small amount of vinegar can be applied and gently scrubbed before rinsing. Rinse the glass thoroughly with clean water and dry with a squeegee or a clean, lint-free cloth to prevent new spots from forming. Sinks and bathtubs, whether porcelain, ceramic, or stainless steel, can also suffer from hard water stains. For general cleaning, spraying with a vinegar solution and letting it sit before wiping and rinsing works well. For more concentrated stains, apply white vinegar directly or create a paste of vinegar and baking soda. Apply the paste to the stained areas, let it sit for about 30 minutes, then scrub with a soft brush or sponge. Rinse thoroughly with water. Be cautious with colored grout or natural stone, as vinegar’s acidity can sometimes affect these materials; test in an inconspicuous area first. Toilets often develop a hard water ring at the waterline. To address this, pour about one to two cups of white vinegar directly into the toilet bowl, ensuring it covers the ring. Let it sit for at least an hour, or preferably overnight for tough rings. After soaking, scrub the ring with a toilet brush. The minerals should loosen and come off more easily. Flush the toilet to rinse. For very stubborn stains below the waterline, you might need to empty the bowl of water first (by turning off the water supply and flushing) before applying vinegar directly to the stains. 2.Kitchen In the kitchen, appliances like kettles and coffee makers are prone to internal mineral buildup, often called scale. This scaling can affect the taste of your beverages and the efficiency of the appliance. To descale a kettle, fill it with a solution of equal parts white vinegar and water. Bring the solution to a boil, then turn off the kettle and let it sit for an hour or two. Empty the kettle and rinse it thoroughly several times with fresh water to remove any vinegar residue and taste. For coffee makers, fill the water reservoir with the same vinegar-water solution and run a brewing cycle without coffee grounds. Afterward, run two to three cycles with plain water to rinse the system completely. Dishwashers can also accumulate hard water deposits, leading to spotty dishes and a less effective cleaning cycle. To clean your dishwasher, place a dishwasher-safe cup or bowl filled with one to two cups of white vinegar on the top rack of the empty dishwasher. Run a regular hot water cycle. The vinegar will circulate through the machine, helping to dissolve mineral buildup on the interior components and spray arms. Washing machines, especially in hard water areas, can suffer from mineral buildup that affects their performance and can even leave deposits on clothes. To clean your washing machine, you can run an empty cycle with hot water and add about two to four cups of white vinegar directly into the drum or the detergent dispenser. Allow the machine to complete a full wash and rinse cycle. This helps to remove scale and soap scum from the drum and hoses. For tiles and grout in kitchens and bathrooms, a vinegar solution can be effective against hard water stains. Spray the solution onto the tiles, let it sit for a short period, then scrub with a brush, paying extra attention to grout lines. Rinse thoroughly with water. As mentioned, always test vinegar on a small, hidden area of tiles, especially if they are natural stone or colored, as acidity can sometimes cause etching or discoloration. While vinegar is a common and effective household cleaner for hard water, lemon juice, another natural acid, can also be used in a similar manner for smaller areas or as an alternative. Commercial descaling products are also available and can be very effective, especially for severe buildup or for appliances where manufacturers recommend specific descalers. Always follow the product instructions carefully when using commercial cleaners. Regular cleaning of affected surfaces can prevent severe buildup, making the task easier over time. Consistent attention to areas prone to hard water can keep your fixtures and appliances looking their best and functioning properly. Hard water stains and mineral buildup can be challenging, but with the right approach, these deposits can be effectively removed from various household surfaces. Understanding how to dissolve these minerals using common household items

How to Clean Hard Water – 2 Easy Steps for a Sparkling Home Read More »

salt on recipient

6 Tips On The Benefits Of Salt For Cleaning – You Need To Know

This common kitchen staple, salt, extends its utility far beyond seasoning food. Its inherent properties make it a surprisingly effective and economical cleaning agent for various household tasks. From scrubbing surfaces to neutralizing odors, and tackling stubborn stains, this inexpensive compound offers a natural alternative to many commercial cleaners, often with fewer harsh chemicals. The granular nature of salt, combined with its chemical characteristics, provides a multifaceted approach to maintaining a cleaner home environment. 1.The Power Of Salt  One of the most straightforward benefits of this common mineral in cleaning lies in its abrasive nature. The crystalline structure of the granules provides a gentle yet effective scouring action, suitable for tackling grime on various surfaces without being overly harsh like some chemical scouring powders or steel wool, which can damage more delicate materials. For instance, caked-on food remnants on pots and pans, especially those made of stainless steel, enamel, or even some non-stick surfaces (when used carefully as a paste), can often be loosened. Creating a paste with the crystalline substance and a little water allows for targeted scrubbing. Alternatively, directly sprinkling the granules onto the affected area and scrubbing with a damp sponge, brush, or even a halved potato can dislodge stubborn residues. This method is particularly useful for materials that might be scratched by more aggressive abrasives. Coarse varieties of this kitchen staple, like kosher or sea variants, offer more pronounced scrubbing power for tougher jobs, while finer table versions can be used for more delicate applications. Kitchen sinks, especially those made of stainless steel or porcelain, can be brightened and cleaned by scrubbing with these white crystals. A mixture of the salt with lemon juice or white vinegar can enhance this cleaning power. The acidity of the liquid helps to dissolve grease, hard water stains and mineral deposits, while the abrasive particles do the physical cleaning, removing loose dirt. This combination not only cleans but also leaves a fresh scent. Even stubborn coffee or tea stains inside mugs and pitchers can be easily scrubbed with a damp cloth soaked in the cleaner. Beyond the kitchen, this abrasive quality also helps to remove dirt from tile grout. A paste applied to the grout lines and scrubbed with an old toothbrush can significantly improve their appearance. For oven spills, once they cool, a generous application of the granules can absorb some of the dirt, and then the abrasive action helps to scrub away the burnt-on residue, often minimizing the need for harsh oven cleaners. Care must be taken with highly polished or delicate surfaces, and it’s always advisable to test on an inconspicuous area first, but for many common cleaning challenges that require a little effort, readily available salt offers a reliable option. 2.Absorbs Spills  The hygroscopic nature of salt, meaning its ability to attract and hold water molecules from its surroundings, makes it an excellent first response for various spills, particularly liquids. When accidents happen, such as knocking over a glass of red wine on a carpet or upholstery, quick action with the kitchen staple can significantly mitigate the stain. By generously covering the fresh spill with a thick layer of the white crystals, they will begin to draw the liquid out of the fibers through osmosis. The absorbent material should be left to sit for a period, sometimes several hours or until it appears to have absorbed the maximum amount of moisture, often changing color as it does so. Once the substance has done its work, it can be vacuumed up. This method is effective because it physically removes much of the staining agent before it has a chance to fully set and bond with the fibers. The quicker the application, the more effective it tends to be. The same principle applies to greasy spills. If oil, butter, or a fatty sauce splatters on the floor, a countertop, or even some fabrics, covering it with the granular cleaner can help absorb the grease. The particles wick the oil into themselves, making the remaining residue easier to wipe or scrape away. For fabric, after this initial treatment, any remaining discoloration might require further spot cleaning, but the initial damage will likely be far less severe. This absorbent property is also why this compound is sometimes used in homemade desiccant packs to reduce humidity in small, enclosed spaces like closets or drawers, helping to prevent mustiness, though its capacity is limited compared to commercial desiccants like silica gel. For liquid spills on hard surfaces that might spread, creating a border with the granules can help contain the spill before covering it entirely. 3.Deodorizers  In addition to its visual cleaning ability, table salt can also be a powerful ally in neutralizing unwanted odors around the home. Its ability to absorb moisture, which often harbors and encourages the growth of odor-causing bacteria and mold, contributes significantly to this effect. For example, a smelly refrigerator can benefit from an open container or small bowl of the mineral; the salt crystals will gradually absorb the strange odors from food and excess moisture that can contribute to a smelly environment. This principle is similar to using baking soda, but offers an alternative if baking soda is not available or if you prefer to use this more readily available item. Drains, which can often be sources of unpleasant odors due to the accumulation of organic matter, grease, and soap scum, can be deodorized. Pouring a strong solution of the granules dissolved in hot water down the drain, or a mixture of the dry crystals followed by hot water, can help break down some of the grease and deodorize the pipes. Adding baking soda and vinegar to the mixture can create an effervescent action that further helps remove buildup. Cutting boards, especially wooden ones that can absorb juices and strong odors from foods like onions, garlic, and fish, can be effectively deodorized. Scrubbing them with coarse crystals, possibly moistened with a little lemon juice for added antibacterial effect and a fresh scent, can lift food particles from

6 Tips On The Benefits Of Salt For Cleaning – You Need To Know Read More »

summer cleaning woman

Preparing for Summer Cleaning – 6 Easy Steps

Before you begin your summer cleaning, certain preparations can make the entire process smoother, more efficient, and considerably less intimidating. Systematically tackling these preliminary steps turns a potentially overwhelming task into a series of manageable actions, setting you up for success and a refreshingly clean home. 1.Four Box Method The first and most impactful step is to thoroughly declutter. Unnecessary items not only take up valuable floor space, but they also collect dust, harbor allergens, and make cleaning around them more time-consuming and time-consuming. Embark on a systematic journey through your home, tackling it room by room, or perhaps by specific categories, such as clothes, books, papers, kitchen utensils, old electronics, or miscellaneous items. For each item, make a conscious decision: will you keep it, donate it, sell it, or discard it? Consider adopting a method like the “Four Box Method”-labeling boxes Keep, Donate/Sell, Trash, and Relocate (for items that belong in another room). Reducing the bulk of your possessions means less stuff to clean, move, and organize. This fundamental act immediately simplifies all subsequent cleaning steps, creating a more open, airy, and accessible space that’s conducive to thorough cleaning. Think of organization as the essential foundation that lightens the load for all future cleaning efforts-not just for summer cleaning, but for ongoing maintenance as well. The mental clarity and sense of calm that an organized space provides are also significant benefits, making your home feel more peaceful. 2.Start Your Summer Cleaning Once your spaces are significantly cleaner, it’s a good idea to develop a detailed, well-thought-out plan. This isn’t just a vague idea of what needs to be cleaned; it’s a concrete roadmap for your summer cleaning. Identify all the specific areas and tasks you plan to tackle during your summer cleaning. This could include deep cleaning kitchen appliances like the oven and refrigerator, washing windows and drapes, scrubbing floors and baseboards, cleaning light fixtures and ceiling fans, or tackling outdoor spaces like patios, decks, or porches. List these tasks meticulously. You can organize them by room (e.g., all kitchen tasks, then all bathroom tasks) or by type of activity (e.g., dusting, vacuuming, and mopping). Having a clear, written checklist provides essential direction, helps you visually monitor progress (which is very motivating), and ensures that no important areas or tasks are inadvertently forgotten. A structured approach avoids the common feeling of being overwhelmed and allows for a more focused, efficient effort in your summer cleaning. This planning phase is crucial for visualizing the full scope of work for your summer cleanup, allowing you to allocate resources, including time and energy, more effectively. You can even prioritize tasks, deciding which ones will have the greatest impact or which ones are most urgent for your cleanup. 3.Accessories And Supplies With your comprehensive cleaning plan in place, the next logical step is to gather all the cleaning supplies and tools you’ll need for your summer cleanup. Take a complete inventory of your current supply of cleaning products, disinfectants, cloths, sponges, brushes, and any specialized equipment, such as vacuum cleaners with all their attachments, mops, buckets, or steam cleaners. Make a detailed list of everything that’s missing, low on supplies, or items that need replacing (such as old, ineffective sponges or worn-out mop heads). Purchase these items before you begin cleaning. Having everything readily available will prevent frustrating interruptions and help you keep the momentum going once the cleaning process begins. Most importantly, make sure your tools are in good working order: empty vacuum cleaner bags or containers, clean or replace filters, make sure mop heads are clean and fresh, and spray bottles are working properly. This preparatory step ensures that when you set aside time for your summer cleaning, you can proceed smoothly and efficiently without unnecessary delays or trips to the store. Consider whether you prefer commercial cleaning products or if you want to use more natural or homemade solutions like vinegar and baking soda for your cleaning, and make sure you have these ingredients on hand. 4.Make Your Own Pace Consider carefully how you will allocate time for your summer cleaning project. Breaking the overall summer cleaning endeavor into smaller, more manageable chunks can be highly effective and less daunting. You can dedicate specific days or weekends to certain rooms or specific types of tasks for your summer cleaning. For example, one Saturday morning could be dedicated to deep cleaning the kitchen, while another afternoon could be dedicated to washing all the windows in the house. Alternatively, you could take a “little and often” approach, dedicating 30 to 60 minutes each day to tackling one or two items on your summer cleaning checklist. Scheduling these time blocks into your existing calendar, just like any other commitment, helps you integrate summer cleaning into your routine without it becoming an all-consuming endeavor that disrupts your entire life. This approach also helps you maintain your energy levels and thoroughness for each individual task, preventing burnout. Be realistic about how long certain cleaning tasks will take; it’s usually better to overestimate a little. Fitting your summer cleaning into your current schedule, rather than trying to overhaul your entire routine to do so, leads to greater consistency and a higher likelihood of completion. 5.Protection Before you apply any cleaning products or start scrubbing or washing heavily, prepare the actual spaces you’ll be working in for your summer cleaning. Ensure good ventilation by opening windows and, if necessary, using fans to circulate the air, especially if you’ll be using strong-smelling cleaning solutions or chemicals while cleaning. This is especially important during the warmer summer months, when indoor air can become stagnant and fumes can build up. Protect furniture, floors, or delicate items that aren’t being cleaned by covering them with old sheets, drop cloths (canvas is durable, plastic protects against spills), or plastic sheeting. If possible and practical, move smaller pieces of furniture out of the area temporarily. Clearing walkways and ensuring that you have safe, unobstructed access to all areas you plan to clean

Preparing for Summer Cleaning – 6 Easy Steps Read More »

4 Easy Home Deep Cleaning Tips You Need to Try

4 Easy Home Deep Cleaning Tips You Need to Try Home deep cleaning goes far beyond routine tidying. Where regular cleaning maintains surface-level order, deep cleaning removes accumulated dirt, stubborn grime, bacteria, and hidden allergens that build up over time in every part of a home. It is a methodical, top-to-bottom process that restores a home to its best hygienic condition, and these four tips make it manageable. 1. Deep Clean the Kitchen From Top to Bottom The kitchen needs the most intensive work because grease, food particles, and bacteria collect there. Clean the interior and exterior of major appliances: degrease ovens inside and out, including racks and doors, clean microwaves internally and externally, wipe refrigerator and dishwasher exteriors, and degrease range hoods and their filters. Wipe cabinet exteriors to remove fingerprints and splatters, descale and polish sinks, faucets, and fixtures, sanitize countertops and backsplashes with attention to grout lines, and scrub floors including edges, corners, and under movable appliances. 2. Say No to Mold, Hard Water, and Dust in Bathrooms Bathrooms are high-moisture areas prone to mold, mildew, and soap scum. Scrub showers and bathtubs, including walls, doors, and tracks, to remove soap scum, hard water deposits, and signs of mildew. Disinfect toilets thoroughly, both inside the bowl and on all exterior surfaces, including the base and surrounding floor. Clean and polish sinks, vanities, countertops, and mirrors, and scrub tiles and grout on floors and walls to restore brightness. Dust light fixtures, exhaust fans, and vents, and descale chrome faucets and showerheads. 3. Dust High, Clean Low, and Don’t Skip the Details Work from top to bottom so dust falls onto surfaces you have not cleaned yet. Dust ceiling fans, light fixtures, picture rails, and curtain rods, then move to baseboards, skirting boards, and electrical outlet covers. Vacuum furniture, including under cushions, and move pieces where possible to clean underneath and behind. Wipe window sills, ledges, tracks, and frames, remove cobwebs from ceilings and corners, and clean interior windows and mirrors. Finish with floors: vacuum carpets thoroughly, including edges and high-traffic areas with spot treatment for stains, and mop hard floors with a suitable cleaning solution, paying attention to corners. 4. Call a Professional Home Deep Cleaning Service Professional cleaners bring training, industrial-grade equipment, and specialized solutions that most homes do not have. They work from a detailed checklist so every agreed area is covered consistently, and a full house deep clean can take many hours or even days of strenuous work when done alone. Reputable companies are insured and bonded: Toronto Shine Cleaning carries a $1,000,000 insurance policy plus a $10,000 accidental breakage and surety bond. The process starts with a consultation to define the scope and finishes with a walk-through so you can confirm the results. The CDC’s cleaning and disinfecting guidance explains why removing dirt before disinfecting matters, and Health Canada’s indoor air quality information covers the allergens a deep clean removes. For mold-prone areas, the CDC’s mold resources explain why moisture control is essential. Signs it is time for a home deep cleaning: Persistent musty odors despite regular cleaning Visible dust build-up in corners or on less-disturbed surfaces Grease build-up in the kitchen or hard water stains in the bathroom Allergy symptoms that worsen indoors A big event, move, sale, or renovation on the calendar Room Deep Cleaning Focus Tools That Help Kitchen Appliances, range hood, cabinets, grout, floors Degreaser, microfiber cloths, scrub brush Bathroom Shower, toilet, tiles, grout, fixtures Disinfectant, descaler, grout brush Living areas and bedrooms Ceiling fans, baseboards, furniture, windows Vacuum attachments, extendable duster Whole home Vents, door frames, switches, floors Vacuum, mop, step ladder Make Deep Cleaning a Seasonal Habit Spring and autumn are natural triggers, and many homeowners book an annual or semi-annual deep clean to maintain a consistently high standard, especially before hosting events or after renovations. Once the professionals finish, ongoing regular maid service keeps the baseline high, while a professional home deep cleaning resets the whole house. Review pricing or find your GTA location, then call (647) 424-0355 to book. How often should I deep clean my home? Many homes benefit from a deep clean once or twice a year, typically in spring and autumn. You may want one more often before or after events, when moving in or out, before selling or renting a property, or after renovations. How long does a professional deep clean take? It depends on the size of the home, its initial condition, and the tasks involved. A full house deep clean can take many hours or even days of work, which is why professional teams working from a checklist are faster and more consistent. Is a professional deep cleaning service insured? Reputable companies are insured and bonded. Toronto Shine Cleaning carries a $1,000,000 insurance policy and a $10,000 accidental breakage and surety bond, so you are protected against accidental damage or liability. What is the difference between regular and deep cleaning? Regular cleaning maintains surface-level order: dusting, wiping counters, and tidying. Deep cleaning removes accumulated grease, soap scum, limescale, dust, and allergens from hard-to-reach places such as behind appliances, inside ovens, and along baseboards, and it sanitizes areas that routine cleaning misses.

4 Easy Home Deep Cleaning Tips You Need to Try Read More »

5 Expert Tips for Cleaning With Hot Water At Home

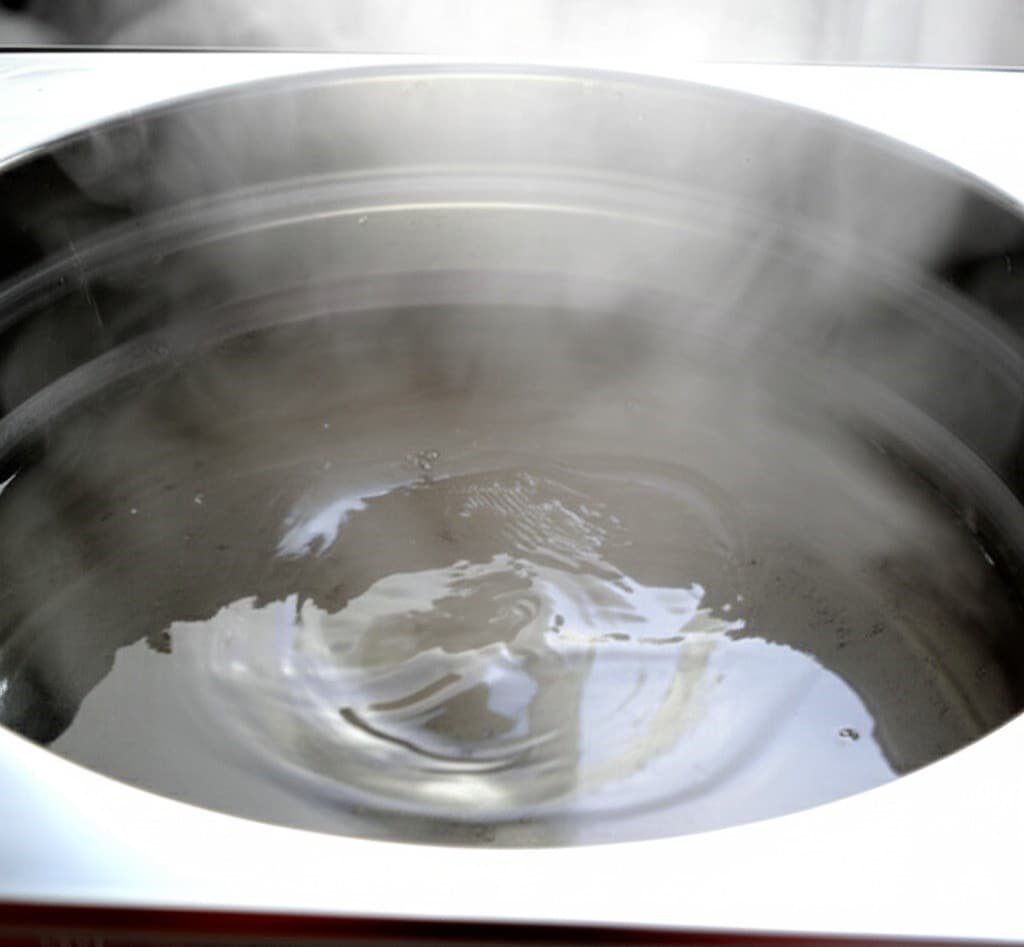
The Power of Hot Water I’m highlighting one of the most fundamental yet profoundly effective allies in our quest for cleanliness: plain, unadulterated hot water. In our modern world, filled with a variety of specialized cleaning solutions and devices, it’s easy to overlook the sheer effectiveness of this readily available resource. Yet for generations, hot water has been the foundation of effective cleaning, and its power remains undiminished. Today, we’re going to delve into the remarkable benefits of incorporating hot water into our cleaning routines, exploring how its thermal energy works to break down dirt, improve hygiene, and ultimately make the task of maintaining a sparkling home significantly easier and more satisfying. The cleaning magic of hot water isn’t just an old wives’ tale; it’s rooted in basic principles of physics and chemistry. When water is heated, its molecules gain energy and move much more quickly. This increased molecular activity translates directly into increased cleaning power. These energized water molecules are better able to break the bonds that hold dirt, grease, and other residues to surfaces. They can penetrate dirt more effectively, loosening its grip and making it much easier to wipe or rinse away. Additionally, hot water often works to reduce the surface tension of the water itself, allowing it to spread more evenly and wet surfaces more thoroughly, which in turn helps cleaning agents, if used, work more effectively. Understanding this fundamental action helps us understand why hot water is not just a preference, but often a necessity for achieving a deep, satisfying clean. Let’s consider its application in the heart of the home, the kitchen, where some of the most challenging cleaning tasks reside. Think of a sink full of greasy dishes after a hearty meal. Attempting to tackle this with cold water can be a frustrating, smeary affair. Introduce hot water, however, and the scenario changes dramatically. The elevated temperature begins to liquefy fats and oils almost immediately, allowing them to be more easily emulsified by dish soap and rinsed away cleanly. The same principle applies to greasy stovetops, oven doors splattered with cooking residues, or countertops where oily spills have occurred. Hot water, often combined with a suitable degreasing agent, dramatically reduces the amount of physical effort – the scrubbing and scraping – required to lift these stubborn substances, leaving behind surfaces that are not only visibly clean but also feel less tacky to the touch. Even the kitchen sink itself, prone to a build-up of food particles and greasy films, benefits immensely from a regular wash and rinse with hot water, helping to keep drains clearer and the basin more hygienic. 2. Moving to the bathroom, another area where hygiene is paramount, hot water continues to prove its worth. Soap scum, that resilient film left behind by soap and hard water minerals, can be particularly stubborn on shower doors, tiles, and bathtubs. Hot water helps to soften and dissolve these deposits, making them more susceptible to removal by bathroom cleaners or even a simple scrubbing with a non-abrasive pad. When cleaning toilets, while specialized cleaners are often used in the bowl, wiping down the exterior surfaces with hot water and a disinfectant can contribute to a more thorough sanitization. For bathroom floors, mopping with hot water not only helps to lift dirt and footprints but also contributes to a faster drying time, reducing the chance of slips and leaving the room feeling fresher overall. The steam generated by hot water during a shower can even play a small role in loosening grime on surrounding surfaces, making them a bit easier to wipe down afterwards.   3. The benefits of hot water extend significantly to our laundry routines. Most laundry detergents are formulated to perform optimally in warm or hot water. The heat helps the detergent to dissolve completely and to activate its cleaning enzymes and surfactants more effectively, allowing them to penetrate fabric fibers more deeply and release trapped dirt, oils, and stains. For heavily soiled items, or for ensuring the effective sanitization of items like bedding or towels, particularly during times of illness, a hot water wash can be invaluable. It aids in killing germs and dust mites, contributing to a healthier home environment. While cold water washing has its place for delicate fabrics or energy saving, the sheer cleaning power for general laundry and stubborn stains is often best unlocked with the assistance of appropriately heated water. 4. Beyond these specific areas, the general application of hot water for cleaning various surfaces around the home brings tangible advantages. When mopping hard floors, whether tile, vinyl, or sealed wood, hot water helps to cut through accumulated grime more effectively than cold. It can make the task quicker and leave floors looking brighter and feeling cleaner underfoot. For wiping down painted walls, baseboards, or other washable surfaces, dampening a cloth with hot water can often be sufficient to remove light marks and dust, sometimes reducing the need for chemical cleaners altogether. The warmth can help to soften adhered dirt, making it easier to lift without excessive scrubbing that could potentially damage the surface. 5. One of the overarching benefits of utilizing hot water in our cleaning endeavors is the reduction in physical effort often required. Because hot water is inherently more effective at loosening and dissolving dirt and grease, we often find ourselves scrubbing less vigorously and for shorter periods. This not only makes the cleaning process less physically demanding but can also help to preserve the surfaces we are cleaning by minimizing wear and tear from excessive abrasion. Furthermore, by enhancing the action of soaps and detergents, hot water can sometimes allow us to use less product to achieve the same level of cleanliness, which can be both economically and environmentally beneficial. The faster evaporation rate of hot water also means surfaces tend to dry more quickly, reducing streaks and water spots, and getting the cleaned area back into use sooner. In essence, the consistent and thoughtful use of hot water elevates

5 Expert Tips for Cleaning With Hot Water At Home Read More »

drains

7 Tricks To Keep Your Drains Clean And Odor-Free

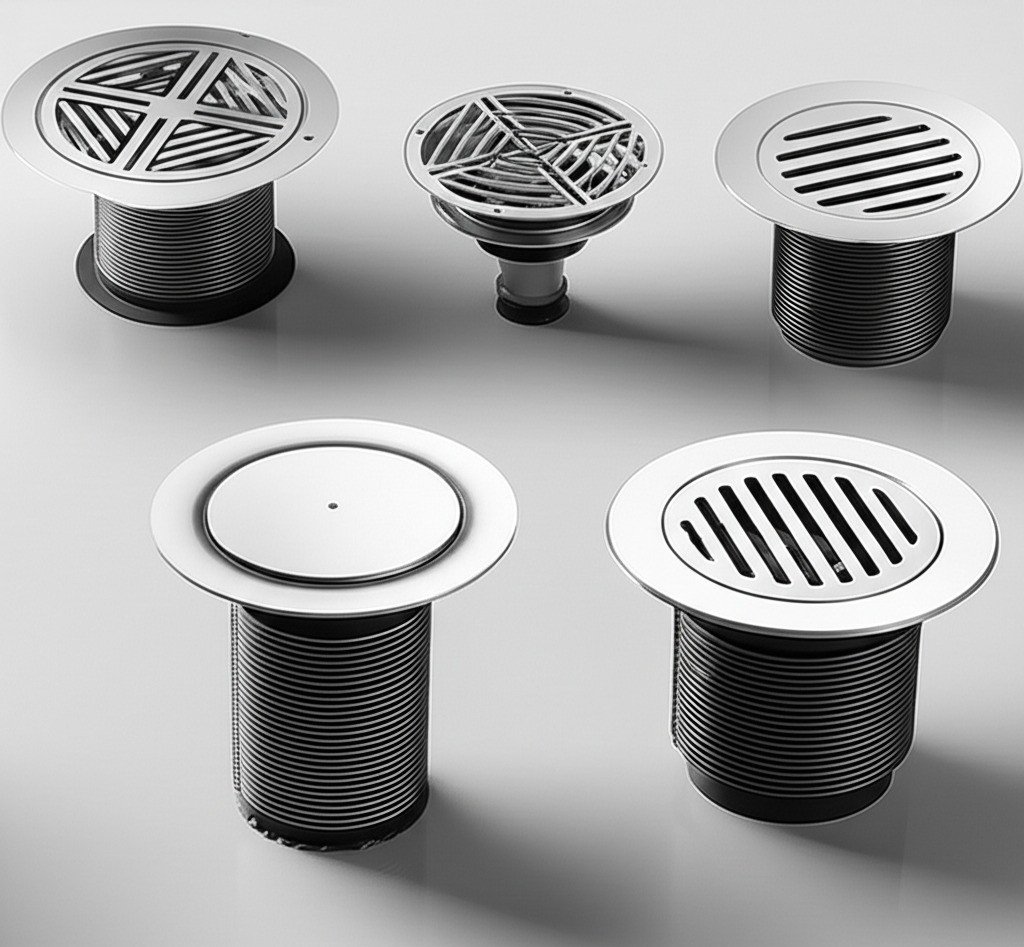
When your drains are working properly, you barely notice them. However, when problems arise, from slow drains to unpleasant odors or even complete blockages, the disruption can be significant. This guide will walk you through seven essential steps to understanding and maintaining your drains, helping you prevent common problems and ensuring that your home’s plumbing system runs smoothly, keeping your home clean and efficient 1. Your Home’s Drains Before we dive into maintenance, it’s important to understand the vital role that drains play. Every sink, tub, shower, toilet, and washing machine in your home is connected to a drainage system designed to safely and efficiently channel wastewater to the main sewer or septic system. Kitchen drains primarily carry dishwashing water, often mixed with small food particles and grease. Bathroom drains contain residue from soap, hair, toothpaste, and other personal care products. Laundry drains carry water laden with detergent and lint. Each of these pathways is crucial, and a problem in one can sometimes indicate a larger problem. Recognizing that these systems are constantly in operation helps underscore the importance of consistent care, preventing minor annoyances from turning into larger, inconvenient, and potentially costly plumbing emergencies. A well-functioning drainage system is the foundation of a healthy and pleasant home environment.   2. Protecting What Goes Down The most effective approach to drain maintenance is proactive prevention, starting with being aware of what we allow into the system. Many common drain clogs are entirely preventable if we exercise caution. In the kitchen, cooking fats, oils, and grease are the leading culprits. While liquid when hot, these substances solidify as they cool inside the pipes, creating sticky, persistent clogs that trap other debris. Coffee grounds, tea leaves, and fibrous food scraps like vegetable peels are also significant contributors to clogs. In the bathroom, hair is a major culprit, tangling together to form dense webs that trap soap scum and other particles. So-called “toilet-flush” wet wipes, despite their name, are notorious for causing clogs because they don’t break down the way toilet paper does. Dental floss, cotton swabs, and feminine hygiene products should also never be flushed down the toilet. By consciously keeping these problematic items out of your drains, you’re taking the most significant step toward keeping your pipes clean and trouble-free. 3. Daily Habits Incorporating a few simple habits into your daily and weekly routines can make a substantial difference in the long-term health of your drain. One of the easiest, yet most effective, measures is to consistently use drain strainers or screens in all sink and shower drains. These inexpensive devices catch hair, food particles, and other debris before they enter the pipes. The key is to empty these strainers regularly, ideally after each shower and several times a day in a busy kitchen sink. Another beneficial habit, especially for the kitchen sink, is to run hot water for a minute or two after washing dishes, especially if greasy items are involved. This helps remove any remaining grease particles while they are still slightly liquefied. For all drains, a weekly flush with very hot water (not boiling water, which can damage some PVC pipes) can help dissolve early buildup of soap scum or grease, keeping your drains cleaner. These small, consistent actions work like preventative medicine for your plumbing. 4. Impending Drain Problems Being aware of the subtle signs your drains may be sending can help you address potential problems before they turn into serious clogs. One of the earliest and most common indicators is a drain that begins to empty more slowly than usual. Water may remain in the sink or shower for a long time after use. Another telltale sign is the gurgling sounds that emanate from the drains as the water passes through. These noises often suggest that air is being trapped and displaced by a partial obstruction within the pipe. Unpleasant odors rising from a drain can also indicate the buildup of decaying food particles, grease, or other organic matter trapped in the pipes or trap. In more advanced cases, you may notice water backing up into other fixtures-for example, water appearing in the bathtub when you flush the toilet could signal a more significant clog in the future. Paying attention to these early signs allows for timely intervention. 5. Gentle DIY Approaches to Fixing Minor Drain Problems When faced with a slightly slow drain, there are a few gentle, homemade methods that can often provide relief without resorting to harsh chemicals. One common and often effective technique involves using a combination of baking soda and vinegar. First, pour about half a cup of baking soda into the affected drain, followed by an equal amount of white vinegar. The mixture will fizz, which can help unclog minor buildup. After about 30 minutes to an hour, flush the drain thoroughly with plenty of hot water. For physical blockages closer to the drain opening, a plunger can be effective. Make sure there is enough water in the sink or tub to cover the top of the plunger, create a good seal over the drain, and use firm, steady pushes and pulls. For P-traps in your sink that are easily accessible, and if you feel comfortable doing so, placing a bucket underneath and carefully unscrewing the trap may allow you to manually remove any accumulated debris. It is generally advisable to avoid commercial drain-unclogging chemicals, as they can be corrosive to pipes, harmful to the environment, and pose safety risks if not handled properly or if they fail to clear the blockage. 6. Regular Flushing  In addition to your daily habits and troubleshooting of minor issues, incorporating a regular, more dedicated maintenance flush into your routine can go a long way toward keeping your drains in good working order. This isn’t about fixing an existing clog, but rather about proactively cleaning your pipes to prevent buildup from taking hold. Once a month, or at least once a quarter, consider performing a more thorough flush. This could involve filling each

7 Tricks To Keep Your Drains Clean And Odor-Free Read More »

oil diffusers and flowers

6 Expert Tips For Getting Rid Of Odors In Your Home

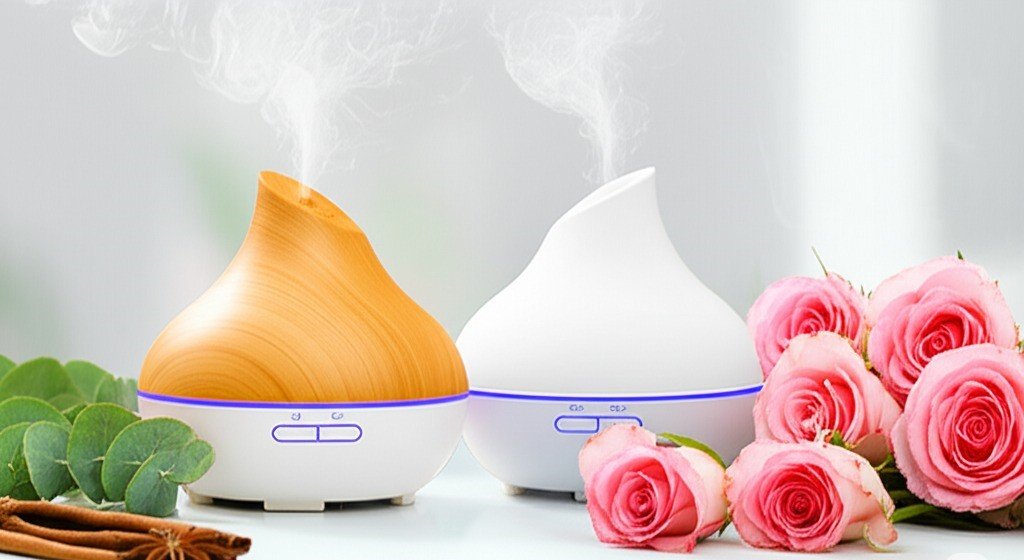
How to prevent odors and have a home that smells good, either conjuring comfort and cleanliness or, if neglected, a sense of discomfort. Creating a space that always welcomes you with a breath of fresh air is less about masking odors and more about a deliberate, multifaceted approach. Today, we’ll walk you through five essential steps to transform your home into a fragrant sanctuary, where freshness is a constant and comforting presence. 1. Eliminating Sources of Odors Our first and most crucial step on the path to a sweet-smelling home lies in the uncompromising elimination of existing and potential odor sources through thorough, regular cleaning. Before any thought is given to introducing pleasant fragrances, the priority must be to neutralize the very things that cause unwelcome smells. This involves a commitment to consistent cleanliness across all areas. Kitchen waste bins, especially those holding food scraps, require daily emptying and periodic washing to prevent lingering odors. Similarly, bathroom bins and other refuse containers must be managed with diligence. Spills in the kitchen, whether on countertops, the stovetop, or the floor, need immediate attention, as decomposing food particles are a primary odor culprit. Sink drains in both the kitchen and bathroom should be regularly flushed and cleaned to prevent build-up. In the bathroom, combating moisture through ventilation and ensuring towels dry completely is key to preventing musty smells. Essentially, this initial stage is about removing the “bad” before we even consider adding the “good,” creating a truly clean slate. 2. Consistent Ventilation With a foundation of cleanliness established, our second vital step involves actively inviting fresh air into our homes. Consistent and effective ventilation is a remarkably simple yet profoundly effective tool in maintaining a pleasant indoor atmosphere. The daily practice of opening windows, even for a short duration when weather conditions permit, allows for the crucial exchange of stale, odor-laden indoor air with clean, fresh outdoor air. This natural circulation works wonders to dissipate lingering cooking smells, general household stuffiness, and a myriad of airborne particles that can otherwise contribute to a less-than-fresh environment. To maximize this effect, aim for cross-ventilation whenever possible by opening windows on opposite sides of a room or the home, creating a gentle but powerful current that sweeps away impurities and revitalizes the air within your living spaces. This regular “breathing” of your home is fundamental to its olfactory well-being. 3. Fabric Odors Our third significant step focuses on managing items within our homes that are particularly prone to trapping and holding onto odors: fabrics. Carpets, upholstered furniture, curtains, bedding, and clothing can all act like sponges, absorbing smells from cooking, pets, smoke, or general daily life. Regular vacuuming of carpets and upholstery is essential, not just for removing visible dirt but also for lifting odor-carrying particles. Bed linens should be laundered frequently, and dirty laundry, especially damp items or sportswear, should not be allowed to accumulate, as it can quickly become a source of unpleasant smells. Ensure all laundered items are completely dry before being stored to prevent mildew. For deeper-seated odors in carpets or large upholstered pieces, periodic professional steam cleaning or the use of appropriate fabric refreshers (preferably natural or unscented initially) can make a substantial difference, effectively neutralizing trapped smells and restoring freshness to these often-overlooked odor reservoirs. 4. Pet Areas The fourth step requires targeted attention to specific zones within the home that are inherently more susceptible to developing persistent odors. For households with pets, this means diligent management of pet-related smells. Regular grooming of animals, frequent cleaning of their bedding, and meticulous daily scooping and regular changing of litter boxes are non-negotiable. Any pet accidents must be addressed immediately with enzymatic cleaners designed to break down odor-causing proteins. High-moisture areas, primarily bathrooms but also potentially poorly ventilated laundry rooms or basements, need consistent strategies to combat mustiness. This includes ensuring good airflow, promptly repairing any leaks, and using dehumidifiers if necessary. The refrigerator also falls into this category; regular clearing out of old food and wiping down interior surfaces prevents it from becoming an odor source. By proactively managing these specific “hotspots,” we prevent localized odors from permeating the entire home. 5. Natural Fragrances Having diligently addressed cleanliness, ventilation, fabric care, and specific odor zones, our fifth and final step involves the artful and thoughtful introduction of subtle, natural fragrances to enhance the home’s ambiance. The aim here is not to overpower the senses with artificial chemicals but to add a delicate layer of pleasing scent that complements the underlying freshness. Consider placing fresh flowers or a bowl of citrus fruits in living areas for a light, natural aroma. Simmering a pot of water on the stove with ingredients like cinnamon sticks, cloves, and citrus peels can gently perfume the air, especially during cooler months. Essential oil diffusers, used responsibly with high-quality oils like lavender, citrus, or eucalyptus, can customize the scent profile of a room. Good quality candles made from natural waxes and scented with essential oils can also contribute, provided they are used safely and with adequate ventilation. The key is subtlety and a preference for natural sources, ensuring these added scents enhance, rather than compete with, the genuine cleanliness you’ve worked to achieve. 6. Maintenance Habits The sixth pillar emphasizes the critical importance of establishing and sticking to regular cleaning routines and habits. While the initial deep cleaning (Pillar One) is essential for a reset, it’s consistent and ongoing maintenance that truly keeps your home smelling great. This involves integrating small cleaning tasks into your daily and weekly routines. Daily habits might include wiping down kitchen counters after every meal, quickly sweeping or vacuuming high-traffic kitchen floors, making sure the sink is free of dirty dishes before bed, and quickly cleaning the bathroom sink. Weekly habits might include vacuuming and dusting all rooms more thoroughly, changing bed linens, cleaning bathroom fixtures more thoroughly, and mopping floors. By breaking down larger cleaning tasks into regular, manageable activities, you can prevent the buildup of dirt, grime, and odor-causing

6 Expert Tips For Getting Rid Of Odors In Your Home Read More »

micro fiber cloth colorful

Best 5 Tips You Need To Know About Microfiber Cloths

Far from being just another option in the cleaning arsenal, microfiber cloth offers a unique combination of effectiveness, versatility, and durability that elevates it to the status of indispensable for those seeking superior results with less effort and, often, fewer chemicals. We’ll explore its remarkable capabilities in five key steps of understanding and application. 1. The Science Behind the Sparkle To truly appreciate why microfiber cloths are such game-changers in the world of cleaning, we must first delve into the unique structure that gives them their power. The term “microfiber” itself refers to the incredibly fine synthetic fibers – typically a blend of polyester and polyamide (nylon) – that are woven together to create the fabric. These individual fibers are astonishingly thin, often many times finer than a single strand of human hair. What makes them even more effective is that during the manufacturing process, these fibers are frequently split or “fragmented.” This splitting process vastly increases the surface area of each fiber and creates millions of microscopic nooks, crannies, and tiny “claws” along each strand. It is this intricate, engineered architecture at a microscopic level that bestows microfiber cloths with their remarkable ability to attract, lift, and trap dirt, dust, and grime. Unlike traditional cotton cloths which might simply push particles around or require significant liquid to suspend dirt, the microfibers actively grab onto debris. Furthermore, the polyester component often carries a natural positive electrical charge, which acts like a magnet for negatively charged dust particles, pulling them from surfaces and holding them securely within the cloth’s weave until it is laundered. This fundamental understanding of their construction is key to recognizing why they perform so exceptionally well in various cleaning applications. 2. Mastering Dry Dusting One of the most immediate and visibly impressive applications of microfiber cloths is their proficiency in dry dusting. When used without any moisture, these cloths transform into highly efficient dust magnets. Imagine gliding a dry microfiber cloth across a dusty bookshelf, an antique wooden table, intricate window blinds, or the delicate surfaces of your electronic devices. You will observe how the dust seems to cling effortlessly to the fabric, leaving behind a surface that is not only visibly cleaner but also smoother to the touch, free from the fine particulate layer that can dull its appearance. The crucial difference compared to traditional feather dusters or less advanced cloths is that microfiber doesn’t merely displace dust, scattering it into the air only for it to settle elsewhere moments later. Instead, the fine, charged fibers actively capture and tenaciously hold onto these dust particles. This superior trapping ability not only enhances the aesthetic appeal of your home by keeping surfaces looking pristine for longer but also contributes significantly to a healthier indoor environment by reducing airborne allergens and irritants, a particularly valuable benefit for households with allergy sufferers or individuals sensitive to dust.     3.Unleashing Wet Cleaning Wonders When a microfiber cloth is dampened with plain water, its cleaning capabilities expand dramatically, turning it into a versatile workhorse for a multitude of cleaning tasks. The absorbent nature of microfiber is quite remarkable; these cloths can typically hold several times their own weight in liquid. This makes them exceptionally effective for quickly and efficiently soaking up spills, whether it’s a splash of juice on the kitchen counter or water around the bathroom sink. Beyond simple spill absorption, a damp microfiber cloth becomes a powerful tool for general surface cleaning. The combination of the microfibers’ scrubbing action and their ability to lift and trap grime means that they can tackle everyday messes like food splatters, sticky fingerprints, soap scum, and light layers of grease with surprising ease, often requiring nothing more than water. For more resistant or greasy build-up, a minimal amount of a mild, pH-neutral cleaning solution can be added to the water, but one of the most significant advantages of microfiber is its capacity to clean effectively and hygienically with little to no reliance on harsh chemical cleaners. This gentle yet powerful action makes damp microfiber cloths ideal for use on kitchen countertops, bathroom tiles and fixtures, appliance exteriors, and dining tables, consistently leaving behind a thoroughly clean and satisfyingly streak-free finish.   4. The Microfiber Advantage on Glass and Polished Surfaces The task of cleaning glass, mirrors, and other highly polished surfaces is an area where microfiber cloths truly demonstrate their superiority, delivering results that are often described as brilliantly clear. Anyone who has previously battled with the frustrating streaks, smudges, and lint residue left behind by conventional cleaning cloths or paper towels when attempting to clean windows, mirrors, or shiny chrome fixtures will find the performance of microfiber to be a revelation. When a microfiber cloth is lightly dampened – either with just a touch of water, or for exceptionally stubborn marks or a professional gleam, with a specialized glass cleaning spray or a diluted solution of water and white vinegar – it glides almost effortlessly across these smooth surfaces. It efficiently lifts away dirt, grime, fingerprints, and water spots. Crucially, due to the fineness of the fibers and the tight weave of the cloth, it dries very quickly and leaves behind virtually no lint or streaks, resulting in an impeccable, crystal-clear finish. This ability to clean without leaving any trace of itself behind is what makes microfiber the go-to choice for ensuring that reflective surfaces throughout the home are not just clean, but flawlessly transparent and sparkling.   5. The Long-Term Value of Microfiber Beyond their immediate cleaning prowess, the durability and inherent reusability of microfiber cloths are fundamental aspects that contribute significantly to their overall value and their standing as an environmentally conscious cleaning choice. Unlike disposable paper towels that contribute to waste after a single use, or traditional cotton cloths that can quickly fray, lose their shape, and diminish in cleaning effectiveness, high-quality microfiber cloths are engineered to withstand hundreds of washing cycles without degrading their unique cleaning properties. To ensure their longevity and maintain peak performance, a

Best 5 Tips You Need To Know About Microfiber Cloths Read More »