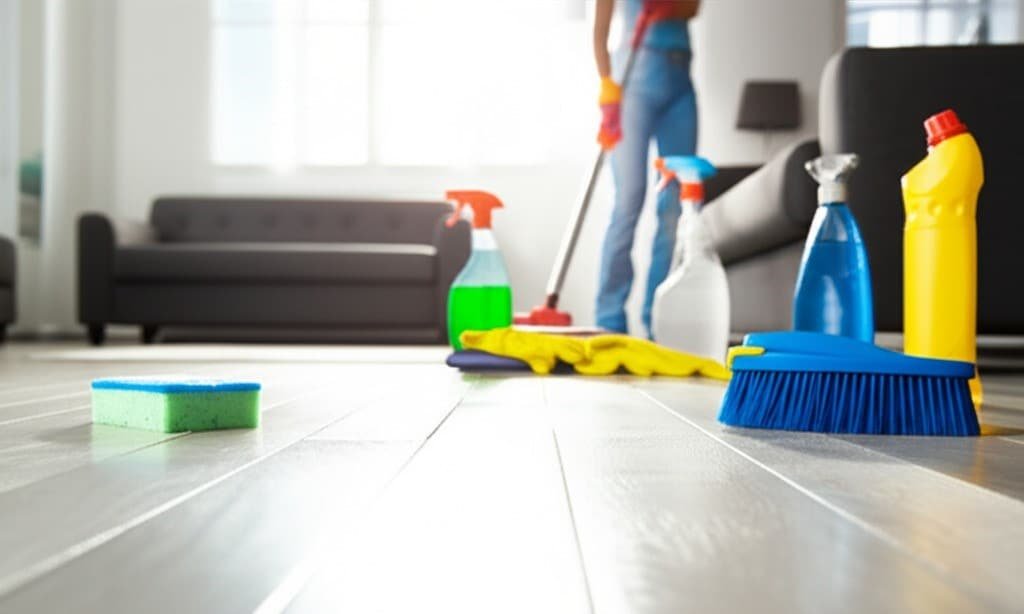
Spring Cleaning

summer deep cleaning

Why Summer Is The Best Season To Do a Deep Cleaning At Home

Why Summer Is the Best Season for Home Deep Cleaning Summer brings longer days, warmer temperatures, and a natural opportunity to refresh your home. A home deep cleaning in summer is easier, faster, and more effective than at any other time of year. Open windows create cross-breezes, bright sunlight reveals grime that stayed hidden all winter, and warm air dries carpets and upholstery quickly. If you have been putting off a thorough clean, these summer advantages make now the right moment to start. 1. Better Ventilation Dries Surfaces Faster Ventilation is the biggest advantage of summer deep cleaning. When windows and doors stay open, fresh air quickly clears the fumes from cleaning products, so the process is more comfortable and safer. Moisture from mopping floors, steam cleaning carpets, or washing upholstery dries fast, and rapid drying prevents mold and mildew, which thrive in damp, stagnant spaces. The CDC’s mold prevention guidance stresses controlling moisture, and summer airflow makes that much easier than in winter, when closed windows trap dampness. 2. Sunlight and Warmth Boost Cleaning Power Sunlight is a natural disinfectant. Its ultraviolet rays kill bacteria and other microorganisms on surfaces, which is especially useful after months of closed-up rooms. Bright summer light also shows dirt that stays invisible in dim conditions: window streaks, wall smudges, and dust in corners all become obvious, so you clean more thoroughly. Warm temperatures help cleaning solutions break down grease and grime with less scrubbing, which means less product and less effort. The CDC’s cleaning and disinfecting guidance is a useful reference for building a healthy routine around these conditions. 3. Take Cleaning Outdoors Summer lets you extend the cleaning zone beyond the house. Rugs can be beaten and aired in the sun, cushions scrubbed and left to dry quickly, and mattresses refreshed with a few hours of sun exposure. Patios, decks, outdoor furniture, and BBQ grills collect grime all year, and warm water plus a hose makes them manageable now. Cleaning these spaces flows naturally into a deeper clean of the indoor areas beside them, creating a seamless reset from the interior to the exterior of your home. 4. Tackle Basements, Garages, and Closets Attics, basements, garages, and closets are less inviting in cold months. Summer warmth makes it comfortable to sort, declutter, and clean them, and items can be carried outside for cleaning or disposal. Clothing can be aired out, seasonal items laundered and stored, and closet shelves wiped down and organized without the rush of cooler weather. 5. Improve Indoor Air Quality Before Fall After a long, closed-up winter, dust, allergens, and stagnant air accumulate in the home. A comprehensive summer deep clean removes dust mites, pet dander, and other pollutants, which supports healthier indoor air quality as the cooler months approach and windows are sealed again. Health Canada notes that indoor air can hold contaminants that build up in tightly closed homes, so a seasonal reset makes a real difference. A practical summer deep cleaning plan covers the tasks that benefit most from warm, dry weather: Wash windows and screens, and let them dry in the sun Steam clean carpets and upholstery with windows open and fans running Scrub patio furniture, decks, and BBQ grills with a hose Beat and air rugs, cushions, and mattresses outdoors Declutter and wipe down the basement, garage, and closets Dust air conditioning units and vents while the weather is dry Task Why Summer Helps Windows and screens Streaks dry clear and screens dry fast in the sun Carpets and upholstery Open windows and fans speed drying and prevent musty odors Patio and deck Warm water and a hose make grime easy to remove Basement and garage Comfortable to work in, and items can be aired outside AC units and vents Dry weather suits dusting and maintenance When to Call a Professional Deep Cleaning Service Even with perfect summer conditions, a full home deep cleaning takes hours of strenuous work. Toronto Shine Cleaning handles the job with trained cleaners, professional equipment, and a systematic checklist, and the company is bonded and insured. Book a home deep cleaning for a thorough refresh, add regular maid service to keep it that way, review cleaning prices, or check whether we serve your neighbourhood in the GTA. Call (647) 424-0355 to book. Why is summer better than spring for deep cleaning? Summer offers longer daylight, warmer temperatures, and the ability to open windows wide. Moisture dries faster, cleaning products work better in warmth, and you can move rugs, cushions, and furniture outdoors. Spring often stays cool and damp, which slows drying and can leave carpets and upholstery at risk of mildew. Can sunlight really disinfect surfaces? Yes. The ultraviolet rays in sunlight kill bacteria and other microorganisms on surfaces, which is why airing rugs, cushions, and mattresses in direct sun is a traditional and effective practice. Sunlight also reveals dirt and streaks that are hard to see in dim winter light. How do I prevent mold after cleaning with water? Dry everything quickly. Open windows and doors for a cross-breeze, run fans, and use a dehumidifier in damp areas like basements. The CDC recommends controlling moisture to prevent mold, and summer ventilation makes that much easier than in winter. Does Toronto Shine Cleaning offer summer deep cleaning? Yes. Toronto Shine Cleaning provides professional deep cleaning across the GTA, and summer is a great time to book because windows can stay open while the team works. Call (647) 424-0355 or request a quote online, and the team brings all supplies and equipment.

Why Summer Is The Best Season To Do a Deep Cleaning At Home Read More »

How Mental Health and House Cleaning are Completely Linked

How Mental Health and House Cleaning Are Completely Linked Your home spends most of its hours absorbing your inner weather. When stress, overwhelm, or low mood take hold, mail stacks up on the counter, laundry lingers in the basket, and dust settles on surfaces you no longer have the energy to notice. When you feel calm and in control, the rooms tend to follow. That mirror is not a coincidence; it is a two-way relationship. Cleaning, often dismissed as a chore, is one of the most accessible tools available for managing how you feel, because it is physical work with visible results that feeds back into your mind. Here is the mechanics of that loop. Cleaning Restores a Sense of Control Life is unpredictable at scale. You cannot steer global events, the economy, other people, or the surprises your career and personal life throw at you, and that helplessness feeds anxiety. A home is different: it is a small, manageable universe where your actions land with direct, immediate consequences. You pick the cleaner, you put in the effort, and the floor goes from grimy to gleaming because you decided it would. Sorting a chaotic pantry or closet offers a contained problem with a clear solution, a rare thing in a world of ambiguous ones. That feeling of efficacy does not stay in the kitchen; confidence earned on a small, winnable task ripples outward into bigger challenges. The Repetitive Motion Is an Active Meditation Scrubbing, wiping, sweeping, and folding are rhythmic, and rhythm grounds a racing mind. When anxious thoughts loop over past regrets or future worries, the sensory demands of cleaning pull attention into the present: warm soapy water on your hands, the back-and-forth hum of the vacuum, the scent of lemon polish, a cloth squeaking across glass. This is a core principle of mindfulness, anchoring you in the now and granting a break from mental chatter. Focused activity lets the nervous system settle, lowering cortisol and easing physical stress signs like a rapid heart rate and shallow breathing. Stay with it and you can slip into flow, that state where time fades and you surface feeling refreshed and centered. A Finished Room Is a Dose of Dopamine Brains are wired to enjoy accomplishment. Watching a filthy, cluttered room become an orderly one through your own effort releases dopamine, the neurotransmitter tied to pleasure, motivation, and satisfaction, so the before-and-after is chemically rewarding, not merely Instagram-worthy. It is evidence of your own competence. This is why making your bed each morning shifts an entire day: it is the first completed task, the first small win that sets a precedent. Every cleared counter and polished surface reinforces capability, which cuts directly against the lethargy, apathy, and futility that depression feeds on. Clutter Charges You Rent on Your Attention The flip side is real too. Clutter is excessive sensory input: every object in view sends a signal, and a crowded room bombards the brain. Paper piles whisper about unfinished tasks, an overflowing laundry basket nags about pending chores, and the visual noise drains focus even below conscious awareness. Living like this keeps stress mildly elevated, makes relaxation hard, and steals the cognitive resources you wanted for work, hobbies, or conversation. Decluttering removes the noise and hands your mind clear space. The benefits of moving your body while you do it stack on top, which the CDC documents in its research on the benefits of physical activity, including reduced short-term anxiety and a lower risk of depression and anxiety over time. Public Health Agency of Canada resources on mental health and wellness and being active for your health make the same connection from the Canadian side. What a Tidy Space Does for Focus, Ritual, and Sleep Beyond mood, order supports performance. A desk buried in old mugs and stray papers fractures attention, and minutes vanish hunting for a pen. A clear workspace minimizes distraction and smooths workflow, and the principle travels: a tidy kitchen makes cooking pleasant, a neat living room becomes actual rest rather than low-grade agitation. Cleaning also marks life transitions, which is why spring cleaning persists across cultures as a way to sweep out the old and make room for the new: Scrubbing after a breakup reclaims your space and closes a chapter Cleaning after an illness signals recovery and a fresh start Preparing a nursery or a home office is an act of hope and readiness Finally, there is sleep, which underpins mood regulation and cognitive function. A cluttered, dusty bedroom fights rest, while a clean sanctuary, fresh sheets pulled back, tells the brain the day is over. Waking rested makes stress easier to carry. Small Cleaning Habits and What They Give Back If you feel Try this What it returns Overwhelmed A ten-minute timer on one counter or shelf A finished task and proof you can start Anxious Rhythmic wiping or vacuuming, no phone Present-moment focus and calmer breathing Stuck or flat Make the bed, then one drawer An early dopamine win to build on Distracted Clear the desk you work at Fewer visual signals competing for attention Restless at night Tidy the bedroom before bed A cue that the day is done, better sleep If even the small version feels unreachable this season, that is exactly when outside help works best, because a professional reset removes the backlog so the habit can actually start. Toronto Shine Cleaning offers thorough, judgment-free service: a one-time deep cleaning restores the baseline, and regular maid visits keep it from sliding back, with rates on the pricing page and coverage across every GTA area listed in our locations. Mental Health and Cleaning FAQ Does a messy house mean I have a mental health problem? No. Homes get messy through busy seasons, illness, moves, and plain fatigue, and one messy weekend proves nothing. The connection runs both ways, but diagnosis belongs to professionals. If clutter consistently feels impossible to face and drains your mood for weeks, that is worth discussing with a

How Mental Health and House Cleaning are Completely Linked Read More »

Barbecue Grills

6 Tips on How to Keep Your Barbecue Grills Looking Like New

Six Tips to Keep Your Barbecue Grill Looking Like New The film clinging to your grates is residue from past meals: carbonized marinade sugars, polymerized fats from meat, and open-flame ash. It is not a badge of honor or a seasoning layer: that buildup adds bitter flavor to fresh food, fuels flare-ups, and can harbor bacteria, so a clean grill matters for taste, safety, and equipment life. Grates touch your food directly, and the routine is simpler than it looks once you learn the order of operations. Tip 1: Assemble the Right Tools First Preparation wins here. Buy a quality grill brush: wire bristles clean fast but can shed into food, so inspect yours before every use or choose a bristle-free coiled-steel design. Then keep these nearby: A long-handled scraper for thick, flat carbon deposits Heavy-duty rubber or nitrile gloves and a bucket Degreasing dish soap, distilled white vinegar, baking soda Microfiber cloths and a non-abrasive scour pad A barbecue degreaser or oven cleaner, only for extreme cases Tip 2: Burn-Off and Scrape After Every Cook The routine always starts with heat, and this one habit outperforms any deep clean. Set the grill to its highest setting, close the lid, and run it for 15 to 20 minutes until fresh residue incinerates into dry white or gray ash, which makes scraping dramatically easier. Then shut off the gas or extinguish the charcoal and, while the grates are still very hot, scrape along the bars with firm pressure. Repeat after every cook and deep cleans stay rare. Tip 3: Submerge the Grates in Hot Soapy Water For a deep clean, remove the grates once they are cool enough to handle. Submerge them in a sink, bucket, or heavy-duty trash bag filled with the hottest water you can handle plus a generous pour of degreasing dish soap. Soak at least 30 minutes, or several hours to overnight for neglected grates, so the polymerized grease the burn-off missed softens and dissolves. Scrub with a stiff non-abrasive brush, rinse away every trace of soap so it cannot flavor your next steak, and dry immediately, because cast iron especially will flash-rust if it sits damp. Tip 4: Fight Rust and Grime with Vinegar and Baking Soda For a detergent-free approach, place cool grates in a large heavy-duty trash bag and pour in a two to one mix of distilled white vinegar and water, using enough liquid to coat every bar. Close the bag and leave it to rest for several hours, ideally overnight, while the acetic acid breaks down grease and rust. Open it, sprinkle baking soda generously over the wet grates, and the acid-alkali reaction fizzes into a gentle abrasive foam. Close the bag for another 20 to 30 minutes, scrub, rinse thoroughly, and dry completely. Tip 5: Reach for Oven Cleaner Only in Extreme Cases When carbon has fused to grates over years of neglect, a commercial oven cleaner or barbecue degreaser is the last resort. Work outdoors with ventilation, away from children and pets, wearing gloves and eye protection, with the grates laid on newspaper. Spray evenly, follow the product instructions, and bag the coated grates for 30 minutes to several hours. Open the bag away from your face, then rinse with a hose obsessively and wash with soap, because leftover caustic residue is hazardous if ingested. Skip this route on porcelain-coated grates unless the label allows it, since harsh chemicals etch the coating. Health Canada’s rules for using household chemicals safely apply directly to degreasers like these. Tip 6: Clean the Cook Box, Then Season Before Reassembly While the grates soak, do not neglect the interior. Heat tents, also called flavorizer bars, catch drippings, vaporize them into flavor, and shield the burner tubes; they get just as filthy, so remove and scrape them or soak them in hot soapy water. Inspect the gas ports along the burner tubes, because clogs cause uneven heating and weak yellow flames; clear them with a paperclip, never anything that can break off inside. Scrape flaking carbon from the lid and basin so it cannot land on your food, then vacuum loose debris out with a wet/dry shop vacuum. Finish with the grease tray and catch pan, where rendered fat becomes a fire hazard: scrape out hardened grease, wash the tray in hot soapy water, replace disposable pans, and scrub reusable ones clean. With everything dry, reassemble the tray, burners, and tents, then season the clean grates: wipe a barely-there sheen of high-smoke-point oil (canola, grapeseed, or vegetable), pat off excess, and heat the closed grill on medium-high for 15 to 20 minutes until smoking stops. That polymerizes the oil into a hard, non-stick finish. Deep-Clean Methods Compared Method Best for Dwell time Watch out for High-heat burn-off and scrape Every cook, light residue 15 to 20 minutes heating Very hot grates; work along the bars Hot soapy soak Routine deep cleans 30 minutes to overnight Rinse all soap; dry fast to prevent rust Vinegar soak plus baking soda Surface rust, natural cleaning Hours plus 20 to 30 minutes fizzing The bag must be heavy-duty and sealed Oven cleaner or BBQ degreaser Years of fused carbon 30 minutes to several hours bagged Gloves, eye protection, outdoor air; skip on porcelain coating Scrape after every cook and you stretch the distance between full resets; deep clean at the start and end of grilling season and the equipment lasts for years. The same logic applies indoors, since food-contact surfaces deserve real cleaning, a point the CDC makes in its food safety basics. When your grill, or the kitchen beneath it, needs a professional reset, Toronto Shine Cleaning brings that care to GTA homes: a deep cleaning handles the big job, regular visits keep kitchens maintained, and the pricing page shows plans for every area we serve. Call (647) 424-0355 to book. Barbecue Cleaning FAQ How often should I deep clean my grill? Scrape and burn-off after every cook; deep clean the grates, burners, cook box, and grease

6 Tips on How to Keep Your Barbecue Grills Looking Like New Read More »

preparing for the July cleaning

How to Prepare for July Cleaning: 4 Steps Fast and Easy

July Cleaning brings a unique set of circumstances to our living spaces. The longer days, increased outdoor activity, and potential for more guests mean our homes need a different kind of attention. Preparing for a thorough July Cleaning is not merely about having supplies on hand; it is a systematic approach to ensuring efficiency and effectiveness, laying the groundwork so the actual cleaning process becomes smoother and more impactful. Without proper preparation, cleaning can feel overwhelming and incomplete, like trying to build a house without first pouring a solid foundation. 1.Preparing The Mind Start by mentally preparing yourself for the task ahead. This involves more than just setting aside time; it means adopting a mindset focused on systematic action rather than sporadic effort. Acknowledge that a significant clean requires energy and focus. Break down the entire house into manageable zones or rooms. Avoid the trap of trying to tackle everything at once, which often leads to burnout and a sense of defeat. Instead, visualize the clean, organized space you aim to achieve, and let that vision guide your planning. Consider creating a simple, unwritten mental checklist or a rough written outline of areas you want to address. This helps in prioritizing tasks and ensures nothing important is overlooked. Think about who else might be able to contribute, even small tasks, as collaboration can significantly lighten the load. Hydrate well, ensure you have comfortable clothing, and think about playing some uplifting music to keep spirits high. The mental readiness is the first, often underestimated, step towards a successful July Cleaning. 2.One Room At a Time Once your mind is aligned, the next crucial step is comprehensive decluttering. This isn’t just tidying; it’s a strategic removal of anything that obstructs access or impedes effective cleaning. Clutter acts as a barrier, trapping dust, hiding spills, and making it impossible to properly wipe surfaces or vacuum floors during your July Cleaning efforts. Begin by focusing on one area at a time, perhaps starting with the most heavily used spaces like the kitchen or living room. In the kitchen, this means clearing every countertop. Move small appliances like toasters, coffee makers, and blenders. Don’t just push them aside; truly lift them, wipe the counter beneath them, and consider if they need a quick wipe-down themselves. Empty the sink of all dirty dishes and load them into the dishwasher, or wash them immediately. Go through any papers or mail that have accumulated on kitchen surfaces, sorting them into immediate action, filing, or recycling piles. Check the pantry and refrigerator for expired food items, disposing of anything that’s past its prime to prevent future messes and odors. This creates clear, unobstructed surfaces, allowing your cleaning tools to reach every corner and crevice effectively for your July Cleaning. 3.Supplies And Tools With decluttering underway, the next phase is gathering all your cleaning supplies and tools. There’s nothing more frustrating than starting a task only to realize you’re missing a crucial item or that a bottle is empty. Take an inventory of your cleaning arsenal for your July Cleaning. Do you have a sufficient supply of all-purpose cleaner, glass cleaner, bathroom cleaner, and floor cleaner suitable for your specific flooring types? Check the levels of your dish soap and hand soap. Ensure you have plenty of clean microfiber cloths for dusting and wiping, a separate set for glass, and another for bathrooms to prevent cross-contamination. Sponges, scrub brushes for tough grime, a toilet brush, and a squeegee for windows or shower doors are essential. Check the condition of your mop and bucket; do they need to be cleaned or replaced? Ensure your vacuum cleaner bags are empty or the canister is cleared, and that all attachments are readily available and free of blockages. A good dustpan and brush are also invaluable. Don’t forget protective gloves to safeguard your hands from harsh chemicals and dirty water. Have a designated cleaning caddy or bucket where you can neatly organize and transport these items from room to room, minimizing trips back and forth to the supply closet. This foresight saves valuable time and maintains momentum once the actual July Cleaning begins. Before the deep cleaning commences, there are a few immediate pre-cleaning actions that make a significant difference. First and foremost, empty all trash cans throughout the house. This prevents new odors from developing and clears the way for wiping down the bins themselves. Next, address any obvious large debris or major spills. If there’s a pile of dirt by the entryway, sweep it up. If there’s a visible spill on the kitchen floor, wipe it up immediately rather than waiting for the floor cleaning. These seemingly small actions prevent tracking dirt into other areas and save you from having to clean over existing messes during your July Cleaning. For bathrooms, consider pre-treating stubborn stains in the toilet bowl or shower with a specialized cleaner; allowing it to soak for some time will significantly reduce scrubbing effort later. In the kitchen, if your oven racks are greasy, remove them and soak them in a tub with hot, soapy water. Opening windows and doors, if the weather permits, is also an excellent preliminary step, especially in July, for an effective July Cleaning. This not only ventilates the house, dispelling stale air and potential cleaning fumes, but also helps to dry surfaces more quickly after they’ve been cleaned, which is particularly useful in humid summer conditions. Now, let’s refine the room-by-room preparation, ensuring every space is primed for optimal July Cleaning. 4.Remove Items In the kitchen, beyond clearing countertops and dealing with dishes, think about items typically stored inside cupboards or drawers that might benefit from a quick re-organization or wipe-down of their exterior. Pull out the toaster crumb tray and empty it. If your microwave is splattered, a quick pre-wipe with a damp cloth or a bowl of water steamed inside for a few minutes will loosen grime significantly, aiding your July Cleaning. Ensure the area around your sink is completely clear, moving soap dispensers, sponge holders, and dish racks. If you have a small

How to Prepare for July Cleaning: 4 Steps Fast and Easy Read More »

4 Easy Home Deep Cleaning Tips You Need to Try

4 Easy Home Deep Cleaning Tips You Need to Try Home deep cleaning goes far beyond routine tidying. Where regular cleaning maintains surface-level order, deep cleaning removes accumulated dirt, stubborn grime, bacteria, and hidden allergens that build up over time in every part of a home. It is a methodical, top-to-bottom process that restores a home to its best hygienic condition, and these four tips make it manageable. 1. Deep Clean the Kitchen From Top to Bottom The kitchen needs the most intensive work because grease, food particles, and bacteria collect there. Clean the interior and exterior of major appliances: degrease ovens inside and out, including racks and doors, clean microwaves internally and externally, wipe refrigerator and dishwasher exteriors, and degrease range hoods and their filters. Wipe cabinet exteriors to remove fingerprints and splatters, descale and polish sinks, faucets, and fixtures, sanitize countertops and backsplashes with attention to grout lines, and scrub floors including edges, corners, and under movable appliances. 2. Say No to Mold, Hard Water, and Dust in Bathrooms Bathrooms are high-moisture areas prone to mold, mildew, and soap scum. Scrub showers and bathtubs, including walls, doors, and tracks, to remove soap scum, hard water deposits, and signs of mildew. Disinfect toilets thoroughly, both inside the bowl and on all exterior surfaces, including the base and surrounding floor. Clean and polish sinks, vanities, countertops, and mirrors, and scrub tiles and grout on floors and walls to restore brightness. Dust light fixtures, exhaust fans, and vents, and descale chrome faucets and showerheads. 3. Dust High, Clean Low, and Don’t Skip the Details Work from top to bottom so dust falls onto surfaces you have not cleaned yet. Dust ceiling fans, light fixtures, picture rails, and curtain rods, then move to baseboards, skirting boards, and electrical outlet covers. Vacuum furniture, including under cushions, and move pieces where possible to clean underneath and behind. Wipe window sills, ledges, tracks, and frames, remove cobwebs from ceilings and corners, and clean interior windows and mirrors. Finish with floors: vacuum carpets thoroughly, including edges and high-traffic areas with spot treatment for stains, and mop hard floors with a suitable cleaning solution, paying attention to corners. 4. Call a Professional Home Deep Cleaning Service Professional cleaners bring training, industrial-grade equipment, and specialized solutions that most homes do not have. They work from a detailed checklist so every agreed area is covered consistently, and a full house deep clean can take many hours or even days of strenuous work when done alone. Reputable companies are insured and bonded: Toronto Shine Cleaning carries a $1,000,000 insurance policy plus a $10,000 accidental breakage and surety bond. The process starts with a consultation to define the scope and finishes with a walk-through so you can confirm the results. The CDC’s cleaning and disinfecting guidance explains why removing dirt before disinfecting matters, and Health Canada’s indoor air quality information covers the allergens a deep clean removes. For mold-prone areas, the CDC’s mold resources explain why moisture control is essential. Signs it is time for a home deep cleaning: Persistent musty odors despite regular cleaning Visible dust build-up in corners or on less-disturbed surfaces Grease build-up in the kitchen or hard water stains in the bathroom Allergy symptoms that worsen indoors A big event, move, sale, or renovation on the calendar Room Deep Cleaning Focus Tools That Help Kitchen Appliances, range hood, cabinets, grout, floors Degreaser, microfiber cloths, scrub brush Bathroom Shower, toilet, tiles, grout, fixtures Disinfectant, descaler, grout brush Living areas and bedrooms Ceiling fans, baseboards, furniture, windows Vacuum attachments, extendable duster Whole home Vents, door frames, switches, floors Vacuum, mop, step ladder Make Deep Cleaning a Seasonal Habit Spring and autumn are natural triggers, and many homeowners book an annual or semi-annual deep clean to maintain a consistently high standard, especially before hosting events or after renovations. Once the professionals finish, ongoing regular maid service keeps the baseline high, while a professional home deep cleaning resets the whole house. Review pricing or find your GTA location, then call (647) 424-0355 to book. How often should I deep clean my home? Many homes benefit from a deep clean once or twice a year, typically in spring and autumn. You may want one more often before or after events, when moving in or out, before selling or renting a property, or after renovations. How long does a professional deep clean take? It depends on the size of the home, its initial condition, and the tasks involved. A full house deep clean can take many hours or even days of work, which is why professional teams working from a checklist are faster and more consistent. Is a professional deep cleaning service insured? Reputable companies are insured and bonded. Toronto Shine Cleaning carries a $1,000,000 insurance policy and a $10,000 accidental breakage and surety bond, so you are protected against accidental damage or liability. What is the difference between regular and deep cleaning? Regular cleaning maintains surface-level order: dusting, wiping counters, and tidying. Deep cleaning removes accumulated grease, soap scum, limescale, dust, and allergens from hard-to-reach places such as behind appliances, inside ovens, and along baseboards, and it sanitizes areas that routine cleaning misses.

4 Easy Home Deep Cleaning Tips You Need to Try Read More »

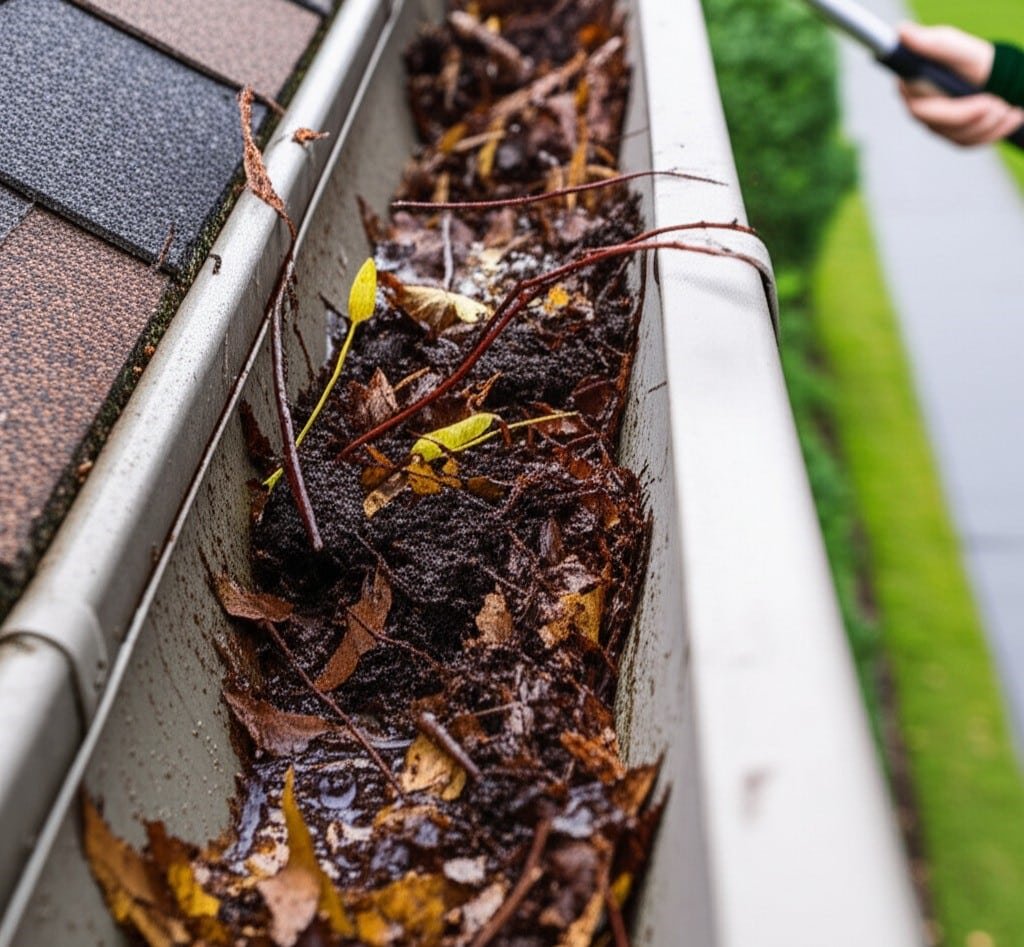
Very dirty gutter

Gutters Cleaning In 3 Steps – You Should To Know

Effective gutters cleaning starts with selecting the right tools. For a thorough cleaning, make sure you have a sturdy ladder. The ladder should be tall enough to safely reach the gutters without straining. Always prioritize safety. You’ll also need heavy-duty, waterproof gloves to protect your hands from the sharp debris and bacteria that are often encountered during cleaning. A gutter shovel or small, sturdy garden spade is essential for removing leaves, twigs, mud, and even snow. These tools make the physical act of cleaning much easier. Have a bucket ready to collect debris, or lay a tarp on the ground beneath your work area to catch any debris that falls. A garden hose fitted with a spray nozzle is crucial for removing fine particles and testing the flow after the main cleaning. Safety glasses are essential to protect your eyes from falling debris or splashing water during the process. For stubborn clogs, a plumber’s snake or flexible auger can be a very useful addition to your arsenal. Having all of these items ready before you begin will speed up the job. 1.Safety First Proper ladder safety is essential before performing any gutter cleaning. Position your ladder on firm, level ground. If the ground is uneven, use a ladder leveler or sturdy boards to create a stable base. Never place a ladder on wet or slippery surfaces. When extending the ladder for cleaning, make sure it reaches at least three rungs above the roof line or gutter lip for safe access. Always maintain three points of contact with the ladder when climbing or working-two feet and one hand, or two hands and one foot. Avoid reaching too far to the side while cleaning; it is much safer to climb down and replace the ladder frequently. This may seem time-consuming, but it significantly reduces the risk of falls, which are a serious hazard when cleaning gutters. Let someone know that you will be cleaning, especially if you are working alone. A properly positioned and safely used ladder is the foundation of any successful, injury-free gutter cleaning task. Start your gutter cleaning by removing the largest debris. It’s usually most effective to start near the outlet of a gutter. This allows you to clear a path for water if you decide to flush during the process, though removing large amounts usually comes first. Using your gutter shovel or trowel, begin removing leaves, twigs, pine needles, gravel, and any other accumulated solids. Work in manageable sections along the gutter. Deposit the removed debris directly into the bucket or onto the tarp spread below. This initial step of the cleaning can be messy, which is why gloves are so important. Pay close attention to areas where debris tends to accumulate, such as valleys or corners of your gutter system. Removing this bulk material consistently is the crux of the gutter cleaning process and will make subsequent steps easier. This part of the cleaning prevents larger items from being pushed into and clogging your gutters. 2.Cleaning Gutters With Water? Once the bulk of the debris has been removed, grab your garden hose, fitted with a spray nozzle, and start at the end of the gutter furthest from a downpipe. Direct a stream of water into the gutter, working toward the downpipe. This flushing action will remove any remaining smaller particles, mud, and grit that your shovel may have missed during the initial phase. Watch the flow of water carefully. If the water pools or backs up, this indicates a blockage further along the gutter or in the downpipe itself. This flushing step of gutter cleaning not only clears the channels, but also serves as an excellent diagnostic tool for identifying problem areas that require more focused attention. A strong, consistent flow toward and into the downpipe signifies a successful cleaning for that section. Checking and clearing your downpipes is an essential part of a thorough gutter cleaning. If, during the flushing step, you notice that water is not draining properly through a downpipe, it is almost certainly clogged. Start by trying to clear the downpipe from top to bottom with a concentrated spray of water from the hose. Sometimes the force of the water is enough to clear the clog. If this does not work, try inserting the hose into the bottom opening of the downpipe and spraying upward. This can sometimes clear the pipe from below. For more stubborn blockages found during gutter cleaning, a plumber’s snake or auger can be carefully inserted from top to bottom or bottom to top into the downpipe to break up or remove compacted debris. In severe cases, it may be necessary to disassemble sections of the downpipe, especially at elbow joints, where clogs often form. Ensuring that your downpipes are clear is vital, as a clogged downpipe renders all your efforts ineffective. 3.Benefits After the primary gutter cleaning and flushing are complete, conduct a thorough inspection of your gutters and downspouts. Look closely for any signs of damage. Check for cracks, holes, or areas of rust, particularly in older metal gutters. Ensure that all gutter sections are securely fastened to the fascia board and that there is no sagging, as sagging can cause water to pool and not drain correctly, defeating the purpose of gutter cleaning. Examine the seams between gutter sections and at the end caps for any leaks. Inspect the downspouts to ensure they are firmly attached to both the gutter outlet and the house, and that they extend far enough away from your home’s foundation to direct water appropriately. This post-gutter cleaning inspection can help you identify minor issues before they become major, costly repairs, extending the life of your gutter system and the benefits of your gutter cleaning. Finally, establish a schedule for regular gutter cleaning. The frequency of gutter cleaning depends largely on your home’s surroundings. As a general rule, gutter cleaning should be performed at least twice a year: once in the late spring after trees have shed their seeds and

Gutters Cleaning In 3 Steps – You Should To Know Read More »

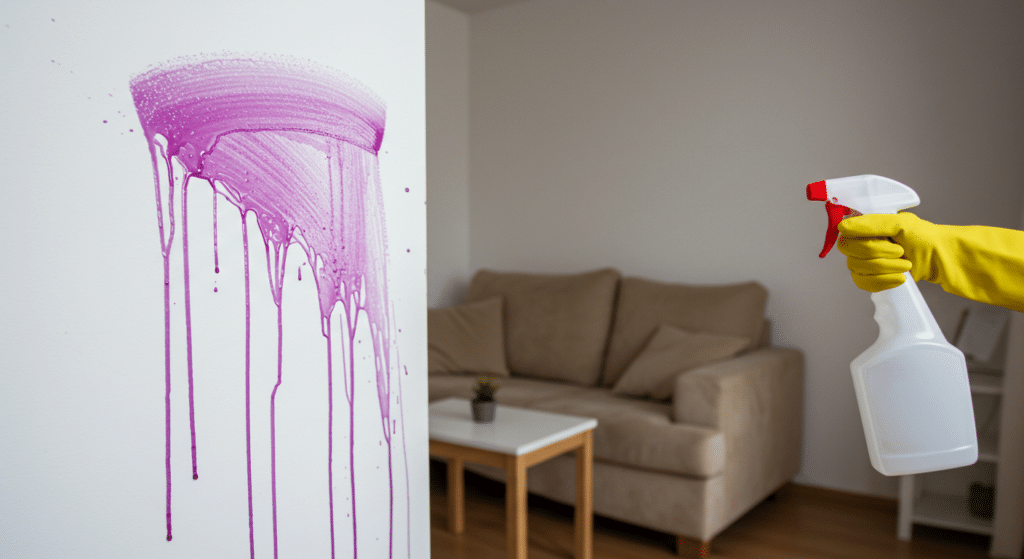
Apartment cleaning mistake, cleaning purple paint spraying a cleaner

7 Common Apartment Cleaning Mistakes and How to Avoid Them

Keeping your apartment clean is essential for a healthy and comfortable living space. However, many people make simple apartment cleaning mistakes that can make the job harder, less effective, or even damaging to surfaces. Here are seven of the most common apartment cleaning mistakes and how to avoid them to keep your home fresh and spotless. 1. Using the Wrong Cleaning Products One of the biggest apartment cleaning mistakes people make is using the wrong products for specific surfaces. Not all cleaners are universal, and using a harsh chemical on delicate materials like wood or marble can cause permanent damage. For example, bleach-based cleaners can discolor granite countertops, while ammonia can strip the finish off wooden furniture. Always read the labels and ensure the cleaner is safe for the surface you are using it on. Another issue with the wrong cleaning products is that some cleaners may leave behind residue that attracts more dirt rather than removing it. Many multi-purpose sprays work well for quick cleans, but they might not be suitable for deep cleaning certain materials. Investing in high-quality, specialized cleaners can make a huge difference in the longevity and cleanliness of your apartment. For a more eco-friendly approach, look for non-toxic cleaners that are safe for both your home and the environment. Many commercial brands now offer plant-based options that effectively clean without harmful chemicals. Choosing the right product ensures your apartment remains fresh without unnecessary wear and tear on your belongings. 2. Skipping High-Touch Areas When cleaning, many people focus on visible areas like floors, countertops, and bathrooms but forget about high-touch surfaces. These areas include light switches, doorknobs, remote controls, and refrigerator handles. Since these spots are used frequently, they accumulate bacteria and germs quickly, making them a hotspot for potential illness. Ignoring these spots is a common apartment cleaning mistake that can compromise your home’s hygiene. To keep your apartment truly clean, make a habit of disinfecting these areas regularly. A simple wipe-down with a disinfectant cloth or spray can go a long way in maintaining a hygienic home. If you’re using reusable cloths, make sure to wash them frequently to prevent bacteria buildup. Especially during flu season or when guests come over, high-touch areas should be cleaned even more often. These small cleaning habits can significantly improve the overall cleanliness of your home and help prevent the spread of germs.     3. Forgetting to Dust Before Vacuuming Many people vacuum first and then dust, thinking they are being efficient. However, dusting after vacuuming can undo all your hard work by allowing dust particles to settle back onto freshly cleaned floors. Dust accumulates on surfaces like shelves, blinds, and furniture, and when disturbed, it becomes airborne, eventually settling on the floor again. This is a common apartment cleaning mistake that leads to more dust buildup. To clean effectively, always dust before you vacuum. Start with higher surfaces, like ceiling fans and shelves, then work your way down. Use a microfiber cloth or a duster that traps dust rather than just spreading it around. This method ensures that any dust that falls to the floor is picked up when you vacuum. In addition to dusting surfaces, don’t forget about vents and baseboards. These areas are often neglected but collect a surprising amount of dust over time. A regular dusting and vacuuming routine will keep your apartment looking fresh and help maintain good air quality. 4. Overloading the Dishwasher Cramming too many dishes into the dishwasher may seem like a time-saver, but it can actually prevent your dishes from getting properly cleaned. When dishes are packed too tightly, water and detergent can’t reach all surfaces, leaving behind food residue and soap buildup. This means you’ll have to rewash items, wasting both time and water. Overloading the dishwasher is another common apartment cleaning mistake that reduces efficiency. Instead, load your dishwasher efficiently by giving dishes enough space for water to circulate. Place larger items on the bottom rack and smaller, more delicate items on the top. If necessary, run two smaller loads instead of overloading one. Additionally, make sure to clean your dishwasher regularly. Food particles and grease can build up over time, reducing efficiency. Running a cleaning cycle with a dishwasher cleaner once a month will help keep it running smoothly and ensure your dishes come out sparkling clean.     5. Using Too Much Cleaning Product It’s common to think that using more cleaning product will make your apartment cleaner, but this is not the case. Overusing cleaning products can leave behind a sticky residue that attracts dirt and dust, making surfaces feel grimy faster than they should. This is one of the most overlooked apartment cleaning mistakes that can actually make your space dirtier. To avoid this mistake, always follow the recommended amount on the product label. Using too much can also make rinsing and wiping more difficult, leading to streaks and buildup. A little goes a long way when it comes to most cleaning solutions. If you notice streaks on glass, floors, or countertops, it may be a sign that you’re using too much product. Try using less and see if it makes a difference in the cleanliness of your space. 6. Ignoring Hidden Areas It’s easy to focus on visible areas like countertops and floors, but hidden spots often accumulate the most dirt. Under furniture, behind appliances, and inside cabinets are some of the most neglected areas in apartment cleaning mistakes. Dust, crumbs, and even mold can build up over time if these areas are ignored. Skipping these hidden areas is a major apartment cleaning mistake that can lead to long-term hygiene issues. Make it a habit to move furniture occasionally and vacuum or sweep underneath. Similarly, clean behind your stove and fridge at least once every few months to prevent grease and food debris from accumulating. Closets and storage areas should also be checked regularly. These spaces can collect dust and clutter, making them harder to clean later. A little

7 Common Apartment Cleaning Mistakes and How to Avoid Them Read More »

Clean glass on the city

6 Expert Tips for Cleaning Glass Without Streaks

Keeping your glass surfaces clean and streak-free can be a challenge, especially when dealing with fingerprints, dust, and water spots. A perfectly clear window or mirror can instantly brighten a space, making it look fresher and more inviting. However, using the wrong techniques or products can leave annoying streaks that ruin the look. With the right methods, you can achieve a professional-quality finish every time. Here are six expert tips to help you with Cleaning glass surfaces without streaks. 1. Use a Microfiber Cloth or Squeegee When cleaning glass, the tool you use is just as important as the cleaning solution. Many people reach for paper towels, but these often leave lint behind and create more streaks. Instead, opt for a microfiber cloth, which is designed to trap dust and absorb moisture without leaving behind fibers. Microfiber cloths are also reusable, making them a more eco-friendly and cost-effective choice. Another great option is a squeegee, a tool used by professional window cleaners. A good-quality squeegee removes excess water and cleaner in a smooth motion, preventing streaks from forming. If you’re cleaning large windows, using a squeegee will make the process much faster and more effective. Just make sure to wipe the blade clean after each swipe to avoid smearing dirt back onto the glass. For best results, dedicate specific microfiber cloths or squeegees to Cleaning glass only. Using the same cloths for other household cleaning tasks can transfer grease and residue, which can cause streaks and make the glass look cloudy. 2. Choose the Right Glass Cleaner Not all glass cleaners are created equal, and choosing the wrong one can lead to streaks or even damage to certain types of glass. Many store-bought Cleaning Glass contain ammonia, which can be effective but also harsh, especially on tinted windows or delicate surfaces. If you’re sensitive to strong chemical smells or have children and pets, consider using an ammonia-free cleaner. A simple but effective alternative is mixing a few drops of dish soap with water. This solution gently cuts through grease and dirt without leaving behind a sticky residue. If your glass has stubborn spots, you can also use a small amount of rubbing alcohol on a cloth to dissolve them before wiping the entire surface. Always apply the cleaner directly to the cloth or squeegee instead of spraying it directly on the Cleaning glass. This prevents excess product from dripping down, which can cause streaks and require extra wiping. A little cleaner goes a long way-too much product can leave behind a filmy residue that attracts dust and makes the Cleaning glass look dull over time. 3. Clean on a Cloudy Day It may seem like a good idea to clean windows on a sunny day, but direct sunlight can actually make the process harder. When Cleaning glass  dries too quickly, it can leave behind streaks and water spots, making it difficult to achieve a flawless finish. Instead, choose an overcast day or clean in the early morning or evening when the sun isn’t as strong. If you must clean on a sunny day, work on smaller sections at a time. Spray the cleaner, wipe immediately, and move on to the next section to prevent the solution from drying too fast. Keeping a dry microfiber cloth handy can also help you quickly buff out any streaks that appear. For exterior windows that are exposed to the sun all day, consider using a hose to rinse off excess dust and dirt before applying the cleaner. This step prevents dirt from being smeared around and helps the cleaner work more effectively. 4. Wipe in One Direction How you wipe the glass makes a big difference in preventing streaks. Many people make the mistake of wiping in random motions, which can spread dirt around and make streaks harder to spot. Instead, use a systematic approach by wiping in one consistent direction. For windows, a great trick is to wipe the inside glass vertically and the outside horizontally (or vice versa). This way, if streaks appear, you’ll know which side needs extra attention. On mirrors and smaller glass surfaces, use long, even strokes rather than circular motions to prevent smudges. Additionally, avoid using old or dirty cloths, as they can leave behind lint and streaks. If you’re cleaning multiple glass surfaces, switch to a fresh microfiber cloth when you notice it getting damp or dirty. Keeping your tools clean is just as important as the cleaning method itself. 5. Don’t Use Too Much Cleaner It’s easy to think that more cleaner equals better results, but using too much product can actually cause streaks. When there’s excess cleaner on the Cleaning glass, it can leave a soapy film that’s difficult to remove completely. This residue attracts dust and dirt, making your glass look dirty again sooner than expected. The key is to use a light mist-just enough to loosen dirt and smudges without drenching the surface. If needed, you can always apply a second, small amount for stubborn spots. Spraying too much cleaner also increases the risk of drips running down onto window sills and frames, which can cause buildup over time. If you accidentally use too much cleaner, go over the Cleaning glass with a dry microfiber cloth or squeegee to remove the excess. This extra step will ensure a streak-free, polished finish. Remember, a little product goes a long way when cleaning glass. 6. Dry With a Lint-Free Cloth The final step in achieving streak-free glass is drying it properly. Even after wiping with a microfiber cloth or squeegee, some moisture can remain on the surface. If left to air-dry, these droplets can leave behind water spots and streaks. To avoid this, always follow up with a dry, lint-free cloth for a final buffing. Some people swear by using crumpled newspaper for this step. While it can be effective, not all newspapers are the same-some contain inks that can smudge or leave residue on the Cleaning glass. If you prefer a guaranteed streak-free

6 Expert Tips for Cleaning Glass Without Streaks Read More »

A cleaning setup featuring a blue bucket with a microfiber cloth

Spring Is Coming! Top Things to Clean in March

March is the perfect time to shake off the winter blues and get your home ready for spring. The changing season means more sunlight, warmer temperatures, and a fresh start. A deep clean in March will help you clear out winter dust, refresh your space, and prepare for the months ahead. Here are seven essential areas to focus on during your March cleaning routine. 1. Wash Your Windows Inside and Out Winter weather leaves behind streaks, dirt, and dust on windows, making them look dull and blocking natural light. That’s why one of the first things to clean in March should be your windows. Grab a microfiber cloth and a streak-free glass cleaner to give them a thorough clean. For extra shine, use a squeegee to remove any remaining residue. Don’t forget about the window tracks and sills! These areas collect dust, grime, and even dead bugs over time. Use a vacuum attachment or an old toothbrush to scrub away dirt before wiping everything down. If you have screens, take them out and rinse them with soapy water to remove built-up dust. A proper clean in March will ensure your windows let in more natural light, instantly brightening your home. With longer days ahead, you’ll want to enjoy all the sunshine you can get! 2. Deep Clean Carpets and Rugs Your carpets and rugs have taken a beating over the winter months, collecting dirt, pet hair, and dust from heavy foot traffic. Even if you vacuum regularly, a deep clean in March is essential to remove embedded dirt and allergens. A steam cleaner or professional carpet cleaning service can make a huge difference. Before deep cleaning, move furniture to vacuum underneath and along baseboards where dust collects. If you notice any stains, treat them with a carpet stain remover and let it sit before scrubbing gently. Baking soda is also great for freshening up carpets-just sprinkle it on, let it sit for 15 minutes, and vacuum thoroughly. A thorough clean in March will not only make your carpets look better but also improve indoor air quality. With allergy season approaching, getting rid of dust and allergens now will help you breathe easier in the coming months. 3. Declutter and Organize Closets Spring is the perfect time to go through your closets and get rid of clothing you no longer wear. One key step to clean in March is decluttering your wardrobe. Start by taking everything out and sorting items into keep, donate, and discard piles. If you haven’t worn something in over a year, it’s probably time to let it go. Once you’ve sorted your clothes, organize them by category or season to make finding outfits easier. Store away heavy winter coats, boots, and scarves to free up space for lighter clothing. Investing in storage bins or vacuum-sealed bags can help keep everything tidy and protected. A well-organized closet saves time and makes getting dressed in the morning much less stressful. Plus, donating clothes you no longer need helps others in need and gives your wardrobe a fresh start for spring. A proper clean in March will leave your space looking neat and refreshed. 4. Clean Out Your Fridge and Pantry March is a great time to go through your kitchen and clear out expired or unused food. A kitchen clean in March should start by emptying your fridge and wiping down shelves and drawers with warm, soapy water. Toss anything past its expiration date and reorganize what’s left to make it easier to access. The pantry needs attention too! Go through dry goods like pasta, rice, and canned foods, checking for anything expired. Wipe down shelves and organize items so you can easily see what you have. This is also a good time to plan meals using ingredients you already own, reducing food waste. A clean and organized kitchen makes meal prep easier and ensures that your food stays fresh. With warmer weather coming, you’ll want a refreshed space to start making lighter, healthier meals. Prioritizing a kitchen clean in March will set you up for a fresh and organized spring. 5. Wash Bedding and Rotate Your Mattress Your bed is where you spend a lot of time, and it collects dust, sweat, and bacteria over time. One of the most important things to clean in March is your bedding. Strip all your pillowcases, sheets, and comforters, and wash them in hot water. If you have a mattress cover, wash that too for an extra layer of cleanliness. While your bedding is in the wash, take time to rotate or flip your mattress. This helps prevent uneven wear and extends its lifespan. If you notice any stains, spot clean them with a mild detergent or upholstery cleaner. Sprinkling baking soda over the mattress and vacuuming it up after 30 minutes can also help eliminate odors. Fresh bedding and a clean mattress improve sleep quality and make your bedroom feel more inviting. After all, there’s nothing better than climbing into a crisp, clean bed at the end of the day. A proper clean in March will ensure your sleep space is fresh and hygienic. 6. Scrub Baseboards and Walls Baseboards and walls often get overlooked, but they collect dust, dirt, and scuff marks over time. To properly clean in March, use a damp microfiber cloth or a mild soap solution to wipe down baseboards, removing built-up grime. Pay special attention to corners and edges where dust accumulates. Walls also need a refresh, especially in high-traffic areas like hallways and kitchens. A gentle wipe with a damp cloth can remove fingerprints, stains, and dust. If you have stubborn marks, try using a magic eraser for a deeper clean. A good clean in March will instantly brighten up your home, making it feel fresh and well-maintained. It’s a simple but effective way to prepare for the new season while eliminating winter grime. 7. Refresh Outdoor Spaces As the weather warms up, you’ll want to spend more time outside, so now is

Spring Is Coming! Top Things to Clean in March Read More »

A cheerful spring scene featuring a broom leaning against a bucket with a cloth draped over it. The setting is an outdoor porch with warm sunlight, su

Preparing for Spring Cleaning: What to Do Before You Start

Preparing for Spring Cleaning: What to Do Before You Start Spring cleaning is a wonderful way to refresh your home after a long winter, but diving in without a plan can quickly become overwhelming. Proper preparation makes the entire process more efficient and far less stressful. By following a few simple steps before you pick up a sponge, you set yourself up for a successful and satisfying clean. Toronto Shine Cleaning shares these preparation tips to help you get started on the right foot. Declutter Your Space First Before you can deep clean, you need to clear out the clutter. Go through closets, drawers, cabinets, and shelves to identify items you no longer use. Sort everything into four piles: keep, donate, recycle, and trash. If you have not used something in over a year, it is probably time to let it go. A clutter-free home not only looks better but also makes cleaning faster and more effective. Tackle one room at a time, starting with high-clutter areas like pantries, storage closets, and home offices, to keep the task manageable. Gather Your Cleaning Supplies Nothing slows down spring cleaning like hunting for supplies mid-task. Stock up on essentials before you begin. Here is a quick checklist of what you will need for a thorough spring clean: Category Recommended Items Surface Cleaners Microfiber cloths, all-purpose cleaner, glass cleaner, disinfectant spray Floor Care Vacuum with attachments, mop, bucket, hardwood or tile cleaner Tools & Accessories Sponges, scrub brushes, squeegee, duster with extension handle Specialty Products Degreaser for kitchen, grout cleaner for bathroom, stain remover for carpets and upholstery Safety & Disposal Rubber gloves, garbage bags, masks if using strong cleaners Consider using eco-friendly cleaning products to protect your home and the environment. Many conventional cleaners contain harsh chemicals that can irritate skin and lungs. The Government of Canada provides resources on using household products safely to help you choose wisely. Make a Room-by-Room Checklist A detailed checklist keeps you organized and ensures no area gets missed. Write down tasks for each room and prioritize areas that need the most attention. Breaking the work into manageable sections makes the job feel less daunting and helps you track your progress. Include tasks like dusting ceiling fans, wiping baseboards, cleaning windows, washing curtains, vacuuming under furniture, and disinfecting high-touch surfaces like light switches and door handles. The CDC recommends cleaning surfaces first with soap and water before disinfecting for the most effective results. Pre-Treat Stubborn Stains Tough stains on carpets, upholstery, and kitchen surfaces need time to break down. Apply stain remover or pre-treatment solutions before you start cleaning so they can work while you tackle other tasks. For kitchen grease, use a degreaser on stovetops and range hoods. In the bathroom, apply grout cleaner to tile and let it sit before scrubbing. Carpet stains should be treated with an appropriate remover and left to absorb before blotting. These pre-treatment steps make deep cleaning much more effective and save you from scrubbing later. Set a Schedule and Enlist Help Spring cleaning does not have to be a one-day marathon. Spread tasks over several days or a weekend to avoid burnout. Assign specific chores to each household member to speed things up: Kitchen — Degrease stovetop, wipe cabinets, organize pantry, clean refrigerator shelves and drawers. Bathroom — Scrub tiles and grout, disinfect toilet and sink, descale showerhead, wash bath mats. Living Areas — Dust ceiling fans and light fixtures, vacuum upholstery, wash windows and curtains, wipe baseboards. Bedrooms — Flip mattress, wash bedding and duvet covers, organize closets, vacuum under furniture. Floors — Vacuum carpets and area rugs thoroughly, mop hard floors, spot-treat any stains. Children can help with dusting, sorting laundry, and wiping surfaces. If spring allergies are a concern, the Health Canada recommends cleaning to reduce indoor allergens during spring as part of your seasonal refresh. If you need help with the heavy lifting, consider booking professional deep cleaning services. Toronto Shine Cleaning offers thorough deep cleaning for your home that covers the tasks you might not have time or energy for, such as carpet cleaning, window washing, and upholstery care. Frequently Asked Questions What is the best order to clean a room? Always work top to bottom. Start with ceiling fans and high shelves, then move to counters and furniture, and finish with floors. This way dust and debris fall onto surfaces you will clean last. How long should spring cleaning take? For a typical home, plan on 6-12 hours spread over a weekend. If you break it into room-by-room sessions of 1-2 hours each, the work feels much more manageable. Do I need to wash my curtains during spring cleaning? Yes, curtains and drapes collect dust, pet dander, and allergens over time. Check the care label and launder or steam clean them as part of your spring refresh. Should I hire professional cleaners for spring cleaning? If you are short on time or dealing with tough jobs like deep carpet cleaning, oven cleaning, or post-winter grime, professional help can be a smart investment. Contact Toronto Shine Cleaning at (647) 424-0355 to discuss your needs. How do I maintain a clean home after spring cleaning? Establish a weekly routine of quick tidying, dusting, and vacuuming. Book a regular cleaning service to keep everything fresh between deep cleans. Spring cleaning does not have to be stressful. With the right preparation, you can transform your home efficiently and enjoy the fresh, clean results. For expert help with the hardest tasks, call Toronto Shine Cleaning at (647) 424-0355 or visit our pricing page to learn more.

Preparing for Spring Cleaning: What to Do Before You Start Read More »