Cleaning Checklist

Caucasian hand meticulously cleans miniature house model with cloth.

7 Steps to a Thorough Home Cleaning: From Top to Bottom

Home Cleaning can feel like a daunting task, but with the right strategy, it doesn’t have to be! Whether you’re prepping for guests, tackling spring cleaning, or just giving your space a much-needed refresh, follow these seven steps to ensure your home shines from top to bottom. 1. Plan and Prepare When planning your home cleaning, it’s also smart to check the inventory of your cleaning products to ensure you have enough supplies to avoid any interruptions. For instance, make sure your cleaning solutions are full, check that your mop heads are clean, and see if your vacuum cleaner bags or filters need replacing. This kind of preparation not only streamlines the cleaning process but also prevents the frustration of having to stop midway to run to the store. Additionally, consider the logistics of your home cleaning. For example, if you live in a multi-story home, plan to start from the top floor and work your way down to efficiently manage the dust and dirt without tracking it back into cleaned areas. This approach saves time and energy, making your cleaning more effective. By taking the time to thoroughly plan and prepare, you can transform what might seem like an overwhelming chore into a series of manageable tasks, making the entire home cleaning process less daunting and more productive.     2. Start at the Top When you begin your home cleaning by starting at the top, it’s efficient to also tackle the cobwebs that might be lurking in the upper corners of your rooms and any dust that has settled on high shelves or ledges. This strategy ensures that you capture all the loose particles before they have a chance to settle elsewhere after you’ve cleaned the lower areas. After dusting the ceiling fans and light fixtures, move on to cleaning any wall hangings, such as picture frames or mirrors, which also tend to accumulate a surprising amount of dust. This top-down approach in home cleaning means that by the time you reach the surfaces and floors, much of the preliminary dust and debris has already been dealt with. 3. Dust and Wipe Surfaces Once you’ve effectively managed the higher areas of your home, continue your home cleaning by focusing on all remaining surfaces. Extend your attention to other furniture pieces, such as tables, chairs, and desks. Utilize your microfiber cloth or duster to pick up dust from these areas, ensuring you reach under any objects and into the corners where dust tends to gather. In your living room and bedrooms, remember to wipe down electronics and appliances, as these can also gather dust that affects their performance and appearance. For fabric surfaces like sofas and armchairs, use an upholstery attachment on your vacuum cleaner to remove dust and allergens, which can significantly freshen up the space. As you move into the kitchen and bathrooms, switch to more robust cleaners designed to handle grease and grime. In the kitchen, make sure to clean the fronts of cabinets, the stovetop, and any counters, particularly around appliances where crumbs and food residues can accumulate. For the bathrooms, give extra care to disinfecting surfaces like faucets, handles, and countertops to ensure they are not just clean but also hygienic. By systematically dusting and wiping from one room to the next, you ensure that no surface is overlooked, contributing to a comprehensive and effective home cleaning session. 4. Tackle the Bathrooms When it comes to home cleaning, giving extra care to the bathrooms is crucial because of the high potential for germ accumulation. Start by applying cleaners to the sink, bathtub, and toilet, allowing them to sit for a few minutes to break down the dirt and grime. During this waiting period, you can tackle other parts of the bathroom such as the mirrors and windows. Use a glass cleaner to ensure these surfaces are streak-free and clear. After allowing the cleaning agents to soak, scrub each area thoroughly with a suitable brush or sponge. For tough grime and lime scale in the toilet or around fixtures, consider using a pumice stone or a specialized cleaning tool that can handle these challenges without damaging the surfaces. Additionally, turn your attention to the grout between tiles, which can often become discolored and moldy. Using a grout brush with a bleach-based cleaner can restore the whiteness and prevent mold from spreading. Once you have scrubbed and rinsed all the major fixtures, finish up by cleaning the floor. The bathroom floor can harbor bacteria and dirt, especially in corners and around the toilet base. Use a disinfectant cleaner and, if possible, a steam mop to ensure the floor is not only clean but also sanitized.     5. Clean the Kitchen Giving the kitchen detailed attention is vital because this space is a central hub of activity and requires hygiene and cleanliness for safety and health. Begin with deep-cleaning the appliances, which involve not just wiping the exteriors but also tackling the interiors. For instance, remove any food particles and grease from the microwave with a cleaning solution designed for appliances. For the oven, use a dedicated oven cleaner to cut through baked-on grime, and consider running a self-cleaning cycle if it’s available. For your refrigerator, take out all items and removable shelves or bins to wash them separately with warm soapy water. Wipe the inside of the fridge with a baking soda solution to remove odors and stains, ensuring all surfaces are dry before replacing the items back neatly. This is also an excellent opportunity to discard any expired or spoiled food, helping to keep the fridge organized and functional. Moving on to the countertops, use a disinfectant cleaner suitable for the material, whether it’s granite, laminate, or stainless steel, to ensure they are not only clean but also germ-free. Don’t forget to clean the backsplash, which can accumulate splatters from cooking. A degreaser can be particularly effective here, especially around the stove area. Cleaning cabinets is another crucial part of kitchen maintenance. Wipe

7 Steps to a Thorough Home Cleaning: From Top to Bottom Read More »

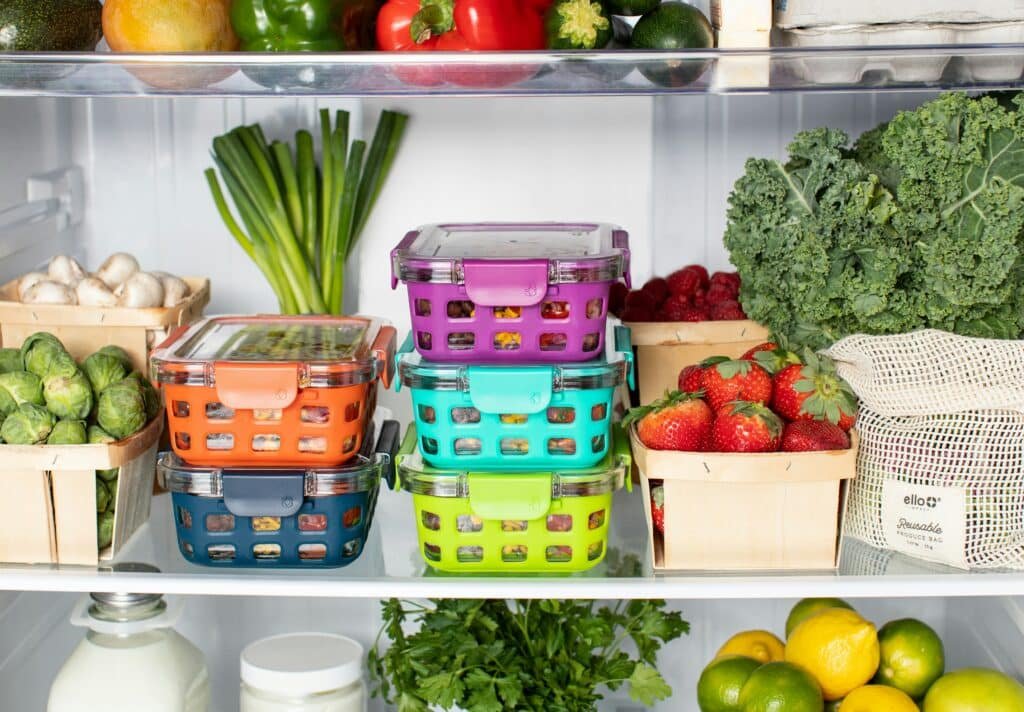
Kitchen refrigerator brimming with fresh veggies and meals.

How to Ensure Your Groceries are Virus-Free: A 7-Step Guide

How to Ensure Your Groceries are Virus-Free: A 7-Step Guide for Toronto Homes The weekly grocery run is one of the most routine errands in a Toronto household, and also one of the most contact-heavy: shared carts, busy checkout lanes, and shelves touched by dozens of shoppers every day. While the likelihood of catching a virus from food packaging is generally low, a few simple habits add real peace of mind, especially when your home includes young children, seniors, or anyone with a weakened immune system. This seven-step guide covers everything from planning your trip to putting the last package away, so you can keep your groceries virus-free from store to pantry. Step 1: Prepare Before You Shop Write your shopping list before you leave the house. Knowing exactly what you need lets you get in and out faster, which means less time in crowded aisles and fewer chances to touch shared surfaces. Pack hand sanitizer and disinfectant wipes for your hands, the cart, and payment screens. Keep a mask handy for busy periods when keeping distance is difficult. Shop during off-peak hours, such as weekday mornings, when stores are quietest. Step 2: Choose Touch-Free Options When Possible Delivery and curbside pickup remove most of the guesswork. Your order is packed by store staff and loaded straight into your car or left at your door, which limits your exposure to public spaces. If you do shop in person, touch only the items you plan to buy, and keep your hands away from your face while you browse. Step 3: Sanitize Your Hands and Cart Wipe the cart handle, basket edges, and child seat with a disinfectant wipe before you start, then apply hand sanitizer after touching door handles and payment terminals. These small steps stop germs from hitching a ride from the cart to your groceries, and then from your groceries to your kitchen. Step 4: Practice Safe Handling in the Aisles Use the produce bags as a barrier when picking loose fruits and vegetables instead of grabbing them with bare hands. Skip items with torn or damaged packaging, and avoid touching your eyes, nose, or mouth while shopping, since those are the easiest entry points for viruses. Step 5: Clean Your Groceries When You Get Home Designate a landing zone near the door or in the kitchen for incoming bags, then treat each item by type. Grocery Type Recommended Cleaning Method Cans, jars, and plastic bottles Wipe each container with a disinfectant wipe and let it air dry before storing. Fresh fruits and vegetables Rinse under running water and rub gently with your hands. Avoid soap or household detergents, which can leave residues that are not safe to eat. Cardboard boxes and bags Wipe the outside, or set them aside for a few hours before putting them away. Frozen items Wipe the packaging, since it has been handled in the store and during delivery. A produce wash is optional: running water and light friction remove most dirt and microbes from the surface. Cleaning physically removes germs while disinfecting kills them, so match the method to the item. The CDC explains both approaches in its food safety and home cleaning and disinfection guidance. Step 6: Designate a Cleaning Area and Tidy It After Keep one zone for groceries that still need attention so clean items and unwashed items never mix. Once everything is stored, wipe down the countertops, the sink area, and any bins or bags that touched the groceries. Wash reusable shopping bags regularly, either in the machine or by hand with warm soapy water. Health Canada’s safe food handling tips are a useful refresher for the whole family. Step 7: Wash Your Hands Thoroughly Finish every grocery session by washing your hands with soap and water for at least 20 seconds, including between your fingers, under your nails, and on the backs of your hands. This one habit is the most effective way to keep viruses from moving from your hands to your face or your food. Keep the Whole Kitchen Virus-Free Groceries are only one link in the chain. Fridge handles, faucets, counters, and cabinet fronts collect germs from everyday use, so wipe them down regularly and give the kitchen a deep clean every few weeks. If you would rather spend Saturday at the farmers market than scrubbing the fridge, Toronto Shine Cleaning provides deep cleaning services in Toronto and regular residential cleaning across the GTA, so your kitchen stays hygienic without eating your weekend. We serve Toronto and surrounding areas, and clients rate us 4.9 out of 5 on Google, as shown on our reviews page. Call 647-424-0355 to book a visit. Seven steps sound like a lot, but most of them take seconds once they become routine. Plan your list, protect your hands, clean by type, and wash up at the end, and your kitchen stays a safe place for everyone in your household. Do I need to disinfect every single package? No, focus on items you will touch frequently, such as cans, jars, bottles, and frozen packages. Fresh produce only needs a rinse under running water, and cardboard can be wiped or set aside briefly before storing. Can I wash fruits and vegetables with dish soap? No, avoid soap, detergent, and bleach on produce. These products can leave residues that are not safe to eat. Running water and gentle rubbing with your hands are enough, and a produce wash is optional. Is grocery delivery safer than shopping in store? Delivery and curbside pickup limit your exposure to shared surfaces like carts and checkout screens, which reduces contact with germs. If you do shop in person, keep your hands away from your face and sanitize after touching shared surfaces. How long should I wash my hands after handling groceries? At least 20 seconds with soap and water, covering between your fingers, under your nails, and the backs of your hands. Do this after unpacking and again before you eat or prepare food.

How to Ensure Your Groceries are Virus-Free: A 7-Step Guide Read More »

deep cleaning toronto

5 Quick Home Cleaning Tips for a Healthier Living Space | Toronto Shine Cleaning

Five Small Habits That Do Big Work for Your Home Walking into a spotless space feels effortless for other people, but the truth is that a genuinely clean home comes from a handful of small, boring habits repeated often. You do not need a weekend marathon or a van full of products. The five quick home cleaning tips below shorten the process, lower the stress, and leave your rooms healthier for the people in them. Pick one to start with today. 1. Declutter Before You Scrub Decluttering is the secret weapon that most routines skip. Clutter is not just an eyesore. Piles of paper, stacks of books, and shelves of knick-knacks trap dust mites, give pests somewhere to hide, and turn dusting into an obstacle course. The mess also taxes your mental well-being, adding stress to the one place that should feel like a sanctuary. You do not have to empty the house in a weekend. Choose a single drawer, closet, or room and handle one item at a time, asking whether you truly need, use, or love it. If the answer is no, let it go. With fewer objects in the way, vacuuming and dusting stop being a shuffle of moving things around and become actual cleaning, reaching corners that clutter used to guard. Many people find the lift in mood surprising, because a calmer space tends to produce a calmer head. 2. Make the Bed Every Morning The connection between your bed and the cleanliness of your home is real. A made bed is an anchor of order in the bedroom, and scattered clothes suddenly look wrong next to it, so you pick them up. Dust on the nightstand becomes visible, so you wipe it. If you work from home, the effect compounds all day, because your eyes keep returning to one tidy surface that quietly raises the standard for everything around it. There is a psychological layer too. Finishing one task early is a small win that sets a constructive tone, and momentum built before breakfast often carries into the rest of your routines, especially on days when motivation is thin. 3. Set a Cleaning Timer Cleaning feels impossible when it looms as an open-ended afternoon. Shrink it instead. Set a timer for fifteen minutes, or five if the day is packed, and work only until it rings. Racing the clock concentrates effort, cuts procrastination, and turns a dreaded chore into a manageable daily habit. One day the focus is the coffee table and sofa cushions, the next it is kitchen counters and the pantry. Because the sessions rotate, no area goes neglected long enough to become a mountain. 4. Wipe High-Touch Surfaces Every Day Door handles, light switches, remote controls, and phone screens get touched constantly, which makes them prime real estate for germs. A quick daily wipe with a disinfectant interrupts the chain of transmission, and the habit matters most during cold and flu season or any public health worry. The CDC explains the mechanics, including the difference between cleaning and disinfecting, in its guidance on cleaning and disinfecting your home. Consistency beats intensity here, so keep a cloth and solution where you will actually grab them. Doorknobs, cabinet pulls, and light switches Remote controls and shared electronics Faucet taps and toilet flush handles Countertops and table edges Finishing the round, wash your hands properly, following the CDC hand washing recommendations, because clean hands are what keep the mess from racing back. 5. Handle Small Messes the Moment They Happen The fifth habit is the cheapest: deal with little messes while they are little. A splash on the stove wipes off in seconds when fresh and needs a scrub and a curse the next day. Spills on upholstery set into permanent marks. Chasing tiny messes as they appear keeps every future session short, and it is the single biggest difference between homes that stay clean and homes that swing between scrubbing marathons and shame. How the Five Tips Fit a Week Habit Frequency Time cost Main payoff Declutter one spot Weekly rotation 10 minutes Less dust, faster cleaning Make the bed Every morning 2 minutes Order and momentum Timer bursts Daily 5 to 15 minutes No task pileups High-touch wipes Daily 5 minutes Fewer germs circulating Instant spill fixes As needed Seconds No stains to fight later Physical movement is part of the deal too, and brisk wiping, vacuuming, and stair climbing contribute to your activity total, a bonus the CDC outlines for regular physical activity. When to Hand It to Professionals Five habits keep a home healthy between visits, but they do not replace a deep clean of baked-on grease, grout, and neglected corners. Toronto Shine Cleaning brings deep cleaning for the reset days and a regular maid service for maintenance, with visits from $212.63 for a studio or one bedroom before HST, two bedrooms at $273, and three bedrooms at $327, all shown on the pricing page. Frequently Asked Questions How long should a daily cleaning timer run? Anywhere from five to twenty minutes works. The point is a defined finish line, not the length. Start with a number you will not skip on a busy day, then let the habit grow. What counts as a high-touch surface? Anything multiple people contact several times a day: handles, switches, remotes, taps, shared screens, and appliance buttons. Wipe them daily, and more often when someone in the household is sick. Does decluttering really make cleaning faster? Yes, because surfaces clear of objects can be wiped in one pass, and floors and shelves expose the dust that piles normally hide. Every item removed is one item you no longer dust around. Will making my bed actually keep the room tidy? It sets a visual standard that messier corners stand out against, which nudges small corrections all day. It also counts your first completed task of the morning, and people tend to keep finishing what they start. Can habits replace scheduled cleaning services? They keep the

5 Quick Home Cleaning Tips for a Healthier Living Space | Toronto Shine Cleaning Read More »

Pristine marble kitchen countertop gleaming in natural sunlight.

7 Tips for Keeping Your Apartment Clean: A Comprehensive Guide | Toronto Shine Cleaning

A Realistic System for a Spotless Apartment Keeping an apartment clean stops being daunting the moment you replace heroic weekends with a system. Small spaces actually work in your favor, because a few smart routines cover the whole home in minutes rather than hours. These seven tips, refined for apartment living, turn chores into habits you barely notice, whether you are juggling a busy schedule or simply refuse to spend Saturdays scrubbing. 1. Build a Cleaning Schedule You Can Keep A schedule is the foundation. Split tasks into daily, weekly, and monthly buckets and commit to each one. Handle dishes right after dinner and wipe kitchen counters every evening so crumbs and spills never pile up, which keeps the kitchen inviting for cooking. Assign fixed days to weekly work, for example vacuuming on Saturday and dusting on Sunday, and the chores become predictable instead of looming. Then reserve monthly slots for bathroom deep work, closet organization, and clearing out the refrigerator. Scheduled tasks never snowball into a terrifying marathon, because upkeep arrives in small pieces. 2. Declutter as a Habit, Not an Event Clutter makes even a clean apartment feel messy, because it multiplies the surfaces dust lands on. Spend a few minutes daily returning items to their homes and accumulation never gets a head start. A minimalist mindset accelerates this: keep what you need or love, and the fewer objects you own, the fewer you dust, wash, and move around before cleaning a surface. Treat decluttering as an ongoing commitment rather than a one-time project, and the space stays open, calm, and much easier to maintain. 3. Buy the Right Tools Once Good tools cut the time and effort of every session. The apartment starter kit is short: Microfiber cloths that trap dust and grime without streaks or lint, on counters and glass alike A reliable vacuum matched to your floors, powerful on carpet yet gentle on hardwood, compact enough for small storage An extendable duster for ceilings and corners A squeegee for shower doors and tiles, which prevents water marks and mildew Quality rubber gloves to protect hands and grip slippery items Product choice matters as much as equipment. Eco-friendly, non-toxic cleaners keep the air safe for you, your family, and pets while still handling real grime, and Health Canada’s household products guidance explains how to choose and use consumer cleaning chemicals responsibly. 4. Let One Cleaner Do Many Jobs A capable multi-purpose cleaner replaces a shelf of single-use bottles. One product that moves from countertops to bathroom tiles declutters your storage, trims your shopping list, and keeps you from switching solutions mid-task. Modern eco-friendly formulas are gentle on surfaces yet tough on dirt, and concentrated versions stretch further, since you dilute to the strength each job needs. Fewer bottles, less packaging waste, and a lighter monthly bill, all without sacrificing results. 5. Prioritize the Rooms That Wear Out First High-traffic areas collect the most dirt because they see the most life. The living room is where guests look first and where dust settles into sofas and curtains, so regular dusting, vacuuming, and spot cleaning keep it welcoming. The kitchen absorbs spills, crumbs, and grease that attract pests if ignored, so wipe counters, stove tops, and appliance faces daily and give them a deeper pass weekly. The bathroom sees constant moisture and use, so squeegee the shower after bathing and disinfect fixtures weekly. If household members touch shared surfaces constantly, the CDC cleaning and disinfecting recommendations are a sensible baseline. And if you notice fuzzy patches or a musty smell in the shower or behind the toilet, treat bathroom mold as a health topic, not a cosmetic one, using the CDC mold and health guidance to handle it safely. 6. Sweep In Clean: A No-Shoes Policy Most apartment filth walks in on shoes. A bowl of slippers by the door and a good floor mat keep street grit, melted salt, and tracked-in grime outside, which lightens vacuuming and protects floors. Guests happily accept the trade when the alternative is obvious. 7. Close the Day With a Ten-Minute Reset Before bed, run one timer for ten minutes: dishes into the dishwasher, clothes off the floor, surfaces cleared, and a fast sweep of the main living area. Waking up to a reset apartment removes the visual noise that makes mornings stressful, and the habit makes daily upkeep almost automatic. The Seven Tips at a Glance Tip Cadence Effort per session Daily, weekly, monthly schedule Fixed days Varied, planned Declutter as you go Daily A few minutes Right tools and products Buy once Upfront cost, saved time Multi-tasking cleaners Every clean Fewer bottles, fewer steps High-traffic focus Daily plus weekly Targeted attention No-shoes entry Always Zero Nightly reset Every evening Ten minutes Apartment Upkeep, Shared or Rented Systems beat intensity, but every apartment eventually rewards professional help. A regular cleaner covers the routine, a deep clean resets stuck-in grime, and a move out service protects deposits when the lease ends. Toronto Shine Cleaning covers neighborhoods across the city, listed on the locations page. Frequently Asked Questions How often should I deep clean my apartment? Work through one deep-clean zone each month, such as the bathroom, fridge, or closets, while daily and weekly habits handle the rest. Renters often schedule a full deep clean before moving out. What is the best vacuum for a small apartment? A compact upright or stick model with strong suction and a soft-floor setting. Lightweight matters more than tank size when storage is limited, and a good filter helps with dust and pet hair on upholstery. Are eco-friendly cleaners strong enough for kitchens and baths? Modern non-toxic formulas handle everyday grease and soap scum well. Let them dwell on the surface for a minute or two, then wipe. Concentrates let you mix stronger solutions for stubborn jobs. Do I need a cleaning schedule if I clean whenever I notice mess? Reacting to visible mess misses slow accumulation: dust in corners, grease behind the stove, mildew building

7 Tips for Keeping Your Apartment Clean: A Comprehensive Guide | Toronto Shine Cleaning Read More »

Toronto apartment cleaning

How to Tackle Allergens in Your Home with 6 Simple Changes | Toronto Shine Cleaning

How to Tackle Allergens in Your Home with 6 Simple Changes Sneezing the moment you sit on the sofa, itchy eyes after bed, a nose that runs all winter: indoor allergies rarely come from nowhere. Dust mites, pet dander, pollen, and mold spores settle into fabric, floors, and still corners, and every one of them has a fix. These six changes cut the allergen load in your home without turning cleaning into a full-time job. 1. Dust Top to Bottom, Then Vacuum Everything Fabric Dust mites burrow into fabric and upholstery, so moving a duster across a shelf only shifts them around. Work from the top of each room downward, ceiling fans, bookshelf tops, and picture frames first, so falling dust does not land on surfaces you have already cleaned. The CDC’s home cleaning guidance makes the same case for regular cleaning: remove dirt and allergens before they build up, and surfaces become much easier to keep clean. Vacuuming earns its place in every room, not just over carpet. Floors, sofas, and curtains all hold dander and mite waste, and the attachments exist for the seams and corners where it gathers. Plan at least one pass a week, more in busy rooms or homes with pets, and do not skip under the bed or behind furniture. A HEPA filter captures particles as small as 0.3 microns, well under the size of a dust mite, but only while it is maintained: clean or replace it on the manufacturer’s schedule, because a clogged filter stops trapping allergens and drags the vacuum’s suction down with it. 2. Keep Windows Shut When Pollen Is High Pollen seasons run through spring, summer, and fall, and each one sends tree, grass, or weed grains drifting on the air. An open window invites them in, where they settle onto surfaces and linger for hours. Air conditioning is the practical alternative, keeping the house comfortable while its filters capture pollen, provided you clean or replace those filters as the maker advises. A clogged filter cuts cooling efficiency and can become a source of indoor pollution itself. 3. Choose Allergen-Proof Bedding and Wash It Hot You spend a third of your life in bed, which makes bedding prime mite territory. Zippered covers woven tightly enough that mites and their allergens cannot pass through, fitted over the mattress, pillows, and duvet, lock them out of the soft habitat they prefer. The covers protect the core, but sheets, pillowcases, and duvet covers still collect allergens, so wash them weekly in water of at least 130 F (54 C) to kill mites and rinse the residue away. Where allergies hit hardest, smooth-surfaced furniture and hard flooring beat upholstery and wall-to-wall carpet, and a HEPA purifier keeps working while you sleep. 4. Hold Indoor Humidity Between 30% and 50% Dust mites and mold both need moisture, and humidity between 30% and 50% leaves them least comfortable. A dehumidifier handles basements, crawl spaces, and ground floor rooms that run damp; empty the tank on a schedule. Where humidity is a year-round problem, a whole-home dehumidifier ties into the HVAC system and treats the entire house at once. Ventilation covers the rest: run exhaust fans while you cook or shower, keep them on long enough to clear the steam, and confirm the clothes dryer vents outside. The CDC’s guidance on mold is blunt about why it matters: mold grows wherever moisture lingers, including on wood, fabric, and household dust. 5. Declutter So Allergens Have Fewer Hiding Places Every knickknack is a landing strip for dust, and every crowded shelf is a spot the vacuum cannot reach. Decluttering is not about an empty house; it is about keeping what serves a purpose or earns its place, which cuts both the surfaces that collect allergens and the time you spend cleaning around them. Start with one zone at a time, clear counters, coffee tables, and desks first, and add storage that keeps things off the floor. 6. Groom Pets and Give Them Boundaries Pets bring dander indoors, and their coats ferry in pollen, mold, and dust from outside. Regular baths and brushing remove much of it, though over-bathing dries the skin and produces more dander, so ask your veterinarian what schedule suits your pet’s coat. Boundaries help too: keep pets out of bedrooms and off upholstered furniture so part of the home stays low-allergen, and wash pet bedding and toys regularly. Managing pet allergens is about reduction, not elimination, and consistent habits get you most of the way. Allergen Hotspots at a Glance Hotspot What collects there The fix Bedding and pillows Dust mites and their allergens Allergen-proof covers and weekly hot washes at 130 F (54 C) Carpets, rugs, upholstery Dander, mite waste, tracked-in pollen HEPA vacuuming weekly or more, plus periodic deep cleaning Bathrooms and basements Mold spores in damp air Exhaust fans and dehumidifiers; humidity at 30%-50% Cluttered surfaces Settled dust that vacuuming misses Decluttering plus storage that frees open surfaces A Weekly Allergen Checklist Dust top to bottom with a microfiber cloth. Vacuum floors, sofas, curtains, under beds, and behind furniture. Wash bedding in water of at least 130 F (54 C). Check that humidity sits between 30% and 50%. Brush pets and keep them out of the bedroom. Frequently Asked Questions How often should I vacuum to control allergens? Once a week is the floor, not the target. Sensitive households and homes with pets do better with two or more passes in busy rooms, plus attention under furniture and along baseboards. Do I really need to wash bedding in hot water? Yes, if dust mites are a concern. Water of at least 130 F (54 C) kills mites and removes the allergens they leave behind. Allergen-proof covers protect the mattress and pillows, but sheets, pillowcases, and duvet covers still need a weekly hot wash. Can professional cleaning help with allergies? It can, because the biggest gains come from the spots people skip: under beds, behind furniture, along baseboards, and around vents.

How to Tackle Allergens in Your Home with 6 Simple Changes | Toronto Shine Cleaning Read More »

Hourglass in sunlight symbolizing efficient time management.

How to Conquer Your Spring Cleaning in Just One Day: 5 Time-Saving Tips

Spring Cleaning in Just One Day Is Possible The flowers are blooming and the birds are chirping, but your home needs a refresh. The good news: you do not need a whole week of scrubbing and dusting. With a focused plan, the right tools, and these 5 time-saving tips, you can conquer your spring cleaning in just one day and keep your weekend free. 1. Plan and Prioritize Before You Start Walk through your home with a critical eye, as if you are a guest seeing it for the first time. What catches your attention first? The pile of shoes by the front door, or the dust bunnies under the living room couch? Those high-visibility spots should sit at the top of your list because they have the biggest impact on how your home feels. Then add the tasks that matter most to you, like sparkling windows or a spotless bathroom. Be realistic: the goal is a refresh, not a renovation. If a task would not make a noticeable difference today, save it for a regular cleaning day. 2. Gather Your Tools and Supplies Nothing slows a one-day clean like hunting for supplies. Organize your caddy by task: glass cleaner, microfiber cloths, and a squeegee in one section for windows and mirrors, and multi-surface cleaners, disinfectants, and dusters in another for counters. Stock up on trash bags and paper towels, the items you reach for in nearly every room, and keep a small notepad in the caddy to jot down anything running low. Specialized tools like a grout brush, an extendable duster, and a scrub brush for tile and tubs turn a daunting day into a manageable one. 3. Work in Zones and Set Timers Sequence your tasks so waiting time becomes working time. Spray cleaner on kitchen counters and bathroom tiles, then vacuum the living room while the cleaner does its job. Set timers to create mini-deadlines: dust one room in 10 minutes, declutter a shelf in 15. Short bursts of focused work, sometimes called the Pomodoro Technique, build momentum and make the day feel like a game. Balance heavy tasks like scrubbing floors with lighter ones like running the laundry, and schedule 5 to 10 minute breaks to stretch and hydrate. Regular cleaning removes germs and dirt from surfaces, which is why the CDC recommends cleaning as the first step in a healthy home routine. 4. Recruit Your Household Team One person cleaning the whole house takes all day; a team finishes in hours. Start with a quick huddle over breakfast to assign tasks and agree on what done looks like. Put a simple chart on the fridge so everyone can see progress as tasks get checked off. Rotate jobs to prevent monotony, turn the work into a friendly contest, and plan a small celebration, like takeout or a movie night, once the last room is done. 5. Focus on High-Impact Areas Not every corner deserves equal time. Spend your energy where it is noticed and felt: Entryways and common areas, the first spaces guests see. Light fixtures and light switches, which brighten a room when wiped down. The living room: fluff pillows, tidy magazines, clear the coffee table. The bedroom: a made bed instantly transforms the room. Kitchen and bathroom countertops, cleared and wiped until they shine. Area Time Budget Impact Entryway and living room 45 minutes High, sets the tone for the whole home Kitchen 60 minutes High, visible and heavily used Bathrooms 45 minutes High, hygiene and freshness Bedrooms 30 minutes Medium, rest and relaxation Windows and light fixtures 30 minutes Medium, adds brightness In bathrooms, pay special attention to tile and grout, where damp conditions can invite mold; the CDC’s mold overview explains how to prevent and manage mold in your home. Finish Your Spring Cleaning in One Day Wrapping up spring cleaning in a single day is entirely within reach with a bit of foresight, a strategic approach, and maybe a helping hand. But life gets busy, and sometimes your schedule simply will not allow it. That is where Toronto Shine Cleaning comes in: our team handles the deep cleaning of kitchens and bathrooms, dusting every corner, and making windows sparkle while you enjoy your weekend. Regular maid service keeps the home fresh between seasons, and a full home deep clean resets even the busiest household. Call (647) 424-0355 or request a quote on our pricing page, and see why Toronto homeowners trust our reviews. One-Day Spring Cleaning FAQ Can I really spring clean my whole house in one day? Yes, if you plan first, gather supplies, work in zones, and focus on high-impact areas. A realistic checklist and a household team make a full-home refresh possible in about 6 to 8 hours. What order should I clean rooms in? Start with the driest tasks, like dusting, before wet tasks like mopping, and finish with the kitchen and bathrooms. Work top to bottom so dust falls onto surfaces you have not cleaned yet. What is the Pomodoro Technique for cleaning? It is a time management method where you work in short, focused bursts of about 10 to 25 minutes with brief breaks in between. It keeps you motivated and prevents burnout during a long cleaning day. What should I skip when I only have one day? Skip deep tasks that are not visible, like organizing closets, washing baseboards, or detailing appliances. Save them for a regular cleaning day or a professional deep clean.

How to Conquer Your Spring Cleaning in Just One Day: 5 Time-Saving Tips Read More »

Dish soap and its lots of uses, how dish soap is useful

How Dish Soap Can Transform Your Cleaning Routine: Top 8 Tips

The Unsung Hero Under Your Kitchen Sink Most households own one bottle of dish soap and use it for exactly one job. It is engineered to break down grease, and grease sits behind most household messes. The eight techniques below turn that bottle into an all-purpose cleaner, a jewelry soak, a stain pre-treater, and a window solution, cheap enough to shrink your cleaning cabinet. Tip 1: Brew Your Own All-Purpose Cleaner Fill a spray bottle most of the way with water, then add dish soap aiming for about a teaspoon per cup. That ratio gives real cleaning power without leaving surfaces filmied. Cap it tightly, shake gently, then mist countertops, appliances, cabinets, or walls and wipe with a clean cloth or sponge; the mild formula will not damage or discolor. For tougher grime, let it dwell a minute or two before wiping. Tip 2: Revive Dull Jewelry in a Bowl Mix a few drops of mild dish soap into warm, not hot, water; the warmth loosens the oils and dirt clinging to metal and stones. Soak pieces for 15 to 30 minutes, then scrub crevices and intricate settings with a soft-bristle toothbrush or jewelry brush. Rinse under gentle, lukewarm water over a strainer so nothing travels down the drain, then buff dry with a soft, lint-free cloth. Finish with a hairdryer on its lowest setting, held at a safe distance, to chase moisture from tight spots. Tip 3: Pre-Treat Greasy Fabric Stains Dab a coin-sized amount of dish soap straight onto the stain and work it in with your fingertips or an old soft toothbrush so it penetrates the fibers, gently on delicates. Let it sit anywhere from five to thirty minutes; the wait breaks the oils loose. Spot test a hidden area first, since some dyes and fabrics react badly. Wash per the care label, then inspect the spot before machine drying, because heat sets leftover stains. Repeat the treatment if any mark lingers. Tip 4: Scrub Garden Tools and Outdoor Furniture Fill a bucket with warm water and a generous squirt of soap, visibly soapy without being overly sudsy. Scrub tool heads with a firm brush to clear soil, sap, and rust, including sweaty handles. On furniture, hit the crevices and joints where damp hides and mold and mildew start; many cushions take mild soap, but check care labels. Rinse with clean water, dry tools fully with a cloth or sun to keep rust away, and wipe furniture dry so no water spots remain. Tip 5: Unclog a Kitchen Drain With Soap and Heat Set a kettle or pot of water boiling. Meanwhile, squirt roughly a quarter to half a cup of dish soap into the drain, enough to coat the pipe and reach the blockage, then pour the boiling water carefully down after it. The heat softens grease while the soap emulsifies it and lubricates the pipes, letting the dislodged clog flush away. Tough blockages may need two or three rounds; letting the soap sit a few minutes before the water strengthens it. Tip 6: Refresh the Inside of Your Fridge Empty the fridge and wash removable shelves, drawers, and bins in the sink or tub. Mix a squirt or two of dish soap into a gallon of warm water, dip a clean sponge, wring it damp rather than dripping, and wipe the walls, ceiling, and floor; soap cuts food grease without residue. Dried-on messes soften if the solution sits a few minutes, with a soft brush finishing gently. Wipe again with a cloth rinsed in plain water, then towel dry or air dry with the door open. Clean storage is food safety: the CDC’s foodborne illness prevention guidance starts with clean surfaces where food lives. Tip 7: Squeegee Streak-Free Windows Stir just a few drops of dish soap into a warm water bucket; a little breaks down grime without leaving film. Wash the glass from the top down in a zigzag with a sponge or soft cloth wrung mostly dry, then set a squeegee at the top edge and pull straight down with steady pressure, wiping the blade on a clean dry cloth after every stroke and overlapping each pass slightly. Finish corners and edges, where streaks breed, with dry microfiber or a small squeegee. Tip 8: Rescue a Bath Time With Gentle Soap In a pinch, a few drops of the gentlest, most natural dish soap you own will wash a dog. Wet the coat with lukewarm water first, lather the soap in your hands, and work it through the fur while avoiding eyes, ears, and mouth rather than scrubbing. For fleas, the soap acts as a mild insecticide against the ones currently on your pet, though it will not prevent the next wave, so leave it on a few minutes before rinsing. Rinse until the water runs clear, because residue attracts dirt and dries skin, then towel dry and blow dry on a cool setting, focusing on dense undercoats. Regular use strips natural oils, so routine baths belong to pH-balanced pet shampoos. Plain soap and water anchor hygiene for people too, per the CDC’s clean hands guidance. What One Bottle Replaces The whole kit fits on one shelf: Spray bottle and bucket for the all-purpose mix, tools, furniture, and windows Soft cloths, microfiber towels, and an old toothbrush for jewelry and seams Squeegee and drain strainer for streak-free glass and safe jewelry rinses Dish Soap Recipes At a Glance Job Mix Dwell time All-purpose spray 1 tsp soap per cup of water 1 to 2 minutes on grime Jewelry soak Few drops in warm water 15 to 30 minutes Grease stain pre-treat Undiluted dab on the spot 5 to 30 minutes Fridge wash A squirt or two per gallon Minutes on dried spills Drain flush Quarter to half cup plus boiling water Optional pause before pouring Dish Soap Questions, Answered Will a soap-and-water spray disinfect my counters? No. It lifts grease, crumbs, and most surface soil, but it is a cleaner rather than

How Dish Soap Can Transform Your Cleaning Routine: Top 8 Tips Read More »

Boost your efficiency with productivity techniques and tools.

5 Essential Tips: How to Skyrocket Your Cleaning Productivity

Clean Smarter, Not Harder Cleaning that eats your entire weekend usually means the process, not the dirt, is the problem. With a little structure, the same house can stay fresh in a fraction of the time. The five essential tips below cover planning, tools, decluttering, prioritizing busy rooms, and racing the clock, so you can trade marathon scrub sessions for short, satisfying bursts that keep your home consistently tidy. Tip 1: Plan Your Cleaning Around Your Life A cleaning schedule works when it fits the life you already live. If mornings energize you, a quick sweep with your coffee sets a productive tone for the day. If evenings are calmer, fifteen minutes of decluttering after dinner can be your wind down routine. Busy households often do best with short bursts spread across the week instead of one exhausting weekend blitz, while people who find cleaning therapeutic may prefer a few dedicated weekend hours. Whatever shape it takes, consistency is what turns chores into an automatic routine. Break tasks into small slices Trying to clean an entire house in one go is like eating a whole pizza in a single bite. Slice it up instead: Mondays for mopping, Tuesdays for the bathroom, and so on. Smaller assignments feel less daunting, give every room equal attention over time, and are far easier to hand to family members or roommates. Nobody dodges a request to spend ten minutes on one sink the way they dodge a request to clean a whole bathroom. Tip 2: Use the Right Tools for the Job Cleaning with weak tools is like painting with a toothbrush. Invest in equipment that is effective and durable rather than the priciest item on the shelf. A reliable vacuum with strong suction makes a real difference in homes with pets or large carpeted areas, and a HEPA filter helps control allergens. Microfiber cloths trap dust and grime almost like magnets, cut the elbow grease you need, and wash for reuse, which is a win for your budget and the planet. Then keep everything within reach so momentum never dies: One dedicated storage spot, such as a laundry room cupboard or pantry shelf, so nothing is ever scattered across the house. A portable caddy loaded with cleaners, sponges, gloves, and brushes, so multi level homes do not require stair runs for supplies. Fresh cloths and a bucket staged before you start, because hunting for tools mid task is what turns thirty minutes into two hours. Health Canada’s resource on household products is a useful reference for choosing and storing cleaning chemicals safely. Tip 3: Declutter Before You Clean You cannot wipe what you cannot reach. Trying to clean a counter buried under appliances, mail, and gadgets is like mowing a lawn full of garden gnomes, so clear the stage first. Put away the toaster you rarely use, store the spare spices, and find homes for the paper piles before a cloth ever touches the surface. Then make decluttering a habit instead of a yearly panic. Ten minutes a day, or thirty minutes a week, through one drawer or one shelf is enough. Ask two questions about each object: do I need this, and have I used it in the past year? Fewer objects on surfaces means less to clean around, a space that stays tidier on its own, and a clearer mental inventory that stops duplicate purchases. Tip 4: Focus on High Traffic Areas Treat your home like a city: the busiest streets need the most maintenance. The kitchen is your downtown, hosting every meal and gathering, so it demands the most frequent attention. The bathroom sees daily use and needs regular work to stay hygienic, and the living room collects dust, crumbs, and wear from everyone who relaxes there. Prioritizing these hubs does not mean ignoring the rest of the house; it means spending finite energy where it shows most. Pair that priority with spot cleaning, the proactive move of handling messes the moment they appear. Spilled cereal gets swept now, mirror fingerprints get wiped now, and small messes never graduate into weekend sized projects. Since the CDC notes the health benefits of everyday physical activity, these quick active laps around the house pay you back twice. Tip 5: Time Yourself and Make It Fun A timer converts cleaning into a friendly competition with yourself. Set twenty minutes, challenge your household to finish as much as possible before the buzzer, and watch sidetracking vanish. Tasks that normally sprawl across an hour routinely collapse into a fraction of that when the clock is ticking, because decisions get faster and focus gets sharper. Then attach the fun. A favorite playlist turns mopping into a dance break, and podcasts or audiobooks keep your mind busy while your hands scrub. Pairing the chore with something you already enjoy builds a positive association, which is the quiet secret behind every routine that actually sticks. A Sample Weekly Productivity Plan Day Focus Time Box Monday Floors: sweep and mop 20 minute timer sprint Tuesday Bathroom fixtures and mirror 15 minutes after dinner Wednesday Kitchen counters and appliance fronts 20 minute timer sprint Thursday Declutter one drawer or shelf 10 minutes Friday Dust high traffic surfaces 15 minutes Saturday Deeper vacuum pass and spot checks 30 to 60 minutes Sunday Rest, or reset the coming week Optional Frequently Asked Questions How long should a daily cleaning session last? Fifteen to twenty minutes is plenty for maintenance when it happens daily. The point of short sessions is preventing buildup, which is what makes weekend cleaning marathons necessary in the first place. What if I miss a scheduled day? Simply fold the missed task into the next open slot and keep moving. A flexible schedule absorbs a missed day without collapsing, which is exactly why task slicing beats all or nothing weekend plans. Do timer sprints really work? They work because deadlines force prioritization. You stop reorganizing one shelf and start covering the room. Most people are surprised how much

5 Essential Tips: How to Skyrocket Your Cleaning Productivity Read More »

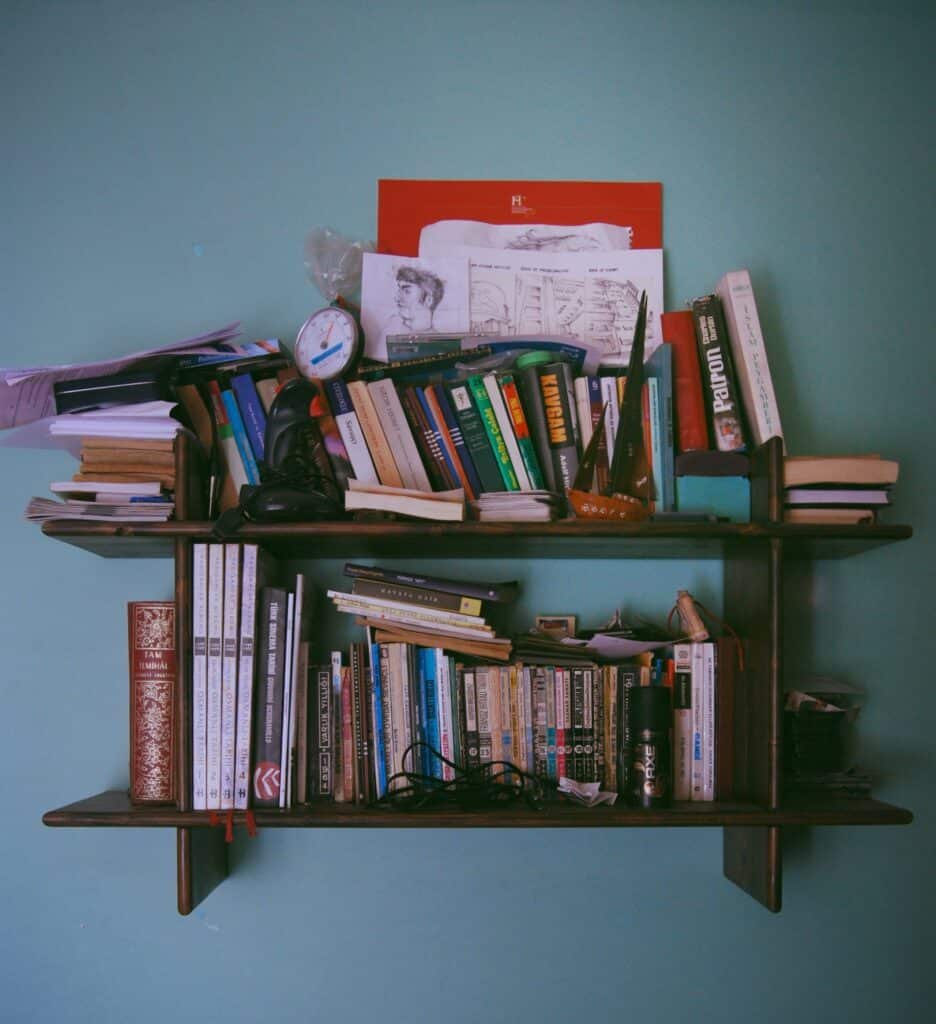
Disorganized book in a bookshelf

How to Declutter Your Home in 5 Simple Steps This Weekend

Hey there! Ready to reclaim your space and feel the joy of a clutter-free home? Let’s dive into how you can declutter your home in just 5 simple steps this weekend. It’s all about making your space more inviting and less of a “Where did I put that again?” kind of place. Step 1: Set How to Declutter Your Home When you’re thinking about decluttering, it’s like setting the stage for a home makeover show starring you. First, picture what you want each space to look like. Is it turning your living room into a cozy, magazine-worthy space? Or maybe you’re dreaming of a kitchen where you can actually see the countertop (imagine that!). But here’s the kicker: be specific with your goals. Instead of just saying, “I want a cleaner bedroom,” how about, “I want a bedroom with enough space to do my morning yoga.” This way, you’re not just decluttering; you’re creating a vision of your ideal home lifestyle. Visualize the End Result: Close your eyes and imagine walking into your newly decluttered space. What does it look like? How does it make you feel? Visualization is a powerful motivator. It’s like giving yourself a sneak peek of the rewards waiting for you at the end of this decluttering journey. Set Realistic and Achievable Goals: Rome wasn’t decluttered in a day! Set goals that you can realistically achieve over the weekend. If your home office is overflowing with papers and random gadgets, maybe aim to create a clear workspace and an organized shelf. You don’t have to go full Marie Kondo in one go – small victories matter! Consider Your Lifestyle: Your decluttering goals should align with your lifestyle. If you’re a busy bee, creating a low-maintenance and minimalist space might be the way to go. Love cooking? An organized pantry and accessible kitchen tools should be your target. Tailor your decluttering to suit how you live. Write It Down: Grab a notepad or your phone and jot down these goals. Seeing them in black and white makes them more real and gives you a clear roadmap. Plus, ticking off completed tasks? Super satisfying!     Step 2: Break It Down The thought of decluttering your entire house might sound as fun as a trip to the dentist, but here’s a game-changer – break it down, room by room. Think of it like episodes of your favorite TV show; each room is a new episode in your decluttering saga. Creating a Decluttering Schedule: Grab your calendar or planner and let’s get scheduling. Allocate specific times for each room. Maybe Saturday morning is perfect for sprucing up the living room, while Sunday afternoon is ideal for giving your bedroom some love. By scheduling, you’re not just wishing for a cleaner home; you’re planning for it. Start with the Easiest Room: Kick off with a room that feels less daunting. Maybe it’s the bathroom, where you can toss empty bottles and old toiletries, or perhaps it’s the dining area, where reorganizing a few things can make a big difference. Starting easy gives you a quick win and sets a positive tone for the rest of the project. Use Timers for Focused Bursts: Set a timer for each decluttering session. Maybe give yourself 30 minutes per room. This creates a sense of urgency and helps you stay focused. Plus, it’s kinda fun to race against the clock! Involve the Family or Roommates: Make it a group activity! Assign tasks to family members or roommates. Kids can sort through their toys, while your partner tackles a different area. It’s like having your own decluttering crew, and it makes the task more enjoyable. Decluttering Categories: In each room, focus on specific categories. In the living room, deal with magazines, books, and DVDs. In the bedroom, focus on clothes and accessories. This categorical approach prevents you from feeling overwhelmed and keeps you on track. Step 3: Mastering Your System The ‘Keep’ Pile Items in the ‘Keep’ pile are the easy ones. These are your go-to items, things you use regularly, or those with sentimental value that genuinely make you happy. A good rule of thumb is the 90/90 rule: if you haven’t used it in the last 90 days and don’t plan to in the next 90, maybe it’s not a keeper. Remember, ‘keep’ doesn’t mean hoard – be selective! The ‘Donate’ Pile The ‘Donate’ pile is for items that are still in good condition but no longer serve a purpose in your life. Clothes that don’t fit, books you’ve read and won’t revisit, or that kitchen gadget you never used – these items can find a new home and be useful to someone else. Consider local charities, shelters, or community centers. Donating not only declutters your home but also helps others and is good for the environment. Win-win! The ‘Trash’ Pile This one’s for items that are beyond repair or use – broken appliances, worn-out clothes, outdated electronics, etc. It’s important to dispose of these responsibly. Recycle what you can and be mindful of the environment. This pile might also include items that hold no value, even for donation, like old papers or broken items. The ‘Maybe’ Box Sometimes, there are items you’re just not sure about. For these, create a ‘Maybe’ box. Store these items out of sight and set a reminder for, say, six months. If you haven’t needed or thought about them by then, it’s safe to say you can let them go. Be Honest and Realistic This step requires honesty. Ask yourself hard questions about why you’re holding onto things. Is it for sentimental reasons, guilt, or the ‘just in case’ mindset? Remember, your goal is a clutter-free space that brings peace and joy, not stress. One Room at a Time Apply this system room by room. Don’t move to the next room until you’ve sorted through everything in the current one. This keeps the process organized and prevents you from feeling overwhelmed. Involve Others If you live

How to Declutter Your Home in 5 Simple Steps This Weekend Read More »

How to Rejuvenate Your Home After the Holidays: Winter Maintenance Guide

Close the Holidays Out Properly Winter has settled in, the festivities are memories, and your home is quietly asking for a reset. Post holiday cleanup is about more than tidiness: it is how you start the new year with order instead of tinsel in every corner. The guide below moves through decoration storage, tree disposal, room by room deep cleaning, kitchen recovery, and the winter safety checks that keep the rest of the season calm. Un deck the Halls with Care Take the decorations down when you are ready, not when guilt says so. When you do begin, start with small items like ornaments and tinsel, and finish with the lights, which cause the most grief a year later. Wrap each strand around a piece of cardboard before storing it, the simplest trick known for preventing the tangled knot that ambushes you next December. As each item packs away, give it a quick inspection: dead bulbs, chipped ornaments, and tired ribbon are easier to replace now than in a panic on December 20th. Send the Tree Off Well Removing the tree closes the season’s chapter, and in Toronto and surrounding areas, municipal tree recycling programs give it a second life as mulch instead of landfill. Before your tree joins that program, strip it completely: every ornament, every strand of tinsel, every light. Adornments jam the chippers, so set the tree out as bare and natural as the forest made it. Deep Clean the Living Spaces The living room hosted the gift openings and movie marathons, so return its calm deliberately. Vacuum carpets and floors thoroughly, then chase the hiding places: under couch cushions where popcorn kernels and cookie crumbs have taken residence. Dust the shelves and entertainment centre, and wipe down every surface guests touched. The dining area earned the feast, so go past the table and chairs to the room’s corners, sideboards, and serving tables, treating wine and gravy splashes while they are still young, and finish with floors still marked by dropped food and scuffs. The kitchen, command centre of every baking marathon, needs a full scrub: countertops, stovetop, and oven crying out after weeks of use; a fridge cleared of leftovers that overstayed the season, with shelves wiped; and the sink, faucet, and a cleaning cycle on the faithful dishwasher. Freshen Every Floor Vacuuming is the first line of defence, and it deserves a thorough pass: move furniture, work the corners, and reach under the sofa and between cushions for the festive debris. The CDC cleaning guidance supports exactly this order of operations: clean visible messes first, then disinfect high touch zones. Then mop hardwood, tile, and laminate with a cleaner suited to that floor type, lifting sticky spills and restoring the shine celebrations dulled. Carpeted areas reward a deeper intervention: steam cleaning pulls grime and allergens deep from the fibres, lifting stubborn stains and odours, and leaving carpet softer and brighter than a routine vacuum achieves. Tackle the Kitchen Appliances The oven worked hardest, so start there. Built up grease and burnt food are not merely ugly; lingering residue is a fire hazard and a drag on efficiency, so run the self cleaning cycle or apply oven cleaner with elbow grease. Next, empty the refrigerator entirely, wipe the interior, check expiration dates while you handle each item, and reorganise as you restock, which cuts waste and keeps groceries visible. Give the smaller helpers their moments too: descale the coffee maker, wipe the microwave, and run the dishwasher’s cleaning cycle. Finally, clear the pantry, discard anything expired, wipe the shelves, and rearrange staples around how you actually cook. Refresh the Guest Rooms Guests left; their fingerprints on the peace of the room should not. Strip and wash the linens, sheets, pillowcases, and blankets, resetting the room hygienically for whoever sleeps there next. Dust thoroughly, because bedroom dust is an allergen question, and reach past the obvious to nightstands, dressers, window sills, and headboards. Finish with a full vacuum, pulling trapped dust from carpet fibres and leaving those satisfying lines that read as a clean room in one glance. Prepare for the Rest of Winter Post holiday maintenance looks forward as much as back. Icy walkways are a genuine hazard, so stock salt or ice melt now, ready for the next deep freeze, because ice underfoot is a safety issue, not a convenience; Health Canada’s household chemical safety tips also cover keeping these products away from children and pets. Inspect snow tools before you need them; a cracked shovel found mid snowfall is a bad morning. In heavy snow zones, watch the roof, clearing accumulation regularly with a roof rake to avoid damage, and keep gutters clear of ice and debris so water drains instead of forming ice dams that push moisture into the house. Three winter checks worth doing before the next storm: Restock salt and ice melt now, not during the storm Test shovels, roof rakes, and scrapers while it is mild Swap the furnace filter so heated air keeps moving The Post Holiday Checklist Task What It Involves Why Now Decorations down Ornaments, tinsel, cardboard wrapped lights, damage check Prevents tangles and December panic Tree recycling Strip all decorations, set tree out bare Keeps Toronto recycling programs working Floor refresh Vacuum deep, mop hard surfaces, steam clean carpets Remains of feasts and traffic are still fresh Kitchen reset Oven, fridge, dishwasher, descale, pantry Residue is a hazard and wastes food Winter proofing Salt stock, shovel check, roof snow, clear gutters Safety before the next storm, not after Frequently Asked Questions When should holiday lights come down? Anytime the season feels finished, but sooner rather than later if lights stayed up for weeks, since heat and time make bulbs brittle and wires stiff. Wrap each strand around cardboard as it comes down and storage is solved at the same moment. What do I do with a real Christmas tree in Toronto? Use your city’s tree recycling program, common across Toronto and surrounding areas, which turns

How to Rejuvenate Your Home After the Holidays: Winter Maintenance Guide Read More »