Cleaning Checklist

5 Bathroom Cleaning Tips Every Toronto Home Should Follow

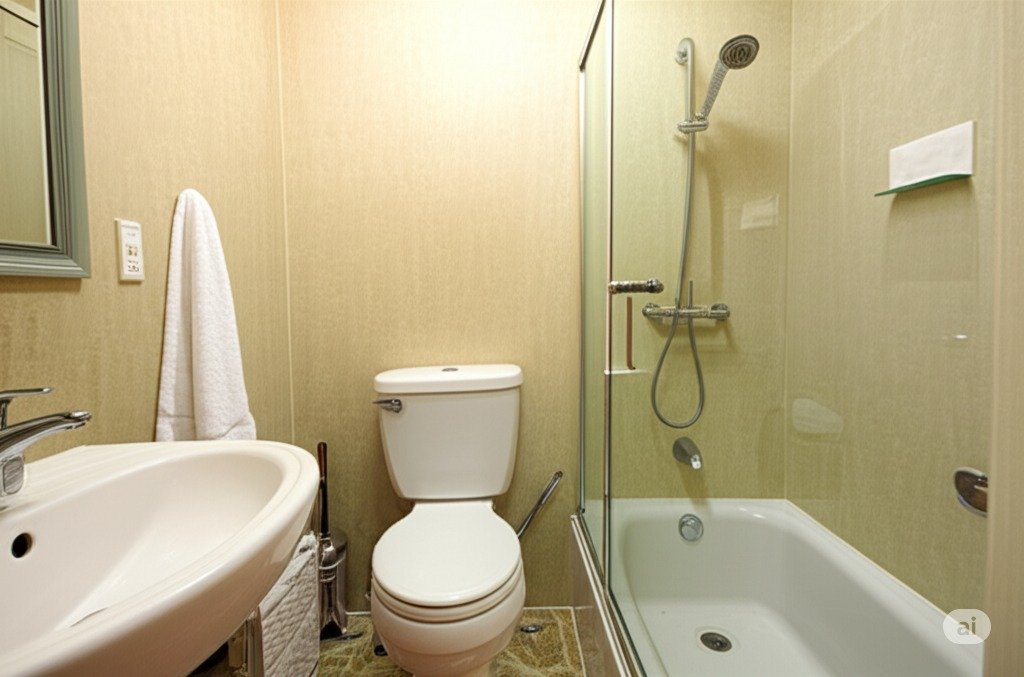
5 Bathroom Cleaning Tips Every Toronto Home Should Follow A truly clean bathroom is more than surface shine. It is deep hygiene, fresh air, and the quiet confidence that the most hardworking room in the house is properly cared for. These five stages take a bathroom from wiped down to genuinely serene, and they work for every Toronto bathroom from a downtown condo ensuite to a family home’s main bath. Assemble the kit once and all five stages get faster: Toilet bowl cleaner and a dedicated toilet brush A soap-scum formula cleaner and non-abrasive sponges A grout brush or an old toothbrush Cream cleanser, glass cleaner, and lint-free microfiber cloths pH-neutral floor cleaner and a well-wrung mop Tip 1: Conquer the Commode with Diligence Start where hygiene matters most. Apply a quality toilet bowl cleaner so it reaches under the rim and coats the surfaces as it flows down, and give it a few minutes to dissolve the buildup you cannot see. Scrub the entire interior with a dedicated toilet brush, reaching every curve. Then do the part most cleanings skip: the exterior. Wipe the tank, the lid, both sides of the seat including the often-forgotten underside, the pedestal, and the floor around the base with a disinfectant cleaner. That full-fixture approach is the difference between a toilet that looks clean and one that is hygienically sound. Tip 2: Win the Battle Against Soap Scum in the Bath and Shower The shower fights a constant war against soap scum, hard water stains, and, in damp conditions, the early stages of mildew. Choose a bathroom cleaner formulated to dissolve exactly those three, apply it to every surface, whether the walls are tile, fiberglass, or acrylic, along with the shower door or curtain, and let it sit for a few minutes so it can actually loosen the grime. Scrub with a non-abrasive sponge, and give the grout lines a dedicated pass with a grout brush or an old toothbrush; grout is where mildew claims its first territory. Polish the showerhead, taps, and drain cover last to remove water spots and mineral buildup. For a bathtub, same principles with special attention to the waterline where residue collects. Tip 3: Make the Vanity and Mirror Sparkle The sink basin collects toothpaste splatter and water spots at remarkable speed. A gentle cream cleanser or a versatile spray cleaner handles it, including the drain area where debris accumulates. Wipe and polish the faucets and handles, touched dozens of times a day, until they shine without fingerprints. Clear the countertops of product residue, then finish with the mirror: quality glass cleaner and a lint-free microfiber cloth in overlapping strokes for the streak-free finish that instantly makes the whole room feel brighter and larger. Thirty seconds of countertop tidying completes the calm, orderly look. Tip 4: Treat the Floor as a System Floors collect stray hairs, splash dust, and debris, so remove the loose material before any wet cleaning: sweep with a soft broom or vacuum with an attachment along the baseboards and around the toilet and vanity. Then mop with a pH-neutral floor cleaner diluted per the manufacturer’s instructions, safe for ceramic tile, vinyl, or linoleum alike. Wring the mop well, since over-saturating the floor is hard on unsealed grout. Work the edges of the room, the lip under the vanity if accessible, and carefully around the toilet base, the spots that make the difference between mopped and actually clean. Tip 5: Finish with Freshness That Lasts The details after the cleaning determine how long it lasts. Run the extractor fan during and after every shower to pull humidity down, which starves mildew and musty odors before they start; Health Canada’s humidity and mould guidance treats ventilation as the front line of bathroom health. Empty the bin before it overflows, wipe the light switches and door handles that every family member touches, and skip the overpowering artificial fragrances in favor of simply fresh air. A bathroom that smells like nothing is the one that feels genuinely clean. Stage Focus Key Tool Toilet Bowl interior plus full exterior and floor Toilet brush and disinfectant Bath and shower Soap scum, hard water, grout lines Non-abrasive sponge, grout brush Vanity and mirror Basin, faucets, streak-free glass Cream cleanser, microfiber cloth Floor Dry removal first, then a damp mop pH-neutral cleaner, well-wrung mop Finishing Ventilation, touchpoints, fresh air Extractor fan and a damp cloth Bathroom Cleaning FAQs How often should a bathroom be deep cleaned? A light weekly routine covering toilet, sink, and mirror keeps a bathroom presentable, with a full five-stage session monthly. Large households, or bathrooms with poor ventilation, deserve the deep session every two weeks. What removes soap scum without scratching? A cleaner formulated for soap scum, given dwell time, plus a non-abrasive sponge. Never reach for abrasive powders or pads on acrylic, fiberglass, or glossy tile, because the scratches they leave then hold grime and scum returns faster. How do I stop mildew from coming back? Ventilation first: run the fan during showers and for a while after, and leave the door open when possible. Keep a small squeegee by the shower for a ten second glass wipe, and treat grout lines with a mildew remover at the first dark speck. Where bleach-based products are part of the plan, follow the label carefully; the CDC’s bleach safety guidance covers ventilation and the combinations to avoid. Is professional bathroom cleaning worth it? For the deep session, absolutely: pros bring grout brushes, proper disinfectants, and the routine to keep mildew permanently behind. Many Toronto homes pair a monthly deep clean with their own weekly touch-ups and get the best of both. Your Bathroom Sanctuary, Maintained Toronto Shine Cleaning’s deep cleaning service delivers all five stages in one visit, and recurring housekeeping keeps the sparkle between deep cleans. A regular studio or one bedroom clean starts at $212.63 before HST, with every option on the pricing page. Call (647) 424-0355 and let the bathroom become the easiest room to

5 Bathroom Cleaning Tips Every Toronto Home Should Follow Read More »
clean oven

The Best Way To Clean Your Oven And Make It Shine In 5 Steps

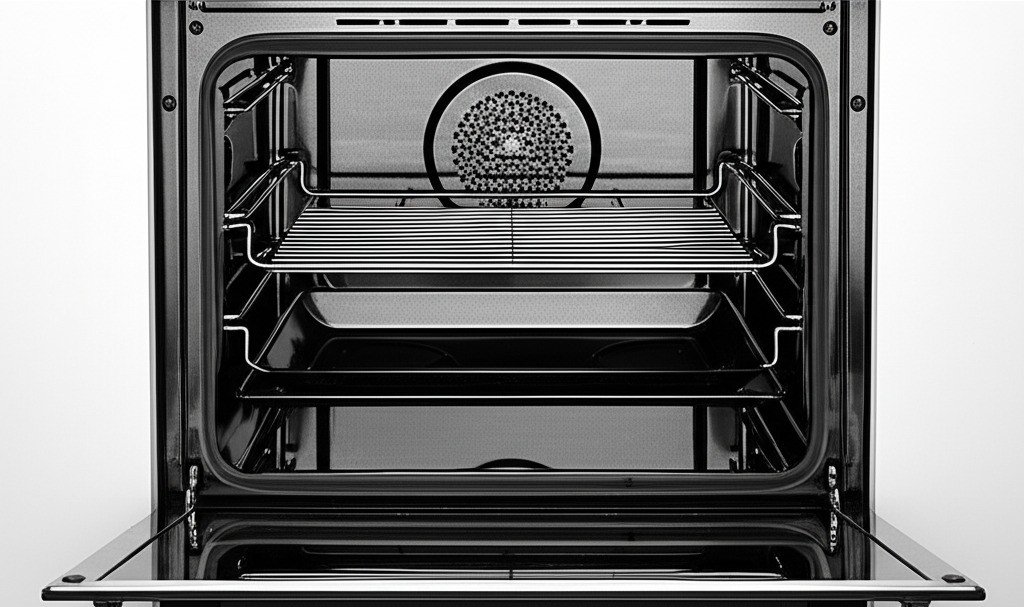
The Best Way To Clean Your Oven: Five Steps To a Spotless Interior Facing a filthy oven can feel like gearing up for a battle. The baked-on grime and mystery splatters look invincible, but with a clear plan you can conquer them and get your oven genuinely sparkling again. This is not only about appearance: a clean oven heats more evenly, cooks better, and keeps your whole kitchen smelling fresh. Roll up your sleeves and work through these five steps in order. Done methodically, the chore that takes most people an exhausting weekend becomes a manageable hour or two, with the waiting time doing the heavy lifting for you. Step 1: Prep Work, Safety, and Protection Safety and setup decide whether this job goes smoothly. Make absolutely sure the oven is completely cold before you begin, no exceptions: cleaning a warm or hot oven risks burns and makes cleaning fumes noticeably more intense. Then do the following preparation: Pull out the oven racks, which usually carry the worst grime, and set them in the sink or a bathtub lined with an old towel to prevent scratches. Clear everything else out: pizza stones, oven thermometers, and that forgotten baking tray. Remove loose debris with a small brush and dustpan, or the crevice tool on your vacuum, sweeping crumbs, ash, and charred food particles from the oven floor. Getting this out now prevents turning it into a muddy paste later. Lay newspaper or old towels on the kitchen floor in front of and beneath the oven door to catch drips, and set up ventilation by cracking a window or switching on the extractor fan. Step 2: Apply Your Chosen Cleaner Evenly With the oven prepped, bring in your cleaning solution, whether a heavy-duty commercial oven spray formulated for tough grease or a homemade paste of baking soda and water. Before you start, put on sturdy rubber gloves to protect your skin, and consider safety glasses if you are using a strong chemical spray, because these products are potent; Health Canada’s guidance on household chemical safety is worth following for any caustic cleaner. Coat every interior surface evenly and thoroughly: the sides, the back panel, the bottom, and the inside of the door. Avoid spraying cleaner directly onto visible heating elements or internal fans, which are sensitive components. Do not be shy with product on the really stubborn baked-on spots. A generous, even coat now means dramatically less elbow grease later. Step 3: The Waiting Game, Where the Real Cleaning Happens Now let patience do the work. This is not wasted time: the solution is busy penetrating and breaking down the caked-on grease and food residue. Check your product’s label for the manufacturer’s recommended dwell time, and see the table below for typical ranges. Whatever the recommendation, do not rush this stage, because the full, uninterrupted dwell is what makes the next step dramatically easier. Think of it as your secret weapon against excessive scrubbing, and use the downtime productively on the racks. Cleaner option Best for Typical dwell time Commercial oven spray Regular cleaning and moderate grease From around 30 minutes, always per the label Heavy-duty chemical cleaner Long-neglected, baked-on grime Several hours to overnight, per the label Baking soda and water paste A gentler homemade approach Several hours or overnight for tough messes Hot soapy water soak The removed racks While the cleaner dwells inside the oven Step 4: Scrub, Wipe, and Watch the Transformation The wait is over, and the cleaner has done the heavy lifting, so the grime should be significantly looser. Gather a non-scratch abrasive pad, a heavy-duty sponge, and a few clean rags. For spots that refuse to budge, a plastic scraper helps; an old credit card works in a pinch if used carefully. Wipe and scrub the interior systematically, starting at the top and working down, or finish one section before moving on, and do not forget the glass panes in the door. The deposits come away far more easily now than they would have with cold water and muscle alone. Rinse your sponge or rag frequently in a bucket of clean water so you are not simply spreading loosened dirt around the cavity, and pay special attention to corners, crevices, and recesses where grease loves to hide. Step 5: Rinse, Dry, and Reassemble On the home stretch. Now remove every last trace of cleaning product, because residue can produce nasty fumes or alter the taste of your food the next time you bake. Wipe all interior surfaces multiple times with clean, damp cloths, rinsing one often if that is what it takes, until no soapy or slippery feel remains. For an effective final rinse, many people wipe the surfaces with a cloth dampened in water mixed with a little white vinegar, which helps neutralize remaining cleaner residue and adds a nice sparkle. Then air-dry the oven with the door open for a few hours, or dry it thoroughly with a clean towel or microfiber cloth. Give the soaked racks a final rinse, dry them completely, and slide them back into position. Remove your floor protection and take a moment to admire the work. Oven Cleaning FAQ Can I use the self-cleaning cycle instead? A self-clean burns off soil with extreme heat, but it still cannot handle thick grease piles or loose debris, and many manufacturers advise against additional chemical cleaners with the cycle. The five manual steps above work on any oven and give you control over stubborn spots. What about the oven door glass? Clean it as part of Step 4 rather than skipping it. With the interior surfaces degreased during the dwell time, the panes wipe far more easily, and a dry microfiber buff at the end keeps the view into the oven streak-free. How often should an oven be cleaned? A light wipe after big spills keeps grime from carbonizing, and pairing it with a scheduled regular cleaning visit prevents the multi-hour buildup described in this post. Kitchens that roast or

The Best Way To Clean Your Oven And Make It Shine In 5 Steps Read More »

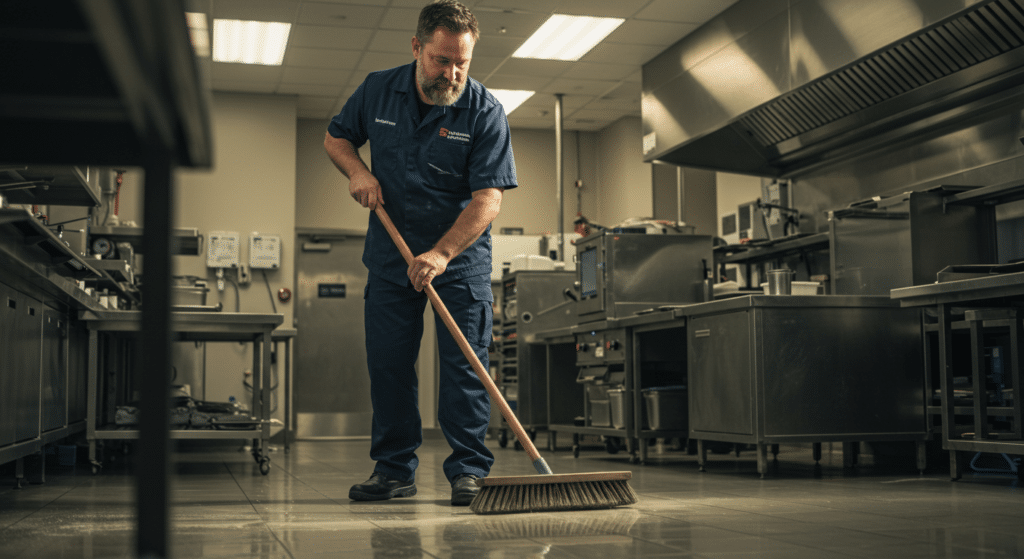
Middle aged man work as a professional cleaner while brooming

7 Must-Know Tips Before Hiring a Cleaning Service

7 Must-Know Tips Before Hiring a Cleaning Service Bringing a cleaning team into your home should take weight off your shoulders, not add worries. The right service saves hours every week and gives you time back for work, family, and rest, which is genuinely good for your mental health and wellbeing. The wrong choice, however, costs money and trust. These seven must-know tips before hiring a cleaning service will help you check the important boxes, ask the right questions, and book with confidence. Read Online Reviews and Look for Patterns Review sites such as Google, Yelp, and Facebook reveal how a company actually behaves between marketing pages. Look for repeated comments about punctuality, consistency, and attention to detail, and note whether customers book again and again. Happy repeat clients are a strong sign that results are reliable, not accidental. Negative feedback is just as informative. If several people mention missed spots, late arrivals, or weak communication, treat that as a warning. One bad day happens, but a pattern tells you how the business operates. Browse our customer reviews to see what regular clients say about our team. Confirm Insurance, Bonding, and Staff Screening Before anyone enters your home, ask whether the company is insured and bonded and request proof. Coverage protects you if an item is damaged or a worker is injured on the job, and bonding adds another layer of security. A professional firm shares this paperwork without hesitation; vagueness is a red flag. Toronto Shine Cleaning is fully bonded and insured, carrying a $1,000,000 insurance policy plus a $10,000 accidental breakage and surety bond, so your home and belongings are protected. Also ask how workers are screened and whether the same team returns each visit. Background checks and familiar faces make it easier to relax and enjoy the results. Ask What Supplies They Bring and What the Service Includes Some companies expect you to stock every spray, mop head, and cloth. A prepared team arrives with its own professional supplies and the know-how to match products to surfaces, which protects your countertops, floors, and fixtures. Health Canada’s household products information is a good reference for choosing safe, effective cleaners at home. Before booking, ask exactly what each visit covers. Basic packages may include dusting and vacuuming, while others go further into kitchen appliances and bathroom tile. Request a written or digital checklist so nothing is left to guesswork, and confirm whether extras such as inside-the-fridge cleaning or baseboard scrubbing are available as add-ons. Know Who Will Be in Your Home It is normal to feel hesitant about handing over your keys. Ask whether the company sends the same team every time or rotates staff, and whether workers are background-checked and professionally screened. Some services even introduce their cleaners by profile or photo before the first appointment, which turns a formal transaction into a comfortable relationship. When you know who is arriving, you can enjoy a clean home without hovering. Check Scheduling Flexibility and Compare Real Value Your calendar changes, and your cleaning plan should bend with it. Look for a company that offers weekly, bi-weekly, or one-time visits, allows rescheduling without penalty, and provides easy online booking. Life gets busy, and a regular cleaning service should simplify your week, not complicate it. Finally, compare value instead of chasing the lowest quote. A rock-bottom price often means cut corners, skipped details, or surprise fees. Weigh what is included: insurance, supplies, a clear checklist, guarantees, and responsive communication. Paying a fair price for a thorough, insured team is the better investment in the long run. Before you sign up, confirm these points with any candidate: Proof of insurance and bonding. Bring-your-own professional supplies and products. A written checklist of included tasks. Background-checked staff and consistent teams. Flexible scheduling with simple rescheduling. Clear, all-in pricing with no surprise fees. Responsive communication before and after visits. Use this cheat sheet during your phone interviews: Question What It Tells You Consider It a Red Flag If Are you insured and bonded? You are covered if something breaks The company will not provide proof Do you bring your own supplies? The right products are used on every surface You must buy all supplies yourself What is included in each visit? The scope of work is clear There is no checklist and answers stay vague Who will clean my home? Staff are screened and accountable Teams rotate with no notice or introduction Can I reschedule easily? The service fits your lifestyle Every change costs a fee or hassle Frequently Asked Questions About Hiring a Cleaning Service How much does a cleaning service cost in Toronto? Pricing depends on home size, visit frequency, and the condition of the space. Toronto Shine Cleaning’s regular cleaning rates before HST start at $212.63 for a studio or one-bedroom, with a two-bedroom home at $273 and a three-bedroom at $327; see our pricing page for full details. Do I need to be home during the cleaning? Many clients prefer to be present for the first visit, and after that the arrangement is flexible. Ask the company about entry options such as a spare key or building concierge access, and choose whatever makes you most comfortable. What happens if something is damaged during a visit? A properly insured and bonded company will walk you through its claims process. Toronto Shine Cleaning carries a $1,000,000 insurance policy and a $10,000 accidental breakage and surety bond to cover these situations. How do I know the cleaner will do a good job? Start with reviews, a written scope of work, and a clear checklist. After the first visit, inspect the results and give feedback, because a quality company uses your input to make the next clean even better. Choosing a cleaning service does not need to be a gamble. Check reviews, verify insurance and bonding, confirm the scope, and compare real value, and you will find a partner that respects your home and your time. Whether you need a one-time reset or ongoing

7 Must-Know Tips Before Hiring a Cleaning Service Read More »

A cheerful spring scene featuring a broom leaning against a bucket with a cloth draped over it. The setting is an outdoor porch with warm sunlight, su

Preparing for Spring Cleaning: What to Do Before You Start

Preparing for Spring Cleaning: What to Do Before You Start Spring cleaning is a wonderful way to refresh your home after a long winter, but diving in without a plan can quickly become overwhelming. Proper preparation makes the entire process more efficient and far less stressful. By following a few simple steps before you pick up a sponge, you set yourself up for a successful and satisfying clean. Toronto Shine Cleaning shares these preparation tips to help you get started on the right foot. Declutter Your Space First Before you can deep clean, you need to clear out the clutter. Go through closets, drawers, cabinets, and shelves to identify items you no longer use. Sort everything into four piles: keep, donate, recycle, and trash. If you have not used something in over a year, it is probably time to let it go. A clutter-free home not only looks better but also makes cleaning faster and more effective. Tackle one room at a time, starting with high-clutter areas like pantries, storage closets, and home offices, to keep the task manageable. Gather Your Cleaning Supplies Nothing slows down spring cleaning like hunting for supplies mid-task. Stock up on essentials before you begin. Here is a quick checklist of what you will need for a thorough spring clean: Category Recommended Items Surface Cleaners Microfiber cloths, all-purpose cleaner, glass cleaner, disinfectant spray Floor Care Vacuum with attachments, mop, bucket, hardwood or tile cleaner Tools & Accessories Sponges, scrub brushes, squeegee, duster with extension handle Specialty Products Degreaser for kitchen, grout cleaner for bathroom, stain remover for carpets and upholstery Safety & Disposal Rubber gloves, garbage bags, masks if using strong cleaners Consider using eco-friendly cleaning products to protect your home and the environment. Many conventional cleaners contain harsh chemicals that can irritate skin and lungs. The Government of Canada provides resources on using household products safely to help you choose wisely. Make a Room-by-Room Checklist A detailed checklist keeps you organized and ensures no area gets missed. Write down tasks for each room and prioritize areas that need the most attention. Breaking the work into manageable sections makes the job feel less daunting and helps you track your progress. Include tasks like dusting ceiling fans, wiping baseboards, cleaning windows, washing curtains, vacuuming under furniture, and disinfecting high-touch surfaces like light switches and door handles. The CDC recommends cleaning surfaces first with soap and water before disinfecting for the most effective results. Pre-Treat Stubborn Stains Tough stains on carpets, upholstery, and kitchen surfaces need time to break down. Apply stain remover or pre-treatment solutions before you start cleaning so they can work while you tackle other tasks. For kitchen grease, use a degreaser on stovetops and range hoods. In the bathroom, apply grout cleaner to tile and let it sit before scrubbing. Carpet stains should be treated with an appropriate remover and left to absorb before blotting. These pre-treatment steps make deep cleaning much more effective and save you from scrubbing later. Set a Schedule and Enlist Help Spring cleaning does not have to be a one-day marathon. Spread tasks over several days or a weekend to avoid burnout. Assign specific chores to each household member to speed things up: Kitchen — Degrease stovetop, wipe cabinets, organize pantry, clean refrigerator shelves and drawers. Bathroom — Scrub tiles and grout, disinfect toilet and sink, descale showerhead, wash bath mats. Living Areas — Dust ceiling fans and light fixtures, vacuum upholstery, wash windows and curtains, wipe baseboards. Bedrooms — Flip mattress, wash bedding and duvet covers, organize closets, vacuum under furniture. Floors — Vacuum carpets and area rugs thoroughly, mop hard floors, spot-treat any stains. Children can help with dusting, sorting laundry, and wiping surfaces. If spring allergies are a concern, the Health Canada recommends cleaning to reduce indoor allergens during spring as part of your seasonal refresh. If you need help with the heavy lifting, consider booking professional deep cleaning services. Toronto Shine Cleaning offers thorough deep cleaning for your home that covers the tasks you might not have time or energy for, such as carpet cleaning, window washing, and upholstery care. Frequently Asked Questions What is the best order to clean a room? Always work top to bottom. Start with ceiling fans and high shelves, then move to counters and furniture, and finish with floors. This way dust and debris fall onto surfaces you will clean last. How long should spring cleaning take? For a typical home, plan on 6-12 hours spread over a weekend. If you break it into room-by-room sessions of 1-2 hours each, the work feels much more manageable. Do I need to wash my curtains during spring cleaning? Yes, curtains and drapes collect dust, pet dander, and allergens over time. Check the care label and launder or steam clean them as part of your spring refresh. Should I hire professional cleaners for spring cleaning? If you are short on time or dealing with tough jobs like deep carpet cleaning, oven cleaning, or post-winter grime, professional help can be a smart investment. Contact Toronto Shine Cleaning at (647) 424-0355 to discuss your needs. How do I maintain a clean home after spring cleaning? Establish a weekly routine of quick tidying, dusting, and vacuuming. Book a regular cleaning service to keep everything fresh between deep cleans. Spring cleaning does not have to be stressful. With the right preparation, you can transform your home efficiently and enjoy the fresh, clean results. For expert help with the hardest tasks, call Toronto Shine Cleaning at (647) 424-0355 or visit our pricing page to learn more.

Preparing for Spring Cleaning: What to Do Before You Start Read More »

Blank paper and pen with apple at side

February Cleaning Checklist: Keep Your Home Fresh

February Cleaning Checklist: Keep Your Home Fresh This Winter Midwinter in Toronto means boots full of salt, windows that stay shut, and indoor air carrying more dust and germs than usual. A focused February cleaning checklist keeps your home cozy, healthy, and organized while you wait out the cold. The tasks below tackle the dirt winter drags in, refresh the soft surfaces that trap odors, and set you up for an easier spring clean. Deep Clean Entryways and High-Traffic Areas Entryways, hallways, and living rooms take the hardest hit in winter because snow, slush, and road salt get tracked straight onto them. Vacuum carpets thoroughly with a HEPA-filter vacuum to pull out trapped dirt, allergens, and pet dander without releasing fine particles back into the air. On hardwood or tile, mop with a gentle but effective cleaner to lift grime without dulling the finish. Baseboards and corners gather dust and debris quickly, so wipe baseboards with a damp microfiber cloth and use a melamine sponge on scuff marks. Move furniture and clean underneath it, where dust accumulates unnoticed. At the front door, lay down a heavy-duty mat, ask family members to remove their shoes on arrival, and keep a shoe rack or storage bench nearby so wet footwear never travels past the entry. Dust and Disinfect High-Touch Surfaces Germs thrive when a home stays closed up, so make disinfecting part of your February cleaning checklist. Wipe countertops, doorknobs, and light switches with a disinfectant spray or wipes, giving extra attention to kitchen surfaces where food is prepared. The CDC explains that cleaning with soap or detergent removes most germs from surfaces, so clean first and disinfect when it is truly needed: follow the CDC guidance on when and how to clean and disinfect your home. Dust weekly with a microfiber cloth or electrostatic duster so allergens never settle in. Cover ceiling fans, air vents, and window blinds, and check the surfaces that hide dust best, because Health Canada lists dust among the indoor air contaminants that affect health. Electronics such as remote controls, keyboards, and phones accumulate bacteria fast, so wipe them down with a disinfectant wipe on the same schedule. Refresh Bedding and Upholstery Couches, curtains, and mattresses hold dust and odors, and closed winter windows make mustiness worse. Vacuum upholstered furniture with an upholstery attachment, working into crevices and under cushions where crumbs collect. Pillowcases, sheets, and comforters deserve a weekly warm-water wash, which kills bacteria and dust mites, and dry bedding in sunlight when you can. Dust mites thrive in beds, carpets, and furniture, so regular washing keeps their numbers down, as explained on the Health Canada page about dust and dust mites. Rotate and flip your mattress every few months to spread wear evenly. Sprinkle baking soda over upholstery before vacuuming to neutralize odors, and switch to a pet-specific upholstery cleaner if dogs or cats share the furniture. Cut Kitchen Grease and Bathroom Grime Wipe cabinets and countertops with a grease-cutting cleaner, focusing on the area around the stove where splatters land. Warm water and mild dish soap handle everyday touch-ups without harsh residues. Clean the oven with a baking soda paste or commercial oven cleaner, let it sit for a few hours, then wipe it away with a damp cloth. Wash the stovetop, burner grates, and knobs so the whole kitchen looks spotless. Sort the pantry, discard expired items, and group similar products in bins or labeled jars to make meal prep faster and cut food waste. In the bathroom, run the exhaust fan or open a window after hot showers so mold cannot take hold. Scrub tile grout with a grout brush and baking soda paste, and switch to a hydrogen peroxide solution for stubborn discoloration. Clean mirrors with a streak-free glass cleaner, use a vinegar-free product on faucets and showerheads, and replace old sponges, shower liners, and towels. Declutter and Prepare for Spring Use the last weeks of winter to clear closets and plan the seasonal refresh: Sort items into keep, donate, and discard piles. Pack bulky winter coats and sweaters into vacuum-sealed storage bags to reclaim closet space. Organize the clothes you keep by type and color. List upcoming spring tasks such as washing windows and cleaning gutters. Tackling small decluttering jobs now means spring cleaning starts from a much lighter base, and the home stays organized year-round. February Cleaning at a Glance Task Frequency Best Tool Vacuum carpets and rugs Weekly, more often in high-traffic zones HEPA-filter vacuum Dust furniture, blinds, and vents Weekly Microfiber or electrostatic duster Wash bedding and pillowcases Weekly in warm water Warm-water laundry cycle Disinfect high-touch surfaces Several times a week Disinfectant spray or wipes Clean oven, stovetop, and grates Monthly Baking soda paste February Cleaning FAQ How often should bedding be washed during winter? In winter, wash sheets, pillowcases, and comforters every week in warm water so sweat, dust mites, and bacteria cannot build up while windows stay shut. Why do baseboards get so dirty in February? Winter air pushes dust and settled grime toward the floor, and baseboards sit right in that path, so they pick up a visible layer quickly; a damp microfiber wipe every week or two keeps them looking fresh. Is disinfecting necessary if everyone is healthy? Regular cleaning removes most germs from surfaces, but disinfecting high-touch points such as doorknobs and light switches several times a week lowers the odds of winter illnesses moving through the household. When should I book a professional deep clean? If grease, grime, or dust have built up faster than your weekly routine can manage, or before spring entertaining begins, a professional deep clean resets the entire home in one visit. Let Toronto Shine Cleaning Handle the Hard Part Following this February cleaning checklist keeps a home fresh through the cold, but thorough cleaning is time-consuming on a busy schedule. Toronto Shine Cleaning provides residential and commercial services, whether you need a one-time deep cleaning or ongoing regular maid service. Read our customer reviews

February Cleaning Checklist: Keep Your Home Fresh Read More »

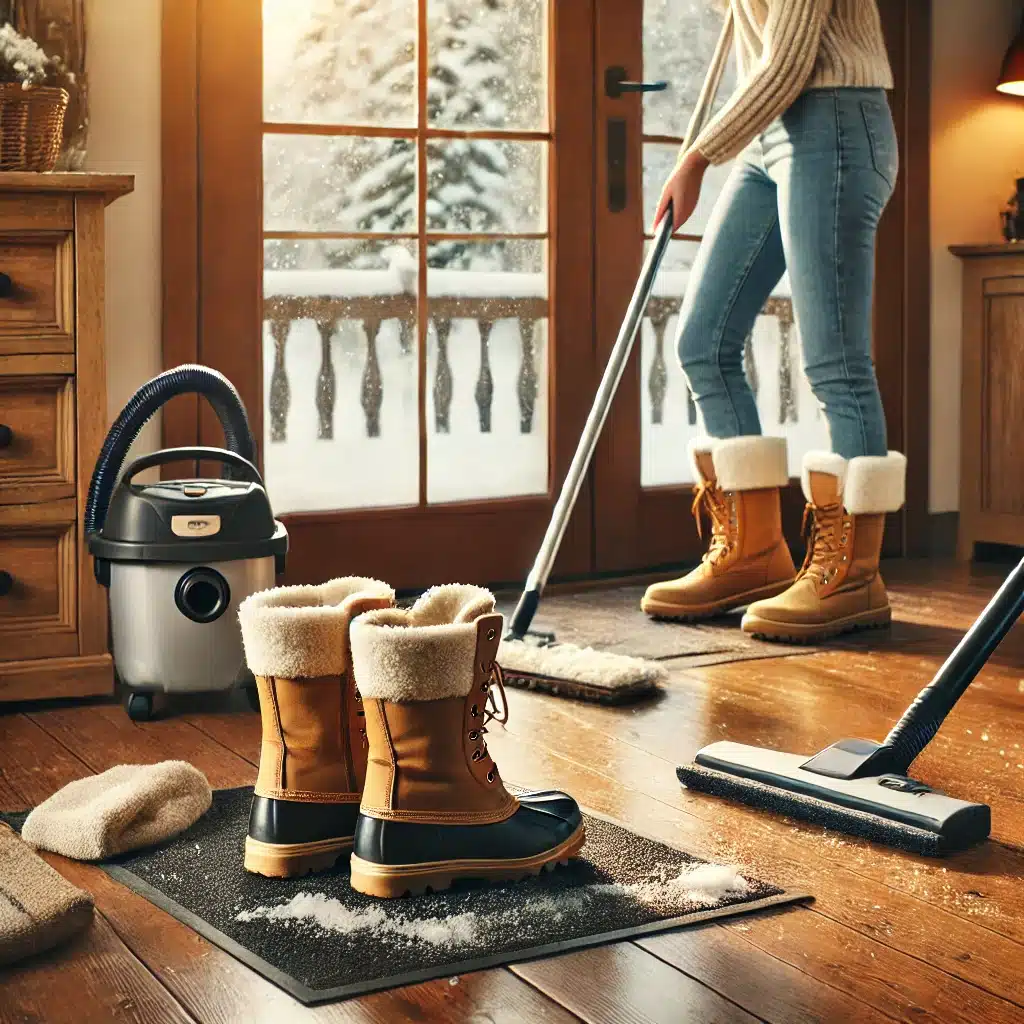
Winter January cleaning the floor

January Cleaning Checklist: Removing Snow, Slush, and Ice Indoors

January Cleaning Checklist: Removing Snow, Slush, and Ice Indoors January in Toronto means snow, slush, and ice follow you through the front door no matter how careful you are. Wet floors, salt stains, and slippery surfaces become daily problems, but a practical January cleaning checklist keeps the mess contained and your home safe. These steps focus on the entryway, floors, and indoor air, the three places winter hits hardest, and most of them take only a few minutes once they become habit. Set Up Heavy-Duty Mats and Boot Trays at Every Entrance Stop snow and slush before they spread by layering your entryway: a rough-textured outdoor mat scrapes snow off boots, and a super-absorbent mat inside soaks up the moisture that remains. Boot trays catch water and debris from shoes, keep footwear organized, and prevent puddles from reaching your floors. Mats only work when maintained, so they need daily shaking, a weekly vacuum pass, and a wash whenever they look tired to stay absorbent all month. Mop and Dry Floors Frequently Moisture from melting snow makes floors slippery and dangerous, so wipe up water promptly with a microfiber mop or absorbent cloth. A mop barely dampened with warm water and a squirt of mild detergent lifts salt and grime without harming your flooring, and never flood the floor, because excess moisture seeps into cracks and causes warping or mildew. Health Canada’s advice on using household chemicals safely is worth a read before mixing any cleaning products. Finish every mopping session with a dry microfiber mop or towel so no moisture lingers to create a slip hazard. Remove Salt Stains from Floors and Carpets Salt melts ice outside but leaves white, powdery stains inside that dull floors and damage them over time. Stir a few drops of dish soap into warm water, then scrub the stain gently with a microfiber cloth or soft brush. On carpets, blot with a damp cloth rather than scrubbing, absorb the moisture with a dry towel, and vacuum regularly so salt never builds up. Treating stains promptly keeps floors looking fresh through the whole season. Deep Clean Entryway Mats and Rugs Entry mats absorb an astonishing amount of dirt, salt, and moisture, so give them the same care as your floors: Shake mats out daily to remove loose grit and salt. Vacuum them weekly, ideally with a HEPA-filter vacuum. Wash them weekly in warm water with mild detergent. Air dry completely before putting them back to prevent mold. Rotate spare mats so each one dries fully between uses. Well-maintained mats keep trapping debris at the door instead of releasing it onto your floors. Wash Doors and Walls around Entrances Snow and slush splash against doors and walls, leaving streaks that dull the entryway. Clean these surfaces on a regular schedule with a soft damp cloth or a mild all-purpose cleaner, and reach for warm water with a little dish soap on stubborn marks while skipping harsh chemicals that damage paint. Door handles and frames collect grime quickly because hands touch them all day, so include them in every pass to keep the entry welcoming and hygienic. A quick wipe of baseboards in the same sweep catches the grit kicked off boots before it hardens into a stain. Balance Humidity and Clean Heating Vents Winter air creates two opposite problems indoors. Excess humidity causes condensation on windows and floors, which leads to slippery surfaces and mold, while overly dry air lets dust float and irritates respiratory systems. Use a humidifier when the air is dry or a dehumidifier when moisture collects, and Health Canada’s information on indoor air contaminants explains how humidity, dust, and mold interact. Give heating vents a weekly vacuum and swap in fresh air filters on schedule so the furnace never recirculates dust and allergens. Keep Entryways Dry and Safe Most winter falls happen indoors, close to the door. Wipe up moisture immediately, then pull a dry towel or squeegee across the floor to remove the last film of water. Keep spare towels or extra mats near the entrance for unexpected wet spots, and inspect entryways regularly so puddles never linger. A strict drying routine keeps your home presentable and hazard-free all winter. January Entryway Care Schedule Task Frequency Purpose Shake out entry mats Daily Removes salt and grit before it spreads Wipe up wet spots and puddles Daily Prevents slips and floor damage Vacuum mats and heating vents Weekly Keeps debris and dust under control Wash mats and treat salt stains Weekly Protects carpets and flooring Wipe doors, walls, and handles Weekly Keeps the entry clean and polished January Cleaning FAQ How do I stop salt from damaging my floors? Catch it at the door with mats and boot trays, sweep or vacuum twice a week, and clean salt stains quickly with warm water, a few drops of dish soap, and a soft cloth. Why do floors stay wet even after mopping? A damp mop leaves a film behind; follow every mopping with a dry microfiber mop or towel so melting snow residue cannot refreeze or create a hazard. Should I use a humidifier or dehumidifier in January? It depends on your home: use a humidifier when the air feels dry and dusty, and a dehumidifier if condensation forms on windows and floors. How often should entry mats be washed? Once a week in warm water with a mild detergent, with daily shaking and weekly vacuuming in between, and let them dry completely before reuse. Let Toronto Shine Cleaning Handle Winter Messes Following this January cleaning checklist keeps snow, slush, and ice from taking over your home, but winter maintenance is relentless. Toronto Shine Cleaning provides thorough deep cleaning and regular cleaning across Toronto and the GTA, so your home stays spotless even in the worst weather. Check our pricing and call (647) 424-0355 to book your winter clean today.

January Cleaning Checklist: Removing Snow, Slush, and Ice Indoors Read More »

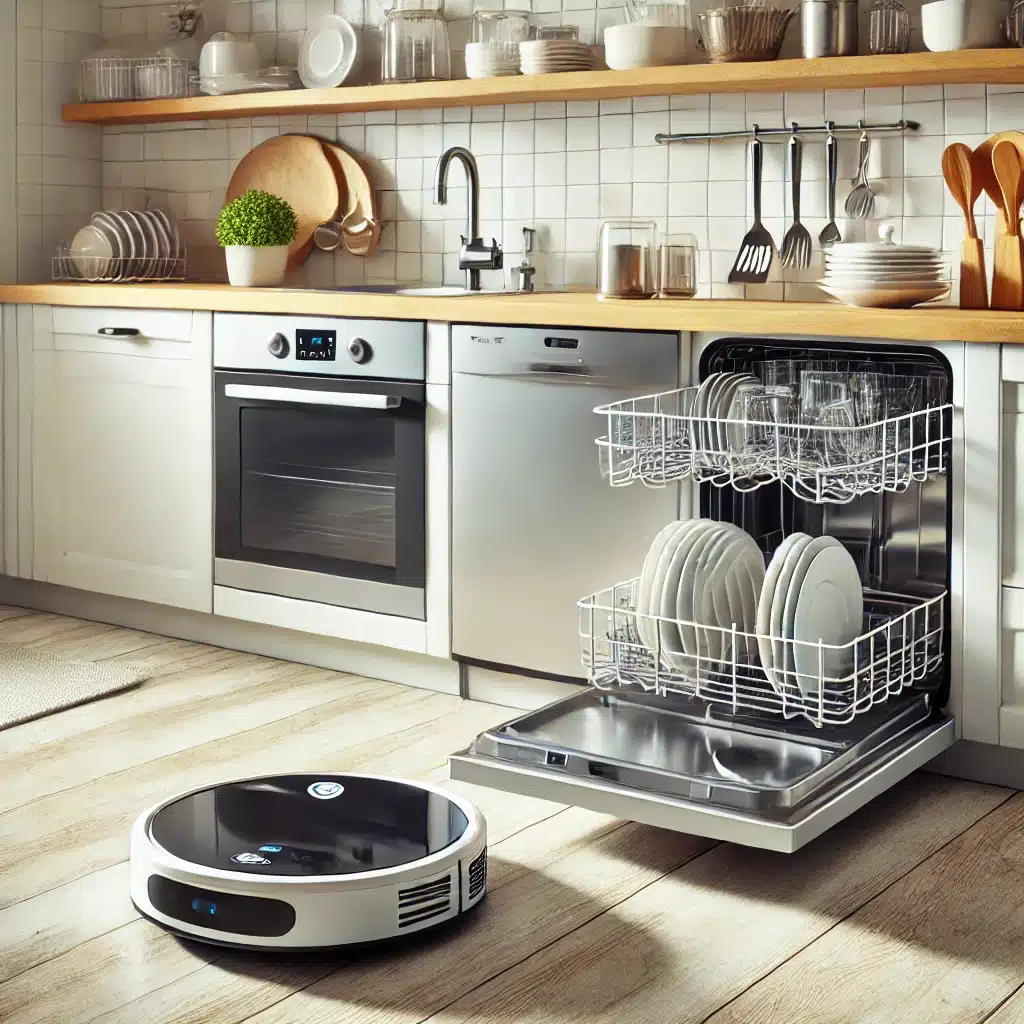
Automatic cleaning utencils for time saving cleaning

6 Time-Saving Cleaning Hacks for Busy Toronto Households

6 Time-Saving Cleaning Hacks for Busy Toronto Households Nobody wants to spend a Saturday scrubbing when the weekend is short and the weather is good. The six habits below shave minutes off routine chores without buying anything exotic, and they work equally well in a downtown condo, a rental walk-up, or a family house in Scarborough. Pick two, run them for a fortnight, and the rest of the routine gets easier. If time is the real problem, (647) 424-0355 reaches a team that does the work for you. 1. Clean as You Go Small messes are cheap; accumulated ones are expensive. Wipe the counter while the pasta boils, rinse the pan before the sauce dries, and return the coat to its hook instead of the chair. Each action takes seconds, yet it prevents the layer of grime that turns a quick tidy into a full afternoon of scrubbing. The kitchen and front hall reward this approach more than any other rooms in the house. 2. Run a Short Timed Sprint Set a timer for ten or fifteen minutes and clean one room only. The limit forces decisions, stops perfectionism, and makes the task feel finishable on a weekday evening. Music helps, provided you keep your hands moving instead of skipping tracks. Put the phone face down and work until the alarm sounds, then stop even if a shelf remains. Repeated over a week, these short bursts cover more ground than a single long session, and they are easier to repeat. 3. Keep a Supply Kit in Every Zone Walking to a central closet for spray costs more time than the wiping itself. A small caddy per bathroom, plus one in the kitchen and one upstairs, keeps the tool within arm’s reach of the mess. All-purpose spray, glass cleaner, and a folded microfibre cloth Disinfecting wipes for taps, handles, and switches A duster or extendable wand for shelves and blinds A mini vacuum or handheld for crumbs and pet hair Refill bottles so the caddy never runs dry High-touch surfaces such as handles, switches, and taps deserve a regular wipe, and the CDC guidance on cleaning and disinfecting your home explains when a simple clean is enough and when disinfection is worth it. 4. Steam the Microwave Clean Fill a microwave-safe bowl with water and a squeeze of lemon, then run it for three minutes and leave the door shut for a few minutes afterwards. The loosened steam turns baked-on splatter into something a cloth lifts in one pass. No lemon on hand is fine, since plain water or a splash of white vinegar does the same job. Wipe the walls, the turntable, and the door seal, then leave the door open to dry. 5. Run a Shoe-Free Entry Outdoor footwear carries grit, road salt, and allergens across every floor it touches in a Toronto winter. A rack or tray by the door, plus a pair of indoor slippers for guests, keeps most of it outside. Sweep the mat twice a week and shake it outdoors rather than into the hallway. Floors stay visibly cleaner for longer, mopping happens less often, and carpeted rooms stop absorbing grey salt trails. This is the cheapest change on the list and often the one with the biggest visible payoff. 6. Let the Dishwasher Work Harder That appliance handles far more than dinner plates. Sponges, soap dishes, toothbrush holders, pet bowls, plastic toys, and removable range hood filters all come out fresher after a hot cycle. Check the manufacturer’s label for a dishwasher-safe mark first, and keep delicate or electronic items out entirely. Do not run a cycle for three mugs either, since waiting for a reasonably full load keeps the shortcut from wasting hydro. Loading these small items alongside the dishes means one run does two jobs, which is the whole point of a shortcut. Habit Where it pays off most Clean as you go Kitchen counters, sinks, entryway Timed sprint Bathrooms and bedrooms Zone caddies Multi-storey homes Microwave steam Appliances and interiors Shoe-free entry Floors, rugs, stair landings Dishwasher cycle Small hard goods and bowls Two Supporting Habits Dry microfibre does most of the work in a fast clean, so a stack of clean cloths beats a bottle of spray on glass, stainless steel, and screens. The second habit arrives at the very end: wash your hands once the bin liner and the bathroom cloth are finished, because hands are the quickest route for germs to travel from a tap or a waste bin to a snack. The CDC handwashing guidance takes a minute to read and applies to every kitchen in the city. When Hiring Out Saves the Most Time Some weeks there is no ten-minute window, and that is where professional help pays for itself. Toronto Shine Cleaning serves homes across Toronto and the GTA, and a scheduled regular cleaning visit covers kitchens, bathrooms, floors, and dusting on a repeatable checklist. Rates begin at $212.63 before HST for a studio or one-bedroom, with two-bedroom homes from $273 and three-bedroom homes from $327 as listed on the pricing page. Seasonal deep cleaning sessions handle ovens, grout, baseboards, and vents when the shortcuts are not enough. Every cleaner is bonded and insured under a $1,000,000 policy and a $10,000 accidental breakage and surety bond. Frequently Asked Questions Which hack saves the most time overall? The shoe-free entry, because it reduces how often floors and rugs need work at all. Cleaning as you go is a close second once it becomes automatic. Is a ten-minute clean actually worthwhile? Yes, if you keep it to one room and start with the dirtiest surface. Ten focused minutes on a bathroom beats an hour of drifting between tasks. Can I put everything in the dishwasher? No. Check for a dishwasher-safe marking, and never load electronics, cast iron, or delicate hand-painted items. Do I still need deep cleaning if I use these tricks? Eventually, yes. Daily habits slow the buildup, but ovens, grout, and vents still need

6 Time-Saving Cleaning Hacks for Busy Toronto Households Read More »

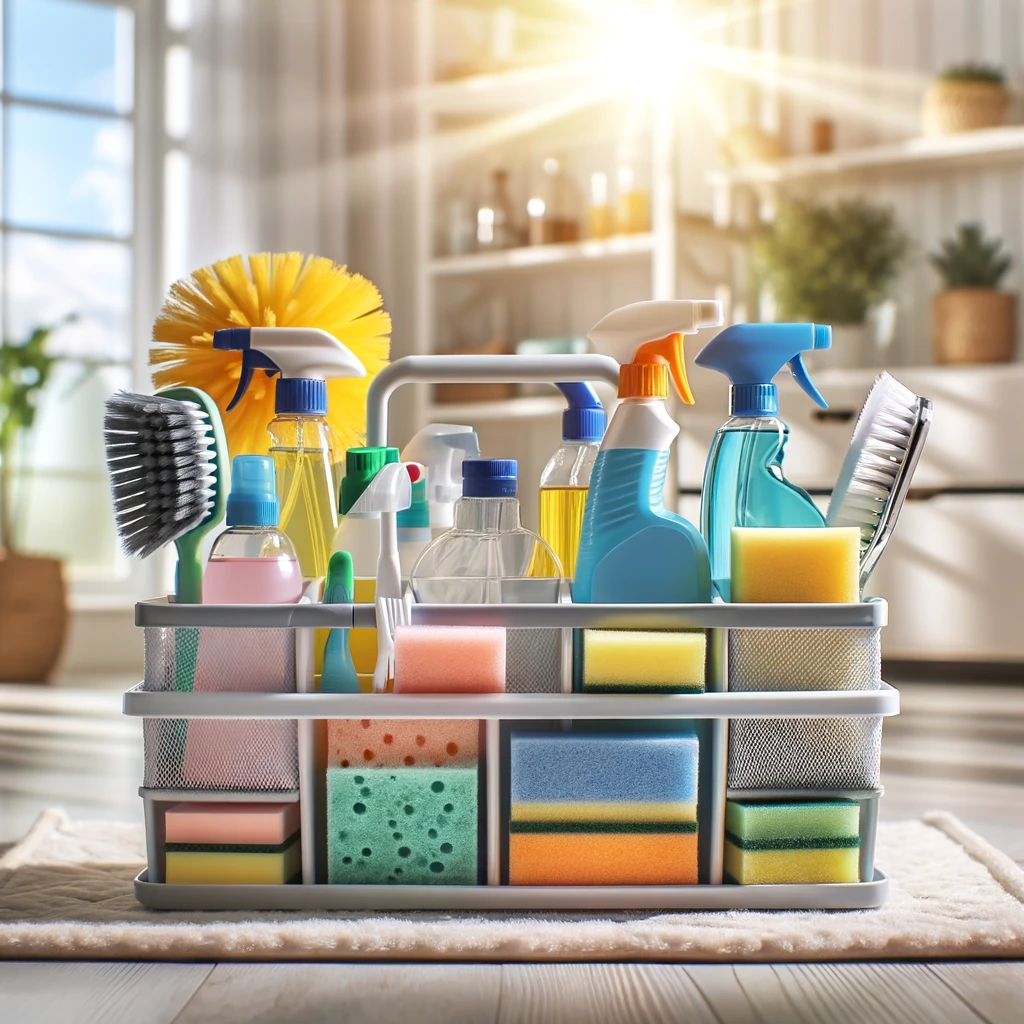
Organized cleaning caddy with supplies, sprays, and brushes.

5 Must-Have Tools for Cleaners to Achieve a Spotless Home

5 Must-Have Tools for Cleaners to Achieve a Spotless Home Professional cleaners earn their reputation with technique, but technique only works when the kit is right. The five tools below are the ones working crews reach for on every job, from a small downtown condo to a three bedroom house in Etobicoke. Each one earns its place by removing a specific kind of soil, and together they cover dust, spills, floors, fabric and grout without a shelf full of single purpose gadgets. Here is what to buy, why it works, and how to keep it performing. 1. Quality Microfiber Cloths Microfiber is the backbone of a modern cleaning kit. The split fibers lift and trap dust, grease and bacteria rather than pushing them across the surface, which is why one damp cloth can clean a granite counter, a stainless steel fridge door and a mirror without streaks. A good cloth holds several times its own weight in water, so spills disappear on the first pass and you spend less time wringing and re-wiping. Buy a colour coded set: blue for glass and mirrors, green for kitchen, red for washrooms, yellow for dusting. That habit alone prevents the cross contamination that spreads germs from a bathroom to a kitchen. Wash them in warm water without fabric softener or dryer sheets, air dry, and each cloth will survive hundreds of uses. 2. Extendable Duster Ceiling fans, crown moulding, light fixtures and the tops of tall cabinets collect dust out of sight until someone looks up. An extendable duster with a bendable head reaches them from the floor, so no ladder, no wobbling on a chair and no missed corners. Look for a washable microfiber sleeve and a locking pole that holds its length under pressure. The same tool handles air vents, curtain rods and the tops of door frames in seconds. Keep one sleeve for high areas and one for delicate pieces like framed art, since a sleeve that cleaned a baseboard should never touch a lampshade. Rinse it, squeeze it out and hang it to dry. 3. Multi-Surface Cleaner A single pH-balanced multi-surface cleaner keeps the caddy light and the routine simple. It handles sealed countertops, painted trim, appliance fronts, tile and laminate floors, so a cleaner does not have to carry a different bottle into every room. Choose a plant-based concentrate where possible, dilute it in a labelled spray bottle, and never mix it with bleach or another acid. On a typical visit the same product cleans the kitchen counters in the morning, the bathroom vanity mid-job and the hallway floor at the end, which cuts both cost and chemical exposure in a customer’s home. 4. Vacuum With the Right Attachments One vacuum with the right tools does the work of three machines. A power head pulls grit out of carpet pile, a bare floor head handles hardwood without scratching, a crevice tool gets along baseboards and between cushions, and an upholstery tool lifts pet hair from a sofa in a fraction of the time a brush takes. A HEPA filter matters for anyone with allergies or pets, because it holds the fine particles that would otherwise blow straight back into the room. Empty the canister or change the bag after every job, and rinse or replace the filter on the maker’s schedule. A clogged vacuum spreads dust instead of removing it. 5. Scrub Brush With a Handle Grout lines, bathtub rings, sink rims, oven racks and dried on kitchen spills all need bristles and pressure. A brush with a moulded handle gives the leverage to scrub without straining wrists, and a narrow head fits into the gaps where mildew grows. Keep a stiff brush for tile and grout, a soft one for fixtures and painted wood, and a small detail brush for taps, drains and the seams around a stovetop. Rinse the bristles, shake them out and store the brush bristles down so it dries instead of sitting in water. Where Each Tool Earns Its Keep Tool Best Rooms Main Job Microfiber cloths All rooms Dust, glass, spills, polishing Extendable duster Living areas, stairwells High and hard to reach dust Multi-surface cleaner Kitchen, bathroom, floors Everyday soil on sealed surfaces Vacuum with attachments Carpets, upholstery, hard floors Grit, pet hair, crevices Scrub brush with handle Bathroom, kitchen Grout, tubs, baked on residue Caddy Basics That Are Easy to Forget Two spare microfiber cloths in every colour code Rubber gloves and a sealable bag for waste A plastic scraper for dried food and gum Rinse aid and a small bottle of white vinegar Floor sign or a note when a hard floor is still wet A small flashlight for checking under appliances Order matters as much as the tools. Soil has to come off first with soap and water, and disinfection only works on a surface that is already clean, which is the sequence the CDC outlines for homes. Gloves off, then a full hand wash with soap and running water, as explained on the CDC hand hygiene page. Tools Are the Start, Not the Finish Even a full caddy cannot compete with a week that leaves no evenings free. Toronto Shine Cleaning brings commercial grade equipment and trained staff to homes across the city. The regular cleaning service keeps a home on schedule, a deep clean handles the seasonal reset, and move in and move out work starts at $242.63 before HST. Regular visits begin at $212.63 for a studio or one bedroom, with details on the pricing page. Every cleaner is bonded and insured under a $1,000,000 policy with a $10,000 accidental breakage and surety bond, and the team operates from 140 Yonge St Suite 285, Toronto ON M5C 1X6. Call (647) 424-0355 to book, or check the locations page to confirm coverage in your neighbourhood. Frequently Asked Questions Do professional cleaners bring their own tools? Yes. A professional service arrives with its own microfiber systems, vacuums, mops and surface specific products, so a homeowner supplies nothing.

5 Must-Have Tools for Cleaners to Achieve a Spotless Home Read More »

Person holding basket with cleaning supplies and vacuum attachment.

6 Essential Supplies for Cleaning Every Home

6 Essential Supplies for Cleaning Every Home Keeping a home tidy is less about elbow grease than about having the right tools within reach. A modest kit that covers floors, glass, fabric, grout and stubborn grime will outperform a cupboard stuffed with single-use products. Here are six items worth owning, what each does best, and how to get the longest life out of them. 1. Microfiber Cloths Microfiber is the workhorse of any cleaning kit. The split fibres lift dust and hold it instead of pushing it around, so plenty of surfaces come clean with water alone. Use one cloth dry for dusting shelves and screens, and a damp one for mirrors, windows and stainless steel. A barely moist cloth also polishes without leaving streaks behind. Because they are washable, microfiber cloths replace a steady stream of paper towels and disposable wipes. Rinse them after use, launder them without fabric softener or dryer sheets, and they keep absorbing well for years. Colour-code your set, for example blue for glass, yellow for the kitchen and green for bathrooms, so a cloth that has been near a toilet never ends up on a countertop. 2. All-Purpose Cleaner One dependable all-purpose cleaner can replace a shelf of specialist sprays. Look for a formula that is safe on sealed surfaces and also disinfects, so a single pass removes grease and lowers the germ count on high-touch spots such as door handles, light switches and taps. Kitchen counters, appliance fronts and bathroom tiles all sit within its range. Fewer bottles means less clutter under the sink, less money spent, and a routine you can actually remember. Dilute concentrates according to the label, and keep a spray bottle filled so a spill takes seconds to deal with rather than turning into a weekend project. Read the CDC guidance on cleaning and disinfecting a home if you want the public-health reasoning behind the two-step process. 3. Vacuum Cleaner Floors collect dust, crumbs, pet hair and allergens, and a vacuum with real suction lifts them out of carpet rather than skimming the surface. Look for adjustable height or suction settings so the same machine can handle plush carpet, hardwood and tile without scratching the finish. Attachments matter as much as the motor. An upholstery brush refreshes sofas and curtains, a crevice tool reaches along baseboards and between cushions, and a stair tool speeds up the trickiest part of the house. A HEPA filter is worth the upgrade when anyone at home suffers from allergies, since it traps fine particles instead of blowing them back into the room. Bagless bins are convenient and bagged models limit dust exposure when you empty them, so either works provided you keep the filter clean. 4. Scrub Brushes Wiping alone will not shift baked-on grease or soap scum, and that is where a set of brushes earns its place. Keep a stiff-bristled brush for outdoor jobs such as decks, patios and driveways, where dirt has been pressed into the surface over months of foot traffic. A softer brush handles bathrooms, tiles and fixtures without scratching the finish, while a narrow brush gets into grout lines, drain surrounds and the tight corners where mildew starts. Build a small trio rather than one compromise brush, and store them dry so the bristles keep their shape. 5. Mop and Bucket Floors take more wear than any other surface in the home, so a reliable mop and bucket belong in the kit. A traditional mop with a wringer lets you control how wet the head is, which protects laminate and sealed wood from standing water while still lifting sticky marks off tile and vinyl. Washable mop heads cut waste and running costs, and they tend to hold up better than disposables across a season of use. Spray mops suit smaller homes and quick touch-ups because the solution goes straight onto the floor with no bucket to carry. Whichever style you pick, change the water once it turns grey, and the floor will dry clean instead of streaky. 6. Rubber Gloves Gloves protect more than a manicure. Household cleaners can irritate skin, and repeated contact with water and detergent strips the natural oils that keep hands comfortable. A durable pair creates a barrier against splashes, reduces the chance of a reaction, and keeps your grip steady on slippery tubs and wet dishes. Textured gloves also improve control when you handle knives or delicate glassware, which cuts the odds of a break. Rinse them inside and out after use, dry them fully and they will not turn musty between jobs. How to Keep the Kit Working Rinse cloths and mop heads after every use and dry them completely before storing. Replace brush heads and vacuum filters on schedule rather than waiting for performance to drop. Keep the six essentials in one caddy so you move room to room in a single trip. Store chemicals out of reach of children and pets, and never mix bleach with ammonia or acidic cleaners. For disinfecting products specifically, the CDC’s guidance on cleaning and disinfecting with bleach sets out dilution and safety rules worth following. When the List Is Not Enough Some jobs sit beyond a home kit: post-renovation dust, deep grout work or a whole property that needs a reset before guests arrive. Toronto Shine Cleaning serves the Greater Toronto Area with trained, bonded and insured cleaners carrying $1,000,000 in liability coverage plus a $10,000 accidental breakage and surety bond. Homeowners can compare rates on the pricing page, see what past clients say on the reviews page, or call (647) 424-0355 to talk through what the house needs. Routine upkeep, a seasonal reset and end-of-tenancy work are all covered through the regular home cleaning and move-in and move-out service pages, so a single call can book whatever the property requires. Frequently Asked Questions How often should microfiber cloths be washed? Wash them after every one to three uses, depending on the job. Rinse well first, skip fabric softener and dryer sheets

6 Essential Supplies for Cleaning Every Home Read More »

Professional maid in uniform diligently cleans office space with supplies.

How to Choose the Best Janitorial Services: 5 Key Factors

How to Choose the Best Janitorial Services: 5 Key Factors A workspace that looks after itself does not exist. Behind every consistently clean office, clinic or retail floor is a janitorial arrangement that was chosen carefully. Five factors separate providers that deliver month after month from those that fade after the first invoice, and every one of them can be checked before you sign. 1. Reputation and Reviews Start with what other clients already know. Reviews on Google, Yelp and the Better Business Bureau reveal patterns: how often a provider arrives on schedule, how steady the quality stays between visits, and how quickly problems get answered. Read for repetition rather than for a single glowing or furious post. Recurring complaints are the real signal. Missed visits, uneven results from different crews and slow replies to emails tend to appear in reviews long before a contract ends. Ask the company for references as well, then actually call them. Questions about reliability, the professionalism of the staff on site and how past issues were resolved give you a picture no marketing page can. 2. Range of Services Offered Match the provider’s capabilities to what the building actually needs. Routine janitorial work covers dusting, vacuuming and waste removal, but most sites need more: carpet extraction and hard floor care to protect the flooring investment, window washing to keep daylight coming through, and sanitizing in washrooms and other busy zones. Some sectors carry extra requirements. A medical or dental office needs disinfection protocols, careful handling of clinical waste and products that meet healthcare standards. If a provider has never worked in that environment, the gap will show up during an inspection. Hiring one company that covers the full scope saves you from coordinating several vendors and keeps accountability in one place. Ask for the scope in writing before you compare quotes. Two providers can advertise the same list of services and still differ on how often each task happens, which rooms are included and whether supplies are part of the fee. A written scope is what makes one bid comparable with another. 3. Experience and Expertise Longevity matters, though not on its own. A firm that has operated for years has usually refined its processes and learned how to handle unexpected messes, but relevant sector experience counts just as much as the calendar. A crew familiar with clinics understands strict sanitation routines; a crew that only services offices may not. Ask about staff training too. Ongoing instruction and certification keep workers current on safe chemical handling, equipment use and newer methods. A company that invests in its team tends to produce consistent results and fewer incidents, which matters in a space where employees and visitors spend their whole day. 4. Customized Cleaning Plans No two buildings are cleaned the same way. Lobbies, lunchrooms and washrooms may need daily attention, while storage areas and executive offices can wait for a weekly pass. Server rooms, labs and other sensitive spaces call for specific products and extra care around electronics. Before signing, ask how the provider builds its plan. A serious company walks the site first, noting traffic patterns, floor types and problem areas, then writes a schedule around them. Flexibility is the real test: as headcount grows or operating hours change, can the plan be adjusted without a drop in quality? 5. Eco-Friendly Practices Green cleaning is now a practical requirement for many landlords and corporate tenants. It means non-toxic, biodegradable products, waste reduction, recycling programs and equipment chosen to use less water and energy, such as microfiber systems and vacuums with HEPA filtration. The benefits land close to home. Fewer harsh chemicals in the air means fewer allergic and respiratory complaints among employees, which shows up in morale and sick days. A greener building also supports sustainability reporting. The CDC’s hygiene overview and its guidance on when and how to clean and disinfect explain the health logic behind those routines. Questions to Ask Before You Sign Which tasks are included in every visit, and which ones cost extra? Who supervises the crew, and how are quality checks recorded? How much notice is needed for a schedule change or an added deep clean? Which products will be used, and are they suitable for your floors and fixtures? How are complaints logged, and how fast is a response expected? Janitorial Services in the Greater Toronto Area Toronto Shine Cleaning works with businesses across the Greater Toronto Area and brings the same standards to a commercial contract that it applies in homes: trained staff, tailored schedules, and a bond and insurance package that includes $1,000,000 in coverage and $10,000 for accidental breakage. Rates are listed on the pricing page, the service area is set out on the locations page, and feedback from past clients sits on the reviews page. Call (647) 424-0355 to arrange a walkthrough of your premises. Frequently Asked Questions How do I check a janitorial company’s reputation quickly? Read reviews across more than one platform to spot repeated themes, then ask for two or three client references and phone them. Ask each reference how the crew handled a problem, since that tells you more than a list of happy outcomes. Should I hire one provider for all cleaning tasks? Usually yes, when the company can cover routine work, floor care, windows and sanitizing. One contract means one point of accountability, and it removes the scheduling gaps that appear when several vendors share a building. Why does staff training matter in a janitorial contract? Trained workers handle chemicals and equipment safely and clean consistently from one visit to the next. Ongoing certification also keeps a team current as products and standards change, which lowers the risk of incidents on your site. What makes a commercial cleaning plan flexible? A provider that reassesses the site when your headcount, hours or floor plan change. Ask how often plans are reviewed and what happens if you need extra attention in one area for a week.

How to Choose the Best Janitorial Services: 5 Key Factors Read More »