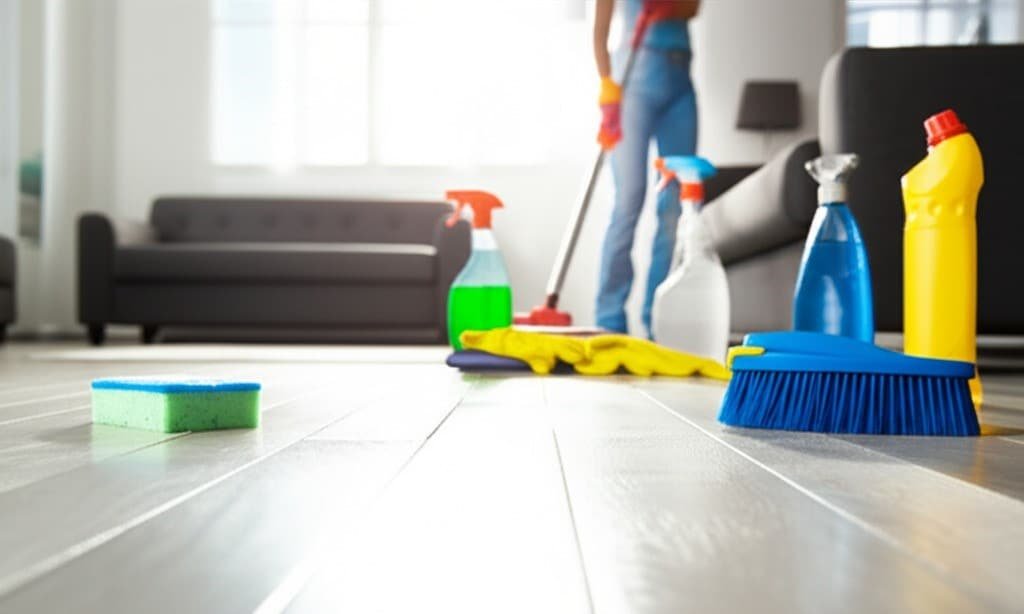
Cleaning Checklist

The Best Window Cleaning Solution – 4 Tips You Need To Try

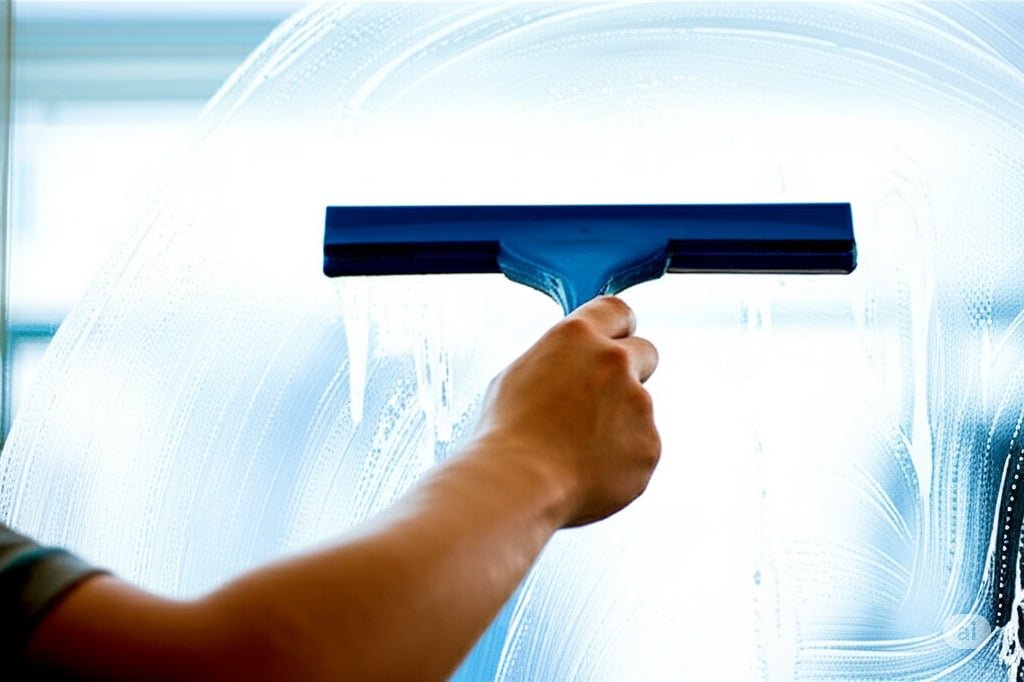
The Best Window Cleaning Solution: 4 Tips for Streak-Free Windows Achieving truly clean, streak-free windows comes down to the right solution, the right water, and the right technique. You can mix an effective cleaner at home for pennies, or choose a commercial product for convenience. These four tips cover both paths, plus the tools that make either one work. 1. Vinegar and Water: The Classic Homemade Solution White vinegar, thanks to its acetic acid content, cuts through grease and grime. A common mixture is one part white vinegar to one part warm water, while a more diluted mix of one part vinegar to ten parts water suits regular cleaning. The acidity breaks down mineral deposits left by hard water and general dirt. Apply with a spray bottle or sponge, then wipe or squeegee clean. The vinegar smell fades as the glass dries, and using distilled water in the mix prevents the mineral streaks that tap water can leave behind. 2. Dish Soap and Water for Greasy Windows A few drops to a teaspoon of liquid dish soap per gallon of warm water makes a strong surfactant solution that loosens and lifts dirt and greasy film. Moderation is key: too much soap leaves a residue that is difficult to remove and causes streaks. Rinse thoroughly or squeegee carefully to remove every trace of soap, and use distilled water to avoid mineral deposits on the glass. 3. Commercial Cleaners: Ammonia vs Ammonia-Free Commercial window cleaners are formulated for glass and often contain solvents, detergents, and ammonia or ammonia substitutes. Ammonia-based cleaners evaporate quickly for a streak-free shine, but they have a strong odor and may not suit tinted windows or certain frames. Ammonia-free products use other solvents and surfactants with less smell and a gentler effect on surrounding materials. Always follow the manufacturer’s instructions. If you prefer to know what is in your products, Health Canada publishes a guide to chemicals in household products. 4. Tools and Technique Matter as Much as the Solution A high-quality squeegee with a straight, pliable rubber blade is the professional’s key tool. Wet the glass with your chosen solution, then draw the squeegee from the top down in a consistent pattern, overlapping each stroke by about an inch. Wipe the blade with a clean, lint-free cloth after every stroke so collected dirt is not redeposited. For scrubbing, a sponge or a dedicated window scrubber with a microfiber sleeve loosens heavy soil before squeegeeing. Finish the edges of the pane and the sill with a dry microfiber cloth; these cloths are absorbent, non-abrasive, and lint-free, which makes them ideal for washing, drying, and polishing glass. The order of steps matters too. Dust the frame and sill before you wet the glass, so loose dirt does not rinse onto the pane. Apply the solution generously, scrub with the sponge or scrubber, then squeegee in smooth, overlapping strokes. Wipe the blade after each pass and finish the edges and sill with a dry microfiber cloth before the water dries. Working window by window keeps the solution from drying on the glass, which is what causes hazy patches on hot, sunny days. Everything you need for streak-free windows: White vinegar or liquid dish soap Distilled water for hard-water areas Spray bottle and sponge or window scrubber Squeegee with a pliable rubber blade Clean, lint-free microfiber cloths Solution Best For Watch Out For Vinegar and water (1:1 or 1:10) Everyday grime and hard water spots Acidity on some frames over time Dish soap and water Greasy, heavily soiled glass Residue if you use too much soap Ammonia-based commercial cleaner Fast, streak-free shine Strong odor, not for tinted windows Ammonia-free commercial cleaner Gentler, low-odor cleaning Higher cost than DIY mixes When to Let Professionals Handle the Windows DIY solutions work well for regular maintenance, but large windows, second-storey glass, and stubborn build-up are easier and safer with professionals. Toronto Shine Cleaning provides professional window cleaning services, and its home deep cleaning covers interior windows, frames, and sills. Pair it with regular maid service to keep glass and sills fresh all year, review pricing, and check service areas across the GTA. Call (647) 424-0355 to book. The CDC’s cleaning and disinfecting guidance is a useful reference for keeping household surfaces healthy. Is vinegar safe for all window frames? Vinegar’s acidity may not suit every surface over prolonged exposure. Test it on an inconspicuous part of the frame first, and keep vinegar off bare metal and unsealed wood where possible. Why does tap water leave streaks on windows? Tap water in hard-water areas contains minerals like calcium and magnesium. When the water evaporates, these minerals are left behind as spots or streaks. Distilled water, which has most impurities removed, significantly reduces this problem. Can I use ammonia-based cleaner on tinted windows? Ammonia-based cleaners may not be suitable for tinted windows or certain frame materials. Choose an ammonia-free product or a homemade vinegar or dish soap solution instead. Does Toronto Shine Cleaning clean windows? Yes. Toronto Shine Cleaning provides professional window cleaning services so you get a guaranteed spotless finish without mixing solutions or perfecting your squeegee technique. Call (647) 424-0355 to book.

The Best Window Cleaning Solution – 4 Tips You Need To Try Read More »
summer cleaning woman

Preparing for Summer Cleaning – 6 Easy Steps

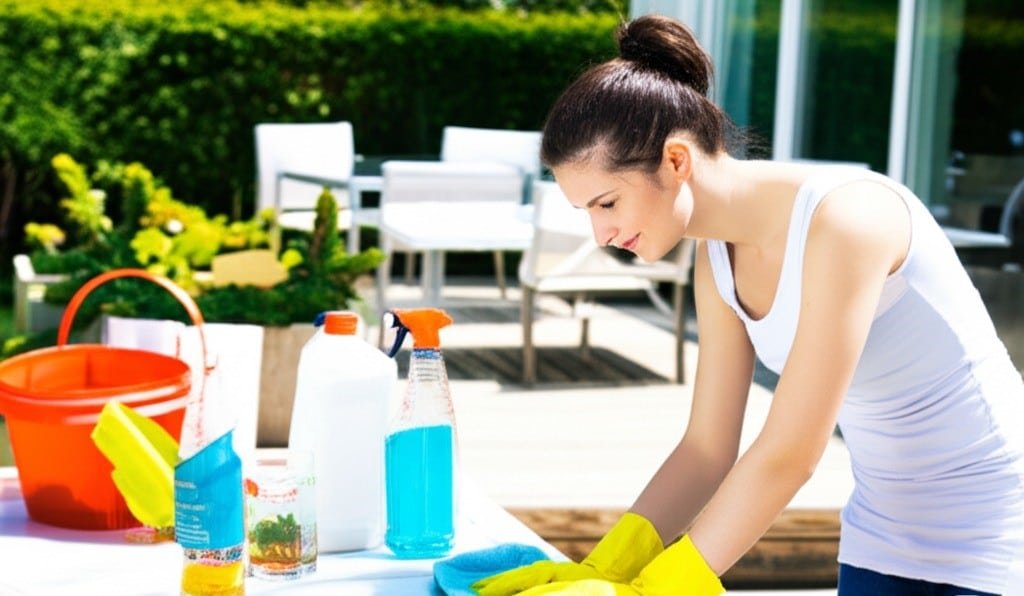
Preparing For Summer Cleaning: The Setup That Does Half The Work A summer cleaning session feels very different when the house is ready for it. Instead of wrestling through piles, running for missing supplies, and burning out by noon, you walk into a clear space with a plan, and every task goes faster and lands better. These six preparation steps turn a vague, overwhelming weekend into a series of manageable actions, and the same habits carry over into year-round upkeep. If preparation is not your strong suit, a professional team handles the whole job in one visit with deep cleaning services built for seasonal resets. Step 1: Declutter First With the Four Box Method Unnecessary objects soak up dust, harbor allergens, and slow down every surface you wipe around, so decluttering is the highest-leverage move you can make. Walk through the house room by room, or by category if that suits you better: clothes, books, papers, kitchen gadgets, old electronics. Give every item a conscious decision using four labeled boxes: Keep, Donate or Sell, Trash, and Relocate for things that belong in another room. Less stuff means less to clean and organize, and the open, calm feeling of a decluttered room is a benefit in itself: an organized home stays faster to maintain all year. Step 2: Turn Your Plan Into a Written Checklist A vague intention to clean up fizzles; a concrete roadmap does not. List every specific task you want to cover: degreasing the oven, emptying the fridge, washing interior glass and drapes, scrubbing floors and baseboards, dusting ceiling fans and light fixtures, and dealing with the deck or patio. Organize the list by room, kitchen tasks then bathroom tasks, or by activity type, dusting, vacuuming, mopping, whichever matches how you work. A written checklist gives direction, lets you watch progress pile up (genuinely motivating), keeps important areas from being forgotten, and lets you prioritize the tasks with the biggest visual impact before your energy runs out. Step 3: Gather Supplies and Test Your Equipment Nothing kills momentum like a mid-scrub store run. Inventory your products, cloths, sponges, brushes, buckets, and specialty equipment, then buy replacements for anything low, expired, or worn out before cleaning day. Do a quick function check too: fresh vacuum bags or an emptied canister, clean filters, fresh mop heads, spray bottles that mist rather than sputter. Decide in advance whether you will use commercial products or simple homemade solutions like white vinegar and baking soda, and stock the ingredients you chose. Check product labels and safety information as you shop; Health Canada’s overview of indoor air contaminants is a good reminder that strong-smelling chemicals deserve careful use in closed homes. All-purpose cleaner, glass cleaner, and disinfectant for shared and touch surfaces Microfiber cloths in quantity, plus sponges, scrub brushes, and an old toothbrush for grout A vacuum with crevice and dusting attachments, mop, bucket, and rubber gloves DIY staples if chosen: white vinegar, baking soda, lemons, dish soap Drop cloths or old sheets, trash bags, and boxes for the sorting step Step 4: Schedule Blocks That Fit Your Real Life Decide how you will spend your time before you spend it. One approach assigns specific days or weekends to rooms or task types: Saturday morning for the kitchen, a weeknight afternoon for every window in the house. The alternative is a little and often, thirty to sixty minutes daily crossing off one or two checklist items. Either way, put the blocks on your calendar like any other commitment, protect your energy for each task instead of sprinting through one marathon weekend, and estimate generously, because tasks almost always take longer than planned. Fitting cleaning into the schedule you already have produces consistency, and consistency is what actually finishes the job. Step 5: Protect the Space and Yourself Before Scrubbing Prepare the room to be cleaned as carefully as you prepare the task list. Open windows and set fans to circulate air, especially in warm months when fumes linger in stagnant rooms. Cover furniture and floors you are not working on with old sheets, plastic sheeting, or canvas drop cloths, move small furniture clear of the zone, and keep walkways unobstructed to prevent trips while carrying buckets. Strip knick-knacks and clutter off the surfaces themselves so you can wipe in long, uninterrupted strokes. Dress for the work too: old clothes, closed-toe shoes, and rubber gloves, with eye protection for overhead spraying or ladder work. When the job involves disinfecting as well as cleaning, the CDC’s page on when and how to clean and disinfect your home explains the sequence that matters: visibly dirty surfaces need soap and water first, because soil can stop a disinfectant from working. Step 6: Recruit the Household and Keep Morale Up Solo projects stall; family projects finish. Assign tasks matched to each person’s age and ability, state expectations clearly, and demonstrate anything new rather than hoping for it. Splitting the workload turns a chore into a team effort toward a shared result, teaches kids responsibility, and, with upbeat music playing and a payoff planned, stops feeling like a punishment. Rewards can be small: ordering takeout when the last room is done, or a family movie night once the checklist is empty. Prep step Core action Typical time Declutter Four boxes: Keep, Donate/Sell, Trash, Relocate A full day or spread over a week Plan Write a room-by-room or task-by-task checklist 30-45 minutes Supplies Inventory, buy missing items, test equipment 1 hour plus shopping Schedule Book room blocks or 30-60 minute daily slots 10 minutes to plan Protection Ventilate, cover, clear walkways, glove up 15-20 minutes per room Team up Assign tasks, set music, plan a reward 5 minutes to delegate Frequently Asked Questions About Summer Cleaning Prep What is the four box method? A decluttering system using boxes labeled Keep, Donate or Sell, Trash, and Relocate. Every item you touch gets an instant verdict, so sorting decisions happen once and clutter leaves the room as you work. How long

Preparing for Summer Cleaning – 6 Easy Steps Read More »

4 Easy Home Deep Cleaning Tips You Need to Try

4 Easy Home Deep Cleaning Tips You Need to Try Home deep cleaning goes far beyond routine tidying. Where regular cleaning maintains surface-level order, deep cleaning removes accumulated dirt, stubborn grime, bacteria, and hidden allergens that build up over time in every part of a home. It is a methodical, top-to-bottom process that restores a home to its best hygienic condition, and these four tips make it manageable. 1. Deep Clean the Kitchen From Top to Bottom The kitchen needs the most intensive work because grease, food particles, and bacteria collect there. Clean the interior and exterior of major appliances: degrease ovens inside and out, including racks and doors, clean microwaves internally and externally, wipe refrigerator and dishwasher exteriors, and degrease range hoods and their filters. Wipe cabinet exteriors to remove fingerprints and splatters, descale and polish sinks, faucets, and fixtures, sanitize countertops and backsplashes with attention to grout lines, and scrub floors including edges, corners, and under movable appliances. 2. Say No to Mold, Hard Water, and Dust in Bathrooms Bathrooms are high-moisture areas prone to mold, mildew, and soap scum. Scrub showers and bathtubs, including walls, doors, and tracks, to remove soap scum, hard water deposits, and signs of mildew. Disinfect toilets thoroughly, both inside the bowl and on all exterior surfaces, including the base and surrounding floor. Clean and polish sinks, vanities, countertops, and mirrors, and scrub tiles and grout on floors and walls to restore brightness. Dust light fixtures, exhaust fans, and vents, and descale chrome faucets and showerheads. 3. Dust High, Clean Low, and Don’t Skip the Details Work from top to bottom so dust falls onto surfaces you have not cleaned yet. Dust ceiling fans, light fixtures, picture rails, and curtain rods, then move to baseboards, skirting boards, and electrical outlet covers. Vacuum furniture, including under cushions, and move pieces where possible to clean underneath and behind. Wipe window sills, ledges, tracks, and frames, remove cobwebs from ceilings and corners, and clean interior windows and mirrors. Finish with floors: vacuum carpets thoroughly, including edges and high-traffic areas with spot treatment for stains, and mop hard floors with a suitable cleaning solution, paying attention to corners. 4. Call a Professional Home Deep Cleaning Service Professional cleaners bring training, industrial-grade equipment, and specialized solutions that most homes do not have. They work from a detailed checklist so every agreed area is covered consistently, and a full house deep clean can take many hours or even days of strenuous work when done alone. Reputable companies are insured and bonded: Toronto Shine Cleaning carries a $1,000,000 insurance policy plus a $10,000 accidental breakage and surety bond. The process starts with a consultation to define the scope and finishes with a walk-through so you can confirm the results. The CDC’s cleaning and disinfecting guidance explains why removing dirt before disinfecting matters, and Health Canada’s indoor air quality information covers the allergens a deep clean removes. For mold-prone areas, the CDC’s mold resources explain why moisture control is essential. Signs it is time for a home deep cleaning: Persistent musty odors despite regular cleaning Visible dust build-up in corners or on less-disturbed surfaces Grease build-up in the kitchen or hard water stains in the bathroom Allergy symptoms that worsen indoors A big event, move, sale, or renovation on the calendar Room Deep Cleaning Focus Tools That Help Kitchen Appliances, range hood, cabinets, grout, floors Degreaser, microfiber cloths, scrub brush Bathroom Shower, toilet, tiles, grout, fixtures Disinfectant, descaler, grout brush Living areas and bedrooms Ceiling fans, baseboards, furniture, windows Vacuum attachments, extendable duster Whole home Vents, door frames, switches, floors Vacuum, mop, step ladder Make Deep Cleaning a Seasonal Habit Spring and autumn are natural triggers, and many homeowners book an annual or semi-annual deep clean to maintain a consistently high standard, especially before hosting events or after renovations. Once the professionals finish, ongoing regular maid service keeps the baseline high, while a professional home deep cleaning resets the whole house. Review pricing or find your GTA location, then call (647) 424-0355 to book. How often should I deep clean my home? Many homes benefit from a deep clean once or twice a year, typically in spring and autumn. You may want one more often before or after events, when moving in or out, before selling or renting a property, or after renovations. How long does a professional deep clean take? It depends on the size of the home, its initial condition, and the tasks involved. A full house deep clean can take many hours or even days of work, which is why professional teams working from a checklist are faster and more consistent. Is a professional deep cleaning service insured? Reputable companies are insured and bonded. Toronto Shine Cleaning carries a $1,000,000 insurance policy and a $10,000 accidental breakage and surety bond, so you are protected against accidental damage or liability. What is the difference between regular and deep cleaning? Regular cleaning maintains surface-level order: dusting, wiping counters, and tidying. Deep cleaning removes accumulated grease, soap scum, limescale, dust, and allergens from hard-to-reach places such as behind appliances, inside ovens, and along baseboards, and it sanitizes areas that routine cleaning misses.

4 Easy Home Deep Cleaning Tips You Need to Try Read More »

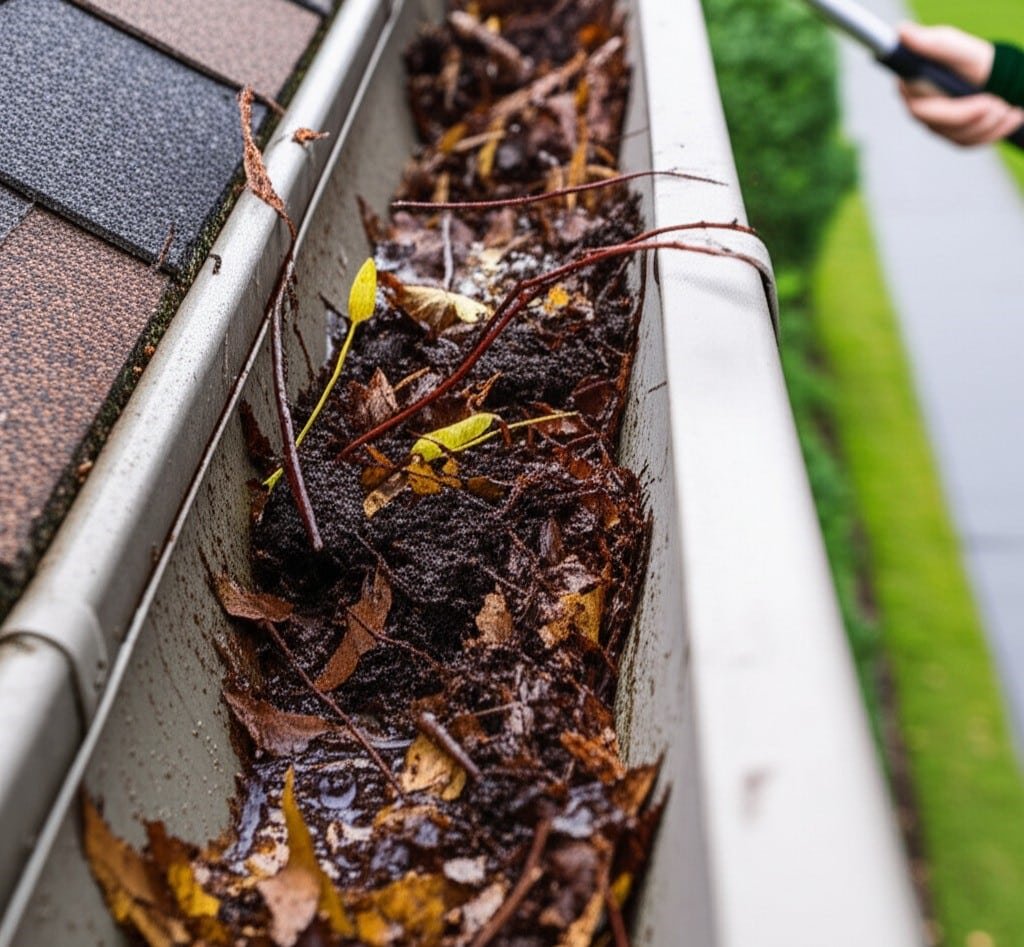
Very dirty gutter

Gutters Cleaning In 3 Steps – You Should To Know

Gutters Cleaning In 3 Steps: A Job You Can Do Safely Clogged gutters do not announce themselves. Water backs up under the roofline, seeps behind the fascia, and works its way toward the foundation, where repairs get expensive quickly. The task itself is straightforward when it is done in order: set up safely, pull out the bulk debris, then flush and check the whole run. Three steps, one afternoon, and the house stays dry. Tools to Have Ready A sturdy ladder tall enough to reach the gutters without straining Heavy-duty waterproof gloves for sharp debris and bacteria A gutter shovel or small garden spade for leaves, twigs, mud and snow A bucket, or a tarp spread on the ground to catch what falls A garden hose fitted with a spray nozzle Safety glasses, plus a plumber’s snake or flexible auger for stubborn clogs Step 1: Safety First, Then the Big Debris Place the ladder on firm, level ground. On uneven soil, use a ladder leveler or sturdy boards so the feet cannot shift, and never set it on a wet or slippery surface. Extend it so the top rises at least three rungs past the roofline or gutter edge, and keep three points of contact while climbing, meaning two feet and one hand, or two hands and one foot. Rather than leaning out sideways, climb down and move the ladder. It takes longer, but it removes the job’s biggest hazard. If you work alone, tell someone that you are going up. Gloves protect your hands from sharp debris and the bacteria it carries, so wash up thoroughly once you climb down, following the CDC hand hygiene guidance. Begin near the gutter outlet and work in manageable sections, scooping leaves, twigs, pine needles and gravel into the bucket or onto the tarp below. Valleys and corners collect the most, so give them extra attention. Clearing this bulk first stops larger items from being pushed into the downpipes later. Step 2: Flush the Channels With Water Once the bulk is out, take the hose and start at the end of the run furthest from a downpipe, directing the stream toward the downpipe. The water carries away the smaller grit, mud and fine particles your shovel missed, and it doubles as a test. If water pools or backs up, something is still blocking the channel or the pipe. A steady flow into the downpipe means that section is clear. Downpipes deserve their own check. If water refuses to drain, try a concentrated spray from the top first. If that fails, feed the hose into the bottom opening and spray upward. For a stubborn blockage, work a plumber’s snake or auger down from the top or up from the bottom; in severe cases take apart the sections at the elbow joints where clogs form. A blocked downpipe erases all the work you did upstream. Step 3: Inspect and Set a Schedule With the run clean, walk it once more and look for damage. Check for cracks, holes and rust, especially on older metal gutters, and confirm that every section is fastened tightly to the fascia board with no sagging. Sagging lets water pool instead of draining, which defeats the point of the job. Examine the seams and end caps for leaks, and make sure the downspouts are attached firmly at both ends and send water well away from the foundation. Spotting these small problems now prevents costly repairs later, and water that sits against the house instead of draining away is a mold risk, as the CDC mold guidance warns. Most homes need gutters cleaned twice a year: once in late spring after trees release seeds and pollen, and again in late fall once the leaves are down. If mature trees crowd the roof, and especially pines that drop needles all year, plan on three or four visits. Put reminders in your calendar so the task does not slip. Keeping the channels clear is what protects your roof, siding, foundation and landscaping from water damage. Step What You Do What to Watch For 1. Safety and setup Ladder on firm level ground, three rungs above the gutter, three points of contact Never lean out sideways; tell someone you are on the roof 2. Remove debris Start near the outlet, shovel leaves, twigs, needles and gravel into a bucket or onto a tarp Valleys and corners where debris collects 3. Flush and check Hose from the far end toward the downpipe, then clear a blocked pipe with a snake Pooling or backing up means a blockage Cleaning Products That Work Plain water at good pressure handles most of the work. For stubborn dirt or mildew, a little mild detergent in a bucket of water, applied with a brush and rinsed well, is usually enough. A mix of equal parts white vinegar and water loosens algae, mold and mildew stains: apply it, wait fifteen to twenty minutes, scrub gently, then rinse. Diluted all-purpose household cleaner can brighten the exterior of the gutters, but test it on a hidden spot first. Commercial gutter cleaners exist for severe leaf staining, algae or rust on metal, so read the label to confirm it suits your gutter material, such as aluminum, vinyl or steel. Always begin with the mildest option. Avoid abrasive chemicals and keep high-pressure washers at a distance, since both can damage surfaces, ruin gaskets or dislodge sections. For routine indoor cleaning, the CDC home cleaning page is a good follow-up. Frequently Asked Questions How often should gutters be cleaned? Twice a year suits most homes: late spring after seeds and pollen fall, and late fall once the leaves are down. Homes surrounded by mature trees, especially pines, may need three or four cleanings. What if a downpipe stays blocked after flushing? Spray from the top first, then feed the hose into the bottom and spray upward. If that fails, run a plumber’s snake or auger through the pipe, and take apart the elbow joints in severe

Gutters Cleaning In 3 Steps – You Should To Know Read More »

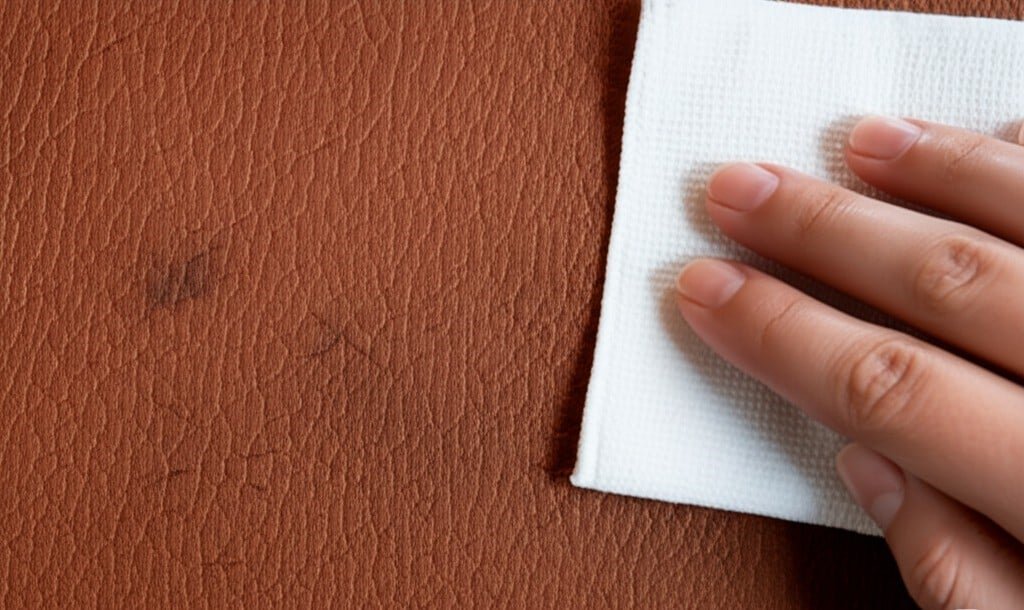
dry leather

5 Tips for Caring for Dry Leather That You Need to Know to Make It Last Longer

Keep Dry Leather Soft: 5 Care Tips That Extend Its Life Leather looks better with age when its natural oils stay put, but once those oils deplete, the material turns stiff, brittle, and prone to cracking, discoloration, and a rough, papery texture. It first shows up as faint creases at fold lines and dull patches that resist polishing. Dryness can often be reversed and, better still, prevented with consistent care. Because leather is porous, it absorbs liquids, oils, and dirt, so every product you choose matters. These five tips cover cleaning, conditioning, storage, and moisture control. Why Leather Turns Dry in the First Place Leather comes from animal hides, and unlike fabric, it stays soft only while the natural oils inside its fibers remain. Water is the biggest threat to that balance: soaking or frequent wet cleaning washes the oils out, leaving the hide dehydrated, brittle, and quick to crack. Many everyday detergents make the problem worse because they are alkaline and contain harsh chemicals that strip finishes, fade dyes, and pull out still more moisture. Heat accelerates the same damage by speeding up evaporation until the surface tightens and splits. Leather type matters too: full-grain, top-grain, suede, nubuck, and sheepskin each have distinct surfaces that react differently to cleaning agents, which is why generic care routines cause so much avoidable damage. Tip 1: Clean Dry Leather With Leather-Safe Methods Only The fastest route to dry, cracked leather is washing it like laundry. Never machine wash leather garments, never soak them, and skip all-purpose detergents. For everyday grime, wipe with a barely damp soft cloth and dry it right away. When a piece needs a real deep clean, professional leather dry cleaning is the safer option. A specialist inspects the item, identifies the leather type, checks for existing damage, and runs a colorfastness test on an inconspicuous spot so dyes do not bleed. Stubborn stains from ink, oil, food, or drinks get pre-treatment with spotting agents formulated for leather. The wash itself uses solvents rather than water: hydrocarbon solvents are gentler than older perchloroethylene (perc) formulas and carry less risk of color loss, shrinkage, or finish damage. Always read the care label first, and follow the safe-use advice in Health Canada’s guidance on household products before trying any cleaner. Items that benefit most from professional solvent cleaning include: Jackets, coats, and vests exposed to weather and wear Trousers, skirts, and dresses in smooth leather Suede and nubuck garments, easily marked by water Gloves and hats, depending on construction Sheepskin jackets and rugs combining leather with wool Leather type Surface character Care approach Full-grain and top-grain Smooth, finished surface Solvent cleaning with regular conditioning Suede and nubuck Delicate napped texture Professional care almost exclusively Sheepskin Leather combined with wool Specialist cleaning protects both layers Tip 2: Condition Dry Leather on a Regular Schedule Cleaning, even with gentle solvents, removes some of the oils that keep leather supple, which is why professionals follow every wash with a re-oiling step called fatliquoring. Conditioners and fatliquors penetrate the fibers and restore lost moisture and emollients, bringing back flexibility and softness. Between professional visits, apply a quality leather conditioner designed for your specific leather type and follow the manufacturer’s schedule; most hides benefit from a treatment every few months, while heavily used items may need more frequent attention. Test any conditioner on a hidden area first. Products made for smooth leather should not be used on suede or nubuck, so match the product to the material and handle conditioners with care using Health Canada’s household chemical safety advice. Tip 3: Store Leather Out of Sunlight and Heat Where leather lives between uses decides how long it stays soft. Keep items in cool, dry, well-ventilated spaces, away from direct sun, radiators, and heat sources that fade color and pull moisture from the hide. Hang jackets on broad, padded hangers so shoulders keep their shape, and give garments room to breathe. If a leather piece gets wet, let it dry naturally at room temperature and never speed the process with a radiator, hair dryer, or other direct heat, since rapid drying leaves the hide stiff and prone to cracking. Airing items out periodically also prevents musty odors. Tip 4: Blot Spills Instead of Rubbing Them Everyday accidents are where most leather damage begins, and quick, gentle reactions protect the material’s oils. When something spills, blot the area immediately with a clean, dry, absorbent cloth; rubbing spreads the liquid and grinds it into the fibers. For oily marks, resist the urge to scrub, and let a professional treat stubborn oil-based stains, which are difficult to lift at home without stripping the finish. Keep leather away from prolonged moisture, and dry rain-soaked items slowly at room temperature, away from heat, before storing them. Tip 5: Know When Dry Leather Needs a Professional Some situations call for an expert. Suede and nubuck pieces, sheepskin items, garments with delicate construction, and valuable items with set-in stains all deserve professional hands, and care labels that read “Dry Clean Only” or “Professionally Leather Clean Only” should be followed to the letter. Professionals also handle color touch-ups, protective finishes, pressing, and glazing for smooth leather. Set realistic expectations: very old or deeply set stains may not disappear completely without risking the hide, and older or fragile leathers can show minor changes in color or texture after cleaning. The higher cost of leather cleaning reflects specialized solvents, equipment, and labor, so choose an experienced cleaner. Frequently Asked Questions About Dry Leather Care Can cracked dry leather be repaired? Mild dryness often responds to conditioning, which restores flexibility over several treatments, while deep cracks in the finish may need professional repair; catching dryness early gives the best outcome. Is it safe to clean leather with soap and water at home? No: water and most detergents strip the natural oils that keep leather supple, so stick to products labeled for leather and leave deep cleaning to professionals using solvent methods. How often should I condition my

5 Tips for Caring for Dry Leather That You Need to Know to Make It Last Longer Read More »

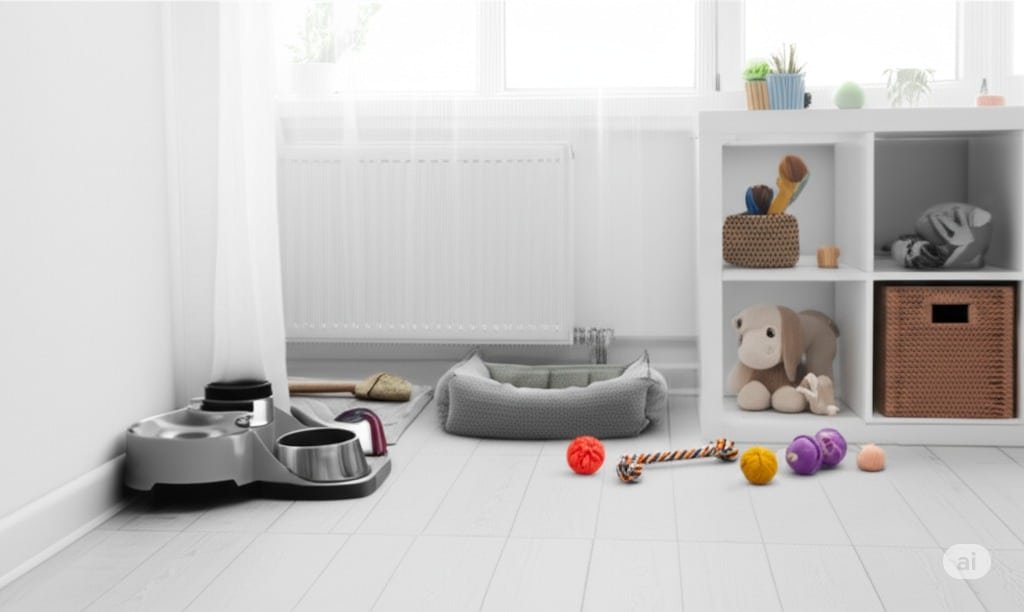
5 Best Tips To Keep Your Pet’s Area Clean And Odor-Free

5 Best Tips To Keep Your Pet’s Area Clean And Odor-Free Pets bring companionship, energy, and plenty of love, and they also bring fur, paw prints, and messes around their feeding and bathroom zones. Keeping their area fresh is not just about appearances: it protects your family’s health and your pet’s comfort too. A clean environment means fewer allergens, fewer odors, and fewer chances for bacteria to spread between bowls, bedding, and litter boxes. You do not need elaborate equipment, just consistent routines and the right habits. These five tips cover every pet zone, from the food station to the carpet, so two-legged and four-legged family members can enjoy a fresh space. Tip 1: Set Up Routines and Designated Pet Zones Pets thrive on predictability, and so does your cleaning schedule. Daily tasks keep messes from compounding: sweep or vacuum high-traffic areas, wipe the perimeter around food bowls, and scoop the litter box every day for cats. Weekly, wash pet bedding, vacuum under furniture where fur collects, and give food and water bowls a thorough cleaning. Monthly, add the heavier jobs such as deep-cleaning carpets or washing pet toys. Pair this schedule with dedicated zones: a set spot for feeding, a comfortable sleeping corner, and a consistent elimination area. Choose bedding with removable, machine-washable covers, non-porous stainless steel or ceramic bowls, and an easy-scrub litter box. Daily: sweep or vacuum pet traffic areas, wipe bowl perimeters, scoop the litter box Weekly: wash bedding, vacuum under furniture, deep-clean food and water bowls Monthly: shampoo carpets or steam-clean upholstery, wash toys, launder crate pads Tip 2: Manage Fur, Dander, and Paw Prints Pet hair and dander are constant companions for animal owners, but the right tools keep them under control. Vacuum regularly with strong suction, and choose a model with a HEPA filter if you can, since it captures fine dander particles as well as visible hair and helps allergy sufferers breathe easier. Go slowly with overlapping passes so hair is pulled up rather than pushed down, use the right attachment on hard floors so fur does not scatter, and do not skip the sofa, a favorite lounging spot. Lint rollers handle quick touch-ups on clothing and furniture, and a slightly damp rubber glove wiped across fabric gathers embedded fur into easy-to-remove clumps. Microfiber cloths trap dust on hard surfaces instead of pushing it around. Regular grooming removes loose fur before it reaches your floors, and a mat and towel by entry points catch muddy paws. Tip 3: Keep Food and Water Stations Hygienic The feeding area matters for your pet’s health, not just your floors. Wash food and water bowls daily in warm, soapy water, scrub away food residue and biofilm, and rinse well so no soap remains. Stainless steel, ceramic, and glass bowls resist bacteria better than plastic, which develops scratches that harbor germs. Slide an easy-to-clean placemat or shallow tray under the bowls to catch stray kibble and splashes, and wipe it down regularly. Deal with spills promptly, since dried food attracts ants and other pests and feeds lingering odors. Store dry kibble in an airtight container to keep it fresh and pest-free, cover and refrigerate opened wet food, and throw out uneaten portions quickly. Wash your own hands after handling pet bowls and waste, following the CDC’s hand hygiene guidance. Tip 4: Stay on Top of the Litter Box and Potty Areas Elimination areas decide how your whole home smells. For cats, scoop the litter box daily: it cuts odor, keeps the box inviting so accidents stay unlikely, and lets you notice changes in your cat’s habits. Choose a litter that suits your cat, clumping clay, silica gel, or natural pine or corn options, and do a complete change and box wash weekly or bi-weekly depending on the number of cats. Scrub with mild soap and hot water, avoid ammonia products, which cats dislike, rinse fully, and dry completely before refilling. A textured mat at the entrance traps litter scatter. For dogs, remove used potty pads promptly, clean any seepage, and handle accidents fast: blot the liquid, then treat with an enzymatic cleaner that breaks down urine compounds and neutralizes the scent so your dog is not drawn back. Avoid ammonia cleaners, whose smell can mimic urine. Scoop dog waste from the yard regularly to cut odors and limit parasites. Tip 5: Deodorize and Deep Clean on a Cycle Daily habits prevent most smells, but a deeper cycle keeps pet areas truly fresh. Wash bedding in hot water with a pet-safe detergent when the fabric allows, which helps control bacteria and dust mites, and dry it completely before returning it, since dampness breeds mildew. Clean toys by material: hard plastic and rubber toys wash in hot soapy water or on the dishwasher’s top rack, while plush toys usually survive a machine wash. Once or twice a year, have carpets and upholstered furniture steam cleaned professionally, or rent a machine, to lift deep-set dirt and allergens. For everyday odor control, open windows for ventilation, leave open boxes of baking soda in pet rooms or sprinkle it on carpets before vacuuming, and only use air fresheners labeled pet-safe. A HEPA air purifier in main living areas removes odor-carrying particles and dander; the CDC’s healthy pets information offers more on keeping animals and households well together. Pet zone Core task Frequency Food and water bowls Wash in warm soapy water, rinse, dry Daily Pet bedding Machine wash with pet-safe detergent, dry fully Weekly Litter box Scoop daily; full change and scrub Weekly to bi-weekly Toys Wash by material in soapy water or machine Monthly Carpets and upholstery Professional steam cleaning Once or twice a year Frequently Asked Questions About Pet Area Cleaning How often should I wash my pet’s food and water bowls? Daily is best: warm, soapy water removes residue and biofilm, followed by a thorough rinse so no soap remains. How often should I completely change the litter? Most homes do a full change and box scrub weekly

5 Best Tips To Keep Your Pet’s Area Clean And Odor-Free Read More »

5 Expert Tips for Cleaning With Hot Water At Home

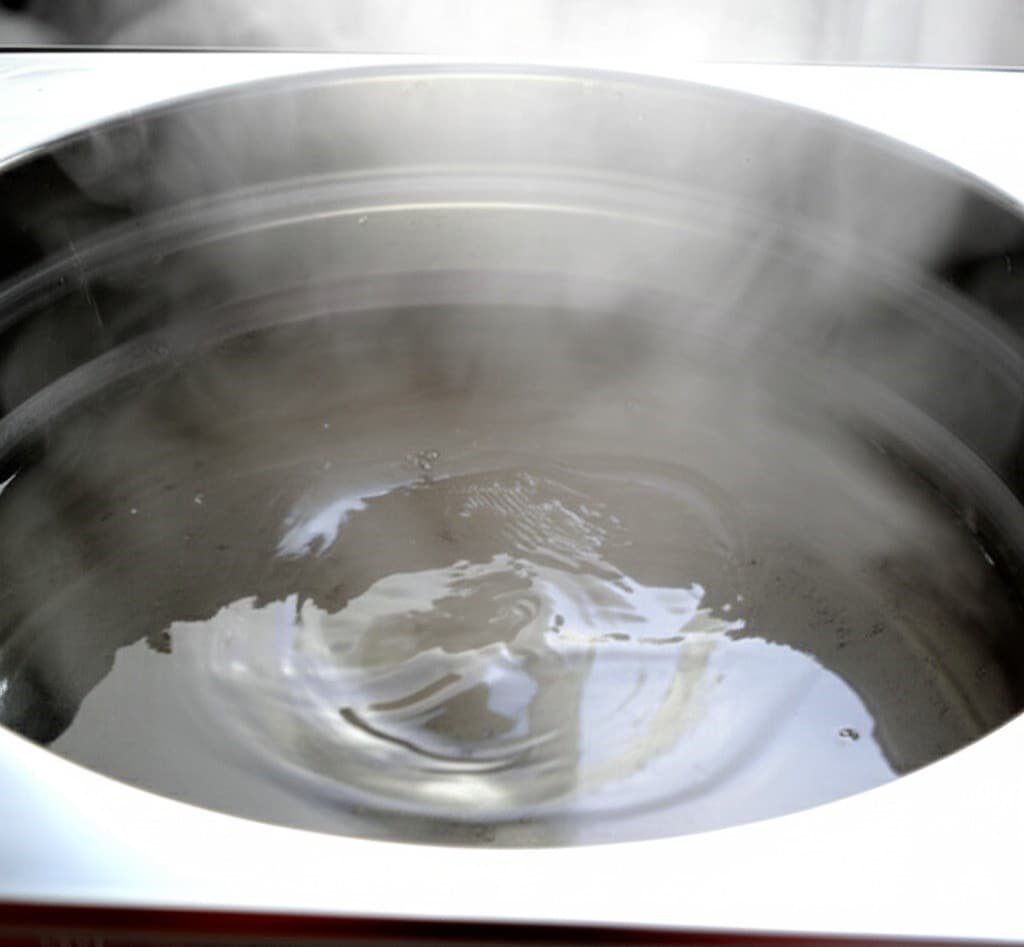
5 Expert Tips for Cleaning With Hot Water At Home Hot water is one of the oldest and most effective cleaning tools we own, yet it is easy to overlook in a world of specialty sprays and gadgets. Its power comes from simple physics: heat energizes water molecules, helping them break the bonds that hold grease, dirt, and residue to surfaces. Warm water also lowers surface tension, so it spreads evenly and wets surfaces more thoroughly, which lets soaps and detergents work harder. Used thoughtfully, hot water cuts scrubbing time, improves hygiene, and leaves surfaces drying faster. These five expert tips show you exactly where hot water earns its keep, from the kitchen sink to the laundry room, plus the few places where cooler water is the wiser choice. Tip 1: Use Hot Water to Conquer Kitchen Grease The kitchen holds the toughest cleaning jobs, and hot water is the grease fighter’s best friend. Fats and oils liquefy the moment they meet heat, so hot water lets dish soap emulsify them and rinse them away instead of smearing them around. Fill the sink with hot water for greasy dishes, and use it on stovetops, oven doors splattered with cooking residue, and countertops after oily spills: the warmth lifts stubborn buildup with far less scrubbing, and surfaces come away less tacky to the touch. Give the sink basin itself a regular hot rinse too, since it collects food particles and greasy film that can dull drains over time. In the kitchen, follow basic food hygiene, such as washing hands and surfaces properly, as outlined in the CDC’s food safety guidance. Tip 2: Break Down Bathroom Soap Scum and Grime Bathrooms demand hygiene, and hot water delivers it. Soap scum, that stubborn film of soap residue and hard water minerals, softens and dissolves far faster under hot water, so shower doors, tiles, and bathtubs need less chemical firepower and less elbow grease. Wipe toilet exteriors with hot water and a disinfectant for a more thorough clean, and mop bathroom floors with hot water, which lifts dirt and footprints while drying quickly to reduce slips and leave the room fresher. Even the steam from a hot shower works for you by loosening grime on surrounding surfaces, making a post-shower wipe-down quicker. Add hot water and soap at the sink for handwashing, following the CDC’s guidance on hand hygiene, to keep germs from spreading around the household. Tip 3: Boost Your Laundry With Warm and Hot Washes Detergents are formulated to perform best in warm or hot water. Heat dissolves detergent completely and activates its enzymes and surfactants, letting them penetrate fabric fibers more deeply to release trapped dirt, oils, and stains. For heavily soiled items, and for bedding and towels that need a hygienic refresh, such as during illness, a hot wash helps reduce germs and dust mites and keeps the linen closet healthier. Reserve cold water for delicate fabrics and for loads where saving energy matters, but reach for heat when you need genuine cleaning power. Always check care labels, since some modern fabrics are built for cooler washes, and dry everything completely so damp laundry never becomes a source of musty smells. Tip 4: Mop Floors and Wipe Walls the Smart Way Beyond the obvious spots, hot water improves general surface cleaning across the home. When mopping tile, vinyl, or sealed wood floors, hot water cuts through accumulated grime more effectively than cold, so floors look brighter and feel cleaner with the same effort. For painted walls, baseboards, and other washable surfaces, a cloth dampened with hot water often removes light marks and dust on its own, sometimes eliminating the need for chemical cleaners altogether. The warmth softens adhered dirt so it lifts without the aggressive scrubbing that can damage finishes. Surfaces also dry faster after a hot water clean, which means fewer streaks and water spots and a room that is ready to use sooner. Tip 5: Let Heat Reduce Your Effort and Product Use One of the quietest benefits of hot water is the effort it saves you. Because heat loosens dirt and grease so effectively, you scrub less vigorously and for less time, which is easier on your body and gentler on the surfaces you clean, since abrasion wears finishes down over the years. Hot water also boosts the action of soaps and detergents, so you can often use less product for the same result, a win for both your budget and the environment. Faster evaporation means less time waiting for wet surfaces to dry, fewer streaks, and fewer chances for grime to resettle. Combined, these advantages turn hot water into a genuine labor-saving tool for every weekly clean. Hot water is not the answer everywhere, so keep these exceptions in mind: Delicate fabrics labeled for cold washing, which heat can shrink or damage Unsealed wood floors and furniture that water can stain or warp Caked-on grime that needs soaking time rather than heat alone Energy-conscious loads where cold water and the right detergent do the job Area Why hot water helps Best practice Kitchen surfaces and dishes Liquefies fats and oils for easy rinsing Hot water plus dish soap; rinse the sink after use Bathroom tile and tubs Softens soap scum and mineral film Hot water with a non-abrasive pad or bathroom cleaner Laundry Activates detergent enzymes for deep cleaning Warm or hot washes for bedding, towels, and heavy soil Floors, walls, baseboards Lifts grime with less scrubbing and dries fast Hot water mop or cloth; avoid unsealed wood Frequently Asked Questions About Cleaning With Hot Water Is hotter water always better for cleaning? Not always: very hot water can damage delicate fabrics, unsealed wood, and some surfaces, so match water temperature to the material and check care labels first. Does hot water alone disinfect surfaces? No: hot water cleans by lifting dirt and grease, but disinfection needs an appropriate disinfectant applied according to its label, so clean first and disinfect where needed. Why does hot

5 Expert Tips for Cleaning With Hot Water At Home Read More »

drains

7 Tricks To Keep Your Drains Clean And Odor-Free

7 Tricks To Keep Your Drains Clean And Odor-Free Working drains are invisible, but a slow sink, a strange gurgle, or a sour smell from the pipes quickly reminds you how much your home depends on them. Every sink, tub, shower, toilet, and washing machine shares one drainage system, and each feeds it different debris: kitchen drains carry dishwater, food bits, and grease; bathroom drains collect soap, hair, and toothpaste; laundry drains deliver detergent and lint. Most drain problems are preventable with simple, consistent habits. These seven tricks cover prevention, daily routines, gentle fixes, and when to stop DIY and call a plumber. Tricks 1-2: Stop Clogs Before They Start Trick 1: Keep Grease and Food Scraps Out of Kitchen Drains Cooking fats, oils, and grease are the leading cause of kitchen clogs. They pour down the drain as liquids, then cool and solidify inside the pipes into sticky buildup that traps everything else that passes. Wipe greasy pans with a paper towel before washing, dispose of cooled cooking oil in a container, and keep coffee grounds, tea leaves, and fibrous scraps like vegetable peels out of the sink. A mesh strainer catches what rinses off plates, and emptying it into the compost or trash instead of the sink keeps the pipe clear. Trick 2: Never Flush Bathroom Offenders In the bathroom, hair is the main culprit: strands tangle into dense webs that trap soap scum and slow the water. Brush hair before showering and clear the drain cover regularly. The toilet deserves equal caution. Flushable wet wipes do not break down like toilet paper, and dental floss, cotton swabs, and feminine hygiene products should never be flushed; they snag on pipe joints and build into blockages. Cooking grease, oils, and fats Coffee grounds and tea leaves Fibrous food scraps and vegetable peels Wet wipes, dental floss, and cotton swabs Feminine hygiene products Tricks 3-4: Build Daily Habits That Keep Drains Clear Trick 3: Use Strainers and Empty Them Often Drain strainers or screens are the cheapest plumbing insurance you can buy. Fitted over every sink and shower drain, they catch hair and food debris before it enters the pipes. The secret is emptying them regularly, after every shower and several times a day in a busy kitchen: a full strainer protects nothing. Trick 4: Flush With Hot Water on a Schedule Heat keeps pipe buildup soft. After washing greasy dishes, run hot water for a minute or two so liquefied fats rinse through before they cool and cling. Once a week, pour comfortably hot tap water down every drain, but never boiling water, which can damage PVC pipes and some older metal joints. Once a month, fill sinks and tubs with very hot water and release the plugs at once so a strong surge sweeps the pipes clean. This monthly flush acts like spring cleaning for your drain lines, dissolving early soap scum and grease before they harden. Tricks 5-6: Read the Signs and Use Gentle DIY Fixes Trick 5: Learn the Warning Signs of a Growing Clog Watch for water that drains slower than usual, gurgling sounds as air pushes past a partial blockage, and odors rising from the drain, which signal trapped food or grease breaking down in the pipe. A more serious warning is water backing up into other fixtures, such as a bathtub that fills when you flush the toilet, which points to a blockage deep in the line. Act on the first sign and you avoid the emergency. Trick 6: Clear Minor Buildup With Baking Soda and Vinegar For a slow drain, gentle homemade methods usually do the job without harsh chemicals. Pour about half a cup of baking soda into the drain, follow with an equal amount of white vinegar, and let the fizz work for 30-60 minutes on soft buildup. Finish with a generous flush of hot water. For blockages near the opening, a plunger often works: cover the cup with water, seal it over the drain, and pump with steady strokes. If the sink’s P-trap is accessible, place a bucket underneath, unscrew it carefully, and remove the debris by hand. Avoid commercial chemical drain cleaners, which are corrosive to pipes, hard on the environment, and risky to handle; for more on the hazards of household chemicals, see Health Canada’s household chemical safety information. Warning sign What it usually means Smart response Slow draining water Buildup narrowing the pipe Baking soda and vinegar flush, then hot water Gurgling noises Air trapped behind a partial blockage Plunger first; snaking if it persists Bad smells from the drain Decaying food or organic matter in the trap Clean the trap area and flush with hot water Water backing up elsewhere Deep blockage, possibly the main line Stop using the fixtures and call a plumber Trick 7: Know When to Call a Professional Plumber Some problems are beyond DIY, and recognizing them saves you from expensive damage. Call a plumber when clogs keep returning despite your best efforts, when several drains back up at the same time, or when sewage rises into any fixture, a serious health hazard that needs immediate professional attention. Suspected tree root intrusion, a collapsed pipe, or other structural damage also demands expert hands, since amateur attempts usually make it worse. Plumbers bring the right tools, including drain cameras to see the problem, and augers and hydro-jetters to clear it safely. For everyday prevention, choose the right products for the job, as outlined in Health Canada’s guide to household products. Frequently Asked Questions About Drain Care How often should I use the baking soda and vinegar treatment? Monthly is a good maintenance rhythm for most households, but weekly hot water flushes matter more, since they prevent buildup from forming in the first place. Is it safe to pour boiling water down the drain? No: boiling water can damage PVC pipes and some metal joints, so use comfortably hot tap water instead for regular flushes. Why does my drain smell even though

7 Tricks To Keep Your Drains Clean And Odor-Free Read More »

oil diffusers and flowers

6 Expert Tips For Getting Rid Of Odors In Your Home

6 Expert Tips For Getting Rid Of Odors In Your Home A fresh-smelling home is more than a pleasure: it signals cleanliness, comfort, and care to everyone who walks through the door. The secret is not masking smells with sprays but removing their causes and keeping the air moving. Most odors start with something simple, a bin of food scraps, a damp towel, a litter box, or a pile of laundry, and they build when those sources are neglected. These six expert tips give you a complete system for getting rid of odors at the source, refreshing the air, and keeping your home consistently welcoming. Tip 1: Eliminate Odor Sources Before Adding Fragrance Fragrance cannot fix a home that has not been cleaned, so start by removing whatever creates the smell. Empty kitchen waste bins daily, especially when they hold food scraps, and wash the bins periodically. Deal with spills on countertops, stovetops, and floors immediately, because decomposing food particles are prime odor culprits. Flush and clean kitchen and bathroom sink drains regularly so trapped debris does not ferment, and keep bathroom moisture in check by running the vent fan and letting towels dry completely between uses. Think of this as creating a clean slate before adding anything good; Health Canada’s information on indoor air contaminants explains what can build up in household air. Tip 2: Ventilate Daily to Swap Stale Air for Fresh Clean homes still smell stale if the air never changes, so make ventilation a daily habit. Open windows whenever the weather allows, even briefly, to exchange odor-laden indoor air for fresh outdoor air. Cooking smells, household stuffiness, and fine airborne particles all dissipate faster with a real air current, so open windows on facing sides of a room or across the house to create a steady flow. Bathrooms and kitchens benefit most, since they generate moisture and odors, but every room deserves regular airing. Tip 3: Refresh Fabrics That Trap Household Smells Carpets, upholstered furniture, curtains, bedding, and clothing act like sponges for cooking smells, pet odors, and everyday life. Vacuum carpets and upholstery regularly to lift odor-carrying particles along with visible dirt, and launder bed linens frequently. Do not let dirty laundry pile up, especially damp towels and sportswear, and dry everything fully before storage, since damp fabric breeds mildew. For deeper odors in carpets or large upholstered pieces, schedule a professional steam cleaning once or twice a year, or use a fabric refresher, preferably a natural or unscented formula, to neutralize trapped smells rather than cover them. Tip 4: Target the Hotspots That Breed Odors Some zones generate smells continuously and need dedicated attention. Pet areas top the list: groom animals regularly, wash their bedding often, scoop litter boxes daily, change the litter on schedule, and treat accidents immediately with an enzymatic cleaner that breaks down the odor-causing proteins. High-moisture areas are next: bathrooms, poorly ventilated laundry rooms, and basements stay musty without good airflow, so ventilate them, repair leaks promptly, and run a dehumidifier if needed; the CDC’s mould health and cleanup guidance explains why dry air is healthier air. The refrigerator belongs on the list too: clear out old food and wipe the interior so it never becomes a hidden odor source. Kitchen bin and recycling: empty daily, wash weekly Sink drains: flush with hot water weekly Pet bedding and litter box: wash and scoop on schedule Bathroom towels and mats: wash often, dry fully Refrigerator: clear expired food and wipe shelves weekly Tip 5: Add Subtle Natural Fragrances as a Finishing Layer Once the sources are gone and the air moves freely, a light natural fragrance makes a home feel finished: a delicate layer of scent that complements genuine cleanliness. Place fresh flowers or a bowl of citrus in living areas, or simmer a pot of water with cinnamon sticks, cloves, and citrus peels for a gentle perfume during cooler months. Essential oil diffusers with quality oils such as lavender, citrus, or eucalyptus let you customize each room’s scent, and candles made from natural waxes scented with essential oils work well when burned safely with adequate ventilation. Tip 6: Lock In Freshness With Maintenance Habits The final tip ties everything together: consistency beats occasional marathons. Small daily habits stop odors before they start: wipe kitchen counters after every meal, sweep or vacuum high-traffic kitchen floors, keep the sink free of dirty dishes overnight, and give the bathroom sink a quick clean each evening. Weekly, vacuum and dust every room, change bed linens, clean bathroom fixtures thoroughly, and mop floors. Breaking the work into manageable pieces prevents buildup and beats a draining once-a-month marathon. These habits become the backbone of a home that smells as fresh as it looks. Area Daily habit Weekly habit Kitchen Wipe counters, clear the sink, empty food scraps Wash the bin, flush drains, wipe the fridge shelves Bathroom Quick sink wipe, hang towels to dry fully Scrub fixtures, wash towels and bath mats Floors and carpets Sweep or vacuum high-traffic areas Vacuum all rooms, mop hard floors Bedding and laundry Never leave damp clothes piled up Change linens, launder and dry everything fully Pet zones Scoop litter, spot-clean accidents Wash bedding, refresh the litter box Frequently Asked Questions About Household Odors Why does my home smell musty even though I clean it? Musty smells usually come from moisture: check for damp towels, poor ventilation, leaky pipes, or humid basements, since reducing humidity is the real cure for mildew odors. Do air fresheners actually remove odors? Most only mask them; lasting freshness requires removing the odor source first, then using natural scents or ventilating to keep the air genuinely clean. How can I get pet odors out of my carpet? Treat fresh accidents with an enzymatic cleaner, vacuum regularly, sprinkle baking soda before vacuuming for ongoing freshness, and steam clean carpets once or twice a year. How often should I wash bedding to keep bedrooms fresh? Weekly washing of sheets and pillowcases removes the body oils, skin

6 Expert Tips For Getting Rid Of Odors In Your Home Read More »

micro fiber cloth colorful

Best 5 Tips You Need To Know About Microfiber Cloths

Best 5 Tips About Microfiber Cloths Every Toronto Homeowner Should Know A quality microfiber cloth is one of the hardest-working items in any cleaning closet, and most of us use barely half of what it can do. Woven from synthetic strands far finer than a human hair, this fabric grabs dust, lifts grease, and traps grime inside its weave instead of flicking it back into the room. You can wipe a counter with nothing but tap water, polish a mirror without a single lint fiber left behind, and skip a shelf of harsh sprays along the way. If your cloths leave streaks or smell sour after a few weeks, the problem is usually the technique rather than the material. These five tips cover how the fibers work, how to dust, how to wipe, how to finish glass, and how to launder them so the set lasts for years. Tip 1: Understand the Science Behind the Weave Most of these cloths blend polyester with polyamide, a type of nylon. During manufacturing, many of the strands are split open, multiplying the surface area and creating millions of microscopic gaps that hook onto particles the way tiny claws do. There is also an electrical effect: polyester tends to carry a mild positive charge while household dust skews negative, so the cloth attracts debris off a surface and holds it there until wash day. Cotton rags, by contrast, often push grit around or need a spray to suspend it. Before you set your routine, the federal guidance on when and how to clean and disinfect your home is a practical refresher on which jobs need soap, which need a disinfectant, and which only need a good wipe. Tip 2: Dust With the Cloth Bone Dry A dry microfiber cloth is the best weapon against shelves, blinds, baseboards, cabinet tops, and the dusty strip above your door frames. The charged fibers lock onto fine particulates instead of scattering them, which matters in homes where spring pollen or pet dander sets off sneezing fits. Work from the highest surface downward, fold the cloth into quarters, and rotate to a clean face as soon as one side looks grey. Take a heavily loaded cloth outside to shake it out rather than rinsing it in your kitchen sink, and wash your hands when you finish, since collected dust travels with allergens and microbes. The CDC hand-washing guidance is worth a skim for households with young kids. Tip 3: Damp Wiping Handles Most Everyday Messes Without Chemicals Wet a cloth and wring it until it barely feels damp. The fabric can absorb several times its own weight in liquid, so it soaks up a juice spill or a puddle by the sink in one pass. A damp cloth will typically clear sticky fingerprints, food spatter, light soap scum, and thin grease films from countertops, bathroom tile, faucet fixtures, appliance fronts, and dining tables using water alone. When a spot resists, add a drop of mild, pH-neutral detergent to the cloth instead of reaching for a stronger solvent. The scrubbing action of the split fibers does most of the work, so your kitchen ends up clean without a heavy chemical smell hanging over last night’s dinner plates. Tip 4: Finish Glass and Chrome With Two Cloths This is where the fabric earns its reputation. Paper towels shed lint and traditional rags leave lines, while a tight, low-loop microfiber weave glides over smooth surfaces and dries almost completely. Lightly dampen one cloth with water, wipe the mirror or window, then buff with a second dry cloth for a professional finish. Stubborn water spots respond well to a diluted white vinegar spray or a glass cleaner on the wet pass, followed by the dry buff. Chrome taps and stainless appliance panels come up gleaming with the same method. Fold your windows, mirrors, and glass shelves into a seasonal deep cleaning so frames, tracks, and edges get the attention they rarely receive between visits. Tip 5: Launder Microfiber Properly and It Survives Hundreds of Washes A good set endures hundreds of laundry cycles without losing its grip, but heat, detergent residue, and softeners quietly destroy that performance. Keep these habits instead: Wash the cloths separately from cotton towels and socks, because shed lint packs into the fine fibers and blunts their ability to grab dust. Leave out fabric softener and bleach-based boosters. Both coat the strands, which reduces the static pull and cuts absorbency. Choose a plain, mild detergent without added lotions or brighteners. Air-dry or use a low tumble setting, since high heat can warp the synthetic strands. Rinse cloths that wiped heavy grease before they join the rest of the load. Treat the set this way and one purchase replaces years of paper towel rolls, which is better for your budget and for the landfill. Which Job Calls for Which Cloth Surface Cloth state Best approach Shelves, blinds, screens Fully dry Glide slowly, fold to a clean face often Kitchen counters and tables Lightly damp Water first, one drop of pH-neutral soap if needed Bathroom tile and fixtures Damp Let water soften the spot, wipe, then dry Mirrors and windows Damp plus dry Clean wet, buff with the second cloth Grease film on a stovetop Damp and warm Mild detergent and gentle pressure Microfiber Cloth Questions, Answered Can I throw microfiber in with my regular laundry? Technically yes, but it is not a good idea. Cotton items shed lint that jams into the tiny fibers, and dryer sheets or softeners coat the cloth so it stops absorbing. Wash them in their own short cycle for the best results. Is vinegar safe to use on microfiber? A diluted solution is fine for glass and water-spot duty, and the cloth rinses clean afterward. Reserve full-strength acid treatments for scrubbing tasks that do not involve your good polishing cloths. How often should the cloths be washed? After every damp use, ideally, and after any job involving grease, raw food residue, or the bathroom.

Best 5 Tips You Need To Know About Microfiber Cloths Read More »